Craftsmanracer's 82 build/unbuild
 07-22-2013, 06:49 PM
#1
Registered User
Thread Starter
iTrader: (1)
Join Date: Nov 2012
Posts: 108
Likes: 0
Received 0 Likes
on
0 Posts
Craftsmanracer's 82 build/unbuild
Hey everybody!
I recently got bored of my crown vic police interceptor, and I have always loved the old yotas, so I wised up and bought an '82 that was built as a crawler. It came to me without a transfer case, so I also recieved a parts truck with a good t-case that I swapped in.
Bringin her home
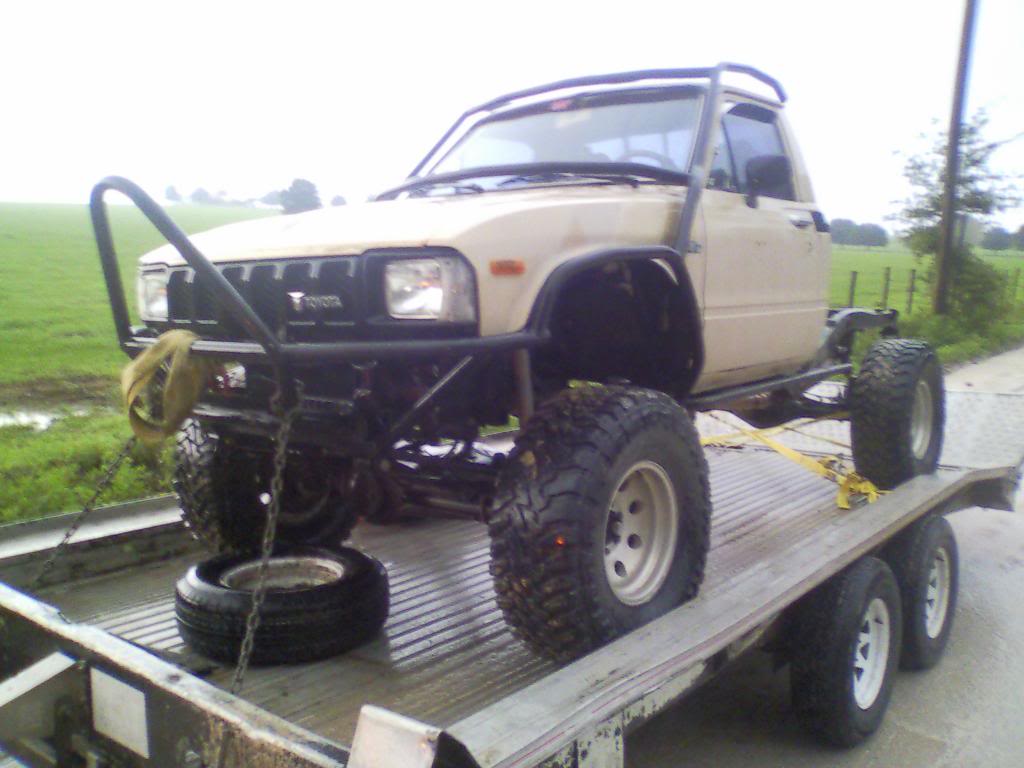
Free Parts truck
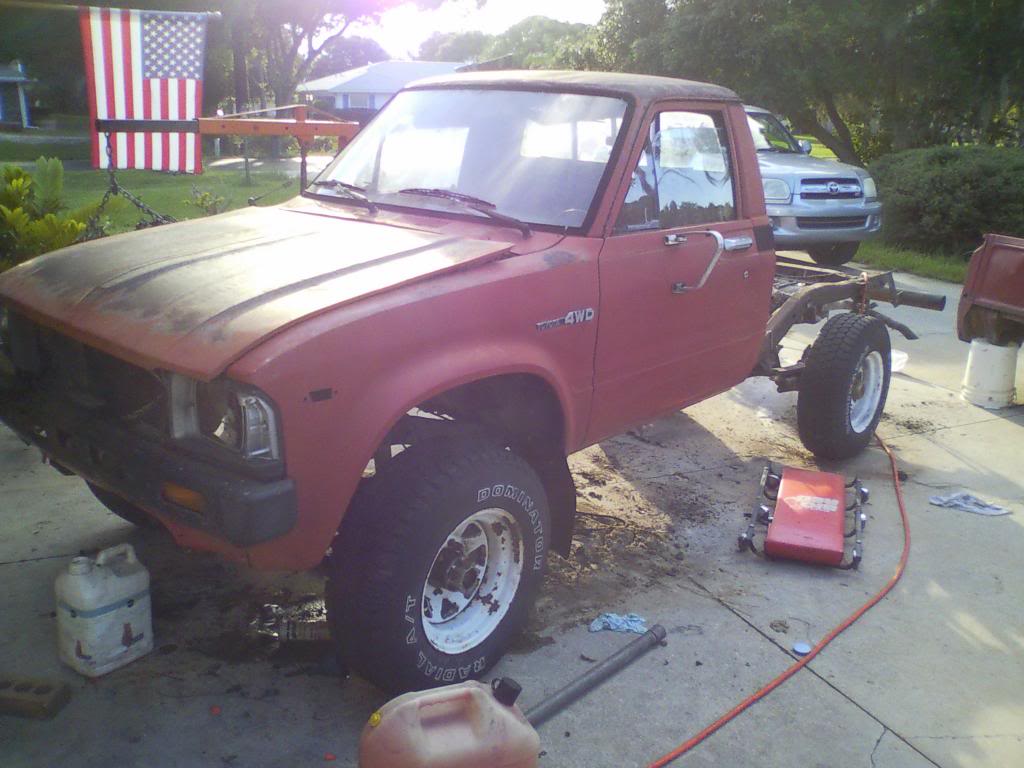
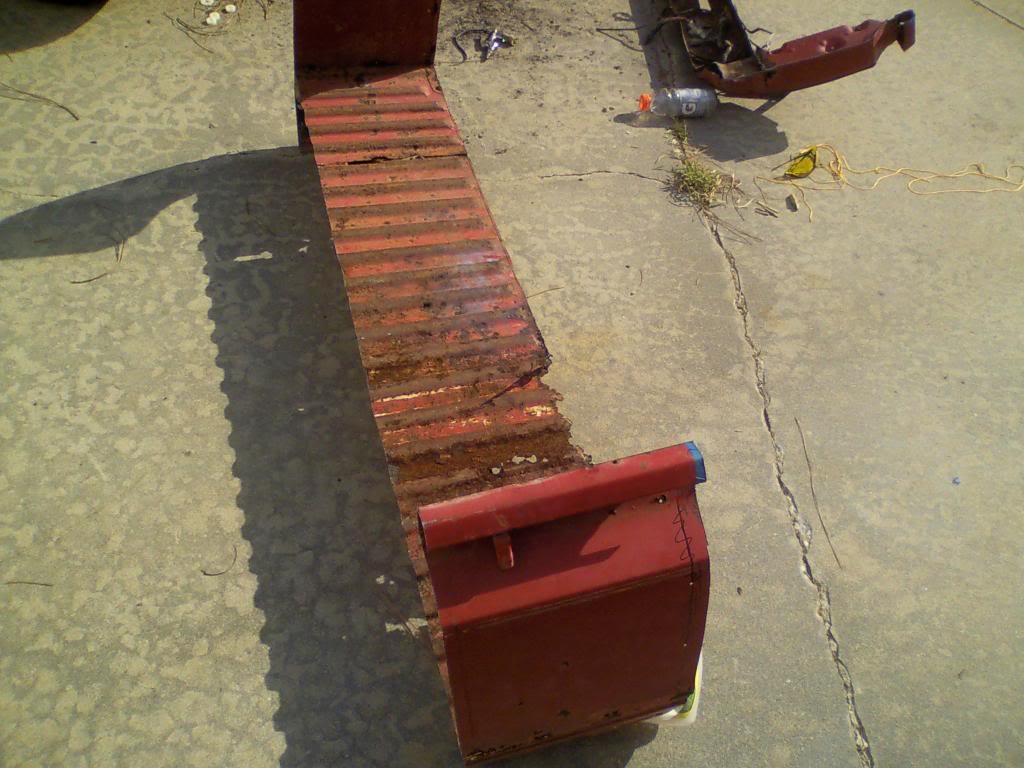
I was originally planning on building a flatbed, but the parts truck had a bed that was 90% there, and I am partial to bobbed longbeds, so thats what's happening.
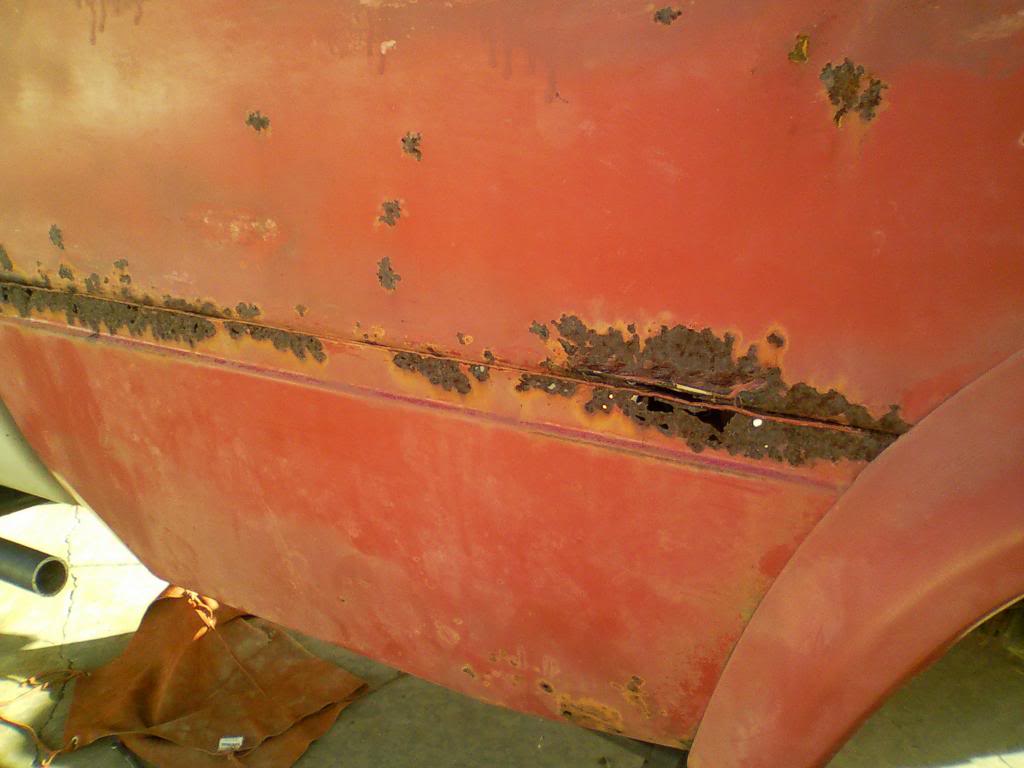
There is some rust though...

Got the bed mounted today, I had to transfer all of the brackets from the parts truck onto my truck.
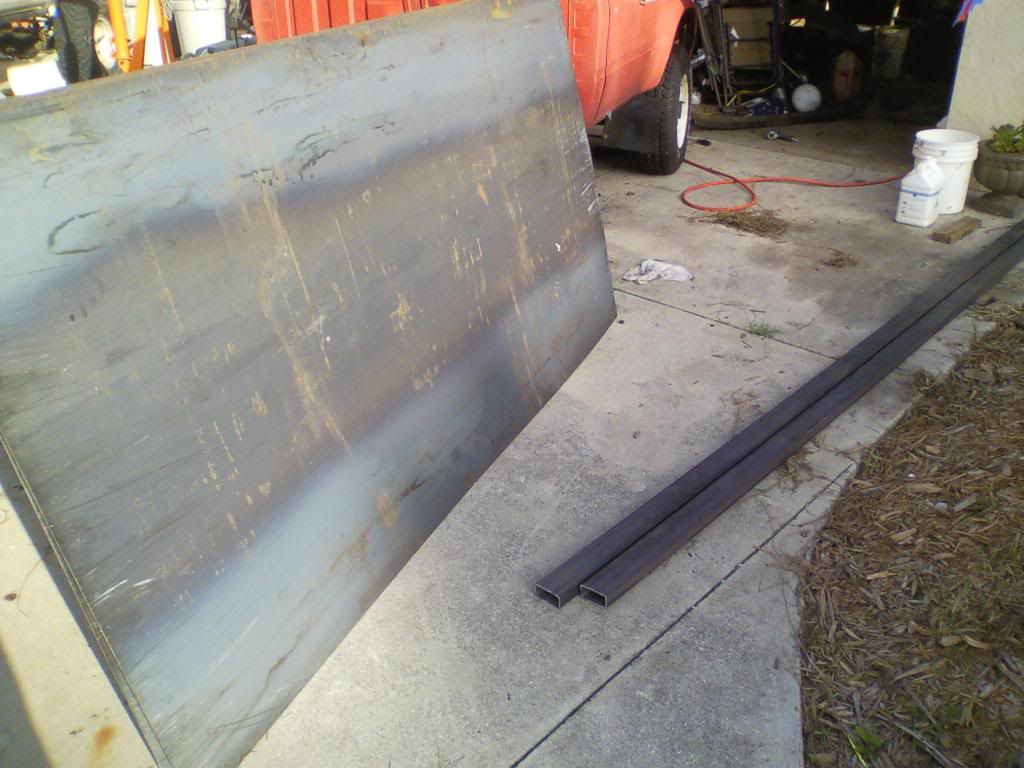
Got 2 4x8's of 14ga, and 20ft of 1.5x3 rectangle
Was gonna use it for the flatbed, but now I'll have to find another use for it.
Here's another issue:
Already ordered the big kahuna $180 kit from marlin to fix it.
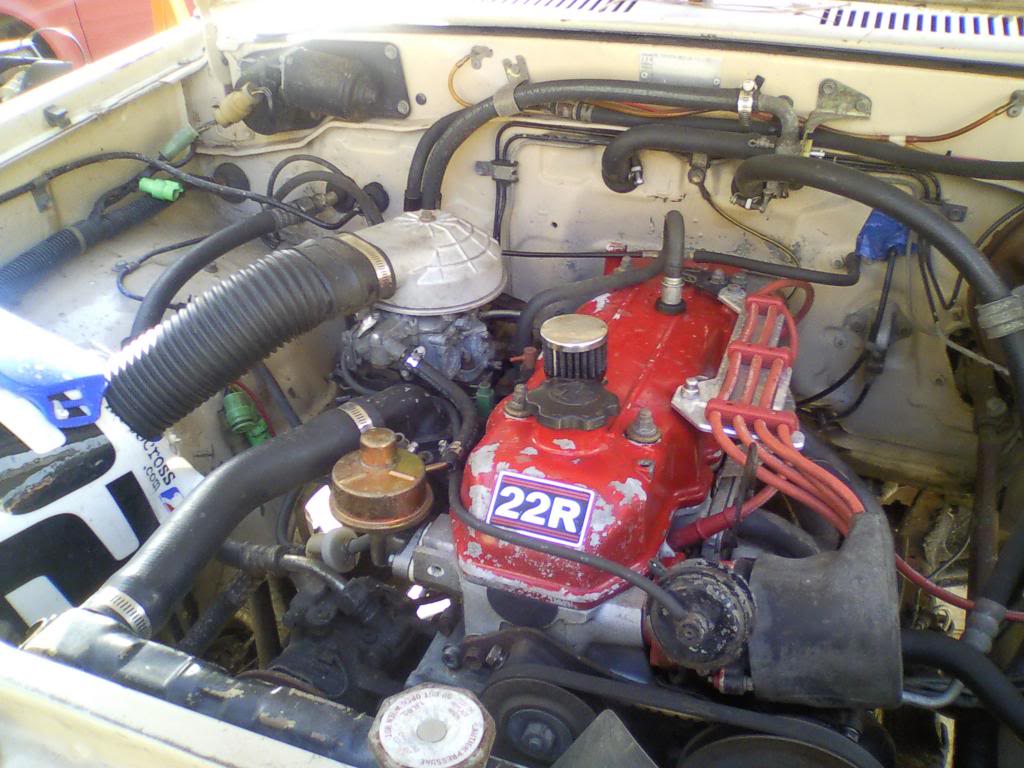
Even though it needs work, I feel I got a good deal, as it has a bunch of goodies already installed, and a bunch of work already done to it that I would've done anyways. (lockers,gears,engine performance parts, high steer, etc)
The engine is already de-emmisioned
I know I should have started taking pictures earlier, but i figured I was already early enough into the build that I could make a tread about it.
Future plans for the truck are:
bob bed
get a/c working
fix hole in floor from twin case setup
rebuild front axle
and much more
I recently got bored of my crown vic police interceptor, and I have always loved the old yotas, so I wised up and bought an '82 that was built as a crawler. It came to me without a transfer case, so I also recieved a parts truck with a good t-case that I swapped in.
Bringin her home
Free Parts truck
I was originally planning on building a flatbed, but the parts truck had a bed that was 90% there, and I am partial to bobbed longbeds, so thats what's happening.
There is some rust though...
Got the bed mounted today, I had to transfer all of the brackets from the parts truck onto my truck.
Got 2 4x8's of 14ga, and 20ft of 1.5x3 rectangle
Was gonna use it for the flatbed, but now I'll have to find another use for it.
Here's another issue:
Already ordered the big kahuna $180 kit from marlin to fix it.
Even though it needs work, I feel I got a good deal, as it has a bunch of goodies already installed, and a bunch of work already done to it that I would've done anyways. (lockers,gears,engine performance parts, high steer, etc)
The engine is already de-emmisioned
I know I should have started taking pictures earlier, but i figured I was already early enough into the build that I could make a tread about it.
Future plans for the truck are:
bob bed
get a/c working
fix hole in floor from twin case setup
rebuild front axle
and much more
Last edited by craftsmanracer; 07-22-2013 at 06:55 PM.
 07-25-2013, 05:23 PM
#4
Registered User
Thread Starter
iTrader: (1)
Join Date: Nov 2012
Posts: 108
Likes: 0
Received 0 Likes
on
0 Posts
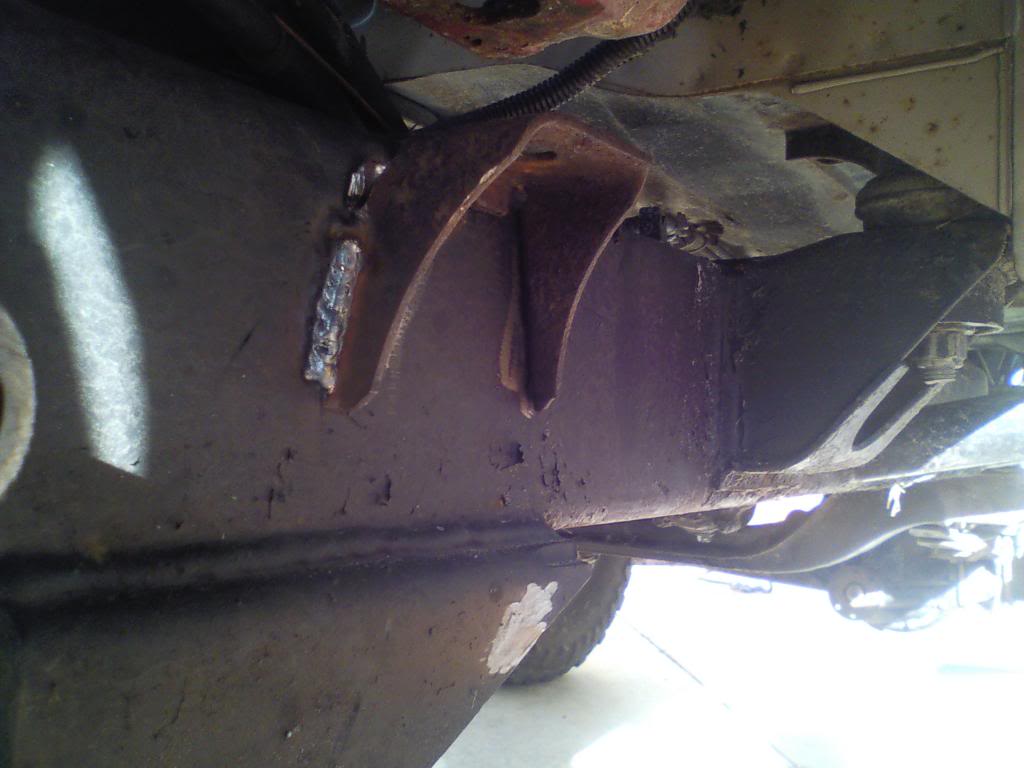
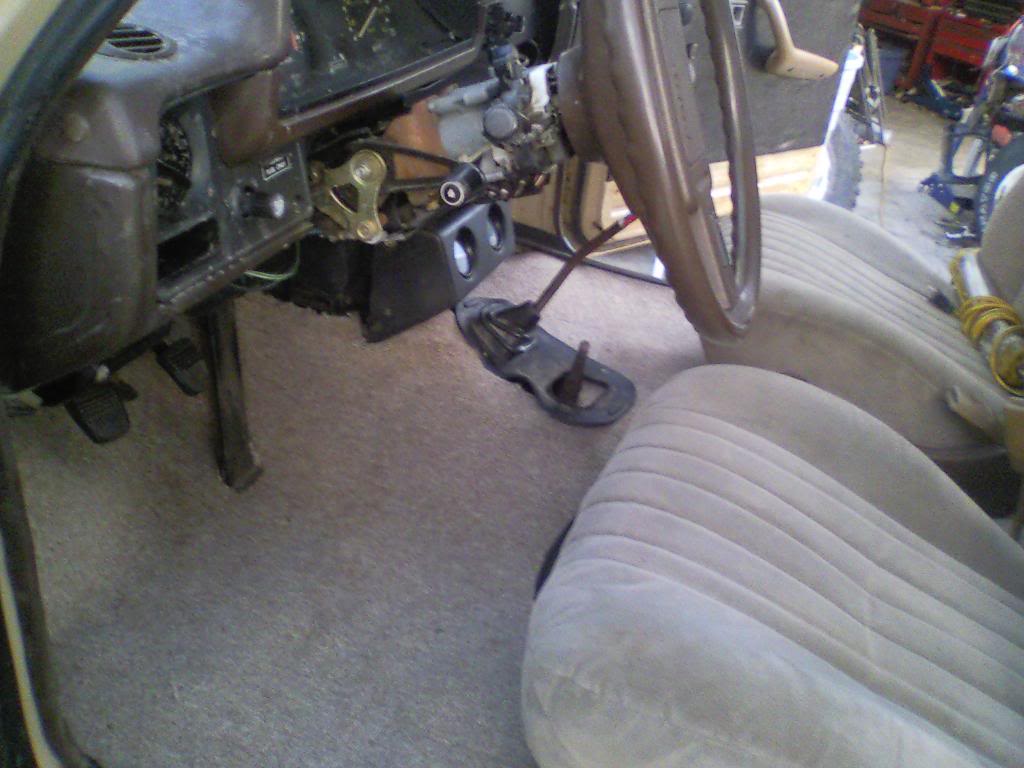
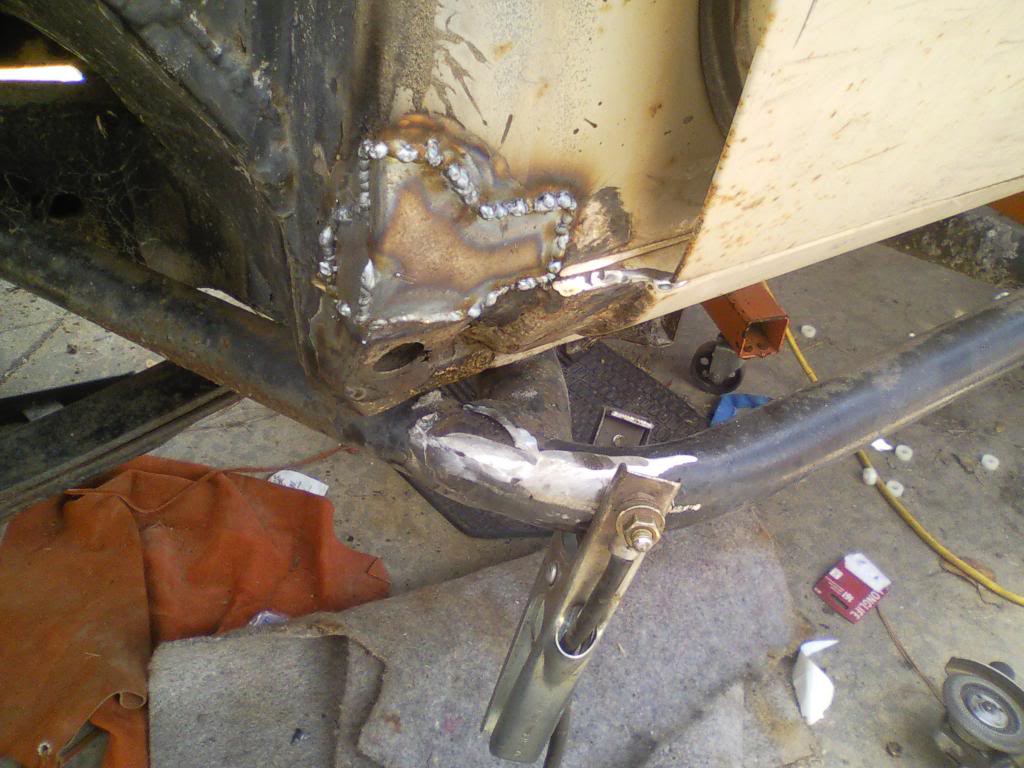
Being that my truck had a dual case setup in it previously, and I have only the one, I would be blasted with hot air while driving from the GIANT HOLE in my cab.
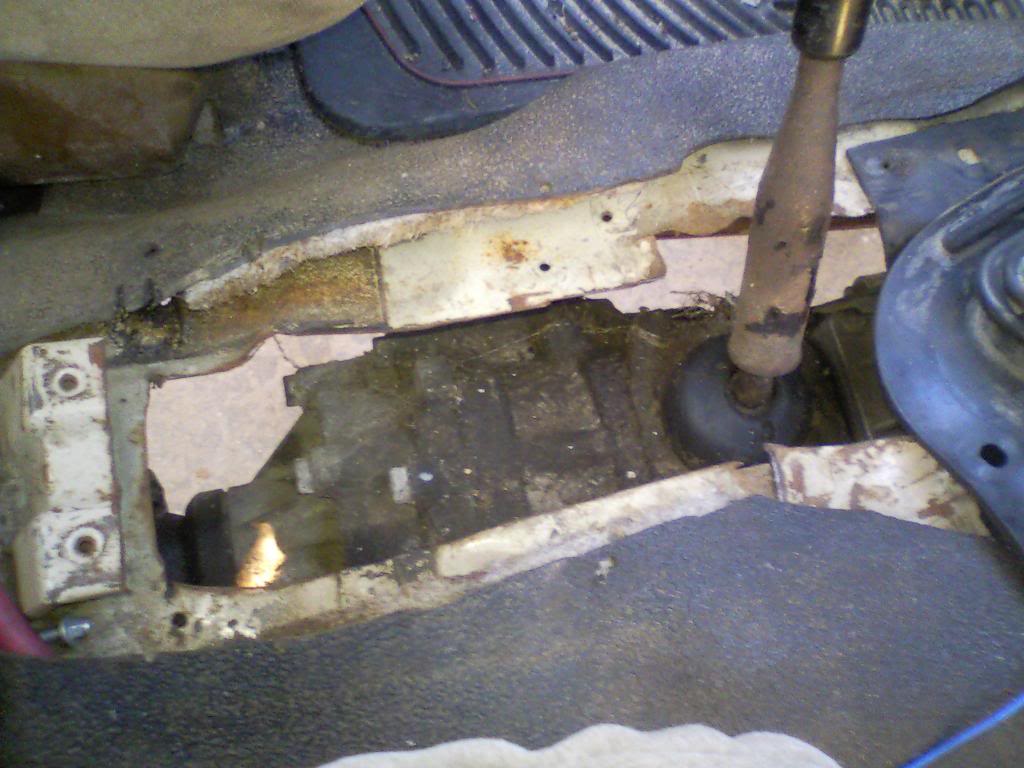
So it was time to break out the mig and burn in a piece of sheetmetal I had lying around.
I welded just the one side, and then hammered the flat piece until it was a not-flat-more-shaped-like-my-transmission-tunnel piece.
(guess if you can see where I forgot to turn the gas back on)

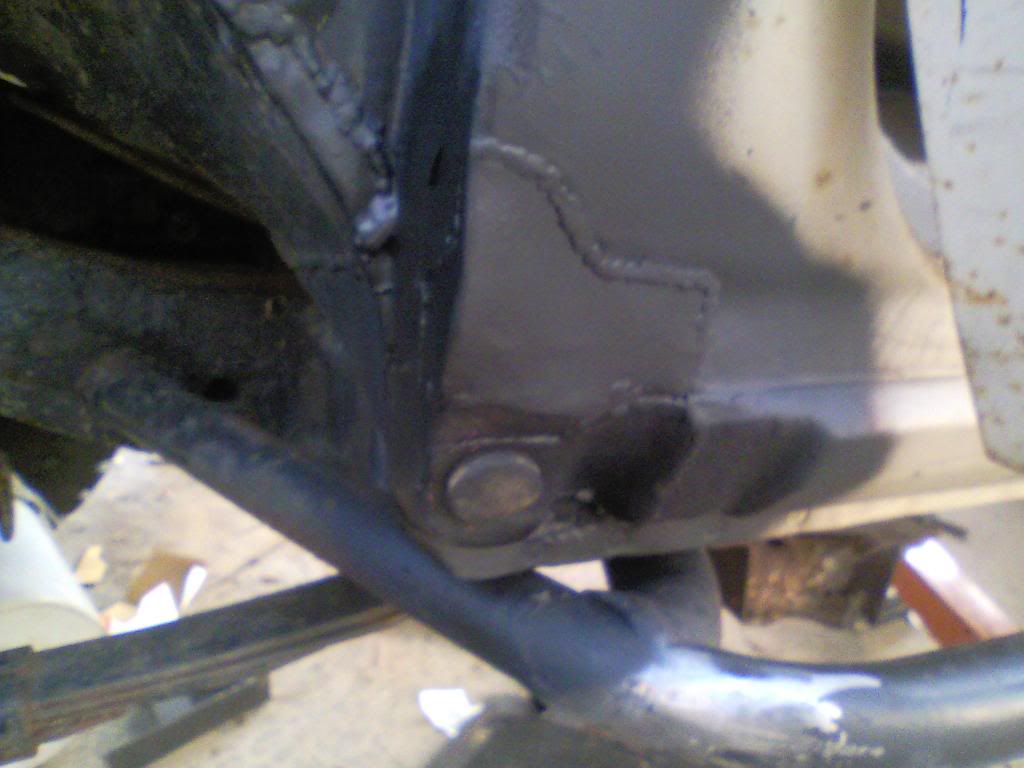
And finished
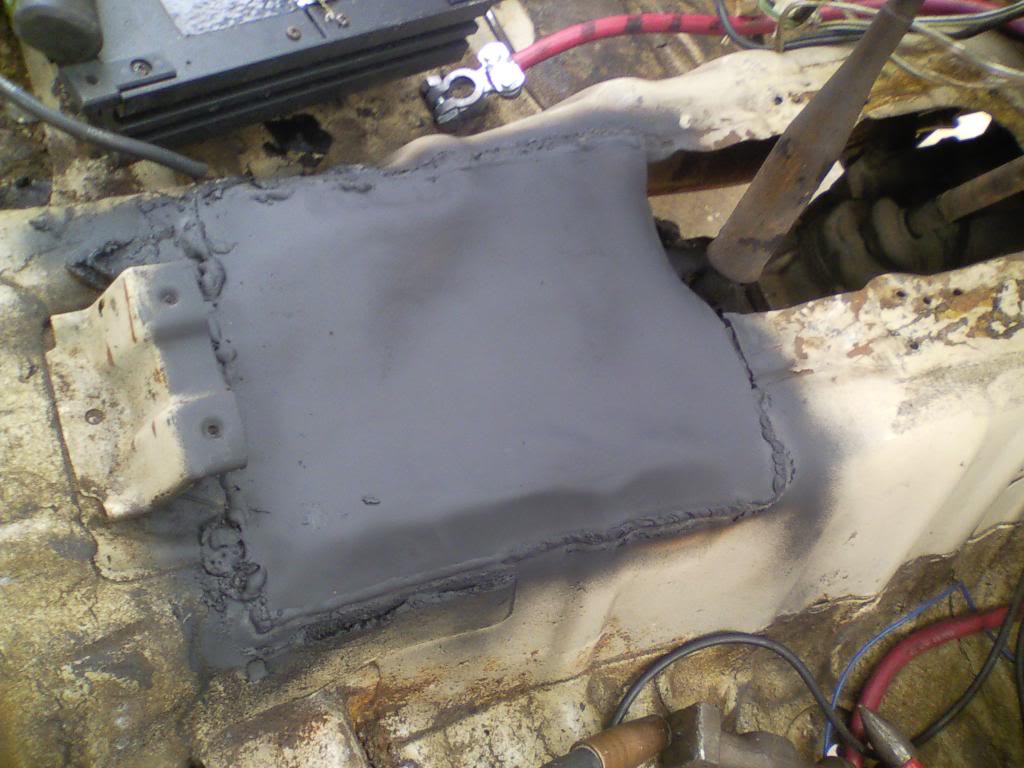
Not too pretty, but it's going to be covered up anyways. And I can't run my tig off of an extension cord, so the fancy welds will have to be for the stuff that isn't in the truck thats in the driveway. (bumpers,etc)
So it was time to break out the mig and burn in a piece of sheetmetal I had lying around.
I welded just the one side, and then hammered the flat piece until it was a not-flat-more-shaped-like-my-transmission-tunnel piece.
(guess if you can see where I forgot to turn the gas back on)
And finished
Not too pretty, but it's going to be covered up anyways. And I can't run my tig off of an extension cord, so the fancy welds will have to be for the stuff that isn't in the truck thats in the driveway. (bumpers,etc)
07-26-2013, 05:17 PM
#5
Registered User
Thread Starter
iTrader: (1)
Join Date: Nov 2012
Posts: 108
Likes: 0
Received 0 Likes
on
0 Posts
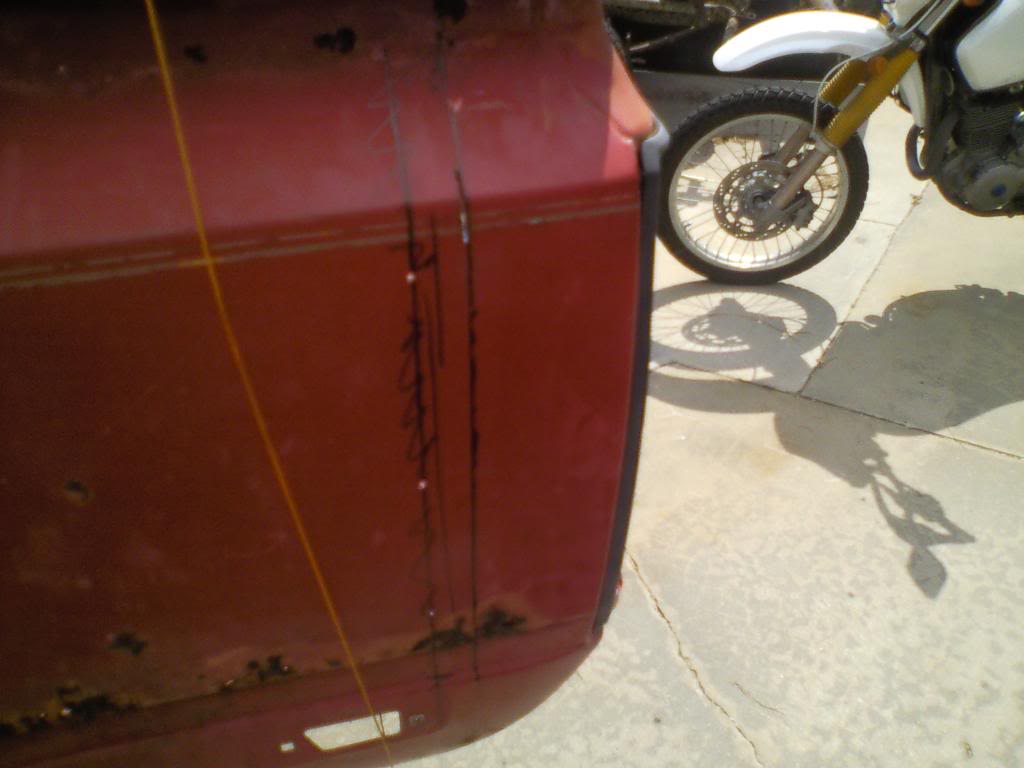
Bed boob day
It looked goofy with the long box on it, and with my shortened frame, I had nothing to attach the rear support to anyways. Sooooo I chopped it.
Making the lines
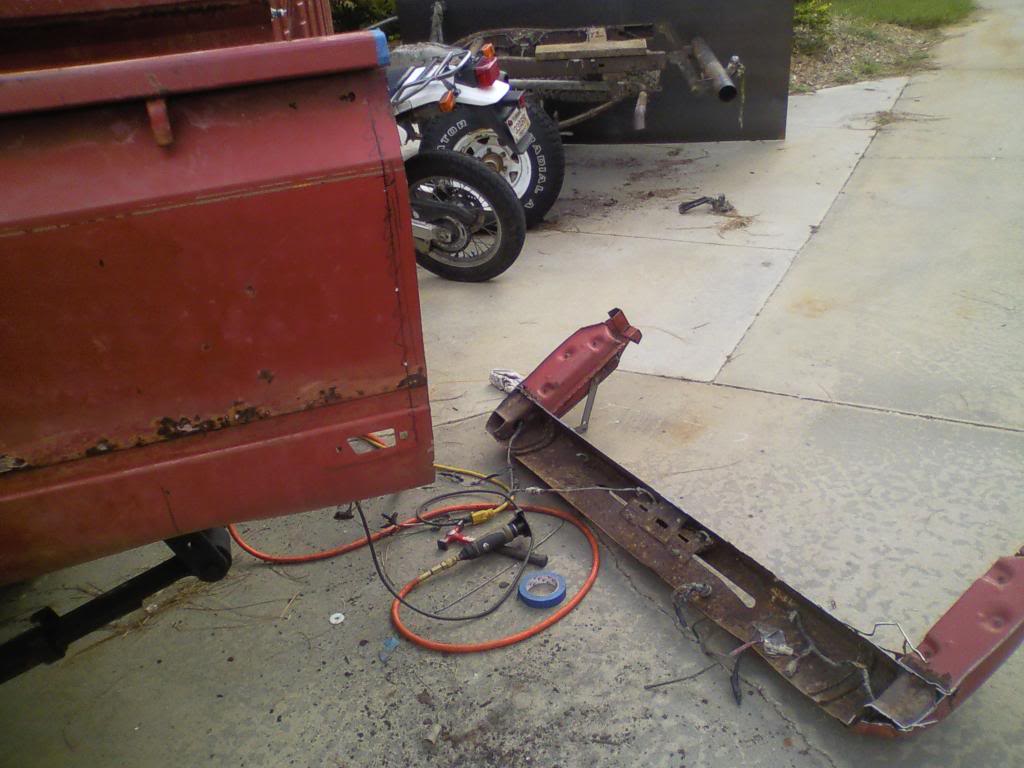
back's off
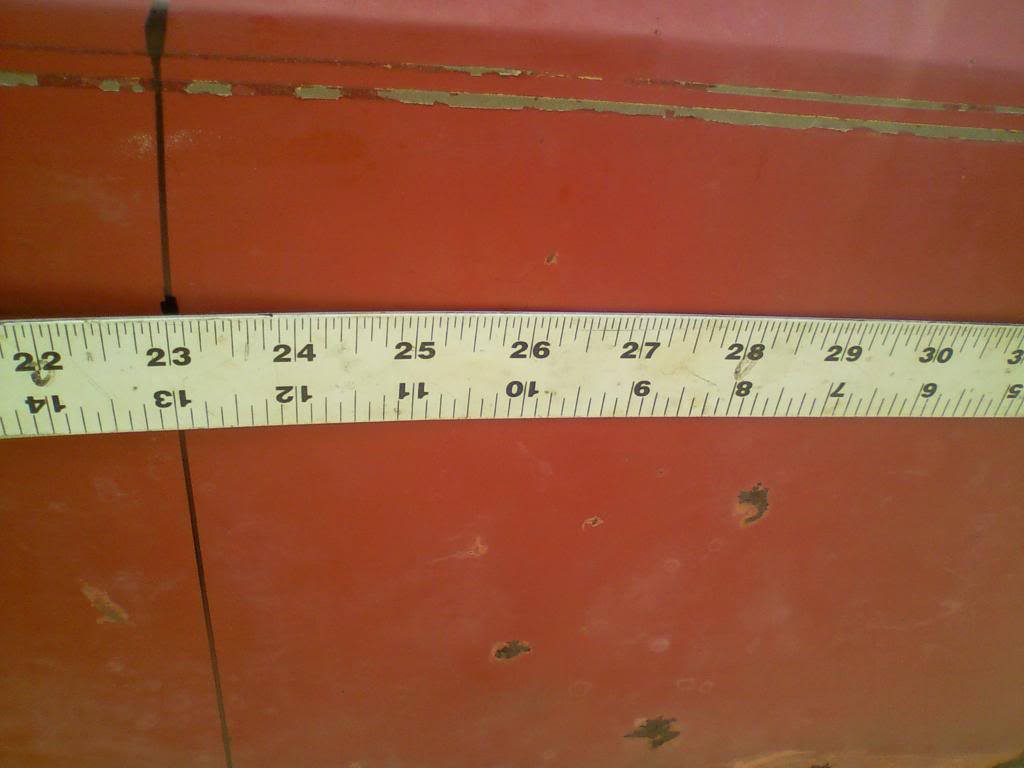
13 inches (or 23 if you are upside down)
looks alot better
And a quick mock up of what I'll be working on tomorrow grinding and welding
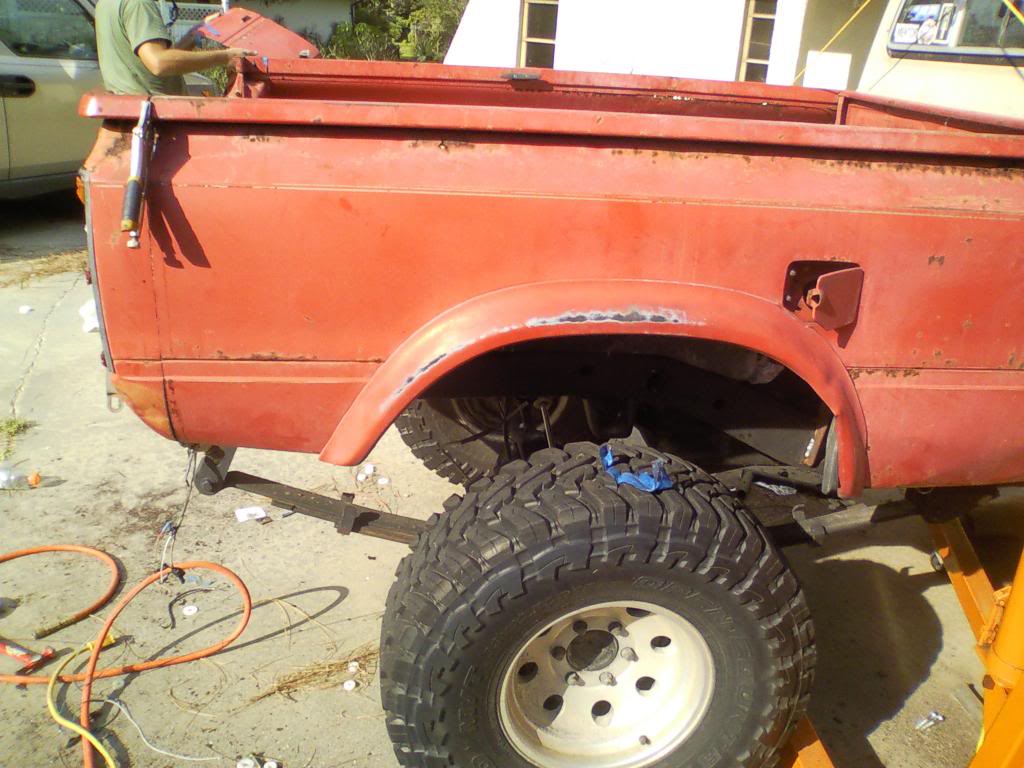
It looked goofy with the long box on it, and with my shortened frame, I had nothing to attach the rear support to anyways. Sooooo I chopped it.
Making the lines
back's off
13 inches (or 23 if you are upside down)
looks alot better
And a quick mock up of what I'll be working on tomorrow grinding and welding
07-27-2013, 08:56 PM
#6
Registered User
Thread Starter
iTrader: (1)
Join Date: Nov 2012
Posts: 108
Likes: 0
Received 0 Likes
on
0 Posts
LOOOONG day today, got the bed end welded up to the rest of the box.
Bunch of little caterpillar welds so the sheet won't warp
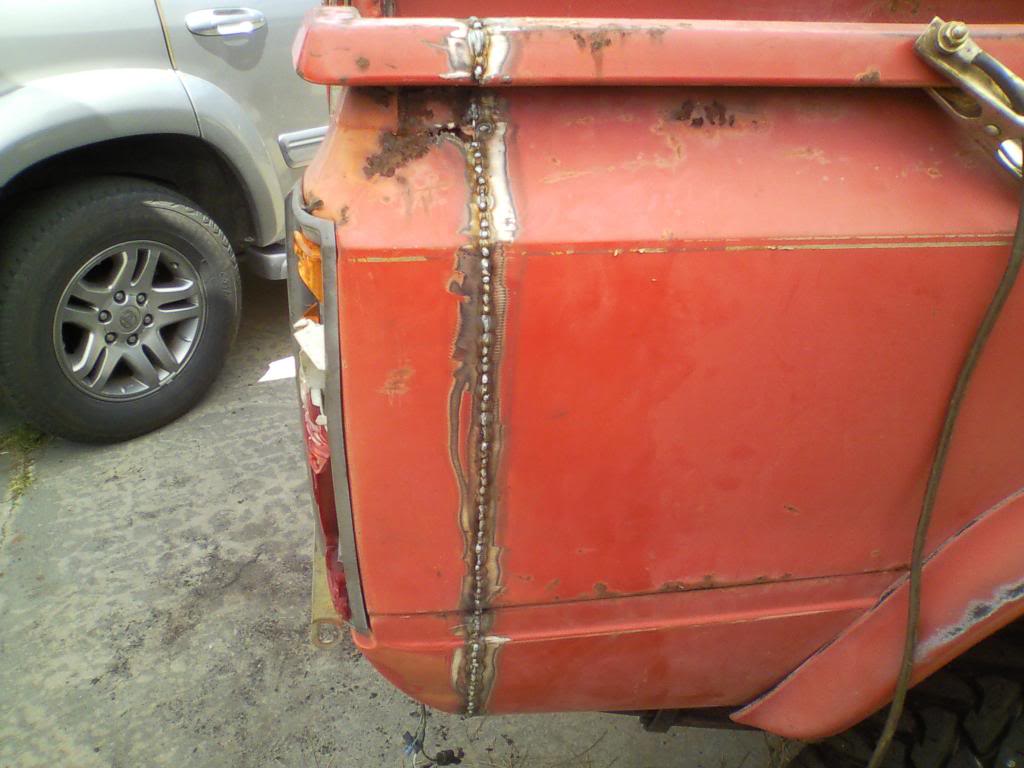
The rust in the above pic has been repaired, just like this side...
Bent the sheet up and welded it in.

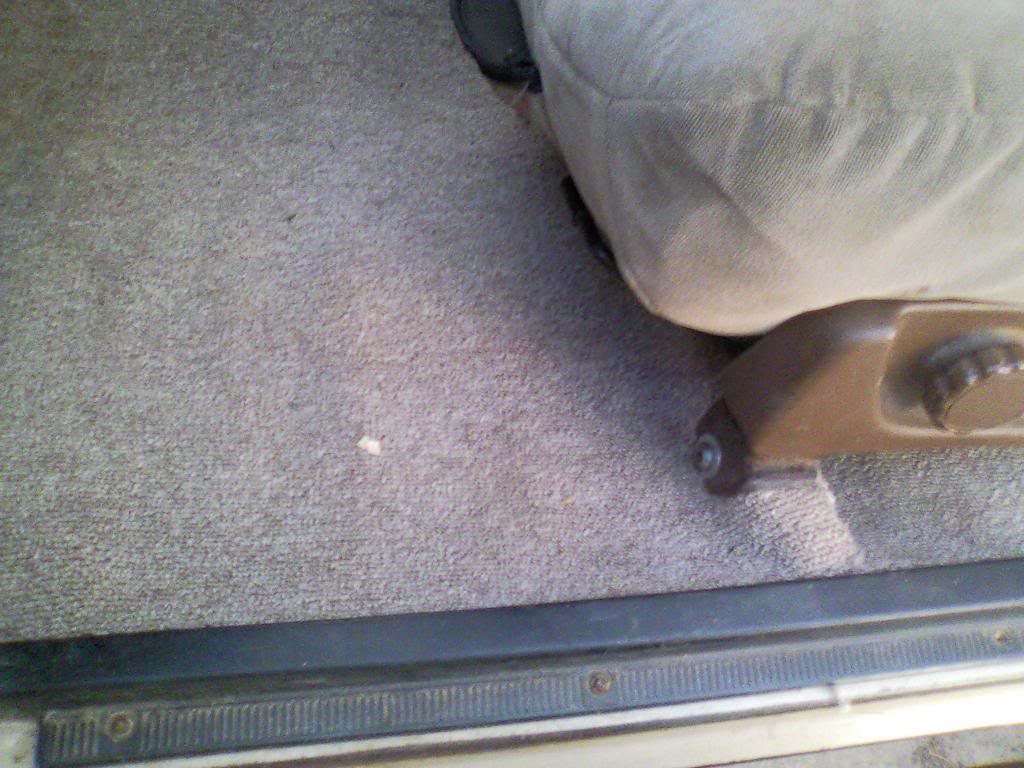
Being that I already had the interior apart from the patch panels, I decided to re-do the flooring.
It has a rubber floor mat that was in it, which is okay, but it held water underneath it, and my last car had rubber floors so I was jonezing for something different.
This stuff works pretty well for sound deadening, costs $13 a roll, and 1.5 rolls did up the whole floor.
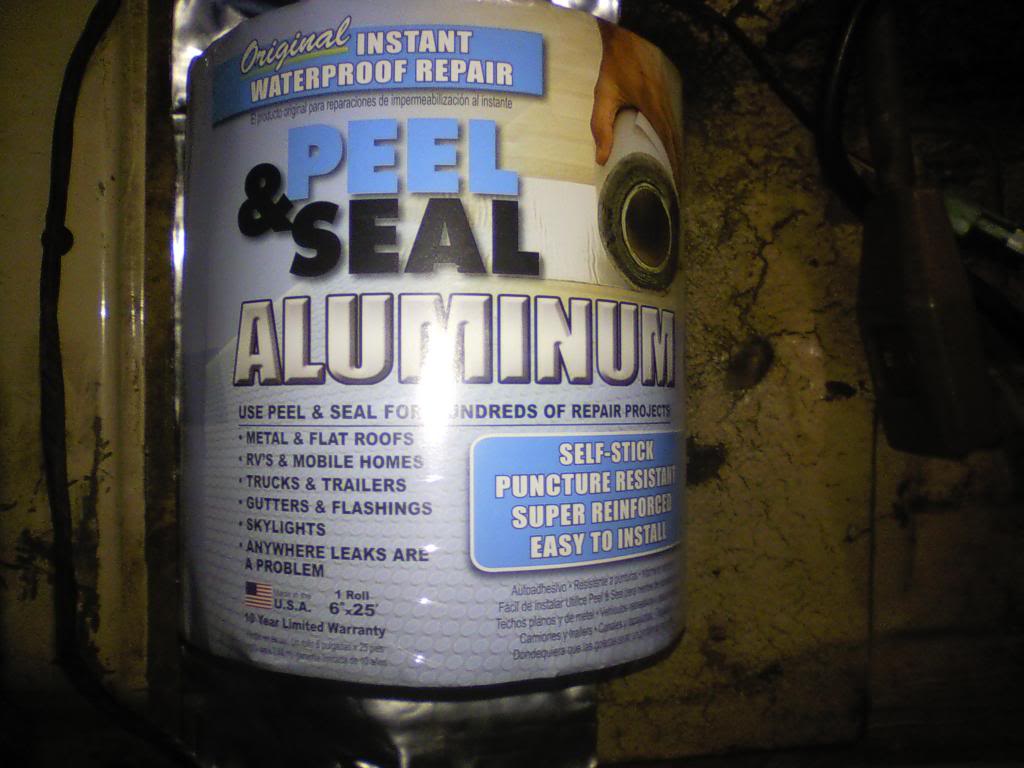
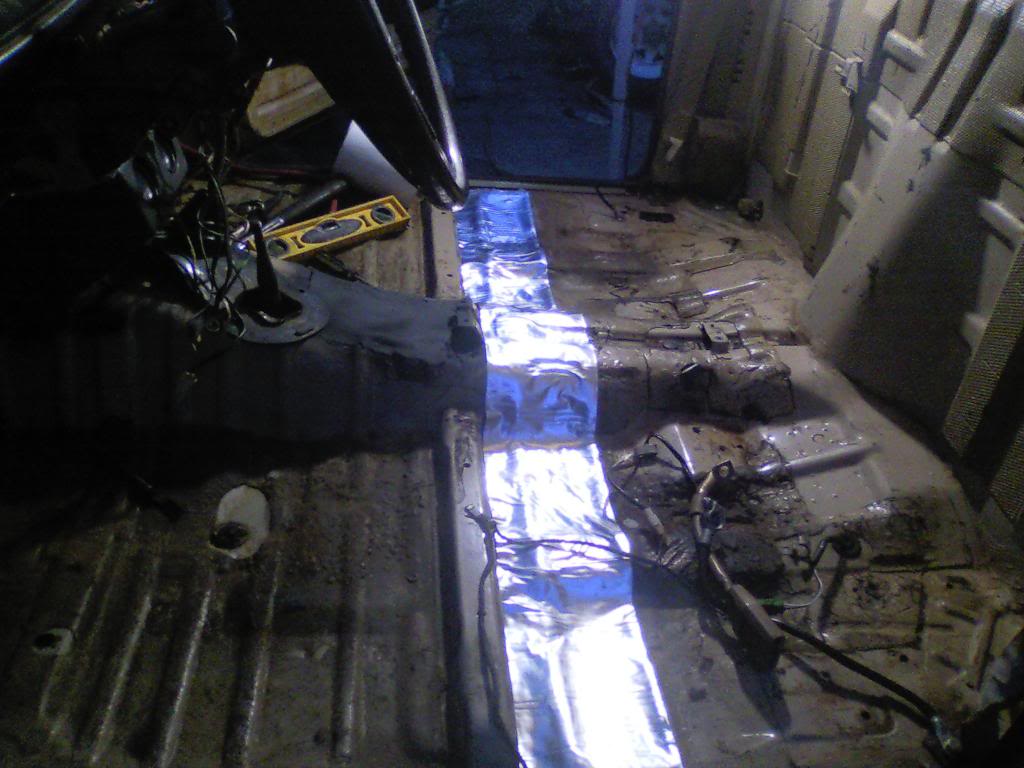
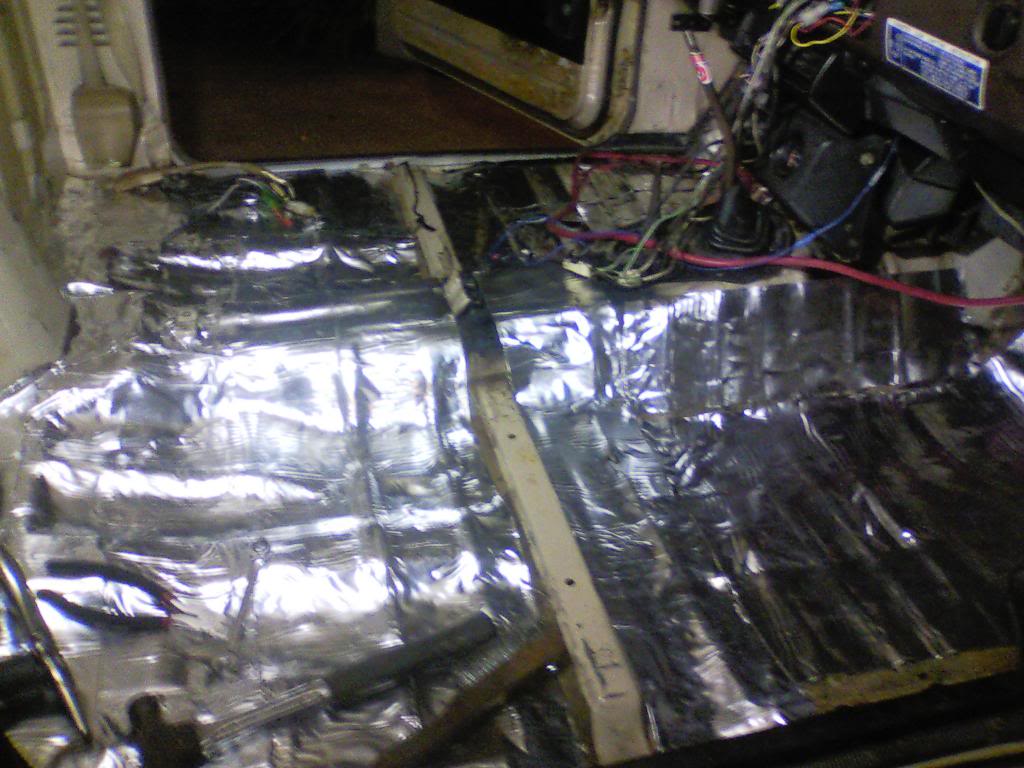
Next up is to finish cutting up the carpet for the floors, and re-install the seats.
Bunch of little caterpillar welds so the sheet won't warp
The rust in the above pic has been repaired, just like this side...
Bent the sheet up and welded it in.
Being that I already had the interior apart from the patch panels, I decided to re-do the flooring.
It has a rubber floor mat that was in it, which is okay, but it held water underneath it, and my last car had rubber floors so I was jonezing for something different.
This stuff works pretty well for sound deadening, costs $13 a roll, and 1.5 rolls did up the whole floor.
Next up is to finish cutting up the carpet for the floors, and re-install the seats.
07-28-2013, 08:34 PM
#7
Registered User
Thread Starter
iTrader: (1)
Join Date: Nov 2012
Posts: 108
Likes: 0
Received 0 Likes
on
0 Posts
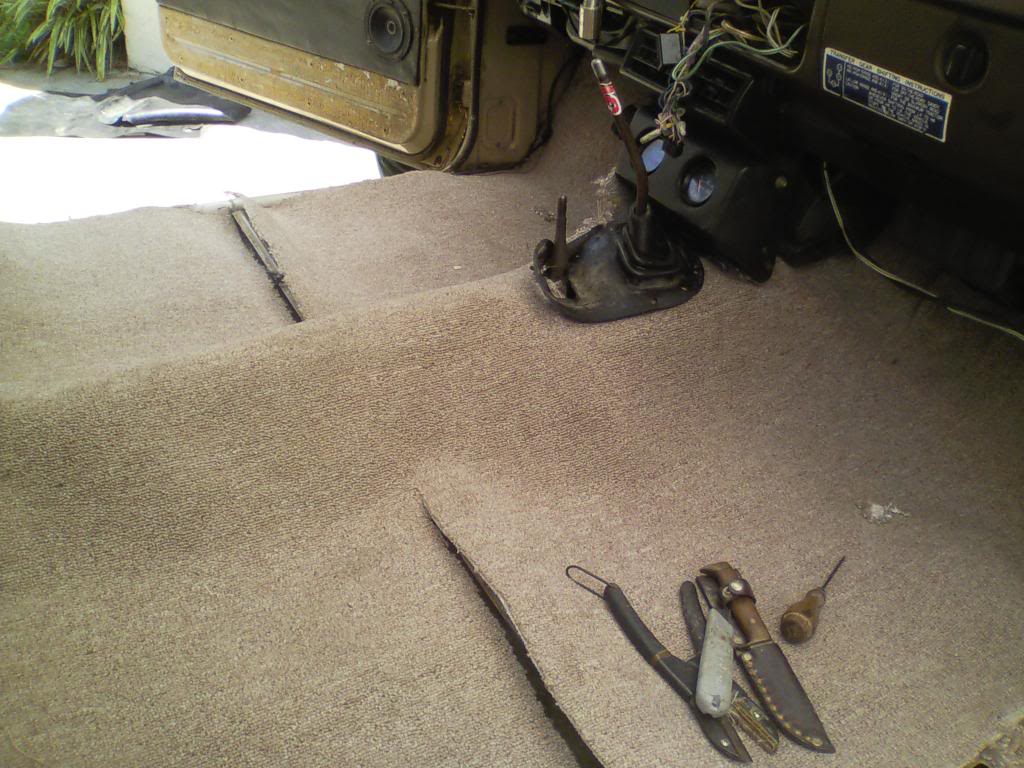
mucho progresso today
got the cheapo lowes carpet installed, looks pretty good.
I was this >< close to buying the green plastic grass that is at mini golf courses for the interior. I still might, but for now, I guess the tan carpet will do.
Rough cut
Done cut
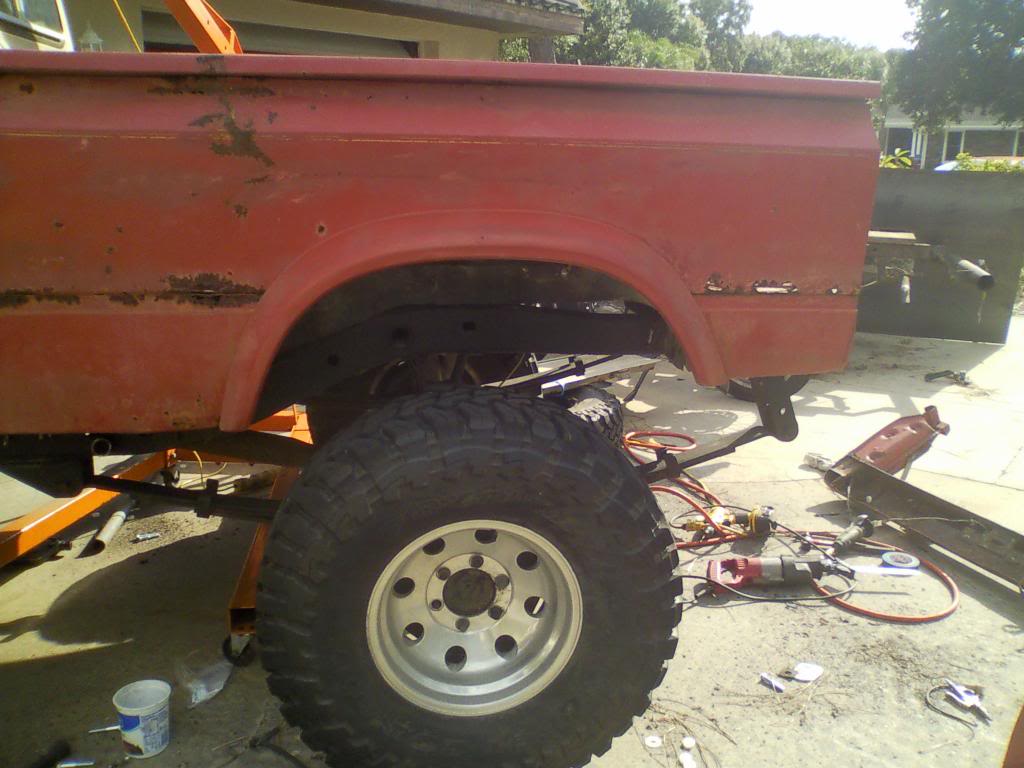
cut off some more of the tubes, switching to the fenders with the full flares
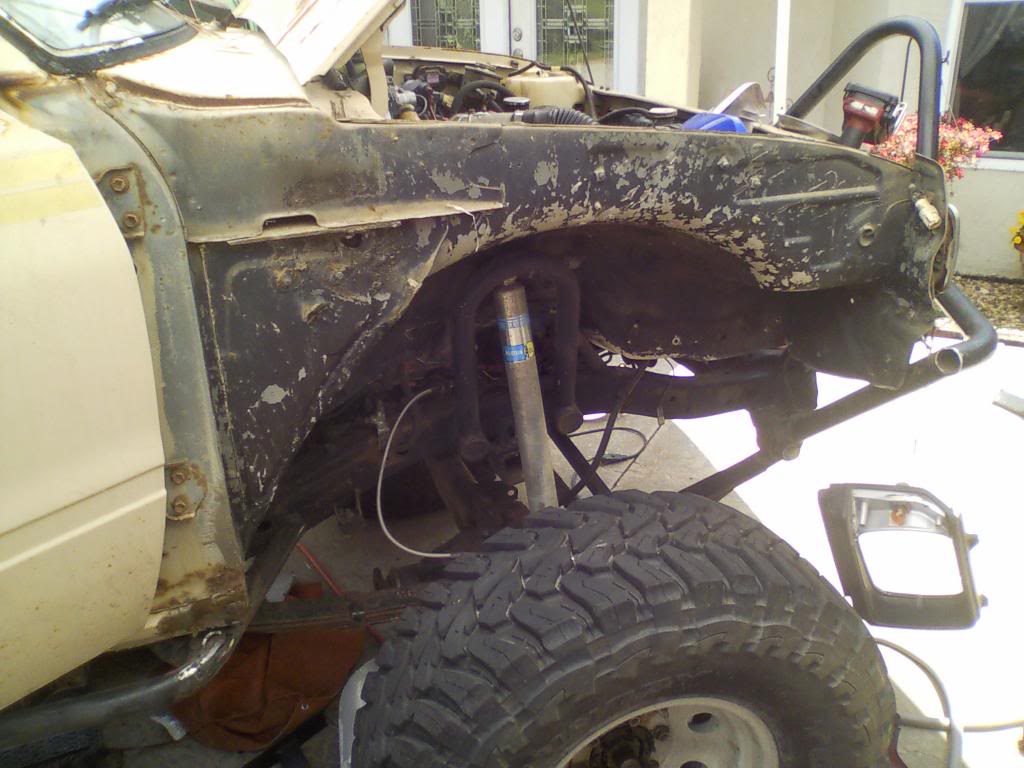
found some rust, so it was patch time
Steady progress everyday...If you can't already tell, I work on multiple projects within my project at the same time.
got the cheapo lowes carpet installed, looks pretty good.
I was this >< close to buying the green plastic grass that is at mini golf courses for the interior. I still might, but for now, I guess the tan carpet will do.
Rough cut
Done cut
cut off some more of the tubes, switching to the fenders with the full flares
found some rust, so it was patch time
Steady progress everyday...If you can't already tell, I work on multiple projects within my project at the same time.
Trending Topics
07-28-2013, 09:02 PM
#9
Registered User
Thread Starter
iTrader: (1)
Join Date: Nov 2012
Posts: 108
Likes: 0
Received 0 Likes
on
0 Posts
I'll get a whole-truck pic when I get the fenders onto it tomorrow.
The welder has definitely become my new best friend. I used to be in really tight with the TIG, but now I am cheating on it with the little MIG. The fact that is is okay with extension cords is what has sold me.
Its better for thin sheet anyways
The welder has definitely become my new best friend. I used to be in really tight with the TIG, but now I am cheating on it with the little MIG. The fact that is is okay with extension cords is what has sold me.
Its better for thin sheet anyways
08-02-2013, 06:57 AM
#13
Registered User
Join Date: May 2013
Location: San Antonio, Tx.
Posts: 400
Likes: 0
Received 0 Likes
on
0 Posts
i picked up an 82 longbed not too long ago and being that it's lived in ga... rust needs to be gotten rid of. im considering bobing my bed too because of that very reason.
looks good. i need to get reacquainted with my mig here soon. I'll also be rebuilding the front axle. seems that the PO never got around to replacing the tube seals and knuckle wipers, so i figured i'd just do the whole front end.
looks good. i need to get reacquainted with my mig here soon. I'll also be rebuilding the front axle. seems that the PO never got around to replacing the tube seals and knuckle wipers, so i figured i'd just do the whole front end.
08-02-2013, 06:33 PM
#14
Registered User
Thread Starter
iTrader: (1)
Join Date: Nov 2012
Posts: 108
Likes: 0
Received 0 Likes
on
0 Posts
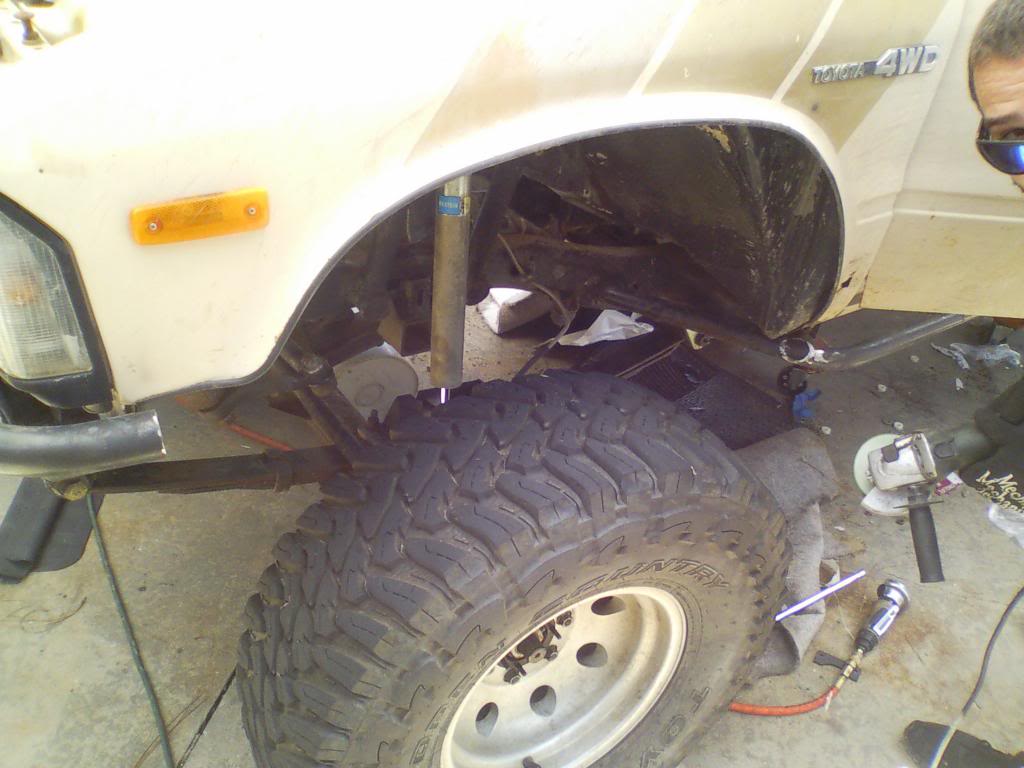
I'll post up my axle rebuild that I will tackle tomorrow, bought a new tub of fancypants synthetic grease for the job.
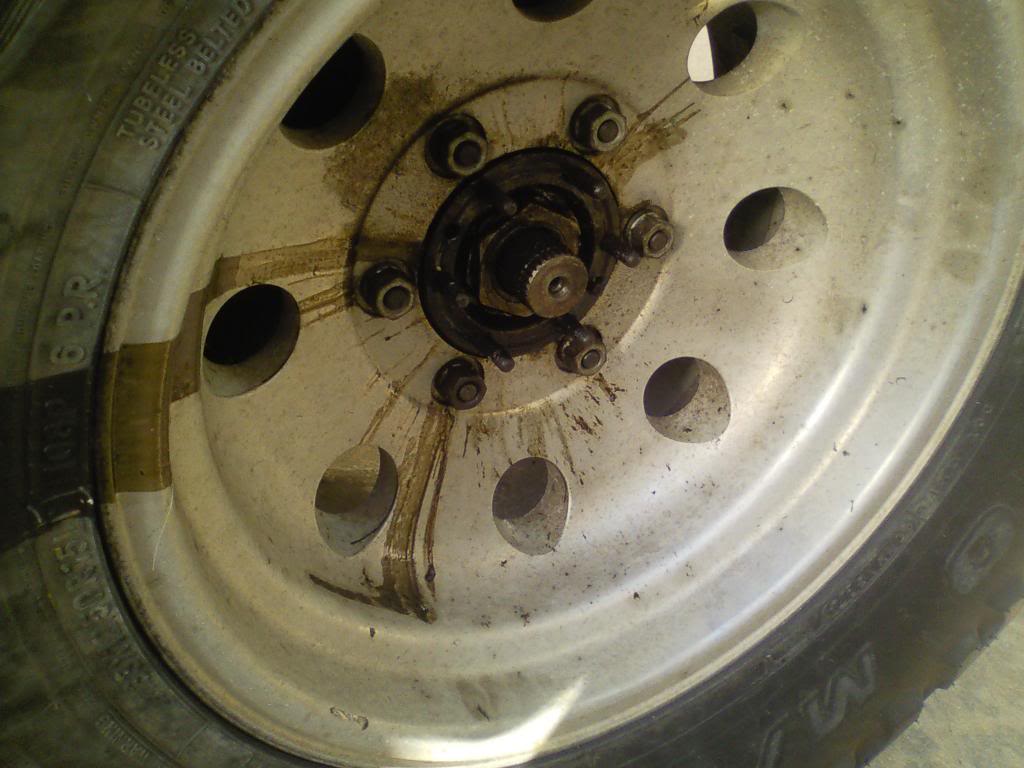
Being that my passenger side brake was glowing HOT LIKE THE SUN from dragging after driving only 5 miles, I decided to do a big brake system overhaul. (I sprayed water on the edge of the rim and it steamed off, even with wheel spacers)
Went and got some landcruiser rotors, and newer calipers. I will also be getting the bigger rear drum cylinders, and a bigger booster/master cylinder.
Pretty cheap too for new parts, after core prices the rotors were $25 a piece, and the calipers were $35 a piece. I can't find any junkyards around with the right booster/master cylinder, so I might just have to bite the $150 bullet and get a new one.
08-02-2013, 06:43 PM
#15
I'll post up my axle rebuild that I will tackle tomorrow, bought a new tub of fancypants synthetic grease for the job.
Being that my passenger side brake was glowing HOT LIKE THE SUN from dragging after driving only 5 miles, I decided to do a big brake system overhaul. (I sprayed water on the edge of the rim and it steamed off, even with wheel spacers)
Went and got some landcruiser rotors, and newer calipers. I will also be getting the bigger rear drum cylinders, and a bigger booster/master cylinder.
Pretty cheap too for new parts, after core prices the rotors were $25 a piece, and the calipers were $35 a piece. I can't find any junkyards around with the right booster/master cylinder, so I might just have to bite the $150 bullet and get a new one.
08-02-2013, 08:02 PM
#16
Registered User
Thread Starter
iTrader: (1)
Join Date: Nov 2012
Posts: 108
Likes: 0
Received 0 Likes
on
0 Posts
Why do Rear drums???? Why don't you do rear disc brakes. There are numerous vendors out there that sell a disc brake conversion kit. They are really cheap to do and easy as pie. I'm about to swap my rear to disc and it won't cost but maybe $100.00 total ya know. Prices may vary depending on who you choose to buy from.
I will eventually, but I've got so many other things to spend an extra $100 on right now. I just need something that will stop decent enough so i can dd it.
08-02-2013, 08:03 PM
#17
^^I agree. The stock front setup is plenty beefy, but the rear drums are garbage. I replaced my front calipers, pads and rotors for under $125. My front end is completely new. I went with a rear disc brake conversion for about $250. All-in-all, my entire break set up is costing me about $600 for the front components, rear conversion, braided steel hoses, LPV, residual valve, 1" master cylinder and all new hard lines and fittings. Check out my build for some of the details.
08-03-2013, 08:13 PM
#18
Registered User
Thread Starter
iTrader: (1)
Join Date: Nov 2012
Posts: 108
Likes: 0
Received 0 Likes
on
0 Posts
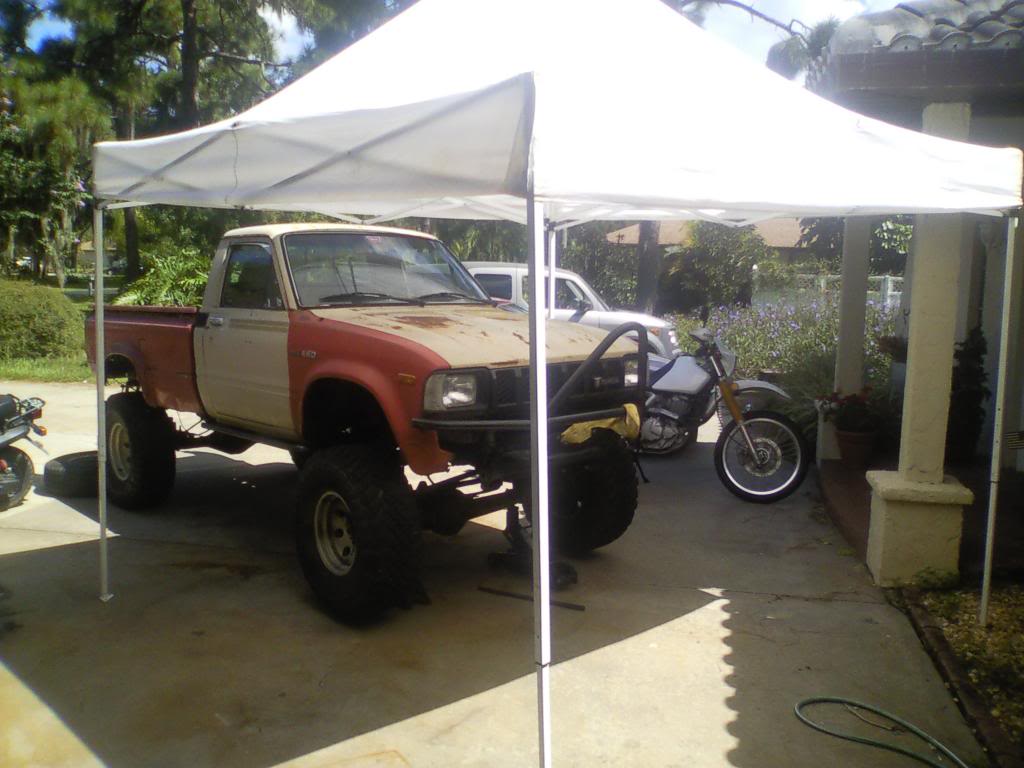
Today I made some BIG PROGRESS and took a BIG AMOUNT OF PICHERS.
I got the axle rebuild kit from marlin crawler, and the new brakes from the 'zone.
First things first:
1. Setup a tent because it is hotter than a rattlesnake's taint outside
2. crank the Rammstein so I can jam out while I wrench it out
pop that wheel off

Get that caliper outta here
At this point I got the wheel studs out, put a lugnut on it so the BFH wouldnt wreck the threads.
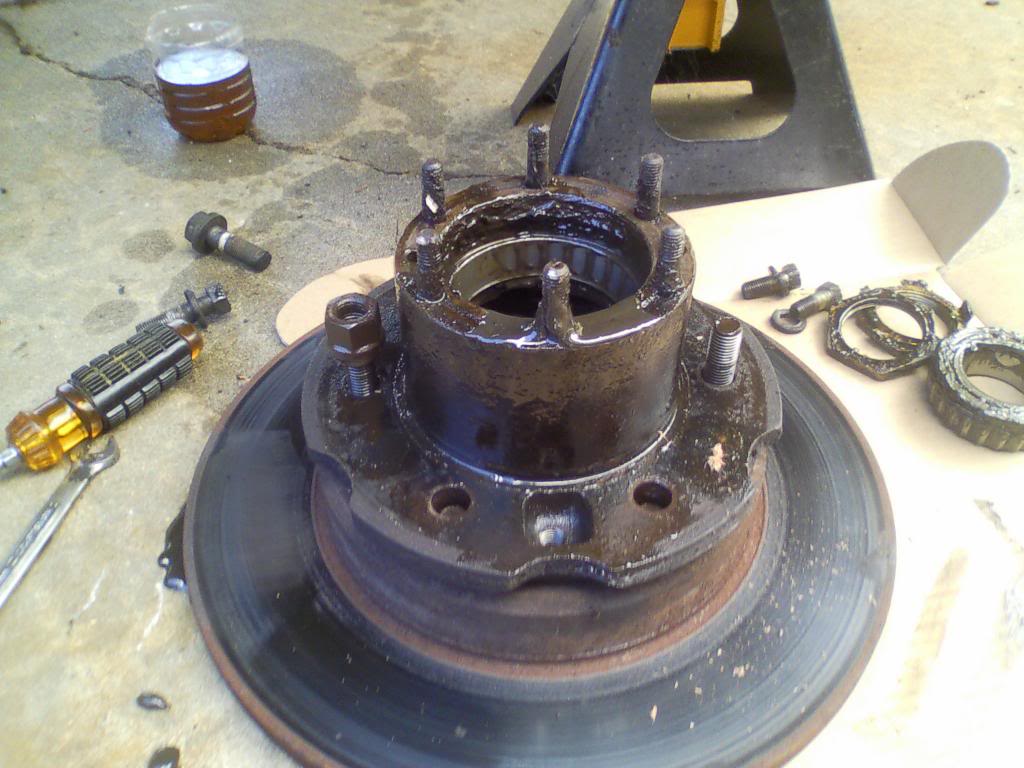
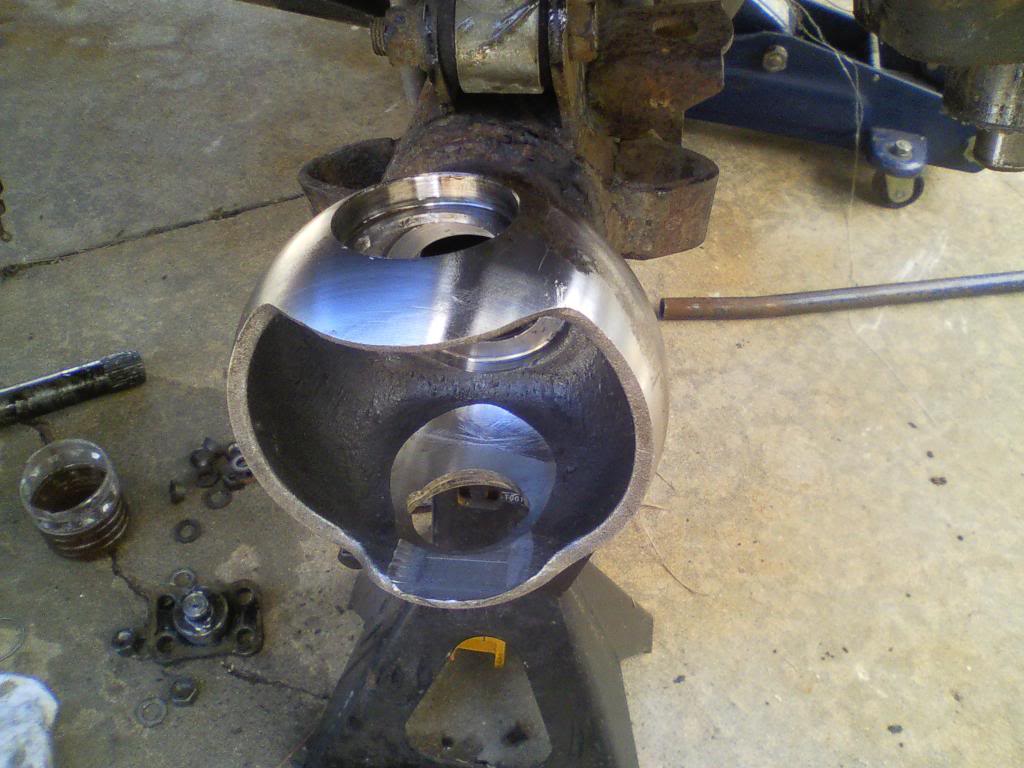
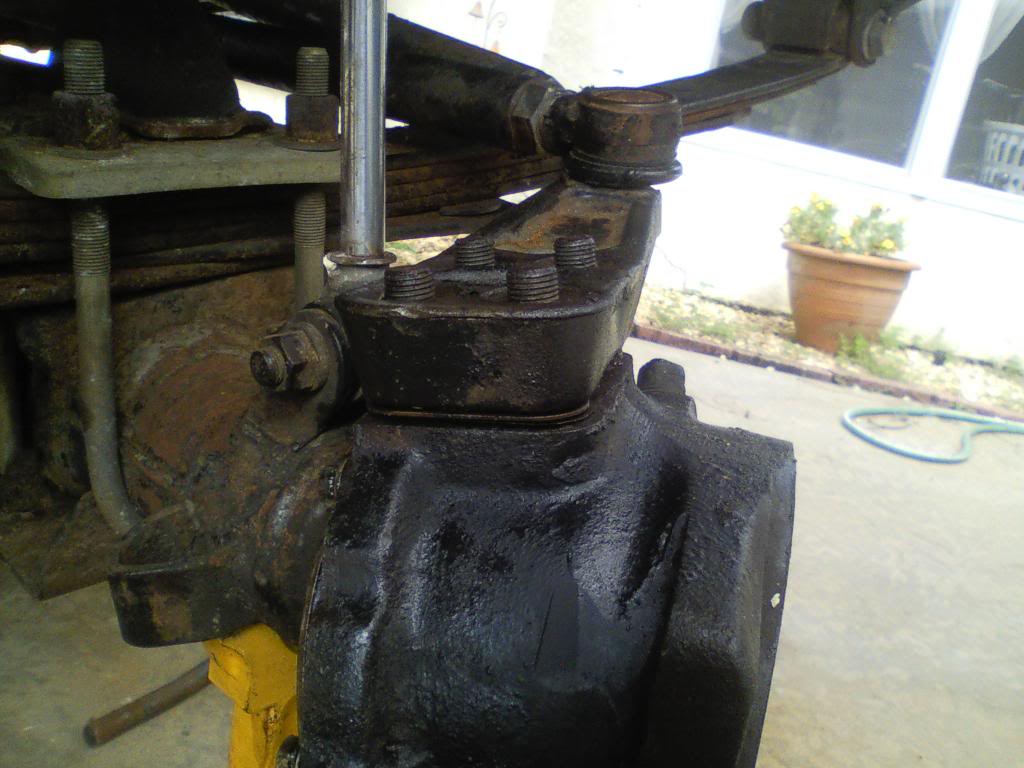
Forgive my lack of proper names for things, but I took off the dust shield/catcher thing, and the plate with the seal built into it, and the thing that the shaft rides in with the brass bushing.
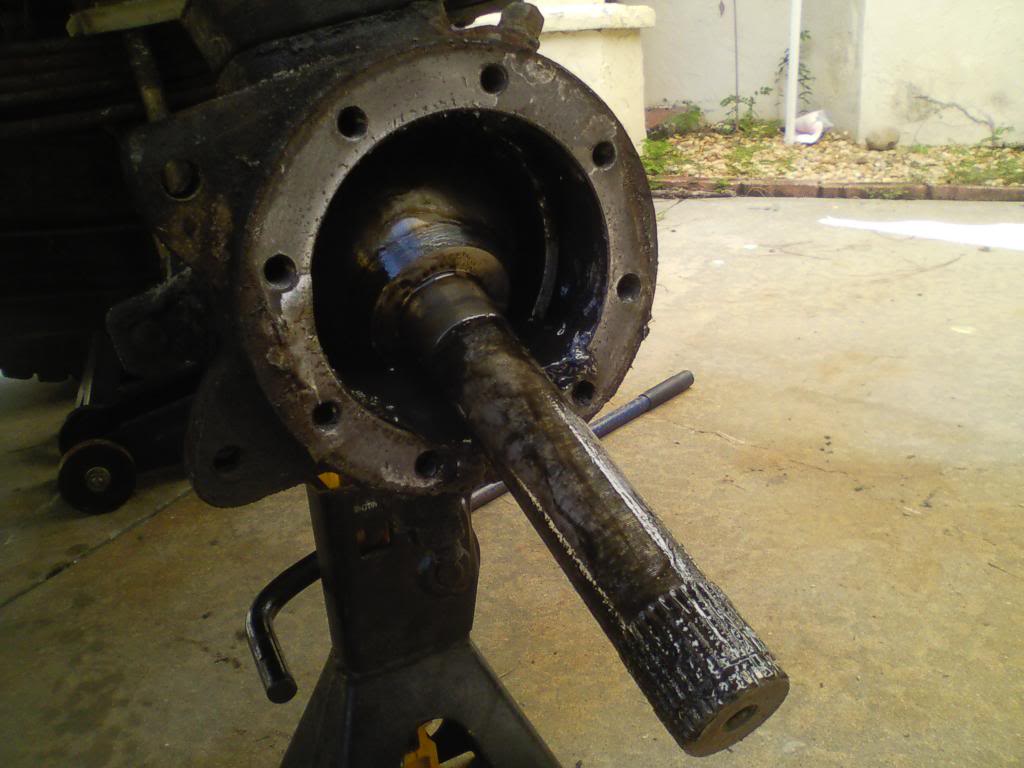
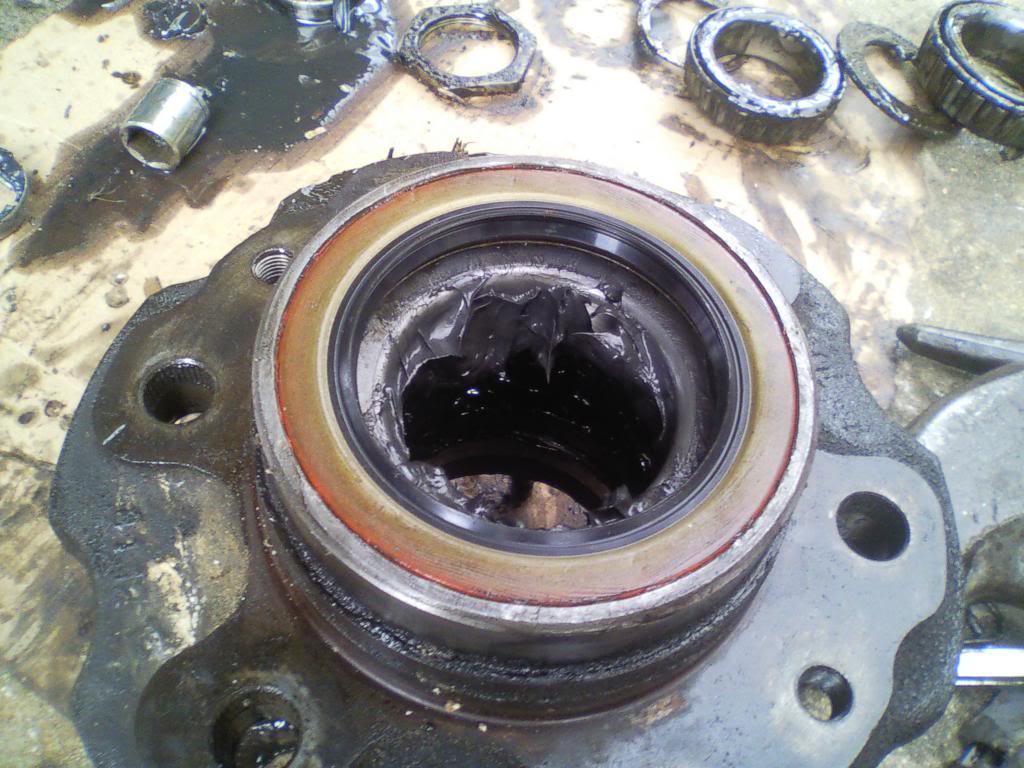
took out the birfield joint to be re-greased up
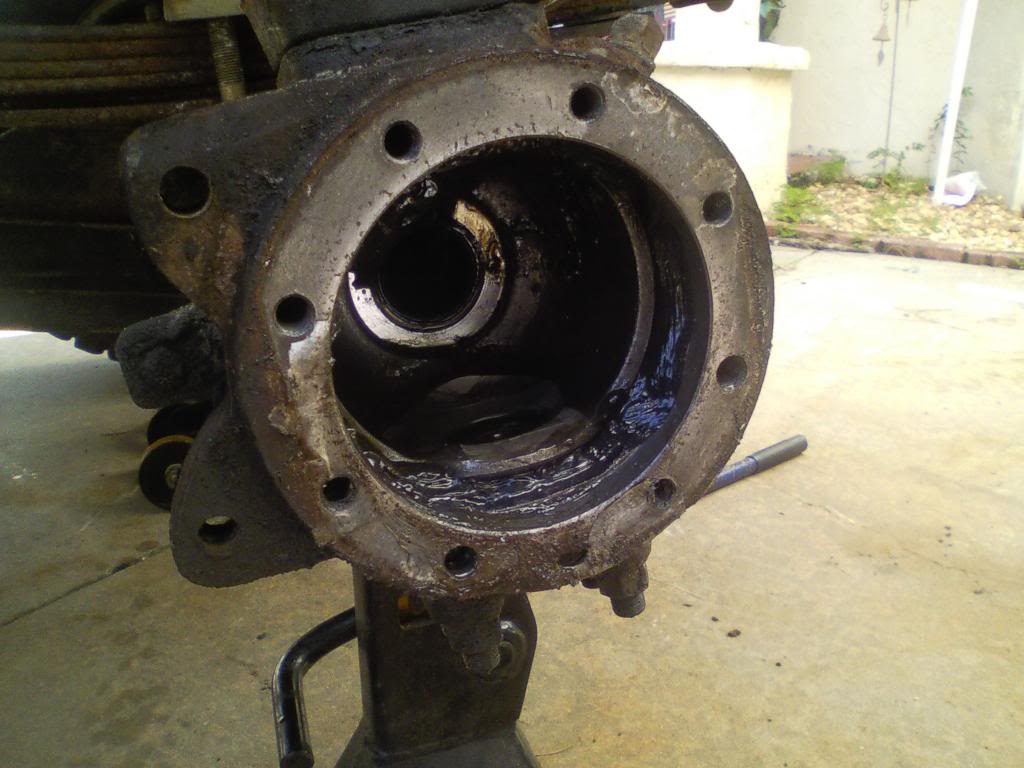
took off the knuckle/birfield housing thing
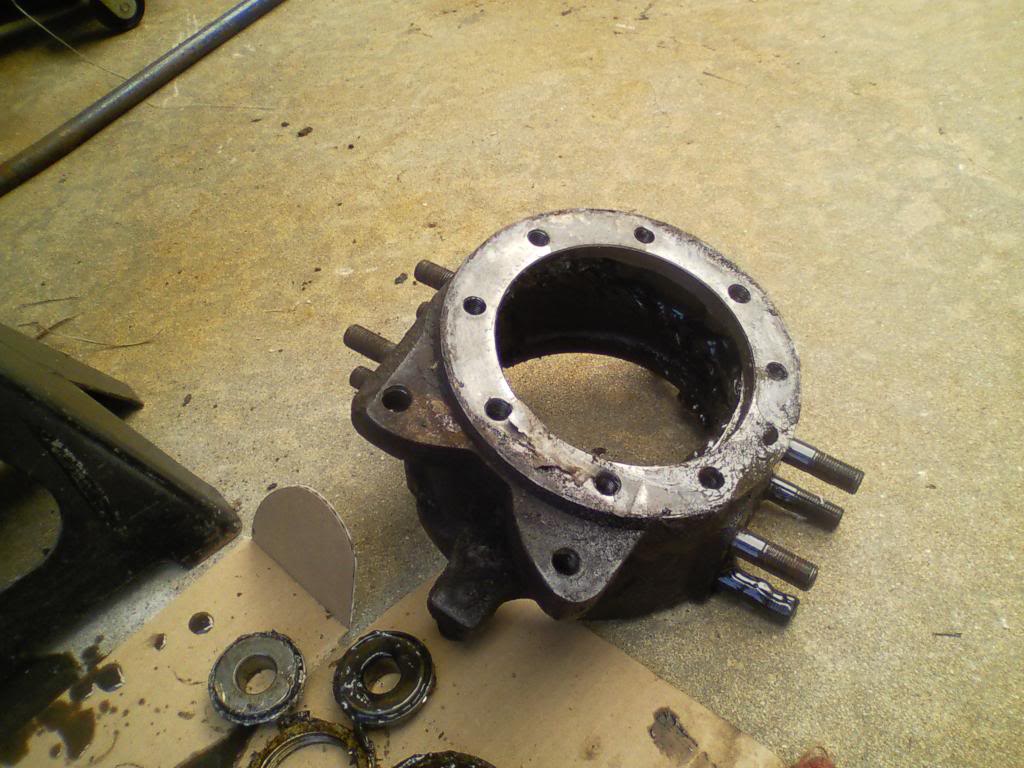
all bare
new seal with homemade seal pusher made from a socket with a reversely installed extension
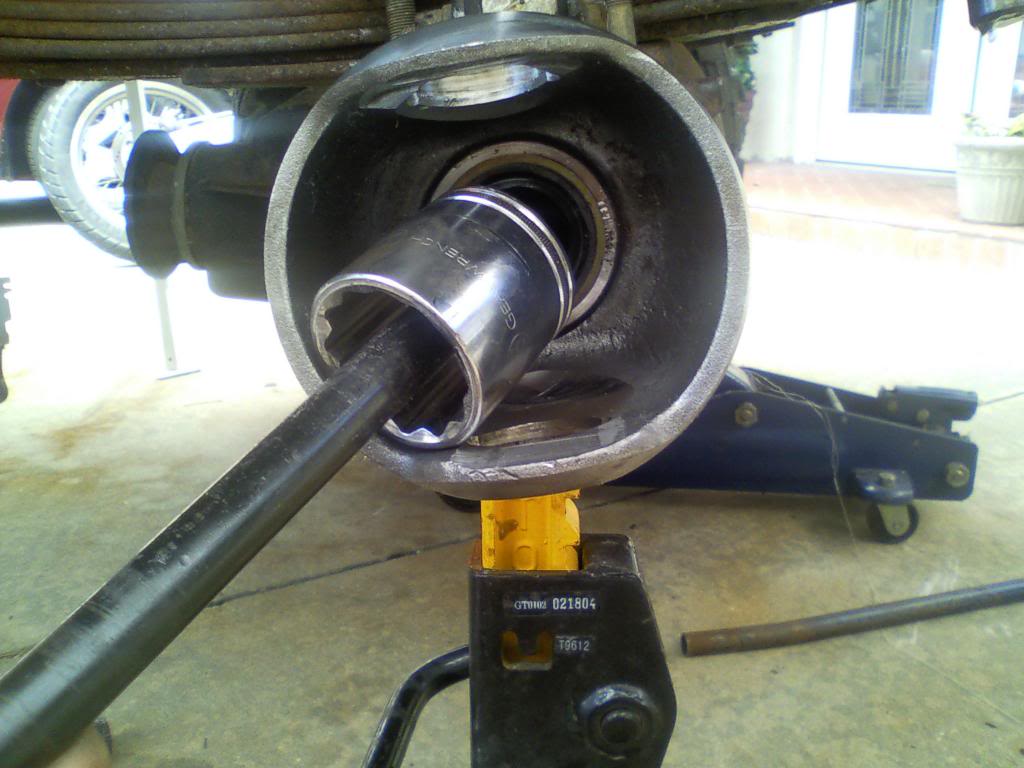
I dont have any fancy brass tools, but I do got wood. So I used that to smash in the races for the top and bottom bearings
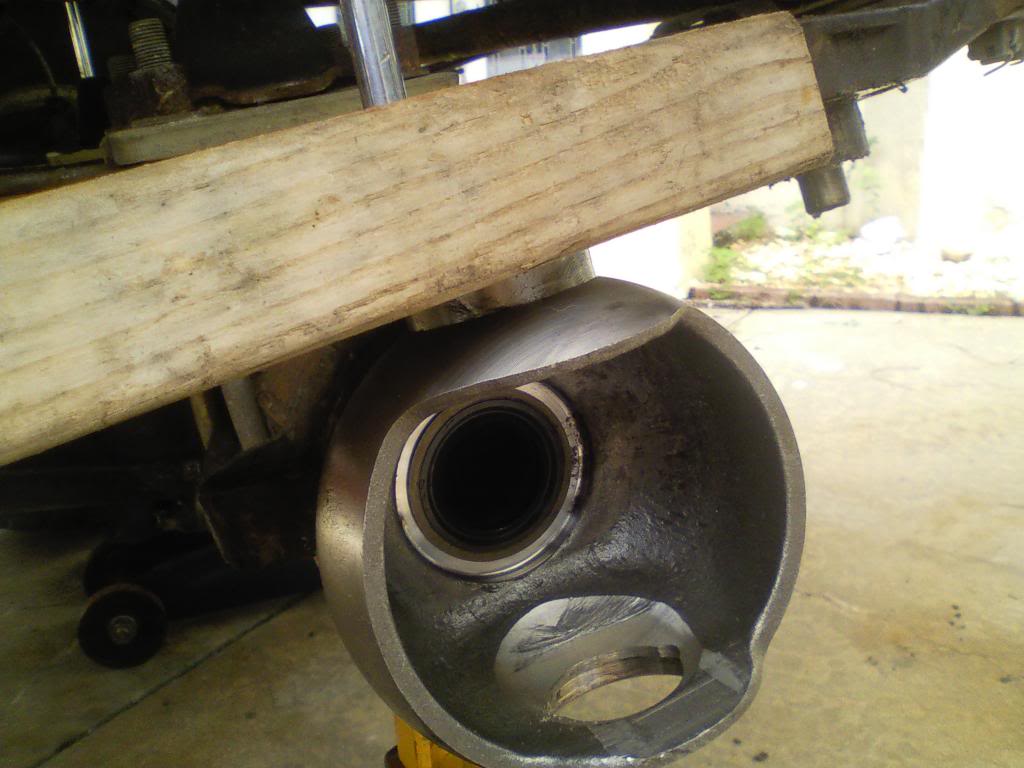
new felt/rubber ring
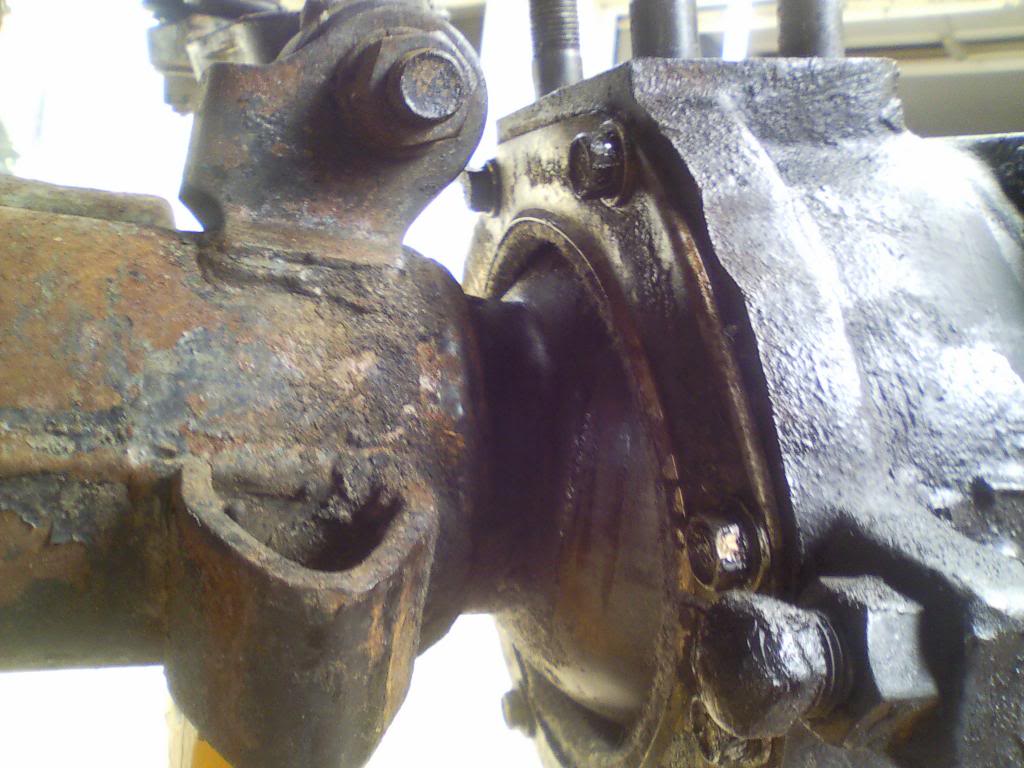
put the steering arm back on, using the same shims that were on there, I didnt want to mess with figuring out how to use the new shims in the kit.
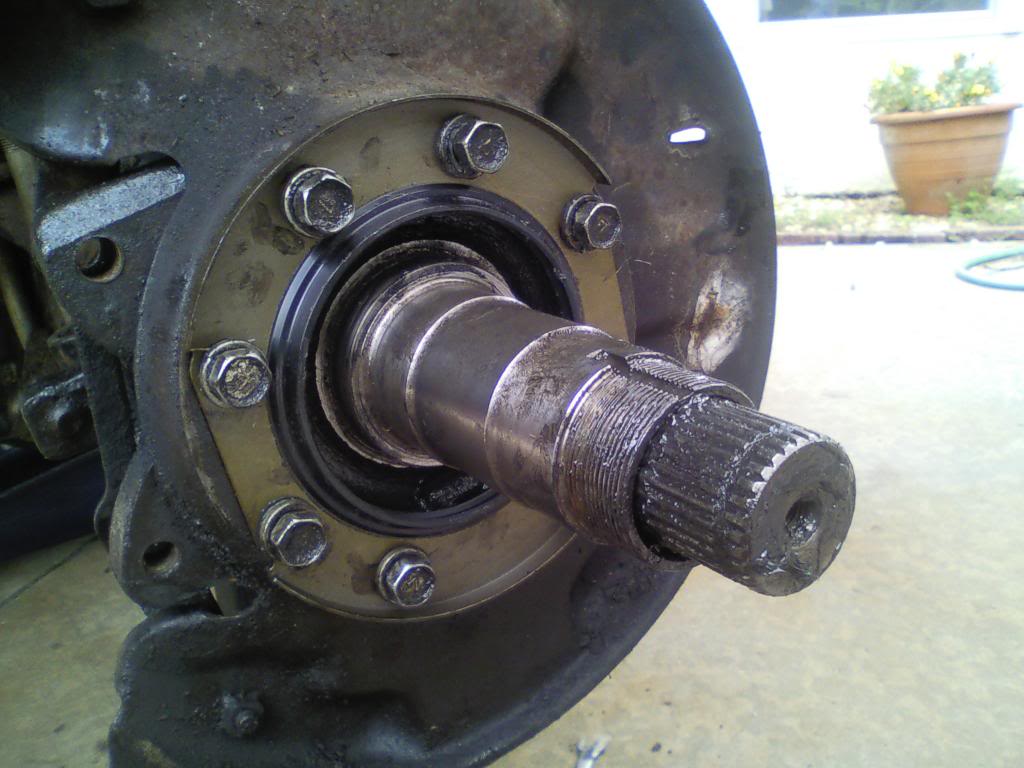
new seal and greased up wheel bearings
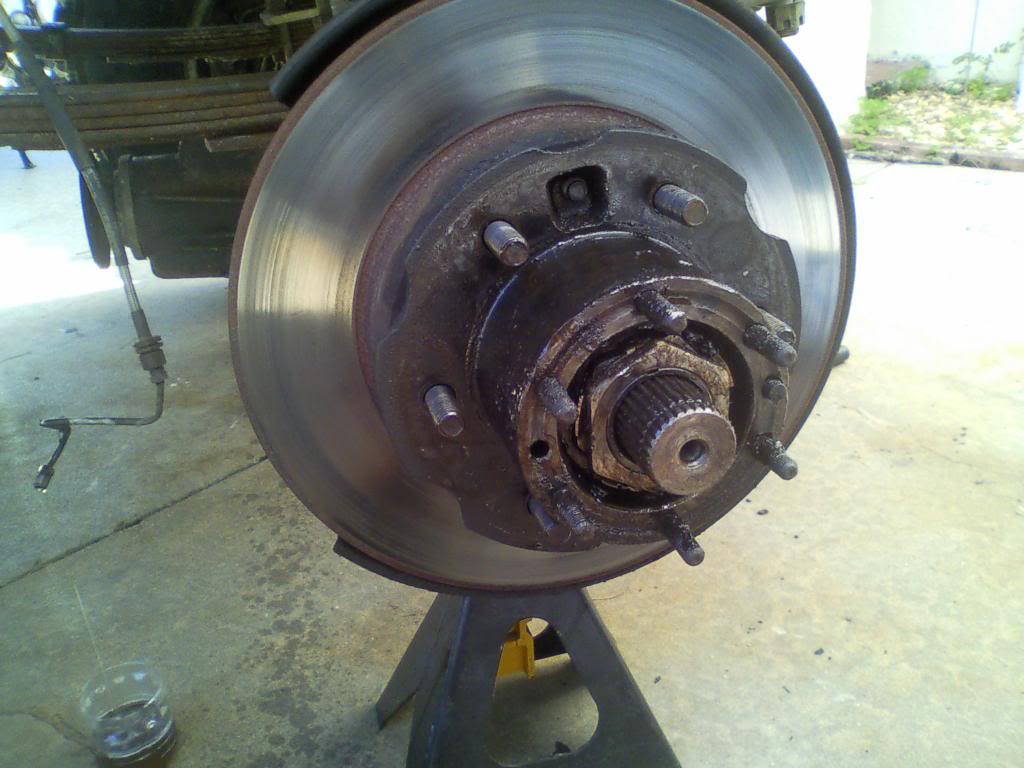
new gold seal and other parts that are in there but cant be seen
new fancy vented landcruiser rotor, and caliper from a newer truck, and put together hubs that arent anything to look at, but are all rebuilt on the inside.
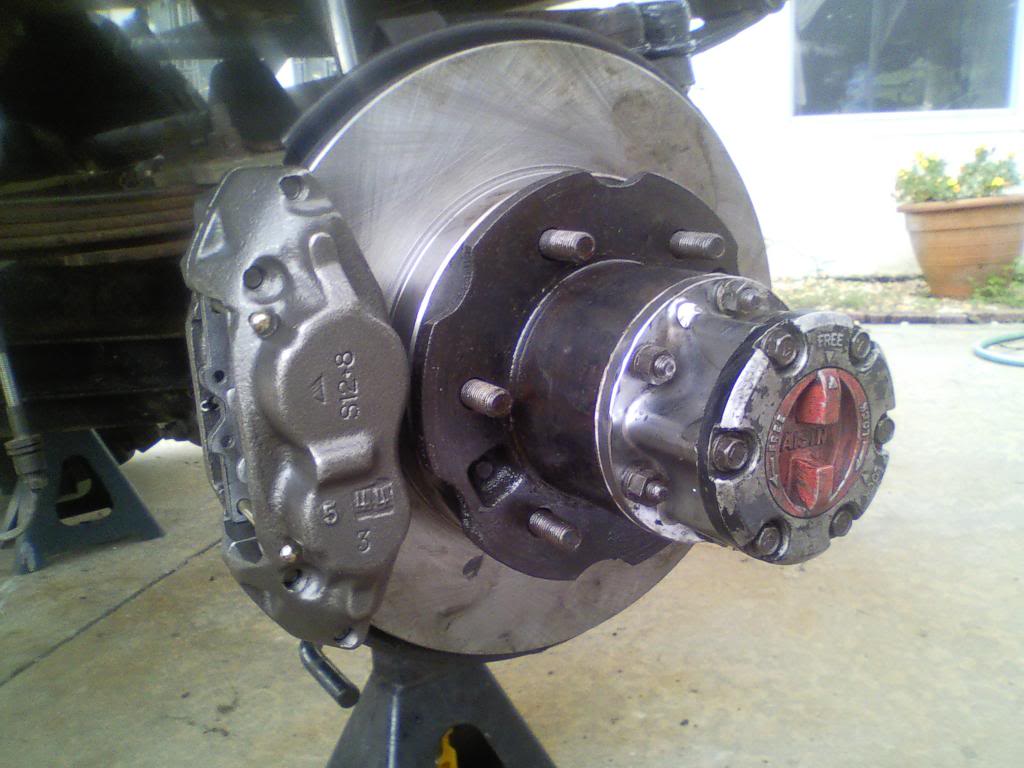
And what do you guys think about the length of the stock studs that I reused?
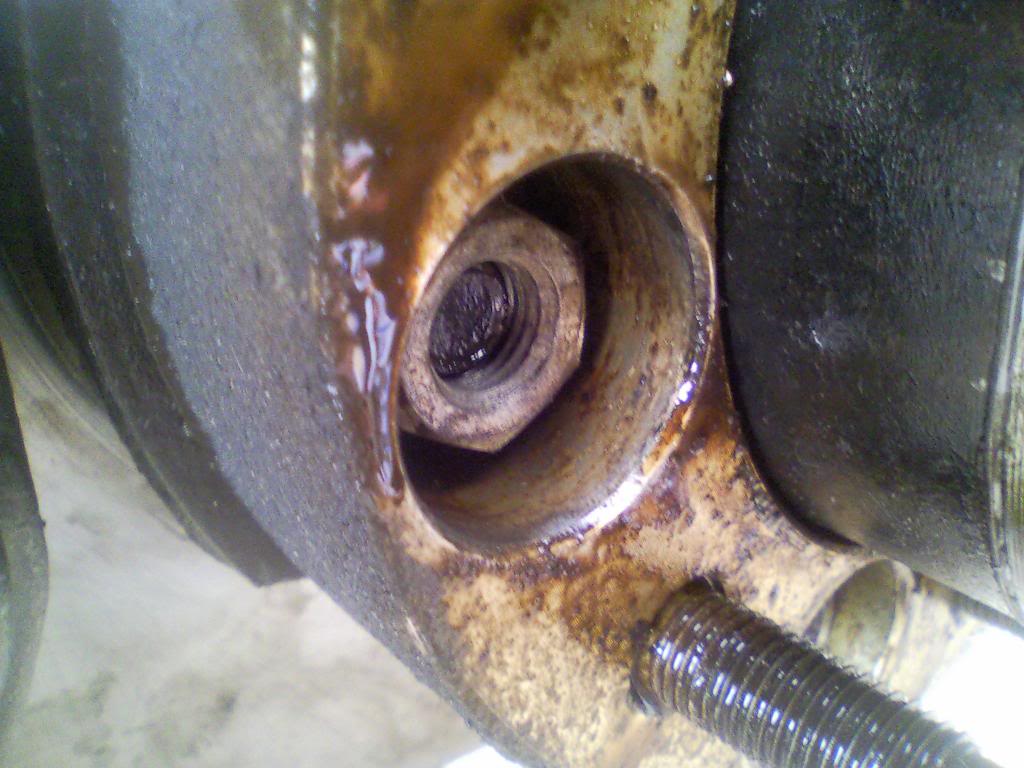
They are engaging plenty of threads, just not all the way. And I am also using wheel spacers if that makes a difference.
I got the axle rebuild kit from marlin crawler, and the new brakes from the 'zone.
First things first:
1. Setup a tent because it is hotter than a rattlesnake's taint outside
2. crank the Rammstein so I can jam out while I wrench it out
pop that wheel off
Get that caliper outta here
At this point I got the wheel studs out, put a lugnut on it so the BFH wouldnt wreck the threads.
Forgive my lack of proper names for things, but I took off the dust shield/catcher thing, and the plate with the seal built into it, and the thing that the shaft rides in with the brass bushing.
took out the birfield joint to be re-greased up
took off the knuckle/birfield housing thing
all bare
new seal with homemade seal pusher made from a socket with a reversely installed extension
I dont have any fancy brass tools, but I do got wood. So I used that to smash in the races for the top and bottom bearings
new felt/rubber ring
put the steering arm back on, using the same shims that were on there, I didnt want to mess with figuring out how to use the new shims in the kit.
new seal and greased up wheel bearings
new gold seal and other parts that are in there but cant be seen
new fancy vented landcruiser rotor, and caliper from a newer truck, and put together hubs that arent anything to look at, but are all rebuilt on the inside.
And what do you guys think about the length of the stock studs that I reused?
They are engaging plenty of threads, just not all the way. And I am also using wheel spacers if that makes a difference.
08-03-2013, 08:21 PM
#19
Registered User
Thread Starter
iTrader: (1)
Join Date: Nov 2012
Posts: 108
Likes: 0
Received 0 Likes
on
0 Posts
Oh, and I just noticed the brake pad shims that I accidentally didn't use sitting in the brake pad box.
These things essential?
After the test drive, the brakes feel much better, but the pedal goes to the floor with enough effort, and I couldn't lock em up. Could be some air in the lines, or it could possibly be that I am still using the stock master cylinder?
These things essential?
After the test drive, the brakes feel much better, but the pedal goes to the floor with enough effort, and I couldn't lock em up. Could be some air in the lines, or it could possibly be that I am still using the stock master cylinder?


