Craftsmanracer's 82 build/unbuild

 12-04-2013, 04:26 PM
#62
Registered User
Thread Starter
iTrader: (1)
Join Date: Nov 2012
Posts: 108
Likes: 0
Received 0 Likes
on
0 Posts
I actually just read a couple of articles about the back-pressure that everybody is talking about, and it is the exhaust gas velocity that makes the difference.
I never thought it made much of a difference with 4 strokes, what with having valves and all, but the stuff I did to my exhaust definitely made a difference.
I never thought it made much of a difference with 4 strokes, what with having valves and all, but the stuff I did to my exhaust definitely made a difference.
12-04-2013, 11:47 PM
#63

Usually if the header is properly designed with the motor, everything after the collector is a restriction, this is why most race cars with no exhaust rules run open header wether it be drag racing, formula 1 etc. But if the header is not designed with the characteristics of the motor yes you can make more power running smaller exhausts to accelerate the gas velocity. I forgot which racing series but If I remember correctly it is all bmw and they all run cheap headers, and they make most power with about 5' of 1.75''id exhaust.
And I'm guessing you actually increased veolicity with your 2'' exhaust connection, think blowing through a straw the air coming out will be faster than blowing through a 1'' pipe.
And I'm guessing you actually increased veolicity with your 2'' exhaust connection, think blowing through a straw the air coming out will be faster than blowing through a 1'' pipe.
Last edited by gillesdetrail; 12-04-2013 at 11:49 PM.
01-06-2014, 06:11 AM
#64
Registered User
Thread Starter
iTrader: (1)
Join Date: Nov 2012
Posts: 108
Likes: 0
Received 0 Likes
on
0 Posts
updates!
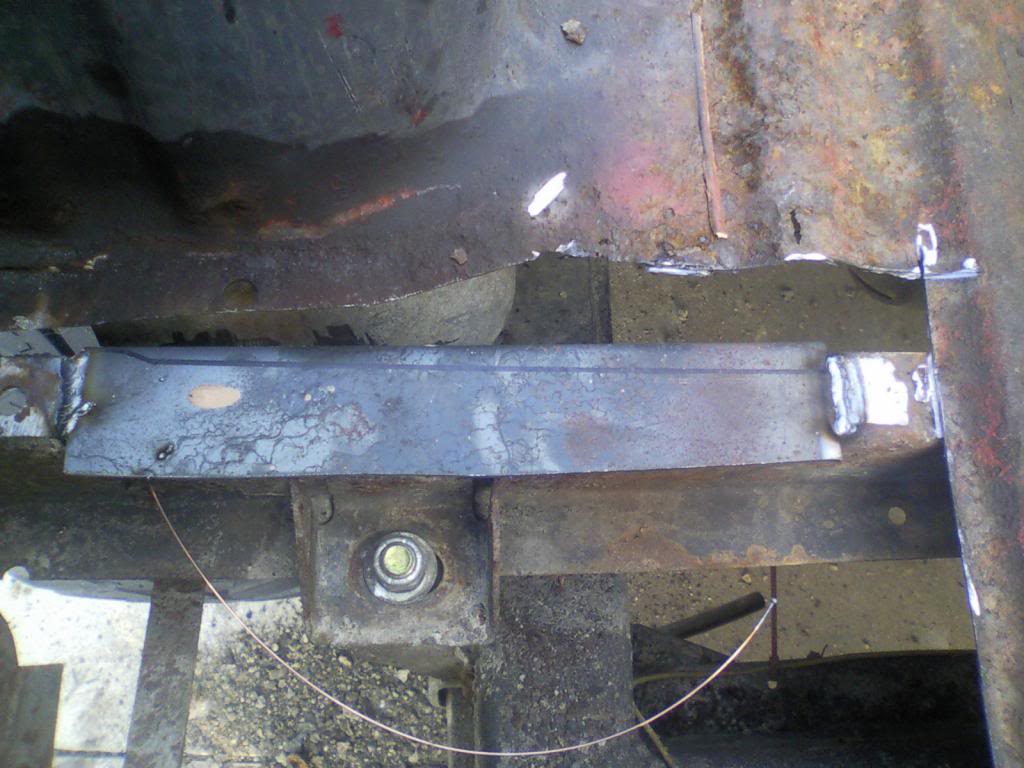
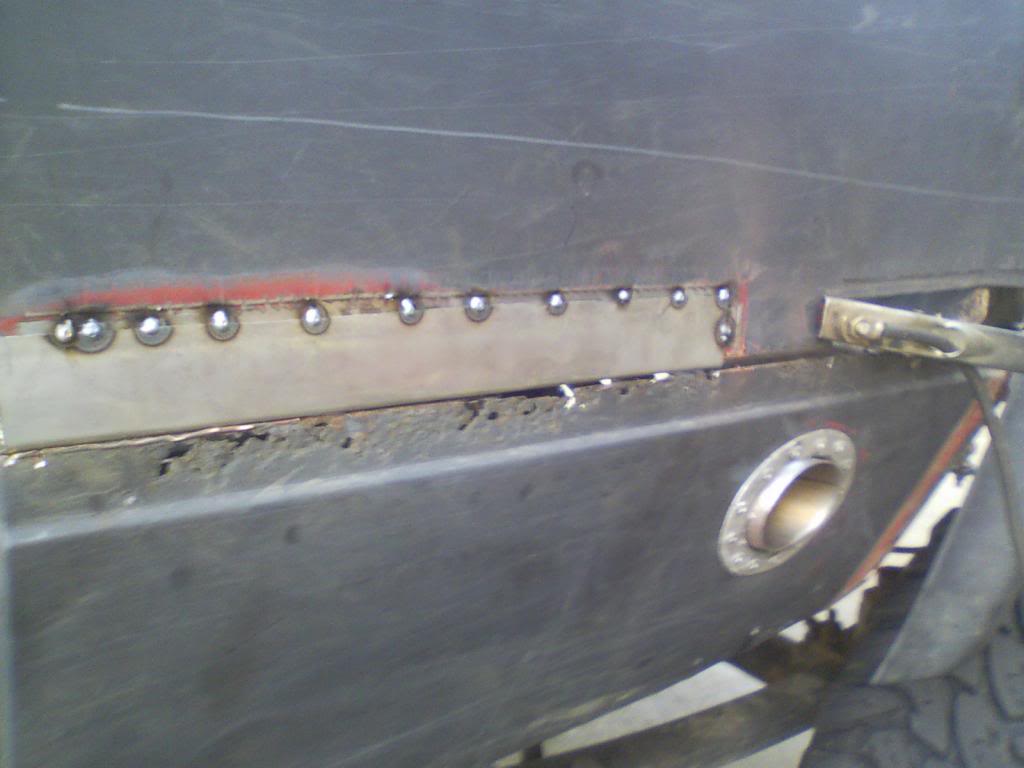
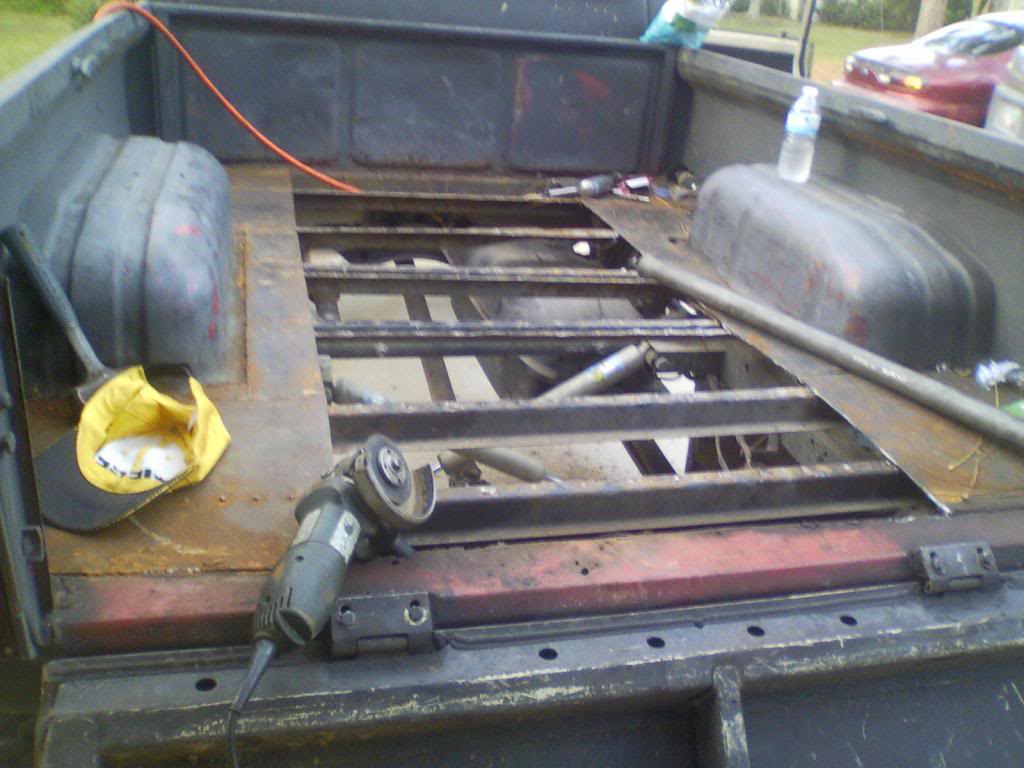
Still dealing with more bed rust issues.

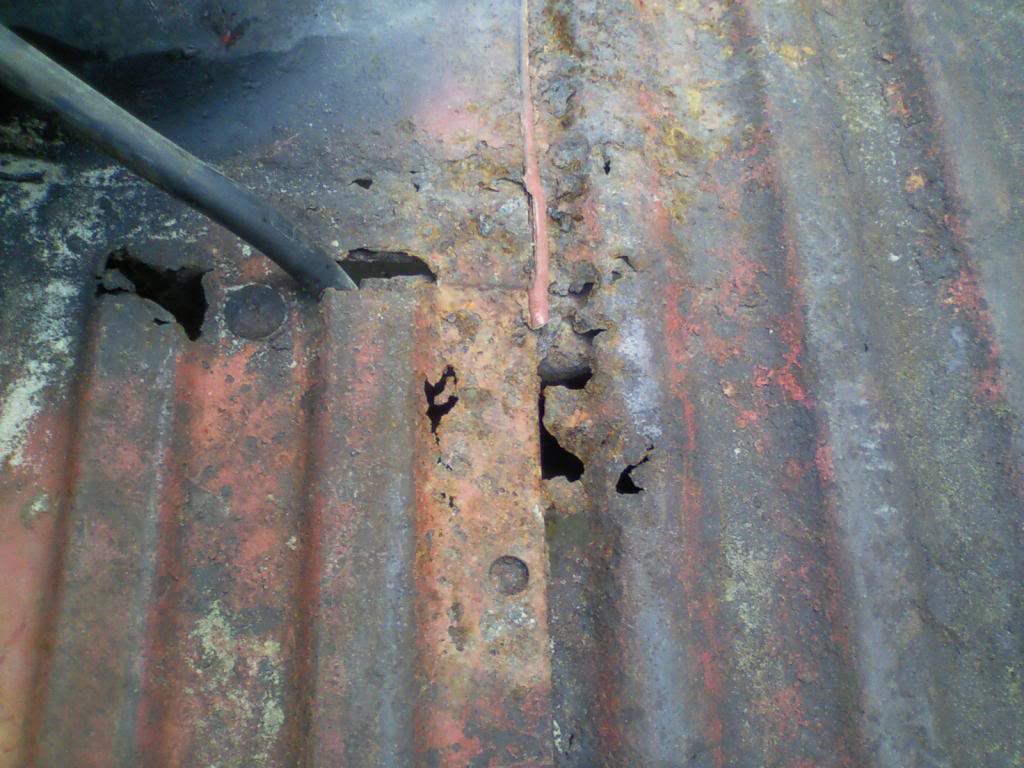
Rusty bed support
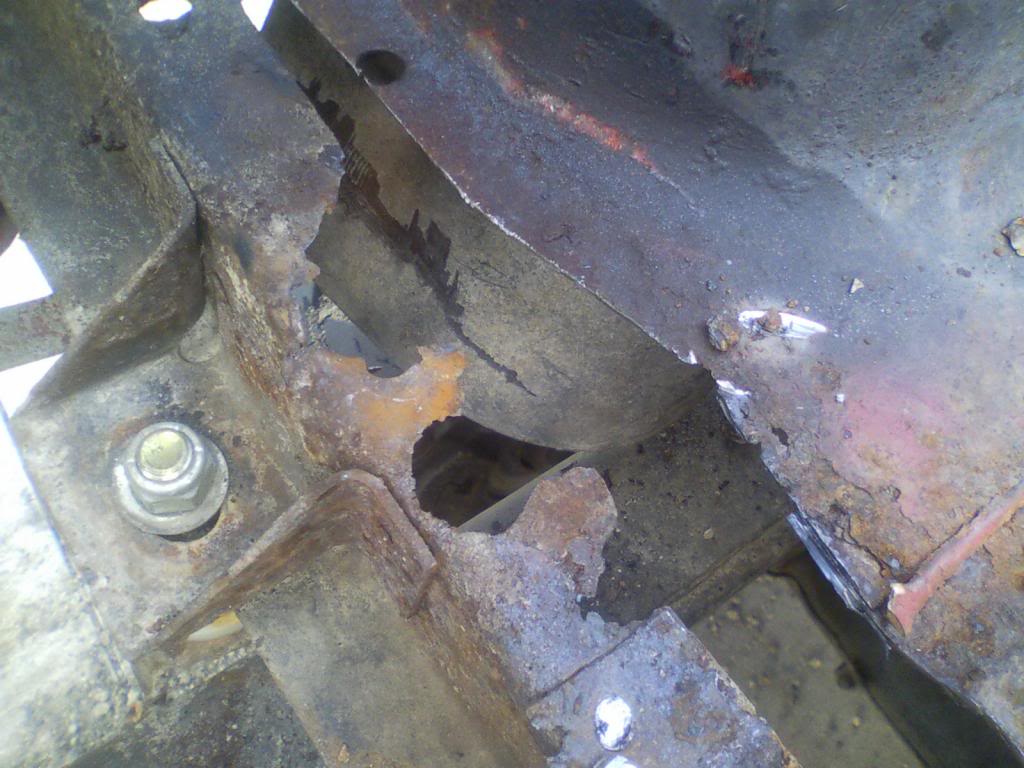
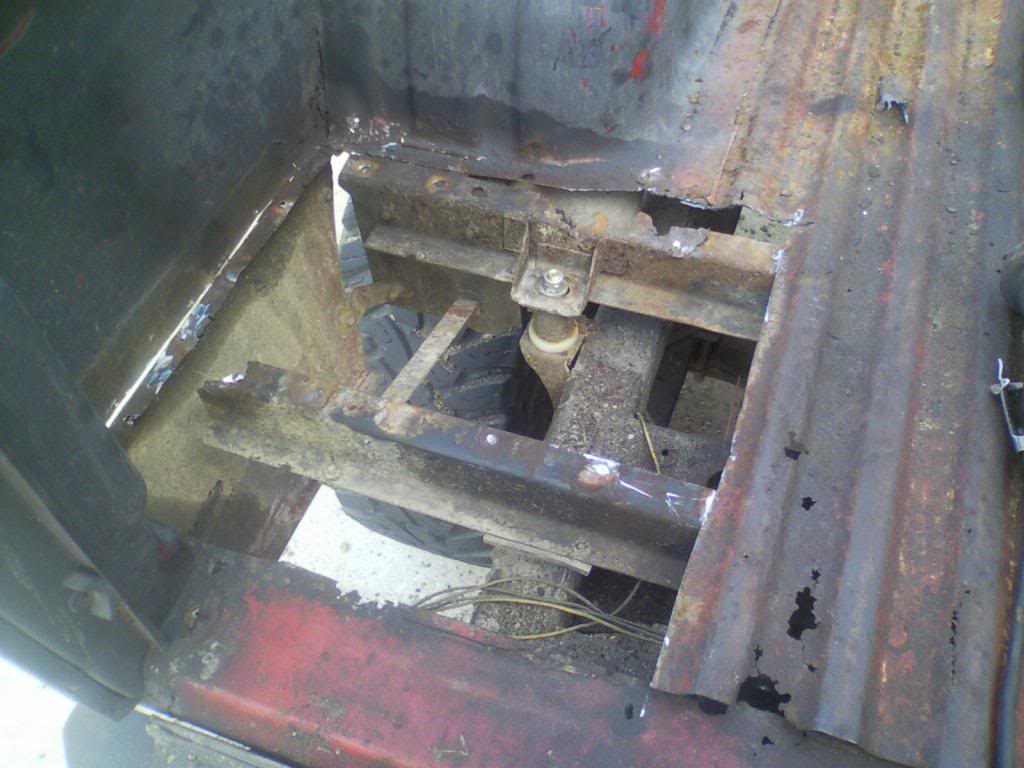
new bed support
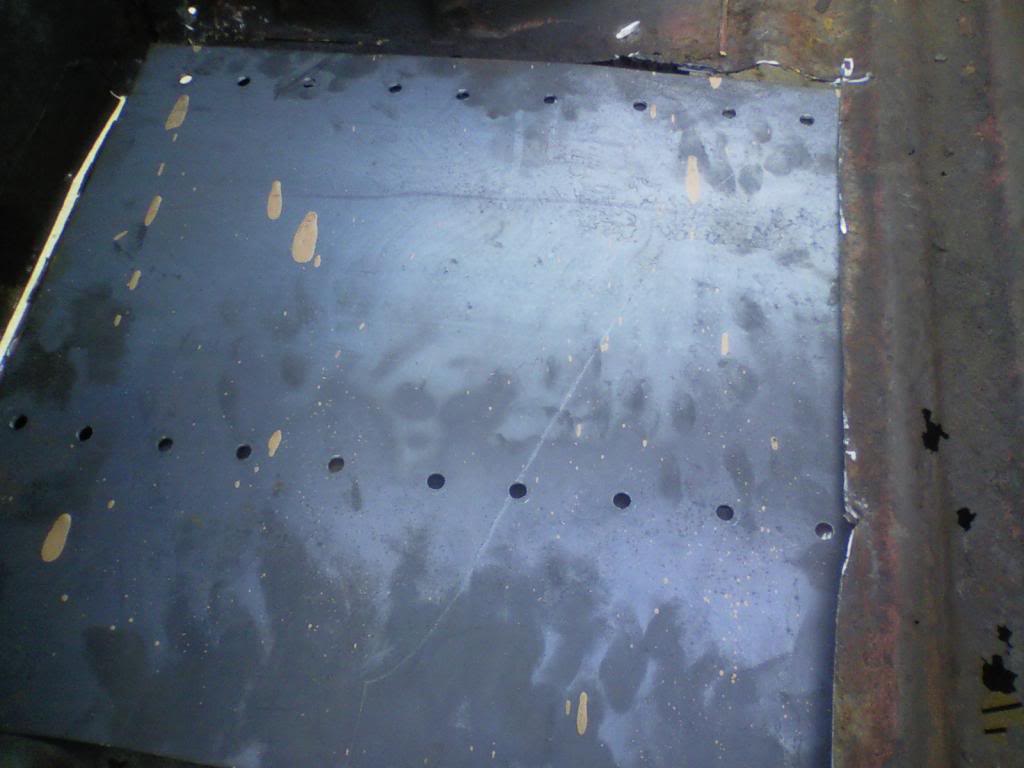
test fit new floor panel
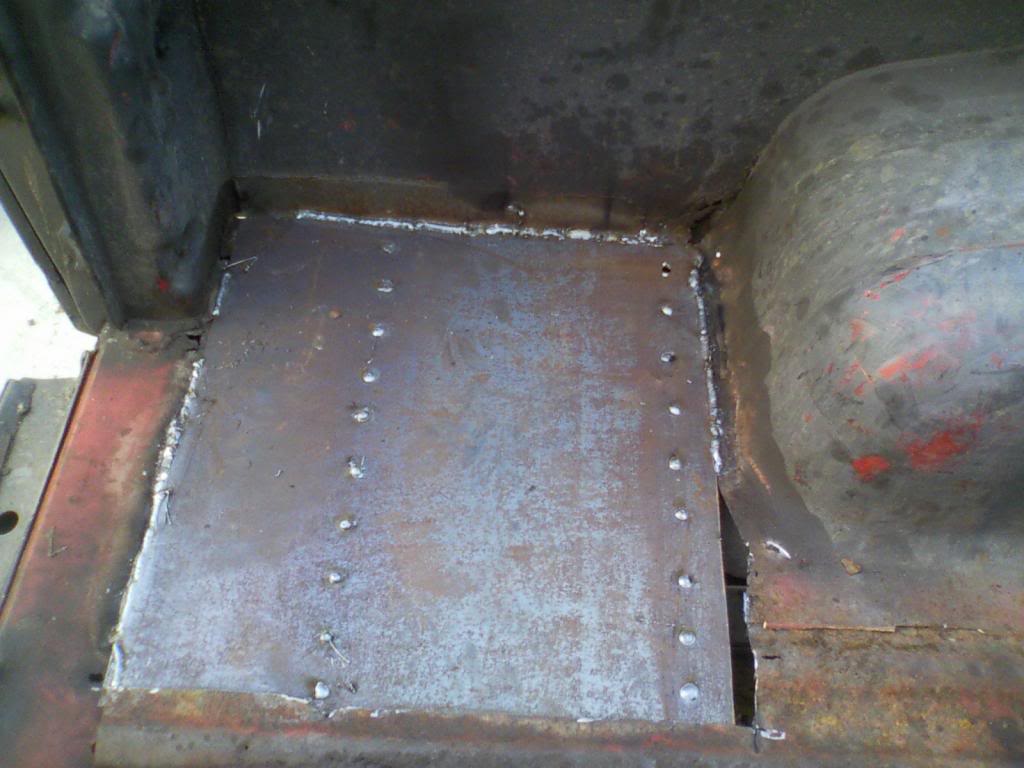
and doing the same for the other sections
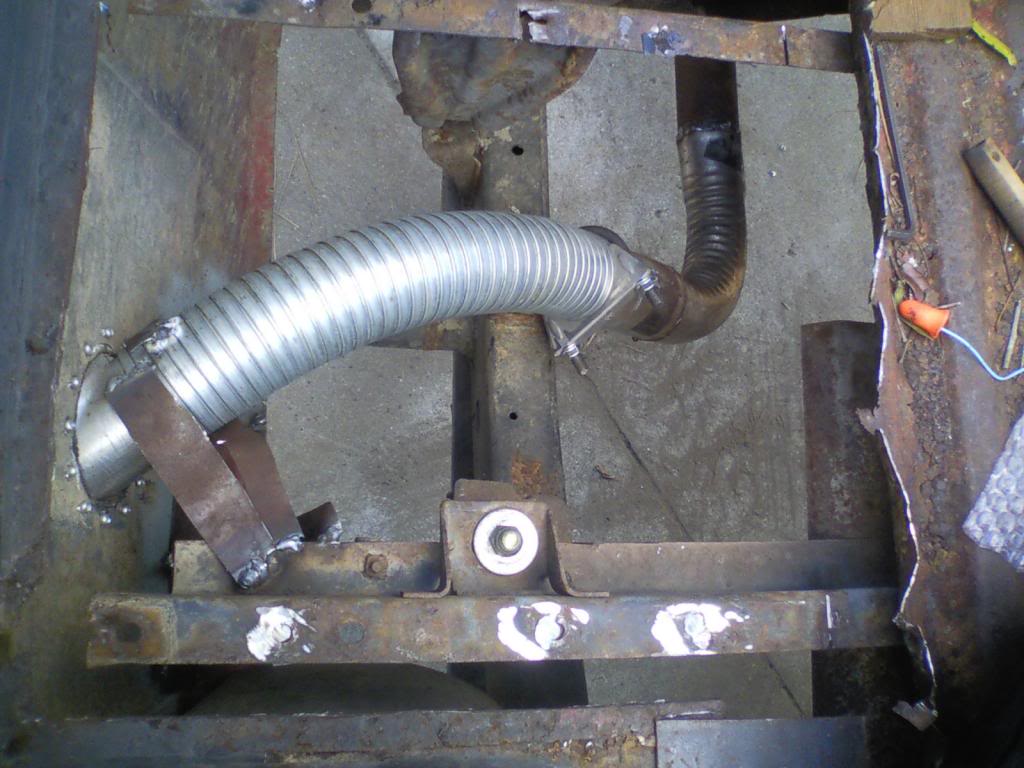
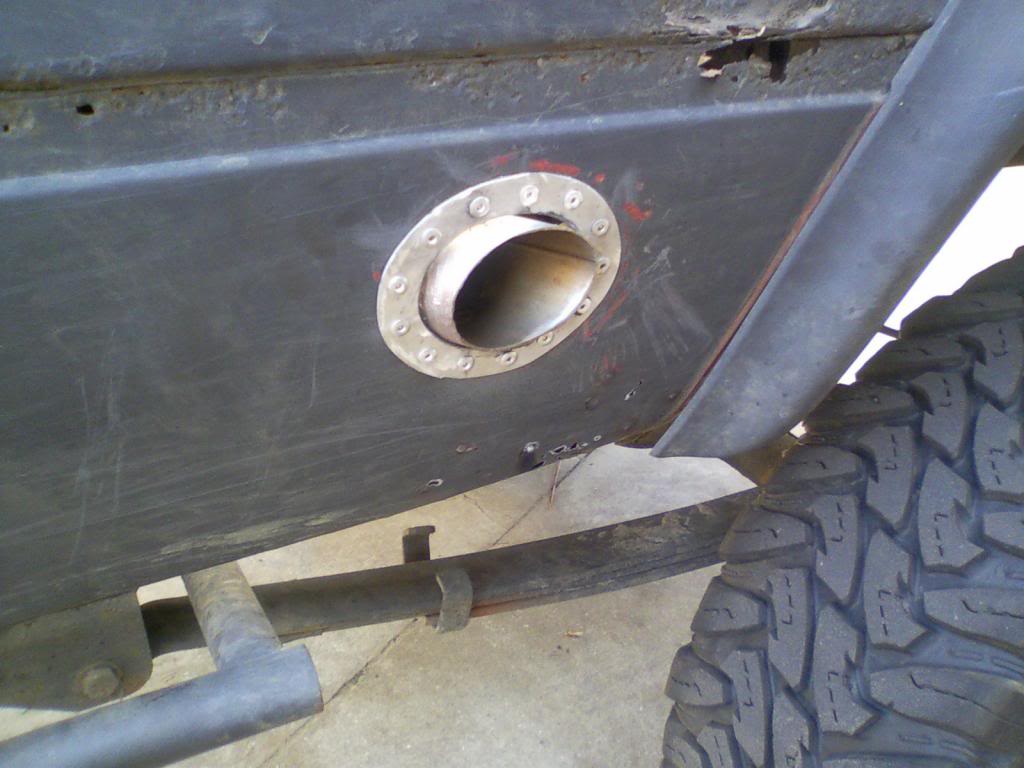
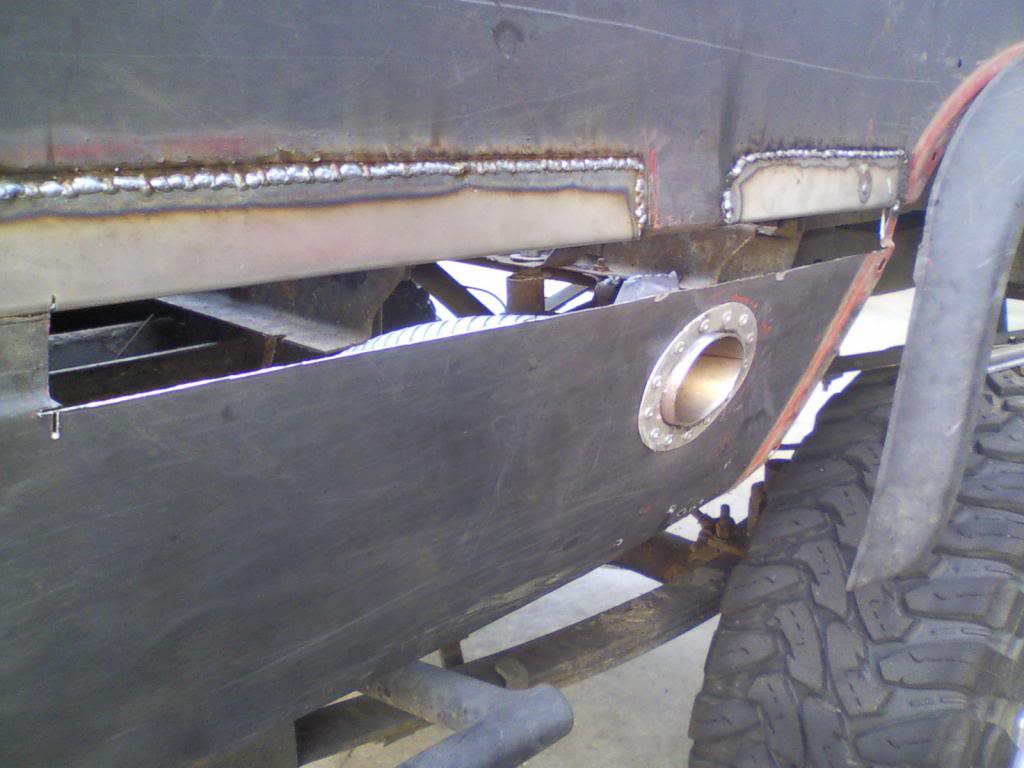
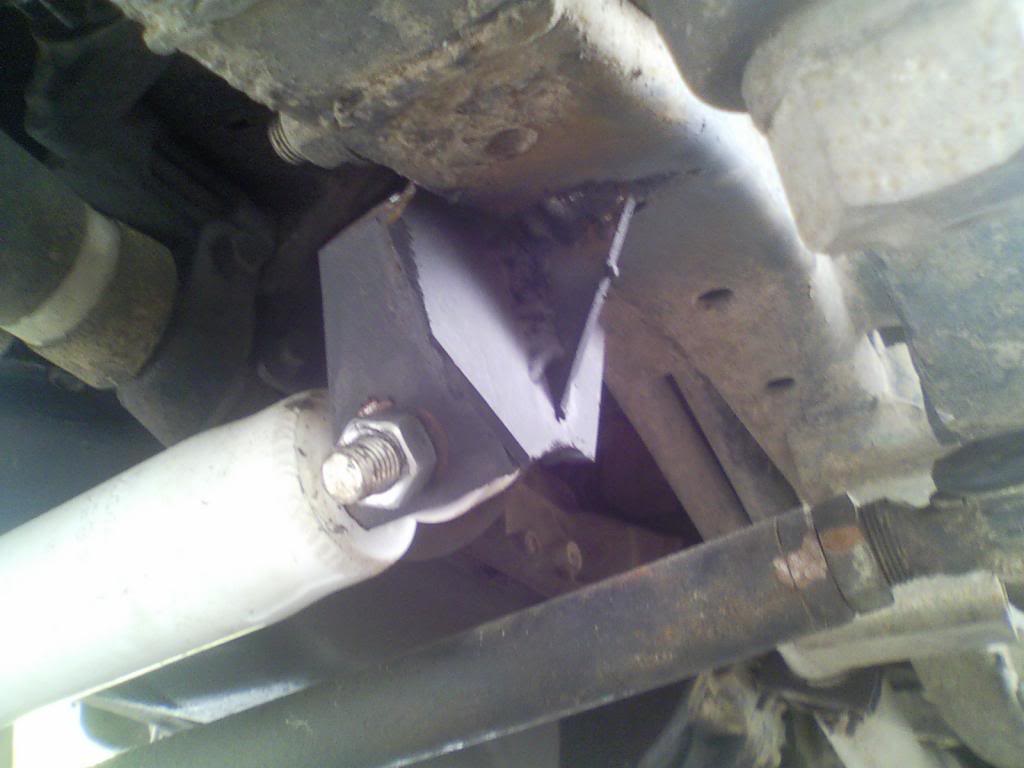
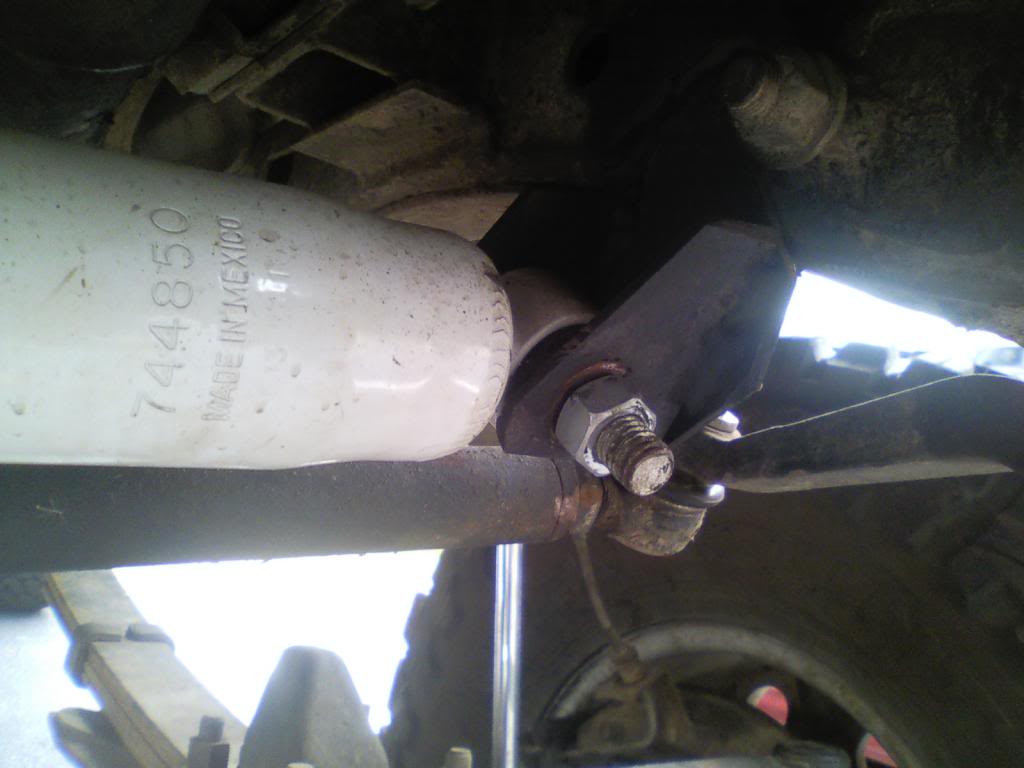
While I was in that section of the bed, I decided to do something to my exhaust.
Started with an aluminum storm panel
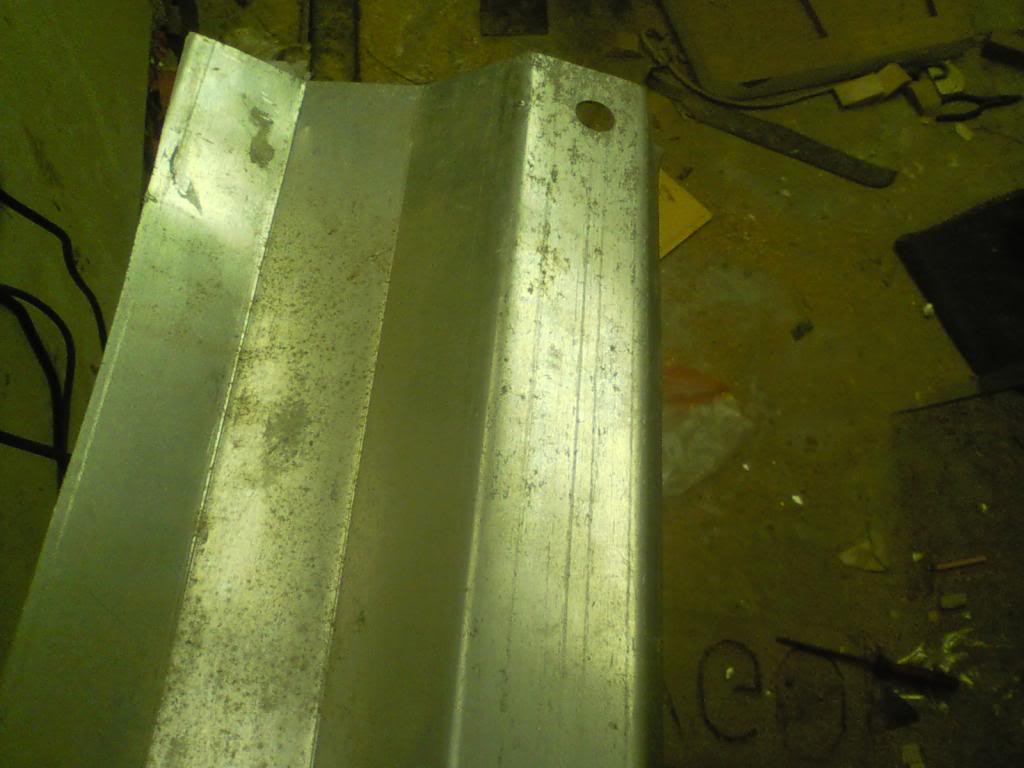
morphed it a little bit
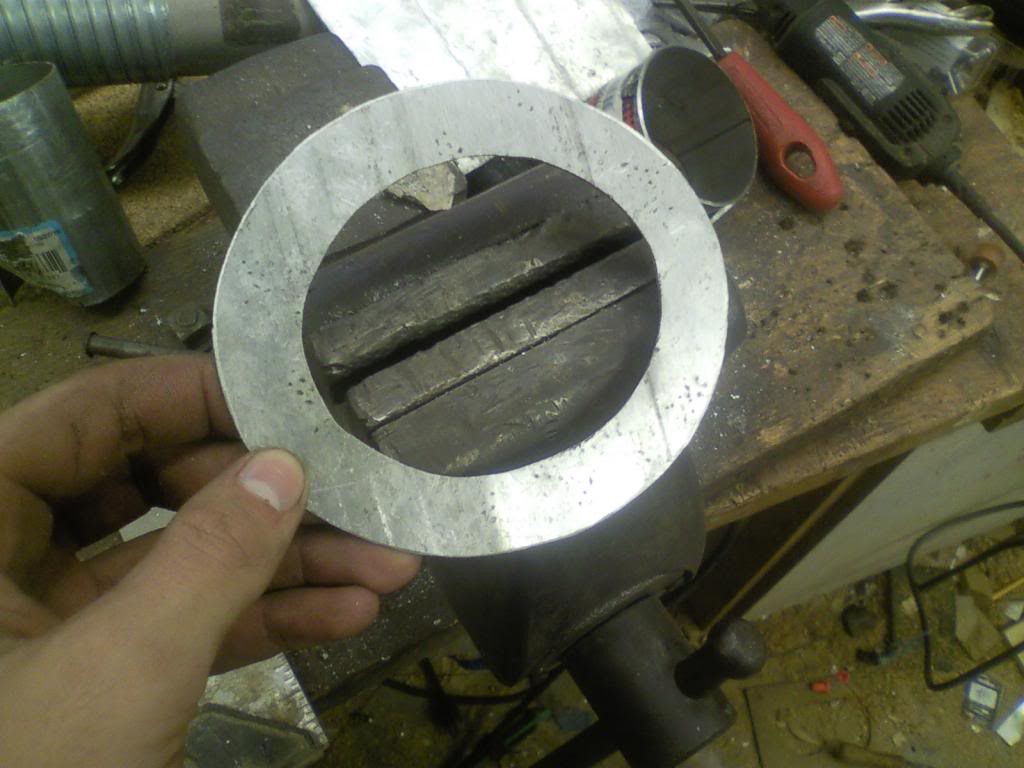
moved my exhaust around a little bit
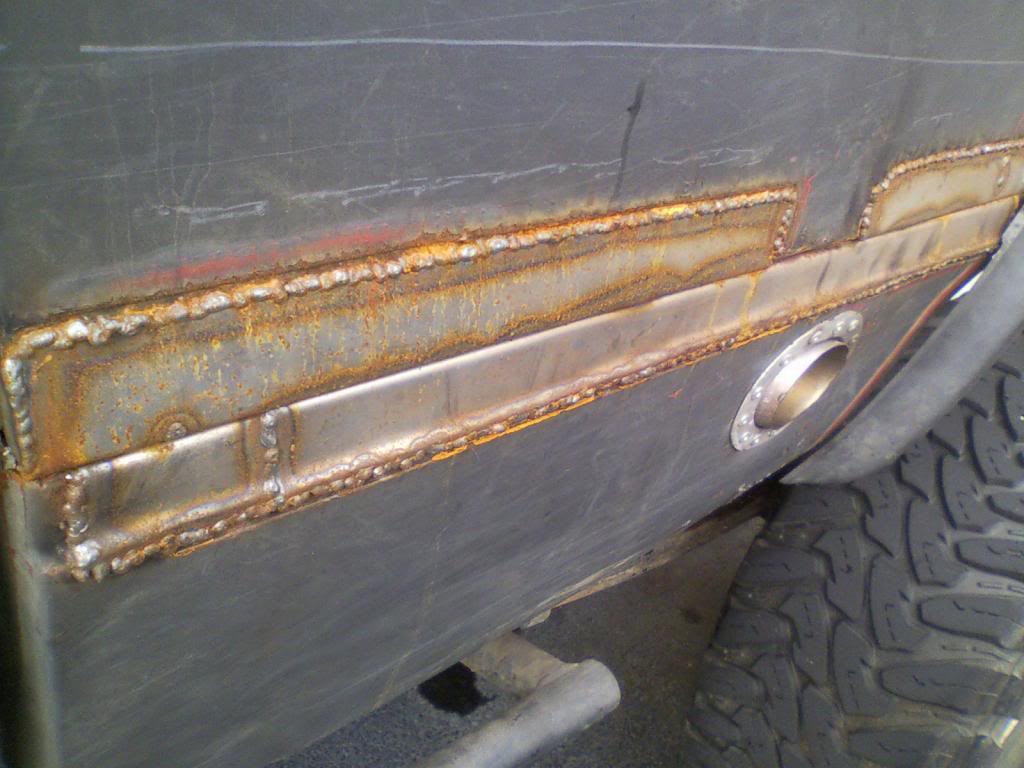
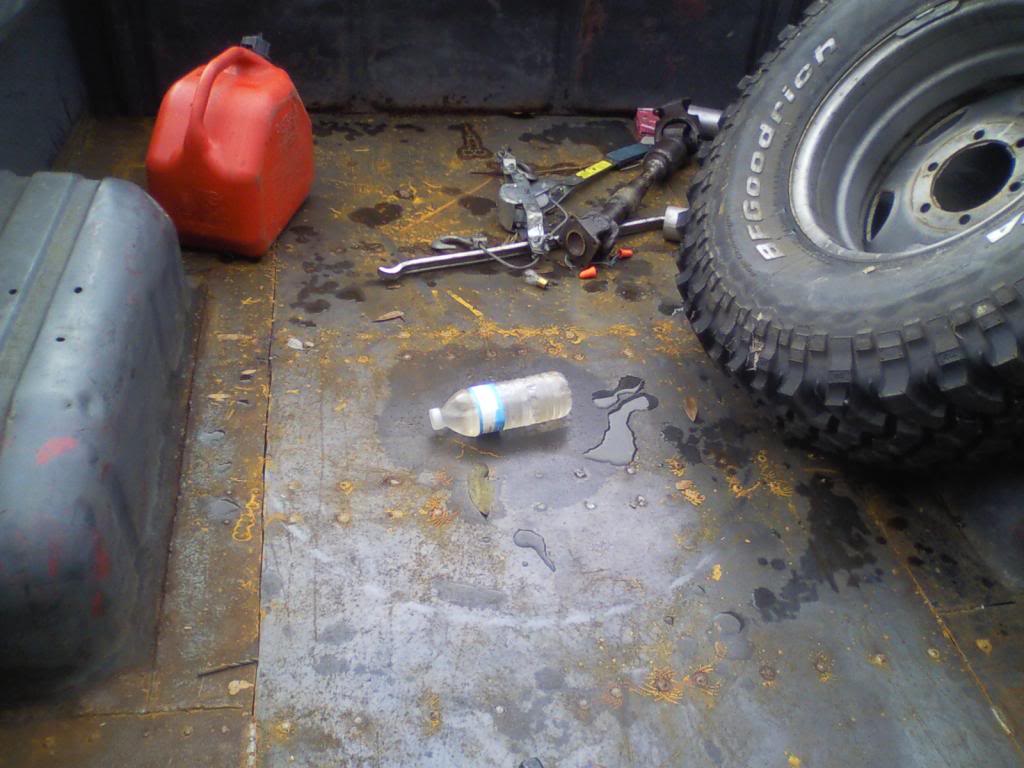
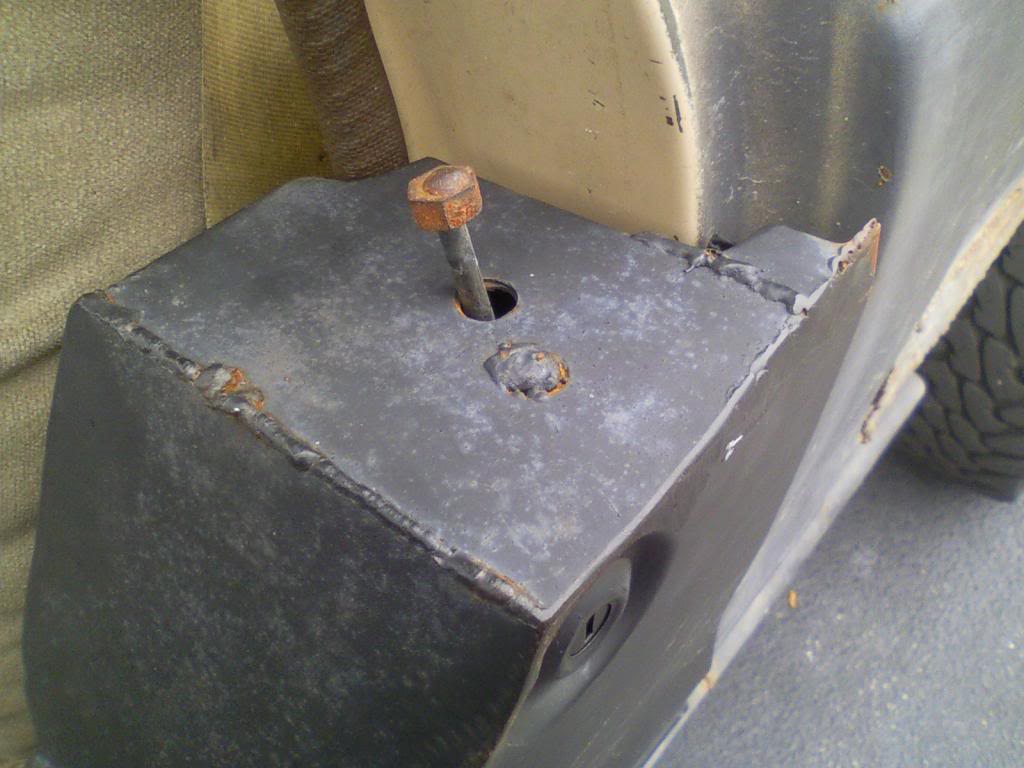
Then there was the stubborn rust in the little divot in the side of the bed.
Went to work with the bender
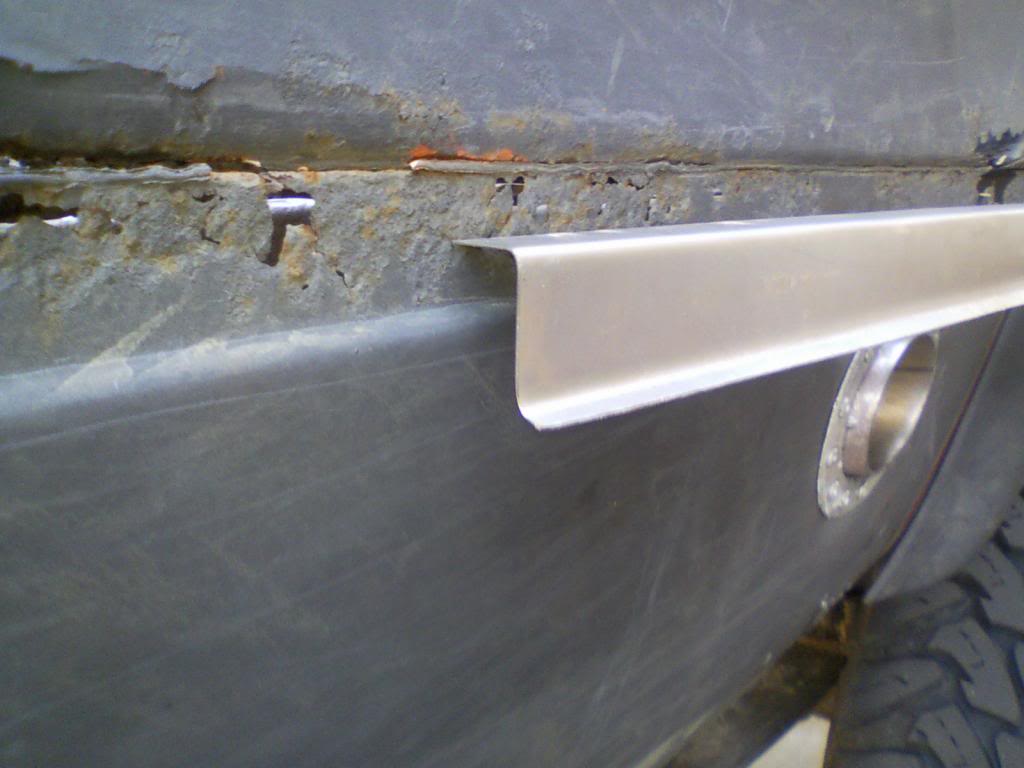
still have to paint it and grind it down, but it matches the body lines
Still dealing with more bed rust issues.
Rusty bed support
new bed support
test fit new floor panel
and doing the same for the other sections
While I was in that section of the bed, I decided to do something to my exhaust.
Started with an aluminum storm panel
morphed it a little bit
moved my exhaust around a little bit
Then there was the stubborn rust in the little divot in the side of the bed.
Went to work with the bender
still have to paint it and grind it down, but it matches the body lines
Last edited by craftsmanracer; 01-06-2014 at 06:23 AM.
01-06-2014, 06:19 AM
#65
Registered User
Thread Starter
iTrader: (1)
Join Date: Nov 2012
Posts: 108
Likes: 0
Received 0 Likes
on
0 Posts
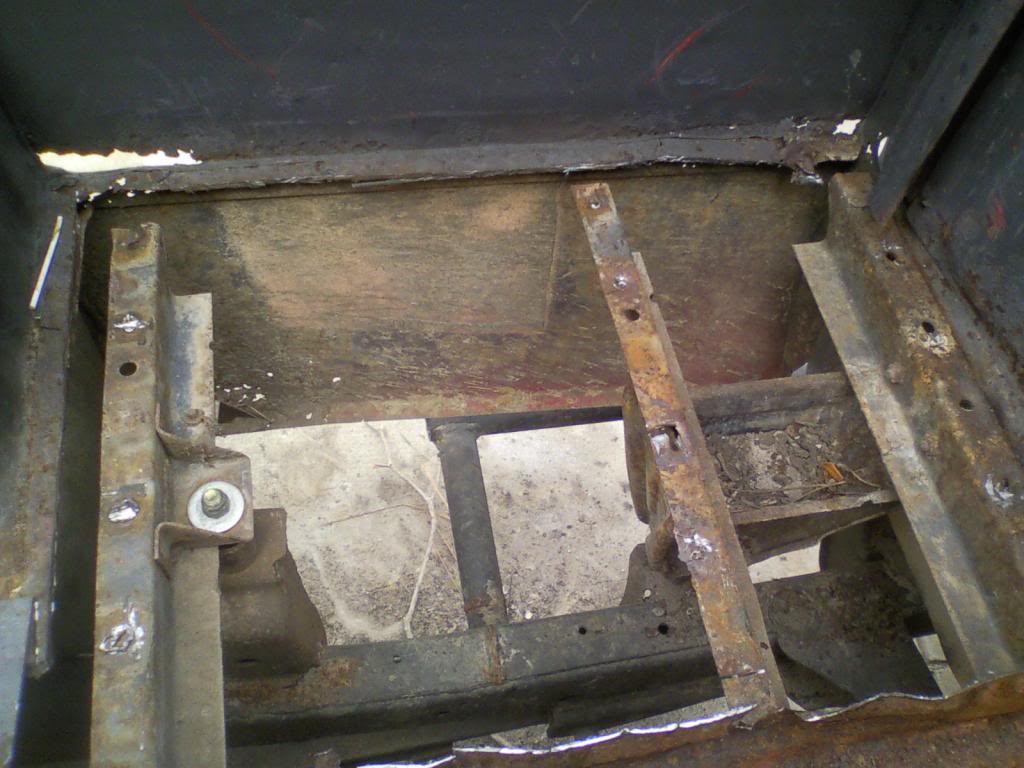
did the rest of the bed, the big center section
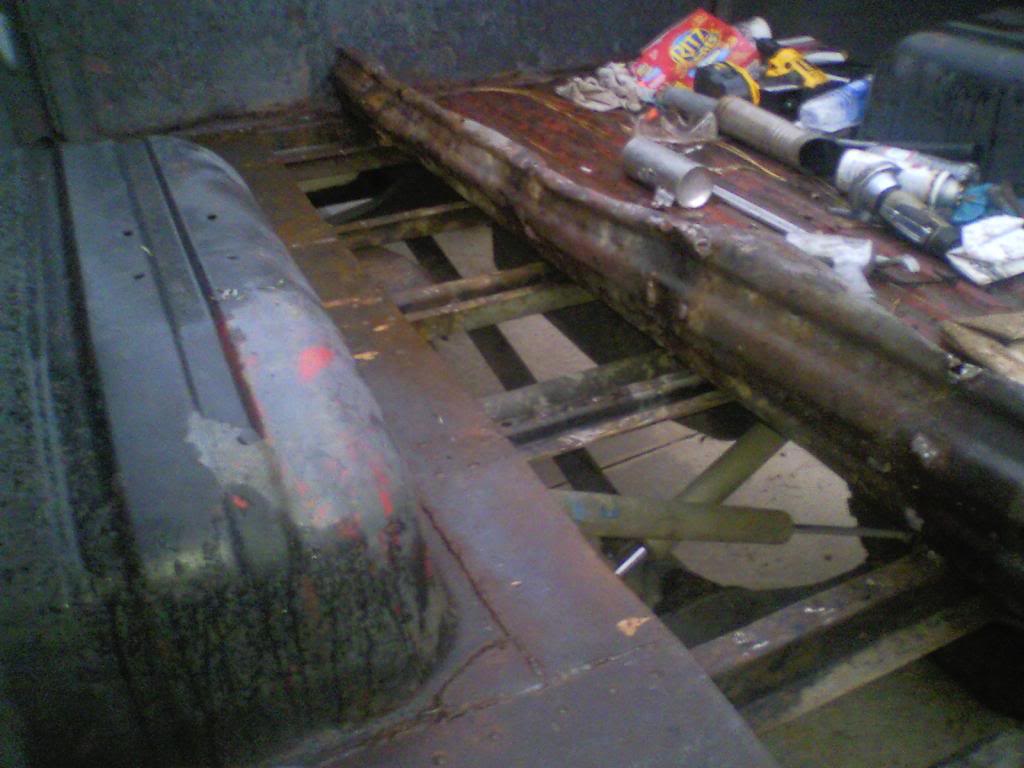
still got some welding to do, but at least the floor is solid now
Then I decided to tackle the whole driveshaft issue.
I havent had a front driveshaft for too long.
so here is the stock one
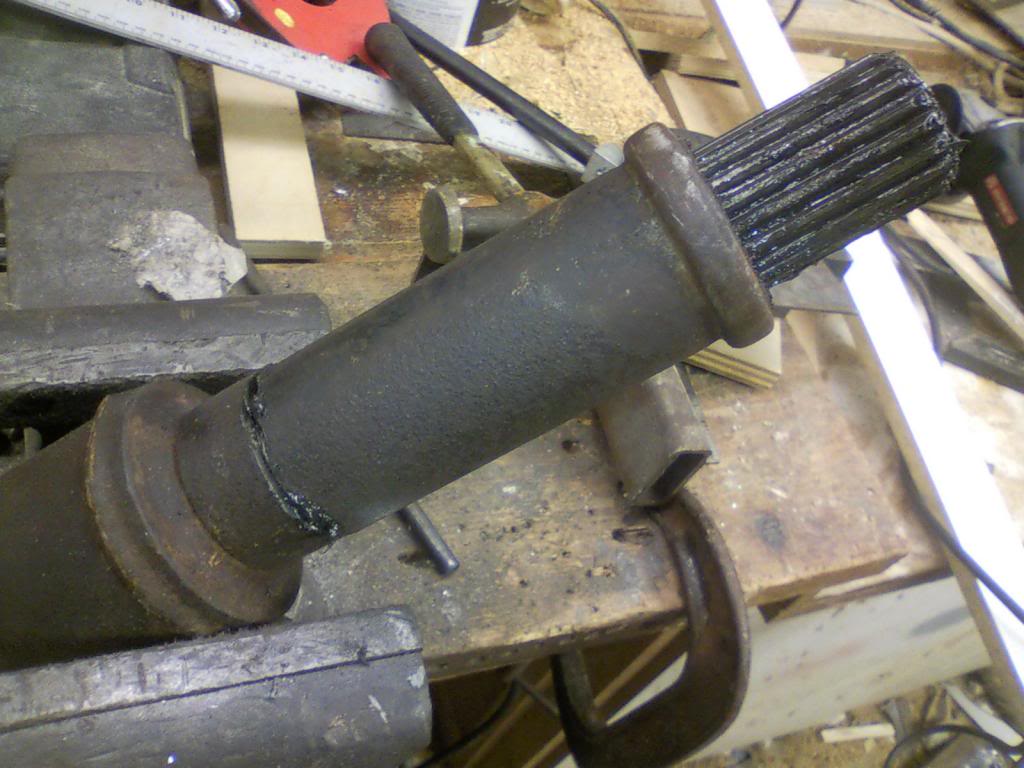
cut the sleeve off
then I cut the female end of the shaft
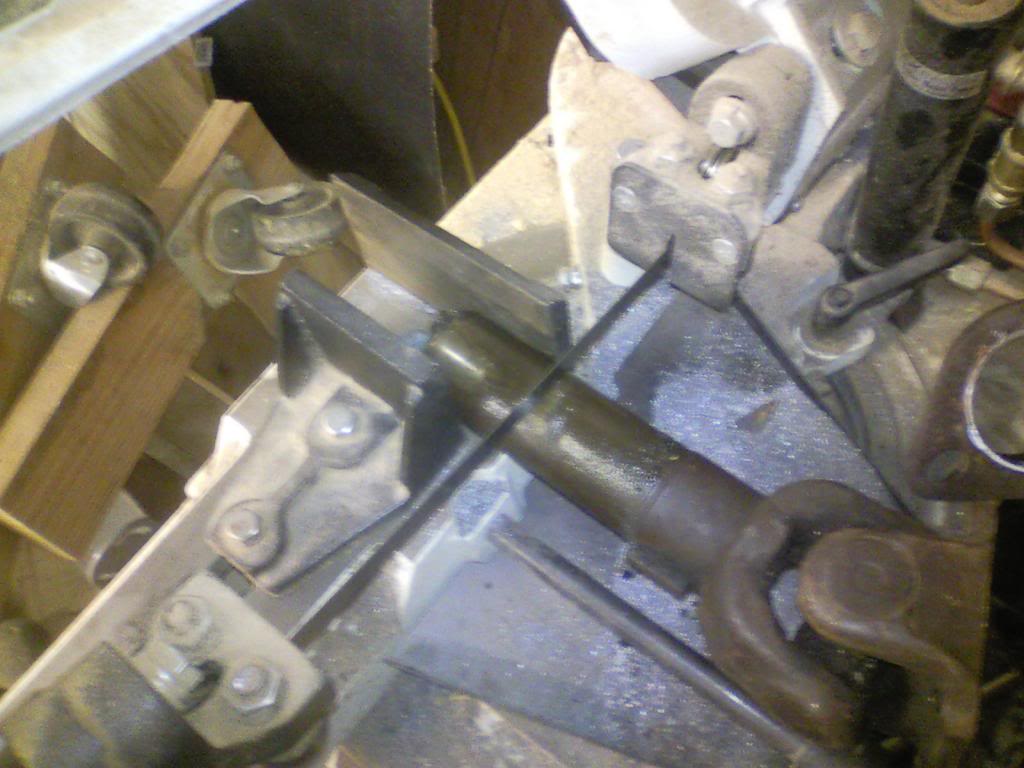
2 halves now on the shaft so the splines match up
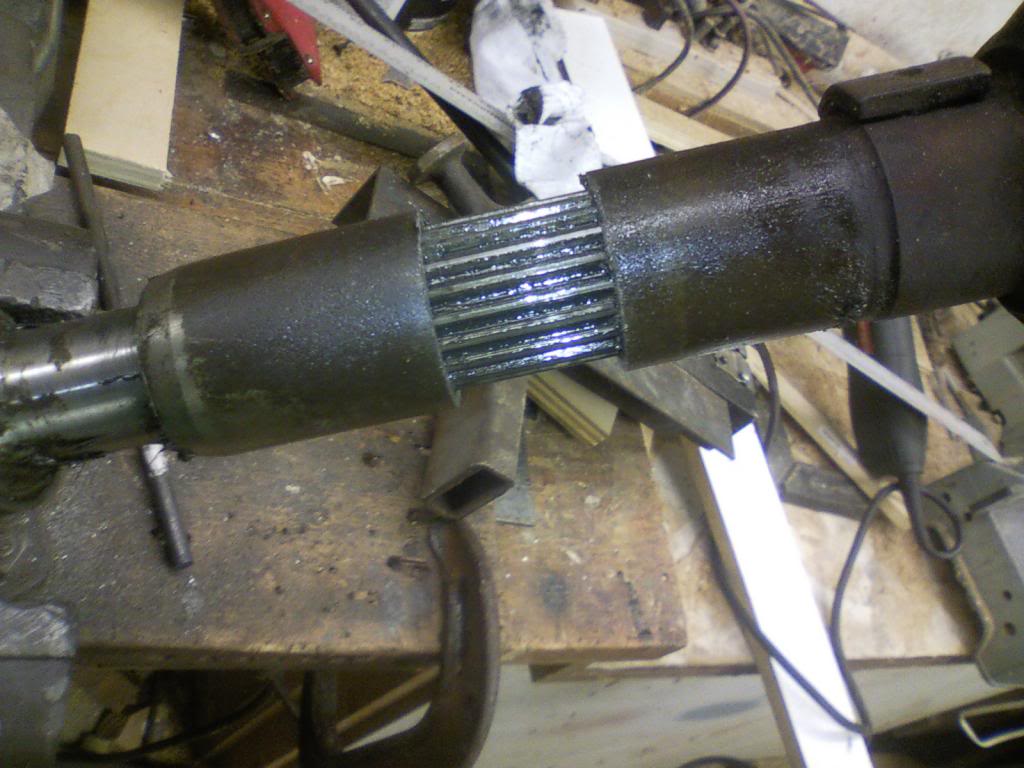
tig welded a pipe over the two halves, now the driveshaft is 1.5" longer
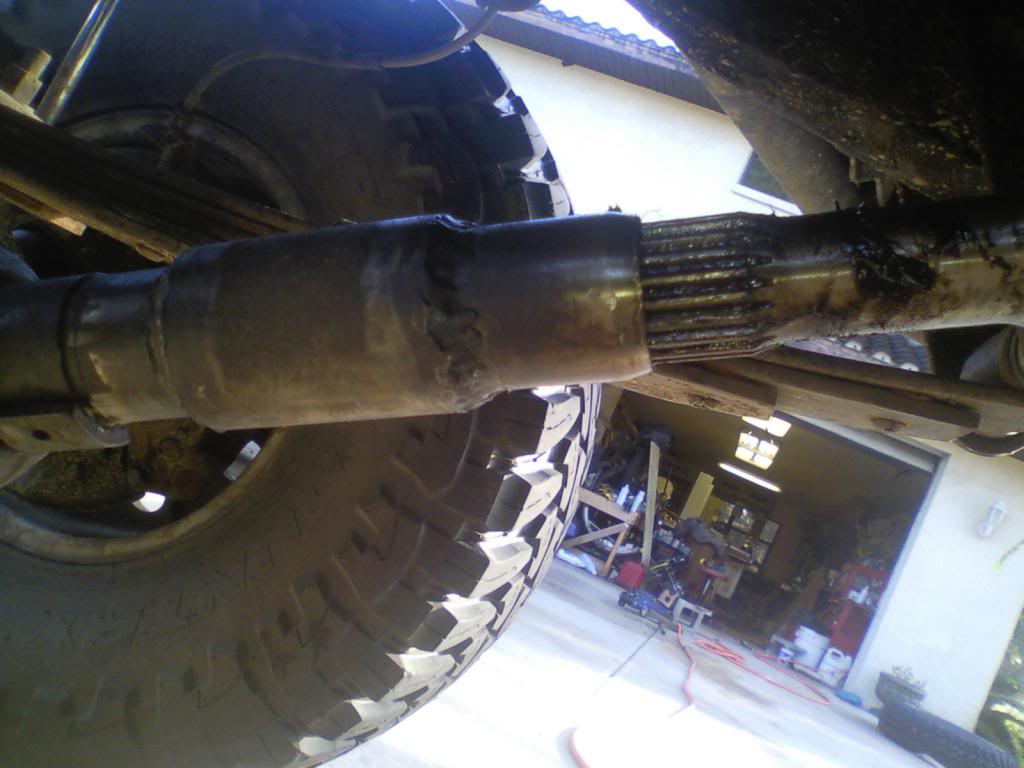
this is how it looks in the truck, the length is fine, but there is another problem
the u-joint is binding
it still turns, but it clunks the whole time.
So i took it back off.
I dont know if just grinding on it will clearance it enough? or is it just too wonky of an angle to work?
still got some welding to do, but at least the floor is solid now
Then I decided to tackle the whole driveshaft issue.
I havent had a front driveshaft for too long.
so here is the stock one
cut the sleeve off
then I cut the female end of the shaft
2 halves now on the shaft so the splines match up
tig welded a pipe over the two halves, now the driveshaft is 1.5" longer
this is how it looks in the truck, the length is fine, but there is another problem
the u-joint is binding
it still turns, but it clunks the whole time.
So i took it back off.
I dont know if just grinding on it will clearance it enough? or is it just too wonky of an angle to work?
 01-06-2014, 07:49 AM
#67
Good idea on the driveshaft extension. For your u-joint binding issue, you might want to check your front pinion angle. If it is just binding slightly, you may be able to get away with using a 1.5 to 2 degree shim to point the angle up a little more towards the t-case. You might be able to get shorter shackles to tilt the pinion angle up too. Ideally, you want your pinion angle to be parallel with your t-case/tranny output flange for proper function and longevity of the u-joints. Typically, with any lift (especially when using longer shackles) you will need to adjust the pinion angle. Just remember that changing the pinion angle also changes the caster angle so your steering will be slightly affected. The true way to fix pinion angle and caster angle when lifting a solid axle truck is to hack off the spring perches, set the pinion angle and then reweld the perches back to the proper location. Then hack off the steering balls and weld them back on to the proper caster angle. Most people don't do that due to the complicated nature of the task.
01-06-2014, 12:51 PM
#68
Registered User
Thread Starter
iTrader: (1)
Join Date: Nov 2012
Posts: 108
Likes: 0
Received 0 Likes
on
0 Posts
Good idea on the driveshaft extension. For your u-joint binding issue, you might want to check your front pinion angle. If it is just binding slightly, you may be able to get away with using a 1.5 to 2 degree shim to point the angle up a little more towards the t-case. You might be able to get shorter shackles to tilt the pinion angle up too. Ideally, you want your pinion angle to be parallel with your t-case/tranny output flange for proper function and longevity of the u-joints. Typically, with any lift (especially when using longer shackles) you will need to adjust the pinion angle. Just remember that changing the pinion angle also changes the caster angle so your steering will be slightly affected. The true way to fix pinion angle and caster angle when lifting a solid axle truck is to hack off the spring perches, set the pinion angle and then reweld the perches back to the proper location. Then hack off the steering balls and weld them back on to the proper caster angle. Most people don't do that due to the complicated nature of the task.
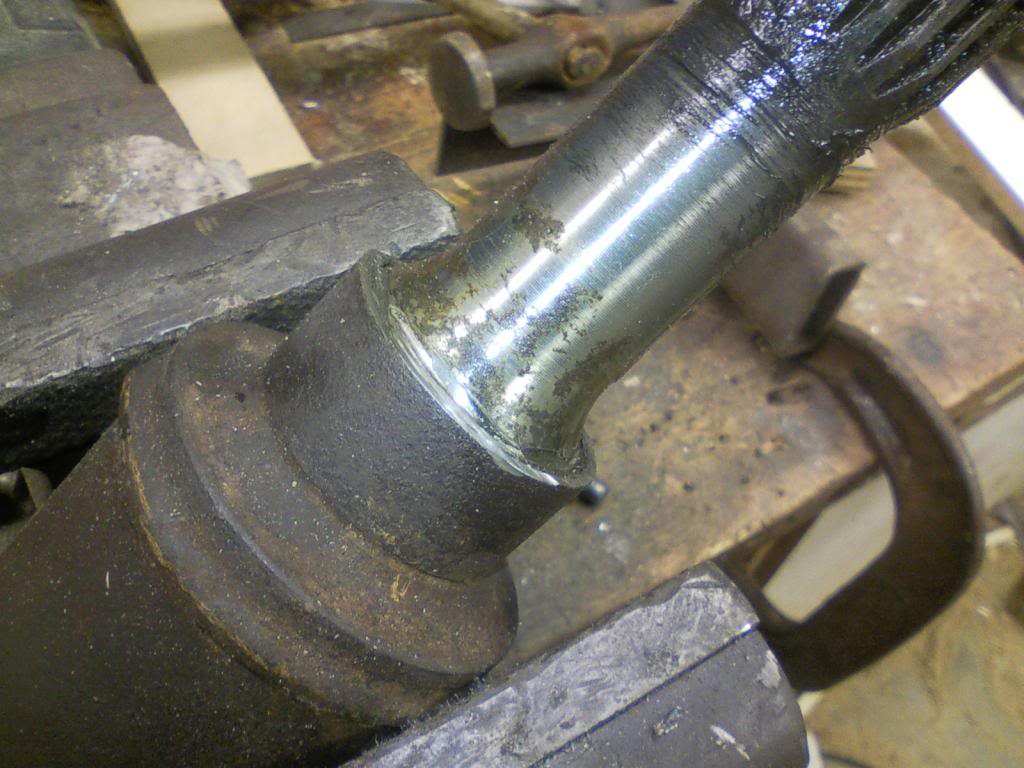
I have no problem grinding the u-joint down to clearance it. I would have to move the suspension through its range of motion to make sure it still doesnt bind.
I'm scared of weakening the u-joint, but from what I see, they are pretty overbuilt from the factory.
01-06-2014, 04:32 PM
#69
If you are going to do any grinding, I would grind the flange side that bolts to the pinion and not the yoke side. That yoke is rather thin there and I have cracked mine where you would be removing metal. At least if you clearance the pinion side you won't be tampering as much with the structural integrity.
03-06-2014, 08:59 PM
#70
Registered User
Thread Starter
iTrader: (1)
Join Date: Nov 2012
Posts: 108
Likes: 0
Received 0 Likes
on
0 Posts
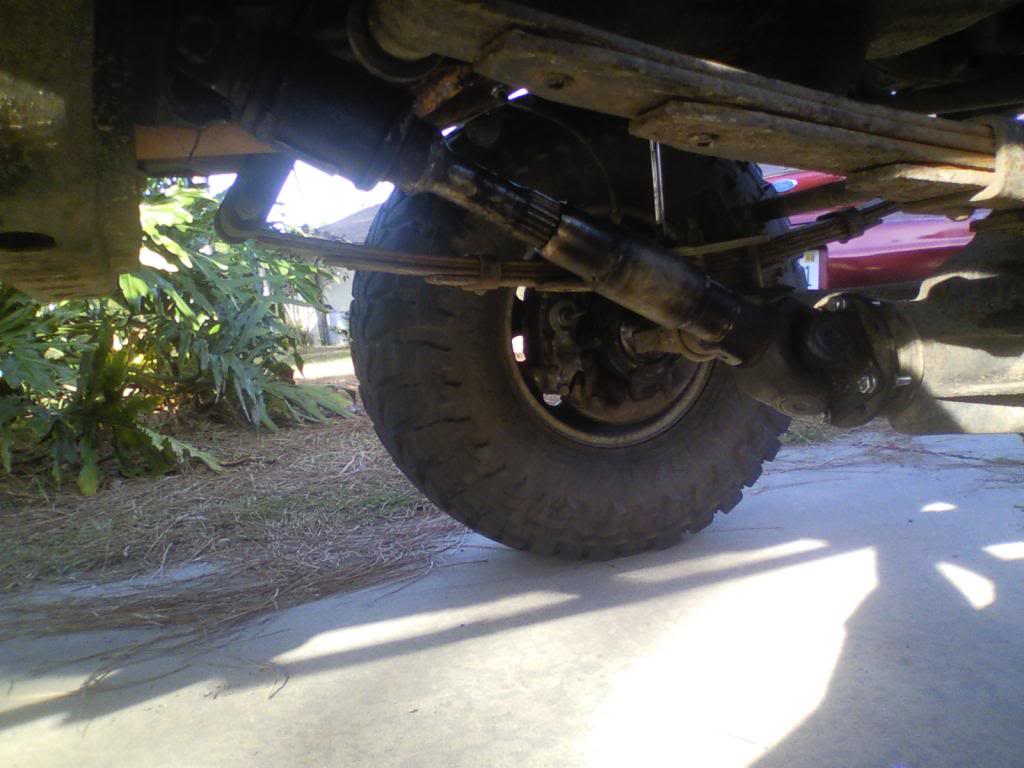
So it turns out that the whole cut-and-turn front axle thing isn't as hard as I thought it was.
It seriously took more time to take apart the axle and put it back together than it took to weld everything.
Can't see the gauge, but the truck had 7 and 7.5 degrees of caster angle before I started.
I decided to change everything 6 degrees. Looking back, I should have done more, because I still had to put in 2 degree shims to get it perfect.
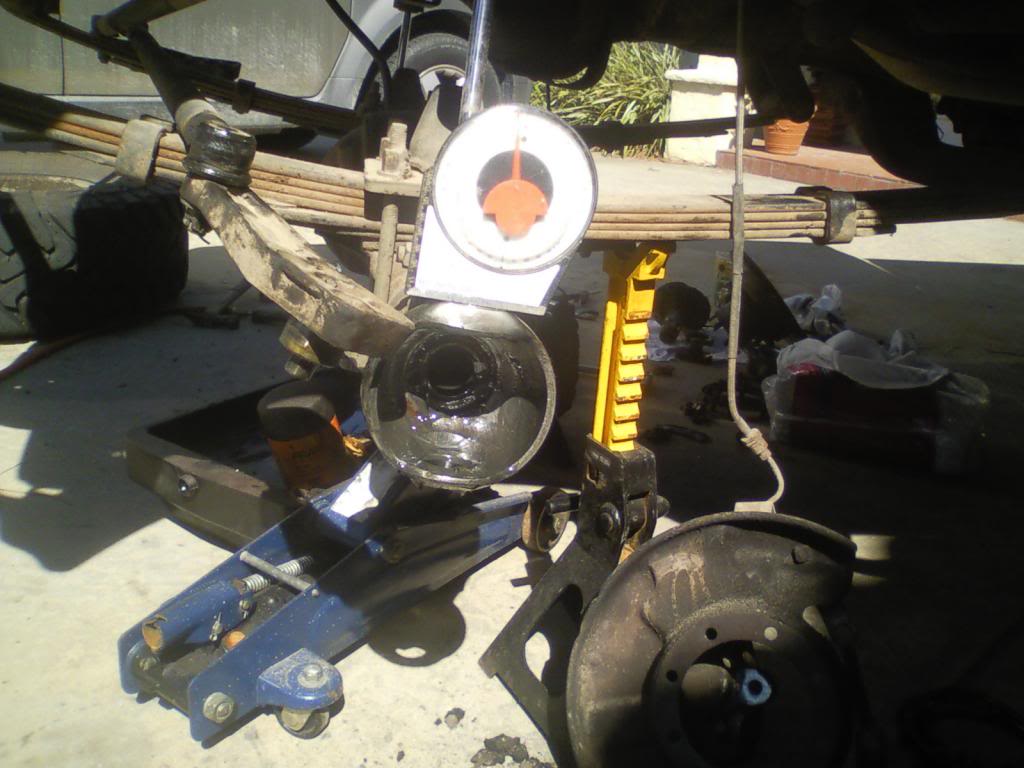
In order to turn the knuckle balls, I took a comealong.
Tied it to my rails, and hooked it to a jack handle going through the axle. You can see the cable running to the back of the truck here.

I put a good crank on the jack handle (bent it a bit), smacked it with the BFH, and it came loose, then from that point, I could just hit the jack handle to turn the ball.
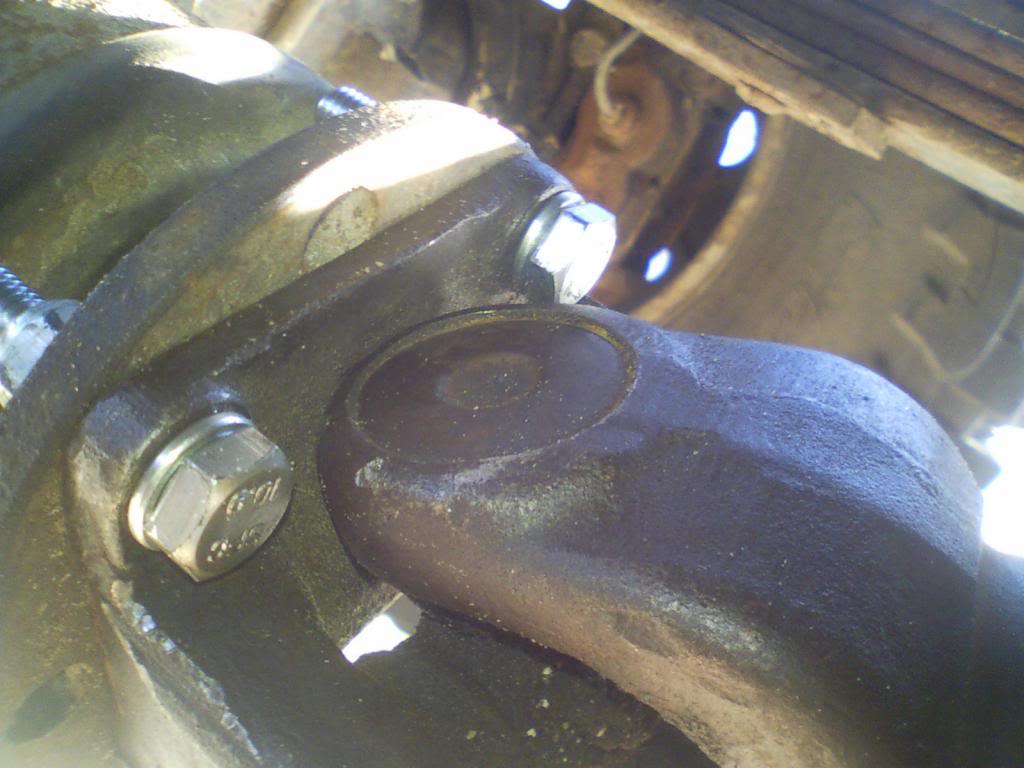
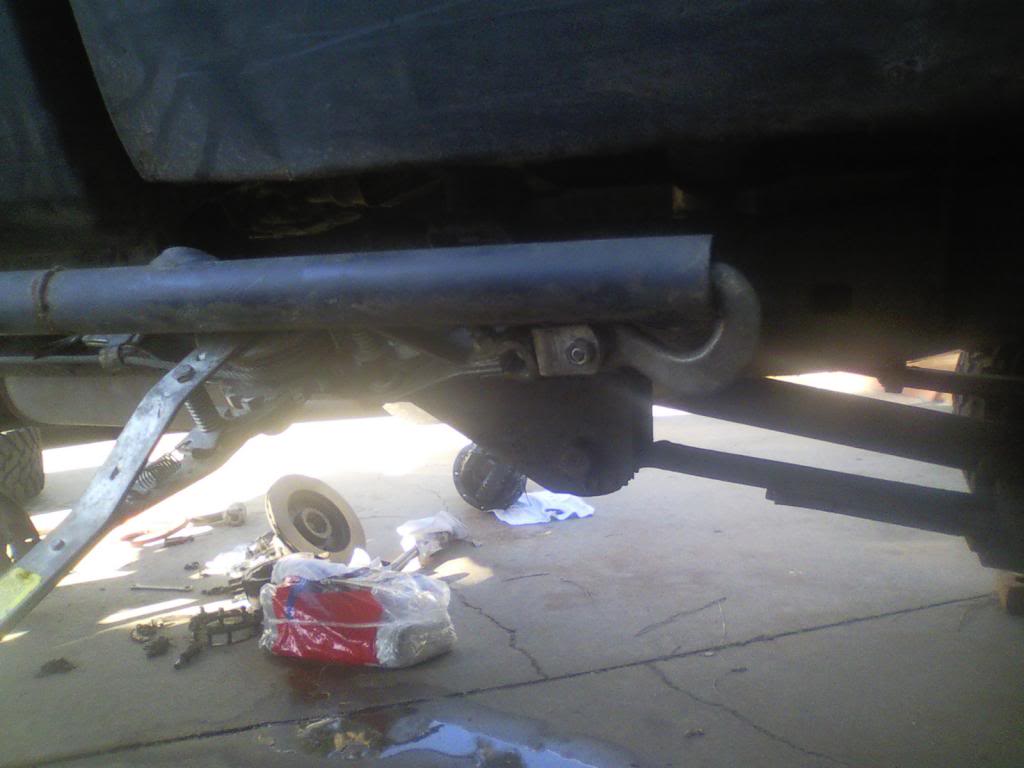
Tac welded the knuckle balls in place, and moved on to welding and turning the rest of the stuff.
I did the shock mounts and steering stops while the axle was in the truck.
When I was doing the final disassembly on the axle, I found a surprise!
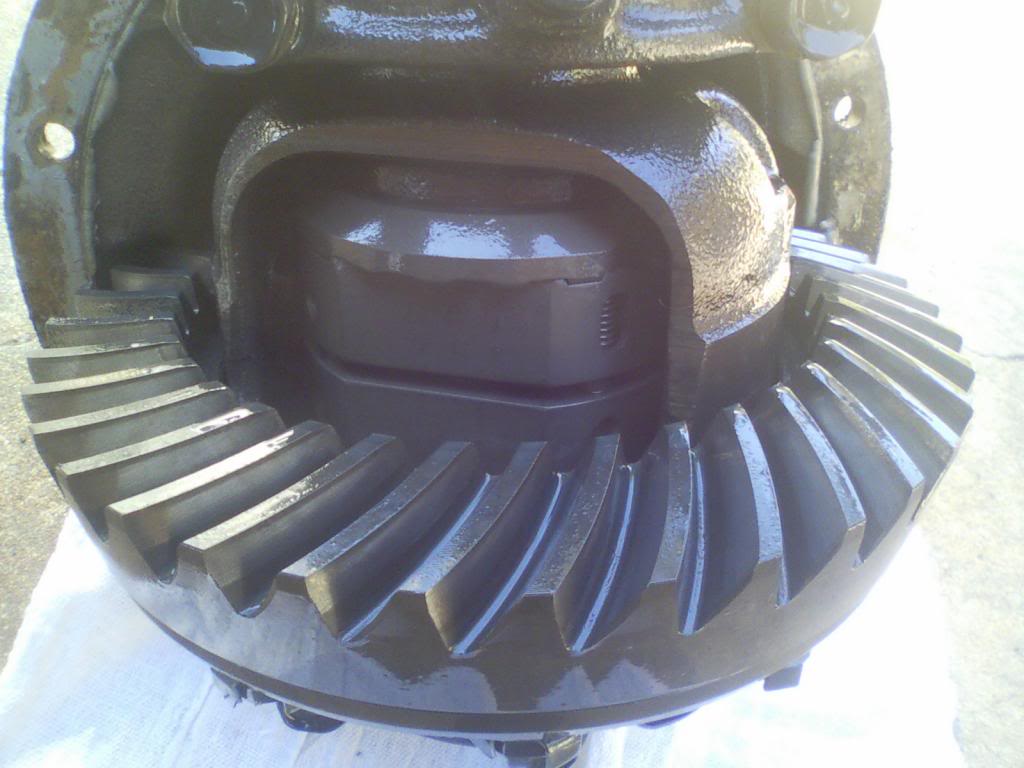
Those aren't spider gears!
Never having 4x4 before, I just assumed I had an open diff up front.
SO now I have 4x4, and with the 2 degree shims, I should be roughly 5 and 5.5 degrees of caster. It drives straight down the road, so I think I did good.
I am wondering if my stock double cardan can be clearanced?
Ive heard it is a huge PITA, but I'm all about those free mods.
It seriously took more time to take apart the axle and put it back together than it took to weld everything.
Can't see the gauge, but the truck had 7 and 7.5 degrees of caster angle before I started.
I decided to change everything 6 degrees. Looking back, I should have done more, because I still had to put in 2 degree shims to get it perfect.
In order to turn the knuckle balls, I took a comealong.
Tied it to my rails, and hooked it to a jack handle going through the axle. You can see the cable running to the back of the truck here.
I put a good crank on the jack handle (bent it a bit), smacked it with the BFH, and it came loose, then from that point, I could just hit the jack handle to turn the ball.
Tac welded the knuckle balls in place, and moved on to welding and turning the rest of the stuff.
I did the shock mounts and steering stops while the axle was in the truck.
When I was doing the final disassembly on the axle, I found a surprise!
Those aren't spider gears!
Never having 4x4 before, I just assumed I had an open diff up front.
SO now I have 4x4, and with the 2 degree shims, I should be roughly 5 and 5.5 degrees of caster. It drives straight down the road, so I think I did good.
I am wondering if my stock double cardan can be clearanced?
Ive heard it is a huge PITA, but I'm all about those free mods.
Last edited by craftsmanracer; 03-06-2014 at 09:01 PM.
03-07-2014, 02:29 AM
#71
Registered User
iTrader: (1)
Join Date: Jul 2012
Location: Calistoga, CA
Posts: 639
Likes: 0
Received 0 Likes
on
0 Posts
You don't want that locking carrier, after all the the cool kids in their Barbie Jeeps just run open diffs, too.
If I send you my address in a PM, I'll gladly take that problematic locker off your hands, free of charge. Heck, I'll even give you my open carrier in exchange!
Joking aside, I love your build; this thread is proof that given the right know-how and some decent effort, anyone can pull together a fun, affordable rig.
03-31-2014, 12:59 PM
#72
Registered User
Thread Starter
iTrader: (1)
Join Date: Nov 2012
Posts: 108
Likes: 0
Received 0 Likes
on
0 Posts
I put a steering stabilizer on the truck, makes a difference for sure. When I would go over bumps at speed it would really shake the wheel.
Some homemade brackets and a little bit of welding to the truck, and it was in!

dont mind the spillage from the oil pan gasket

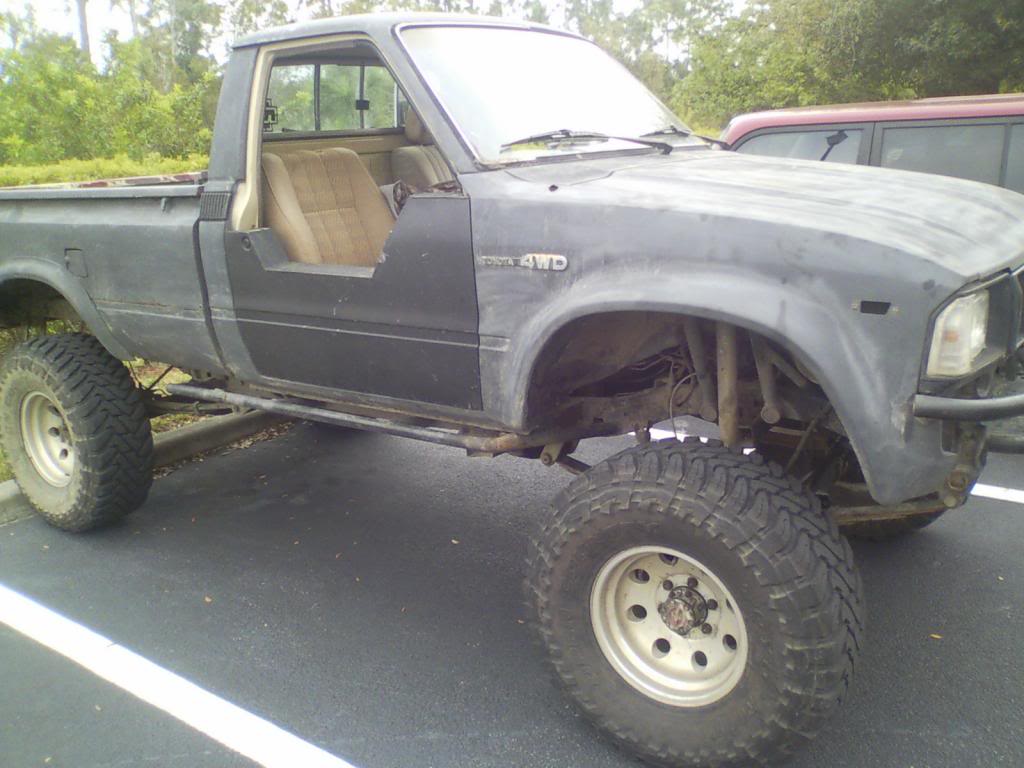
Also finished up the half doors
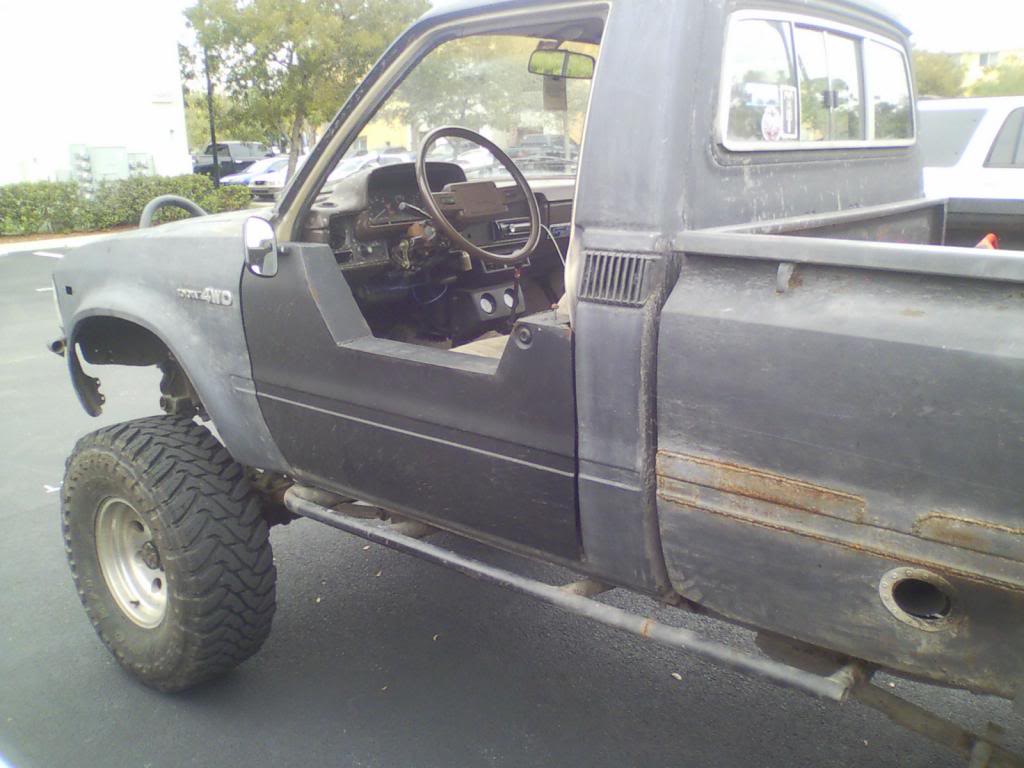
And this generic autozone mirror fits great
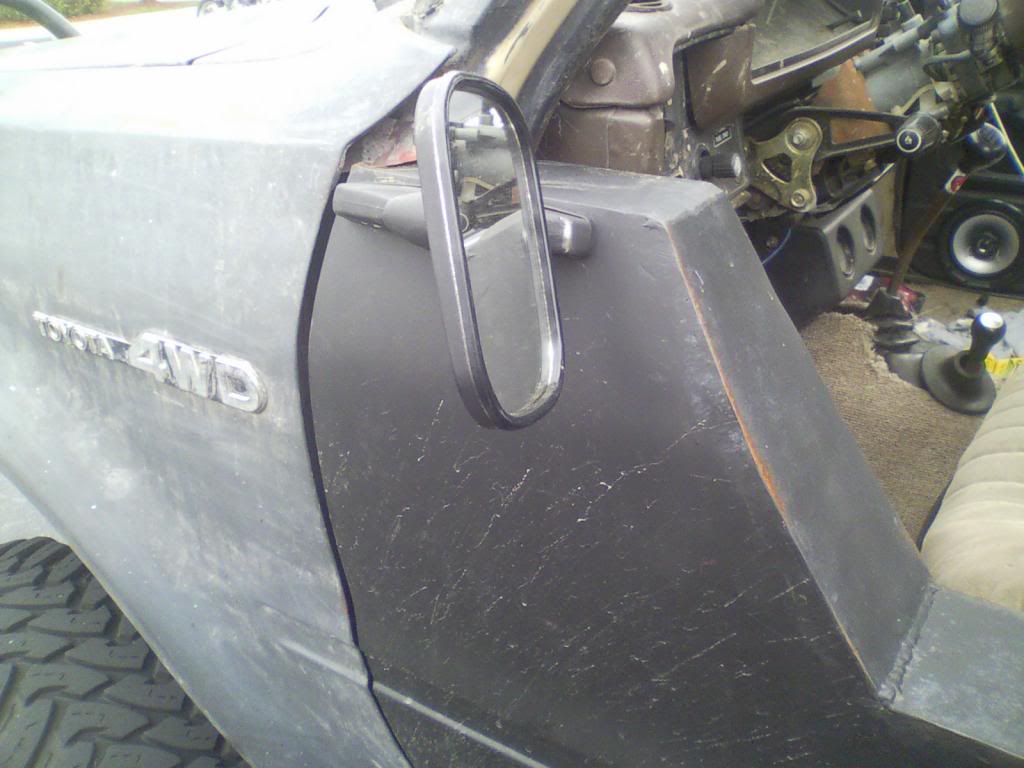
locks are done by pushing down on this rod I welded a nut on top of
I'm thinking maybe diamond plate for the inside of the doors, but I'm not sure yet.
Still thinking of doing a storage space inside the door, cup holders, and maybe some variation on plastic jeep windows. Just for rain when parked, I wouldnt use them when driving. Maybe use magnets???
And the passenger side
Some homemade brackets and a little bit of welding to the truck, and it was in!
dont mind the spillage from the oil pan gasket
Also finished up the half doors
And this generic autozone mirror fits great
locks are done by pushing down on this rod I welded a nut on top of
I'm thinking maybe diamond plate for the inside of the doors, but I'm not sure yet.
Still thinking of doing a storage space inside the door, cup holders, and maybe some variation on plastic jeep windows. Just for rain when parked, I wouldnt use them when driving. Maybe use magnets???
And the passenger side
03-31-2014, 01:06 PM
#73
Registered User
Thread Starter
iTrader: (1)
Join Date: Nov 2012
Posts: 108
Likes: 0
Received 0 Likes
on
0 Posts
I am also starting to think seriously about paint, I am tired of rollin around with the primer look. (looks pretty trashy)
I want some nice paint, but I'm definitely not spending huge amounts of money on it because I know it is going to get scratched up and will be half covered in mud alot of the time. Probably going to spray it myself, buddy of mine has a booth I can borrow.
I was thinking a shiny forest green, or something similar to military green, just a glossy version.
But I was recently hypnotized by the paint on this truck I saw on pirate
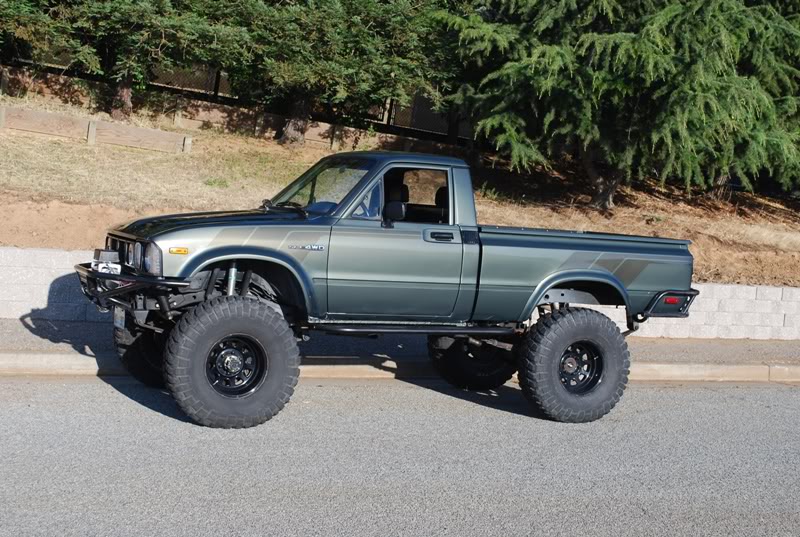
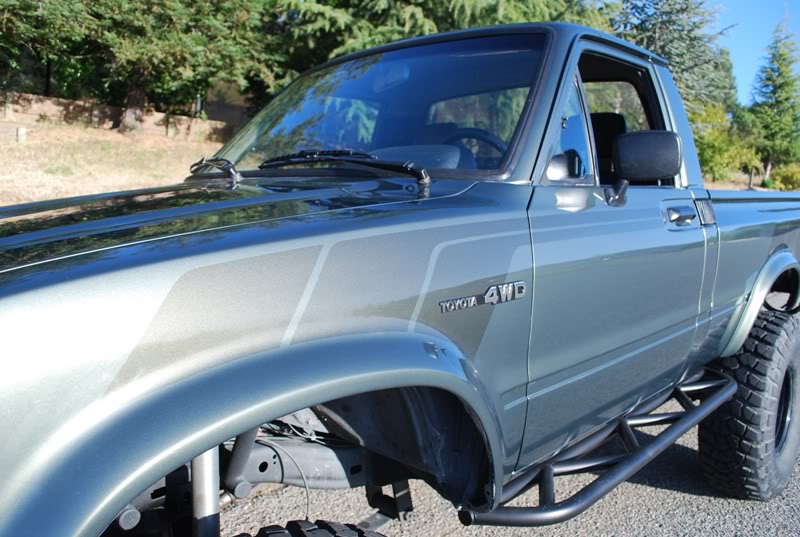
Seriously!! how sexy is that paint!
I want some nice paint, but I'm definitely not spending huge amounts of money on it because I know it is going to get scratched up and will be half covered in mud alot of the time. Probably going to spray it myself, buddy of mine has a booth I can borrow.
I was thinking a shiny forest green, or something similar to military green, just a glossy version.
But I was recently hypnotized by the paint on this truck I saw on pirate
Seriously!! how sexy is that paint!
03-31-2014, 04:39 PM
#74
Registered User
Join Date: Feb 2014
Posts: 351
Likes: 0
Received 0 Likes
on
0 Posts
I am also starting to think seriously about paint, I am tired of rollin around with the primer look. (looks pretty trashy) I want some nice paint, but I'm definitely not spending huge amounts of money on it because I know it is going to get scratched up and will be half covered in mud alot of the time. Probably going to spray it myself, buddy of mine has a booth I can borrow. I was thinking a shiny forest green, or something similar to military green, just a glossy version. But I was recently hypnotized by the paint on this truck I saw on pirate Seriously!! how sexy is that paint!


