
Rune's 3.0 rebuild thread
 09-17-2008, 05:41 PM
#101
Registered User
Sorry, no idea on the wire, just a comment.
Great thread Rune. Thanks for all of it, pics and ?'s. I have never done any engine work either and don't look forward to it, but neccessity sometimes rules. Glad it started on the first try.
Phil
Great thread Rune. Thanks for all of it, pics and ?'s. I have never done any engine work either and don't look forward to it, but neccessity sometimes rules. Glad it started on the first try.
Phil
 09-27-2008, 09:30 PM
#102
Registered User
Join Date: Jan 2007
Location: Anchorage AK
Posts: 10
Likes: 0
Received 0 Likes
on
0 Posts
 10-17-2008, 06:33 AM
#103
Registered User
Join Date: Sep 2007
Location: florida.
Posts: 387
Likes: 0
Received 0 Likes
on
0 Posts
nice write up man how long has it been running strong now? did you end up having any problems with it? did you buy all new pistons and rings or did you have them dipped? my motor is brand new so i really dont need to replace anything but the 1 cylinder i was thinking if it would be a good idea or not to have the pistons dipped to clean them off i guess it really doesnt matter tho
11-26-2008, 10:27 AM
#104
Registered User
Thread Starter
Join Date: Oct 2005
Location: Berkeley, CA
Posts: 587
Likes: 0
Received 0 Likes
on
0 Posts
I see I have been off the board for way too long here. No real problems so far with the exception of the EGR light that I quickly solved. I think I need to do some small adjustments to the TPS, and I also need to do something to my PS pump that still is leaking. This week my starter started clicking on me instead of turning, so I guess I need some new contacts there. But related to the engine rebuild itself it is all golden  It's been running strong since march. I don't drive that much so I think I have 6k miles or something on it since then.
I got all new pistons and rings, original from Toyota of Dallas. I figured there was no reason to try to save a few hundred bucks when I put a HUGE amount of time and effort into this.
It's been running strong since march. I don't drive that much so I think I have 6k miles or something on it since then.I got all new pistons and rings, original from Toyota of Dallas. I figured there was no reason to try to save a few hundred bucks when I put a HUGE amount of time and effort into this.
01-12-2009, 02:11 PM
#106
Registered User

Join Date: Jun 2007
Location: San Diego
Posts: 31
Likes: 0
Received 0 Likes
on
0 Posts
Rune, What exactly was your final cost (if you don't mind sharing). I am thinking of starting this exact project. Thanks for sharing your journey!
Thanks,
Jesse
Thanks,
Jesse
01-13-2009, 08:10 AM
#107
Registered User
Thread Starter
Join Date: Oct 2005
Location: Berkeley, CA
Posts: 587
Likes: 0
Received 0 Likes
on
0 Posts
Oh man, a lot more than what most people here spend on a rebuild. You can get it a lot cheaper than I did, that's for sure. I ended up buying all Toyota parts for whatever needed to be changed out, pistons, rings, bearings, gaskets, pumps, idlers, all of it. Parts alone was probably in the order of $1,500. I was planning on going with the engnbldr parts, but devided if I was going to put all this money, time and effort into the rebuild, some extra hundred bucks on parts is not a bad investment.
As for the machine work, it was somewhere in the order of the parts costs, maybe a tad more. Again, more than what most peaople spend, but I have confidence that the machine shop was a very good one, and did more than what you will get for the cheaper price.
So it can be done cheaper, but I felt the extra money was worth the extra piece of mind knowing I got good parts and great work done.
07-04-2009, 06:23 PM
#108
Registered User

Join Date: Jun 2009
Posts: 4
Likes: 0
Received 0 Likes
on
0 Posts
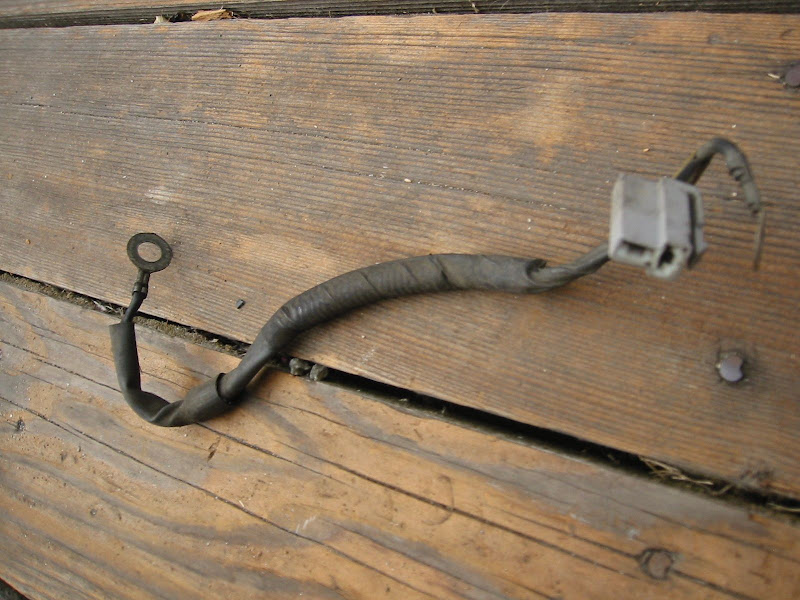
I bet you figured it out by now but just in case... The wire in the pictures is the grounding strap which attaches to a bolt on the upper left side of the left head between the second and fourth cylinder. The end with the connector attaches to the ignition noise filter (the plug) and a grounding screw on the left fender. I am hopefully dropping in my new 3 VZE in tomorrow and hope startup goes as well as yours. BTW, I pulled the tranny with the engine and reassembling the pair after replacing the clutch was about a 1/2 hour job with some swearing.
07-15-2009, 11:26 AM
#110
Registered User
Thread Starter
Join Date: Oct 2005
Location: Berkeley, CA
Posts: 587
Likes: 0
Received 0 Likes
on
0 Posts

Thread
Thread Starter
Forum
Replies
Last Post


