
22re head gasket adventure. [Pics] Help / Advice / Tips welcome!
 11-30-2009, 08:32 AM
#41
Well no progress last night other than ordering my head gasket kit from engnbldr. Got off waaay to late and it was freezing balls in the garage. (Like 40 degrees! Waay too cold for us Californians!) Hahahah. Hopefully I'll get to wrench on it a little tonight.
Oh, and since I made the mistake of remove the distributor, any tips on geting it lined back up TDC?
Oh, and since I made the mistake of remove the distributor, any tips on geting it lined back up TDC?
On the other hand though, I am kind of a firm believer in " If it aint' broke, don't fix it", BUT preventative maintenance is also key in a healthy, long lasting vehicle. the timing chain, oil pump, timing cover, guides ect seems like alot of extra work right now, and I am just excited to get it back on the road. I would definitely replace it all if it didn't look so fresh. It was done 80k ago, along with a new headgasket. The chain looks like its in excellent shape, clean, and the guides have little to no wear in them at all. The oil pump was also changed at that time.
I guess it comes down to how much I want to spend right now, and how much more time I want to spend doing preventative maintenance. Who knows, I may end up replacing the timing components, but maybe not. It does mean more time down, and more $$$. With winter HERE, I would like to have this thing on the road ASAP ( my honda's heater core is plugged up so I have no heat, and its getting freakin' cold here in the mornings hahahah).
I guess it comes down to how much I want to spend right now, and how much more time I want to spend doing preventative maintenance. Who knows, I may end up replacing the timing components, but maybe not. It does mean more time down, and more $$$. With winter HERE, I would like to have this thing on the road ASAP ( my honda's heater core is plugged up so I have no heat, and its getting freakin' cold here in the mornings hahahah).
 11-30-2009, 10:40 PM
#42
Registered User
Thread Starter
Join Date: Nov 2009
Posts: 58
Likes: 0
Received 0 Likes
on
0 Posts
Yay for progress.... sort of hahah.
Well I went back to it tonight and got some more stuff disconnected, and removed the head bolts and the hidden bolt. I managed to get the head loose off the block (thing was stuck on there good!!, but there is too much crap binding it up to pull it all the way out, but it's loose.
Do you guys recommend trying to remove the rest of the intake manifold, then pull it out? It seems without the intake manifold attached, it would be fairly easy to remove. Or should I snake all the wires from the harness, detach them, and then try to pull it out again?
So now I just gotta get that head off, and wait for the HG set to arrive. Thanks for all the support so far!
11-30-2009, 10:59 PM
#44
Registered User
Thread Starter
Join Date: Nov 2009
Posts: 58
Likes: 0
Received 0 Likes
on
0 Posts
Yeah I just might take the intake off. And it looks like I have to trace those 3 or 4 wires down to the tranny, ect anyways since there is no way to remove the intake manifold without those disconnected. Hahhaha that was a stupid question on my part. I will disconnect those wires tomorrow, and give her another go. And If I can find a decent machine shop around here, I will have the head resurfaced. That is if the GF grants me permission to spend the extra money to do so bwahahah.
 keep us posted!
12-02-2009, 12:26 PM
keep us posted!
12-02-2009, 12:26 PM
#46
Registered User
Thread Starter
Join Date: Nov 2009
Posts: 58
Likes: 0
Received 0 Likes
on
0 Posts
Update!
We'll got the fuel rail, intake manifold, and finally the head off today.
Good News: I didn't break anything while taking it apart, and I'm not sure that the head gasket blew.
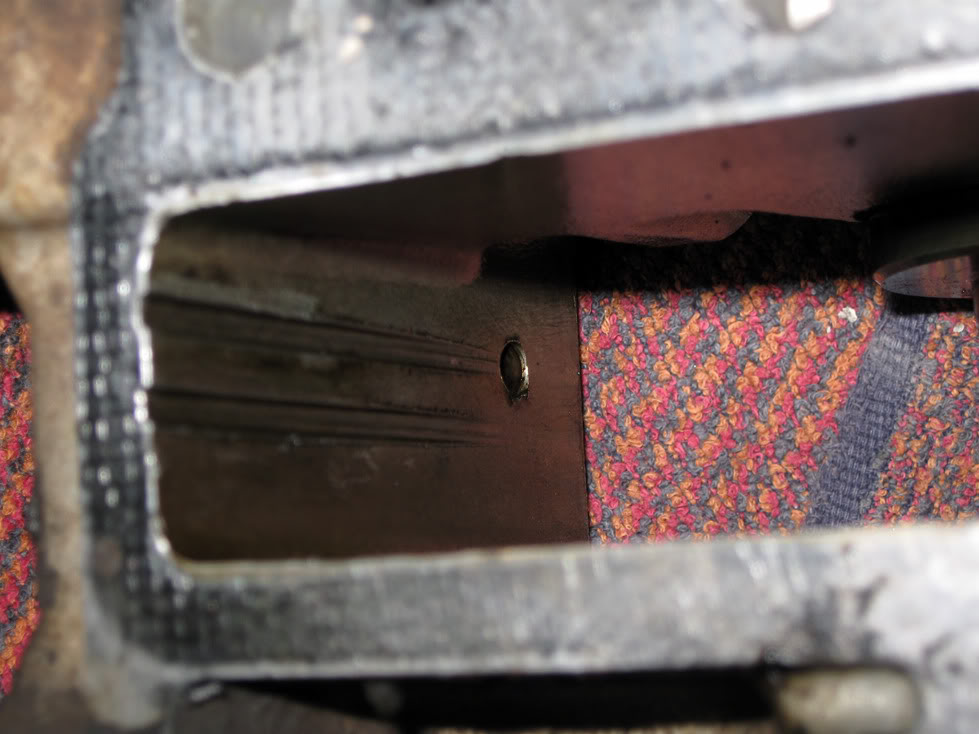
Bad News: The head is garbage, has a few cracks, and before the timing chain was done the first time, the guides must have broken and made some pretty thick rails in the side of the head. On with the pictures:
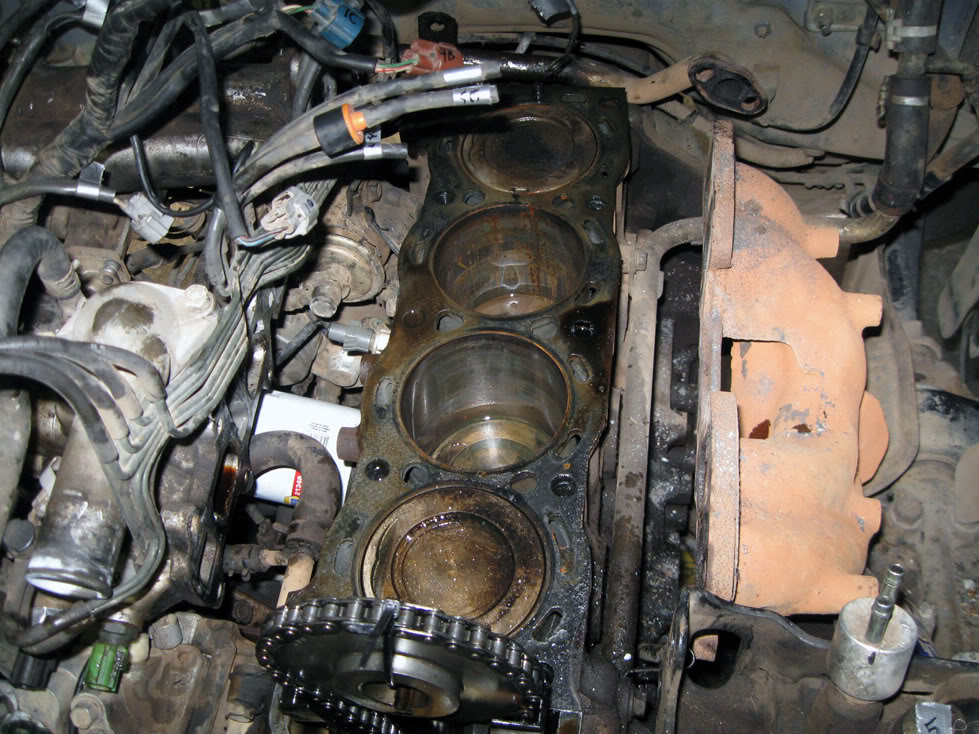
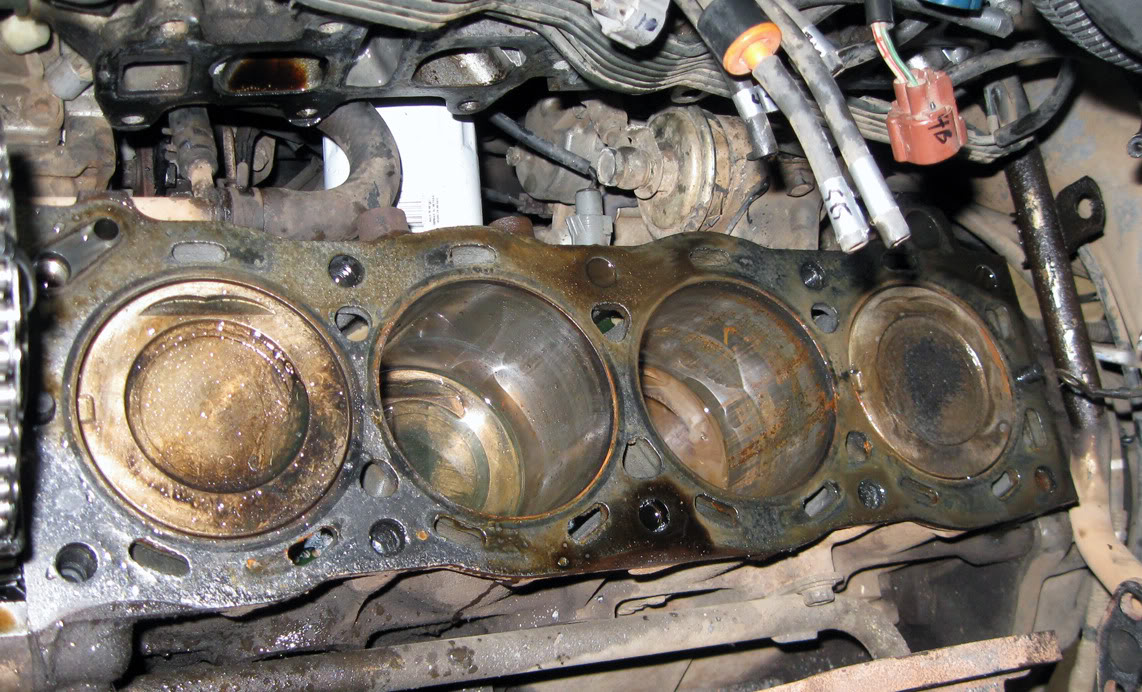

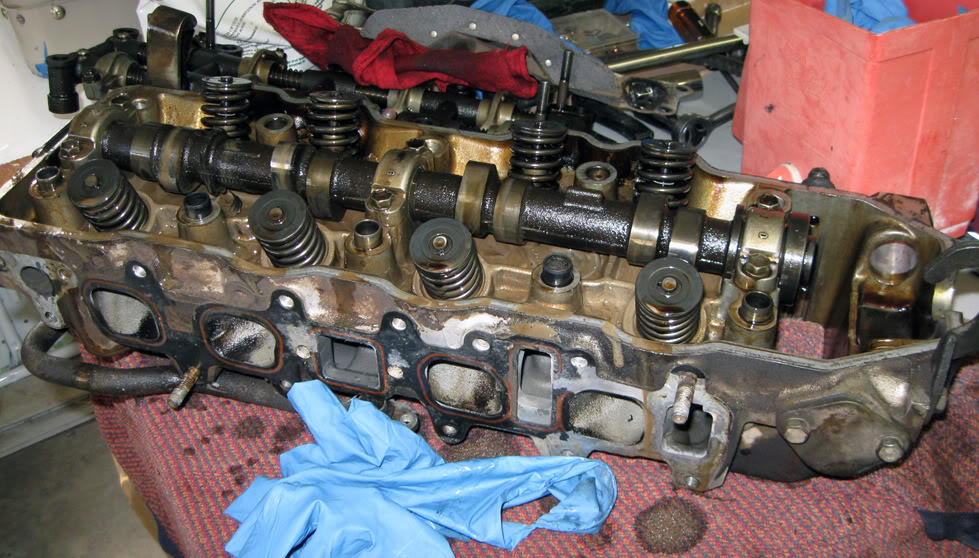
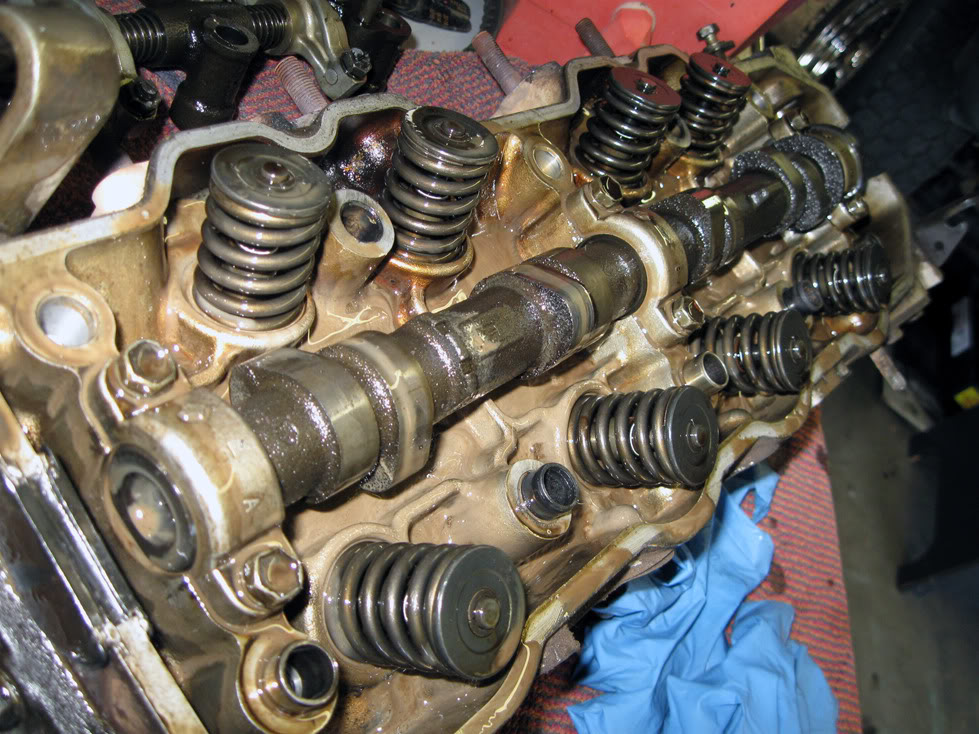
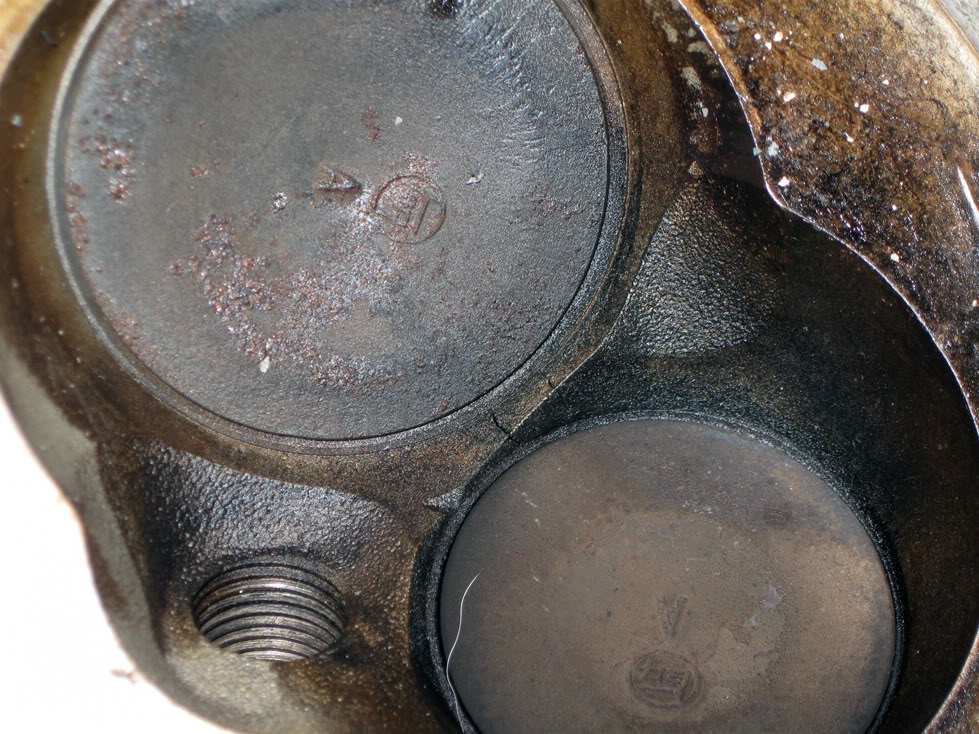
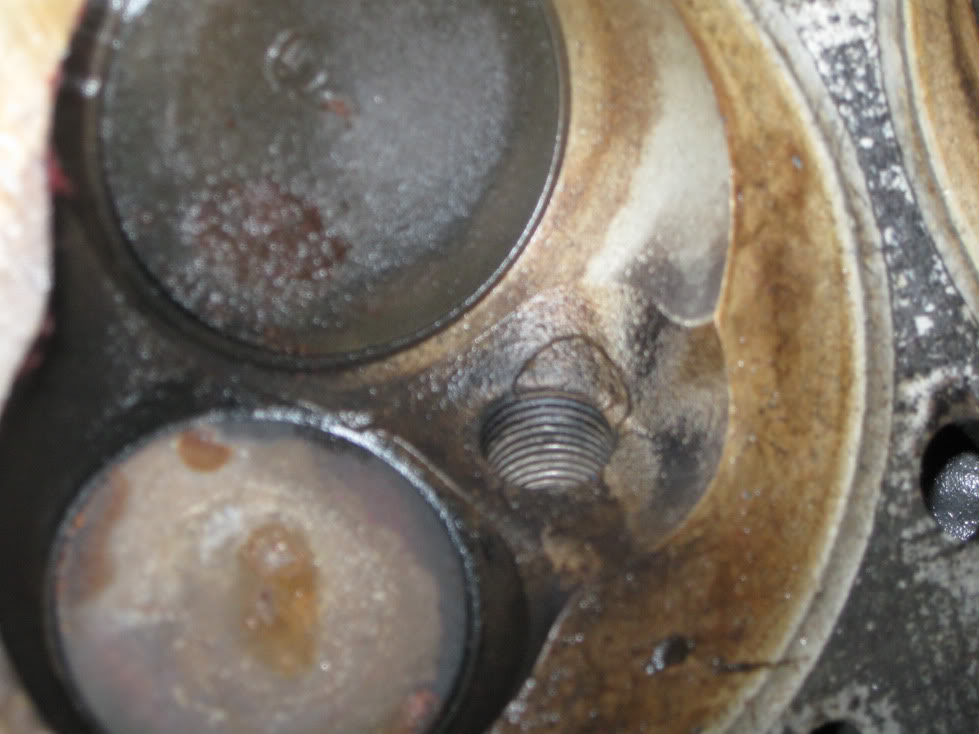
It was weird, the head gasket didnt show any signs of blowing, and that crack in between the valves wouldn't be the one to allow the coolant breach. At a glance, the head doesn't appear to be warped either, although its almost impossible to tell without straigh-edging it.
So what do you think? Get a new head, or rebuild the whole thing? What do you think? I am I right in saying that the current head is toast? I don't see how it could be reusable with those cracks in it, although I could be wrong. I am certainly no mechanic.
We'll got the fuel rail, intake manifold, and finally the head off today.
Good News: I didn't break anything while taking it apart, and I'm not sure that the head gasket blew.
Bad News: The head is garbage, has a few cracks, and before the timing chain was done the first time, the guides must have broken and made some pretty thick rails in the side of the head. On with the pictures:
It was weird, the head gasket didnt show any signs of blowing, and that crack in between the valves wouldn't be the one to allow the coolant breach. At a glance, the head doesn't appear to be warped either, although its almost impossible to tell without straigh-edging it.
So what do you think? Get a new head, or rebuild the whole thing? What do you think? I am I right in saying that the current head is toast? I don't see how it could be reusable with those cracks in it, although I could be wrong. I am certainly no mechanic.
12-02-2009, 12:38 PM
#48
Registered User

Join Date: Aug 2008
Location: Northern Colorado :-(
Posts: 1,758
Likes: 0
Received 2 Likes
on
2 Posts
I had a tiny tiny crack like that between valves. Had it tested and was told it was okay. haven't had any issues so far.
When the head heats up, the crack may embiggen.
When the head heats up, the crack may embiggen.
 Looks like I'm in the market for a new motor. Man what a bummer! I was sooo looking forward to seeing this running by next week. Not gonna happen.
12-02-2009, 01:42 PM
Looks like I'm in the market for a new motor. Man what a bummer! I was sooo looking forward to seeing this running by next week. Not gonna happen.
12-02-2009, 01:42 PM
#51
Registered User
Join Date: Aug 2008
Location: Northern Colorado :-(
Posts: 1,758
Likes: 0
Received 2 Likes
on
2 Posts
How hard is it to remove the block and pistons while you have it stripped down this far? I wish I would have done a complete rebuild when I did the head gasket.
Last edited by DupermanDave; 12-02-2009 at 01:45 PM.
12-02-2009, 10:06 PM
#52
Registered User
Thread Starter
Join Date: Nov 2009
Posts: 58
Likes: 0
Received 0 Likes
on
0 Posts
I have no clue how hard it will be to pull the rest of the motor. The head is off, so I no longer have the hooks for the chains, but I'm thinking i can hook onto the motor some other way.... maybe someone can chime in here hahah. So If I have to pull the block to be machined, I should rebuilt it while its out correct? I know you have to head the pistons to sleeve them into the block, so that is probably something I should have the machine shop do while its in being honed / resurfaced? Sorry if these questions are rudimentary, this is the first motor teardown for me.
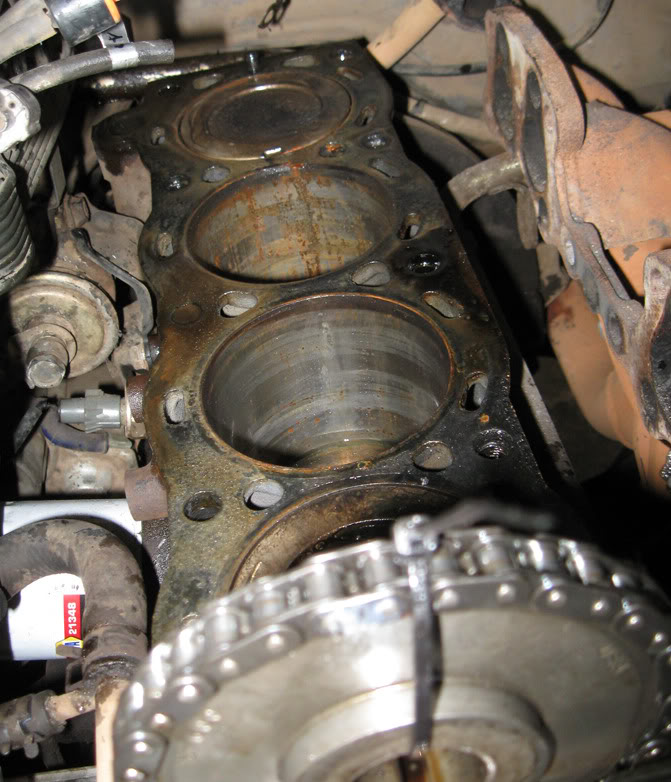
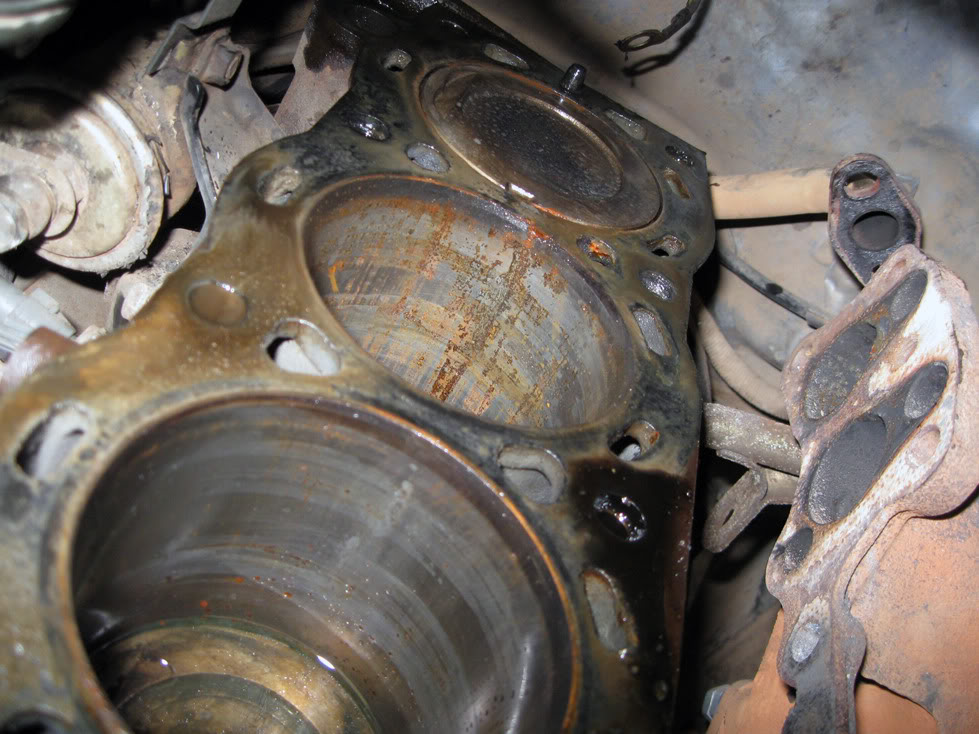
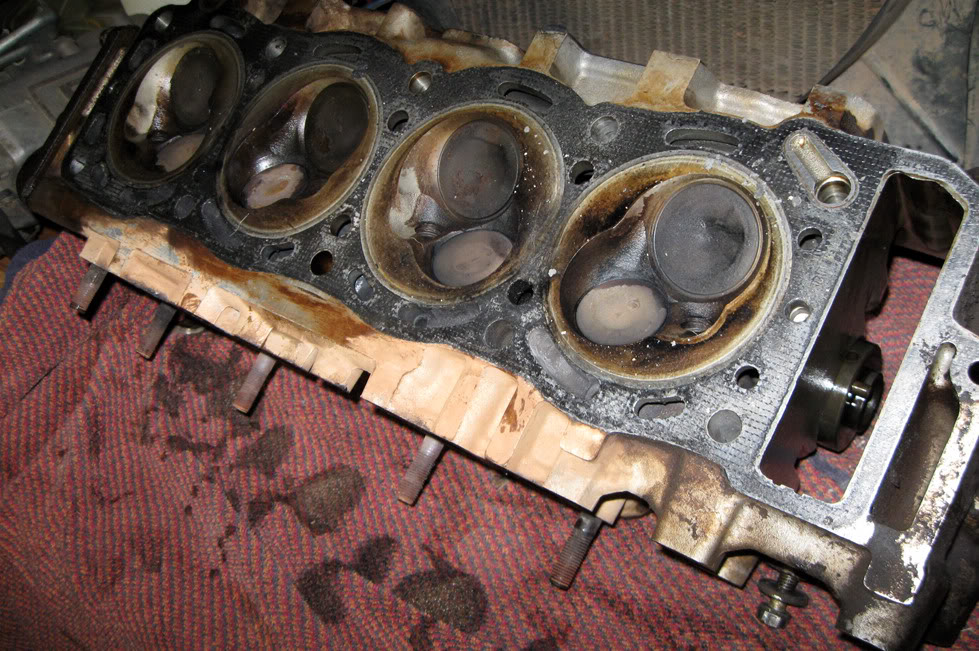
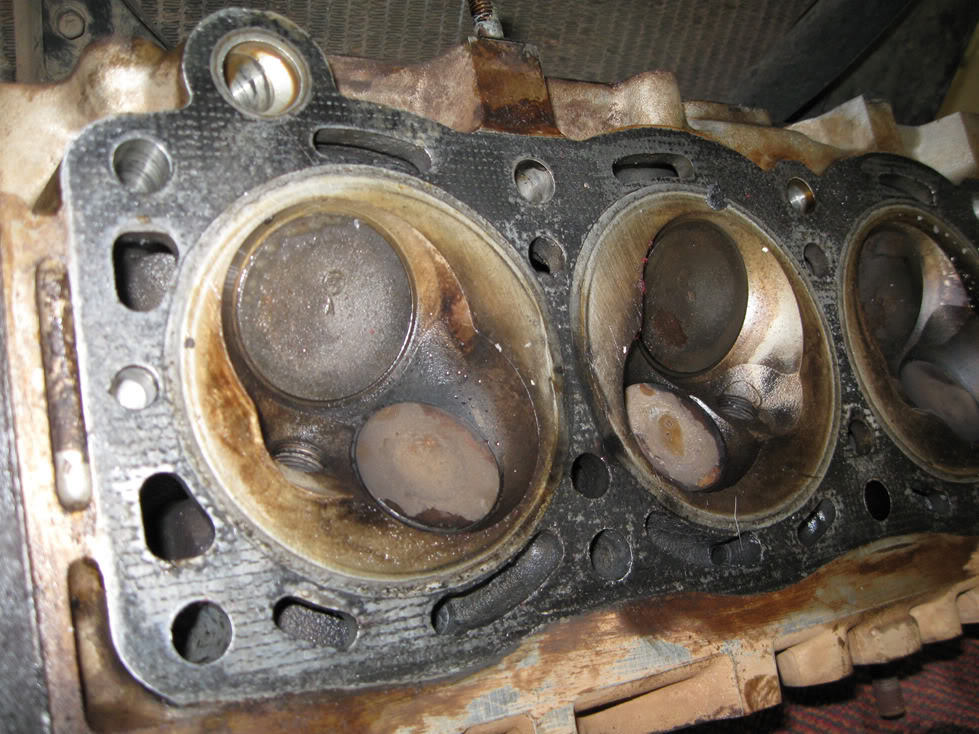
Also, If that rust comes off the cylinder walls (the motor was not run long with a blown HG, so im thinking its just light surface rust) will the block still be ok to use without being machined / honed?
Also, If that rust comes off the cylinder walls (the motor was not run long with a blown HG, so im thinking its just light surface rust) will the block still be ok to use without being machined / honed?
12-03-2009, 02:31 AM
#53
YotaTech Milestone-Two Millionth Post
My thread is no good for your questions since I am leaving my block in.
IAMSUPERBLEEDER pulled his engine, but I believe his was intact when he pulled it
https://www.yotatech.com/forums/f116...ctures-181237/
OLHARLEYMAN pulled his after he had his head off, I believe.
https://www.yotatech.com/forums/f116...begins-185041/
My thread is good for the crakshaft bolt removal. Or I made this one too.
https://www.yotatech.com/forums/f116...emoval-193505/
12-04-2009, 11:30 AM
#54
Registered User
Thread Starter
Join Date: Nov 2009
Posts: 58
Likes: 0
Received 0 Likes
on
0 Posts
My thread is no good for your questions since I am leaving my block in.
IAMSUPERBLEEDER pulled his engine, but I believe his was intact when he pulled it
https://www.yotatech.com/forums/f116...ctures-181237/
OLHARLEYMAN pulled his after he had his head off, I believe.
https://www.yotatech.com/forums/f116...begins-185041/
My thread is good for the crakshaft bolt removal. Or I made this one too.
https://www.yotatech.com/forums/f116...emoval-193505/
IAMSUPERBLEEDER pulled his engine, but I believe his was intact when he pulled it
https://www.yotatech.com/forums/f116...ctures-181237/
OLHARLEYMAN pulled his after he had his head off, I believe.
https://www.yotatech.com/forums/f116...begins-185041/
My thread is good for the crakshaft bolt removal. Or I made this one too.
https://www.yotatech.com/forums/f116...emoval-193505/
Thanks for the links! Although I think I have been through each of those threads a few times.

After scrubbing, cleaning, and more scrubbing the block is actually cleaning up really nice, from what I can tell. That rust was just wimpy surface rust from water sitting in the cylinders a few days, and after some PB blaster soakage, it came right off with a rag. So then I used brake cleaner, PB blaster, and some steel wool (soft fine grit synthetic on the walls, and the real stuff on the block, and its coming clean. It will need some more scrubbing to get the rest of the old gasket residue off, but I had to take a break because the fumes were starting to get to me! My garage isn't very well ventilated. My camera died, but after the next scrub I'll snap some more pictures and you guys can give me your opinions on if it can be used still or not.
 12-04-2009, 11:35 AM
#55
Registered User
Join Date: Aug 2008
Location: Northern Colorado :-(
Posts: 1,758
Likes: 0
Received 2 Likes
on
2 Posts
I'd say go for a full rebuild. I did a headgasket, and after seeing what's required for a full rebuild I wish I would have waited and gotten it all done. It's a little more work that will last another good 250k miles.
Here I am a year later, planning on doing a full rebuild on it when summer rolls around. Will be doing the clutch and pistons.
Here I am a year later, planning on doing a full rebuild on it when summer rolls around. Will be doing the clutch and pistons.
12-04-2009, 05:54 PM
#56
Registered User

Join Date: Jan 2009
Posts: 58
Likes: 0
Received 0 Likes
on
0 Posts
I had this big long novel typed out on the engines I have rebuilt and corners I have cut with success, including my current yota...but didn't want to jinx myself or give you false hope....or see you waste your time/effort.
Just remember that when you pull the engine to rebuild it, you will want to put a new clutch/flywheel/PP/TO bearing while you are in there....and will see a ton of other stuff you think you should replace/paint/etc so just be prepared to know when to say when.
Your call on whether to rebuild or not.
Either way here are a few things I recommend.
-If you decide to rebuild it, have a shop do the machine work and you should be able to put it together to save cost. Remember to CLEAN and RECLEAN the engine and parts and keep things CLEAN when putting them together....get the idea? Take your time, use STP treatment or the like to lube things up during assembly. DO NOT put it back together with your friends hanging around and talking....I speak from experience....distraction is a mofo.
-Any surface getting a gasket and/or sealer, clean with carb cleaner to get all the oil off.
-Make sure you are torquing things to spec
-And probably the number one thing I will say that I found out on these 22re's from an old guy who builds them for a living, chase the head bolt threads in the block with a tap...12mmx1.25 (very, very, very hard to find btw, still don't have one, had to borrow it). I think this has a huge impact on how well the new gaskets seal...messes with your torque readings. Make sure to blow the water/oil out of the holes before putting the head bolts in.
I still ended up typing a bunch of unorganized mumbo jumbo, my appologies.
Nice truck btw!! Goodluck with whatever you decide.
12-06-2009, 07:21 AM
#57
Registered User

Join Date: Oct 2007
Location: Seattle, WA 98107 (Ballard geek)
Posts: 212
Likes: 0
Received 0 Likes
on
0 Posts

 12-10-2009, 04:24 PM
#58
Registered User

Join Date: Dec 2009
Posts: 16
Likes: 0
Received 0 Likes
on
0 Posts
I've been reading through your thread and it seems you are on the right track. I just did the head and timing set on my '94 22re. I did the head first and went back only 2 weeks later to do the timing set. You definitely want to do the timing set now when you do the head! And also change the oil and water pump while you are there! Also, since your timing guides broke and scored a grove on the head it may have also done the same to your timing cover. If it did and cuts deep enough it will cut through into the water chamber behind the water pump and leak water into the oil that way. You will have to drop the oil pan to get the broken guides out as well. If you don't pull the motor you will have to drop the cross member below the oil pan as well as the center link of the steering components. To get the center link loose use a screw down puller like a pitman arm puller. Don't use a pickle fork, it will damage your seals (they are filled with grease). Also for chasing the headbolt threads if you can't find a tap, and it will be hard to find locally (although you can order one through the Snap-On website for about $20), you can find a new bolt easier and use a phenmatic cut-off tool to cut verticle groves in the purchased bolt to use as a tap.
Good luck! You will be glad you did the work yourself and have a great sense of accomplishment and pride when your done! ......but you will do alot of swearing till then.....
Good luck! You will be glad you did the work yourself and have a great sense of accomplishment and pride when your done! ......but you will do alot of swearing till then.....
01-02-2010, 12:49 PM
#59
Registered User
Thread Starter
Join Date: Nov 2009
Posts: 58
Likes: 0
Received 0 Likes
on
0 Posts
Thanks for the advice guys. Haven't made any progress since the holidays came and went and buying a new head for the runner wasn't at the top of our priority list. But now the holidays are over and I'm hoping to order my new head in a week or so. Updates soon to follow! I will do the timing set, oil, and water pump while I'm in there.
01-21-2010, 01:51 PM
#60
Registered User
Thread Starter
Join Date: Nov 2009
Posts: 58
Likes: 0
Received 0 Likes
on
0 Posts
Update!
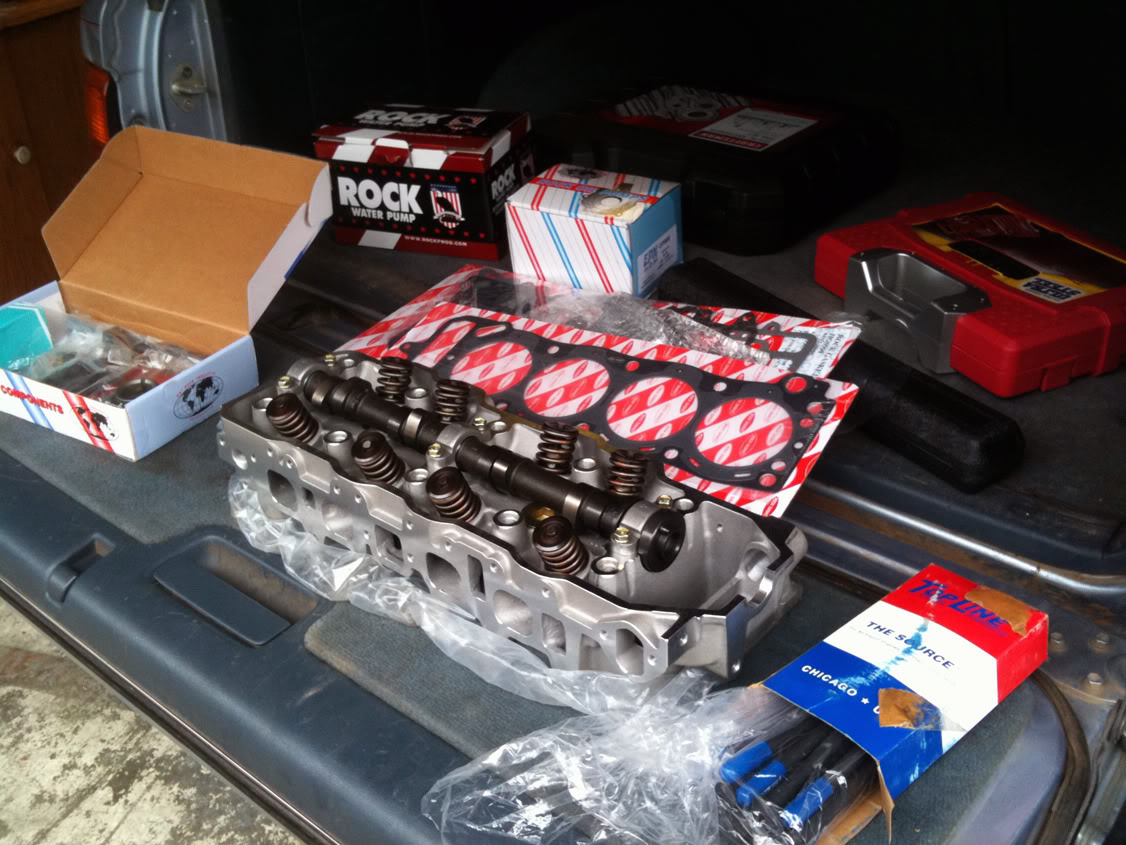
I am back on track and ready to get to work on this thing again. I was waiting on the $$ for new parts needed to continue, but I got a big surprise for my birthday from my amazing girlfriend.
For my birthday she got me:
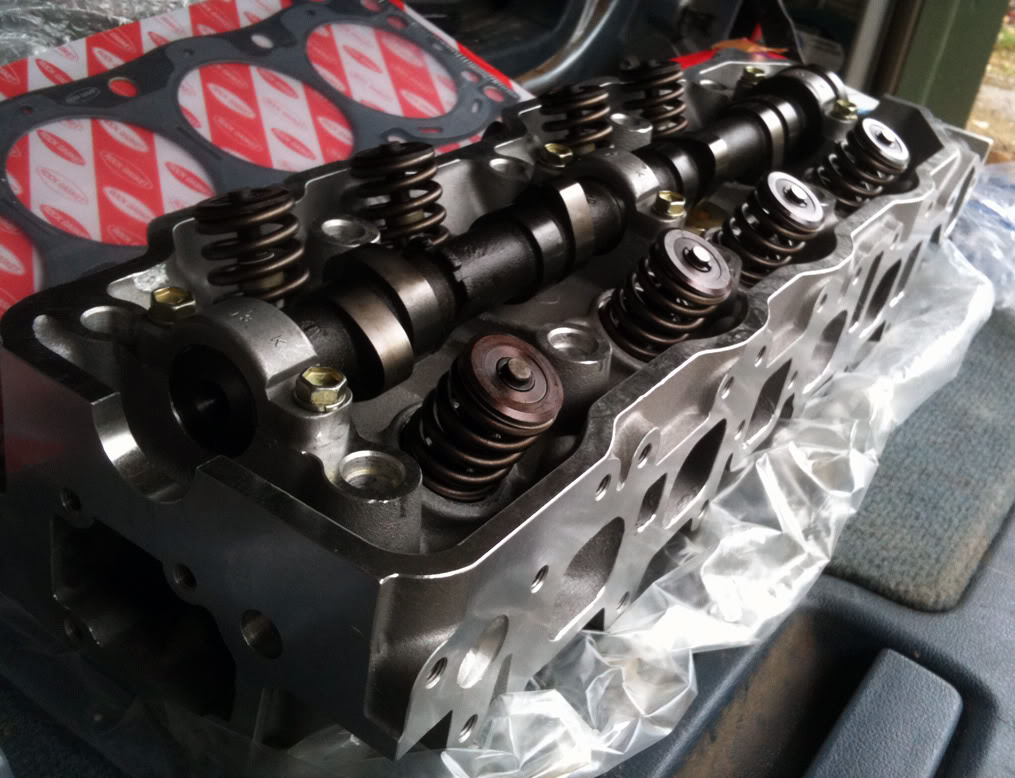
-New stock head from ENGNBLDR, with new valvetrain.
-268 cam
-New timing set with steel backed guides
-new oilpump, and water pump.
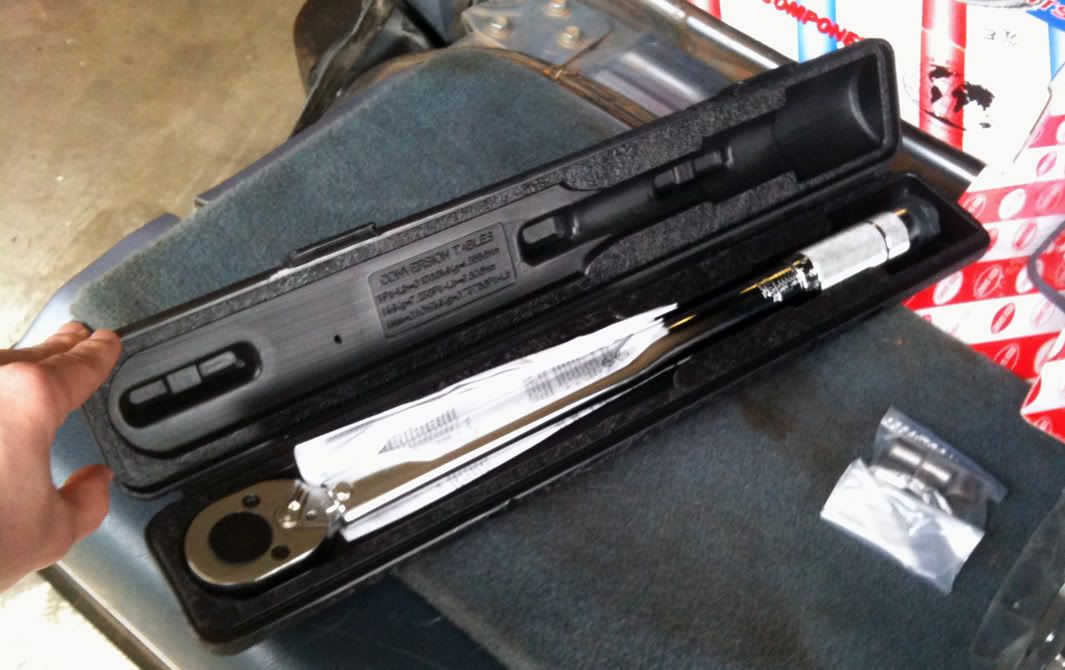
-new torque wrench, and a sweet mechanics Craftsman tool kit. (was using my dads so I finally have my own.
The coolest part was, she had no help from me, I had no clue she was getting all this for me. She searched my computers history, and talked to Ted to find out all the things I needed. I was so impressed!
Some pics:
All my goodies lined up:
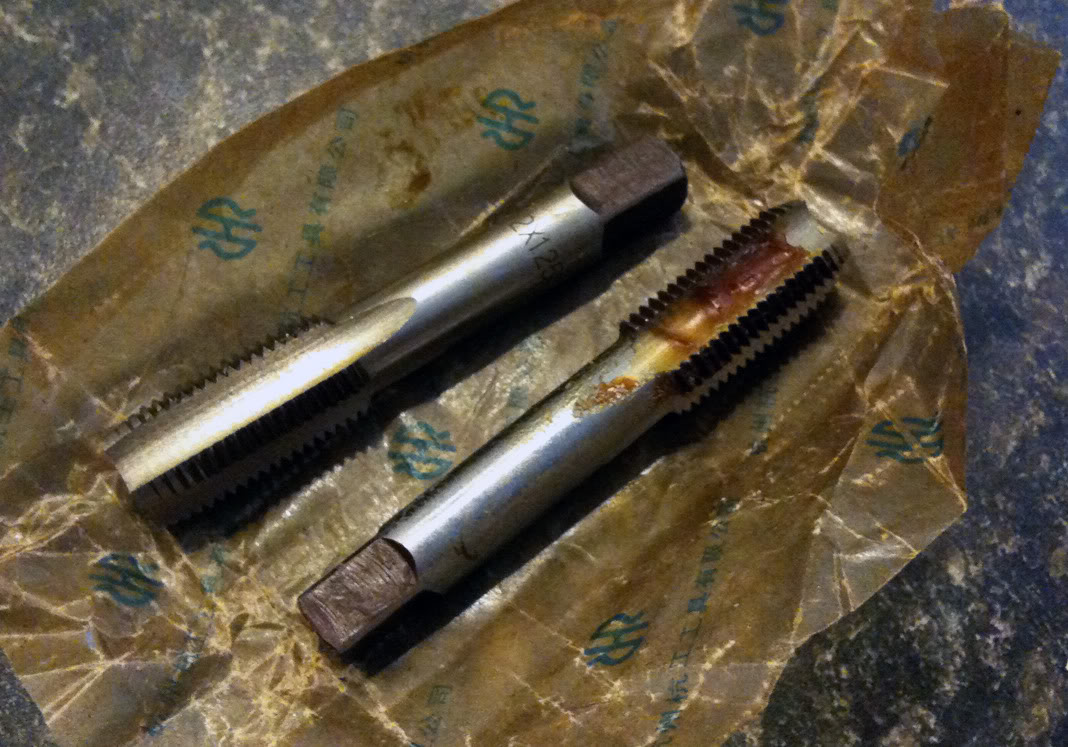
Ordered some 12mm x 1.25 taps off ebay to chase the head bolt holes.
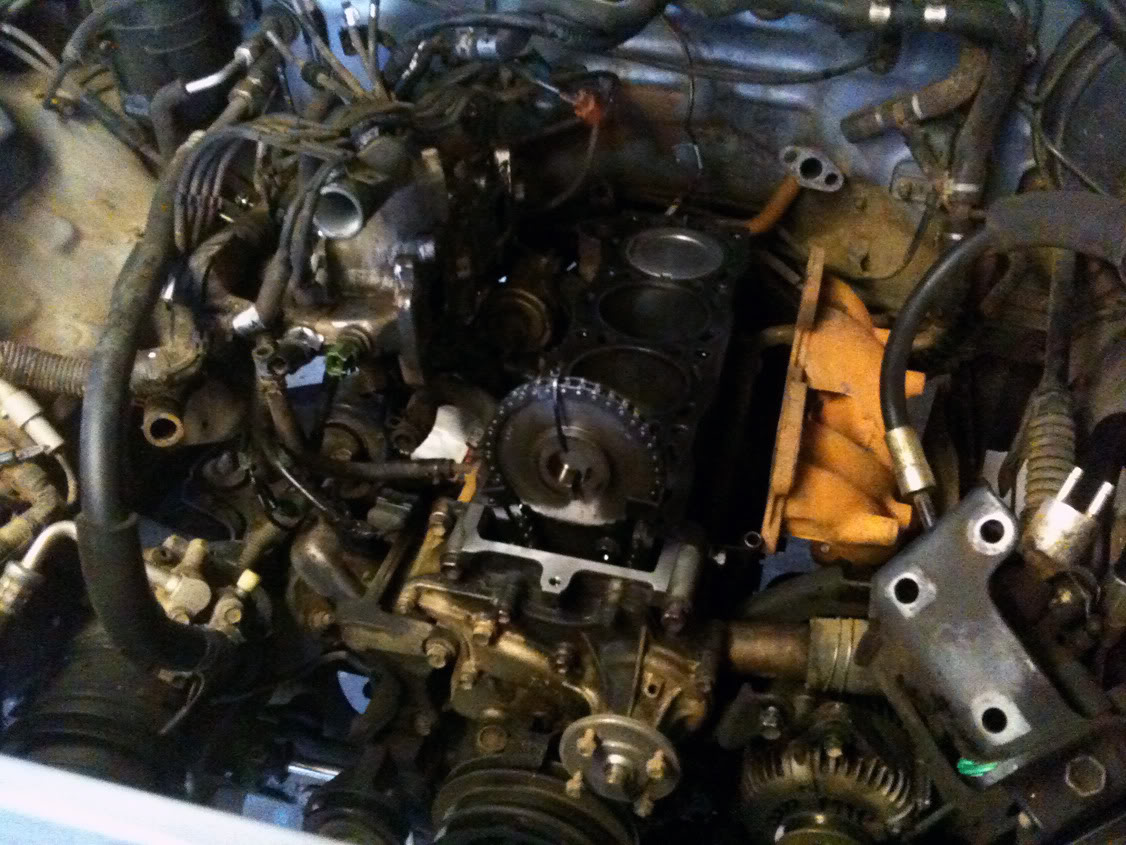
How the engine bay currently sits, more accesories removed, ready to fight the crankshaft pulley bolt.
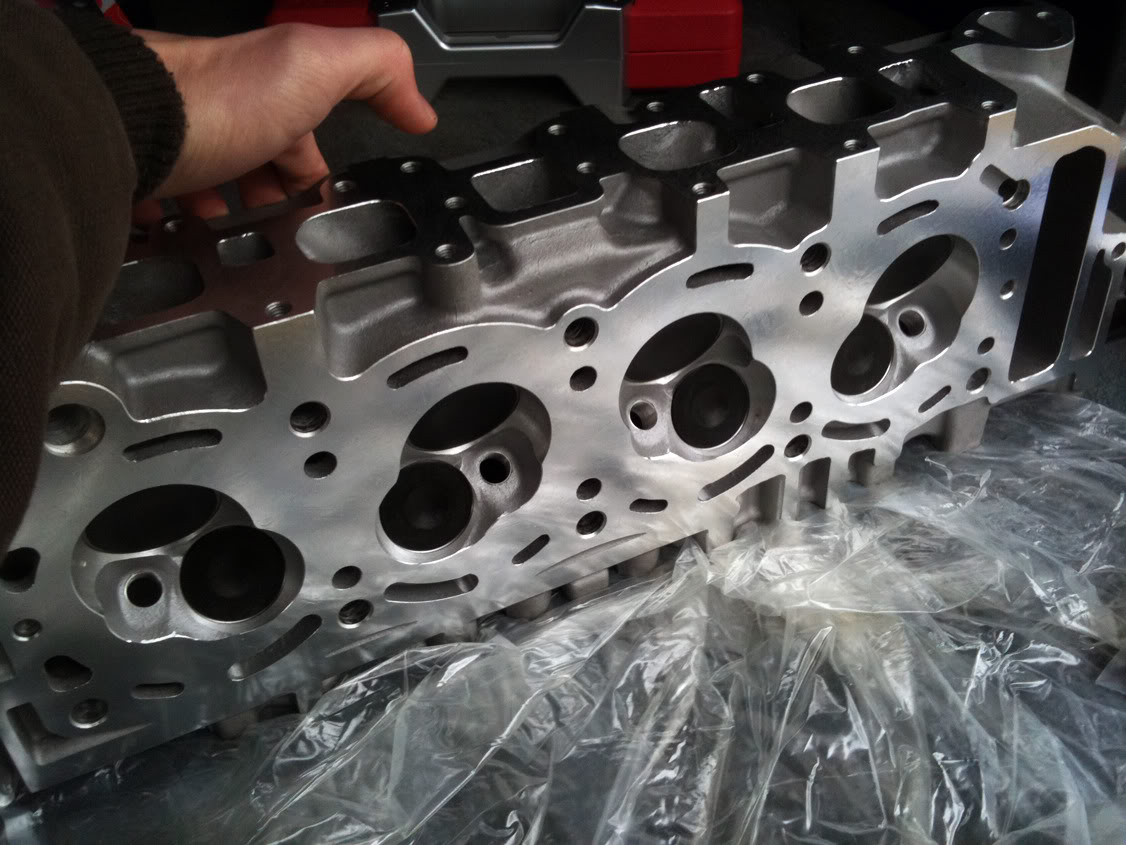
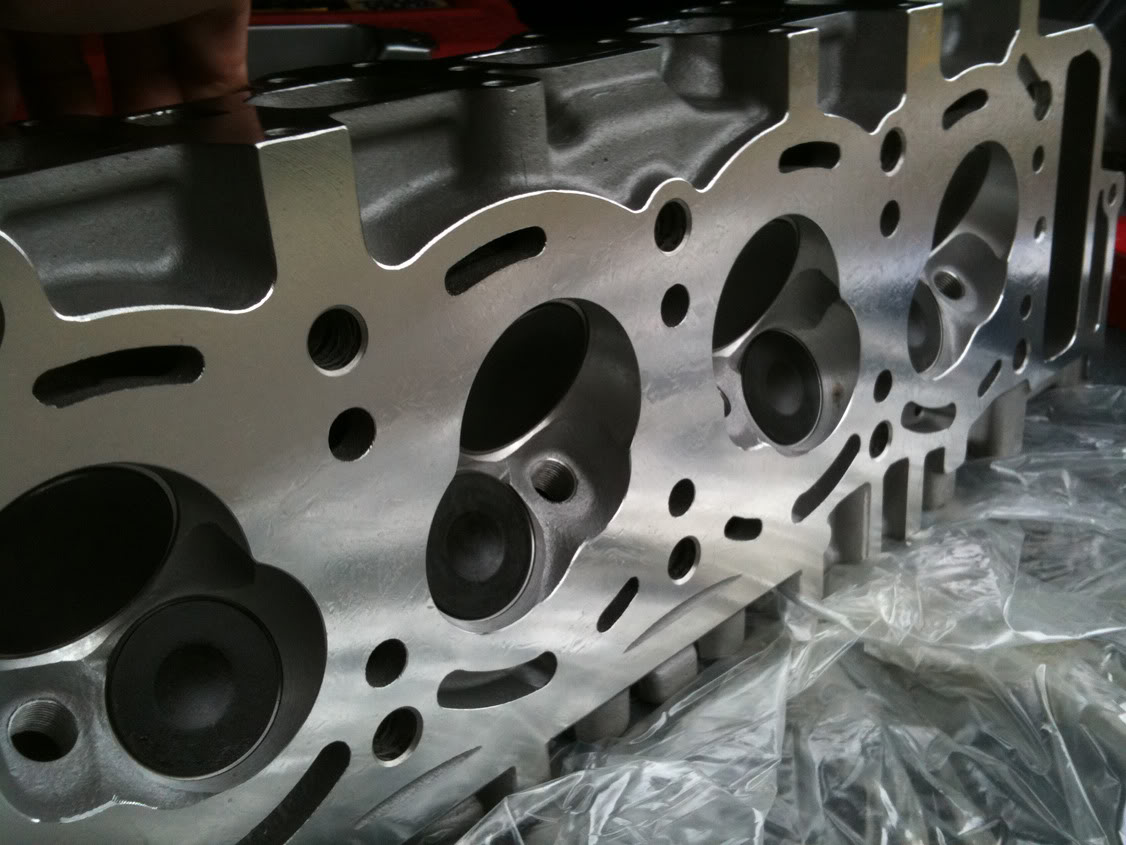
New head from ENGNBLDR.
New shiny torquewrench from sears.
I also went and picked up a 1/2in craftsman break bar, impact gun, and some air tools to aid in getting the crank pulley bolt off, and the rest of the process.
I still have alot of cleaning to do, and finish getting all of the old HG off the block and making sure everything is flat.
So next I'll remove the alternator, and take a shot at that crank bolt. I am hoping to have this thing running in a week! We will see how it goes.
Any tips suggestions are welcome, as I am soon going to dig into the timing set and I'm sure I'll need help. I'll be following 4crawler's writeup.
I am back on track and ready to get to work on this thing again. I was waiting on the $$ for new parts needed to continue, but I got a big surprise for my birthday from my amazing girlfriend.
For my birthday she got me:
-New stock head from ENGNBLDR, with new valvetrain.
-268 cam
-New timing set with steel backed guides
-new oilpump, and water pump.
-new torque wrench, and a sweet mechanics Craftsman tool kit. (was using my dads so I finally have my own.
The coolest part was, she had no help from me, I had no clue she was getting all this for me. She searched my computers history, and talked to Ted to find out all the things I needed. I was so impressed!
Some pics:
All my goodies lined up:
Ordered some 12mm x 1.25 taps off ebay to chase the head bolt holes.
How the engine bay currently sits, more accesories removed, ready to fight the crankshaft pulley bolt.
New head from ENGNBLDR.
New shiny torquewrench from sears.
I also went and picked up a 1/2in craftsman break bar, impact gun, and some air tools to aid in getting the crank pulley bolt off, and the rest of the process.
I still have alot of cleaning to do, and finish getting all of the old HG off the block and making sure everything is flat.
So next I'll remove the alternator, and take a shot at that crank bolt. I am hoping to have this thing running in a week! We will see how it goes.
Any tips suggestions are welcome, as I am soon going to dig into the timing set and I'm sure I'll need help. I'll be following 4crawler's writeup.


