1984 Pickup engine swap


 07-23-2013, 07:42 PM
#23
Registered User
Thread Starter

Join Date: Jun 2013
Location: Craig, Colorado
Posts: 20
Likes: 0
Received 0 Likes
on
0 Posts
07-26-2013, 11:00 PM
#24
Registered User
Thread Starter
Join Date: Jun 2013
Location: Craig, Colorado
Posts: 20
Likes: 0
Received 0 Likes
on
0 Posts
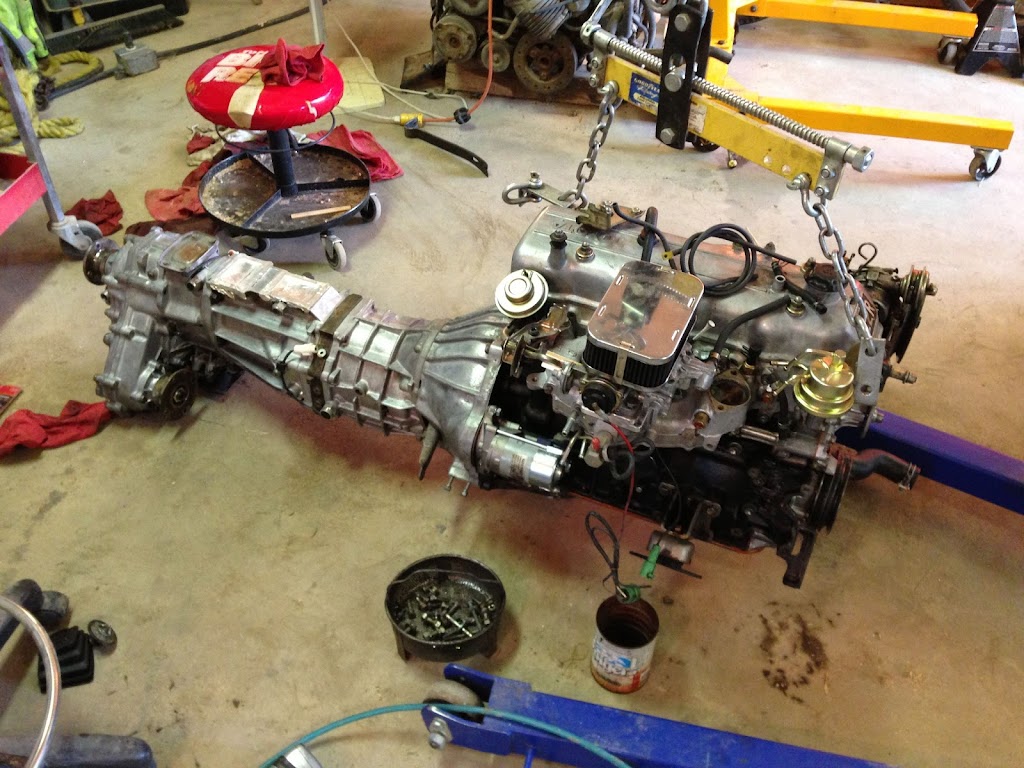
Engine is back in and runs great! Couple minor issues to sort but she's a runner.
My SR5 gauge cluster RPM,Temp and oil pressure are not working. The temp is pegged so I think the sensor on the manifold is bad. RPM I think I can sort. It's missing the wire on connector A pin 6. I can pull that off the parts truck. The oil pressure sending unit I purchased is bad I think. I also didn't install it directly under the oil filter. So I will try that tomorrow.
Need to rebuild the draglink and do the birfs. The front tires are cupped bad and they are loud so I need to replace those when I get the birfs done. Also need some new sway bar bushings.
I'm so happy!
07-27-2013, 07:44 PM
#25
Registered User
Thread Starter
Join Date: Jun 2013
Location: Craig, Colorado
Posts: 20
Likes: 0
Received 0 Likes
on
0 Posts
Got all the lights working today. Brake lights kicked my butt till I found a bad switch. Thanks parts truck!
Rebuilt the draglink this thing was toast.
I'm going to swap the gauge cluster harness so I can get my RPM gauge working.
Still cannot get the oil pressure gauge to work. I installed a sender but nothing. I looked at the parts truck and I don't see a sender just a sensor like mine had.
Left to do before I start daily driving it:
Rebuild front knuckles. Full rebuild kit on the way from Marlin Crawler.
Install new tires. With the knuckles and the draglink so bad the front tires are cupped and extremely noisy. I ordered up some 31x10.5x15 Goodyear Wrangler Duratracs. Should be here Wednesday. $680 + free shipping at Discount Tire Direct.
I also need to order up some new sway bar bushings and end links. I forgot to measure what size I need though.
Gettin close.
07-27-2013, 11:16 PM
#26
Registered User
Thread Starter
Join Date: Jun 2013
Location: Craig, Colorado
Posts: 20
Likes: 0
Received 0 Likes
on
0 Posts
Question:
I purchased an oil pressure sending unit from Napa. Then I removed the sensor under the oil filter on my block and screwed in the sending unit. Do I plug in the same wire that was on the sensor? I did this but I'm not getting any reading on my SR5 gauge cluster.
My RPM gauge isn't working either so I'm thinking of just pulling the entire harness off the parts truck.
Any ideas why my 4wd light on the dash isn't coming on when I shift into 4wd? I plugged in both connectors on the tranny and gearbox. I replaced all the bulbs in the gauge cluster as well.
09-12-2013, 09:21 PM
#27
Registered User
Thread Starter
Join Date: Jun 2013
Location: Craig, Colorado
Posts: 20
Likes: 0
Received 0 Likes
on
0 Posts
Been driving the truck for a while but it's time to spruce up the interior before winter. Driving with no tunes sucks. The only thing I've really done in the last month is route the exhaust back out the side and some minor engine tweaks.
I was going to rhino line the interior but decided to try something else. I picked up a gallon of Hammerite Rust Cap. It gives a hammered finish and can be brushed on. I also picked up some carpet, some 6x9 boxes, Sound Ordinance speakers and a Sony head unit.
First day was spent removing the interior. Headliner, dash, seats, gearbox levers etc...This is what the floor looked like before I power washed it and removed the factory sound proofing. Scraping that crap off sucks. Most of the stuff on mine chipped off in pieces though. Took a drill with a wire wheel to finish it.

Before I took the wire wheel to it.

Test fit and cut the carpet. This was not too bad a job. Had to trim a lot of excess but I was impressed with how well it fit.

This stuff goes on easy and dries fast. I barely used a pint to do the interior. After I got to this point I went to sleep and it was dry about 9 hours later.

The dash on my truck (all old Toyotas) was cracked and they don't make replacements only crappy dash caps. I peeled off the old vinyl and media blasted it down to the metal and painted it. The picture doesn't do it justice.


Dash and carpet back in. Stereo installed. Temp installed the seat to cut the hole through the carpet. Pulled them back out to paint the seat brackets. Should be done tomorrow.


Need to do the head liner, door cards and install 2 front speakers when they get here and the interior is done.
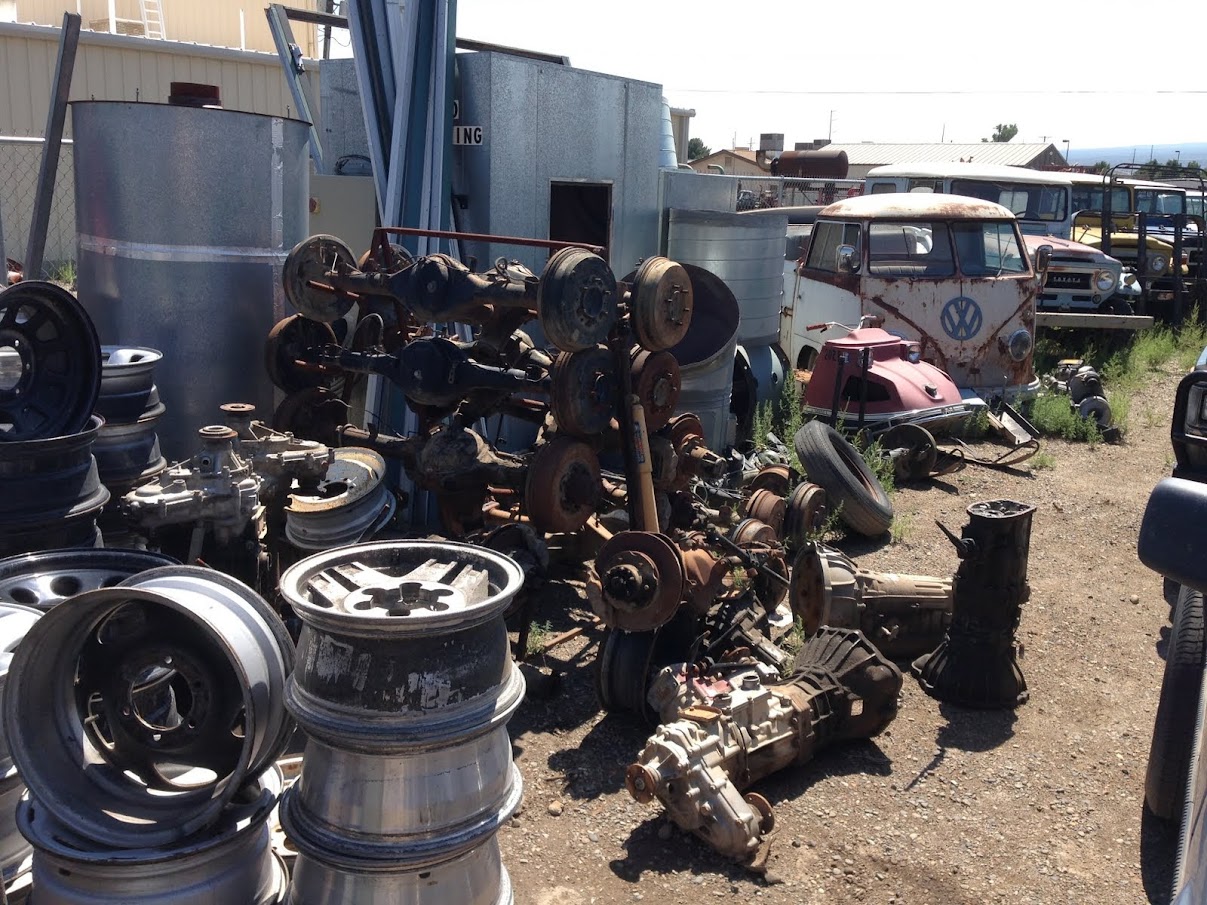
Some pics of a Toyota Land Cruiser/Truck yard in Grand Junction Colorado. Friend took his FJ60 to have some rust repair done. The pics don't really show how many they had but I would guess around 50-75.

The 2 white FJ80's have blown head gaskets.

Shop truck FJ45 spliced from a FJ40 front.

Shop owners FJ60 with a 5.7L V8. Amazing rig. The sea foam green FJ40 in the back is all original and looks perfect.
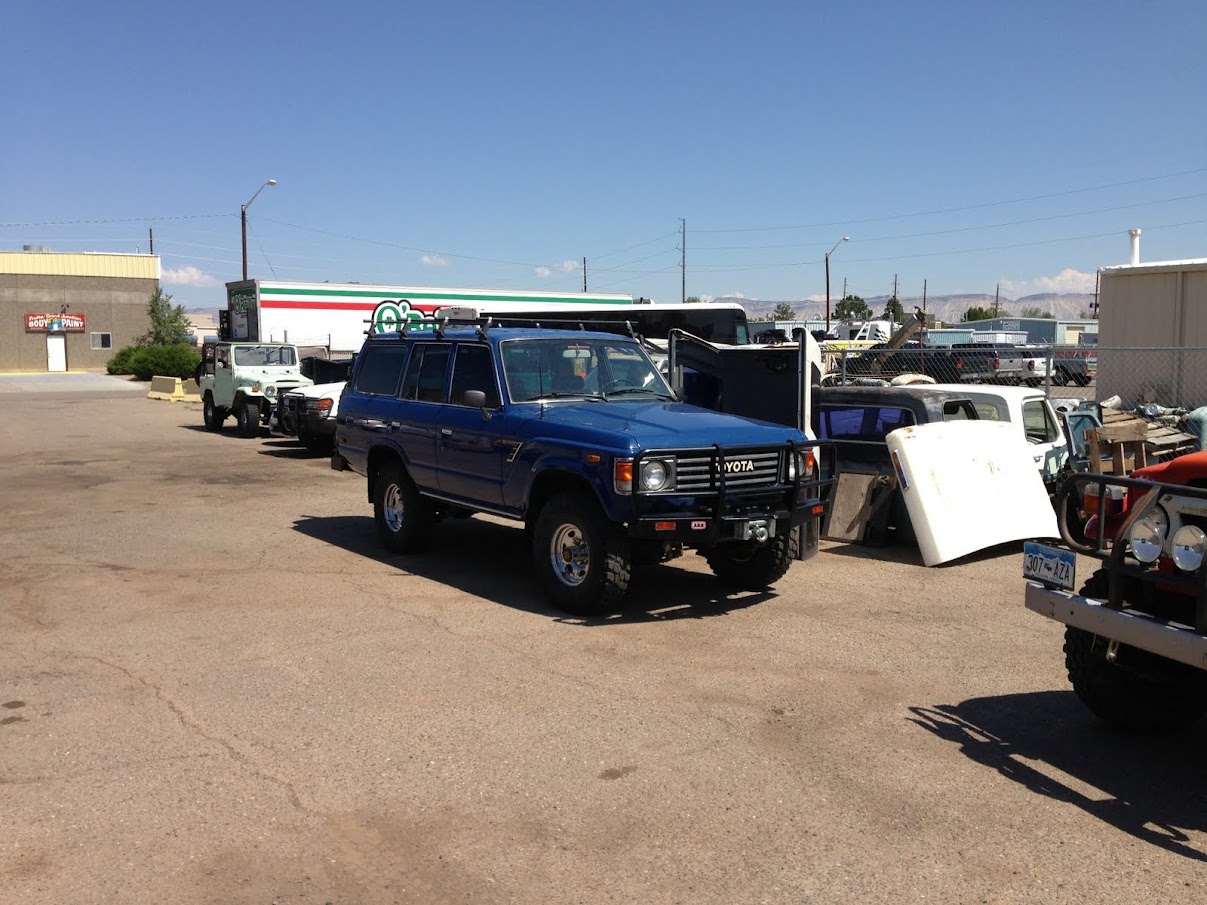
Hey how did that VW sneak in there? Look at all those FJ40's lined up.
I was going to rhino line the interior but decided to try something else. I picked up a gallon of Hammerite Rust Cap. It gives a hammered finish and can be brushed on. I also picked up some carpet, some 6x9 boxes, Sound Ordinance speakers and a Sony head unit.
First day was spent removing the interior. Headliner, dash, seats, gearbox levers etc...This is what the floor looked like before I power washed it and removed the factory sound proofing. Scraping that crap off sucks. Most of the stuff on mine chipped off in pieces though. Took a drill with a wire wheel to finish it.
Before I took the wire wheel to it.
Test fit and cut the carpet. This was not too bad a job. Had to trim a lot of excess but I was impressed with how well it fit.
This stuff goes on easy and dries fast. I barely used a pint to do the interior. After I got to this point I went to sleep and it was dry about 9 hours later.
The dash on my truck (all old Toyotas) was cracked and they don't make replacements only crappy dash caps. I peeled off the old vinyl and media blasted it down to the metal and painted it. The picture doesn't do it justice.
Dash and carpet back in. Stereo installed. Temp installed the seat to cut the hole through the carpet. Pulled them back out to paint the seat brackets. Should be done tomorrow.
Need to do the head liner, door cards and install 2 front speakers when they get here and the interior is done.
Some pics of a Toyota Land Cruiser/Truck yard in Grand Junction Colorado. Friend took his FJ60 to have some rust repair done. The pics don't really show how many they had but I would guess around 50-75.
The 2 white FJ80's have blown head gaskets.
Shop truck FJ45 spliced from a FJ40 front.
Shop owners FJ60 with a 5.7L V8. Amazing rig. The sea foam green FJ40 in the back is all original and looks perfect.
Hey how did that VW sneak in there? Look at all those FJ40's lined up.
 what my house is going to look like in a couple of years......kind of close now.
09-13-2013, 07:51 AM
what my house is going to look like in a couple of years......kind of close now.
09-13-2013, 07:51 AM
#29
Registered User
Pressure washing sucks. There is a good side to having a greasy nasty engine compartment though. NO RUST!
You are going to need a wiring diagram if you don't already have one. The circuits are simple and I'm sure you can figure it out but, they would save a lot of time trouble shooting.
Lookin good by the way.
You are going to need a wiring diagram if you don't already have one. The circuits are simple and I'm sure you can figure it out but, they would save a lot of time trouble shooting.
Lookin good by the way.
09-13-2013, 09:37 PM
#30
Registered User
Thread Starter
Join Date: Jun 2013
Location: Craig, Colorado
Posts: 20
Likes: 0
Received 0 Likes
on
0 Posts
Pressure washing sucks. There is a good side to having a greasy nasty engine compartment though. NO RUST!
You are going to need a wiring diagram if you don't already have one. The circuits are simple and I'm sure you can figure it out but, they would save a lot of time trouble shooting.
Lookin good by the way.
You are going to need a wiring diagram if you don't already have one. The circuits are simple and I'm sure you can figure it out but, they would save a lot of time trouble shooting.
Lookin good by the way.
Only problem I had was after I got everything put back together I wasn't getting any heat. Blower was working though. Found out 2 of the cables that hook up to the HVAC controls were bent and the plastic retainer for for one of them was broken. Luckily I have a parts truck and swapped everything over. I will say the heat in this truck works good.
09-14-2013, 12:25 AM
#31
Super Moderator
Staff
iTrader: (1)
Join Date: Aug 2008
Location: Anderson Missouri
Posts: 11,788
Likes: 0
Received 21 Likes
on
19 Posts
You have done alot to your truck. I see it has been awhile but I noticed the tach not working. In some cases they wont work and you need to run a wire from the negative side of the coil to the "p" on the back of the guage. I will post a pic below.
For the Oil Sender you need the large sending unit and you connect the wire to the small round tab on the sending unit. Some units have a ground, which is a flat connector, do NOT connect to it, it will ruin your oil guage on the cluster. Connecting to the smaller oil sensor that is for the idiot light will ruin the oil guage as well.
Not sure of your wheel drive light. Check the wire coming off of the tcase to the harness is all I can recommend on that.
Copied...
Tach fix
This truck didnt come with the SR5 guage so I added it. If your truck is not Plug and Play like some are, you need to run a wire from the negative side of the coil to the little "p" to make the tach work.
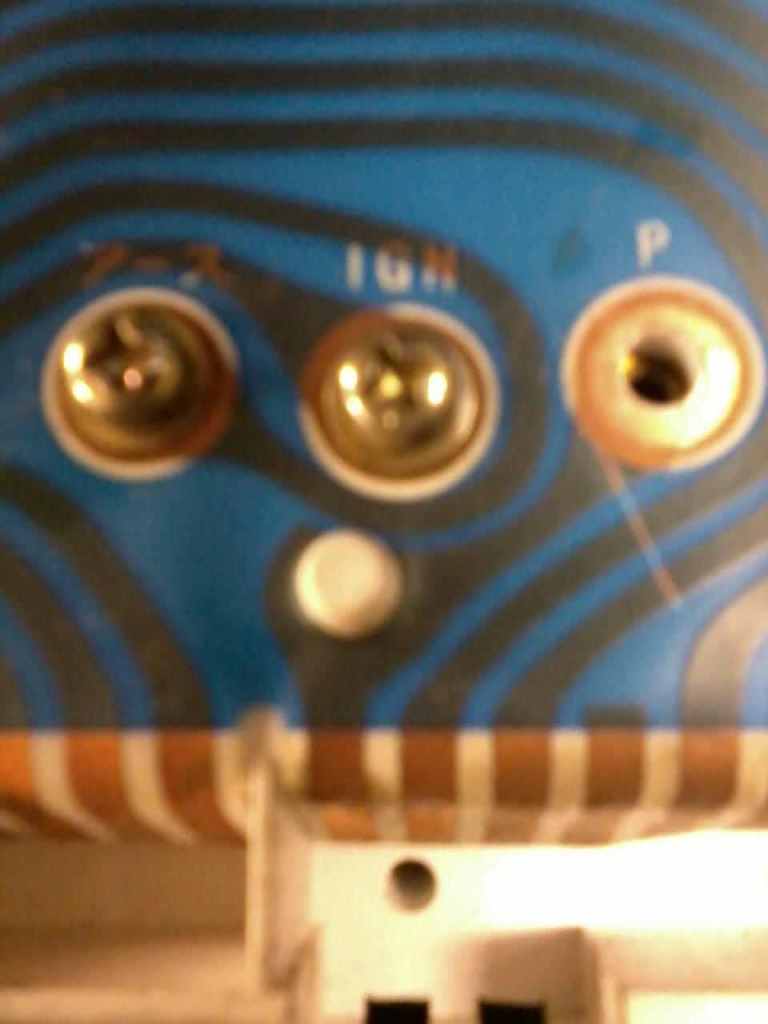
Then what I did so as not to short out the electrical run beside it. I placed a piece of electrical tape over the little "p" and crimped a wire to the smallest connector that I could find.
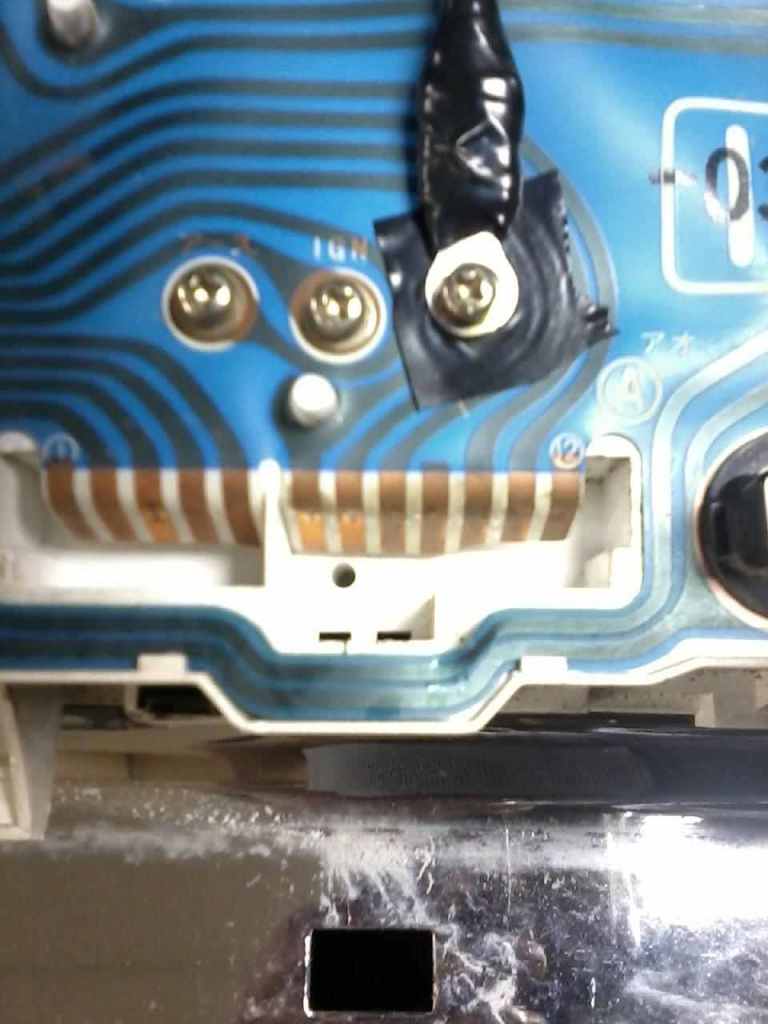
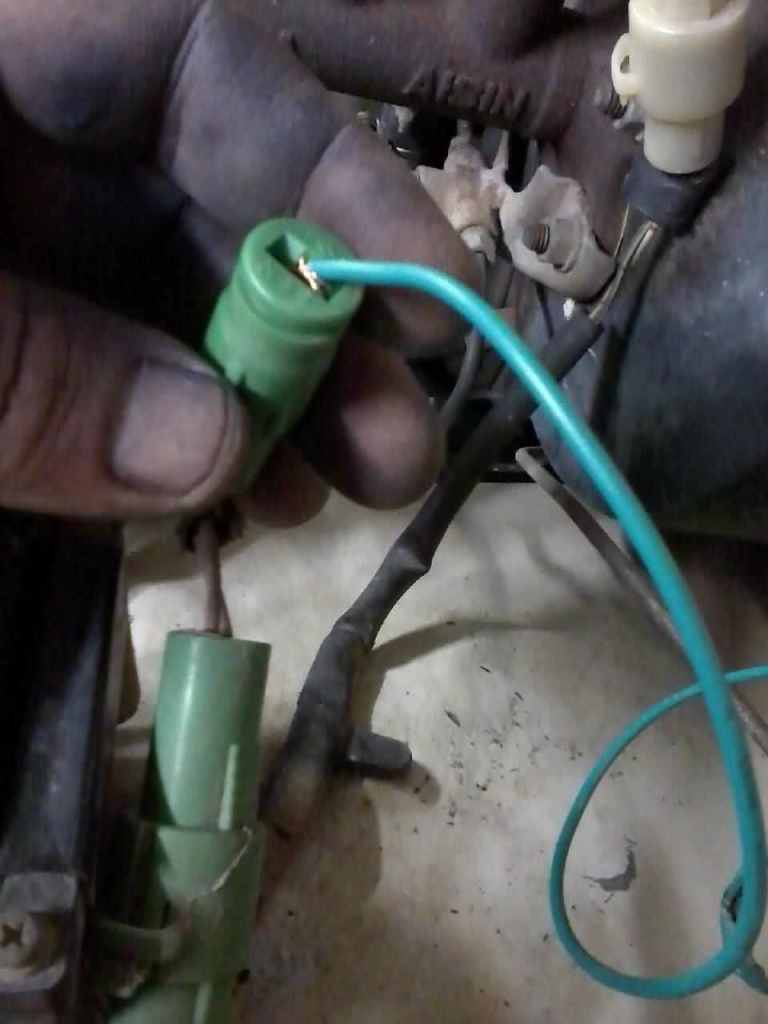
I then ran a wire to the negative side of the coil, on a carburator coil it is a little different then a standard coil you are most used to seeing. This is a temporary connection til I can come up with a better connection for it later on. (Coil for a 22r motor)
For the Oil Sender you need the large sending unit and you connect the wire to the small round tab on the sending unit. Some units have a ground, which is a flat connector, do NOT connect to it, it will ruin your oil guage on the cluster. Connecting to the smaller oil sensor that is for the idiot light will ruin the oil guage as well.
Not sure of your wheel drive light. Check the wire coming off of the tcase to the harness is all I can recommend on that.
Copied...
Tach fix
This truck didnt come with the SR5 guage so I added it. If your truck is not Plug and Play like some are, you need to run a wire from the negative side of the coil to the little "p" to make the tach work.
Then what I did so as not to short out the electrical run beside it. I placed a piece of electrical tape over the little "p" and crimped a wire to the smallest connector that I could find.
I then ran a wire to the negative side of the coil, on a carburator coil it is a little different then a standard coil you are most used to seeing. This is a temporary connection til I can come up with a better connection for it later on. (Coil for a 22r motor)
Last edited by Terrys87; 09-14-2013 at 12:55 AM.
09-14-2013, 09:40 AM
#32

here is a wiring diagram of the ignition control module for '85-'87(?) 22re efi engines, it could be handy for troubleshooting, because it shows wiring colors, hopefully they are the same colors as stock, I haven't looked at it yet... Airtex 6H1307:
http://www.rockauto.com/catalog/more...650&cc=1277300
http://www.rockauto.com/catalog/more...650&cc=1277300

Thread
Thread Starter
Forum
Replies
Last Post
TheManOutside
95.5-2004 Tacomas & 96-2002 4Runners
0
06-18-2015 03:32 PM


