Toyota 4Runner, Tacoma, and Tundra: How to Wash and Wax Your Car/Truck
Improve the look of your Toyota by rubbing away exterior dirt and surface grime. Here's how.
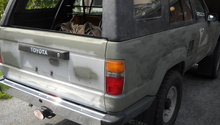
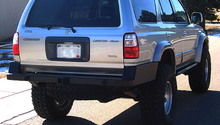
This article applies to the Toyota 4Runner, Tacoma, and Tundra (1985-present).
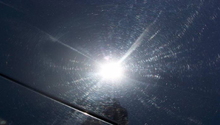
The fastest and simplest way to dramatically improve the appearance of your Toyota 4Runner, Tacoma or Tundra is to wash, wax and detail the interior. While your two main options for carrying out this project include rolling up your sleeves and getting the job done yourself or placing your trust in the hands of a professionally-trained detail team that can do the job at a "professional quality" level, we recommend trying yourself before handing over your keys. In most cases, you can complete the entire project is less than a day, including all drying times, which will account for the majority of the DIY time.

Materials Needed
- Auto detailing cleanser
- Scratch remover
- Electric buffer (optional)
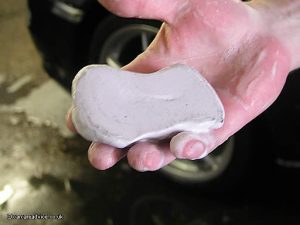
- Clay bar
- Buffing polish
- Car wax
- Microfiber cloths
- Small vacuum
- Window cleaner
- Febreze
- Automotive cleaning wipes
Step 1 – Wash the paint
- Wash your paint using a high quality auto detailing cleanser.
- Move from section to section, applying an even, deliberate, back and forth motion.
- To prevent surface scratches, stick to a microfiber cloth when cleaning or drying your truck, including your tires and wheels.
- For scratches, rub in a scratch remover.
- Use an electric buffer if you own one.
- Clay bar your paint to remove hard-to-see contaminants. Use with a lubricant, remembering to spray each section liberally to capture and remove all deposits.

Step 2 – Polish the paint
- Rub a high quality polish compound into your paint (or buff it in) using a steady, back-and-forth motion, while continuing to apply constant pleasure.
- Any leftover scratches will begin to quickly disappear.
- Don't allow the compound to accumulate on your pad.
- Rinse, if necessary, or swap it out for a new one.
- Wash and rinse your paint after you finish.
- Dry using a clean microfiber cloth.
- Apply a coat of wax using a steady, back-and-forth motion; apply pressure as needed.
- Allow the wax to dry while you detail the inside of your truck.
- Remove the wax using a clean microfiber cloth.
- Touch up your paint as needed.
Pro Tip
- It's perfectly okay to apply "hot wax." The application will protect your paint from the elements. Spray waxes are also available. These are ideal for touch-up applications.
Step 3 – Clean the interior
- Remove trash and other debris from the cabin by hand.
- Sweep or vacuum out the cabin using a broom or vacuum, respectively.
- Using multi-purpose cleaning wipes, wipe down all of your panels, cup holders and dashboard, including your instrument cluster lens.
- Use a window cleaner on the windows, front and rear.
- Remove and wash any removable mats and carpets.
- Spray the truck with Febreze, and then install a slow-release odor eliminator (many varieties clip directly onto your air conditioning vents).

Step 4 – Contact a professional detailer (optional)
When having your Toyota truck detailed, consider the level of detailing you need done. Detailing packages vary considerably by company, and, depending on the types of services requested, including paint touch ups, can be quite expensive. Compare prices of companies in your area and ask about satisfaction guarantees.
Related Discussion
- Polish/Wax Instructions - Yotatech.com