Toyota 4Runner 1996-2002: How to Replace Oxygen (O2) Sensor
Changing out your O2 sensors on your 4Runner is a pretty straightforward process that isn't too difficult to handle.
This article applies to the 4Runner (1996-2002).
If you are getting a CEL for a bad O2 sensor, the trouble could actually be from the MAF sensor. If you have tried cleaning it up but still get the error code, it's time to change your O2 sensor. On the 4Runner, like in most automobiles, you have a forward and a rear sensor. The rear is much easier to get to, the one in front of the catalytic converter is a bit more difficult to reach. The rear is easy enough to get to from under the truck. The forward sensor is a pretty tough reach, especially for someone with big arms and hands, but you can save yourself a considerable amount of cash in your wallet by purchasing the sensor online and taking a couple of hours to do this job yourself. You need a bit of patience and a little time, but no special tools are needed and you'll be back in business with the satisfaction of getting this done on your own.

Materials Needed
- PB Blaster or other penetrating lubricant
- Offset 12mm wrench or ratchet and 12mm socket
- Steel bristle brush
- Anti-seize compound
Depending upon your CEL code, you may only need to replace one of the two sensors. If you are not getting any kind of code, but you find that your gas mileage isn't what it used to be, it's a good idea to change them both.
Step 1 – Lift your truck
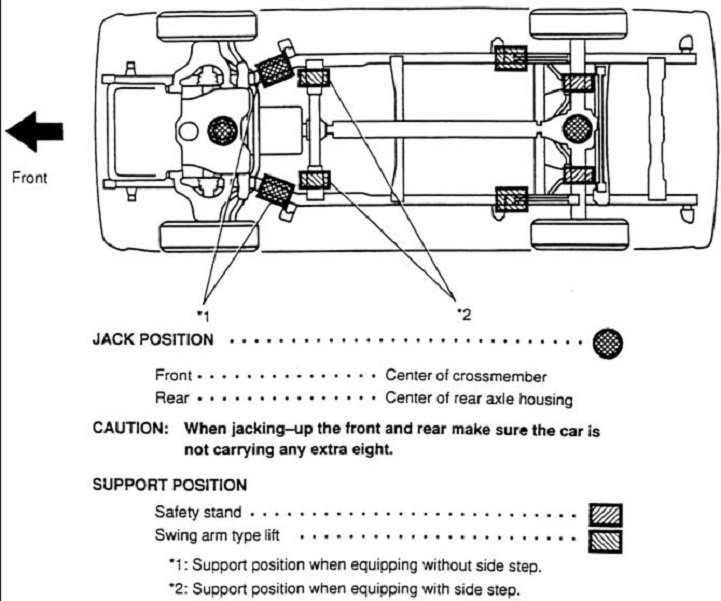
You will need to be under your truck at least for the rear sensor. Use a hydraulic floor jack to lift your truck and place on jack stands in the approved locations. Never work under your truck with just the floor jack, as this is potentially dangerous. You can most likely do the job with just the front end lifted onto jack stands, but it will be easier with the whole truck lifted.
Step 2 – Locate your O2 sensors
From the passenger side door, crawl under your truck and locate your exhaust pipe. In between the front and rear section of this pipe, you should see your catalytic converter. Just behind the converter (closer to the rear end) you will find the rear sensor, which is denoted as bank 1, sensor 2. In front of the catalytic converter, you'll find the bank 1 sensor 1 mounted above the transmission case. This one is difficult to reach. These sensors have a tendency to get really dirty from road grime, salt, dirt and water, not to mention huge fluctuations in temperature. This environment leads to some really nasty rusting. You will be well served by hitting these sensors with a good shot of penetrating lubricant such as PB Blaster or WD-40. Let them sit and soak for at least 15 to 20 minutes, but even better if you have the time to let them soak it all in overnight.

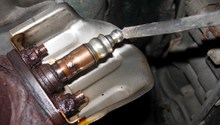
Figure 2. Upstream or forward O2 sensor. 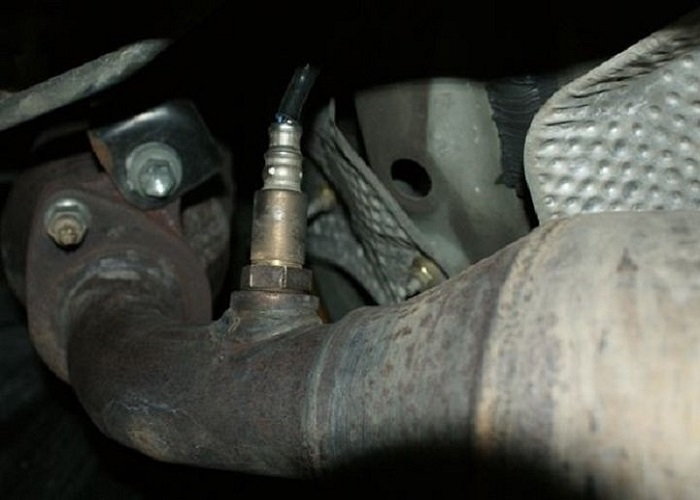
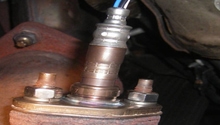
Figure 3. Downstream or rear O2 sensor.
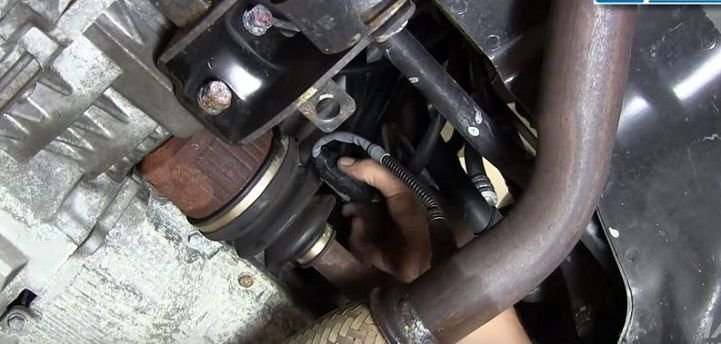
Step 3 – Remove and replace front O2 sensor
The front sensor may be hard to reach up far enough to disconnect the wiring harness. If you just cant reach it from under the truck, you can get to it from the inside of the cabin. You will need to remove the center console around the gear shift and you should be able to reach the connector from there. This is a locking connector that has to be manipulated in two parts. Use a small flat head screwdriver and work each side individually by sliding the screwdriver up into the connector and pry in to unlock one side, then repeat on the other. You may find that the sensor connector is attached to a bracket with a 10mm nut. That bracket will have to come off as well in order to completely free the connector and the wiring harness. From under the truck, you should be able to reach the 12mm sensor bolts using an offset box wrench or a ratchet and 12mm socket. You may find it beneficial to use a steel wire brush and lubricant to really clean those nuts up, which ought to make your life much easier. The new sensor comes with a gasket for the mounting flange. Be sure to get a good tight seal with the gasket before you install it. Be careful to not touch the sensor bulb at any point in this process. It is also good practice to use anti-seize compound on the bolts, and again, do not get any of it on the bulb.
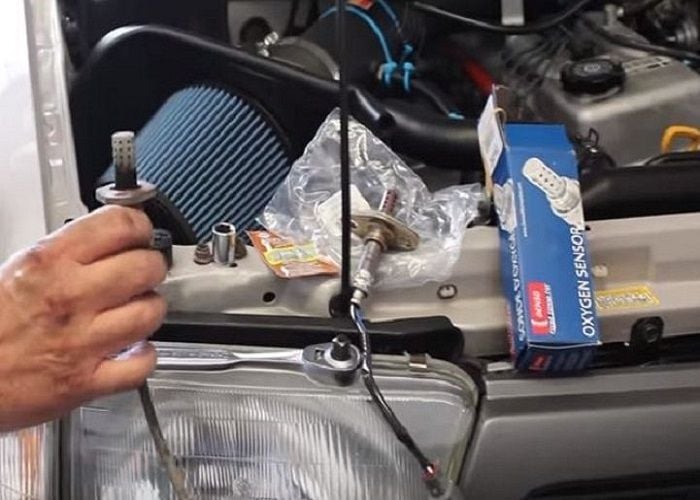
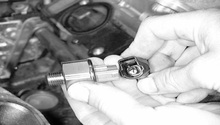
Figure 4. The old and the new forward O2 sensors. 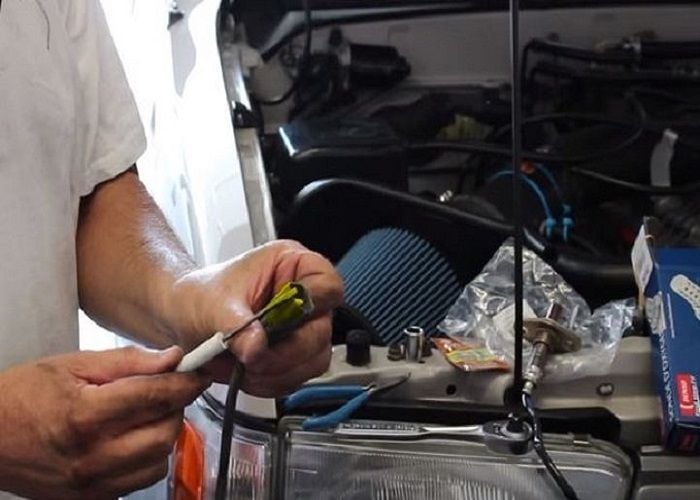
Figure 5. Use a small flat head screwdriver to unlock both sides of the connector to remove it.
Pro Tip
As the designs may have changed over time, double check your new O2 sensor that it matches up with the old before you install it.
Step 4 – Remove and replace the rear O2 sensor
The rear O2 sensor is much easier to work with. You can easily get a hold of the rear sensor and the connector from under the truck; also, there is only one bolt to work with. The sensor does not have a flange with two bolts like the front one does. It mounts directly into the pipe through a bunghole. After soaking it in penetrating lubricant, you should be able to loosen and remove the sensor using a box wrench or even pliers or vice grips. Once it's loose, you can finish the job with your hands and pull the sensor out of the bunghole. Trace the wiring harness up until you get in contact with the connector and disconnect it in the same fashion as the front sensor. When you install the new sensor, you should insert the sensor in the bunghole first and tighten it down before reconnecting the wiring harness. Again, be very careful not to touch the bulb of the sensor during the process.
Step 5 – Drop the truck and take a test drive
If you had a CEL come on, it may stay illuminated for a couple of miles. Drive around for a bit and make sure the light comes off and any codes are cleared. If you never had any codes or CEL, you should notice that the truck runs a lot smoother. You should also notice that your gas mileage returns to a more acceptable rate than before.

Featured Video: How to Change Front Oxygen Sensor on Toyota Truck
Related Discussions
- Replacing Oxygen Sensor 1999 ForeRunner - YotaTech.com
- Changing Oxygen Sensor When Nuts Are Rusted - YotaTech.com
- 1999 4Runner, What O2 Sensor Should I Get for My Situation - YotaTech.com
- 3rd Generation O2 Sensor Information - YotaTech.com