
Front Main Seal Replacement 22RE (pics)
 Mar 29, 2013 | 06:35 PM
#1
Thread Starter
Registered User
Joined: Dec 2010
Posts: 197
Likes: 2
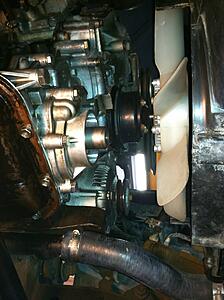
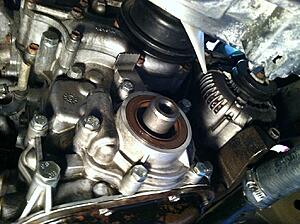
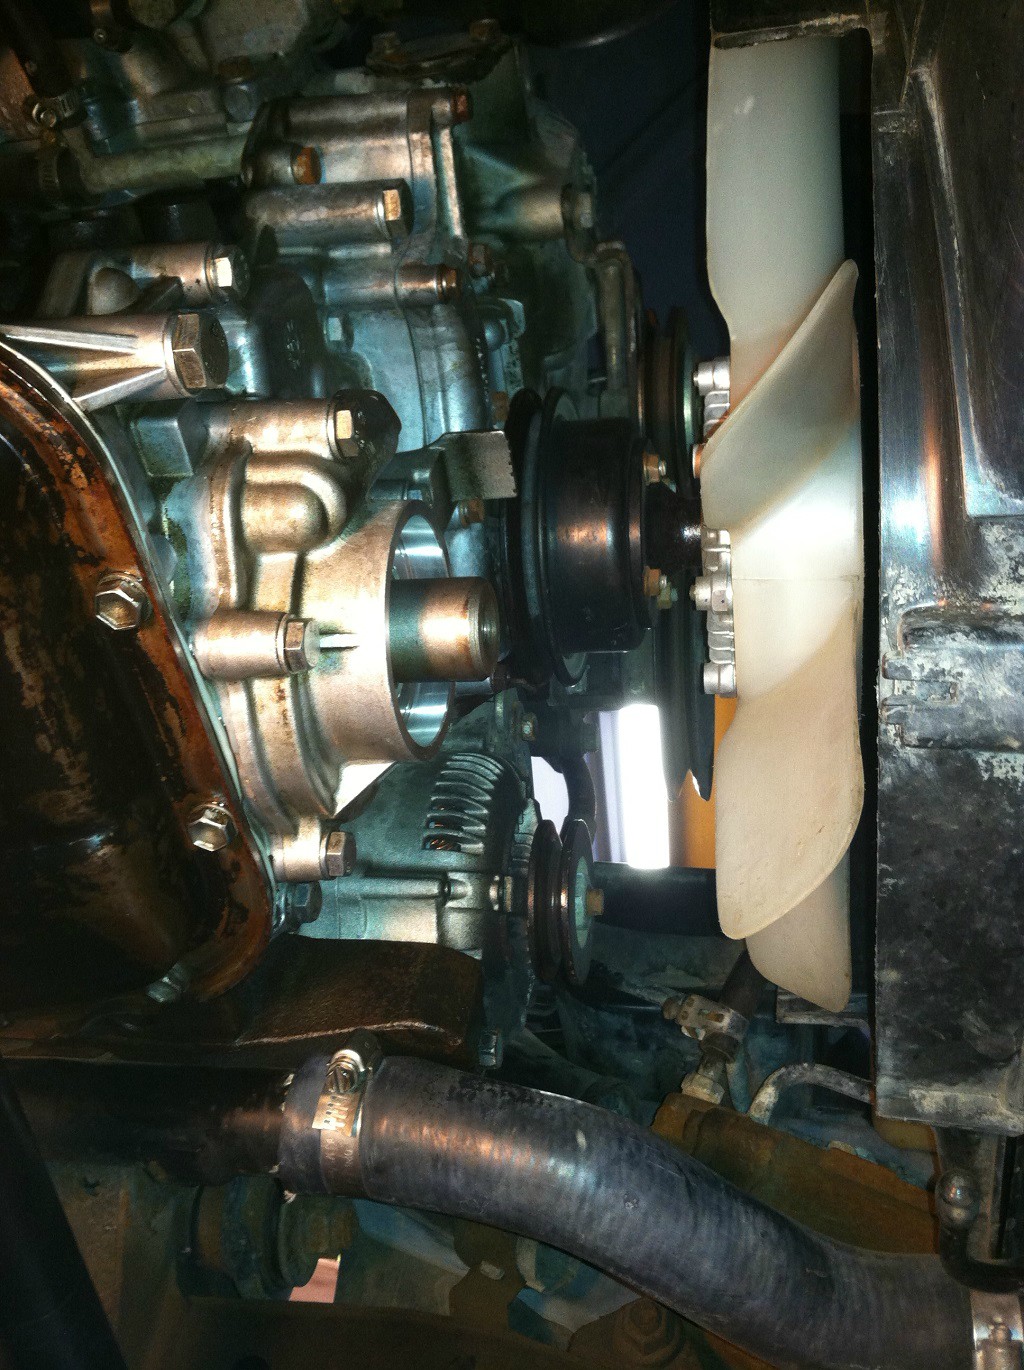
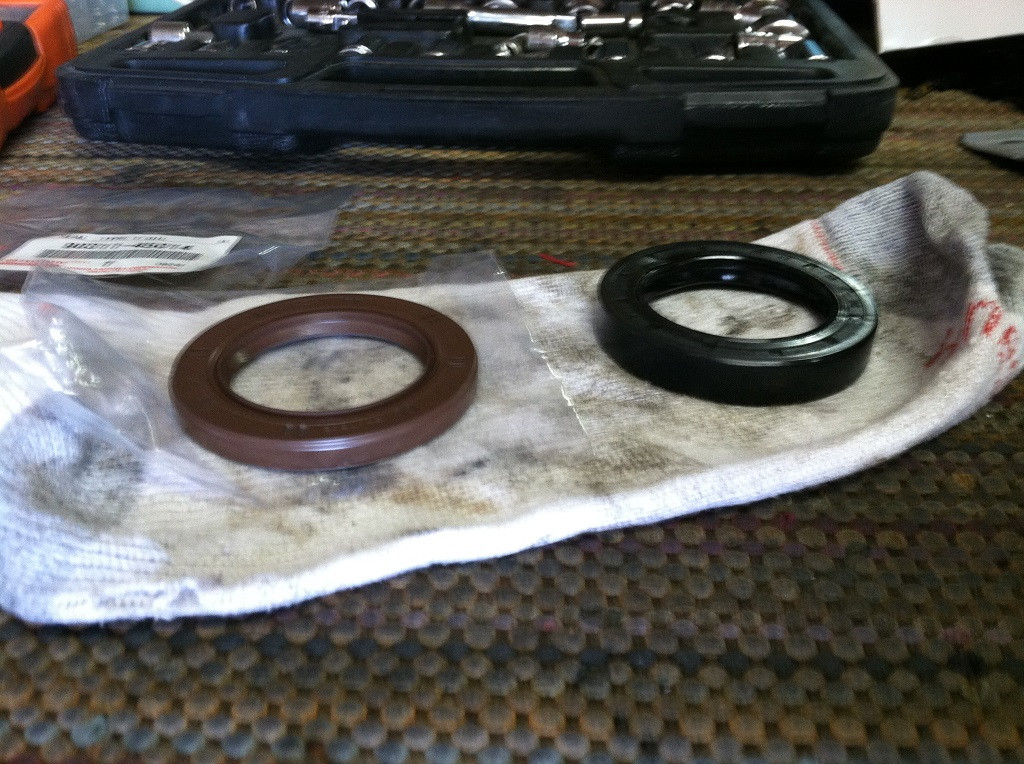
I have read every thread on here tagged with "oil pump" and "front main seal" and there seems to be some confusion as to whether or not the radiator, fan, belts, etc need to be removed to gain access to the front main seal.
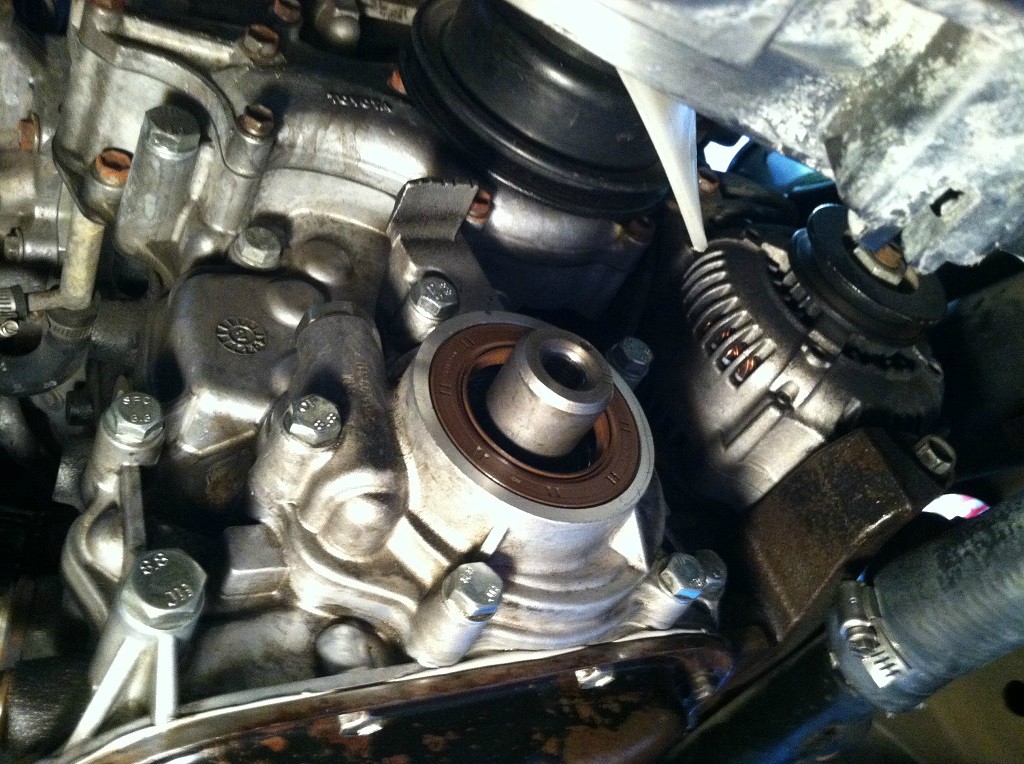
I just replaced the main seal without removing any of those things, no problem at all.
I should've replaced the oil pump o-ring at the same time, after I finished I noticed some oozing from around the oil pump housing.
Just thought I'd squash the confusion, here is proof:

I just replaced the main seal without removing any of those things, no problem at all.
I should've replaced the oil pump o-ring at the same time, after I finished I noticed some oozing from around the oil pump housing.
Just thought I'd squash the confusion, here is proof:


 The usual reason to pull that other stuff is to get a pully remover in there. Did you use one, if so what style?
Mar 29, 2013 | 09:41 PM
The usual reason to pull that other stuff is to get a pully remover in there. Did you use one, if so what style?
Mar 29, 2013 | 09:41 PM
#4

Registered User

Joined: Sep 2007
Posts: 8,380
Likes: 871
From: San Francisco East Bay
The usual question is not how you got enough torque on the bolt (your answer is simple enough), but how you kept the crank from turning. Presumably, you have some sort of tool (many, many described on this forum, but I'd like to hear about yours). A tool you'll need to use again to put that bolt in, to 116 ft-lbs.
Mar 30, 2013 | 02:33 AM
#5
Registered User
Joined: Feb 2013
Posts: 64
Likes: 0
From: Alabama
The usual question is not how you got enough torque on the bolt (your answer is simple enough), but how you kept the crank from turning. Presumably, you have some sort of tool (many, many described on this forum, but I'd like to hear about yours). A tool you'll need to use again to put that bolt in, to 116 ft-lbs.
Mar 30, 2013 | 06:10 AM
#6
Thread Starter
Registered User
Joined: Dec 2010
Posts: 197
Likes: 2
I tightened the crank bolt back down with a 3/8 drive torque wrench to 116 ft lbs, no issue there. I just had to use a breaker bar to bust it loose.
To loosen the bolt I put the tranny in 4th gear and had someone stand on the brakes, worked like a charm (:
To loosen the bolt I put the tranny in 4th gear and had someone stand on the brakes, worked like a charm (:
Mar 31, 2013 | 01:47 AM
#7

Registered User
Joined: Sep 2011
Posts: 5
Likes: 0
From: Newcastle Australia
Did you consider using loctite on the bolt, I know the fsm doesn't call for it but if that bolt ever comes loose while running, at best you end up with a wrecked harmonic balancer keyway, at worst a wrecked crankshaft keyway that is a very expensive repair. Been there with the crank with a diesel in my old 4runner but now Have to do this job with my 3rz so I'm considering the options etc
Trending Topics
Mar 31, 2013 | 08:03 AM
#8
Registered User
Joined: Sep 2007
Posts: 8,380
Likes: 871
From: San Francisco East Bay
I wouldn't use loctite on a 116 ftlb bolt. Many more people on this forum sweat getting that bolt out, than have ever reported throwing the bolt.
Of course, if you don't reinstall it to the full torque, not even loctite would help.
Of course, if you don't reinstall it to the full torque, not even loctite would help.
Mar 31, 2013 | 10:06 AM
#9
Registered User
Joined: May 2008
Posts: 3,277
Likes: 23
From: way way nor cal
I replace front main seals in the truck on 22r's and 22re's all the time WITHOUT removing the radiator, fan, belts, etc. I can do it in under 30 min. I bought a seal puller from harbor freight. I cut out about 2" from the HF puller and welded it back together. There is just enough room from the bottom to lightly tap the handle on the puller to make the seal pop out. I also put a thin piece of wood to cover the radiator just in case I miss the puller with the hammer. I also fabbed up a little round "cup" that is the inside diameter of the seal. I use the crank bolt and the little cup to get the new seal in. I just lightly tighten the crankbolt that goes through the little cup and the seal slowly snugs down on. I do this because it is very hard to get an even seat and seal on the main seal as it goes in. There is no room to tap it in. The little cup method works flawlessly.
To torque the crankbolt I put the rig in gear apply the breaks or remove the valve cover to inhibit the crank from turning. Torque to 115 ftlbs.
Never had one problem doing this method. I have done hundreds of them. It beats tearing apart the entire front end.
I have seen many front seals that appear to be leaking that are not actually the front main seal. Rather, the oil pan gasket or the valve cover or the seal on the oil pump may be leaking and the air and vibration spin oil around the pulley and make it appear oil is leaking from the front main. It takes a little degreaser, good cleaning and a trip to the market and back to determine exactly where leaks are coming from in that area.
Last edited by toyospearo; Mar 31, 2013 at 10:26 AM.
Oct 12, 2014 | 09:17 AM
#10

Registered User
Joined: Aug 2014
Posts: 29
Likes: 0
Just wanted to add/ bring this up. So people ate saving headaches. I did same thing. Used to be a mechanic so u learn to save time.remove bottom fan shroud (clipped in shroud part.) Remove the belts. (5 mins tops total up to here). Remove the power to the distributor so your engine won't start/spark. Put an 18"-24" breaker bar on the crank bolt and position it under your passenger side frame. I rested mine on the leaf spring and it hit on the frame itself after coupe inches of travel. Was easiest way to do it. Hit the ignition for a split second you will hear a pop/knock.. *your bolt is loose*. If you have trouble just tape the bar to the frame with any tape. Now remove crank bolt and pulley by hand. Position it in between the wide fan blades openings to remove with clearance. Pop out your seal. Then put it back together. 30 minute job. Ez =) good luck everyone. This was done on 1985 4 runner 22re.
Oct 12, 2014 | 09:47 AM
#11
Registered User
Joined: Apr 2013
Posts: 129
Likes: 0
From: BC
Just wanted to add/ bring this up. So people ate saving headaches. I did same thing. Used to be a mechanic so u learn to save time.remove bottom fan shroud (clipped in shroud part.) Remove the belts. (5 mins tops total up to here). Remove the power to the distributor so your engine won't start/spark. Put an 18"-24" breaker bar on the crank bolt and position it under your passenger side frame. I rested mine on the leaf spring and it hit on the frame itself after coupe inches of travel. Was easiest way to do it. Hit the ignition for a split second you will hear a pop/knock.. *your bolt is loose*. If you have trouble just tape the bar to the frame with any tape. Now remove crank bolt and pulley by hand. Position it in between the wide fan blades openings to remove with clearance. Pop out your seal. Then put it back together. 30 minute job. Ez =) good luck everyone. This was done on 1985 4 runner 22re.
Oct 12, 2014 | 10:18 AM
#12
Registered User
Joined: Aug 2014
Posts: 29
Likes: 0
That is a great idea. Bungee cords ftw! =)
I did it this way as well and used a bungee to secure the breaker bar to the frame. It was surprising how well it worked. Otherwise there's too much flex in the crank/drivetrain to apply adequate force with just a breaker, even in high gear with the parking brake applied.
Sep 30, 2015 | 05:04 AM
#13

Registered User
Joined: Sep 2015
Posts: 2
Likes: 0
1990 toyota pickup with 90k front main seal fail
Recently i replaced my front oil seal twice with the confidence that i was doing the job correct and still i continue too leak oil. The obvious has been gone through including tight oil pan plug also tight oil filter. Pulling the oil seal for me was a big pain and wasnt nearly as easy as the vids i watched. Had too use a brass punch and hammer the seal out both times and from there followed the rest process. When i finally decided too pull the oil pump the first time i noticed one of the 5 bolds was missing (bolt A top bolt that requires a high temp glue) and i was then convinced that this was my prob. I was not able too determine the exact length of the bolt but ran a diff bolt in there and turned it about 2 1/2 revelations into the thread. I also want too add that the second time around i ended up stripping the bolt at roughly 10ft lbs torque. Once i had everything put back together i then started the engine, checked for leaks (which i had none at the time) and took it for a county block cruise reaching speeds up too 60mph. Both times i pulled my truck into the garage im noticing oil all over the lower half of my enigine and excessive dripping from the front end. Wanted too add that this only happens while me truck is in gear at higher speeds. Could and would i be loosing this much oil out of the top bold on my oil pump?? Ive only owned this truck for a little over 2 months and didnt notice any oil leaks up until about 2 weeks ago when getting gas i had a large puddle of oil under my truck.
Sep 30, 2015 | 01:43 PM
#14
The timing cover uses different sized bolts. The one that uses the sealant is its own certain length. With out sealant it will leak. If the PO left that bolt out, I would check all the other bolts as well as they probably have them mixed up as well.
Oct 1, 2015 | 08:53 AM
#15
Registered User
Joined: Sep 2015
Posts: 2
Likes: 0
Bolt (A) length?
Thx for the reply, changed the seal for the second time and still leaking from the front around the crankshaft seal area. I double checked the bolts holding the oil pan. They were all loose and i suspect the pan/seal have never been replaced. I tightened all the oil pan bolts and took it for a test drive...still leakinh oil. Ive been looking online and calling local scrap yards looking for new oil pump bolts specifically bolt "A" the only bolt that requires sealant. DOES ANYONE KNOW THE LENGTH OF BOLT "A"??? Or know where i cam order new bolts? Thx in advance.
Oct 1, 2015 | 01:37 PM
#17

Groove worn in harmonic balancer from miles and miles and miles..... of driving.<br/><br/>


Redi-sleeve installed over harmonic balancer. Make sure to deburred edge of sleeve or it may damage new seal on installation
Some will say not the right way to fix issue. But it buys time.
Last edited by muddpigg; Oct 1, 2015 at 01:39 PM.
May 8, 2016 | 12:38 PM
#19
Registered User
Joined: Oct 2008
Posts: 101
Likes: 0
From: Covina, CA
Did this today and took all but 30 minutes. Took longer to gather and store my tools. I did have loosen belts in order to remove lower pulley. Removal was simple with the right tool. Now just have to see if that seals it up.
May 8, 2016 | 11:00 PM
#20
Registered User

Joined: Jun 2014
Posts: 254
Likes: 10
From: Honolulu, Hawaii
Nice job! I pulled my radiator, fan, etc. t replace the timing chain and same here, the crankshaft bolt came off using a long breaker bar and I tapped the starter to loosen it. The pulley just came off by wiggling so I didn't get to use my crank pulley puller.


