
Ammocan cup holder build
 Apr 18, 2012 | 09:25 PM
#1

Ammocan cup holder build
After getting a ton of info from this site I finally have something to add.
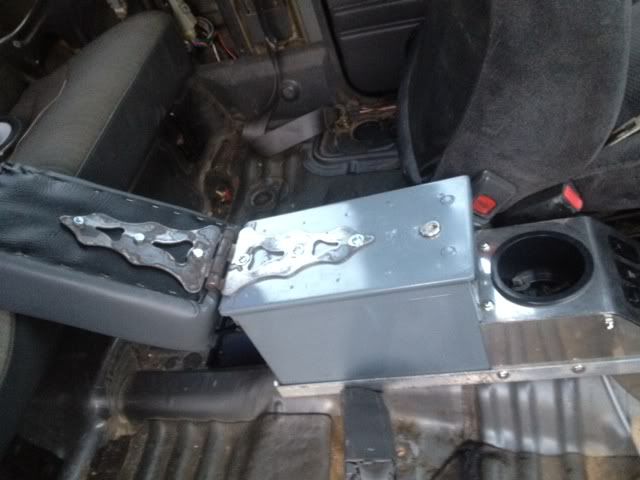
I needed an armrest and a cup holder for my 1st gen 4runner so got real creative after searching all the ammo can armrest threads. So here is what I put together....
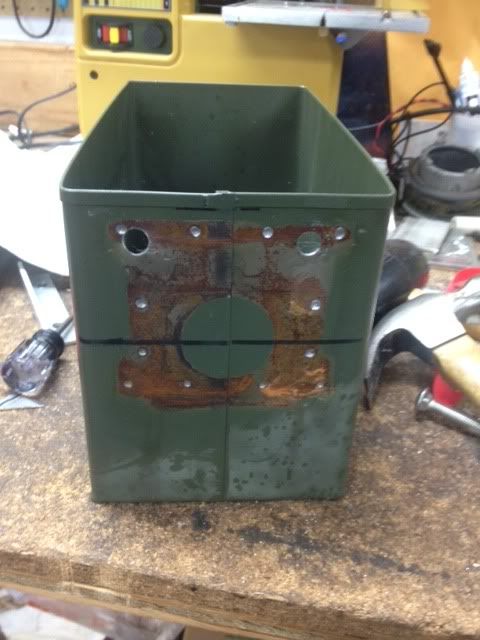
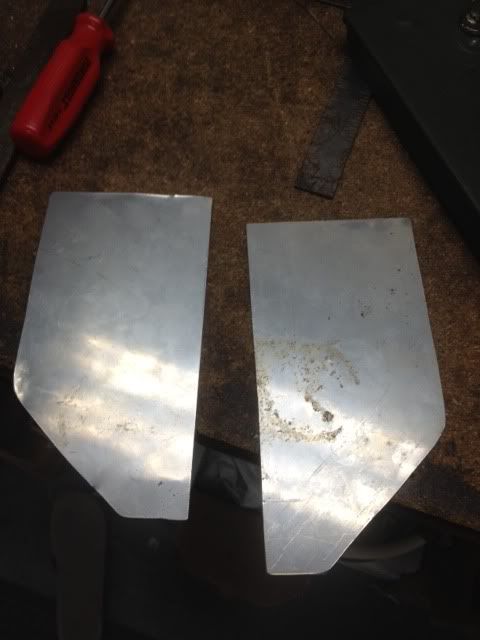
It started with this can. I took off most of the outter fixings by drilling out the welds.
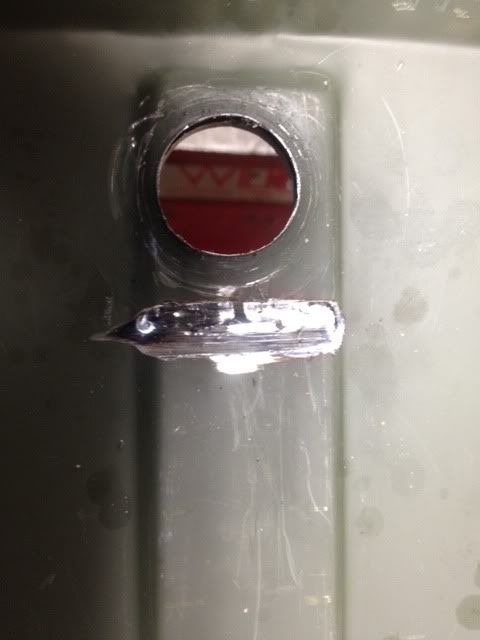
Then drilled out the lid for a lock
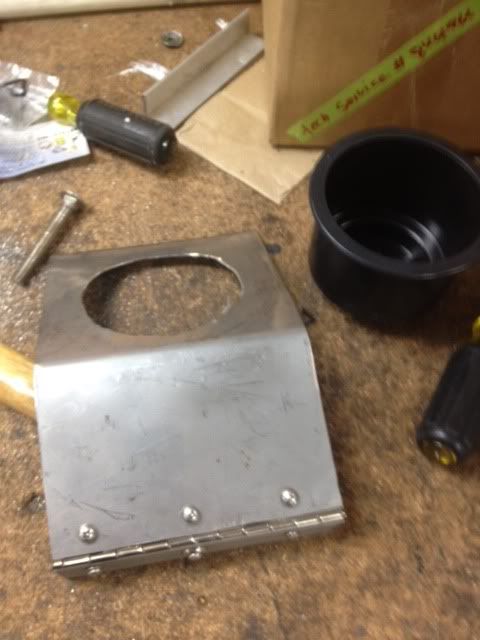
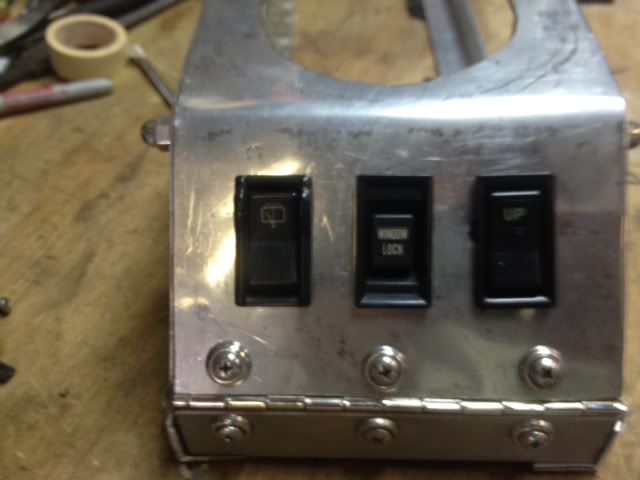
Then built up a stainless steel pannel for the switches I put a hinge on the switch pannel for easy access latter to add more switches and stuff aswell as cut a hole for cup holder.
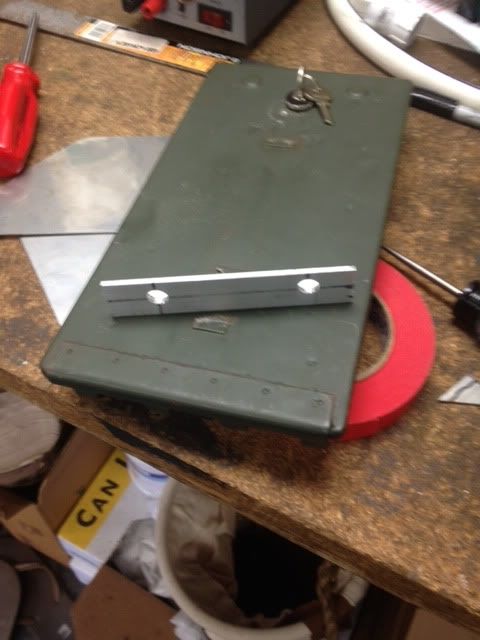
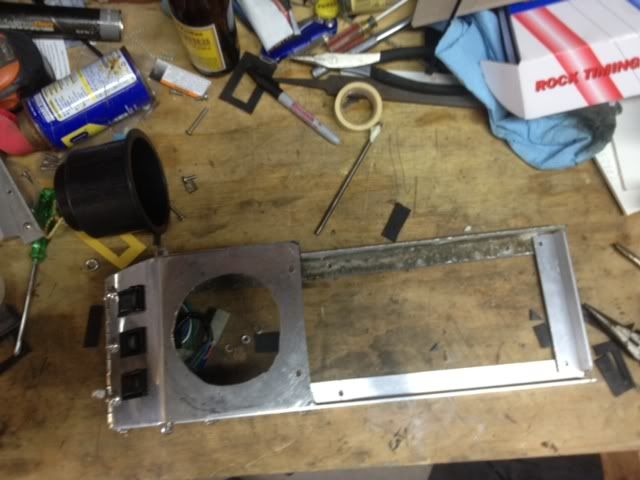
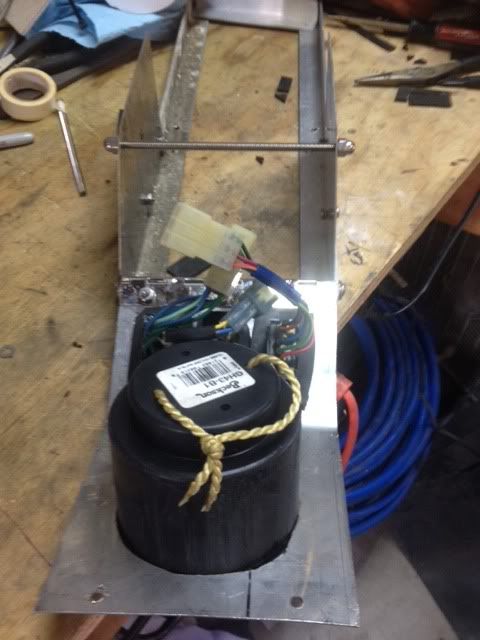
I then built a frame to hold everything together

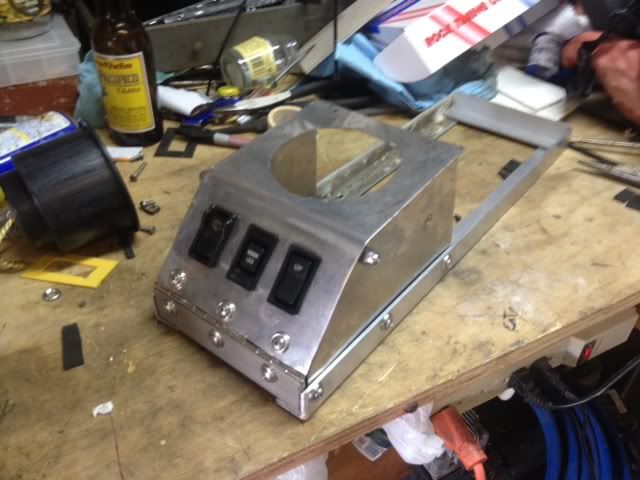
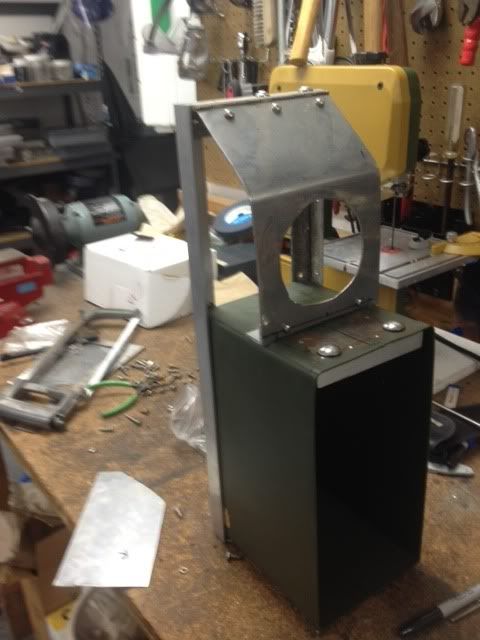
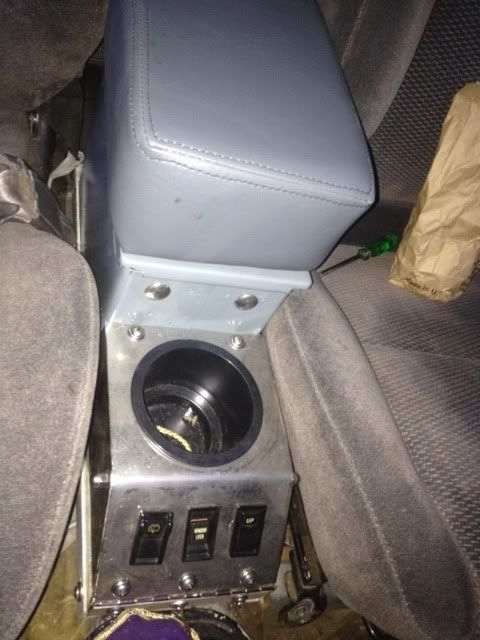
Then put the cup holder in as well as switches

Had this padded armrest made by some friends that run a canvas shop
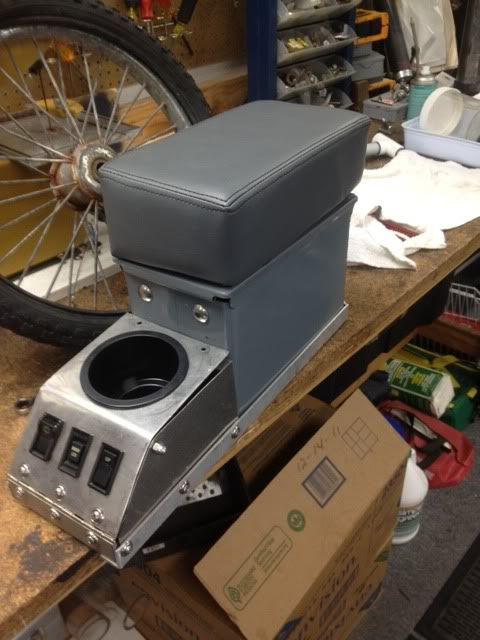
used an old fence hinge I found to hook the armrest on
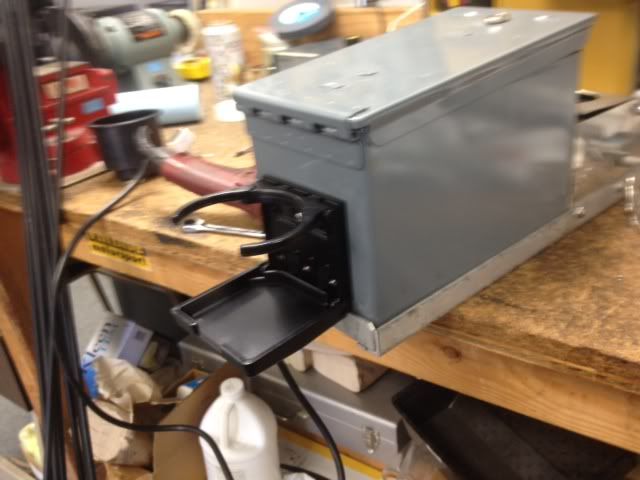
Added a rear passenger fold up cup holder
and done!
future plan is to add a pop up switch in the inside that will light up a few led red lights.
Here is the rig

I needed an armrest and a cup holder for my 1st gen 4runner so got real creative after searching all the ammo can armrest threads. So here is what I put together....
It started with this can. I took off most of the outter fixings by drilling out the welds.
Then drilled out the lid for a lock
Then built up a stainless steel pannel for the switches I put a hinge on the switch pannel for easy access latter to add more switches and stuff aswell as cut a hole for cup holder.
I then built a frame to hold everything together
Then put the cup holder in as well as switches
Had this padded armrest made by some friends that run a canvas shop
used an old fence hinge I found to hook the armrest on
Added a rear passenger fold up cup holder
and done!
future plan is to add a pop up switch in the inside that will light up a few led red lights.
Here is the rig
 I like how you took the ammo can idea, and made it your own. Good lookin' rig too.
Trending Topics
Apr 19, 2012 | 12:17 PM
#8
Thanks for the nice comments. Next mod will be 1/16 Aluminum pannels to replace the missing back passenger and rear side pannels.
Probably Byte RBx's side pannels a bit as they are slick.
Probably Byte RBx's side pannels a bit as they are slick.
Apr 19, 2012 | 12:46 PM
#9
Registered User
iTrader: (2)
Joined: Dec 2009
Posts: 2,159
Likes: 7
From: Pleasanton, CA - SF Bay Area
Let me know when you do the panel mod - on my list too.
I'm really curious how you plan to cut them for the wheel wells.
Do you plan to keep storage doors?
Will you use rivnuts to attach these?
I'm really curious how you plan to cut them for the wheel wells.
Do you plan to keep storage doors?
Will you use rivnuts to attach these?
Apr 19, 2012 | 01:21 PM
#10
I have to say that your work was inspirational! It looks AND functions which is what makes it great.
Where did you come up with the plastic insert for the cupholder?
If I didnt' already have a double-stack factory console from a 2nd gen I'd have to copy your design and make one for myself!
BTW.....aren't your switches upside down from your seating position?????
Where did you come up with the plastic insert for the cupholder?
If I didnt' already have a double-stack factory console from a 2nd gen I'd have to copy your design and make one for myself!
BTW.....aren't your switches upside down from your seating position?????
Apr 19, 2012 | 01:26 PM
#11
Registered User


Joined: Mar 2012
Posts: 7,125
Likes: 681
Apr 19, 2012 | 04:37 PM
#12
I plan on using electric sheet metal cutter (shears) for the straight section and a jig saw with a metal cutting blade. Aluminum is pretty easy to cut. I will make a wood jig / guides for the jig saw. Also since the curved sections are near the carpet interface any imperfections will be hidden.
I do plan on making stroage pannels. I will be using a combo of pop rivets sheet metal screw ect to make it work. All will be stainless.
Apr 19, 2012 | 04:45 PM
#13
I have to say that your work was inspirational! It looks AND functions which is what makes it great.
Where did you come up with the plastic insert for the cupholder?
If I didnt' already have a double-stack factory console from a 2nd gen I'd have to copy your design and make one for myself!
BTW.....aren't your switches upside down from your seating position?????
Where did you come up with the plastic insert for the cupholder?
If I didnt' already have a double-stack factory console from a 2nd gen I'd have to copy your design and make one for myself!
BTW.....aren't your switches upside down from your seating position?????
The cup holder was from West Marine a boat store so was the fold up one.
The switches maybe upside down, the rig did not come with them and I cant remember the orientation from my first 87.
Apr 19, 2012 | 04:48 PM
#14

 for a while i just left the lid off and used it to hold drinks.
Apr 20, 2012 | 08:11 AM
for a while i just left the lid off and used it to hold drinks.
Apr 20, 2012 | 08:11 AM
#18
Registered User

Joined: May 2005
Posts: 1,977
Likes: 231
From: S. FL
Absolutely excellent work, need to add something like this to my list, I'd love to have lockable storage in my center console, plus the factory height is too low for my arm to rest on.
And you added a cupholder! Love it.
And you added a cupholder! Love it.
Jan 28, 2013 | 11:49 AM
#20

Registered User
Joined: Jan 2013
Posts: 52
Likes: 0
From: Albuquerque, NM
Nice mod, I recently got an 87 and the lack of cupholders has been annoying to say the least. May have to go your route once I get everything else taken care of, the cupholders are at the bottom of my priority list...


