
Removing rear heater?
 May 8, 2011 | 03:44 PM
#1
Thread Starter
Registered User
Joined: May 2011
Posts: 23
Likes: 0
From: Nor Cal, California
Removing rear heater? Update: Success!
I dont have much use for a rear heater and would much rather have the room in the center console to store stuff in. I figured I would replace the current center console/heater unit with an ammo can for the extra storage room. I am definitely not a mechanic (which is why I am asking you  ) but I can use tools so I started working on it today not knowing what I would find.
I got the actual console off with zero problems. (pics for anyone who hasnt done it)
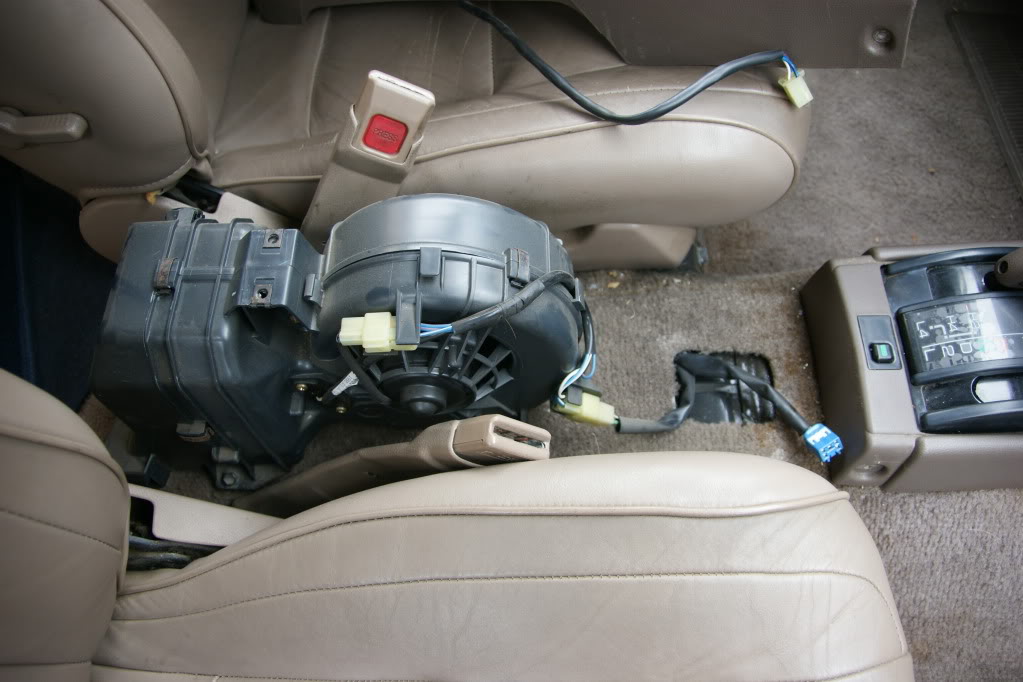
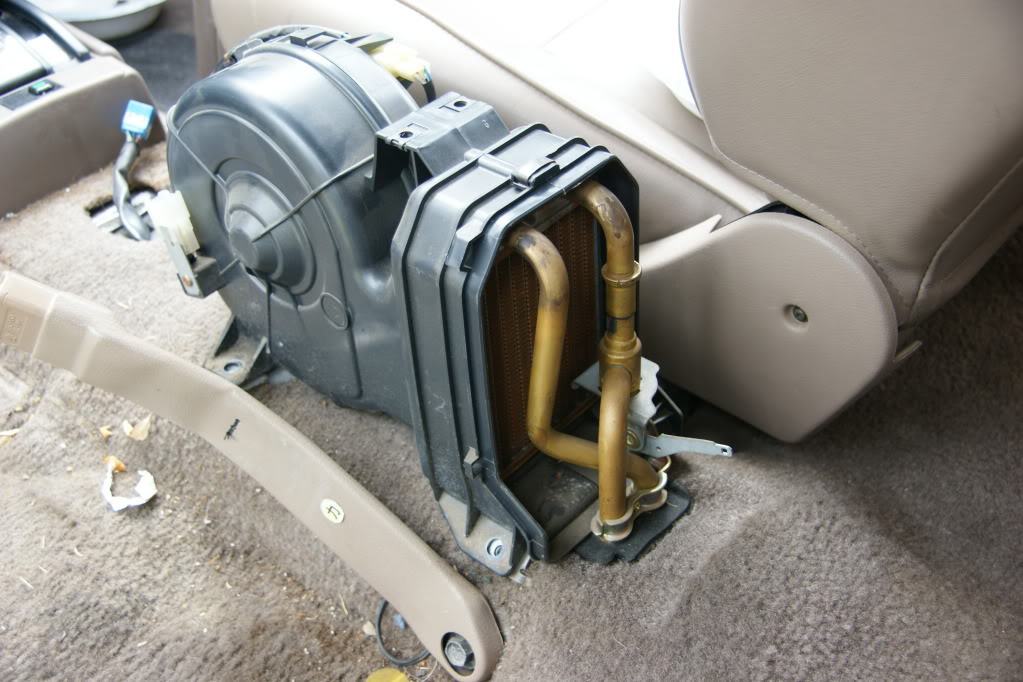
I got the 4 bolts at the base of the heater out and unplugged any connections. I was very disappointed when the heater didnt just lift out (shows my lack of understanding on how a heater works haha). So then I noticed the little cover thing on the back and figured there were more wires connected and I needed to open that up to disconnect them. 2 clips and a screw later and it was off. What a frightening contraption I found behind it.
 .
.
I searched on here and found an old thread from 4 years ago that mentions blocking the connections on the fire wall and removing the lines under the floor. If anyone could explain this to me in noob terms and help guide me through it I would appreciate it very much. I honestly have no idea what these pipes do, where they go, or how to remove them.
) but I can use tools so I started working on it today not knowing what I would find. I got the actual console off with zero problems. (pics for anyone who hasnt done it)
I got the 4 bolts at the base of the heater out and unplugged any connections. I was very disappointed when the heater didnt just lift out (shows my lack of understanding on how a heater works haha). So then I noticed the little cover thing on the back and figured there were more wires connected and I needed to open that up to disconnect them. 2 clips and a screw later and it was off. What a frightening contraption I found behind it.
.I searched on here and found an old thread from 4 years ago that mentions blocking the connections on the fire wall and removing the lines under the floor. If anyone could explain this to me in noob terms and help guide me through it I would appreciate it very much. I honestly have no idea what these pipes do, where they go, or how to remove them.
Last edited by mlrunner95; May 14, 2011 at 05:47 PM.
May 8, 2011 | 03:54 PM
#2
Registered User
Joined: Dec 2010
Posts: 1,295
Likes: 1
From: tacoma wa
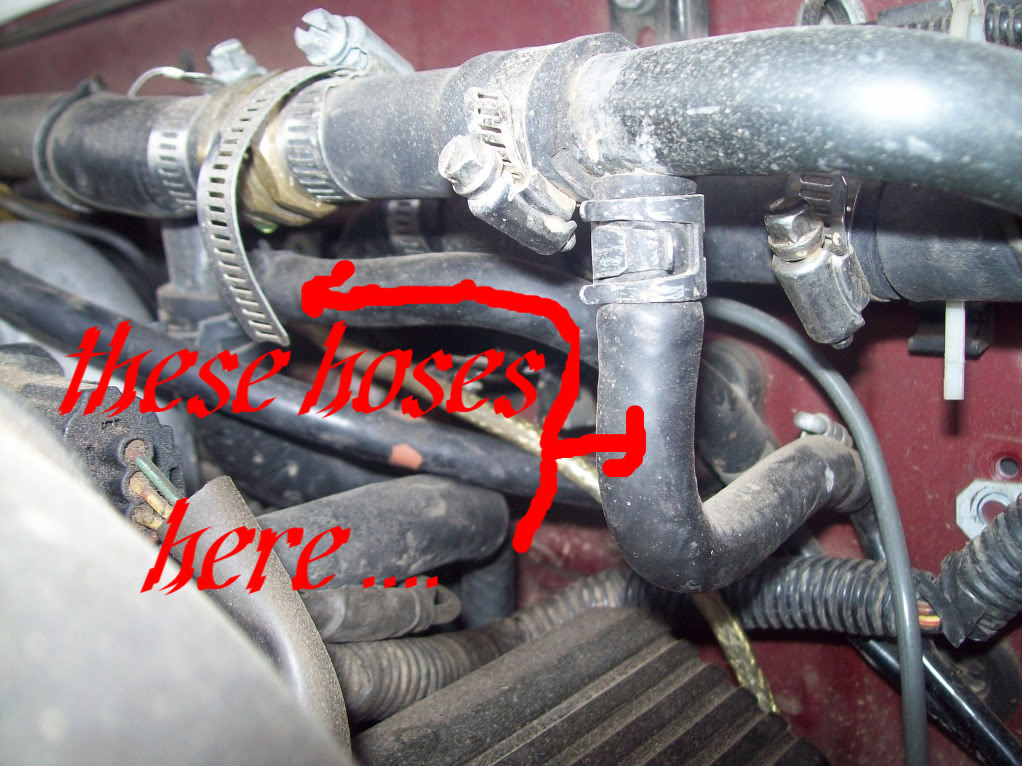
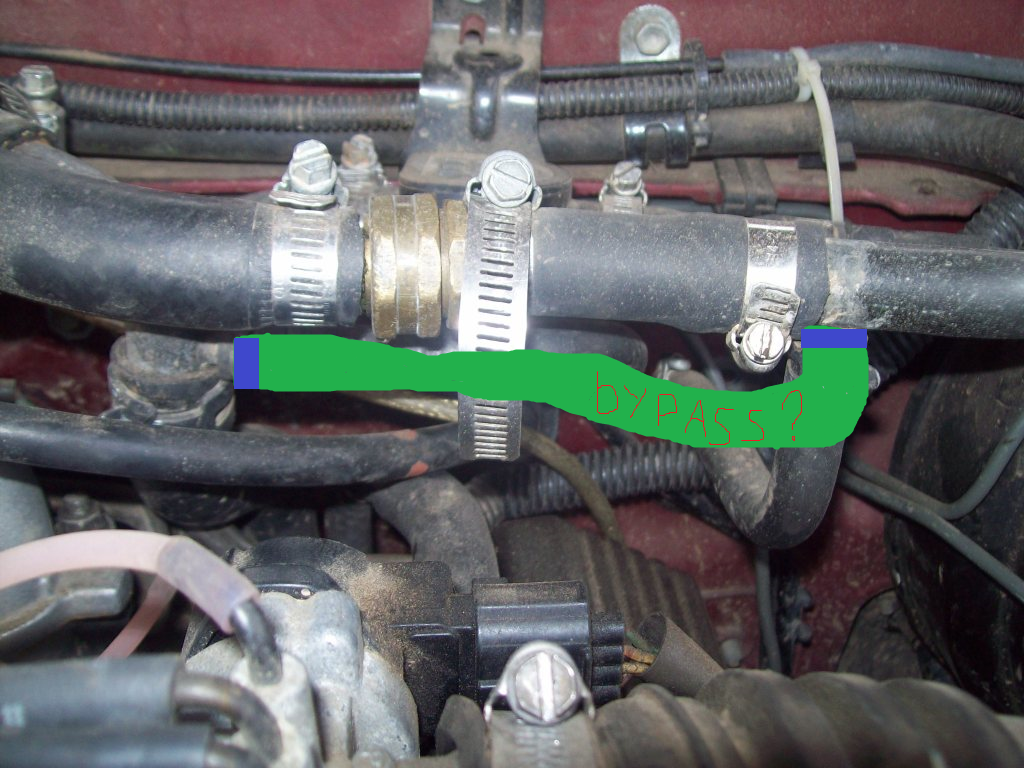
so what u want to do is go in the engine bay and u will find 5/8 hose that goes into the fire wall and a couple more that head down and back to this box, u will need to block off or just take a piece of hose and go from one pipe to the other pipe that is heading towards the back heater. then u can remove the rubber hoses that attach to the heater that comes threw the floor. then remove the heater and block off the floor so air and water dont come in.


 May 8, 2011 | 05:08 PM
#5
Thread Starter
Registered User
Joined: May 2011
Posts: 23
Likes: 0
From: Nor Cal, California
so what u want to do is go in the engine bay and u will find 5/8 hose that goes into the fire wall and a couple more that head down and back to this box, u will need to block off or just take a piece of hose and go from one pipe to the other pipe that is heading towards the back heater. then u can remove the rubber hoses that attach to the heater that comes threw the floor. then remove the heater and block off the floor so air and water dont come in.
 May 8, 2011 | 07:20 PM
#7
Thread Starter
Registered User
Joined: May 2011
Posts: 23
Likes: 0
From: Nor Cal, California
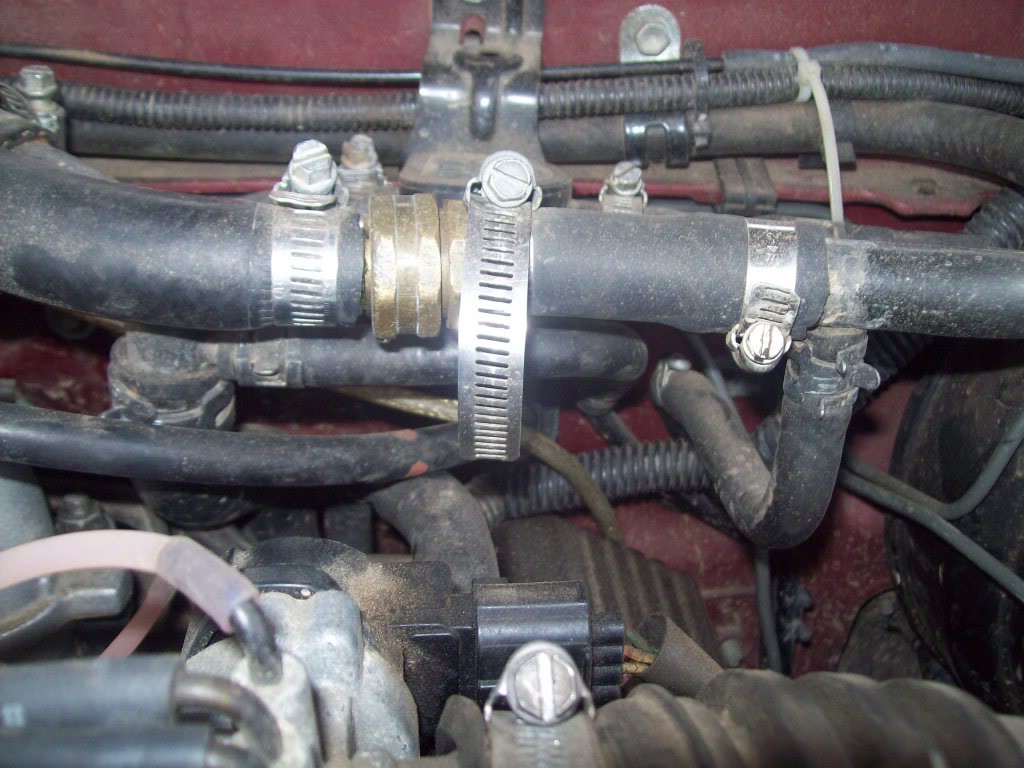
Ah hah! Found them. A picture is worth a thousand words. Thanks alot. So the plan is to undo the metal clamps, pull the 2 hoses off, and connect the 2 nubs together with a single hose. Is this right?
Trending Topics
May 8, 2011 | 08:42 PM
#10
Thread Starter
Registered User
Joined: May 2011
Posts: 23
Likes: 0
From: Nor Cal, California
May 11, 2011 | 12:42 PM
#12
Thread Starter
Registered User
Joined: May 2011
Posts: 23
Likes: 0
From: Nor Cal, California
Ok so I started working on it again today. I began by working on disconnecting the hoses in the engine bay. Once I got the first clamp off and started wiggling the hose off, I heard some decompression and the hose started dripping coolant. I literally JUST had the car worked on for a coolant leak so the sight of more coolant scared me lol. I clamped it back on and figured I would come back on here to make sure im doing it right.
Should I expect coolant to come out? If so, is it a few drops or a flowing river?
Should I have closed some sort of valve before disconnecting the hoses?
Am I doing the wrong hose?
Should I expect coolant to come out? If so, is it a few drops or a flowing river?
Should I have closed some sort of valve before disconnecting the hoses?
Am I doing the wrong hose?
May 11, 2011 | 12:46 PM
#13
Registered User
Joined: Apr 2010
Posts: 815
Likes: 0
From: Kingston, Ontario CANADA
Ok so I started working on it again today. I began by working on disconnecting the hoses in the engine bay. Once I got the first clamp off and started wiggling the hose off, I heard some decompression and the hose started dripping coolant. I literally JUST had the car worked on for a coolant leak so the sight of more coolant scared me lol. I clamped it back on and figured I would come back on here to make sure im doing it right.
Should I expect coolant to come out? If so, is it a few drops or a flowing river?
Should I have closed some sort of valve before disconnecting the hoses?
Am I doing the wrong hose?
Should I expect coolant to come out? If so, is it a few drops or a flowing river?
Should I have closed some sort of valve before disconnecting the hoses?
Am I doing the wrong hose?
Just sounds like to me that the coolant is what was in the line between the rear heater and your engine bay side.
May 11, 2011 | 01:08 PM
#14
Thread Starter
Registered User
Joined: May 2011
Posts: 23
Likes: 0
From: Nor Cal, California
May 11, 2011 | 02:23 PM
#15
Registered User
Joined: Apr 2010
Posts: 815
Likes: 0
From: Kingston, Ontario CANADA
lol...sorry buddy, I'm in the same seat you are when it comes to this. Remember I'm one of the guys that is following your progress so that I can do the same to mine.

 May 11, 2011 | 02:40 PM
#17
Thread Starter
Registered User
Joined: May 2011
Posts: 23
Likes: 0
From: Nor Cal, California
May 11, 2011 | 02:45 PM
#18
Registered User
Joined: Apr 2010
Posts: 815
Likes: 0
From: Kingston, Ontario CANADA
May 11, 2011 | 04:10 PM
#19
Thread Starter
Registered User
Joined: May 2011
Posts: 23
Likes: 0
From: Nor Cal, California
Also, I just had new coolant put in on Monday. Is there a way to drain it, and then put the same coolant back in once I am done? All the guides I have seen for draining coolant involve flushing it out with water. I figure that will dilute the coolant too much.
May 11, 2011 | 05:12 PM
#20
Registered User
Joined: Aug 2010
Posts: 231
Likes: 0
From: Dayton,NV
Ok so a little lesson on that heater! It is a heater core. How it works: When your engine warms up, the coolant also warms up. The coolant then goes through the tube and into that "contraption" as you called it, (that is the heater core). The water circulates through that and warms it up also. When the fan is turned on it blows air across the heater core, in turn warming up the air. Giving you nice warm feet in the winter! Ok so this is how you are going to want to do this. First put a towel down under the hoses that you are going to disconnect in the engine bay. Make sure the lever on your heater control on the dash is all the way to the cold side. Unhook the hoses in the engine bay and bypass them. Some coolant is going to come out, hence the towel. After you have bypassed the two hoses you are going to crawl under the vehicle and trace those two steel lines back to just behind the transfer case. They might be a little hard to find because they are protected by a metal heat shield. You will find them just behind the transfer case and going up into rubber hoses and then into the cab. Get a bucket and some towels. carefully unhook the rubber lines and let the coolant flow into a bucket. After all the coolant has drained (its just what was inside the heater core and the lines, not from your motor) you can then proceed to pull out the entire heater from inside the cab. Be sure to top off the coolant when you are done (shouldnt be too much). Let us know how it works out. Any other questions feel free to ask. If you need any pictures just let me know and I can get some for you. Good luck!


