When you click on links to various merchants on this site and make a purchase, this can result in this site earning a commission. Affiliate programs and affiliations include, but are not limited to, the eBay Partner Network.
Yes' that was a pinhole. I sealed it with Dynapro as well.
I think there was also sealer there, but came out when I cleaned the metal. I should have sealed it earlier with Dynapro555 which I also have. I'm wondering, though...
1) Would the same urethane adhesive used for the windshield work better than Dynapro 555?
2) Would I get luckier with the Dynapro that Nakedrunner?
3) What surface would urethane or dynapro stick best on - POR-15 or clean, bare metal?
3) Any feedback from the bodywork experts?
1) No, imo. Different purposes, obviously.
The adhesive we've all experienced "weaping" with I assume, it will soften in the heat for instance. It is very tacky and the work time is very low like 20-30 minutes.
The sealer has a longer working time, two hours. Is not tacky like the adhesive, "Brushable" translates to if it doesn't go where you want force it in and presto.
2) 95% prep work, 5% application. take those random odds away. I'm not familar with that story line but one miss placed greasy fingerprint and you have a non adhesion point.
3) Bare metal, well actually properly prepared bare metal. POR-15 leaves a hard shiny surface, I'm sure it can be preped for paint and such but I believe it's generally for undercarriage use and such no one bothers.
3) NO expert! Too late now but optimally.. Go to bare metal with a chemical stripper, taking extra effort to get a clean joint as deep between the panels as possible. Apply a cold galvanizer (Zinc-sele?), followed by self etching primer, then seam sealer, and finally your top coat of paint.
The photo labeled "Glass installed", shows a rather large appearing gap on that body panel seam. And in the video it appears there maybe a crack in the roof panel rising from that joint also. I suspect these did not get fully sealed. Is the gap between the glass and body molded with urethane, that keeps intrusion from "driven" rain, run down, and puddling.
Mine has the aftermarket generic gasket and who ever did it I think did a great job getting the corners to lay down for the most part. *shrug* Sure mine leaks water I know it leaks air thru the rock chip HAH!
All said, assuming that gap is still there, fill the gap between the body and glass to stop any puddling along the top with Urethane or rubber gasket. Fill the seams till they are level with the outer panels, puddles/low-spots are bad.
Just how certain are you that isn't coming in the sun roof or something above, capillary action will draw water upwards from that seam but "water flows down hill" is a generally good rule of thumb. As a last ditch effort if you can't seal it you could make it bigger then it wouldn't run up hill?
1) No, imo. Different purposes, obviously.
...Go to bare metal with a chemical stripper, taking extra effort to get a clean joint as deep between the panels as possible. Apply a cold galvanizer (Zinc-sele?), followed by self etching primer, then seam sealer, and finally your top coat of paint.
Yes, will try that on the pinch-weld seam.
The photo labeled "Glass installed", shows a rather large appearing gap on that body panel seam.
Yes, the gap is normal. The chrome trim would hide it, as it would the dirt and moisture which hasten rusting. The adhesive thickness I think it's typical, about 3/16" thick between pinch-weld and glass.
And in the video it appears there maybe a crack in the roof panel rising from that joint also. I suspect these did not get fully sealed. Is the gap between the glass and body molded with urethane, that keeps intrusion from "driven" rain, run down, and puddling....
... fill the gap between the body and glass to stop any puddling along the top with Urethane or rubber gasket. Fill the seams till they are level with the outer panels, puddles/low-spots are bad.
No sun-roof, and I don't see any crack on the roof, although there are lines that may look like cracks, those are where paint and bare, sanded metal meet.
Interesting, because when it rains overnight (not driven) it also leaks. However when I hoses the suspect corner down I was not able to make it leak. Which suggests "puddling"
Yes... I'm thinking that too... Fill it up to include the seam in on the pinch-weld.
Wondering if I should I fill the gap with the Dynatron 550 sealer or maybe just buy same primer and urethane as Safelite uses (Sika flex), then paint over it to protect it from UV ray
Mine has the aftermarket generic gasket and who ever did it I think did a great job getting the corners to lay down for the most part.
hmmm... gasket only like they did the volkswagen beetle or urethane adhesive with gasket around the glass?
3) Bare metal, well actually properly prepared bare metal. POR-15 leaves a hard shiny surface, I'm sure it can be preped for paint and such but I believe it's generally for undercarriage use and such no one bothers.
3) NO expert! Too late now but optimally.. Go to bare metal with a chemical stripper, taking extra effort to get a clean joint as deep between the panels as possible. Apply a cold galvanizer (Zinc-sele?), followed by self etching primer, then seam sealer, and finally your top coat of paint.
What makes you say bare metal? All the windshield channels I've seen (not too many, granted, but a few) were painted.
Side note, that "grey" metal is just another form of iron oxide, I *think* Fe3O4, caused by the regular red Fe2O3 facilitating oxygen mobility deeper into the metal where higher pressures and a lower oxygen ratio favors a different chemical outcome. Point is it's still rust, hence my insistence on chemically treating it. POR should chemically treat it also, my concern is I've heard mixed reviews about putting POR on the clean shiny metal portion.
Here's my plan - phosphoric acid https://en.wikipedia.org/wiki/Phosph...ersion_coating
Haven't decided if I will paint after that yet or not. Need to research what would work best as a topcoat. I don't think POR makes sense but I need to research it's chemistry more.
Also considering this as an undercoat followed by fluid-film. But that's another thread.
The MoreFunner and I will get our kicks on Route 66 (from So Cal to Amarillo, TX, Down to Lubbock, To Dallas, then to Houston area... possibly New orleans, too) between 15 December and New Year. Would be great to meet anyone along that corridor. Pls PM me if you're nearby.
Although I do my best to keep the #rad4runner in good shape, recommendations for for competent and honest shops along the way would also be great.
What makes you say bare metal? All the windshield channels I've seen (not too many, granted, but a few) were painted.
Side note, that "grey" metal is just another form of iron oxide, I *think* Fe3O4, caused by the regular red Fe2O3 facilitating oxygen mobility deeper into the metal where higher pressures and a lower oxygen ratio favors a different chemical outcome. Point is it's still rust, hence my insistence on chemically treating it. POR should chemically treat it also, my concern is I've heard mixed reviews about putting POR on the clean shiny metal portion.
Here's my plan - phosphoric acid https://en.wikipedia.org/wiki/Phosph...ersion_coating
Haven't decided if I will paint after that yet or not. Need to research what would work best as a topcoat. I don't think POR makes sense but I need to research it's chemistry more.
Also considering this as an undercoat followed by fluid-film. But that's another thread.
Regarding the first #3, It is mentioned in the 3M app notes if I am remembering correctly that bare metal is the best substrate. I can see that as 3m hedging their bet so to speak by taking out the middle man.
Grey vs Shiny metal. This is why I am in the chemical stripper club. I'm not sure what the factory dip solution is but it's better than uncontrolled oxidization.
POR is UV sensitive and requires a top coat, particularly when directly exposed. Also note the literature never states it will treat or convert the rust that is there, it's claims are all about porosity, sealing and chip resistance.
Note that acid treatment will leave a porous finish and need sealed still.
RAD
If you don't have a sun roof that is one possibility removed. . if you are certain that panel joint is fully sealed that just leaves the two nearest window clips as likely causes and the drip rail as a wild shot. In the pre-sealed photos the one clip site below the panel seam looked really bad in the photos it obviously had some good sized holes, and the upper clip looked like maybe some pin holes. My concerns are that lateral seam at the top of the A pillar, the crack you might have missed and the channel not being filled level. The sheet metal is kind of sloppy, note the gap between the inner and outer panel at radius-ed section of the corner and between the fourth and fifth spot weld across the window top, and presumably had factory seam sealer.
I have rubber and probably glue also. The corners are sealed to the cab so they don't bulge at the least, but I don't know if my rubber is trim or a gasket. There was a really good thread about the available options, From memory there is the trim that has a simple T profile, and a trim shaped like TC that wraps just the glass, then the gasket an I-beam type that wraps the frame and glass. The first two are glued in the last is not, they might give you some grief over installing the last type since it's not as safe/secure.
I have a clean through rock chip so I know exactly where mine leaks, its right in the middle of the passengers face. Eventually I'll have it replaced presumably with a similar style to what is in it now, but I don't DD it so at this point I don't know for sure it doesn't leak like a sieve on the highway or something strange.
Regarding the first #3......
EDIT: I forgot to mention where I spotted those issues.. In the video of the cleaned surfaces (https://www.yotatech.com/forums/f199...l#post52342726) somewhere around 3-7 seconds covers those areas.
Thanks, Co_94PU.
Safelite glass tech also said that it is possible to apply the urethane adhesive with its proper primer directly on bare metal. Safelite uses Sika brand urethane but I think that also applies.
The pitted portions where the trim clips were actually did not have holes, except for the pin-hole on the A-pillar side, passenger side, top left on pic below, but I sealed that with Dynatron 550 before POR-15 ...
Idea that leak is elsewhere but water wicks to where it drips is also quite possible. Will investigate that.
My next steps are:
1) Spray soapy water on suspect leak points then blow compressed air from inside. I hope canned compressed air will be enough because I do not have a compressor handy.
2) Ask Safelite if it could help me obtain urethane adhesive so I can seal pinch weld seam and the fill the gap above and at the corner to improve sealing, and to prevent pooling. I think using Urethane instead of other sealants, because of better compatibility would give better adhesion. IF safelite can do the seal and fill the gap, so much better. I understand that Urethane and the POR-15 are both UV-sensitive so I will prime and paint over the gap.
Last edited by RAD4Runner; Apr 6, 2019 at 09:28 PM.
My cab kinda looks like that spot under where the clips used to go.. All the way across it and half way back, it has some paint on it but it still feels like the moon's surface. So it could be worse right ;-)
It looks like the outer sheet.. Uhm the cab sheet forms the outer A pillar also. That cut out seen above, that is just a cut out so it conforms not a seperate cap piece. I'll have to hunt around for pictures of that, I am curious.
I thought about it before and didn't mention it.. IF you put some of that ugly tape back across the top and it stops weeping over night I can quit suggesting leaks in the body panels and blame it on the glue also. Is that adhesive heat workable, can you get it hot and apply some pressure directly to it. The theory behind that is the glass would pull away from the body slightly after installed and left a pin hole or such.
I had a look at mine from the inside it definitely has both glue and rubber. It's maybe more of a bull nose than flat face, but I still have no idea of the full profile.
... IF you put some of that ugly tape back across the top and it stops weeping over night I can quit suggesting leaks in the body panels and blame it on the glue also. Is that adhesive heat workable, can you get it hot and apply some pressure directly to it. The theory behind that is the glass would pull away from the body slightly after installed and left a pin hole or such.
....
Yes, I'll try covering the entire top gap with good tape before next rain and see... but when? (I'm in So Cal - LOL)
Most likely not workable with heat. The urethane's pretty firm.
Yes, theoretically, if all the windows on the truck are closed and one slams a door while adhesive is still soft, the pressure could push glass away from body and/or cause pin-hole leaks in adhesive. I hope the soapy water test can help detect that. I hosed down the corner in question for several minutes but no leaks at all.
I dont live far off from Route 66 but am further north then where you are going. I am about 5 hours north of your closest area. Some really cool sites and places along the way. Mom and Pop shops still exist in some places and are well worth checking out. You will find some great food in some of them. Where 66 meets Kansas and Missouri, there is a little town that has cars and trucks that are twins to CARS cartoon show that Larry the Cable guy voices on. Kind of cool. If by chance you get up this way I would meet up with you. Have a great trip and a Merry Christmas.
I dont live far off from Route 66 but am further north then where you are going. I am about 5 hours north of your closest area.
Thanks, Terry.
Yes, I'll be heading southeast to see family in Tx (my cousin who used to live in O'Fallon, MO moved to Plano, TX), and if I have time visit new Orleans.
.
Yes, I've been making a list of points of interest, including those featured in "Cars".
All,
As I mentioned earlier, I'll be driving from So Cal to Houston, Tx along Route 66.
Planned route is here:
Recommendations would be appreciated for:
1) Non-technical but scenic off-road segments, AND
2) Your trusted mechanics along the way, in case I'd need one.
Re: Scenic / Dirt Route
I found "Junction 156 to Cuervo (West to East). From the description here this is what I came up with:
If anyone is familiar with this, is this correct? Is this a scenic route, but NOT too technical?:
I also saw something about "La Bajada Switchbacks" (near Santa Fe, NM?), but it might be too technical for my taste.
Last edited by RAD4Runner; Dec 15, 2016 at 05:35 AM.
On one of my trips from home to San Diego, I went to the town of Tombstone and really enjoyed it. Nothing like you see in the movies but it did have some history to it. Out in the middle of nowhere. I dont know of any mechanics in that area. Seems like I took route 54 one time or the southern most route and the speed limit was 55. A trucker told me not to worry about the speed limit and I met a cop in the oppisite direction doing 85 and he never looked at me twice and he was hauling butt as well. It is all dessert out there and nothing to really see on 54. I dont recall going on the route you are showing unless it is I-40.
Last edited by Terrys87; Dec 15, 2016 at 06:50 AM.
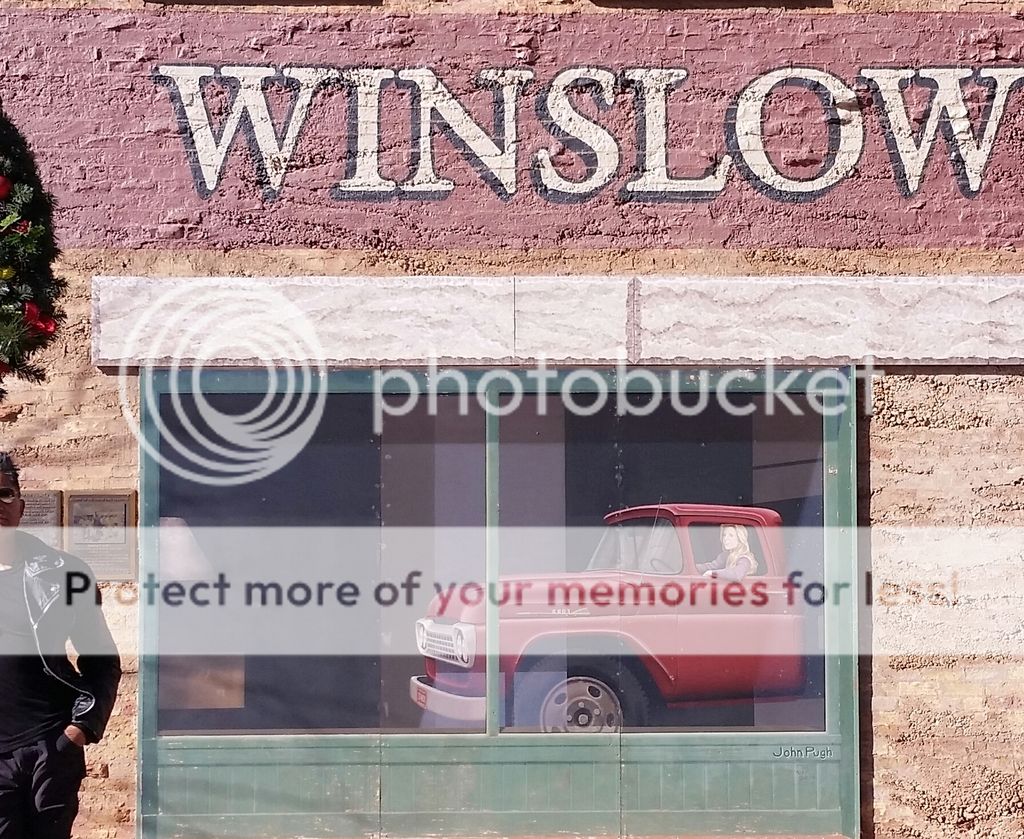
STANDING ON A CORNER IN WINSLOW, ARIZONA...
Red Yota stopped to see the girl in a flat-bed Australian model Ford
SENT RESUME TO FRIEND FROM ROADSIDE, LEAVING AZ...
SNOWED IN SANTA ROSA, NM.
Love's is a God-send for travelers. Even the floor towel felt warm from the dryer!
ORIGINAL SECTION FROM SANTA ROSA TO CUERVO, NM
(West Hwy156 then northeast on Cross Road). Nice dirt road with ruts, but can be done with high-clearance 2WD vehicles unless muddy or snow-filled:
CHRISTMAS ON ROUTE 66:
ORIGINAL SECTION BETWEEN SAN JON, NM AND GLENRIO... RIGHT AT BORDER...
Here, I met a couple, running low on gas, whom Google map sent through this dirt road to gas station. Mother of all ironies... They have a Highlander hybrid and he sells hybrid for a living. I shared with them one gallon out of my spare tank...
Last edited by RAD4Runner; Jun 15, 2020 at 08:41 AM.
I've always wanted to go there. Sounds like it's such a fine sight to see.
Yes, great route. The original sections off the interstate are really cool. There is "Bajada Switchbacks", near Santa FE, NM that I wished I had tackled. real off-road conditions.
I wish I had more time, but realized I had pastries from So Cal so I cold stay on the rad that long
The section between Santa Rosa and Cuervo, NM is a single-lane dirt road. High-clearance vehicle is strongly recommended because of the ruts, but 4WD is not necessary except when it's muddy or there's snow. This is the roughest portion. Not technical at all.
Glad to see you are taking that good looking rig out on another adventure. Keep the pics coming RAD. Hows the windshield holding??
Thanks!
It was raining when I left So Cal. Windshield leaked. Still gotta hunt it down but seems like it's from a seam somewhere. Will try soapy water, and a way to pressurize the cabin... Maybe large vacuum cleaner exhaust into the cabin with vents sealed.
Originally Posted by osv
where's the girl in the flatbed ford?
Turns out it's an Australian model truck - LOL!
Last edited by RAD4Runner; Dec 20, 2016 at 09:38 AM.
Thanks!
It was raining when I left So Cal. Windshield leaked. Still gotta hunt it down but seems like it's from a seam somewhere. Will try soapy water, and a way to pressurize the cabin... Maybe large vacuum cleaner exhaust into the cabin with vents sealed.
i had a cabin leak from the radio antenna seal, of all things.

 Nov 27, 2016 | 07:08 PM


 . if you are certain that panel joint is fully sealed that just leaves the two nearest window clips as likely causes and the drip rail as a wild shot. In the pre-sealed photos the one clip site below the panel seam looked really bad in the photos it obviously had some good sized holes, and the upper clip looked like maybe some pin holes. My concerns are that lateral seam at the top of the A pillar, the crack you might have missed and the channel not being filled level. The sheet metal is kind of sloppy, note the gap between the inner and outer panel at radius-ed section of the corner and between the fourth and fifth spot weld across the window top, and presumably had factory seam sealer.