
TJM-welded on "wings"
 Jun 20, 2007 | 05:20 PM
#1
Thread Starter
Contributing Member
Joined: Apr 2003
Posts: 1,579
Likes: 0
From: Raleigh NC
TJM-welded on "wings"
This is a cosmetic thread but the first welding I did on my truck that took longer than 5 minutes so I'm pretty proud of myself. I'm 4 weeks into a welding course at a local CC.
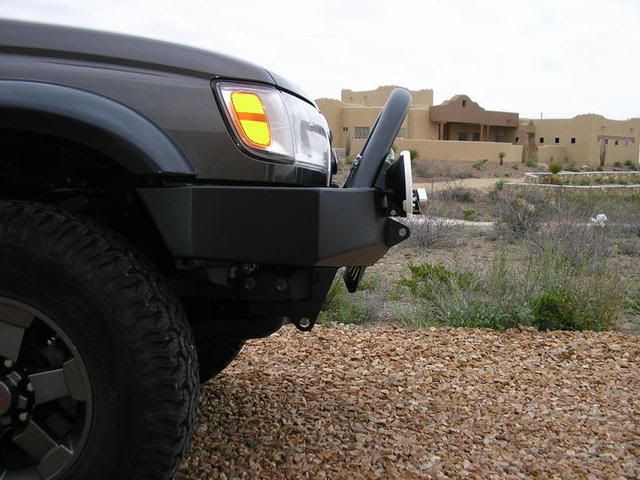
I prefer the looks of a TJM T-15 to the ARB front bumper due to the larger hoops and swept back angles. I think it looks meaner and more aggressive but thats just a cosmetic thing. The one feature i hated of the TJM was the bolted on "wings" so i decided to fix them. Total time was a little over 3 hours and not at all difficult for anyone with moderate welding skills. I butchered the first side but the second side turned out fairly well so I documented it in case someone else might like the idea and try it for themselves.
I also plan to weld the frame mount to the bumper in addition to the bolt on positions to keep it from shifting during winching.
Jun 20, 2007 | 05:21 PM
#2
Thread Starter
Contributing Member
Joined: Apr 2003
Posts: 1,579
Likes: 0
From: Raleigh NC
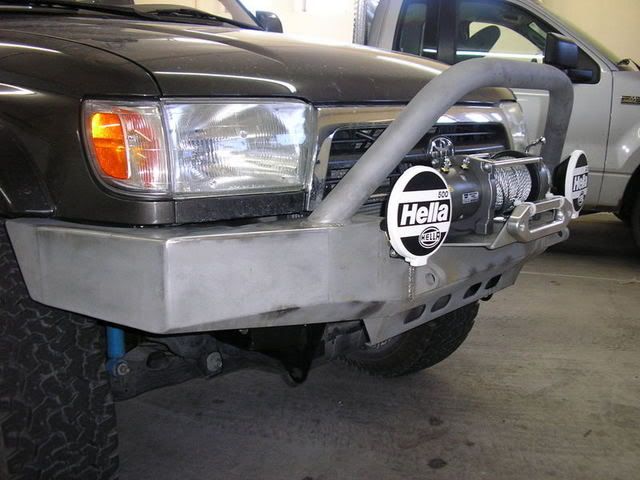
Starting point:

Ground away powder coat:

Bolted back together, notice the fairly large valley that needs to be filled, and the very open gaps on the sides that the rubber piece normally filled up.

Ground away powder coat:
Bolted back together, notice the fairly large valley that needs to be filled, and the very open gaps on the sides that the rubber piece normally filled up.
Last edited by NCSU-4runner; Jul 18, 2008 at 04:54 AM.
Jun 20, 2007 | 05:26 PM
#3
Thread Starter
Contributing Member
Joined: Apr 2003
Posts: 1,579
Likes: 0
From: Raleigh NC
Three passes to fill the valley, i had to take my time since it's only 1/8th inch steel here and the voltage control on my welder only has 4 positions for a very rough voltage adjustment. 3 didn't seem to be hot enough, and 4 was getting very hot very fast. I'm spoiled by the badass welders I use in class that have 1/10th of a volt adjustment with digital readout etc. Two additional tack-tack-tack style passes were needed in front and behind that weld on the top after grinding to achieve a smooth surface.

Top down weave weld, I've only practiced that style for one session in class so its a little sloppy at first, but my last 1/3 of the length turned out by far the best. I barely had to grind that section.

Top down weave weld, I've only practiced that style for one session in class so its a little sloppy at first, but my last 1/3 of the length turned out by far the best. I barely had to grind that section.
Last edited by NCSU-4runner; Jul 18, 2008 at 04:59 AM.


 Jun 20, 2007 | 06:16 PM
#7
Thread Starter
Contributing Member
Joined: Apr 2003
Posts: 1,579
Likes: 0
From: Raleigh NC
the flash of the camera pics up the groves left by the grinder much more than you actually see normally, but yes I could get some sanding discs and make it look like it came that way.
Trending Topics
Jun 20, 2007 | 06:19 PM
#8

 Jun 20, 2007 | 07:08 PM
#10
Thread Starter
Contributing Member
Joined: Apr 2003
Posts: 1,579
Likes: 0
From: Raleigh NC
Right now the wings are stock but I'll be shortening them to match the fenders when I start chopping into the body, and yes the same way as Steve does for people. If you want yours done bring it to Raleigh and I'll have at it. My welding is getting better every day.
 Jun 20, 2007 | 08:37 PM
#12
Contributing Member
Joined: Jun 2005
Posts: 3,415
Likes: 10
From: Phx, AZ
Nice idea and nice work. I don't necessarily mind the wings bolted, but don't like how much you can flex them.
I have been thinking of trying to weld a brace of sorts underneath to strengthen/ stiffen the wings up. For some unknown reason, I never thought of welding the wings at the same time.
Seems like I can have improved performance and cosmetics. Thanks for the idea.
I have been thinking of trying to weld a brace of sorts underneath to strengthen/ stiffen the wings up. For some unknown reason, I never thought of welding the wings at the same time.
Seems like I can have improved performance and cosmetics. Thanks for the idea.
Jun 20, 2007 | 09:38 PM
#13
Banned
Joined: May 2006
Posts: 0
Likes: 0
Right now the wings are stock but I'll be shortening them to match the fenders when I start chopping into the body, and yes the same way as Steve does for people. If you want yours done bring it to Raleigh and I'll have at it. My welding is getting better every day.


