The Fab Shop Tube buggies, armor protection and anything else that requires cutting, welding, or custom fab work

rotten old yota frame

Thread Tools
 
Search this Thread
 
Old Sep 19, 2013 | 07:10 AM
  #21  
Yotaleigheehoo's Avatar
Registered User
 
Joined: Feb 2013
Posts: 45
Likes: 0
Looks broths. Keep the pics coming!
Reply
Old Oct 18, 2013 | 06:16 AM
  #22  
stovtop's Avatar
Thread Starter
Registered User
 
Joined: Nov 2008
Posts: 25
Likes: 0
From: Thunder Bay Ont. Canada
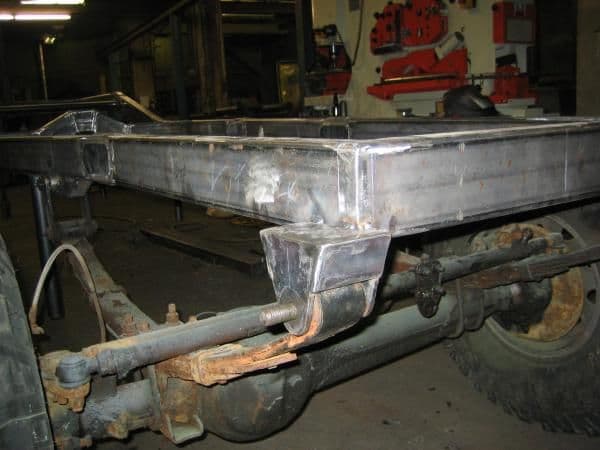
more pics coming computer crapped out ive built it all off measurements of the existing frame even though it rusted out its still a pretty good base mark as for weight ive no real concerns about that just have to add more ponies and shed weight elsewhere thanks for the support and compliments ill post where im at later in the week


chow
Reply
Old Oct 18, 2013 | 06:20 AM
  #23  
HighLux's Avatar
Registered User
 
Joined: May 2010
Posts: 2,587
Likes: 7
From: Ofallon Missouri
Like where this is going. A man could start a nice side business, or even full time business making frames for these trucks.

Hell...I'd pay couple grand for a brand new frame for my trekker.

You are a toyota pioneer my freind.
Reply
Old Dec 8, 2013 | 12:18 PM
  #24  
stovtop's Avatar
Thread Starter
Registered User
 
Joined: Nov 2008
Posts: 25
Likes: 0
From: Thunder Bay Ont. Canada
soo here is some more pics finally
first is a pic of typical frame gusseting on the splices
Reply
Old Dec 8, 2013 | 12:20 PM
  #25  
stovtop's Avatar
Thread Starter
Registered User
 
Joined: Nov 2008
Posts: 25
Likes: 0
From: Thunder Bay Ont. Canada
here is the rear shackle of the front suspension tacked in
Reply
Old Dec 8, 2013 | 12:22 PM
  #26  
stovtop's Avatar
Thread Starter
Registered User
 
Joined: Nov 2008
Posts: 25
Likes: 0
From: Thunder Bay Ont. Canada
this is front suspension hanger tacked in place
Reply
Old Dec 8, 2013 | 12:23 PM
  #27  
stovtop's Avatar
Thread Starter
Registered User
 
Joined: Nov 2008
Posts: 25
Likes: 0
From: Thunder Bay Ont. Canada
front suspension test fit prior to welding
Reply
Old Dec 8, 2013 | 12:24 PM
  #28  
stovtop's Avatar
Thread Starter
Registered User
 
Joined: Nov 2008
Posts: 25
Likes: 0
From: Thunder Bay Ont. Canada
front and back rear suspension brackets tacked in place

Reply
Old Dec 8, 2013 | 12:25 PM
  #29  
stovtop's Avatar
Thread Starter
Registered User
 
Joined: Nov 2008
Posts: 25
Likes: 0
From: Thunder Bay Ont. Canada
rear test fit
Reply
Old Dec 8, 2013 | 12:28 PM
  #30  
stovtop's Avatar
Thread Starter
Registered User
 
Joined: Nov 2008
Posts: 25
Likes: 0
From: Thunder Bay Ont. Canada
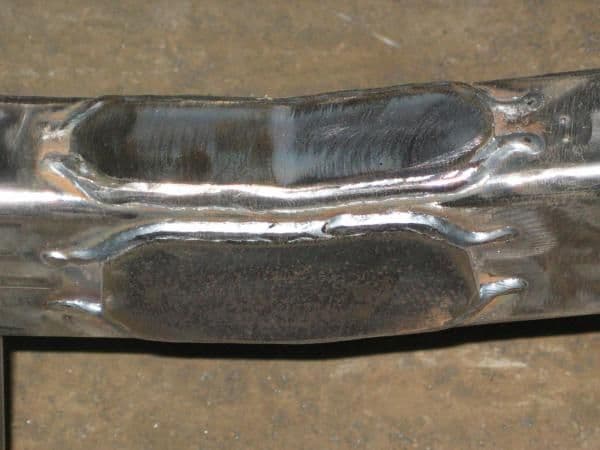
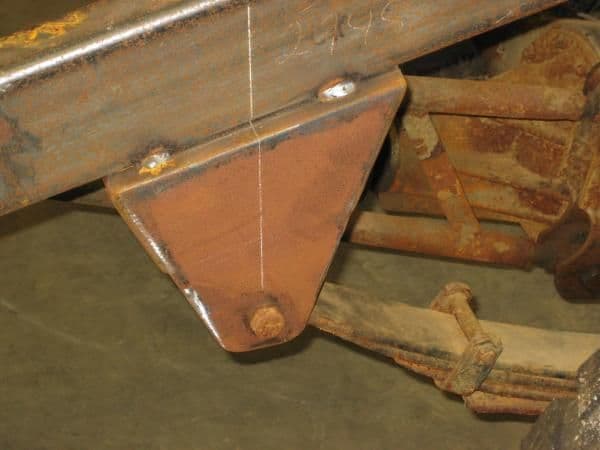
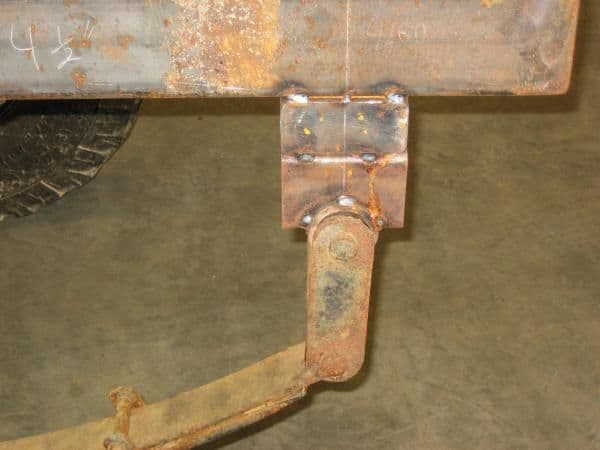
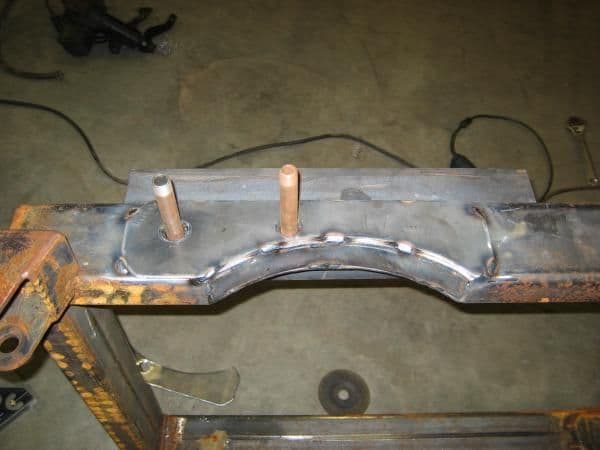
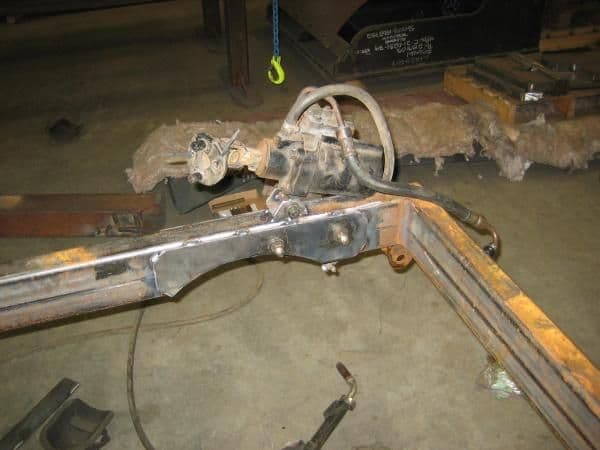
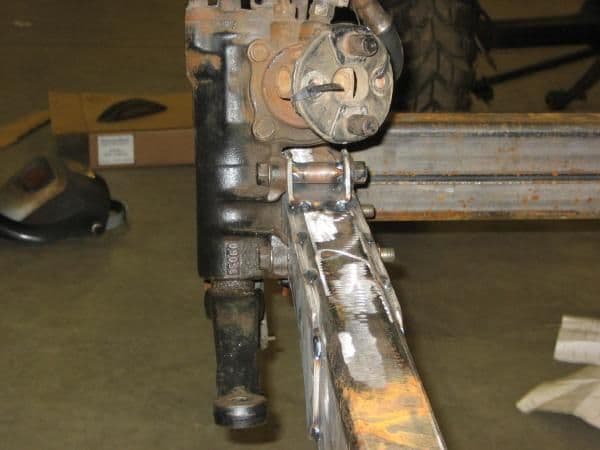
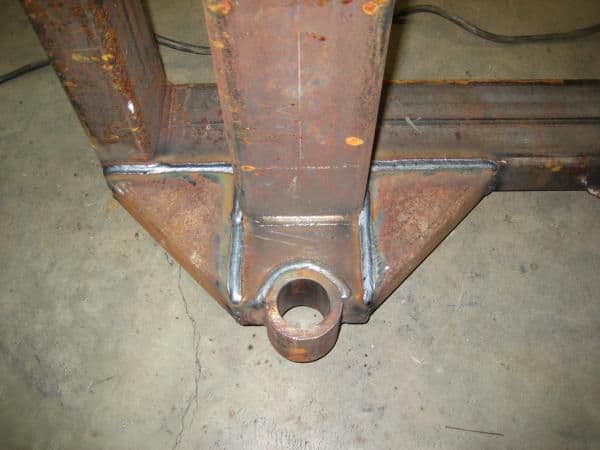
due to my choice to go straight at the front some mods had to be done to make the steering box work
had to plasma out an arch to clear the pitman arm so I bent a plate to fit the arch inside and welded a "sharkfin" gusset to keep strength up
Reply
Old Dec 8, 2013 | 12:31 PM
  #31  
stovtop's Avatar
Thread Starter
Registered User
 
Joined: Nov 2008
Posts: 25
Likes: 0
From: Thunder Bay Ont. Canada
gusset in place and sleeves through holes drilled into frame tubing
Reply
Old Dec 8, 2013 | 12:33 PM
  #32  
stovtop's Avatar
Thread Starter
Registered User
 
Joined: Nov 2008
Posts: 25
Likes: 0
From: Thunder Bay Ont. Canada
made upper clip for third bolt and all test fits look good


Reply
Old Dec 8, 2013 | 12:35 PM
  #33  
stovtop's Avatar
Thread Starter
Registered User
 
Joined: Nov 2008
Posts: 25
Likes: 0
From: Thunder Bay Ont. Canada
front suspension , steering box , rear suspension fully welded and gusseted


Reply
Old Dec 8, 2013 | 12:38 PM
  #34  
stovtop's Avatar
Thread Starter
Registered User
 
Joined: Nov 2008
Posts: 25
Likes: 0
From: Thunder Bay Ont. Canada
ive got the cab and box mounts done also but for got pics so heres the first cab test fit till next time ill show cab and box mounts

cabs very rusted need new one or many hours of body work
Reply
Old Dec 8, 2013 | 01:59 PM
  #35  
wyoming9's Avatar
Registered User
iTrader: (1)
 
Joined: Apr 2009
Posts: 13,381
Likes: 100
From: I live in New Tripoli Pa out in the woods
Red face

looks good

building the first of anything is always so very time consuming

Do you have any idea of the time you have in??
Reply
Old Dec 8, 2013 | 02:14 PM
  #36  
Toyota~Boy's Avatar
Registered User
iTrader: (2)
 
Joined: Oct 2006
Posts: 1,514
Likes: 2
From: Kenna, WestVirginia
This is insane bud. I built a frame from the cab back when I was in high school. I used tubing for it too. Mine was a 2wd and just for getting me to and from school. It's awesome seeing someone do something like this. I do know one thing. I would pay you for a set of blueprints and a material list of you would be interested in it. I'm sure there's others out here that would love to have the same ya know. I'm subbed so keep up the work and show off the pics
Reply
Old Dec 22, 2013 | 06:33 AM
  #37  
stovtop's Avatar
Thread Starter
Registered User
 
Joined: Nov 2008
Posts: 25
Likes: 0
From: Thunder Bay Ont. Canada
thanks for the comments guys theyre greatly appreciated im about 150 hours in and still only bout halfway there as for drawings ive been keeping track of everything in my own special way so when im done I can lead you folks in the right direction but with something like this one guys preference may be anothers disaster so everything should be treated as a guideline
Reply
Old Dec 22, 2013 | 11:54 AM
  #38  
wyoming9's Avatar
Registered User
iTrader: (1)
 
Joined: Apr 2009
Posts: 13,381
Likes: 100
From: I live in New Tripoli Pa out in the woods
Red face

Good Job !!

At least your ideas give who ever a starting point
Reply
Old Dec 22, 2013 | 01:59 PM
  #39  
skoti89's Avatar
Registered User
 
Joined: Jul 2010
Posts: 538
Likes: 6
From: Carson City
Looks great man. I wish i had the time and skills to do something like this. A frame up build would be sweet for my dinged up old 4runner!
Reply
Old Dec 22, 2013 | 02:06 PM
  #40  
The Tick's Avatar
Registered User
 
Joined: Nov 2013
Posts: 89
Likes: 0
From: Wichita, KS
Oh my gosh, you are a magic man. That takes skills. +1
Reply


All times are GMT -8. The time now is 03:55 PM.