
rotten old yota frame
 Nov 28, 2012 | 05:58 PM
#1
Thread Starter
Registered User
Joined: Nov 2008
Posts: 25
Likes: 0
From: Thunder Bay Ont. Canada
rotten old yota frame
unfortunately my frame rotted out
plated several spot already in the past so ive decide to build my own from scratch ill try to get some pics up and keep you posted not very computor saavy so bear with me
plated several spot already in the past so ive decide to build my own from scratch ill try to get some pics up and keep you posted not very computor saavy so bear with me
Last edited by stovtop; Dec 29, 2012 at 02:41 PM.
 Dec 29, 2012 | 01:58 PM
#6
Thread Starter
Registered User
Joined: Nov 2008
Posts: 25
Likes: 0
From: Thunder Bay Ont. Canada
i now have some pics in my profile section but i dont know how to add them here hopefully ill figure it out
cant figure out pictures dont know what a "url" is
im a redneck not a nerd
pics are in my profile section still
cant figure out pictures dont know what a "url" is
im a redneck not a nerd
pics are in my profile section still
Last edited by stovtop; Jan 6, 2013 at 06:46 AM.
Jan 6, 2013 | 06:53 PM
#7
Registered User


Joined: Oct 2009
Posts: 4,832
Likes: 332
From: Northfield, Vermont
Trending Topics
Jan 11, 2013 | 07:28 AM
#8
Registered User

Joined: Jan 2012
Posts: 187
Likes: 0
From: Grants Pass Or.
Cool, that looks like some nice clean work there... I think you just came here to show off.
Upload your pics to photobucket and copy and paste the img code into your post and the pics will appear in your post.
Upload your pics to photobucket and copy and paste the img code into your post and the pics will appear in your post.
 Feb 9, 2013 | 02:21 PM
#12
Thread Starter
Registered User
Joined: Nov 2008
Posts: 25
Likes: 0
From: Thunder Bay Ont. Canada

after blowing up 2 22rs in six months i decided for a 350 swap which nturally called for a sas with 5 inchs of lift plus one in the body to clear distributor and valve covers
Feb 9, 2013 | 02:27 PM
#13
Thread Starter
Registered User
Joined: Nov 2008
Posts: 25
Likes: 0
From: Thunder Bay Ont. Canada

i drove it daily wheeled it quite often and towed a boat with it for camping for 5 years till she rotted out properly

heres some of the rot there is plenty more behind the gas tank and between the spring shackles since i had alredy patched up the likely spots over the years i figured i'll just build a new one from scratch
Last edited by stovtop; Feb 9, 2013 at 02:29 PM.
Feb 9, 2013 | 02:51 PM
#14
Thread Starter
Registered User
Joined: Nov 2008
Posts: 25
Likes: 0
From: Thunder Bay Ont. Canada

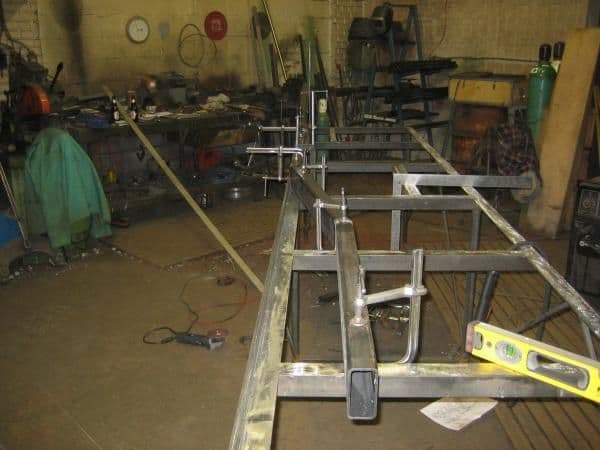
heres the back halves jigged up ready for tacking i decided to keep things simple by keeping it flat insted fo bendy and wavy like the stock frame
heres the front half tacked to the back half passenger side

drivers side frame from the front

standing the two halves together used a laser level to get them both dead nuts even

this is the rear cross member tacked in place

front crossmember tacked in everything is dead nuts level and perfectly square

heres the center main crossmember tacked in

rear tubing style crossmember with stiffeners
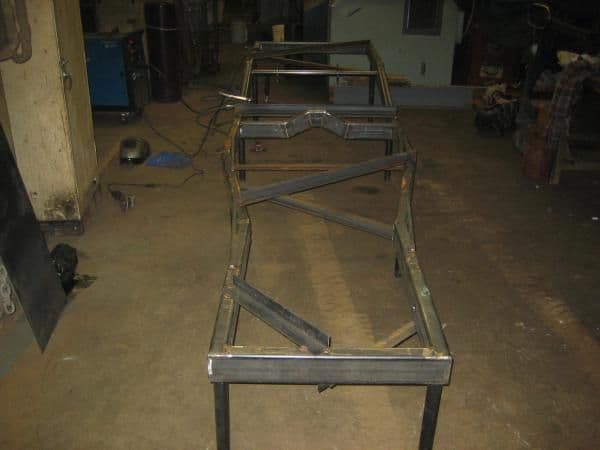
braced up ready for welding

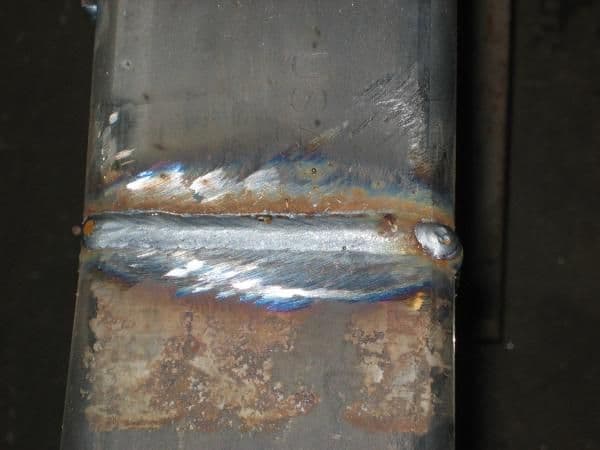
all joints ground out for full penetration welds
Last edited by stovtop; Feb 9, 2013 at 02:53 PM.

 Sep 18, 2013 | 12:31 AM
#19

Registered User
Joined: Sep 2013
Posts: 1
Likes: 0
Hi Stoytp
Sorry to dig this up from the grave but was wondering if you went off drawings for this or just carried measurements over from the old frame to the new one?
I've got a 4 door Hilux that has to go in for it's initial inspection to be registered on the island I live on and the frame is no bueno. The more I poke around, the worse it is. I either need to part it out (no market here for that) or fab up a new frame. My garage is just big enough to fab up a frame, but not big enough to strip down the old chassis to use as reference.
Great forum, first post and thanks in advance.
Buter


