
Camper Trailer Reno
 Apr 8, 2011 | 02:02 PM
#1
Thread Starter
Registered User
Joined: Nov 2007
Posts: 503
Likes: 0
From: PEI, Canada
Camper Trailer Reno
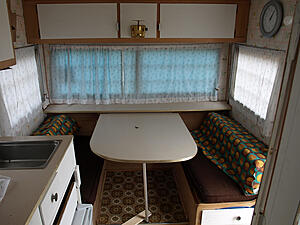
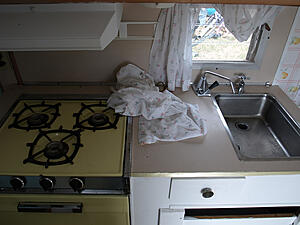
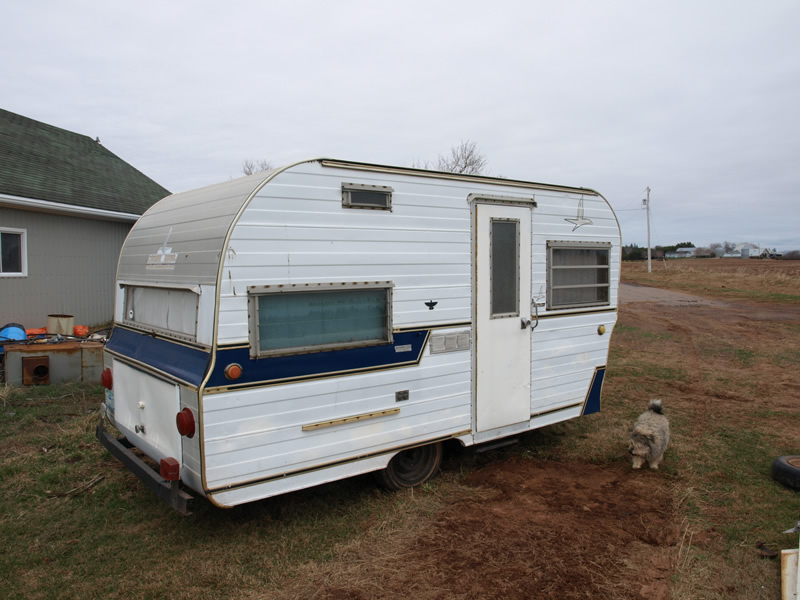
I'm currently working on fixing up a trailer I picked up a couple years ago so I decided to post my progress up here in order to help keep me motivated. First off here are a few pictures from shortly after I first got it.

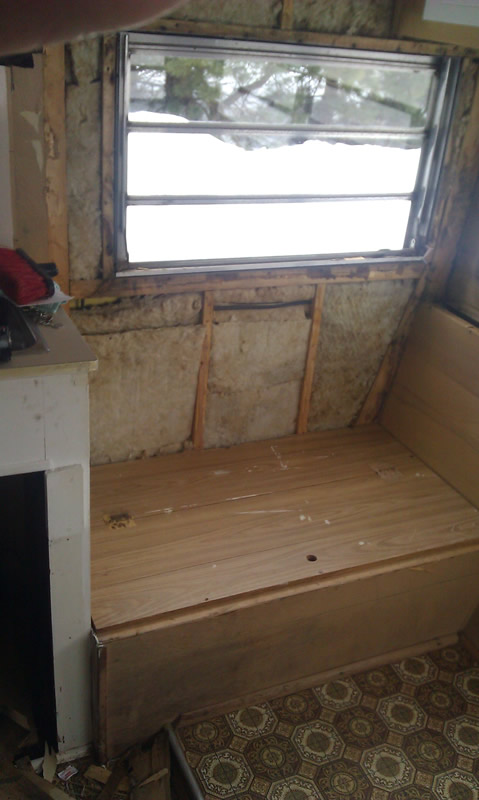
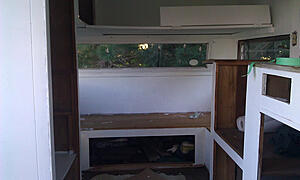
The trailer worked great for the past two summers but it was time to make it more to my liking. First of all some of the paneling had started to warp and come apart and the previous owner had just covered it with wallpaper so it had to be fixed. So first thing I did was start to take off the wallpaper (witch I wasn't very fond of in the first place).
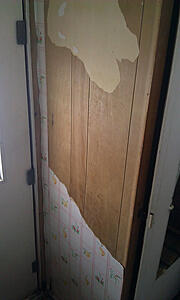
Then open up the walls around there too.

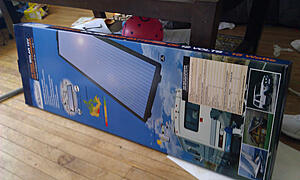
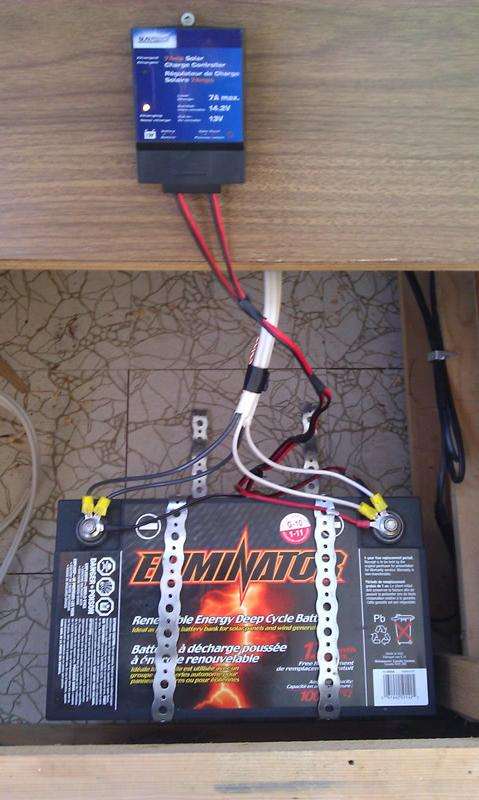
Now ever since I got the trailer I've wanted to make it an Off the grid experience. Originally I just used a small 1300W generator I picked up fairly cheap and it works great but it's not something you want to be running all the time. So my plan has always been to install Solar. Keep the generator for anything demanding and use the solar for smaller things like keeping my phone charged at night (when you can't really leave a generator running anyway) and to run a couple LED dome lights. I actually figured out how I wanted to do it last summer but didn't get around to it untill this spring when the equipment I wanted went on sale.
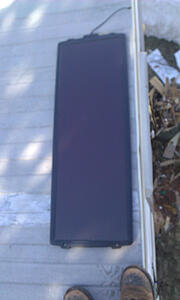
And of course It was much easier running the new wires with the walls opened up. Here it is all sitting in place and charging the battery.

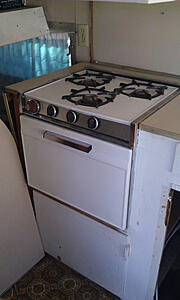
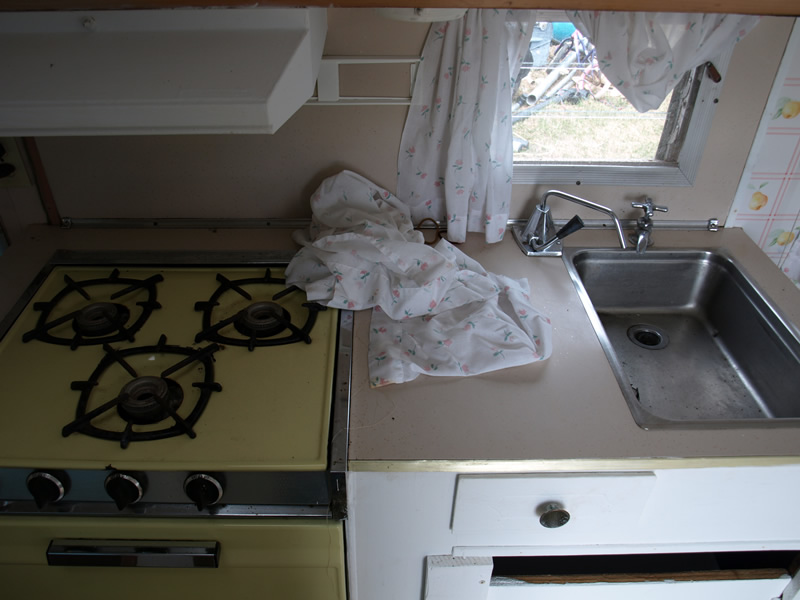
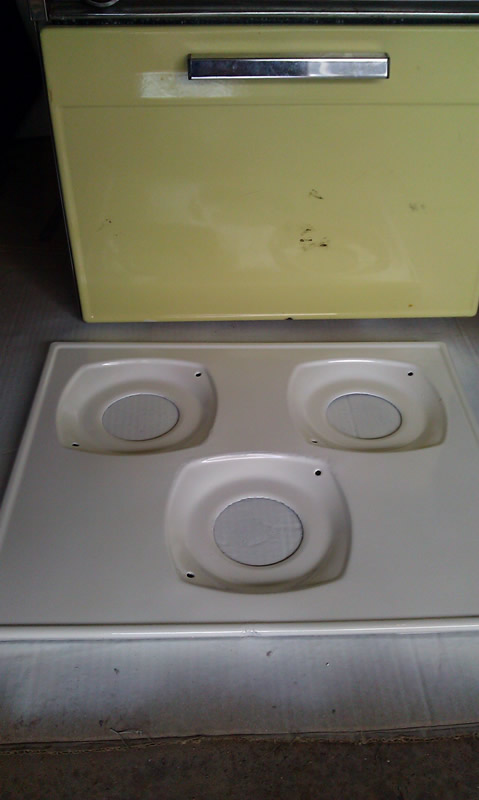
The next thing I started working on was painting the stove. I really wasn't the fan of yellow and I had to remove it anyway to run some of the wiring. I picked up some Tremclad High Heat Enamel paint and took care of it.

And that brings me up to today. I'm waiting for some parts to arrive like the dome lights, an inverter and a few more odds and ends. I plan on doing some painting and eventually putting down some new floors and recovering some cushions.
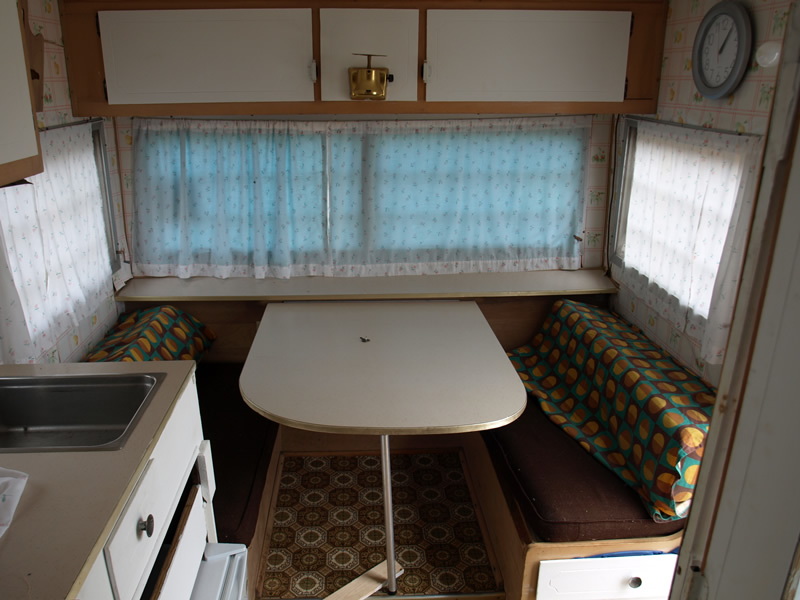
The trailer worked great for the past two summers but it was time to make it more to my liking. First of all some of the paneling had started to warp and come apart and the previous owner had just covered it with wallpaper so it had to be fixed. So first thing I did was start to take off the wallpaper (witch I wasn't very fond of in the first place).

Then open up the walls around there too.
Now ever since I got the trailer I've wanted to make it an Off the grid experience. Originally I just used a small 1300W generator I picked up fairly cheap and it works great but it's not something you want to be running all the time. So my plan has always been to install Solar. Keep the generator for anything demanding and use the solar for smaller things like keeping my phone charged at night (when you can't really leave a generator running anyway) and to run a couple LED dome lights. I actually figured out how I wanted to do it last summer but didn't get around to it untill this spring when the equipment I wanted went on sale.

And of course It was much easier running the new wires with the walls opened up. Here it is all sitting in place and charging the battery.

The next thing I started working on was painting the stove. I really wasn't the fan of yellow and I had to remove it anyway to run some of the wiring. I picked up some Tremclad High Heat Enamel paint and took care of it.

And that brings me up to today. I'm waiting for some parts to arrive like the dome lights, an inverter and a few more odds and ends. I plan on doing some painting and eventually putting down some new floors and recovering some cushions.
Apr 8, 2011 | 04:38 PM
#2
Registered User
Joined: Nov 2004
Posts: 868
Likes: 1
From: Ameliasburgh, On. Ca.
Can't wait to see the final outcome... I'm working on doing a similar setup in my little trailer...

Just redid the inside this past spring due to leaks (bought it that way - $500) Needs some paint now and flooring and it's done... Then onto the solar power...
Just redid the inside this past spring due to leaks (bought it that way - $500) Needs some paint now and flooring and it's done... Then onto the solar power...
Last edited by 91 4Runner; Apr 8, 2011 at 04:42 PM.


 Apr 15, 2011 | 11:11 AM
#6
Registered User
Joined: Feb 2011
Posts: 342
Likes: 0
From: Broken Arrow, OK
hmmm Should I buy a camper to redo..... This makes me say yes... But I think i want a boat first. Where we go camp the trailer might not make it in one piece. and the boat can get launched then meet us where we camp.
Apr 15, 2011 | 11:44 AM
#7
Thread Starter
Registered User
Joined: Nov 2007
Posts: 503
Likes: 0
From: PEI, Canada
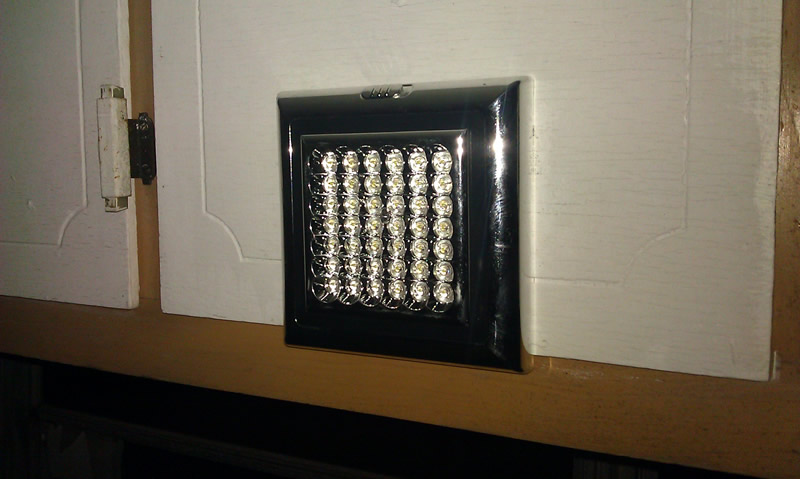
I guess it's time for a quick little update although I don't have many pictures to show. I got the parts I ordered the other day and have my inverter wired up to the battery and also got my light mounted (I ordered two but decided to just hook up the one for now). The light easily light the place up as much as one would need since it will mostly just be used for getting ready for bed or if I just have to quickly find something at night. I also started tearing up the trim so that it'll be easier to rip up the floor when it comes time to install the new one.
Speaking of the floor that brings me to my first picture.

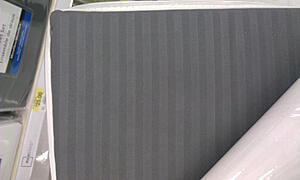
I picked up two boxes of that flooring (one wasn't going to be quite enough). It's allure flooring from Home Depot for anyone who's interested. And after picking out the flooring I decided on a colour scheme. I decided to go with dark grey bedding, curtains, cushion coverings, and the doors of the cabniets then just a plain white on the walls. So after that I decided to pick up some sheets witch brings me up to my next picture
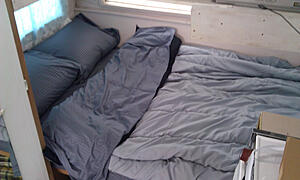
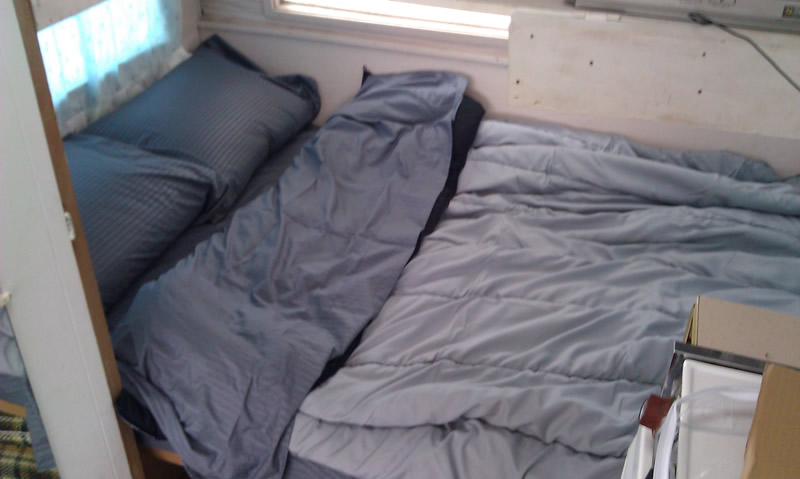
I picked up these cheap sheets at Wallmart that should work well. I figured I'd get some Comforters for the two beds as well (my bed that I leave made up and the one that's made when the tables folded down). Luckly I found a couple comforters at Zellers for only $15 a piece. So here's a picture of the Bed all made up.
I realize this isn't the sort of thing most people on here are interested in but thought I'd throw it up anyway. Next I'm gonna check all the wiring then it'll be time to get some wood back on the walls and ready to start painting. I figure the new floor will be one of the last things to go in since it won't matter if I get a little bit of paint on the old one. Feel free to give some suggestions if you'd like. I'm open to ideas.
Speaking of the floor that brings me to my first picture.

I picked up two boxes of that flooring (one wasn't going to be quite enough). It's allure flooring from Home Depot for anyone who's interested. And after picking out the flooring I decided on a colour scheme. I decided to go with dark grey bedding, curtains, cushion coverings, and the doors of the cabniets then just a plain white on the walls. So after that I decided to pick up some sheets witch brings me up to my next picture

I picked up these cheap sheets at Wallmart that should work well. I figured I'd get some Comforters for the two beds as well (my bed that I leave made up and the one that's made when the tables folded down). Luckly I found a couple comforters at Zellers for only $15 a piece. So here's a picture of the Bed all made up.
I realize this isn't the sort of thing most people on here are interested in but thought I'd throw it up anyway. Next I'm gonna check all the wiring then it'll be time to get some wood back on the walls and ready to start painting. I figure the new floor will be one of the last things to go in since it won't matter if I get a little bit of paint on the old one. Feel free to give some suggestions if you'd like. I'm open to ideas.
Trending Topics
Apr 16, 2011 | 02:26 AM
#10
are you pulling this thing with your '85 in your sig?
Hopefully the trailer has electric brakes and you have done the V-6 calipers/LC vented rotors on the truck...
my old trailer was too far gone to save and too heavy to pull with a 22R so recycled it:

Hopefully the trailer has electric brakes and you have done the V-6 calipers/LC vented rotors on the truck...
my old trailer was too far gone to save and too heavy to pull with a 22R so recycled it:
Apr 16, 2011 | 03:22 AM
#12
Thread Starter
Registered User
Joined: Nov 2007
Posts: 503
Likes: 0
From: PEI, Canada
No I won't be using my 85 in the near future for towing this thing anyway. I'll either mostly be using one of our full size plumbing vans or my buddys half ton dodge.
Apr 16, 2011 | 10:17 AM
#13
Contributing Member
Joined: Mar 2003
Posts: 11,334
Likes: 0
From: COTKU,Ontario,Canada
looks good Jason I like the job you did on the oven. Make sure you run it up hot for a while to "bake" the finish. Sometimes the paint can off gas chemicals that are really bad for you. You don't want to get your food contaminated.
You may also want to consider adding a second solar panel and battery... if you plan to go "off grid" you may find you need additional power capability.
Like those lights what are the dimensions on them? Floor looks nice I often thought if/when I get a trailer I'd do the floor in a bamboo hardwood laminate type thing...
Last edited by aviator; Apr 16, 2011 at 10:26 AM.
Apr 16, 2011 | 06:11 PM
#14
Thread Starter
Registered User
Joined: Nov 2007
Posts: 503
Likes: 0
From: PEI, Canada
looks good Jason I like the job you did on the oven. Make sure you run it up hot for a while to "bake" the finish. Sometimes the paint can off gas chemicals that are really bad for you. You don't want to get your food contaminated.
You may also want to consider adding a second solar panel and battery... if you plan to go "off grid" you may find you need additional power capability.
Like those lights what are the dimensions on them? Floor looks nice I often thought if/when I get a trailer I'd do the floor in a bamboo hardwood laminate type thing...
You may also want to consider adding a second solar panel and battery... if you plan to go "off grid" you may find you need additional power capability.
Like those lights what are the dimensions on them? Floor looks nice I often thought if/when I get a trailer I'd do the floor in a bamboo hardwood laminate type thing...
I've thought about adding more solar but it gets expensive quick. I really only need it to keep my phone charged at night and to have the light for when I get ready for bed at the end of the night. Anytime I want to run something a little more demanding I'm always gonna have my 1300W generator with me. I'm certainly open to it down the road it's just right now I think this suits my needs.
The light it 5.5"x 5.5" and the square of LEDs is 3.5"x 3.5". I was surprised with how much light it gives off. I was sorta expecting to have it give off a nice little glow so you weren't in the dark but it actually lights up the whole place as much as I would need to see anything. I'll be sure to post up here what I think of the flooring once I get it installed.
 Apr 17, 2011 | 03:30 PM
#16
Contributing Member
Joined: Mar 2003
Posts: 11,334
Likes: 0
From: COTKU,Ontario,Canada
Just had a thought Jason... you should rough in some speaker wire and so on while the walls are off you could have a kickin' sound system in that thing.
are those lights flat on the back? I need to add some light to my camper top if I ever plan to use it for anything other then a large tool box. lol
are those lights flat on the back? I need to add some light to my camper top if I ever plan to use it for anything other then a large tool box. lol
Apr 17, 2011 | 04:57 PM
#17
Thread Starter
Registered User
Joined: Nov 2007
Posts: 503
Likes: 0
From: PEI, Canada
Yup, they come with all the mounting hardware needed too. It's hard to notice but around the center of the square of LEDs is a plastic insert with a screw behind it that attaches the light to the mounting plate.
Apr 17, 2011 | 05:06 PM
#18
Thread Starter
Registered User
Joined: Nov 2007
Posts: 503
Likes: 0
From: PEI, Canada
Jun 11, 2011 | 05:58 PM
#20
Thread Starter
Registered User
Joined: Nov 2007
Posts: 503
Likes: 0
From: PEI, Canada
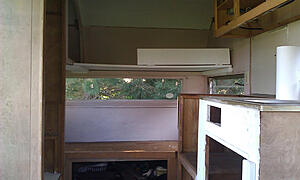
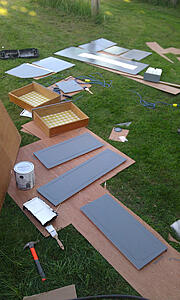
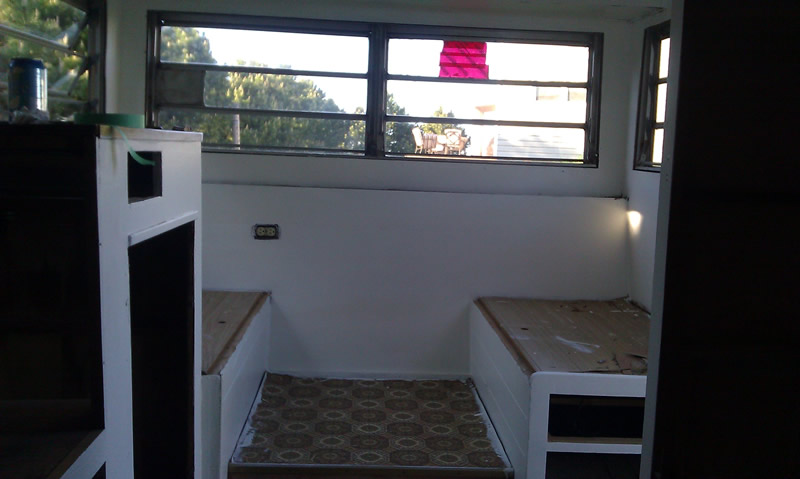
Alright the Reno had slowed down quite a bit since I didn't have any money coming in for a little while but I made up for it today. Yesterday after work I Cleared everything out of the trailer and remover the remaining cupboard doors so it looked a little like this.
Then this morning it was off to the hardware store to pick up Plywood, paint, caulking, and some other doo dads. I'm no carpenter but I managed to get some plywood up on the walls. Sorry I don't have any pictures of that but I'm sure you get the Idea. Then after that it was time for some paint. As I mentioned before just plain white for the walls.
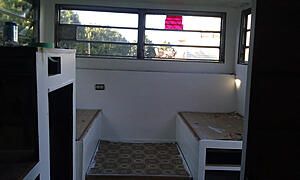
Origionally I had planned to stop at that today but Since everthing was going so smoothly I got started on the doors too.
And since I was still egar to go I thought hey, lets do the floor too. So I actually got the floor down. By the time I finished that it was getting a little dark (good thing I had my Solar Powered LED light ) so that was it for today.

Tomorrow I hope to put up most of the Doors and maybe put on some trim and set my bed up so I can move in while I renovate my bedroom.

Then this morning it was off to the hardware store to pick up Plywood, paint, caulking, and some other doo dads. I'm no carpenter but I managed to get some plywood up on the walls. Sorry I don't have any pictures of that but I'm sure you get the Idea. Then after that it was time for some paint. As I mentioned before just plain white for the walls.

Origionally I had planned to stop at that today but Since everthing was going so smoothly I got started on the doors too.

And since I was still egar to go I thought hey, lets do the floor too. So I actually got the floor down. By the time I finished that it was getting a little dark (good thing I had my Solar Powered LED light
) so that was it for today.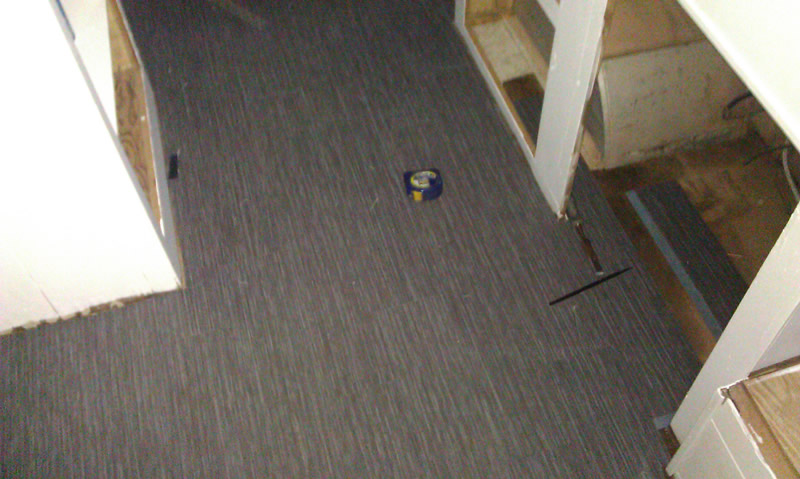
Tomorrow I hope to put up most of the Doors and maybe put on some trim and set my bed up so I can move in while I renovate my bedroom.


