
Another 3rd Gen Front Bumper Build - wjwerdna
 Feb 22, 2008 | 09:56 AM
#41
Contributing Member
Joined: Jun 2005
Posts: 3,415
Likes: 10
From: Phx, AZ
Very nice looking piece. Looks like a very stout mount as well.
It's obvious you are very skilled with design and the related software, and your fab work seems very refined as well. Have you been fabricating for a while now?
Did you cut all that steel with just a grinder? If not, what tools did you use?
It's obvious you are very skilled with design and the related software, and your fab work seems very refined as well. Have you been fabricating for a while now?
Did you cut all that steel with just a grinder? If not, what tools did you use?
Feb 22, 2008 | 11:55 AM
#42
Thread Starter
Contributing Member
Joined: Mar 2006
Posts: 1,861
Likes: 2
From: Novi, MI
Very nice looking piece. Looks like a very stout mount as well.
It's obvious you are very skilled with design and the related software, and your fab work seems very refined as well. Have you been fabricating for a while now?
Did you cut all that steel with just a grinder? If not, what tools did you use?
It's obvious you are very skilled with design and the related software, and your fab work seems very refined as well. Have you been fabricating for a while now?
Did you cut all that steel with just a grinder? If not, what tools did you use?
well, I'm 22, I've been making stuff since I was little, but as far as metal/welding/grinding/etc, not really that long. I pick up stuff fast, and have done enough stuff at work over last couple years to weld pretty decent (even though most of welds on this were done by friend of mine).
I've made my lift kit, sliders, rear hitch-mounted tire carrier, and now the bumper. The bumper is the first one done in 3D, but the tire carrier, lift, and sliders were all rough sketched in AutoCAD.
As far as the actual cutting, a couple pieces were cut on a large horizontal band/cut saw at point of purchase, most of everything was rough cut with a 14" dewalt abrasive cut-off (which needs to be shimmed because it doesn't cut straight) and ground (a lot) to fit, the large holes for lights were cut with an angle grinder/cut-off disk, the small holes were cut with a 3.5" hole saw and ground larger with angle grinder. For the brackets in back, I actually did those somewhere else on a small vertical bandsaw, then milled, welded, and milled again. My own bandsaw would have made this whole process much easier, or a plasma cutter, but that would involve much more grinding
 Feb 25, 2008 | 05:04 PM
#45

Registered User
Joined: Mar 2007
Posts: 721
Likes: 0
From: Dayton, OH
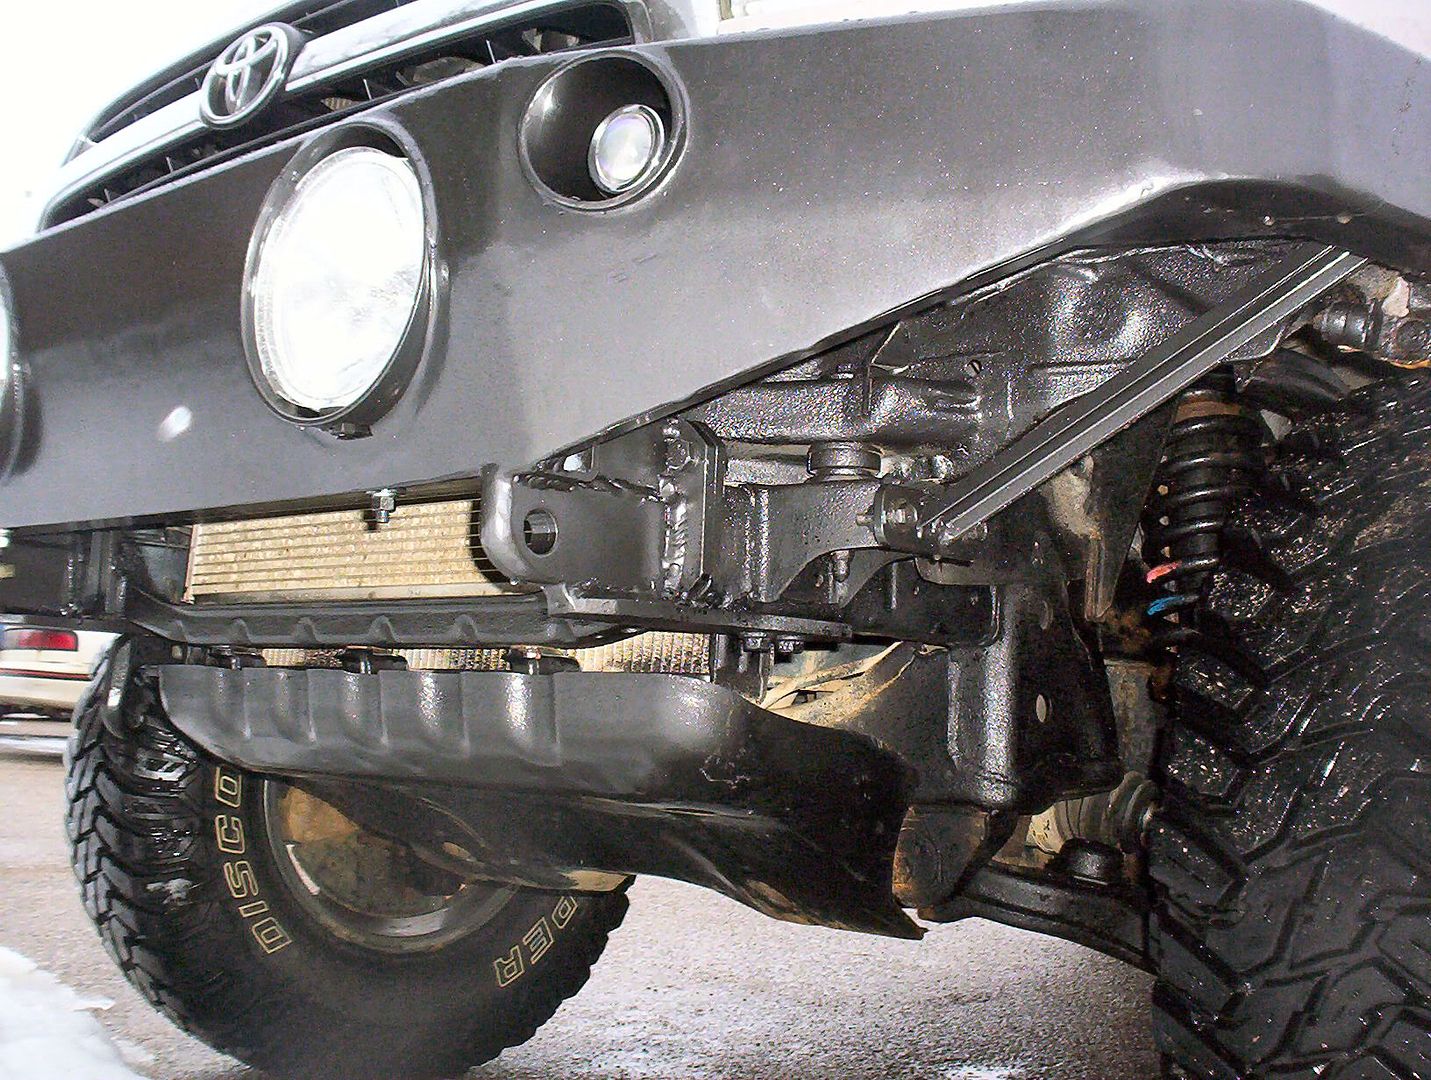
I noticed how think all the steel is on the bumper. If the front of your rig was in a collision, would the frame of your truck suffer more damage than the bumper? It looked like the frame thickness was much less than the bumper material.
I'm not an engineer so I don't how to estimate or guage things like that.
I'm not an engineer so I don't how to estimate or guage things like that.
Feb 25, 2008 | 05:17 PM
#46
Registered User
Joined: Aug 2004
Posts: 1,028
Likes: 0
From: SLO, CA
looks pretty damn good. out of the box and well executed. i love how you had it all CAD'd up beforehand and built from that. the best way to do it, for sure. i'm lucky if my ideas even make it to a napkin nowadays... nice work man.
Feb 25, 2008 | 05:34 PM
#47
Thread Starter
Contributing Member
Joined: Mar 2006
Posts: 1,861
Likes: 2
From: Novi, MI
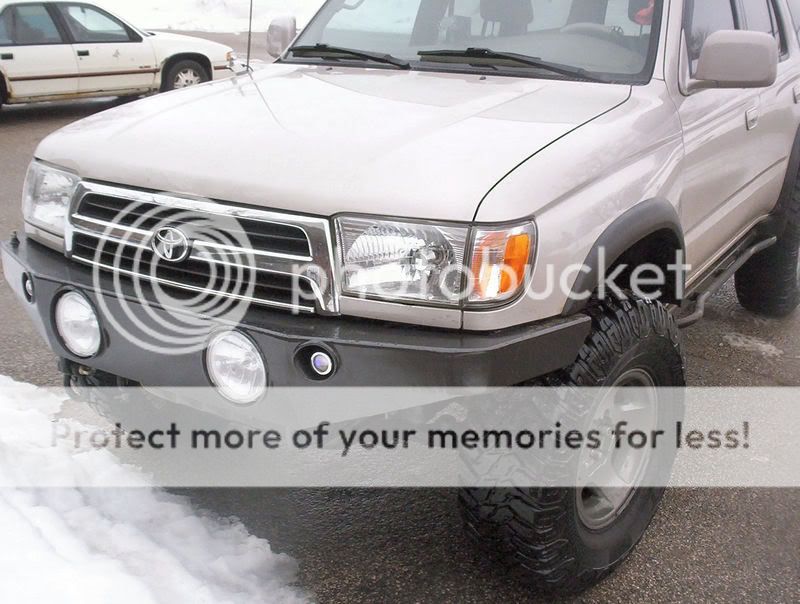
I noticed how think all the steel is on the bumper. If the front of your rig was in a collision, would the frame of your truck suffer more damage than the bumper? Most likely, it would be impossible to reinforce the frame more, and it would be less safe. The frame is reinforced quite a bit (stock) and the bumper is mounted in different points, but a certain impact would of course damage the frame... However, I think in that same case, the stock bumper would allow the same, if not more damage to the frame. Benefit of stock bumper is that it would absorb more energy, thus transferring less to the driver...
It looked like the frame thickness was much less than the bumper material. You are right again, the frame appears to be around .125 or so. The bumper is attached to the front, and along the bottom. It will withstand very heavy pulling loads (recovery, etc). It will also withstand low velocity impacts well to a certain degree.
There is no good way to argue that a heavy steel bumper is better than years and years of engineering. But a steel bumper is what I (and other off-road enthusiasts want) =)
Feb 25, 2008 | 10:42 PM
#48
Registered User
Joined: May 2005
Posts: 170
Likes: 0
Just hope your air bag doesn't go off when some one backs into you or something. That would suck with no crush zone!
Sick bumper btw...


 Feb 26, 2008 | 03:32 AM
#50
Thread Starter
Contributing Member
Joined: Mar 2006
Posts: 1,861
Likes: 2
From: Novi, MI
thanks man, lol it would take more than that to set it off... The crush zone doesn't really affect the airbag (well, of course it does a little), I'm pretty sure that if I am in a crash where the airbag goes off, then it will be fully appreciated (the air bag).
 Feb 27, 2008 | 06:29 PM
#52
Contributing Member
Joined: Jan 2006
Posts: 899
Likes: 0
From: Summit County, Colorado
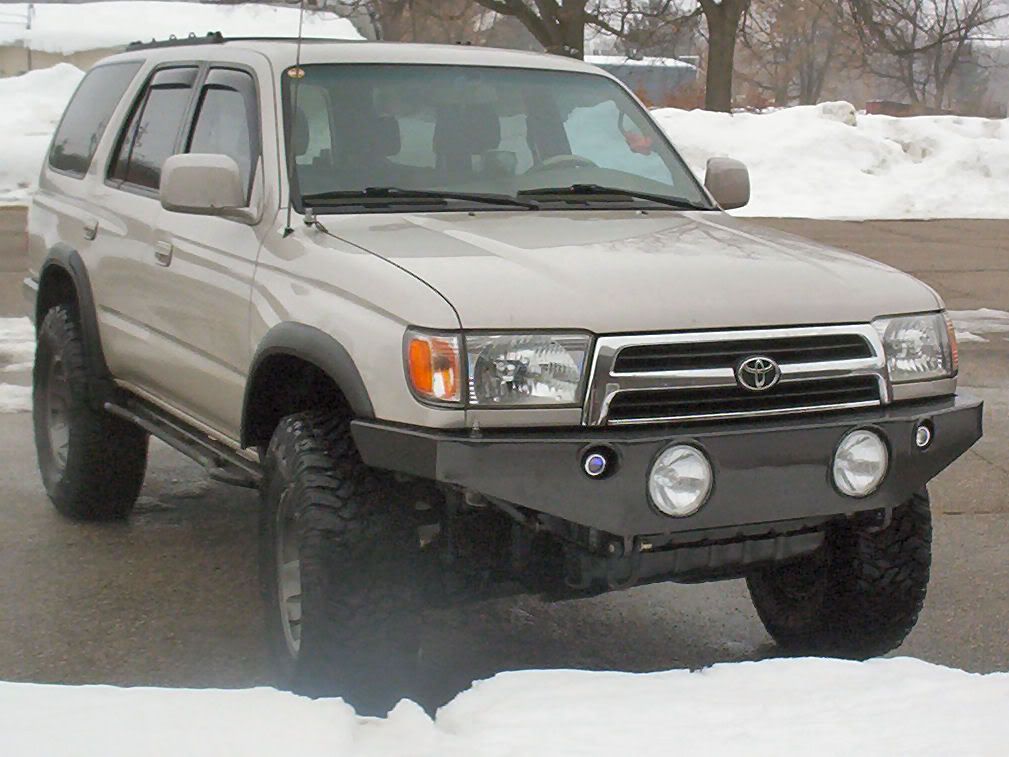
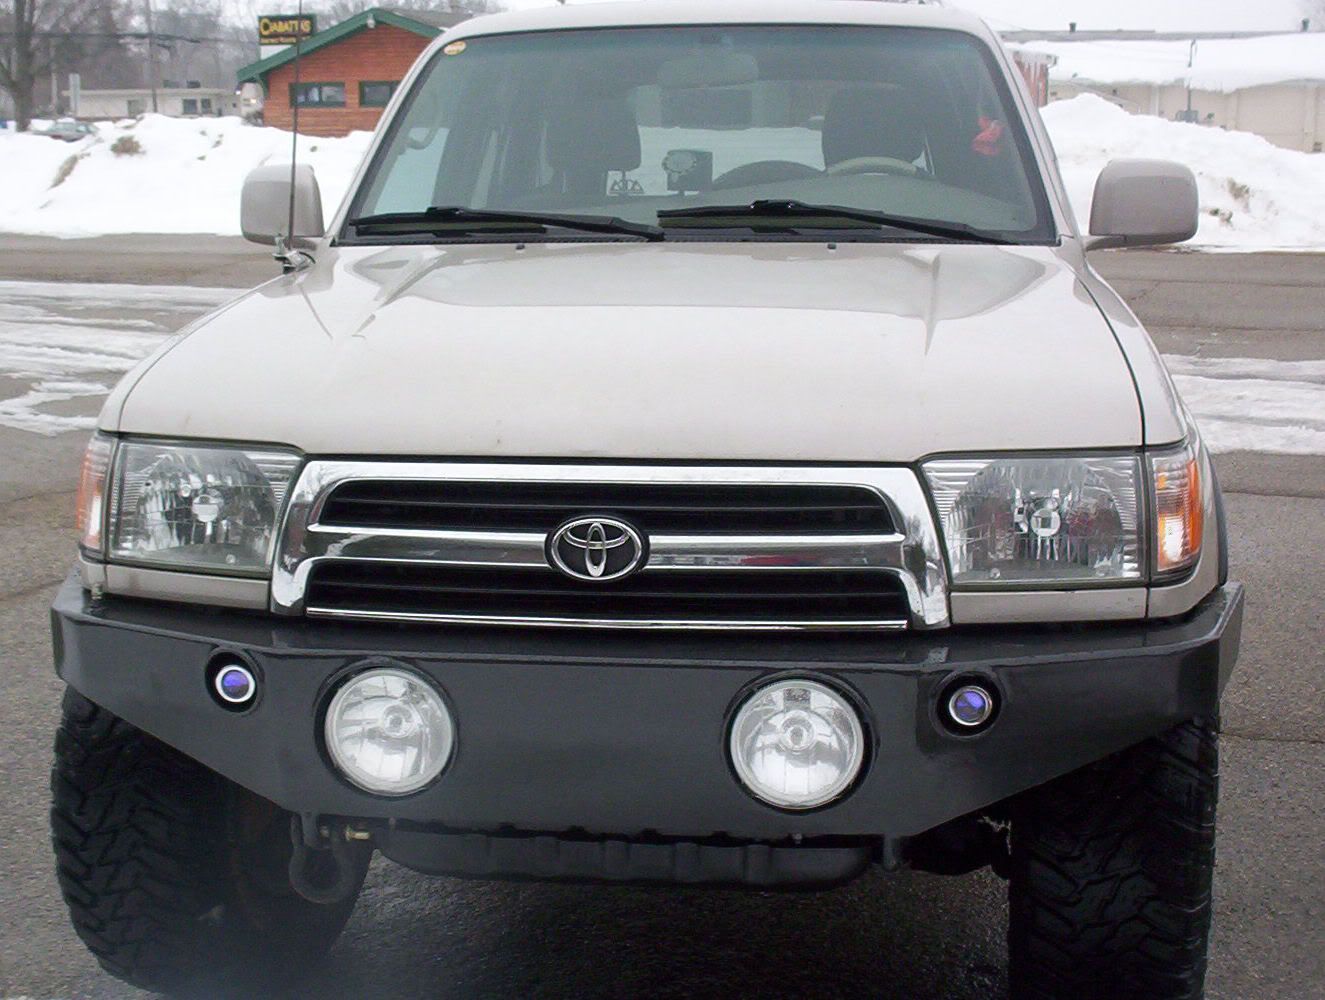
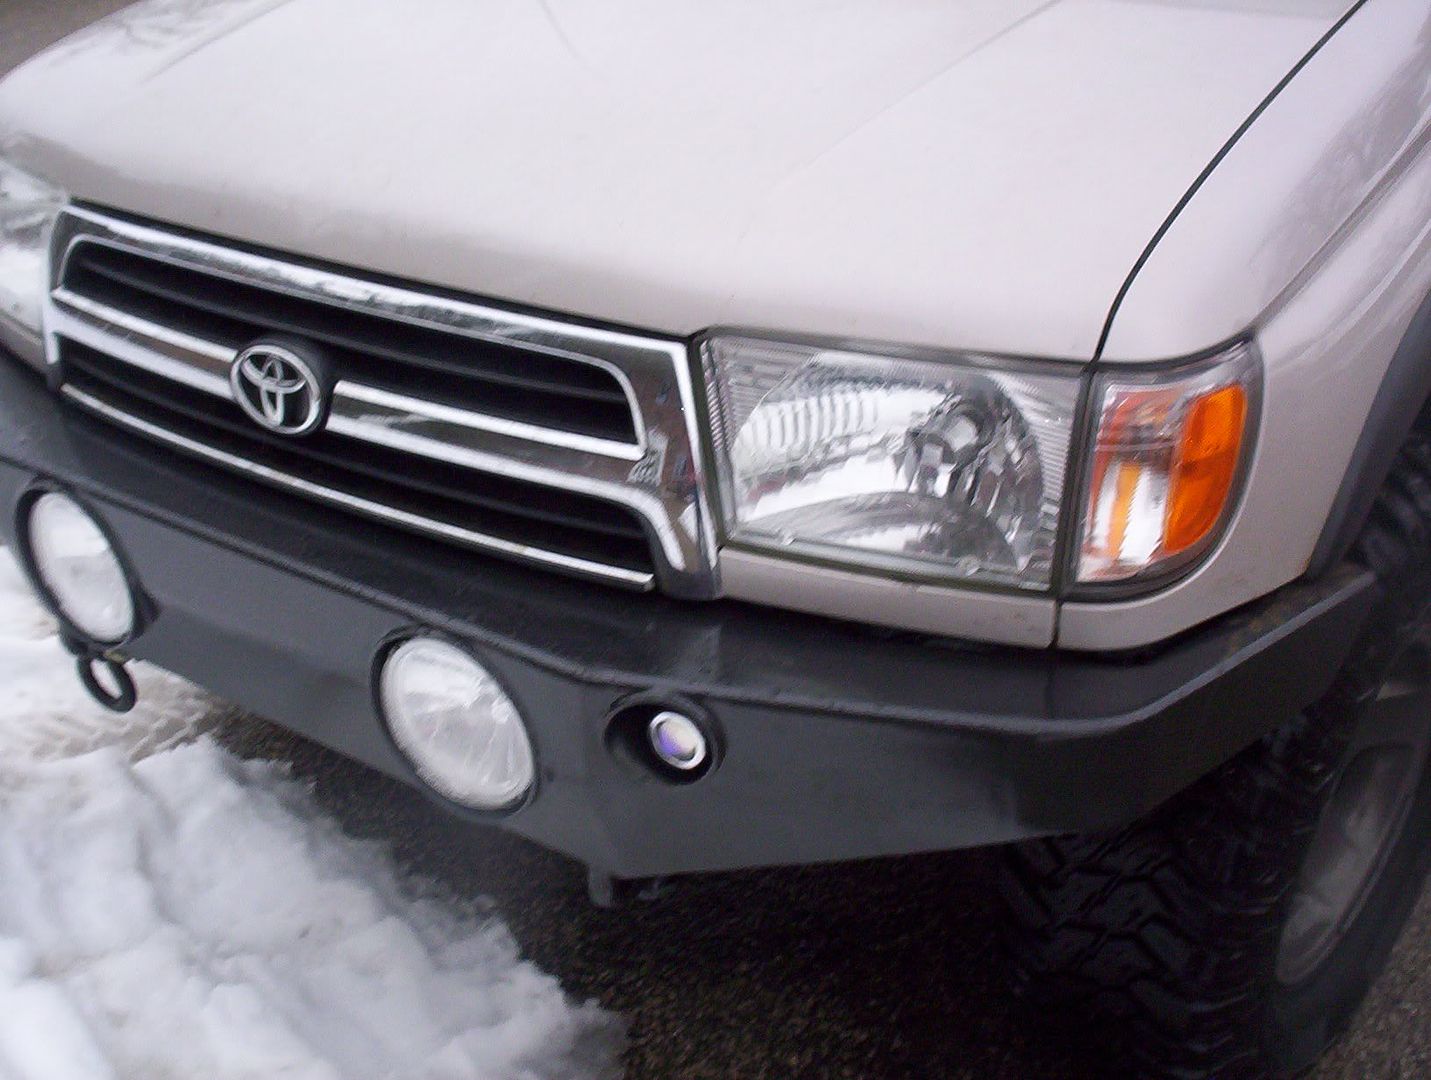
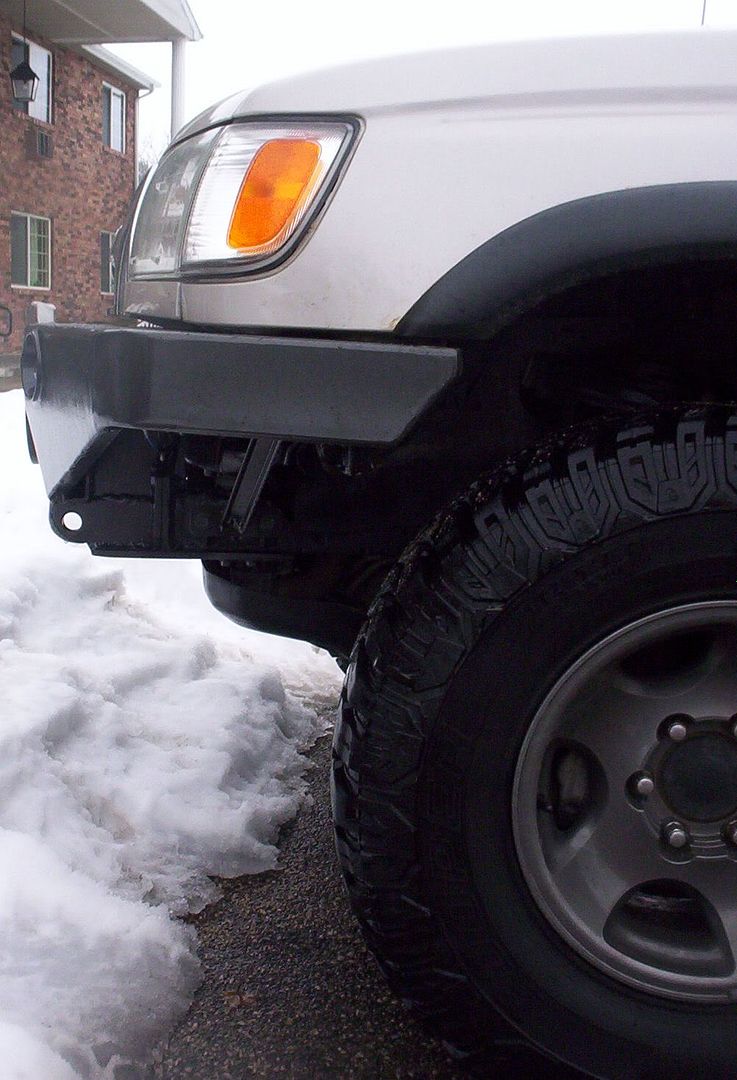
Incredible work on that bumper, and it looks great on your Runner!
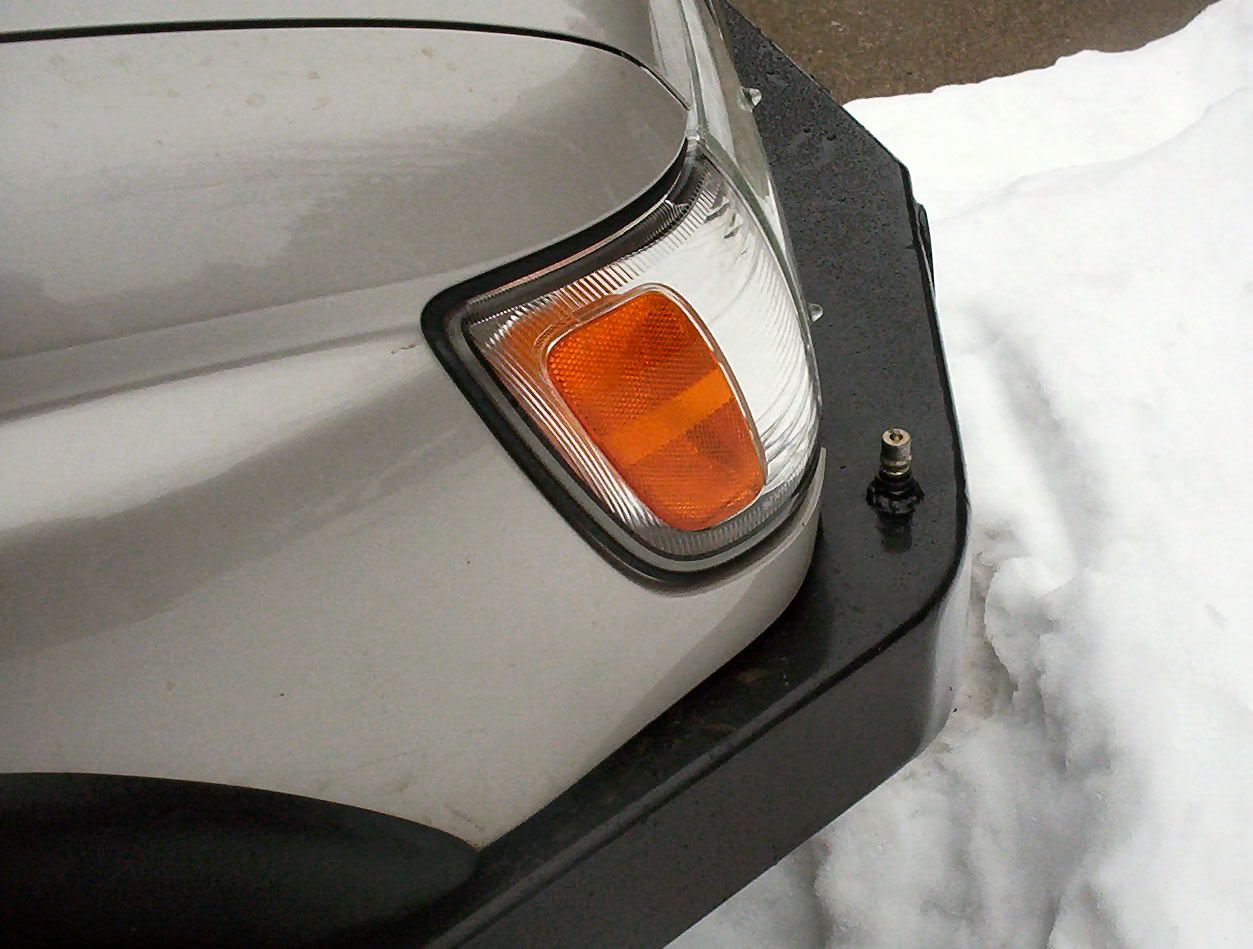
I am curious as to what the fitting on the top of the passenger side is. It looks somewhat hydraulic, but I can't tell, for sure.
I am curious as to what the fitting on the top of the passenger side is. It looks somewhat hydraulic, but I can't tell, for sure.
Feb 27, 2008 | 10:11 PM
#53
Registered User
Joined: Jul 2007
Posts: 375
Likes: 0
From: ATX/ Waco
Mar 2, 2008 | 05:50 PM
#55
Thread Starter
Contributing Member
Joined: Mar 2006
Posts: 1,861
Likes: 2
From: Novi, MI

It's similar to a compressed air quick-connect, but is indeed a hydraulic quick-connect. The female end will be attached to a flag with a compression fitting. This will make it easy to take it off/put it on.
Mar 2, 2008 | 06:11 PM
#56
Registered User
Joined: Feb 2008
Posts: 84
Likes: 0
From: Washington
Heyyy,
Dude good job on the bumper! I wish I had all of the resources to do this! I can weld, but Im not that great at designin stuff like you are.
Soo you were thinkin about making those custom bumpers? How much for one like yours. Just an estimate.. I have a 97 SR5.
Thanks!
Dude good job on the bumper! I wish I had all of the resources to do this! I can weld, but Im not that great at designin stuff like you are.
Soo you were thinkin about making those custom bumpers? How much for one like yours. Just an estimate.. I have a 97 SR5.
Thanks!
Mar 2, 2008 | 06:27 PM
#57
Thread Starter
Contributing Member
Joined: Mar 2006
Posts: 1,861
Likes: 2
From: Novi, MI
Heyyy,
Dude good job on the bumper! I wish I had all of the resources to do this! I can weld, but Im not that great at designin stuff like you are.
Soo you were thinkin about making those custom bumpers? How much for one like yours. Just an estimate.. I have a 97 SR5.
Thanks!
Dude good job on the bumper! I wish I had all of the resources to do this! I can weld, but Im not that great at designin stuff like you are.
Soo you were thinkin about making those custom bumpers? How much for one like yours. Just an estimate.. I have a 97 SR5.
Thanks!
Mar 5, 2008 | 05:57 PM
#58

Registered User
Joined: Mar 2008
Posts: 6
Likes: 0
Your bumper thread
Hats off to you. Hands down the best thread I have seen on development of
a bumper for offroaders and I have searched a lot of sites this last year. Any chance you may do any other cad/ print development this year?
a bumper for offroaders and I have searched a lot of sites this last year. Any chance you may do any other cad/ print development this year?
Mar 5, 2008 | 06:53 PM
#60
Thread Starter
Contributing Member
Joined: Mar 2006
Posts: 1,861
Likes: 2
From: Novi, MI
thanks guys I've got until the end of this month for building, but I plan on making a lot more in CAD the next few years. Let me know if anyone wants something in particular... and we can work out some details
I've got until the end of this month for building, but I plan on making a lot more in CAD the next few years. Let me know if anyone wants something in particular... and we can work out some details


