
Locker Install Write Up
 May 17, 2007 | 12:06 AM
#1
Thread Starter
Contributing Member
Joined: Apr 2004
Posts: 5,464
Likes: 6
From: Arvada, Colorado
Locker Install Write Up
This write up is detailing the installation of an ARB Air Locker. However, the same techniques will be applied when installing ANY other carrier-replacement locker (Detroit, spool, etc). However, if you are replacing gears, this write up DOES NOT COVER A RING AND PINION INSTALL.
I would first like to thank my good friend Drew Frazer for helping me with this install. His help was invaluable, as was his wit and good attitude helped as much as his mechanical skill.
Also, much of this was learned from the website http://www.gearinstalls.com This is ZUK's website, and details everything that I'm about to put down here, and then some.
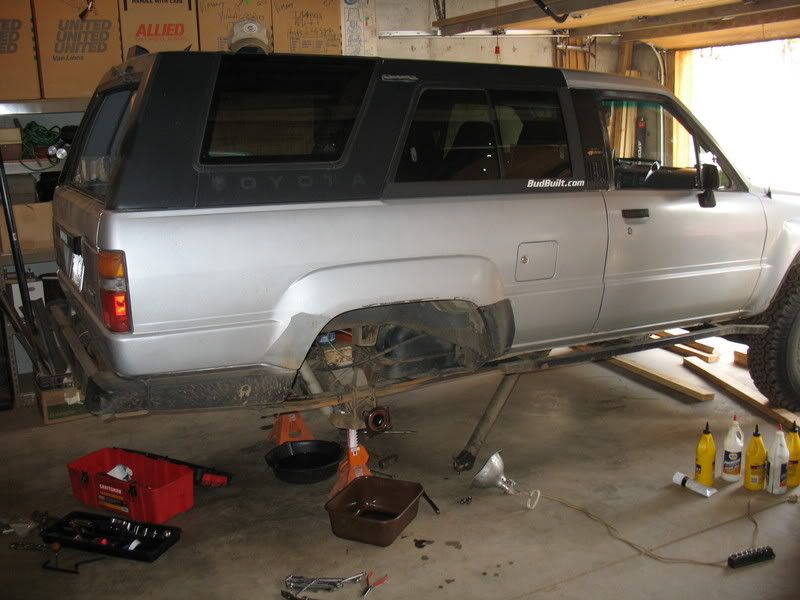
I recommend loosening the driveshaft before you remove the rear wheels from the ground. If not, it can be difficult to keep the wheels from turning. Next, drain the differential, using the drain plug. This will help to keep down on the mess as you remove axles and the housing.
Remove the rear wheels, unbolt the rear axles (located on the back of the brake drums.) Make sure that you have your ebrake off, and remove the ebrake cable. Also disconnect the rear brake lines from the drum assembly.
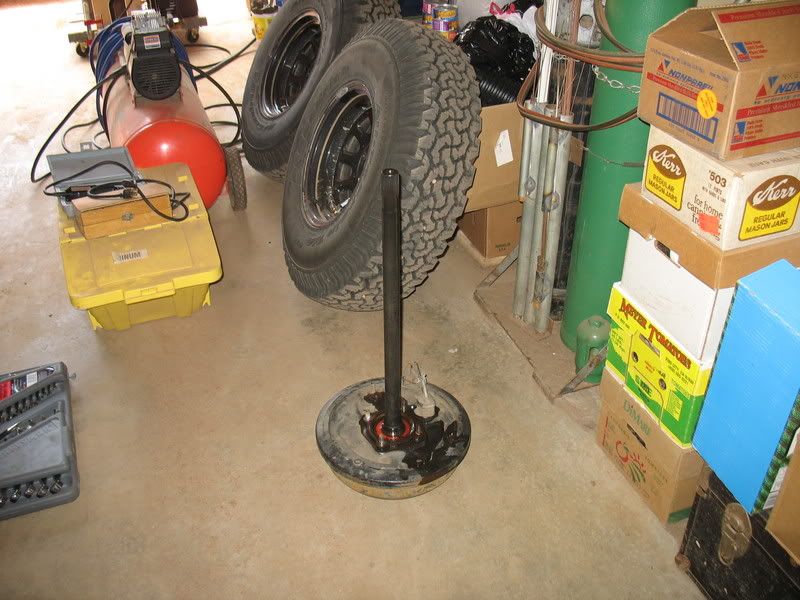
Remove the drum assembly and axle. Repeat for the other side.
Your removed axle piece should look like this:
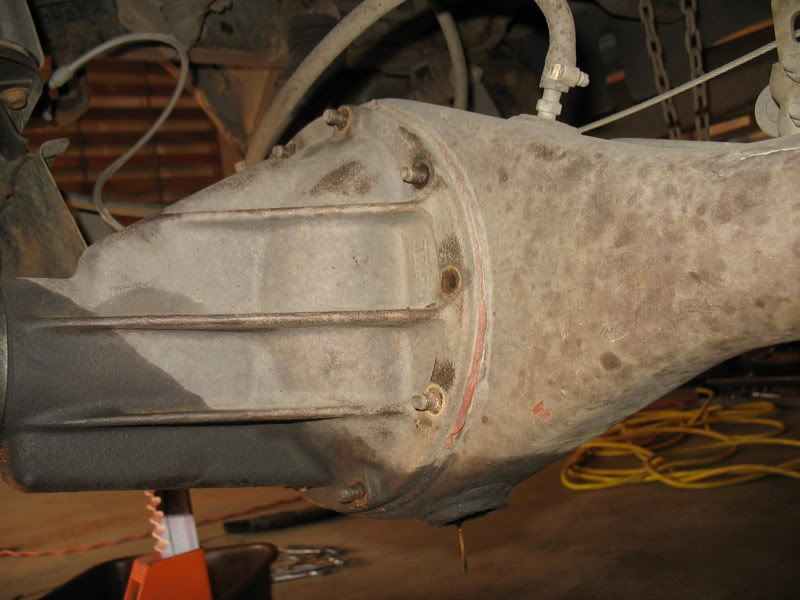
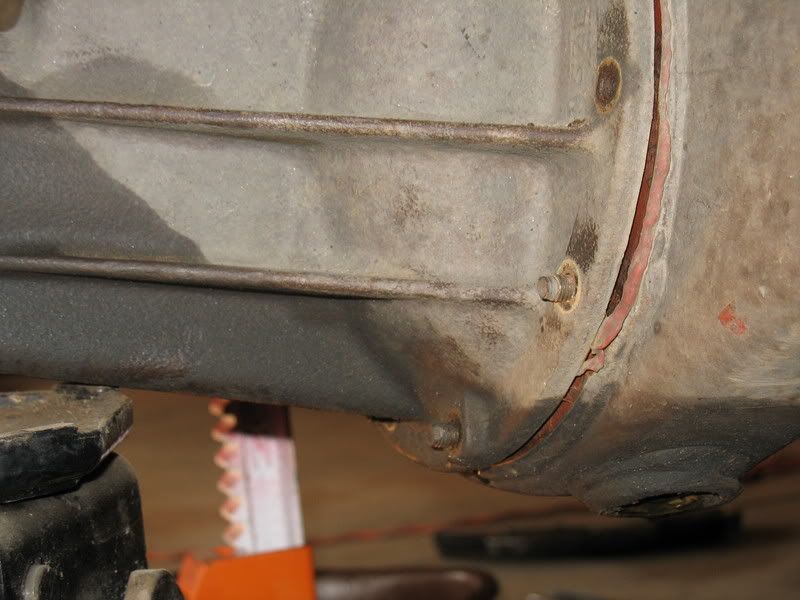
Next is the removal of the third member. Undo all of the nuts on the studs, and use a jack to carefully break the seal on the housing. DO NOT PUSH HARD. You do not wish to break the studs off. Slight pressure will allow the seal to break, as the third has SOME play on the studs themselves. See Pics:
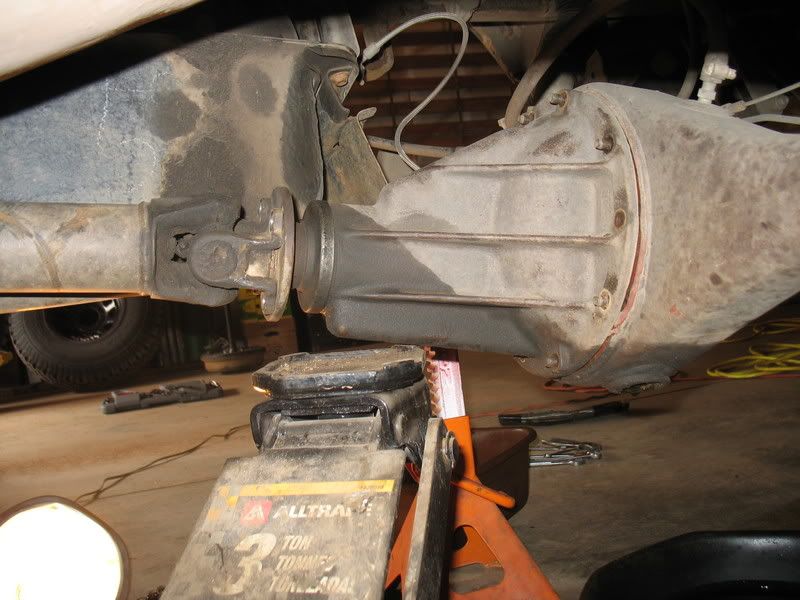
As you can see, my driveshaft was stuck to the diff slightly, so I left it on until I got the diff out. It is infinitely easier to remove the drive shaft after the third is able to move around a bit.
Now that the third is out of the truck, it is time to begin disassembling the differential. Your truck will not be operable at this point, so make sure you have other modes of transportation if you need parts:
The first thing to do is to mark the carrier bearing caps with a punch. The pictures aren't great, but they show the mark I made with a soapstone pointing to my single punch. In the pictures, the cap itself isn't on anymore. However, you will be able to see what I mean when you pull yours out. Simply mark the cap and the housing with a single punch on one side, and a double punch on the other. This will ensure that you get the caps back on the correct side, and in the correct orientation.
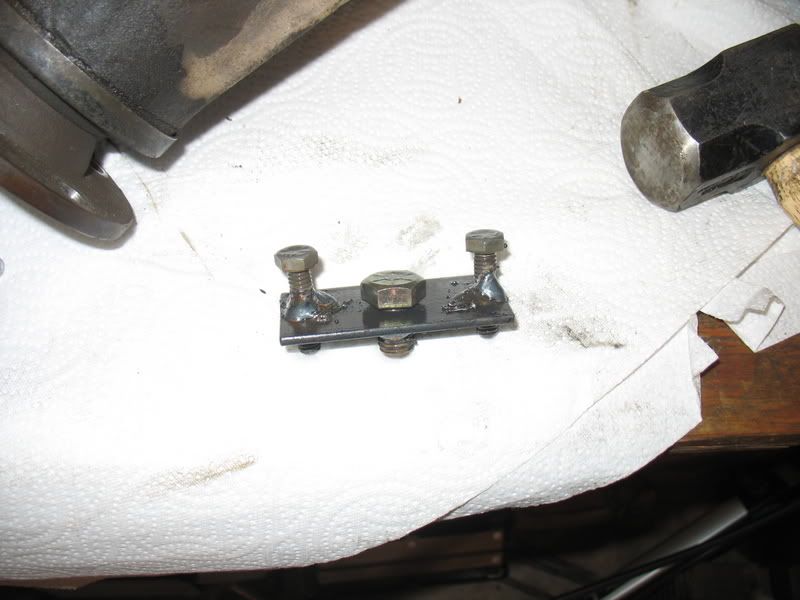
In order to remove the bearing caps, and to correctly reassemble the carrier, you must build a small tool. Get a piece of steel strip from the hardware store, and cut it to 3 inches. Purchase one half inch grade 8 bolt, and two 5/16" grade 8 bolts. Next, drill a hole in the center of the 3" steel strip, and the other two holes 2.5" center to center. The size of hole you drill will depend on how you attach the bolts. I chose to weld. You can also tap the holes, and screw the bolts in, but that will make it more difficult to loosen using this tool. This will allow you to loosen and tighten the carrier bearing adjusting nuts.
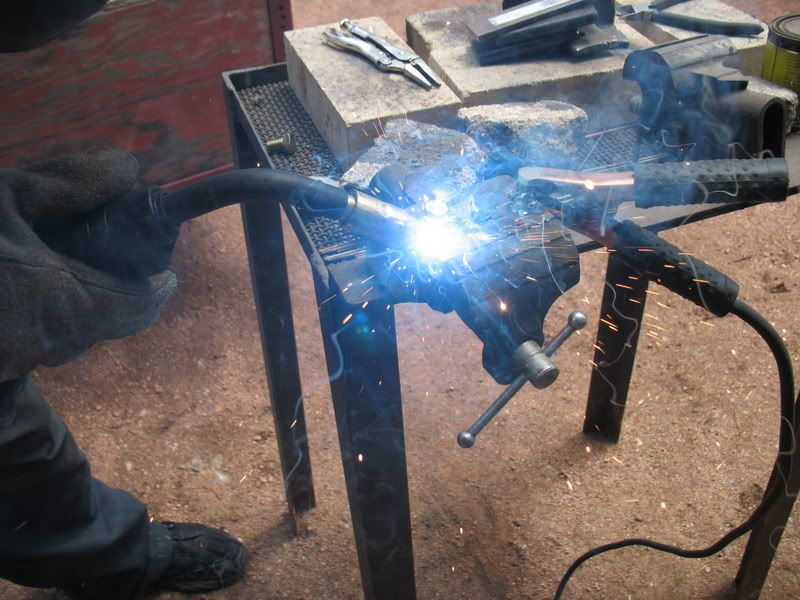
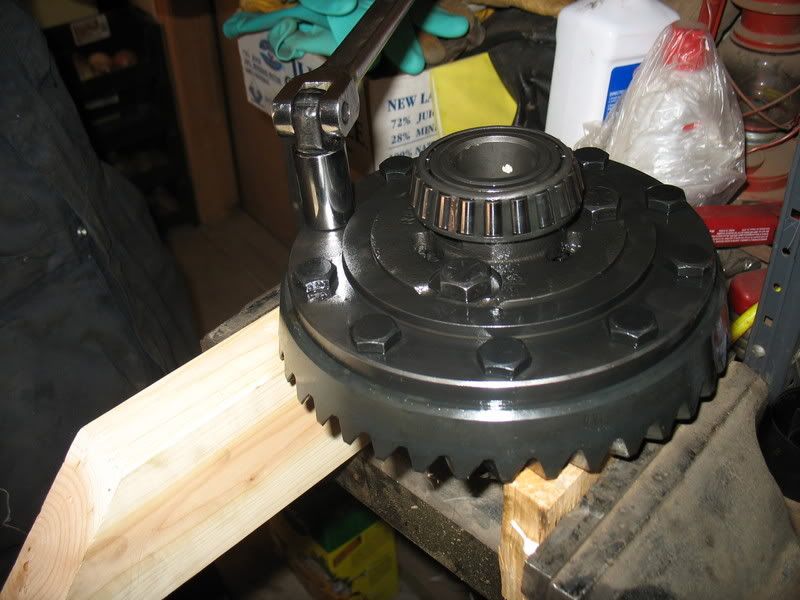
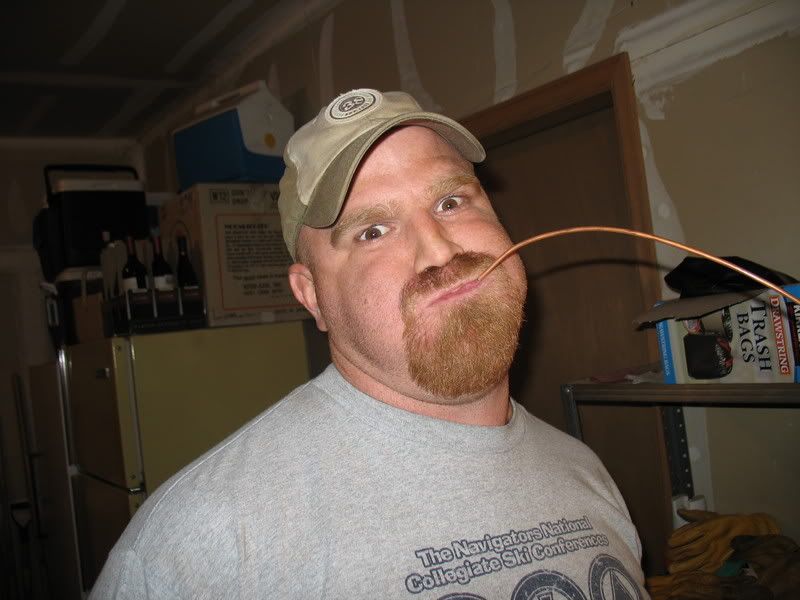
After removing the carrier bearing caps, you can remove the differential. In my case, a Detroit Trutrac, previously installed. Now, you must remove the ring gear. These are on there tight, with threadlocker, so you'll need some leverage. Excuse the goofy guy in the pic (me). I purchased new bearings with my Air Locker (I highly recommend this), but if you choose to reuse your old ones, you will also have to remove the bearings from your old carrier.

Now is decision time. I chose to bring my locker, ring gear, and bearings to a guy I know with a press, and have him press on everything. This just gives me peace of mind, since this is my primary drive axle. However, a year ago, on my front ARB, I used a different method. WARNING: I am a young bachelor, and the following method can really make a mess of things. Check with your wife, or husband, before attempting this method. I will explain in a moment. Metal has a pretty decent coefficient of thermal expansion, enough anyway, to make use of it to get bearings and gears on. Set your oven at 200 deg, and put your locker into the freezer. Once, at 200 deg, put one bearing in. Let it sit for about 20 mins, enough time for it to completely heat. Take out the locker, put in on the bench, and then, using a pair of pliers, move the bearing out. Push the bearing onto the locker. You must do this quickly, or it will not work. Repeat for the other bearing, and the ring gear. Be sure the bearings and ring gear are flush seated on the locker. Also, make sure the ring gear bolt holes line up. Now, here is my warning: After I did this, I did not clean my oven. I cooked a pizza in there about 2 weeks later, and, you guessed it: Pepperoni and 90 weight. Needless to say, lesson learned. You must clean your oven thoroughly after this, both scrubbing and with a clean cycle.
Lastly, if you install the ring gear yourself, be sure to torque down the ring gear bolts to 70 foot-pounds
Next is time to reassemble the carrier into the housing, and set the backlash.
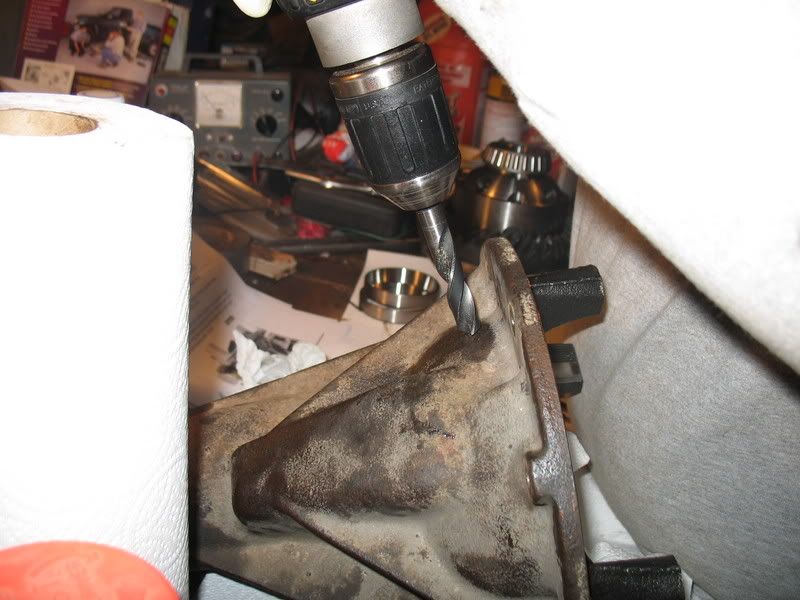
For me, it was time to drill out the hole in the third for my bulkhead fitting. ARB's instructions are top notch, and will detail everything very carefully.

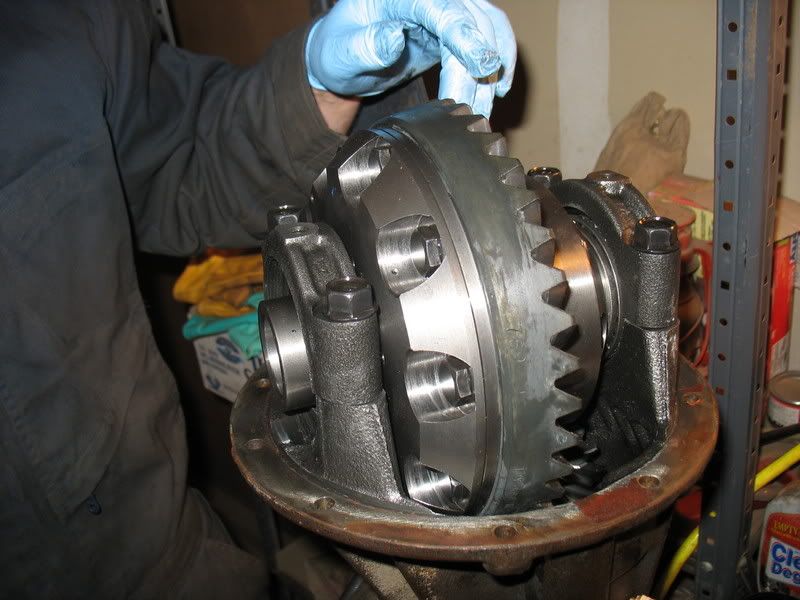
Next, place the carrier and ring gear into the housing, making sure to remember the bearing races, and replace the carrier bearing caps. Be sure to get them on the right side. This is where you match up the one dot and two dot marks you made earlier. Put in the ring gear bolts. Locktite is recommended here as well. However, at this point, only hand tighten the carrier bearing cap bolts. I hand tightened, then used a wrench with about 1/8th to 1/4 turn to be sure the bearing caps were snug.
Be sure that the threads inside the cap and the housing are PERFECTLY lined up. I used a small hammer to adjust the caps side to side until the threads were lined up on both sides of the carrier. Now, put in the carrier bearing adjusting nuts, and screw them in hand tight.
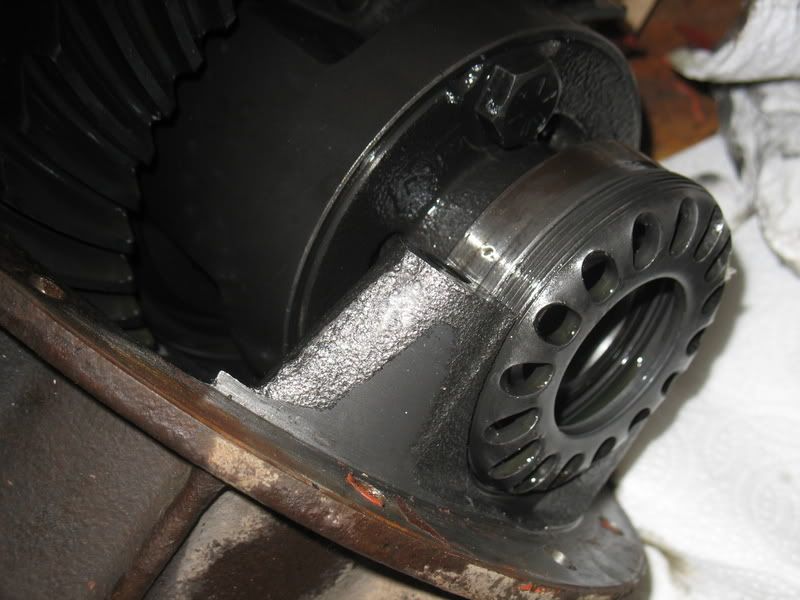
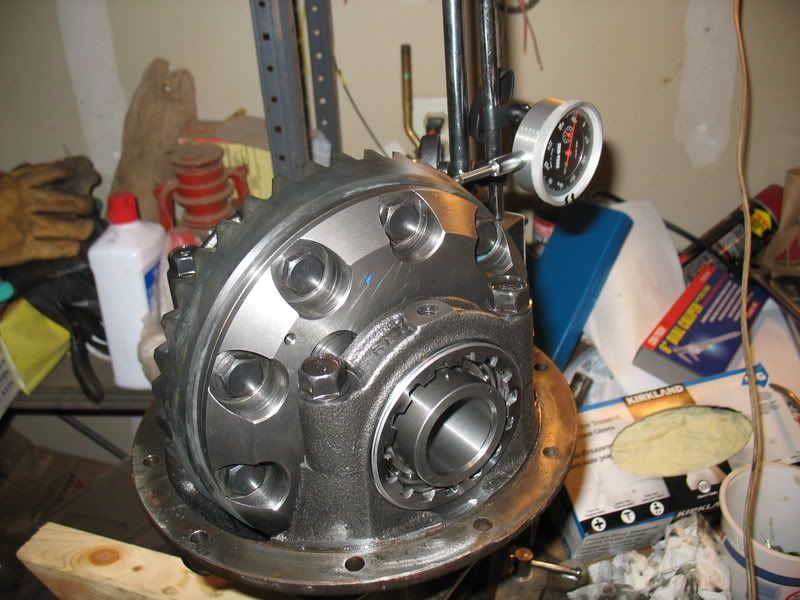
Pre carrier bearing adjusting nuts
Here you can see the supplied adjusting nut installed. On the ARB, they supply you with a new adjusting nut for the airline side of the locker, and one old one for the opposite side. For other lockers, you will reuse your old adjusting nuts.
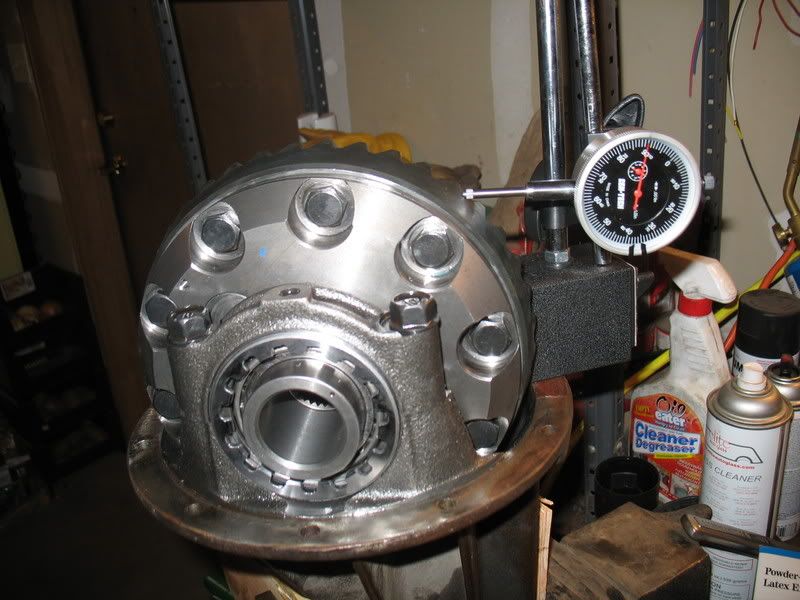
You can also see my harbor freight Dial Indicator and Mag base, purchased for 10 dollars each. These are a MUST HAVE if doing this type of installation. Setting the correct ring gear backlash is CRITICAL for having a long gear life, and gears that will hold up under abuse. Too much backlash, and the gears will deflect and chip, and too little and the gears cannot get enough oil, and will fail very quickly. Backlash is measured in thousandths of an inch, so the dial indicator is very important.
Let me next give a quick explanation of backlash. I describe backlash as the amount of "wiggle" that the ring gear has. The ring and pinion need a certain amount of space between them, and that space is measured by the amount of movement that the ring gear has when the pinion is stationary.
Good backlash values, according to ZUK, who does excellent gear installs, would be about 6 or 7 thousandths. I have heard that any value between 6 and 12 is acceptable, though I personally would never go above ten.
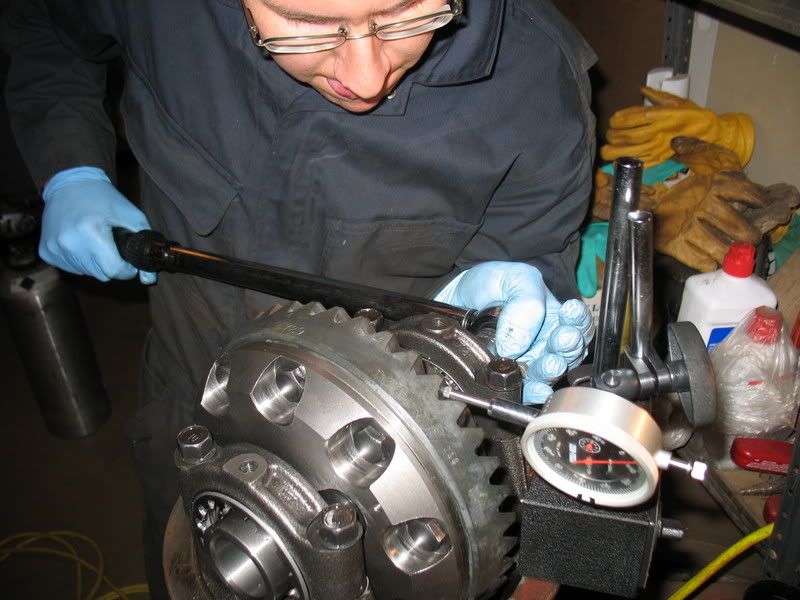
You measure the backlash by contacting the tip of the dial indicator at a right angle with the ring gear tooth you are measuring off of. Press it in a bit, so that you can get a good reading by moving the gear one way, and then the other, until it stops in both directions. The difference between your two measured values is your backlash.
Now, two things need to happen at the same time for this next step. You need to set your backlash, and you need to set your carrier bearing preload. You adjust the backlash by tightening and loosening the adjuster nuts. And you set your preload by torqueing the adjuster nuts to at least 100 ft lbs. Use a torque wrench and the handy adjuster nut wrench you built earlier.
I adjusted the setting on my torque wrench at 85 foot lbs, and moving back and forth until I had a pretty acceptable backlash of .008. I then moved back and forth from one side to the other until I clicked at 85.
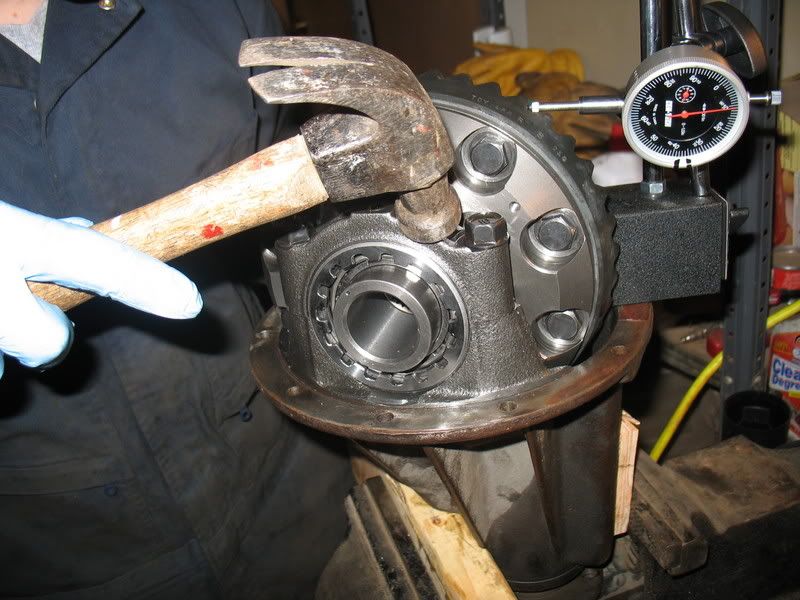
I then stepped up in 5 lb increments to 100, making sure to adjust each side the same amount each time. After each tightening, be sure to tap the bearing caps and the housing by the bearings with a hammer to help seat the bearings properly.
This process took about an hour, but it is worth it to get the backlash set up correctly so your gears last a very long time.
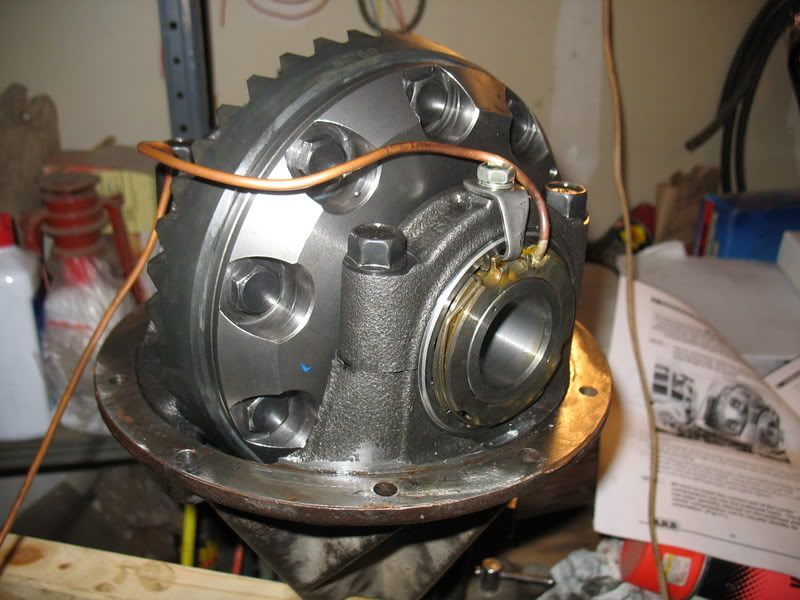
Opposite side with original adjuster nut installed
If you are installing a non-ARB locker, you are done here. I still had to assemble my air set up for the diff. Follow ARB's instructions, which are simple, and very detailed.
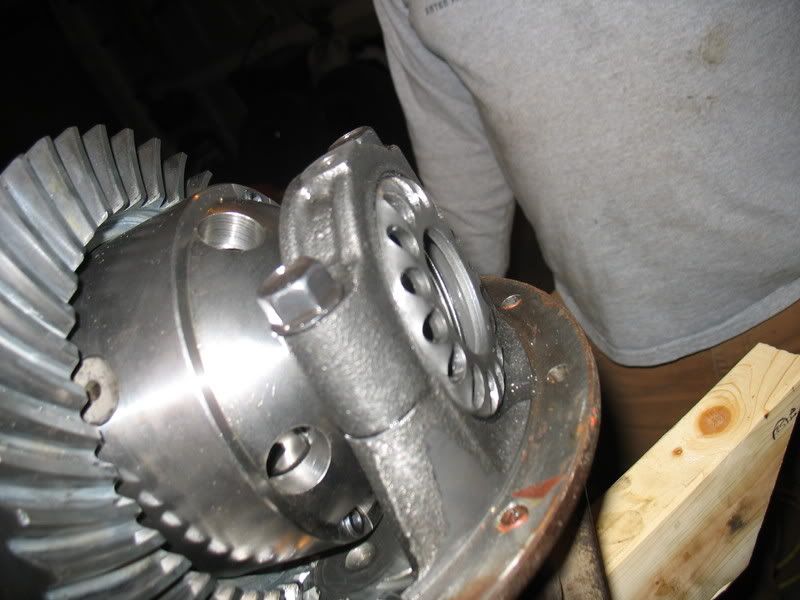
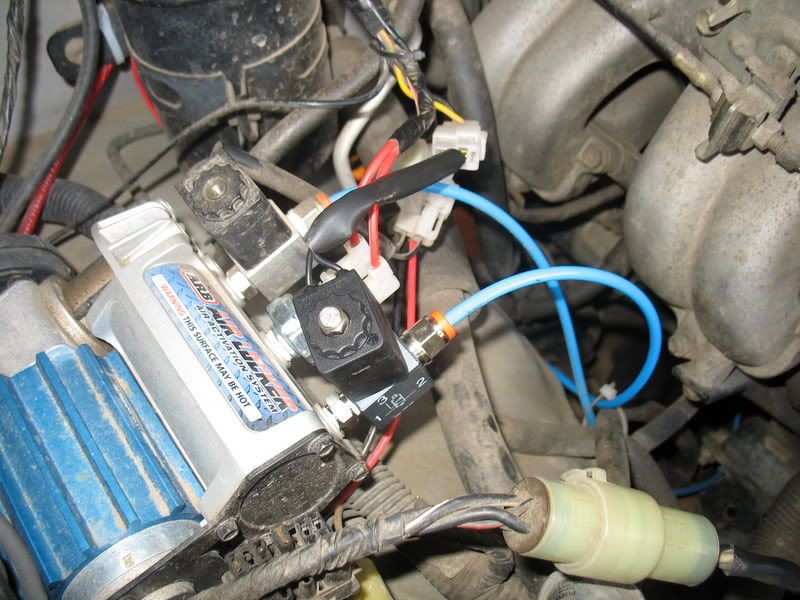
Here is a shot of the air line set up:
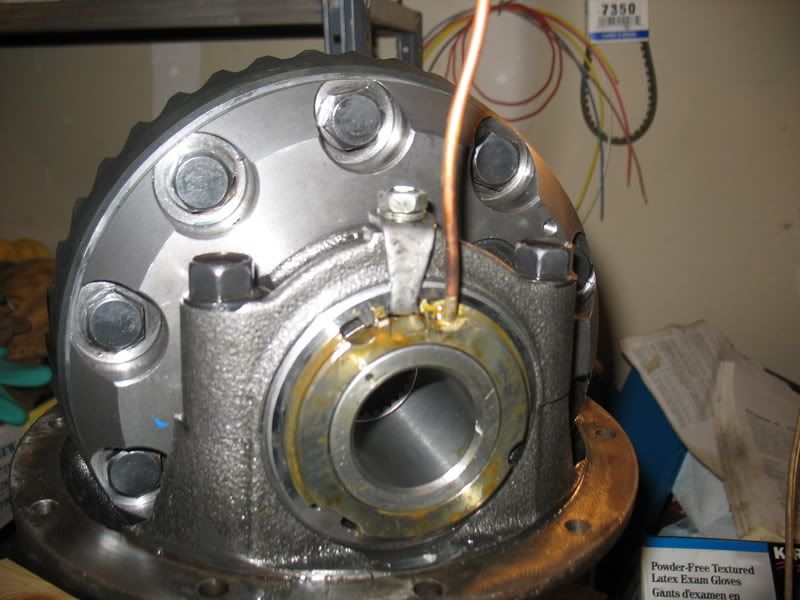
Follow the directions about bending the airline around the ring gear. Be sure there is plenty of clearance between the ring gear and the copper air line. If that line hits that ring gear, it will end your day quick.
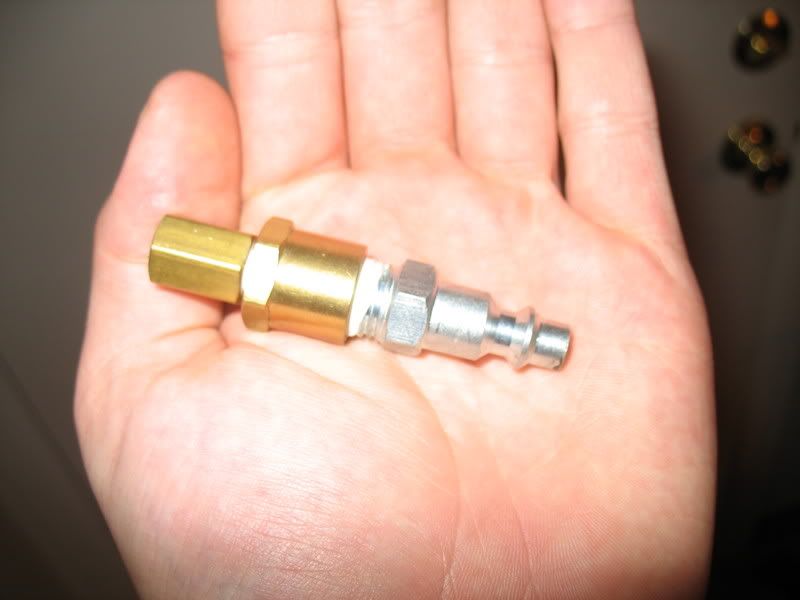
Bench testing the locker
Actually we bench tested the locker using 90 lbs of CO2 from a tank, and a special fitting I built for testing the front one. I built this by going down to the hardware store, with my ARB bulkhead fitting parts, and finding the correct brass fittings to connect the ARB stuff to a male quick disconnect that fits my female quick disconnect on my air hose.
After a bench test, checking for air leaks, and fixing any if you have them, it is time to reinstall the diff. This is the reverse of the removal, so I won't detail it here.
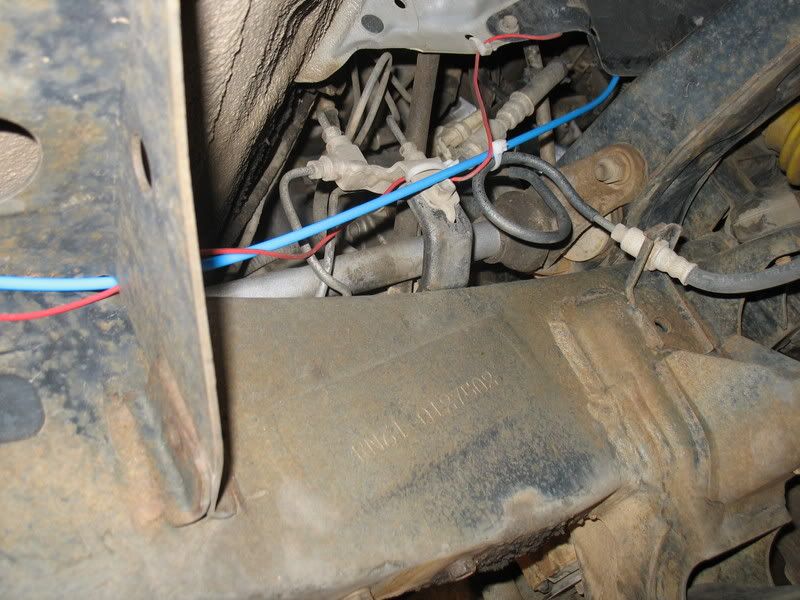
Here are a couple of shots of my airline routing.
Compressor,
Above the frame.
And done!
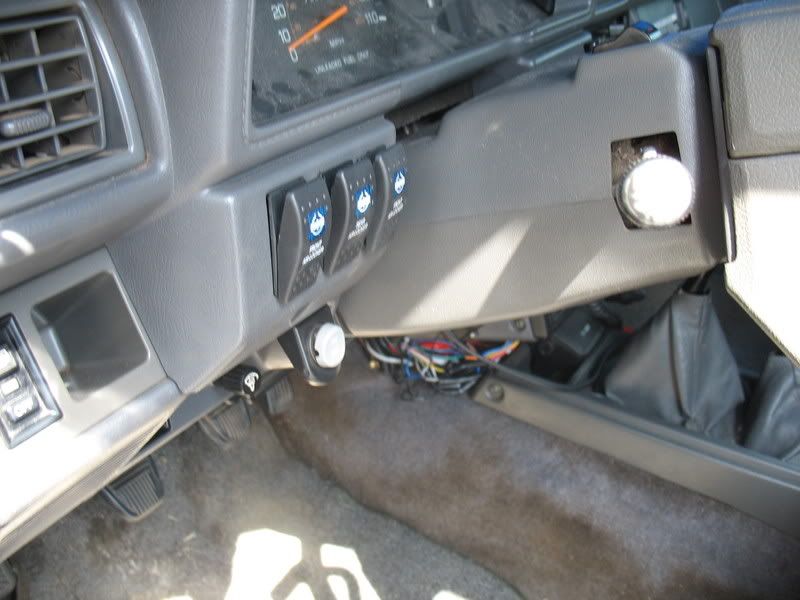
Three magic switches
Electric blue hose

I hope that this has been somewhat informative. Please post up and ask questions if things aren't clear. Thanks!
I would first like to thank my good friend Drew Frazer for helping me with this install. His help was invaluable, as was his wit and good attitude helped as much as his mechanical skill.
Also, much of this was learned from the website http://www.gearinstalls.com This is ZUK's website, and details everything that I'm about to put down here, and then some.
Disassembly
I recommend loosening the driveshaft before you remove the rear wheels from the ground. If not, it can be difficult to keep the wheels from turning. Next, drain the differential, using the drain plug. This will help to keep down on the mess as you remove axles and the housing.
Remove the rear wheels, unbolt the rear axles (located on the back of the brake drums.) Make sure that you have your ebrake off, and remove the ebrake cable. Also disconnect the rear brake lines from the drum assembly.
Remove the drum assembly and axle. Repeat for the other side.
Your removed axle piece should look like this:
Next is the removal of the third member. Undo all of the nuts on the studs, and use a jack to carefully break the seal on the housing. DO NOT PUSH HARD. You do not wish to break the studs off. Slight pressure will allow the seal to break, as the third has SOME play on the studs themselves. See Pics:
As you can see, my driveshaft was stuck to the diff slightly, so I left it on until I got the diff out. It is infinitely easier to remove the drive shaft after the third is able to move around a bit.
Now that the third is out of the truck, it is time to begin disassembling the differential. Your truck will not be operable at this point, so make sure you have other modes of transportation if you need parts:
The first thing to do is to mark the carrier bearing caps with a punch. The pictures aren't great, but they show the mark I made with a soapstone pointing to my single punch. In the pictures, the cap itself isn't on anymore. However, you will be able to see what I mean when you pull yours out. Simply mark the cap and the housing with a single punch on one side, and a double punch on the other. This will ensure that you get the caps back on the correct side, and in the correct orientation.
In order to remove the bearing caps, and to correctly reassemble the carrier, you must build a small tool. Get a piece of steel strip from the hardware store, and cut it to 3 inches. Purchase one half inch grade 8 bolt, and two 5/16" grade 8 bolts. Next, drill a hole in the center of the 3" steel strip, and the other two holes 2.5" center to center. The size of hole you drill will depend on how you attach the bolts. I chose to weld. You can also tap the holes, and screw the bolts in, but that will make it more difficult to loosen using this tool. This will allow you to loosen and tighten the carrier bearing adjusting nuts.
After removing the carrier bearing caps, you can remove the differential. In my case, a Detroit Trutrac, previously installed. Now, you must remove the ring gear. These are on there tight, with threadlocker, so you'll need some leverage. Excuse the goofy guy in the pic (me). I purchased new bearings with my Air Locker (I highly recommend this), but if you choose to reuse your old ones, you will also have to remove the bearings from your old carrier.
Reassembly
Now is decision time. I chose to bring my locker, ring gear, and bearings to a guy I know with a press, and have him press on everything. This just gives me peace of mind, since this is my primary drive axle. However, a year ago, on my front ARB, I used a different method. WARNING: I am a young bachelor, and the following method can really make a mess of things. Check with your wife, or husband, before attempting this method. I will explain in a moment. Metal has a pretty decent coefficient of thermal expansion, enough anyway, to make use of it to get bearings and gears on. Set your oven at 200 deg, and put your locker into the freezer. Once, at 200 deg, put one bearing in. Let it sit for about 20 mins, enough time for it to completely heat. Take out the locker, put in on the bench, and then, using a pair of pliers, move the bearing out. Push the bearing onto the locker. You must do this quickly, or it will not work. Repeat for the other bearing, and the ring gear. Be sure the bearings and ring gear are flush seated on the locker. Also, make sure the ring gear bolt holes line up. Now, here is my warning: After I did this, I did not clean my oven. I cooked a pizza in there about 2 weeks later, and, you guessed it: Pepperoni and 90 weight. Needless to say, lesson learned. You must clean your oven thoroughly after this, both scrubbing and with a clean cycle.
Lastly, if you install the ring gear yourself, be sure to torque down the ring gear bolts to 70 foot-pounds
Next is time to reassemble the carrier into the housing, and set the backlash.
For me, it was time to drill out the hole in the third for my bulkhead fitting. ARB's instructions are top notch, and will detail everything very carefully.
Next, place the carrier and ring gear into the housing, making sure to remember the bearing races, and replace the carrier bearing caps. Be sure to get them on the right side. This is where you match up the one dot and two dot marks you made earlier. Put in the ring gear bolts. Locktite is recommended here as well. However, at this point, only hand tighten the carrier bearing cap bolts. I hand tightened, then used a wrench with about 1/8th to 1/4 turn to be sure the bearing caps were snug.
Be sure that the threads inside the cap and the housing are PERFECTLY lined up. I used a small hammer to adjust the caps side to side until the threads were lined up on both sides of the carrier. Now, put in the carrier bearing adjusting nuts, and screw them in hand tight.
Pre carrier bearing adjusting nuts
Here you can see the supplied adjusting nut installed. On the ARB, they supply you with a new adjusting nut for the airline side of the locker, and one old one for the opposite side. For other lockers, you will reuse your old adjusting nuts.
You can also see my harbor freight Dial Indicator and Mag base, purchased for 10 dollars each. These are a MUST HAVE if doing this type of installation. Setting the correct ring gear backlash is CRITICAL for having a long gear life, and gears that will hold up under abuse. Too much backlash, and the gears will deflect and chip, and too little and the gears cannot get enough oil, and will fail very quickly. Backlash is measured in thousandths of an inch, so the dial indicator is very important.
Let me next give a quick explanation of backlash. I describe backlash as the amount of "wiggle" that the ring gear has. The ring and pinion need a certain amount of space between them, and that space is measured by the amount of movement that the ring gear has when the pinion is stationary.
Good backlash values, according to ZUK, who does excellent gear installs, would be about 6 or 7 thousandths. I have heard that any value between 6 and 12 is acceptable, though I personally would never go above ten.
You measure the backlash by contacting the tip of the dial indicator at a right angle with the ring gear tooth you are measuring off of. Press it in a bit, so that you can get a good reading by moving the gear one way, and then the other, until it stops in both directions. The difference between your two measured values is your backlash.
Now, two things need to happen at the same time for this next step. You need to set your backlash, and you need to set your carrier bearing preload. You adjust the backlash by tightening and loosening the adjuster nuts. And you set your preload by torqueing the adjuster nuts to at least 100 ft lbs. Use a torque wrench and the handy adjuster nut wrench you built earlier.
I adjusted the setting on my torque wrench at 85 foot lbs, and moving back and forth until I had a pretty acceptable backlash of .008. I then moved back and forth from one side to the other until I clicked at 85.
I then stepped up in 5 lb increments to 100, making sure to adjust each side the same amount each time. After each tightening, be sure to tap the bearing caps and the housing by the bearings with a hammer to help seat the bearings properly.
This process took about an hour, but it is worth it to get the backlash set up correctly so your gears last a very long time.
Opposite side with original adjuster nut installed
If you are installing a non-ARB locker, you are done here. I still had to assemble my air set up for the diff. Follow ARB's instructions, which are simple, and very detailed.
Here is a shot of the air line set up:
Follow the directions about bending the airline around the ring gear. Be sure there is plenty of clearance between the ring gear and the copper air line. If that line hits that ring gear, it will end your day quick.
Bench testing the locker
Actually we bench tested the locker using 90 lbs of CO2 from a tank, and a special fitting I built for testing the front one. I built this by going down to the hardware store, with my ARB bulkhead fitting parts, and finding the correct brass fittings to connect the ARB stuff to a male quick disconnect that fits my female quick disconnect on my air hose.
After a bench test, checking for air leaks, and fixing any if you have them, it is time to reinstall the diff. This is the reverse of the removal, so I won't detail it here.
Here are a couple of shots of my airline routing.
Compressor,
Above the frame.
And done!
Three magic switches
Electric blue hose
I hope that this has been somewhat informative. Please post up and ask questions if things aren't clear. Thanks!
Last edited by AxleIke; May 17, 2007 at 12:15 AM.
May 17, 2007 | 05:16 AM
#4
Registered User
Joined: Feb 2007
Posts: 499
Likes: 1
From: Fredericksburg, VA
Im a little unclear on your tool you made for removing the bearing caps. How exactly do you use it?
Nice write up. Hopefully this will inspire more people to do their own installs. I think most people are very intimidated by this. Most companies that sell gears offer great tech support when it comes time for installation. I think more people should be doing their own. Its really not that hard when you apply yourself.
Nice write up. Hopefully this will inspire more people to do their own installs. I think most people are very intimidated by this. Most companies that sell gears offer great tech support when it comes time for installation. I think more people should be doing their own. Its really not that hard when you apply yourself.
May 17, 2007 | 07:35 AM
#6
Thread Starter
Contributing Member
Joined: Apr 2004
Posts: 5,464
Likes: 6
From: Arvada, Colorado
Im a little unclear on your tool you made for removing the bearing caps. How exactly do you use it?
Nice write up. Hopefully this will inspire more people to do their own installs. I think most people are very intimidated by this. Most companies that sell gears offer great tech support when it comes time for installation. I think more people should be doing their own. Its really not that hard when you apply yourself.
Nice write up. Hopefully this will inspire more people to do their own installs. I think most people are very intimidated by this. Most companies that sell gears offer great tech support when it comes time for installation. I think more people should be doing their own. Its really not that hard when you apply yourself.
The tool has the two outter bolts. Those two bolts slide into the holes in the carrier bearing adjusting nuts. The center bolt is for a wrench. So, you just slide the two outter bolts into the adjuster nut, and put a wrench on the center bolt, and then you can turn, and torque the adjuster nuts very easily
Trending Topics
 May 17, 2007 | 10:04 PM
#11
Thread Starter
Contributing Member
Joined: Apr 2004
Posts: 5,464
Likes: 6
From: Arvada, Colorado
Let me know...I'm always around.
Last edited by AxleIke; May 17, 2007 at 10:40 PM.
May 17, 2007 | 10:32 PM
#13
Thread Starter
Contributing Member
Joined: Apr 2004
Posts: 5,464
Likes: 6
From: Arvada, Colorado
No worries man. I enjoyed writing it up...I'm glad folks are finding it useful. When i first started to look into installing my front locker, there was a lot of info on types of lockers, but very little on actually puting it in. Hopefully this will help others figure out what is involved, so they can decide if they want to do it or not.
May 17, 2007 | 10:36 PM
#14
Registered User
Joined: Mar 2007
Posts: 352
Likes: 0
From: Orange County, CA
May 20, 2007 | 04:09 PM
#16
Registered User


Joined: Mar 2006
Posts: 2,586
Likes: 9
From: Atlanta, GA
awesome write-up, very good job. If i were to put an ARB in the front IFS diff would it be pretty much the same process. I have had my rear in and ou several times, so i am very familiar with the orientation of the differentials. Thanks again for the write-up and congrats on getting an ARB in your rear end.
May 20, 2007 | 08:28 PM
#17
Thread Starter
Contributing Member
Joined: Apr 2004
Posts: 5,464
Likes: 6
From: Arvada, Colorado
Nov 13, 2007 | 08:47 PM
#18
Registered User
Joined: Sep 2007
Posts: 10
Likes: 0
Sorry, should have gotten a pic of that.
The tool has the two outter bolts. Those two bolts slide into the holes in the carrier bearing adjusting nuts. The center bolt is for a wrench. So, you just slide the two outter bolts into the adjuster nut, and put a wrench on the center bolt, and then you can turn, and torque the adjuster nuts very easily
The tool has the two outter bolts. Those two bolts slide into the holes in the carrier bearing adjusting nuts. The center bolt is for a wrench. So, you just slide the two outter bolts into the adjuster nut, and put a wrench on the center bolt, and then you can turn, and torque the adjuster nuts very easily
your post gave me confidence. ill be installing mine this weekend.
Nov 13, 2007 | 09:01 PM
#19
Thread Starter
Contributing Member
Joined: Apr 2004
Posts: 5,464
Likes: 6
From: Arvada, Colorado
Dec 4, 2007 | 06:59 PM
#20
Registered User
Joined: Oct 2007
Posts: 60
Likes: 0
From: Flagstaff, AZ
Nice write up. My method for heating bearings is a little different though.
I bought an old deep fryer at Goodwill and I just heat the bearings to ~400F in cooking oil. They go on nicely with no need to freeze the other part and they taste delicious.
I bought an old deep fryer at Goodwill and I just heat the bearings to ~400F in cooking oil. They go on nicely with no need to freeze the other part and they taste delicious.

Thread
Thread Starter
Forum
Replies
Last Post
FS[PacSouthWest]: 2- 8"3rd members:4.88 ratchet lockers,new setup kit, rear axle rebuild kit,diff armor
jerusry
Axles - Suspensions - Tires - Wheels
1
Oct 19, 2015 05:28 PM
Esibnitsud
86-95 Trucks & 4Runners
0
Jul 30, 2015 08:19 PM
crashburnoveride
86-95 Trucks & 4Runners
1
Jul 10, 2015 06:39 AM


