
Corey's 2007 FJ Cruiser Build-Up Thread
 Feb 28, 2009 | 09:01 AM
#281
Thread Starter
Co-Founder/Administrator
iTrader: (1)
Joined: May 2002
Posts: 32,242
Likes: 21
From: Auburn, Washington
BajaRack's FJ ladder installed 2-28-2009
Actually I installed it a few weeks back, but both brackets were not the correct ones, and new ones arrived to those of us who bought the first five ladders.
The new parts arrived 2-27-2009.
Saw the ladder mentioned over on FJ Cruiser forums website.
Very nice looking ladder, and this will allow me to undo the rear latch to my Autohome Maggiolina AirLand roof top tent much easier than jumping up on a rear tire.
Plus the ladder looks cool too
When the ladder was installed a few weeks prior to this buildup entry, the bottom clamp would not work, and they redesigned both the top and bottom clamps like the original one for their FJ Cruiser.
Installing it is pretty straight forward.
Below are some pictures of the install and finished product.
Tools needed:
13 mm Gear wrench and open end wrench on one end for the top bracket.
14 mm Gear wrench and open end wrench for the bottom bracket.
Assortment of Allen wrenches.
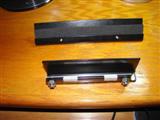
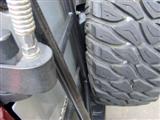
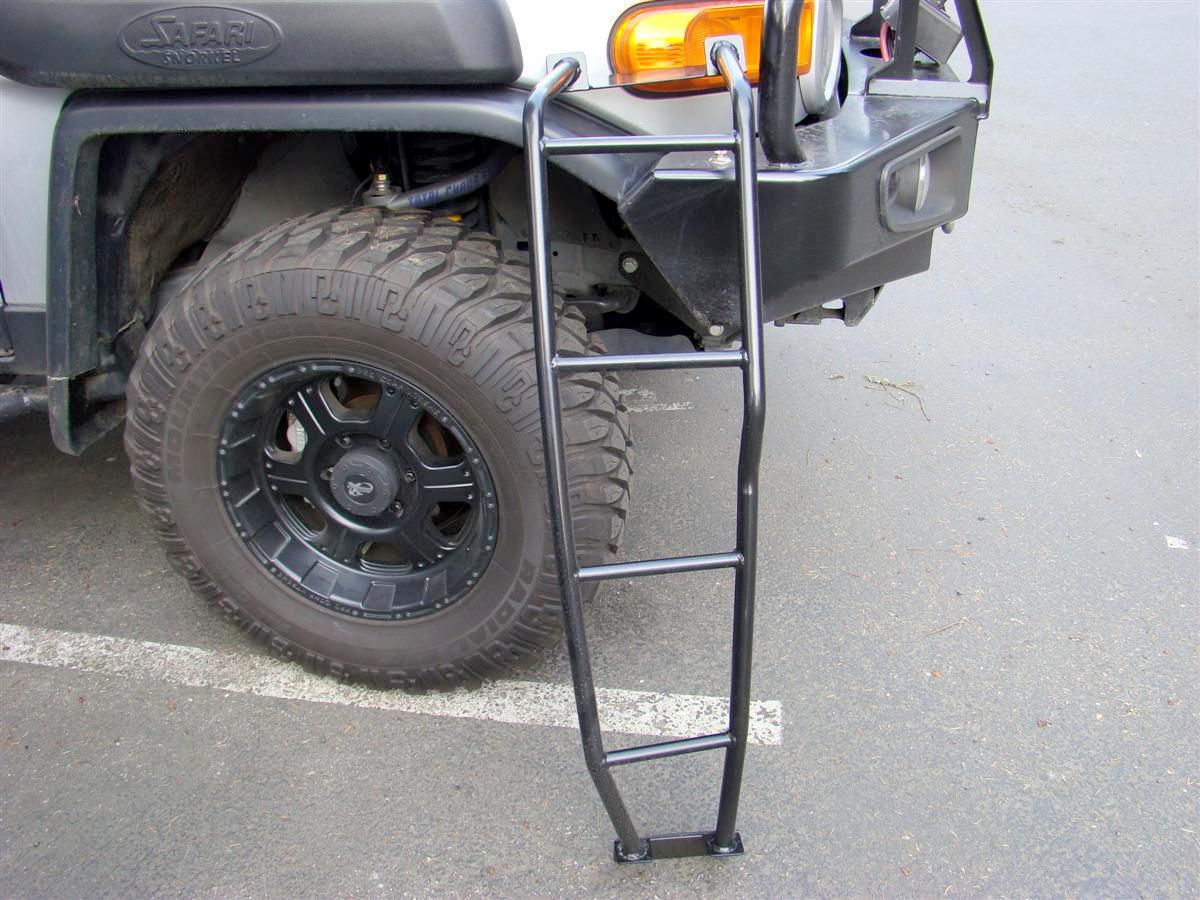
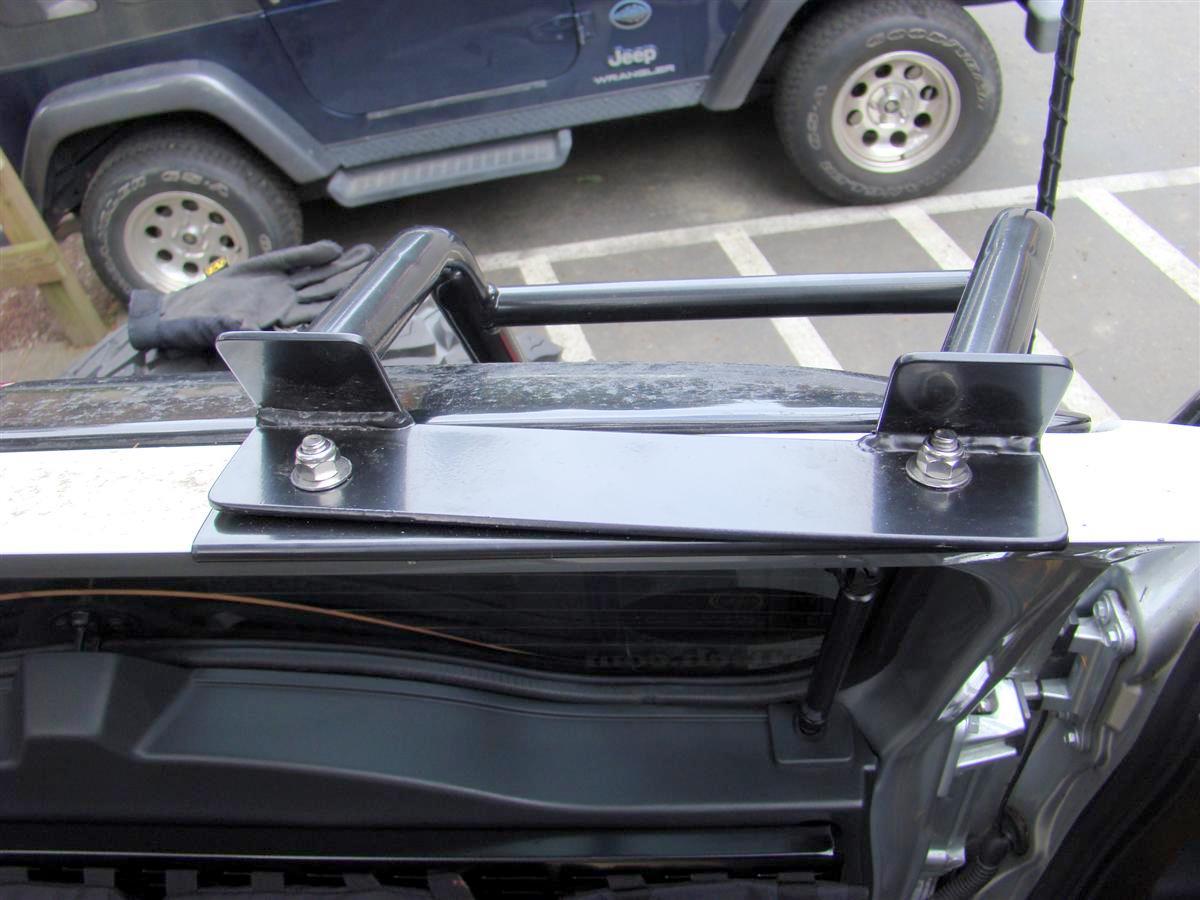
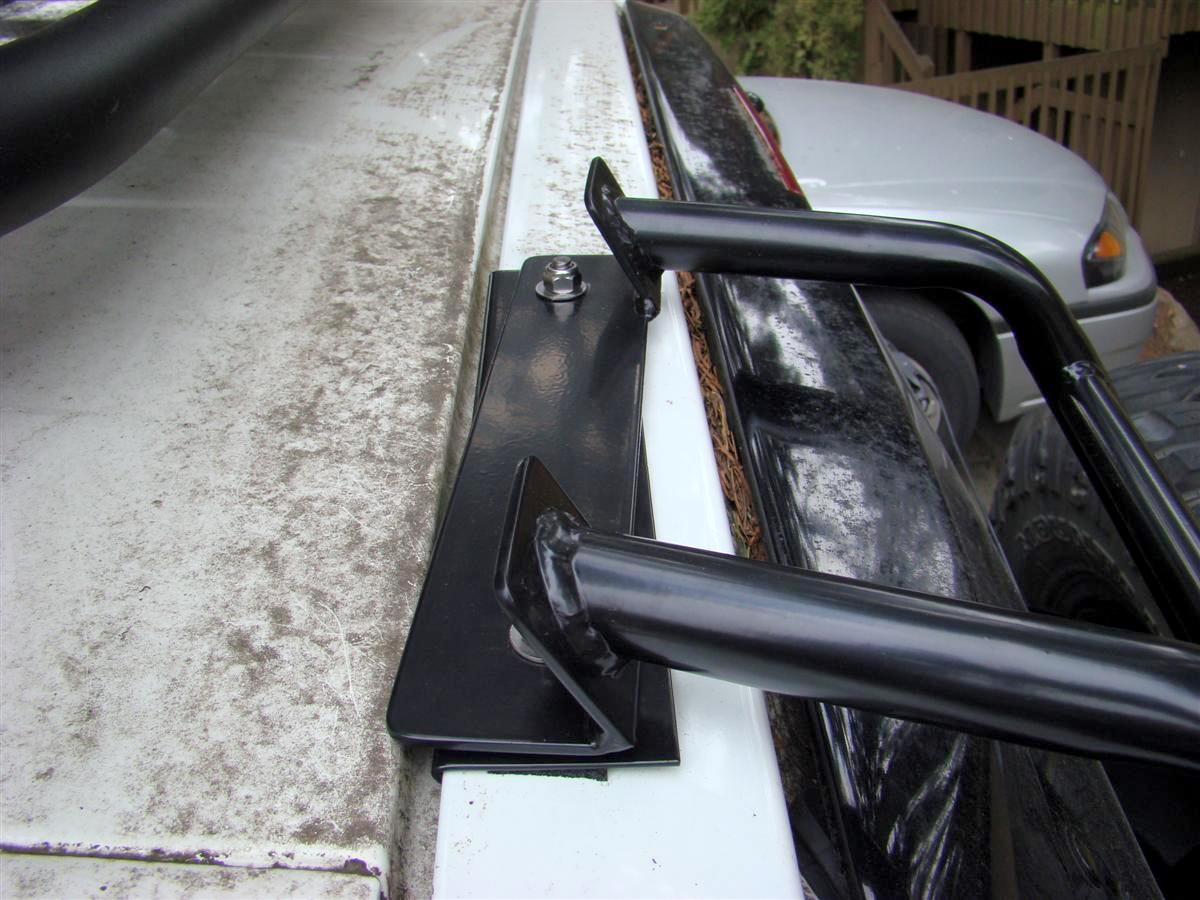
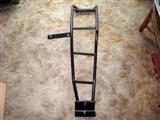
Pictures one through four show the ladder by itself, the new clamps, and the top and bottom clamps installed.
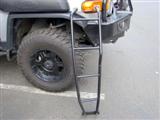
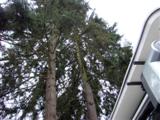
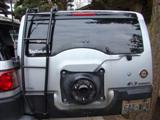
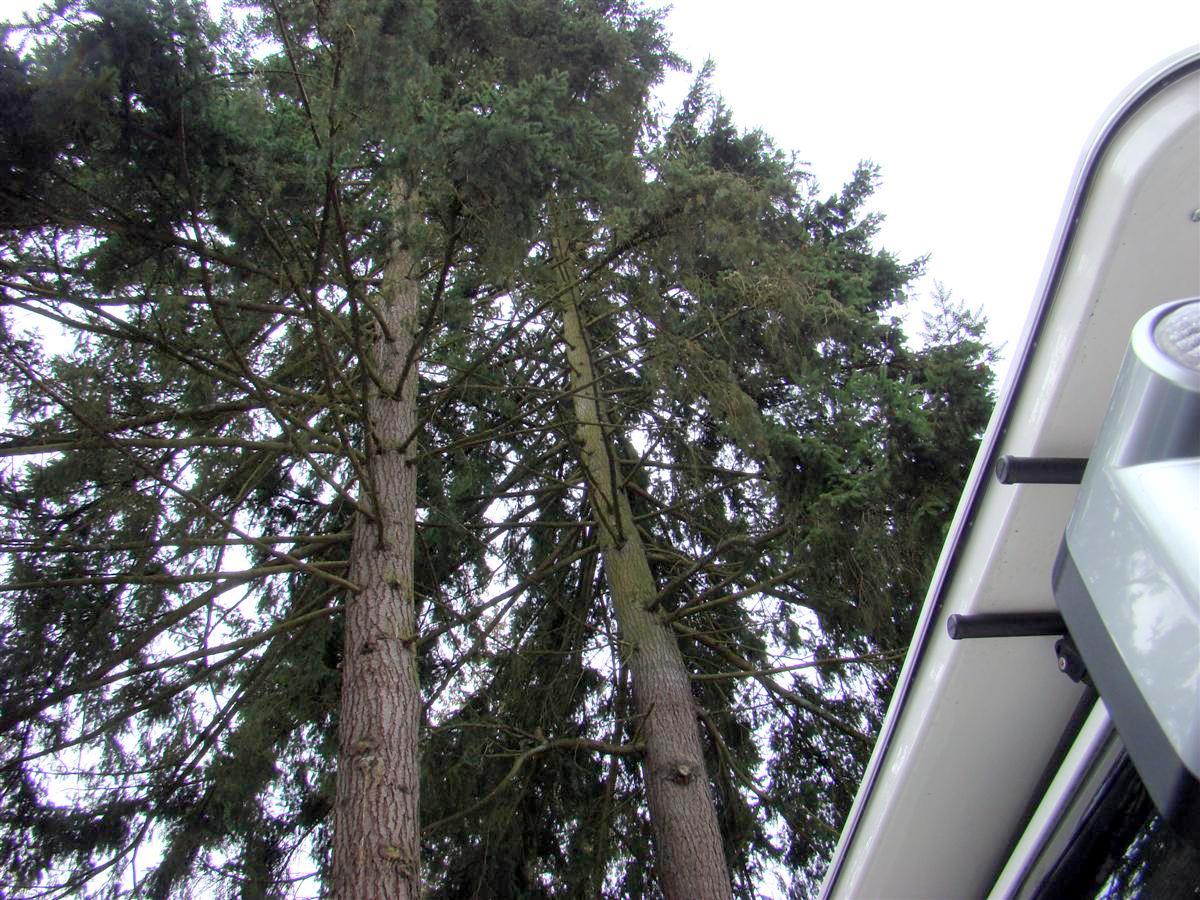
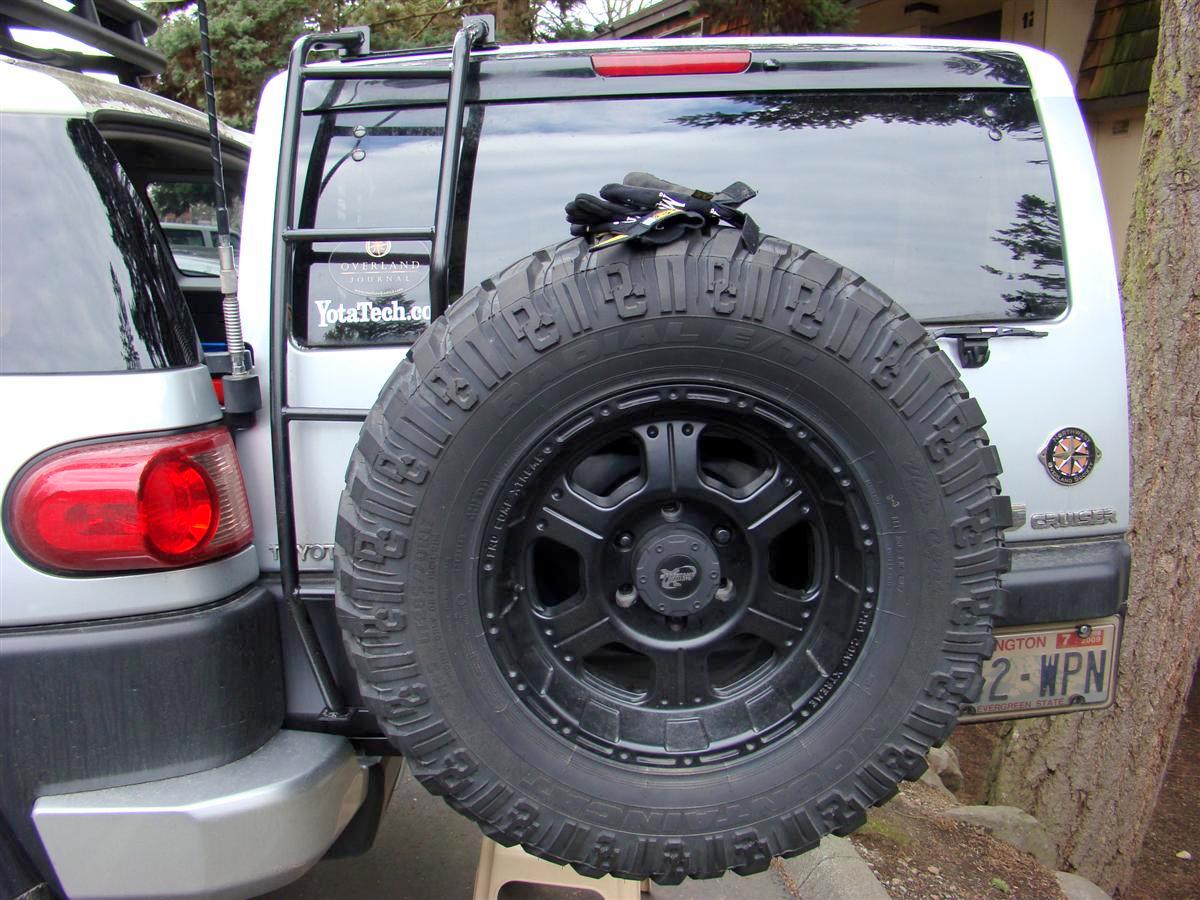
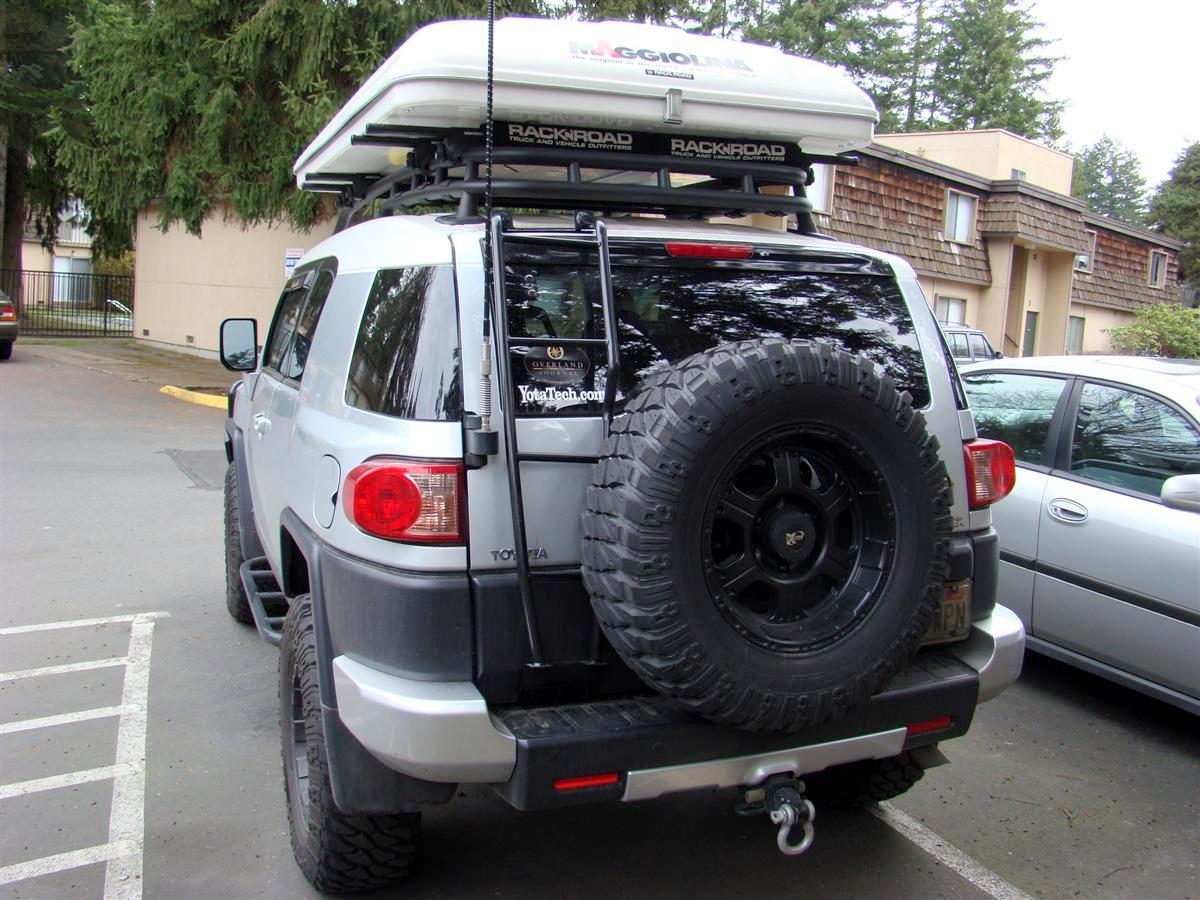
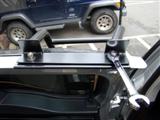
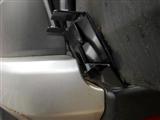
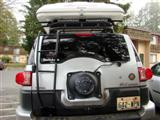
Pictures five through eight show the reason why my rig is filthy during the winter, two old growth fir trees I park under, ladder installed without spare tire, top of the ladder crooked after spare tire is on, and a shot with ladder and tire on.

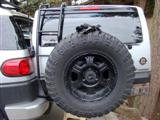
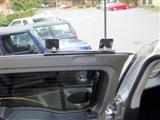
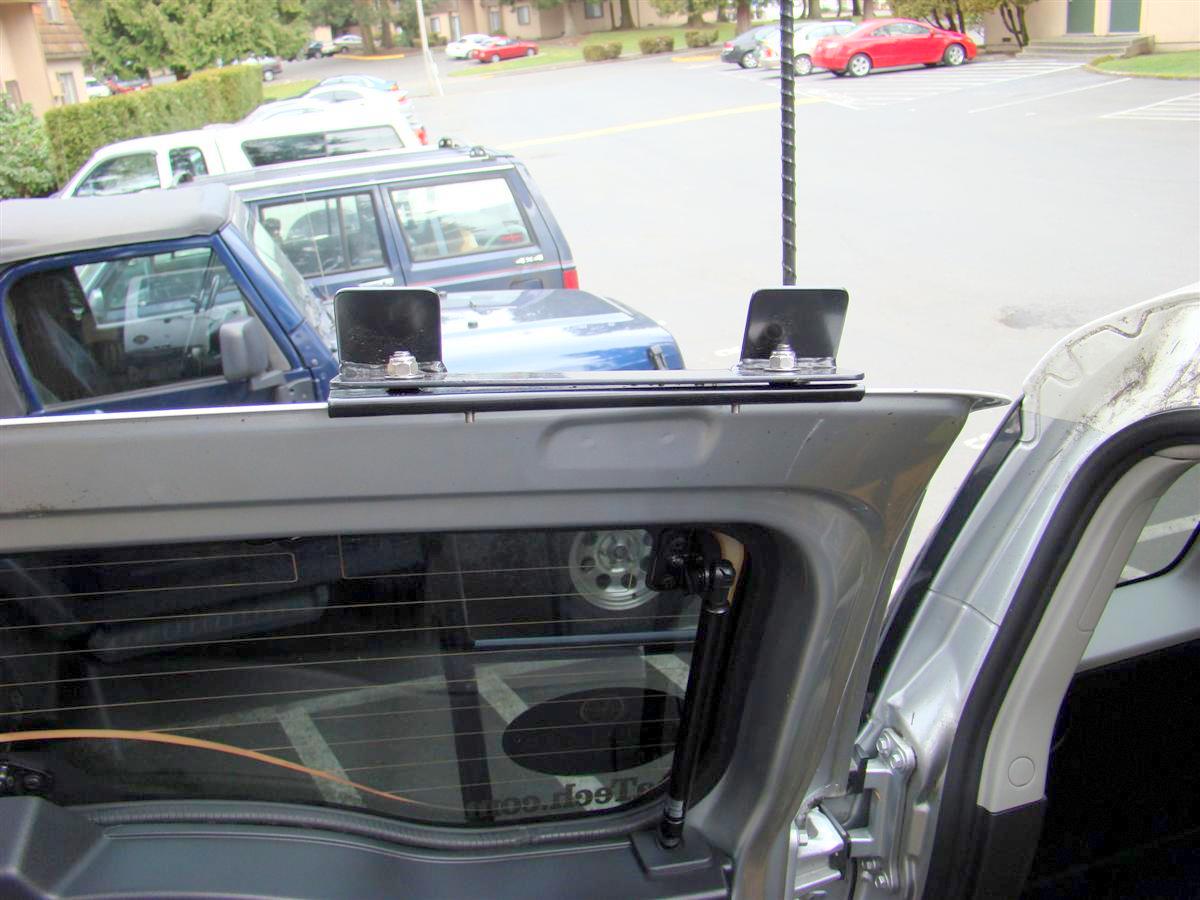
Pictures nine through eleven show another ladder shot with the rear door closed, spare tire clearance, and a shot of the top bracket again.

If you have a bigger than stock size spare tire, you must pull the tire off the mount.
That top bracket is indeed on straight and flush with the door.
It appears the ladder became crooked though apparently after tightening up the spare tire.
I could hear the ladder creaking some as I tightened down the three lugnuts to the spare tire.
I can not figure out how it is crooked though, as the bolts are not bent, everything appears normal.
I am not going to fret over it though, the ladder is strong and secure.
I climbed up on it and even stood on the spare tire to examine the nice garden I have growing up on top of my tent.
I should have snagged a picture of that.
That will be cleaned off when warmer weather gets here and I break out my rigwashing supplies.
Links:
BajaRack
The FJ Cruiser ladder
The new parts arrived 2-27-2009.
Saw the ladder mentioned over on FJ Cruiser forums website.
Very nice looking ladder, and this will allow me to undo the rear latch to my Autohome Maggiolina AirLand roof top tent much easier than jumping up on a rear tire.
Plus the ladder looks cool too
When the ladder was installed a few weeks prior to this buildup entry, the bottom clamp would not work, and they redesigned both the top and bottom clamps like the original one for their FJ Cruiser.
Installing it is pretty straight forward.
Below are some pictures of the install and finished product.
Tools needed:
13 mm Gear wrench and open end wrench on one end for the top bracket.
14 mm Gear wrench and open end wrench for the bottom bracket.
Assortment of Allen wrenches.
Pictures one through four show the ladder by itself, the new clamps, and the top and bottom clamps installed.


Pictures five through eight show the reason why my rig is filthy during the winter, two old growth fir trees I park under, ladder installed without spare tire, top of the ladder crooked after spare tire is on, and a shot with ladder and tire on.

Pictures nine through eleven show another ladder shot with the rear door closed, spare tire clearance, and a shot of the top bracket again.
If you have a bigger than stock size spare tire, you must pull the tire off the mount.
That top bracket is indeed on straight and flush with the door.
It appears the ladder became crooked though apparently after tightening up the spare tire.
I could hear the ladder creaking some as I tightened down the three lugnuts to the spare tire.
I can not figure out how it is crooked though, as the bolts are not bent, everything appears normal.
I am not going to fret over it though, the ladder is strong and secure.
I climbed up on it and even stood on the spare tire to examine the nice garden I have growing up on top of my tent.
I should have snagged a picture of that.
That will be cleaned off when warmer weather gets here and I break out my rigwashing supplies.
Links:
BajaRack
The FJ Cruiser ladder
Feb 28, 2009 | 03:13 PM
#282
Thread Starter
Co-Founder/Administrator
iTrader: (1)
Joined: May 2002
Posts: 32,242
Likes: 21
From: Auburn, Washington
Update on the ladder.
It appears the two holes at the top of the ladder are out of alignment, thus causing the way it looks when you look at the top bracket.
Sergio owner of BajaRack's is sending out a replacement ladder to me to fix this.
It appears the two holes at the top of the ladder are out of alignment, thus causing the way it looks when you look at the top bracket.
Sergio owner of BajaRack's is sending out a replacement ladder to me to fix this.
Feb 28, 2009 | 03:31 PM
#283
Contributing Member
Joined: Oct 2002
Posts: 5,918
Likes: 1
From: Da Gorge, Oregon
I'm sort of glad to hear that, Corey, but it doesn't do credit to the manufacturer to ship out two defective units to a VIP. BTW, what is the load limit of the door hinges? The tire/wheel must weight well over OEM and combined with ? users weight, at some point won't the hinges or their mounting points deform and possibly warp the door allowing a leak or difficulty closing?
Feb 28, 2009 | 03:40 PM
#284
Thread Starter
Co-Founder/Administrator
iTrader: (1)
Joined: May 2002
Posts: 32,242
Likes: 21
From: Auburn, Washington
I have been having a lot of trouble with this ladder for some reason.
I am just curious if the other four who ordered when I did got the holes mixed up too.
This guy on the FJ site did not.
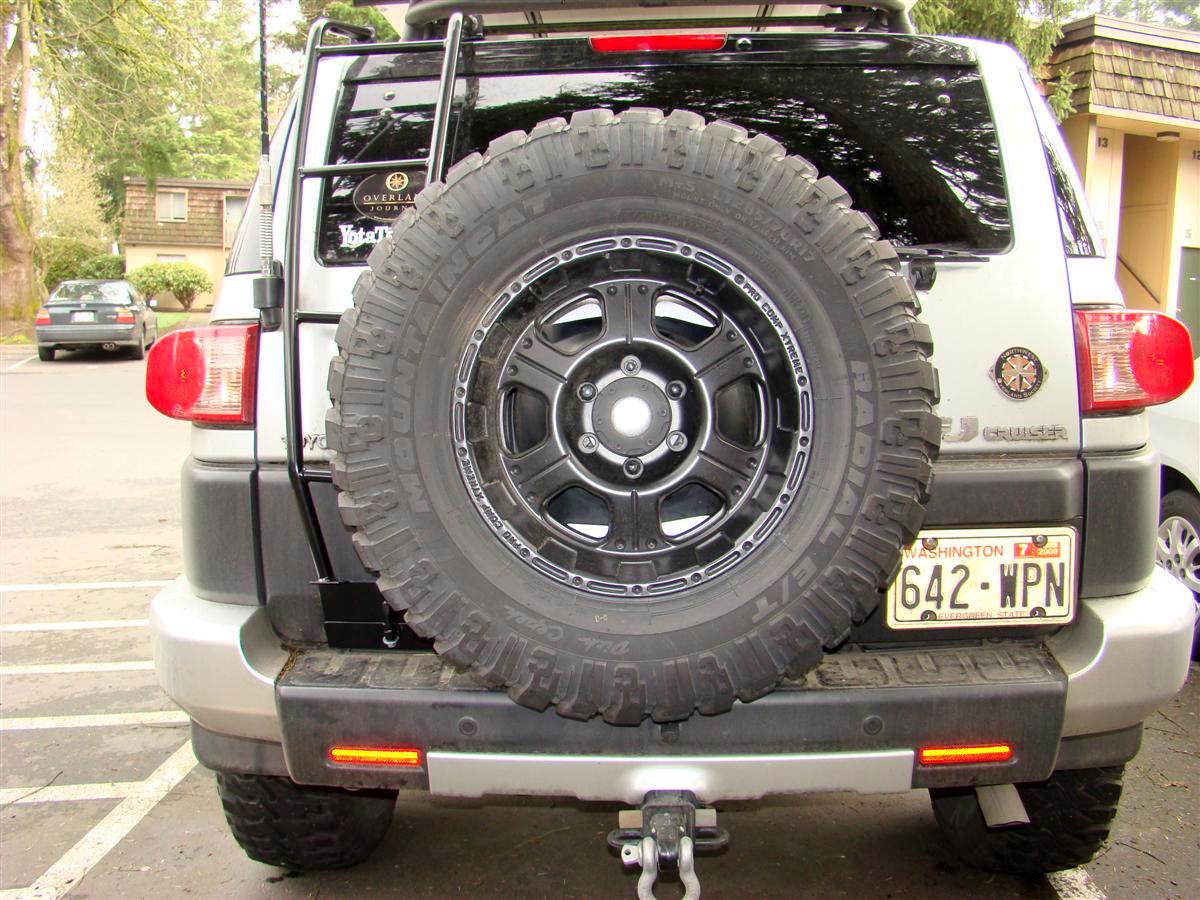
Here is mine again
Notice how his is straight, and holes are in alignment
.jpg)
Oh well, hopefully the new one will ship out next week.
The updated parts were two day UPS, so I would imagine I would get the ladder pretty fast too.
Not sure about the load limit on the door Bob, but when the door is closed, it looks like it can handle quite a bit of weight.
Plus this is like the racks on rigs.
When going down the road, you have a weight limit of around 150 lb on your roof which includes the rack, the tent, and anything else on it.
However when you are parked, you can have around 600 lb on the roof with no problem when still, and the load is distributed via the crossbars.
I am just curious if the other four who ordered when I did got the holes mixed up too.
This guy on the FJ site did not.
Here is mine again
Notice how his is straight, and holes are in alignment
Oh well, hopefully the new one will ship out next week.
The updated parts were two day UPS, so I would imagine I would get the ladder pretty fast too.
Not sure about the load limit on the door Bob, but when the door is closed, it looks like it can handle quite a bit of weight.
Plus this is like the racks on rigs.
When going down the road, you have a weight limit of around 150 lb on your roof which includes the rack, the tent, and anything else on it.
However when you are parked, you can have around 600 lb on the roof with no problem when still, and the load is distributed via the crossbars.
Feb 28, 2009 | 04:41 PM
#285
Contributing Member
Joined: Mar 2003
Posts: 11,334
Likes: 0
From: COTKU,Ontario,Canada
I'm sort of glad to hear that, Corey, but it doesn't do credit to the manufacturer to ship out two defective units to a VIP. BTW, what is the load limit of the door hinges? The tire/wheel must weight well over OEM and combined with ? users weight, at some point won't the hinges or their mounting points deform and possibly warp the door allowing a leak or difficulty closing?
as for the hinges I would say that it is still within the design load of the hinges, at most the bushings will wear faster... and no one [in there right mind anyway] is going to climb the ladder with the door open. When it is closed there is very little stress on the hinges.
or are you saying our leader needs to hit the gym more often?
 Feb 28, 2009 | 05:52 PM
#286
Contributing Member
Joined: Oct 2002
Posts: 5,918
Likes: 1
From: Da Gorge, Oregon
Heh, I'm the one who need more cardio work.
Just something strange looking about those tabs on top where you'd expect a 180� bend instead. IMO it looks rough and unfinished and clearly either wasn't well thought out or something went wrong during manufacture, a big oversight for an item with potentially large liability.
Just something strange looking about those tabs on top where you'd expect a 180� bend instead. IMO it looks rough and unfinished and clearly either wasn't well thought out or something went wrong during manufacture, a big oversight for an item with potentially large liability.
Mar 21, 2009 | 10:39 AM
#287
Thread Starter
Co-Founder/Administrator
iTrader: (1)
Joined: May 2002
Posts: 32,242
Likes: 21
From: Auburn, Washington
BajaRack's FJ ladder installed 3-21-2009 (Part II)
OK, there was definitely something wrong with my first ladder as the holes drilled on top of the ladder where not aligned correctly.
Plus my bottom bracket kept popping off and also knocking off the doors shock that holds it in the open position.
Ladder number two arrived Friday the 20th of March, and I dug into it this morning.
I hope this is the last time I have to take off my spare tire now for the ladder.
The new ladders upper part has the holes drilled correctly, and there is a new surprise, the bottom bracket has been totally redesigned with a hook that ties the bottom bracket and the bottom ladder together to keep them both tight and to prevent the bottom bracket from popping off the door.
I have not had time to take it fir a road test yet to see if any flex pops off the doors shock again, but I will know by Sunday when I go grocery shopping.
Onto the new installation.
Tools needed:
13 mm Gear wrench and open end wrench on one end for the top bracket.
14 mm Gear wrench and open end wrench for the bottom bracket.
Assortment of Allen wrenches.
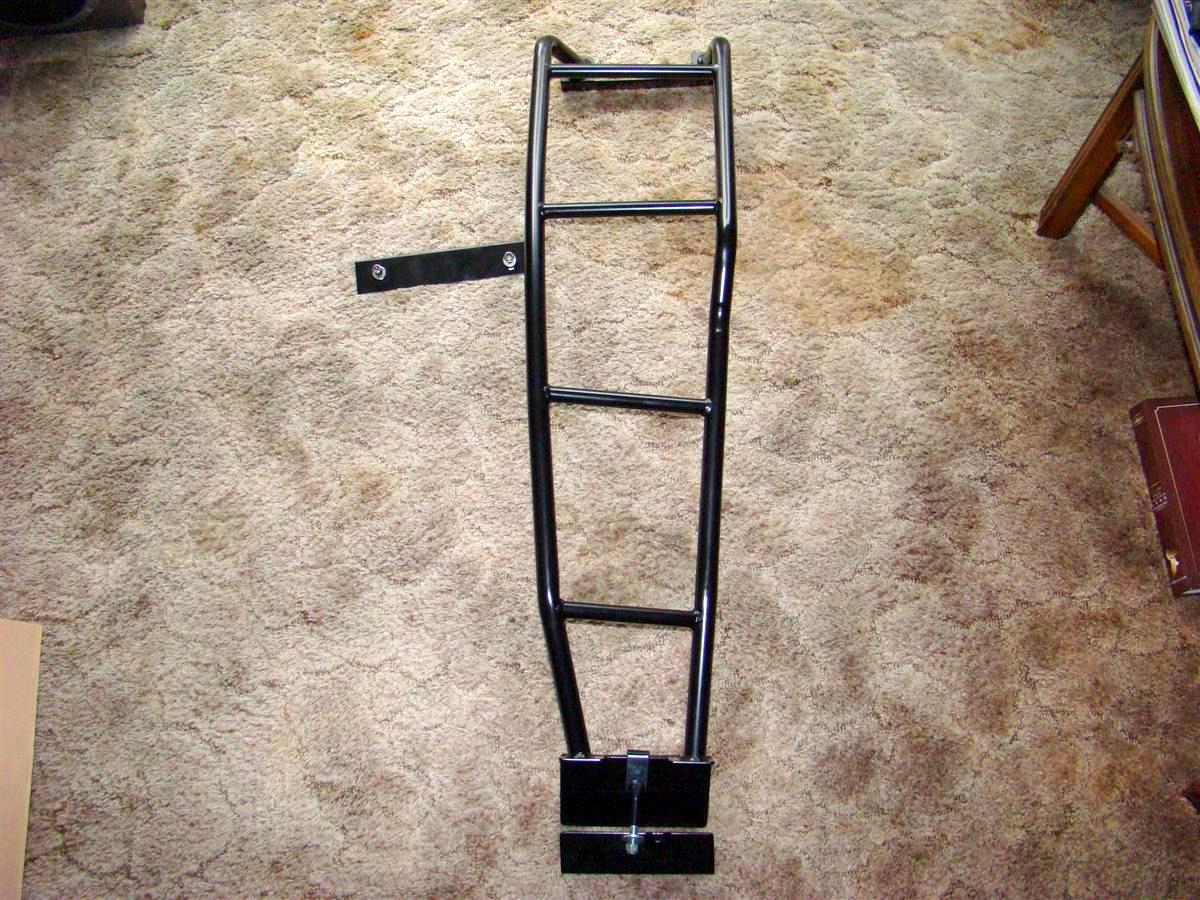
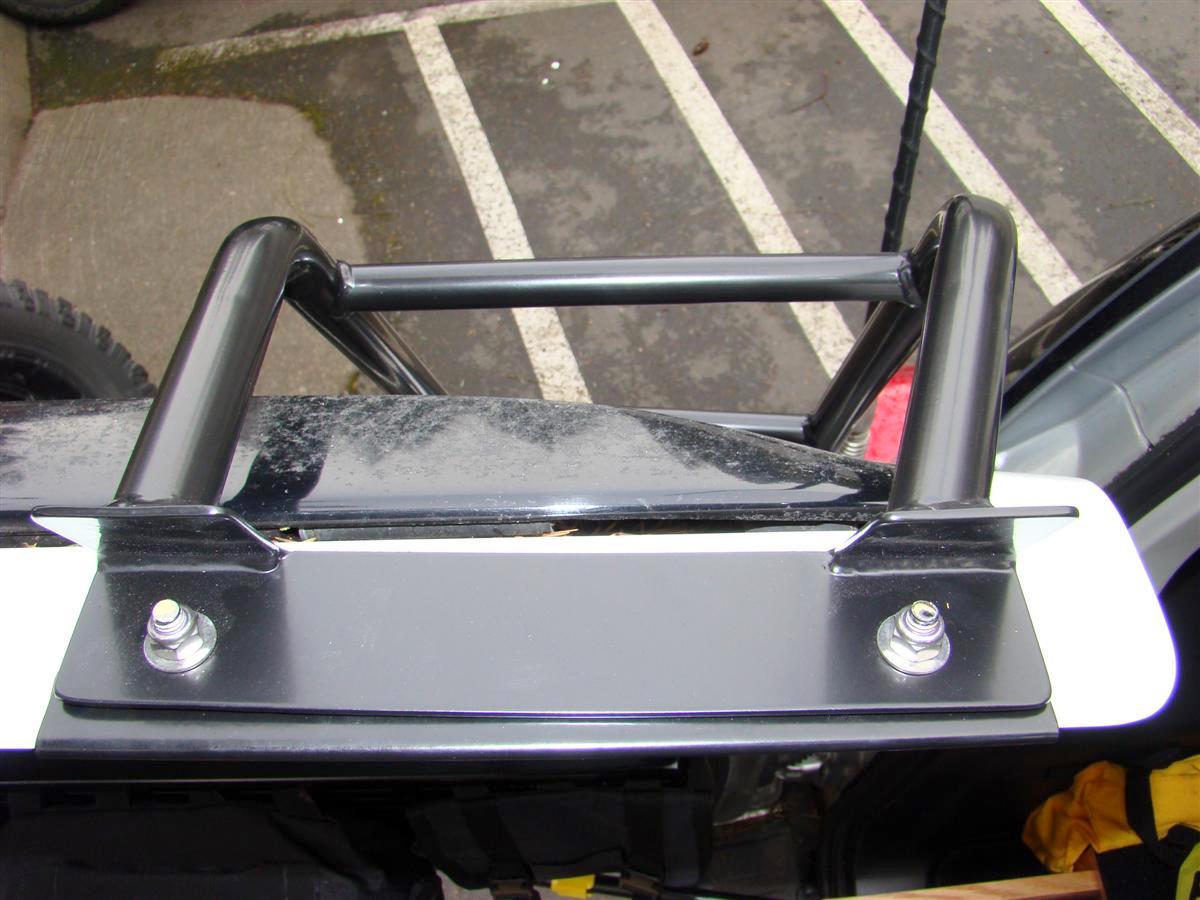
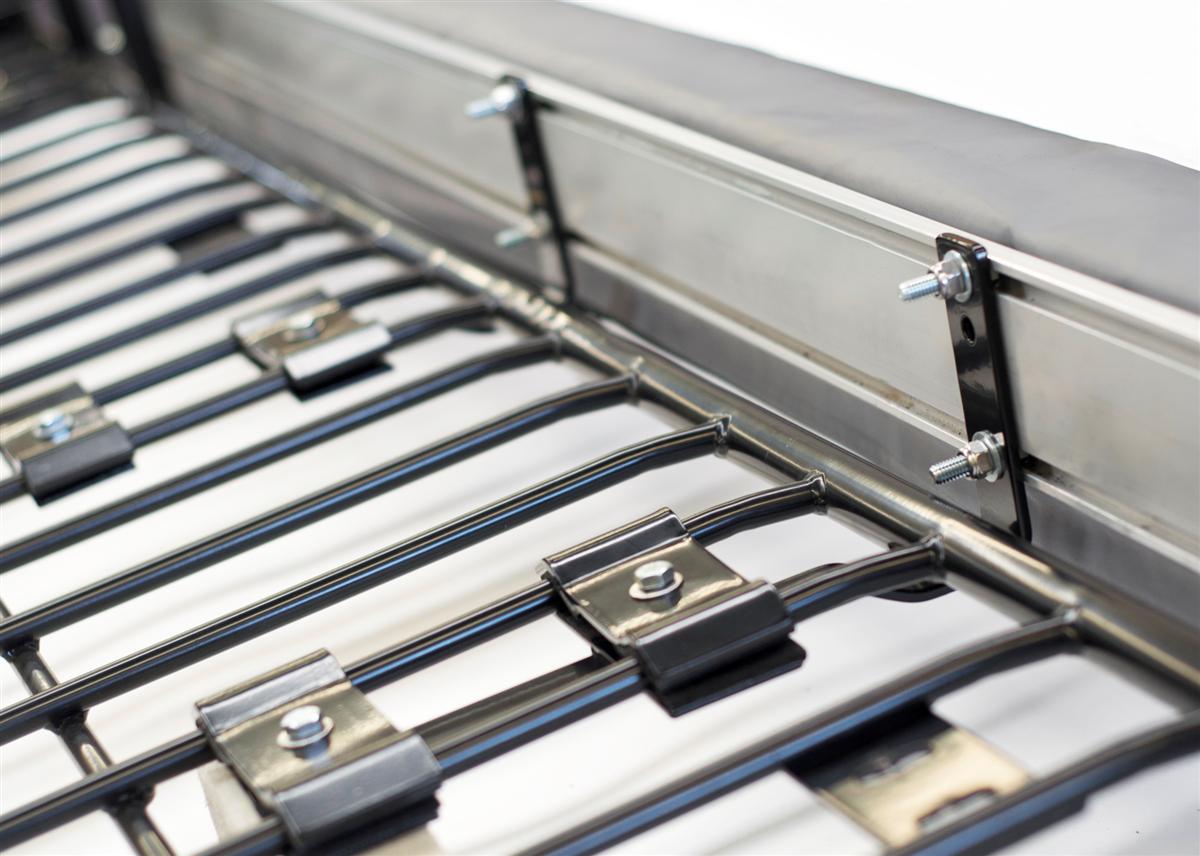
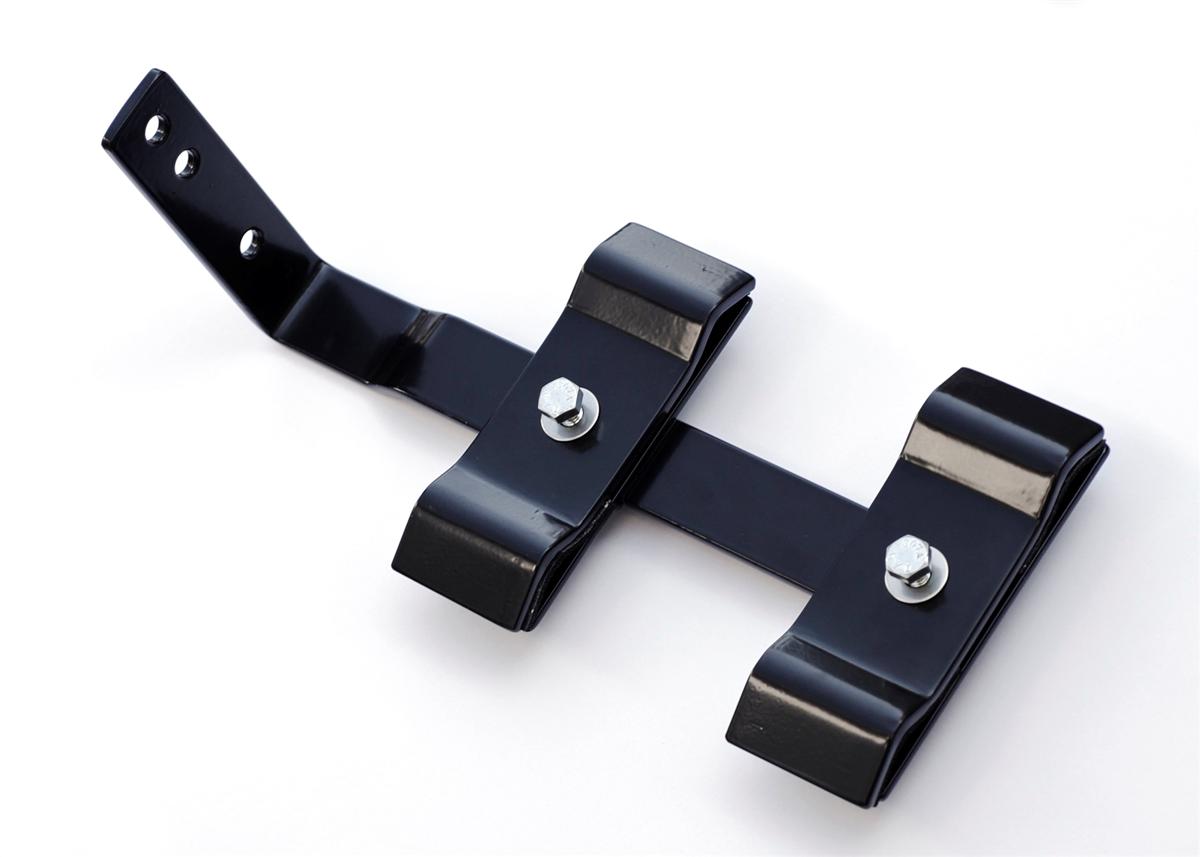
Pictures one and two show the ladder fresh out of the box and the brackets.
Note the new bolt that ties in the bottom bracket and the bottom of the ladder flange.
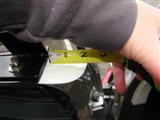
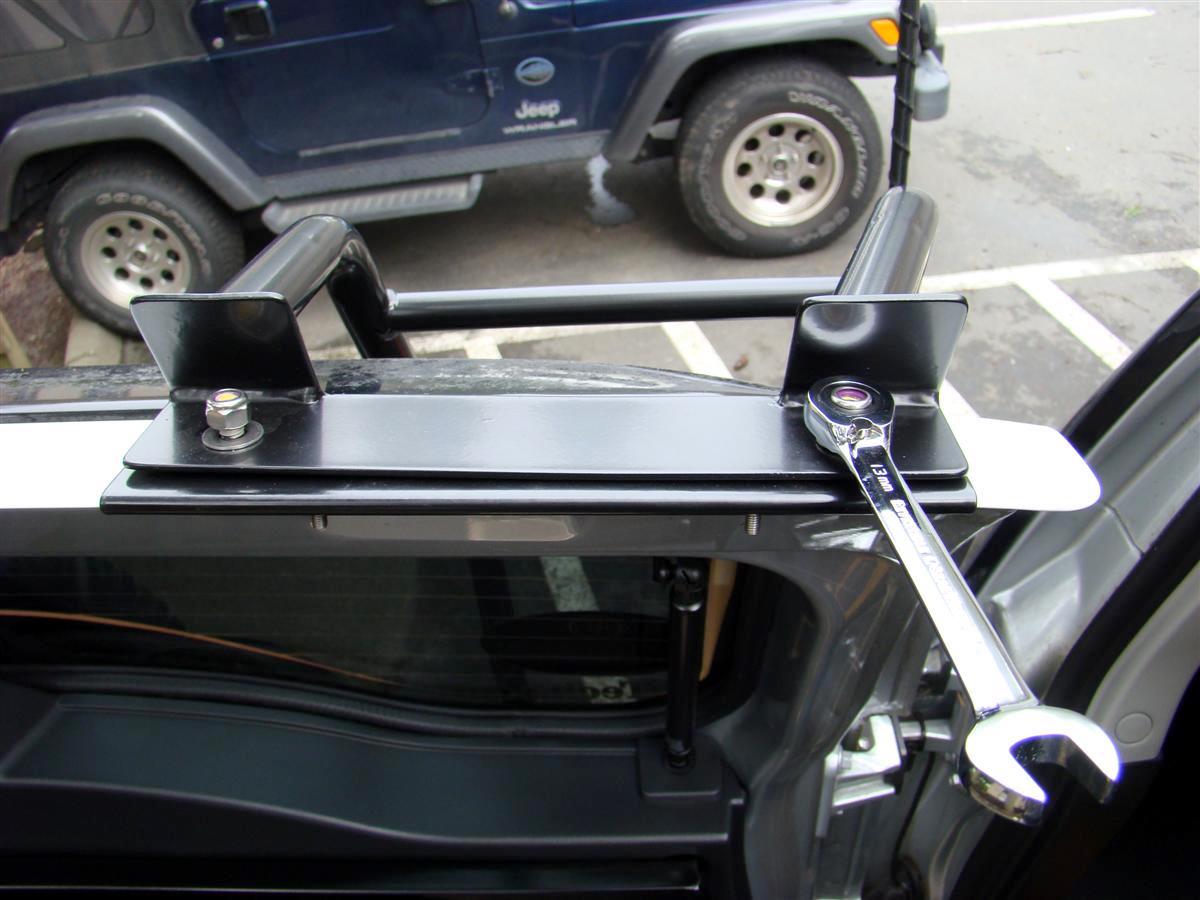
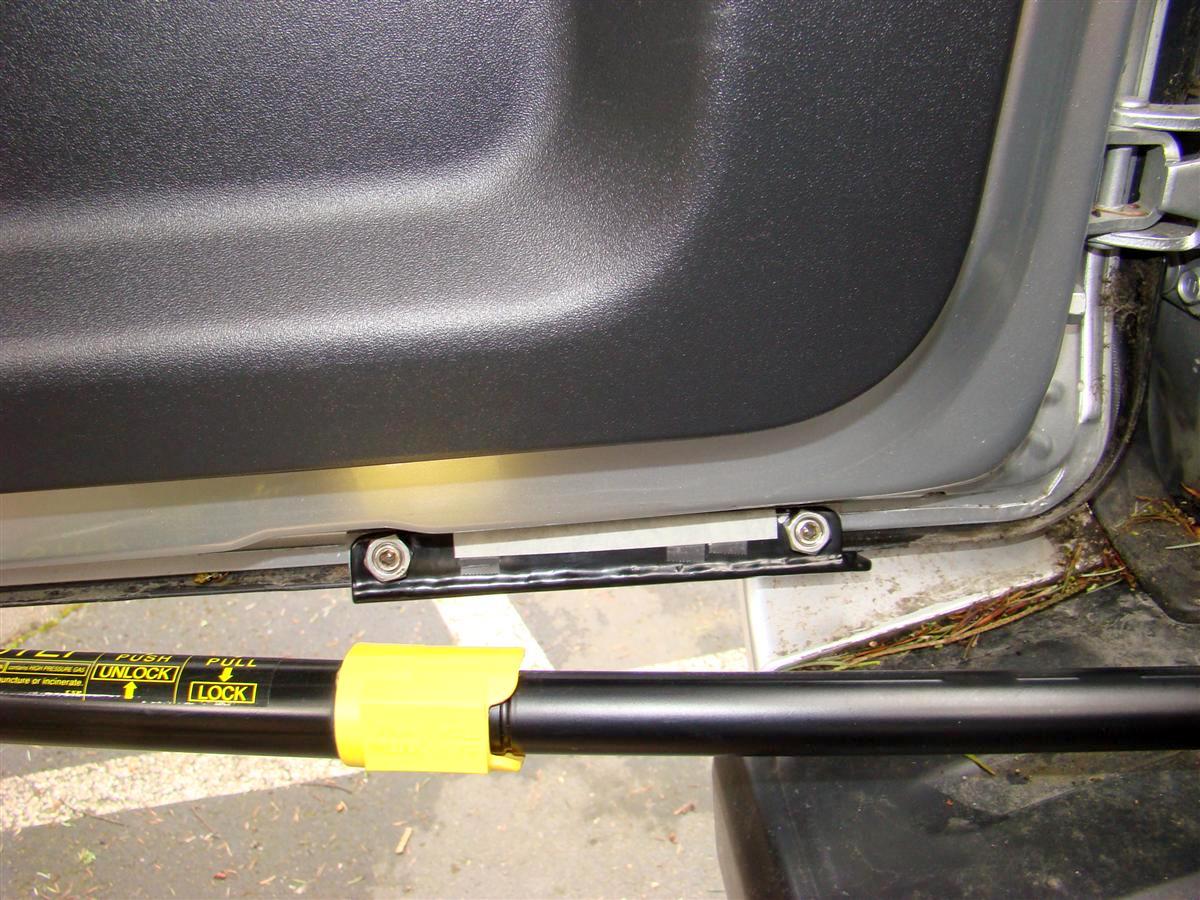
Picture three shows the new and improved ear above the wrench that now lets you get a ratchet wrench on.
Before for just that bolt I had to use the open end of the wrench.
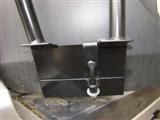
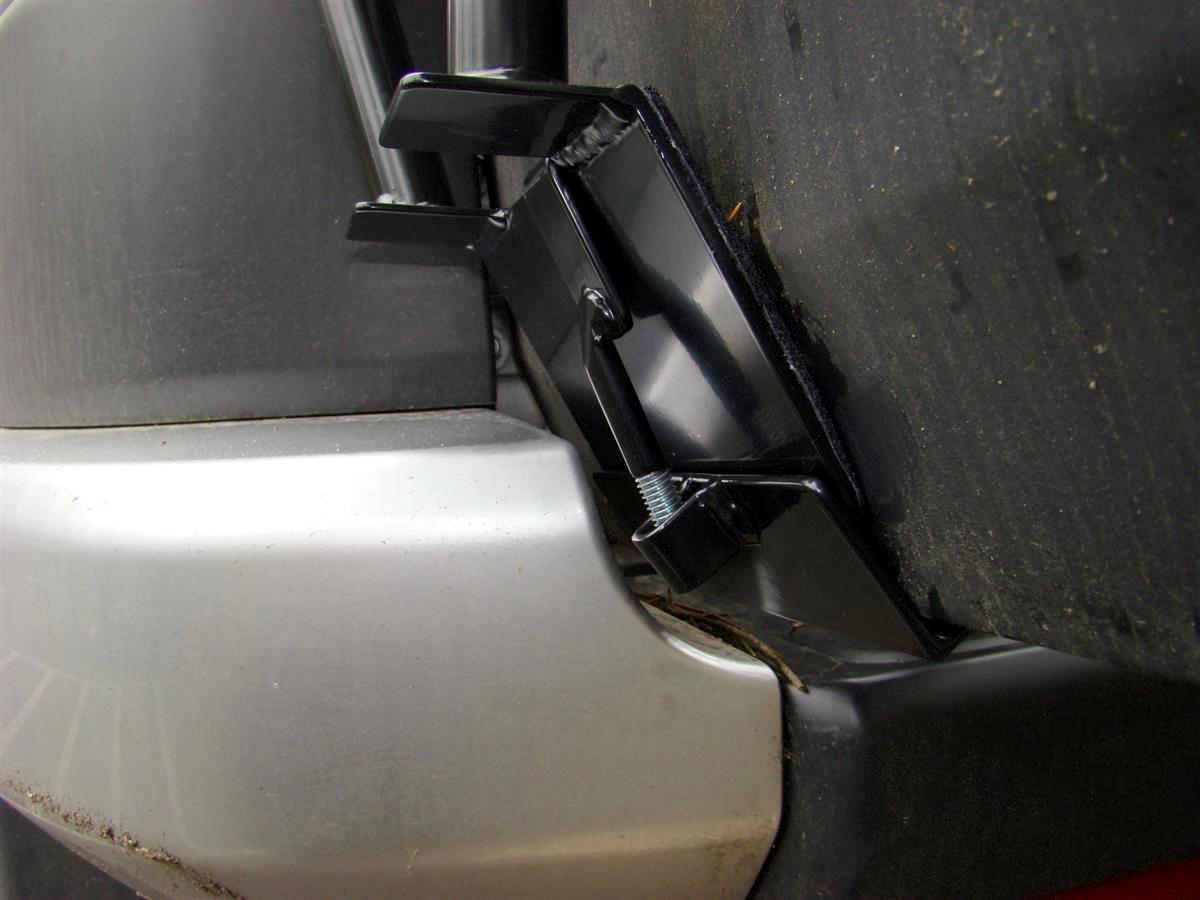
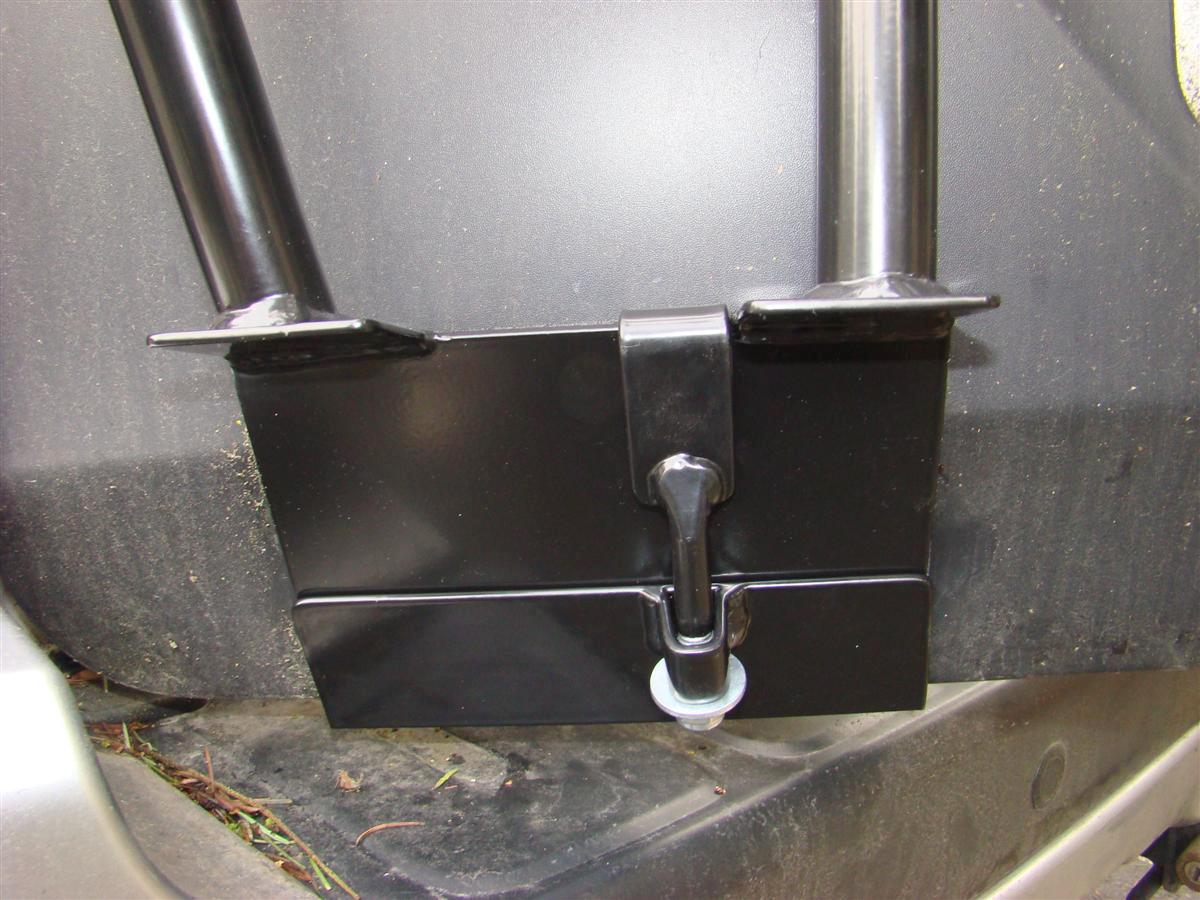
Picture four shows the bottom bracket and the new bolt that ties it and the ladder together.

Picture five shows a different angle of the bottom bracket bolt.
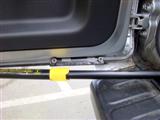
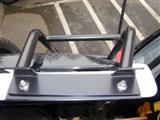
Picture six shows where I lined up my top bracket in relation to the top of the door.
Picture seven shows indeed the holes are aligned correctly, not out of alignment like my first ladder was.
Picture eight shows the bottom bracket from the inside view with it tightened down.
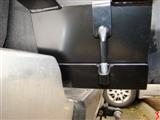

Picture nine shows an outside view of the bottom bracket and ladder now tied in with that new bolt flange system that was revised for the new ladder I received.
Picture ten a view of the ladder in place without the spare tire.
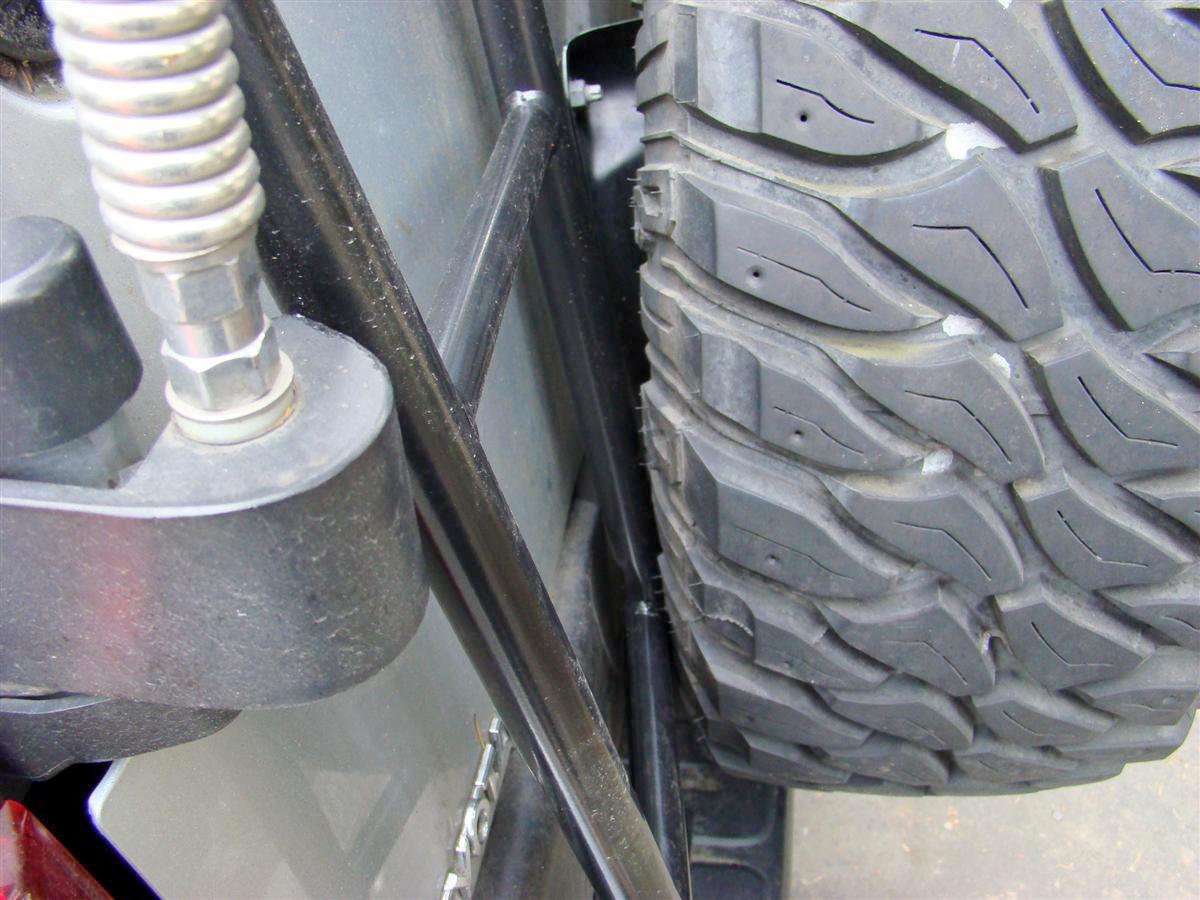
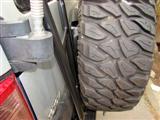
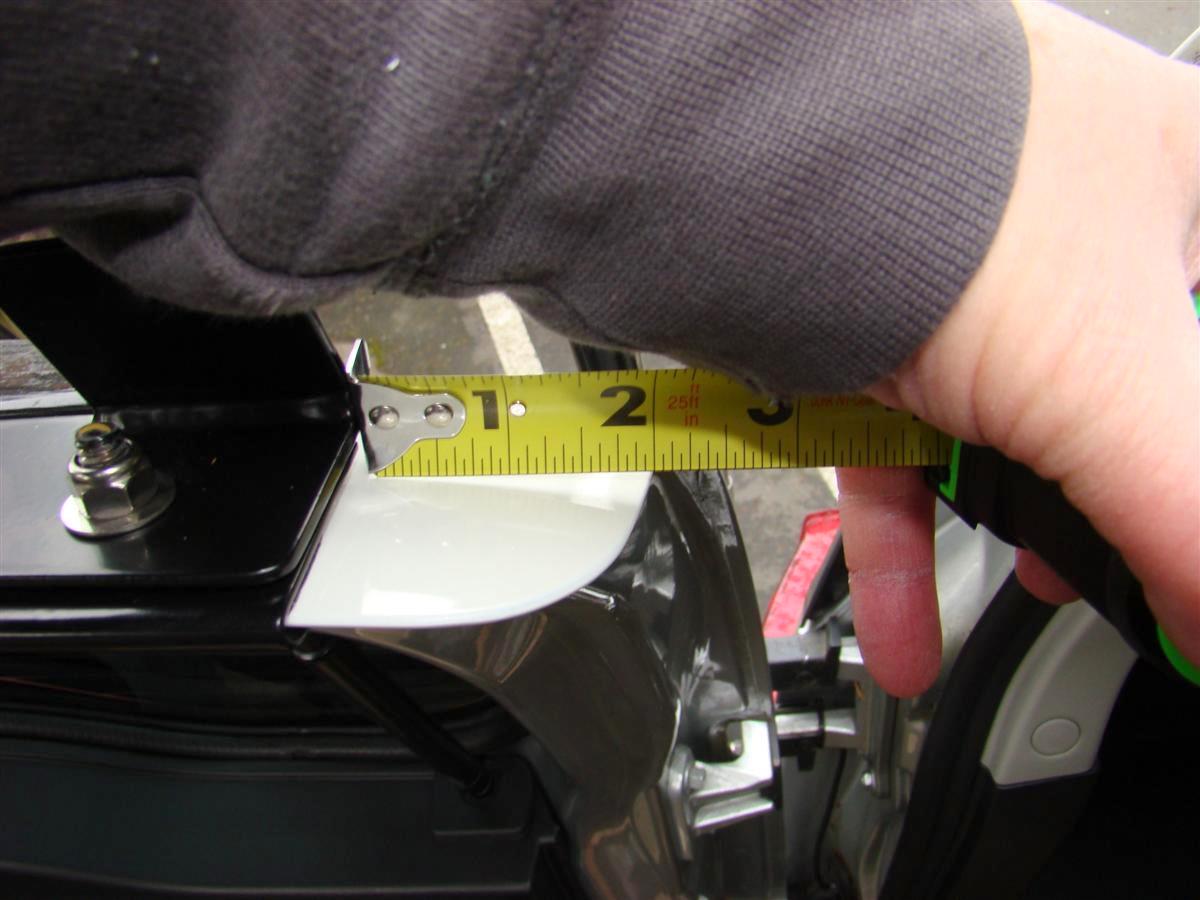
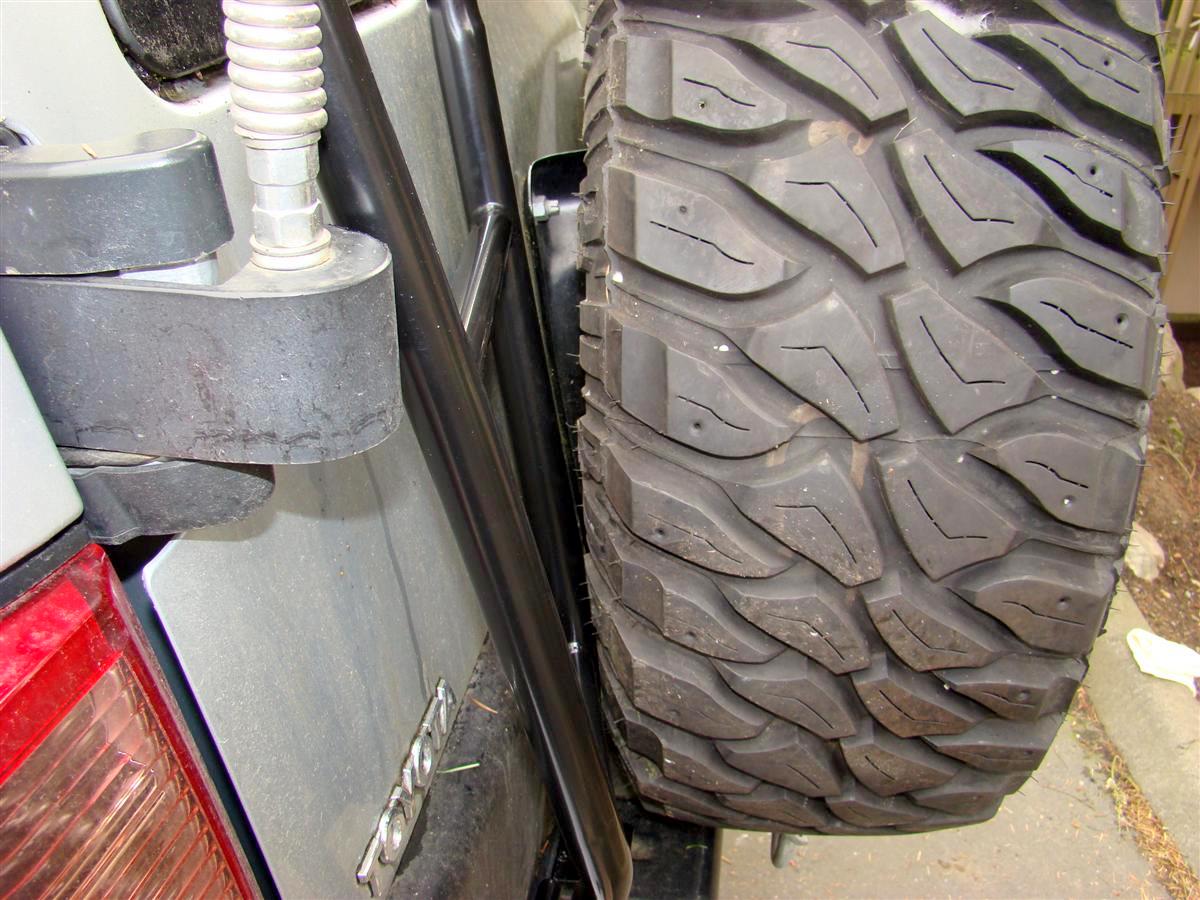
Picture eleven shows the clearance with the spare tire on.
It is barely up against the 285x70x17 tire.
Picture twelve shows the spare tire back in place.

Overall it seems to fit better than the old ladder since it has the holes drilled correctly on top, and with the newly designed bottom bracket holding the ladder and it more securely together.
Links:
BajaRack
The FJ Cruiser ladder
Plus my bottom bracket kept popping off and also knocking off the doors shock that holds it in the open position.
Ladder number two arrived Friday the 20th of March, and I dug into it this morning.
I hope this is the last time I have to take off my spare tire now for the ladder.
The new ladders upper part has the holes drilled correctly, and there is a new surprise, the bottom bracket has been totally redesigned with a hook that ties the bottom bracket and the bottom ladder together to keep them both tight and to prevent the bottom bracket from popping off the door.
I have not had time to take it fir a road test yet to see if any flex pops off the doors shock again, but I will know by Sunday when I go grocery shopping.
Onto the new installation.
Tools needed:
13 mm Gear wrench and open end wrench on one end for the top bracket.
14 mm Gear wrench and open end wrench for the bottom bracket.
Assortment of Allen wrenches.
Pictures one and two show the ladder fresh out of the box and the brackets.
Note the new bolt that ties in the bottom bracket and the bottom of the ladder flange.
Picture three shows the new and improved ear above the wrench that now lets you get a ratchet wrench on.
Before for just that bolt I had to use the open end of the wrench.
Picture four shows the bottom bracket and the new bolt that ties it and the ladder together.
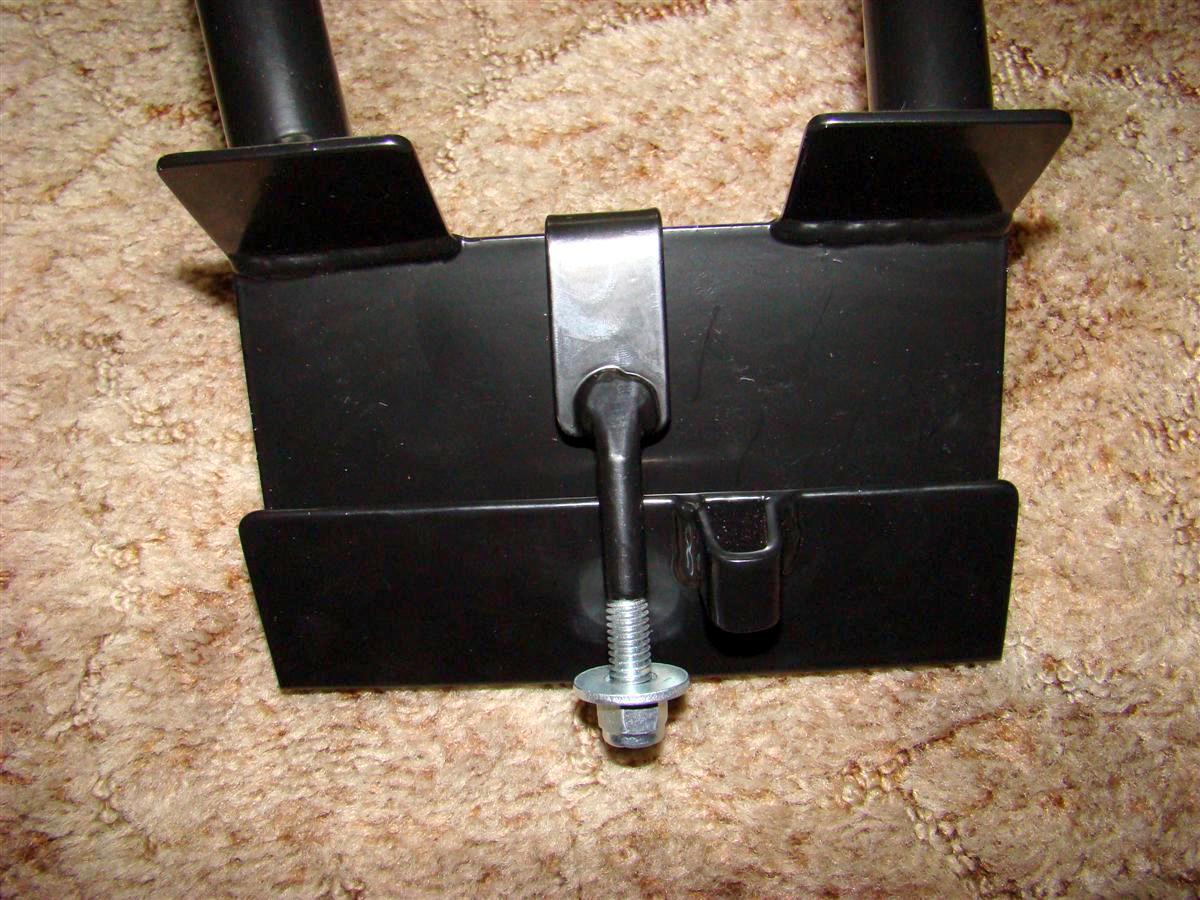
Picture five shows a different angle of the bottom bracket bolt.
Picture six shows where I lined up my top bracket in relation to the top of the door.
Picture seven shows indeed the holes are aligned correctly, not out of alignment like my first ladder was.
Picture eight shows the bottom bracket from the inside view with it tightened down.
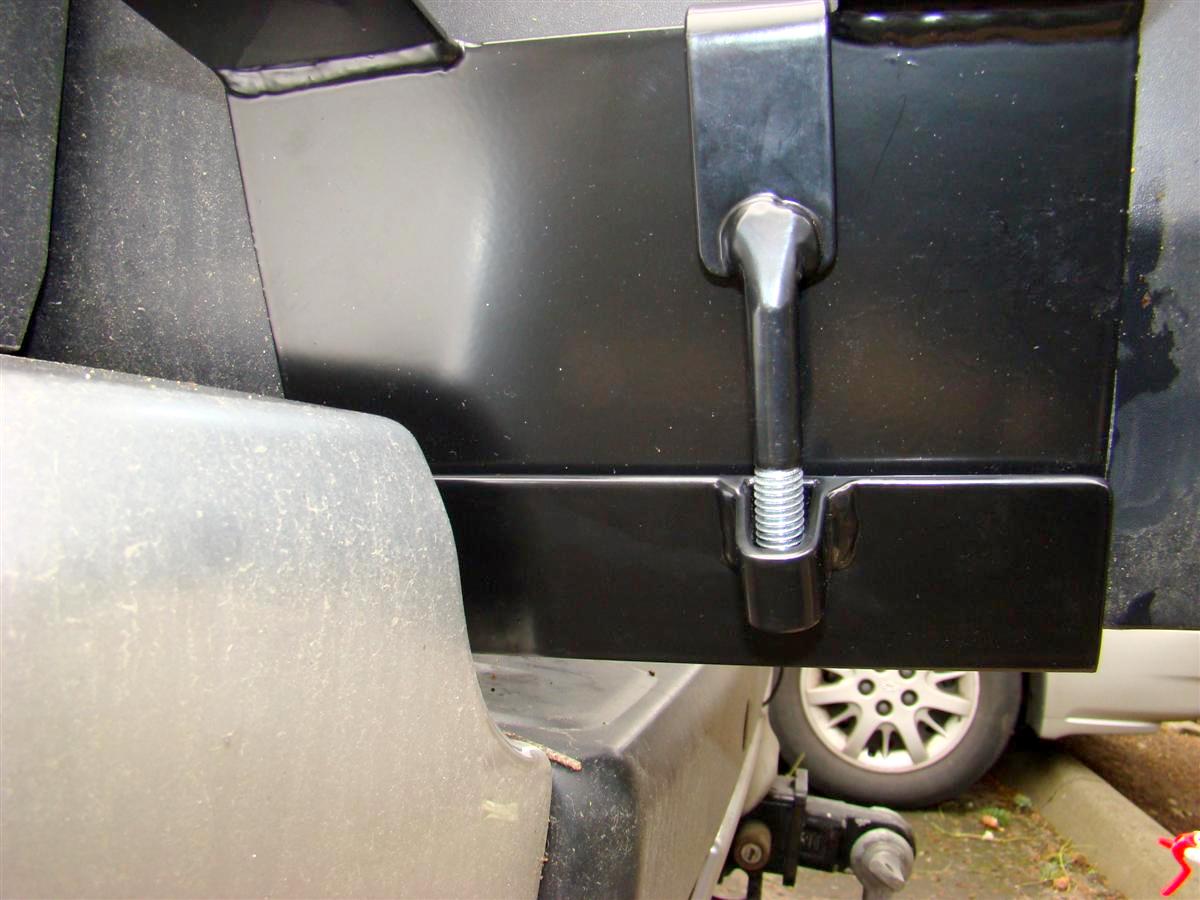
Picture nine shows an outside view of the bottom bracket and ladder now tied in with that new bolt flange system that was revised for the new ladder I received.
Picture ten a view of the ladder in place without the spare tire.
Picture eleven shows the clearance with the spare tire on.
It is barely up against the 285x70x17 tire.
Picture twelve shows the spare tire back in place.

Overall it seems to fit better than the old ladder since it has the holes drilled correctly on top, and with the newly designed bottom bracket holding the ladder and it more securely together.
Links:
BajaRack
The FJ Cruiser ladder
 Mar 21, 2009 | 02:30 PM
#289
Contributing Member
Joined: Mar 2003
Posts: 11,334
Likes: 0
From: COTKU,Ontario,Canada
Looks good Corey
In pic 10 it looks like you have some creeping surface rust starting along the top of the plastic at the bottom of the door under the tire.
It also appears that your wheel is crushing the ladder against the door.
It looks like the mfg. could shift the bottom mount about 2" left and "flare" the ladder around the wheel area a little more. This would allow for a better foot/hand hold when climbing/descending the ladder and also perhaps the addition of a "clip" on jerry can rack.
Finally I would hit the nuts/bolts with a coat of clear to help stop rust which will happen fast particularly to that bottom mount clip.
edit: taking the tire off and on is good exercise for you you should do it more often to prevent bolt seizure {and heart seizure lol}
Last edited by aviator; Mar 21, 2009 at 02:31 PM.
Mar 21, 2009 | 02:43 PM
#290
Thread Starter
Co-Founder/Administrator
iTrader: (1)
Joined: May 2002
Posts: 32,242
Likes: 21
From: Auburn, Washington
Not yet, but I did the first one, and not a creak came from it.
Paul, no rust on my rig at all, not even here in soggy WA. state.
What you see is the result of this puppy.
That is tree spooge from a pair of old growth fir trees.
It comes from the rig not having a proper bath since last September.
The tree emits a combo of pitch, pollen, dirt, ect when mixed with rain water creates that film.
You should see the top of my tent, as I was not able to wash that a month back when I hit up the coin op to wash the rest of the rig.
That will be solved though (its in another thread) as I bought a RV wash brush with flo through water to clean the tent with.
A few more weeks if it warms up here, I will be back to hand washing again, and all that stuff comes right off and stays off until I quit washing it again next fall.
The tire is not pressing very hard on the ladder, but it does contact it.
They designed this for a stock 265x70x17 tire, and I think they should have had some more bend it to accommodate a 33" tire like mine.
Most ditch the stock size tires in favor of the 285x70x17s.
I do wish the flat washer they provided with the new bottom bracket bolt was black, everything else is.
I will hit that with some flat black paint at a later (warmer) date.
Looks good Corey
In pic 10 it looks like you have some creeping surface rust starting along the top of the plastic at the bottom of the door under the tire.
It also appears that your wheel is crushing the ladder against the door.
It looks like the mfg. could shift the bottom mount about 2" left and "flare" the ladder around the wheel area a little more. This would allow for a better foot/hand hold when climbing/descending the ladder and also perhaps the addition of a "clip" on jerry can rack.
Finally I would hit the nuts/bolts with a coat of clear to help stop rust which will happen fast particularly to that bottom mount clip.
edit: taking the tire off and on is good exercise for you you should do it more often to prevent bolt seizure {and heart seizure lol}
In pic 10 it looks like you have some creeping surface rust starting along the top of the plastic at the bottom of the door under the tire.
It also appears that your wheel is crushing the ladder against the door.
It looks like the mfg. could shift the bottom mount about 2" left and "flare" the ladder around the wheel area a little more. This would allow for a better foot/hand hold when climbing/descending the ladder and also perhaps the addition of a "clip" on jerry can rack.
Finally I would hit the nuts/bolts with a coat of clear to help stop rust which will happen fast particularly to that bottom mount clip.
edit: taking the tire off and on is good exercise for you you should do it more often to prevent bolt seizure {and heart seizure lol}
What you see is the result of this puppy.
That is tree spooge from a pair of old growth fir trees.
It comes from the rig not having a proper bath since last September.
The tree emits a combo of pitch, pollen, dirt, ect when mixed with rain water creates that film.
You should see the top of my tent, as I was not able to wash that a month back when I hit up the coin op to wash the rest of the rig.
That will be solved though (its in another thread) as I bought a RV wash brush with flo through water to clean the tent with.
A few more weeks if it warms up here, I will be back to hand washing again, and all that stuff comes right off and stays off until I quit washing it again next fall.
The tire is not pressing very hard on the ladder, but it does contact it.
They designed this for a stock 265x70x17 tire, and I think they should have had some more bend it to accommodate a 33" tire like mine.
Most ditch the stock size tires in favor of the 285x70x17s.
I do wish the flat washer they provided with the new bottom bracket bolt was black, everything else is.
I will hit that with some flat black paint at a later (warmer) date.
Mar 21, 2009 | 03:54 PM
#291
Contributing Member
Joined: Mar 2003
Posts: 11,334
Likes: 0
From: COTKU,Ontario,Canada
Nothing that can't be fixed easily then lol...
You should mention that tire size thing to the mfg. though... they seem to be trying hard to perfect their product...
did you remember some thread locker on the nuts? I see they are ny-lok/metal lok-ers but some 242/262 would make sure they don't seize so you can take the ladder off more easily if you ever have to.
Mar 21, 2009 | 04:49 PM
#292
Thread Starter
Co-Founder/Administrator
iTrader: (1)
Joined: May 2002
Posts: 32,242
Likes: 21
From: Auburn, Washington
Nothing that can't be fixed easily then lol...
You should mention that tire size thing to the mfg. though... they seem to be trying hard to perfect their product...
did you remember some thread locker on the nuts? I see they are ny-lok/metal lok-ers but some 242/262 would make sure they don't seize so you can take the ladder off more easily if you ever have to.
You should mention that tire size thing to the mfg. though... they seem to be trying hard to perfect their product...
did you remember some thread locker on the nuts? I see they are ny-lok/metal lok-ers but some 242/262 would make sure they don't seize so you can take the ladder off more easily if you ever have to.
Never ever used that stuff in my life.
ARB used it though when they installed my snorkel at their headquarters November of 2007.
Jun 27, 2009 | 10:13 AM
#294
Thread Starter
Co-Founder/Administrator
iTrader: (1)
Joined: May 2002
Posts: 32,242
Likes: 21
From: Auburn, Washington
PowerFilm Solar Panel installed 6-27-2009
Normally I would post the installation of a mod like this in this ongoing buildup thread here, but I felt the addition of the solar panel was worthy of its own thread.
Here is a link to the installation of the solar panel.
https://www.yotatech.com/forums/f172...2009-a-185362/
Here is a link to the installation of the solar panel.
https://www.yotatech.com/forums/f172...2009-a-185362/
Jul 10, 2009 | 11:50 AM
#295
Thread Starter
Co-Founder/Administrator
iTrader: (1)
Joined: May 2002
Posts: 32,242
Likes: 21
From: Auburn, Washington
Engel Wireless Thermometer and tent shelf installed 7-10-2009
Two mods today, been busy all morning.
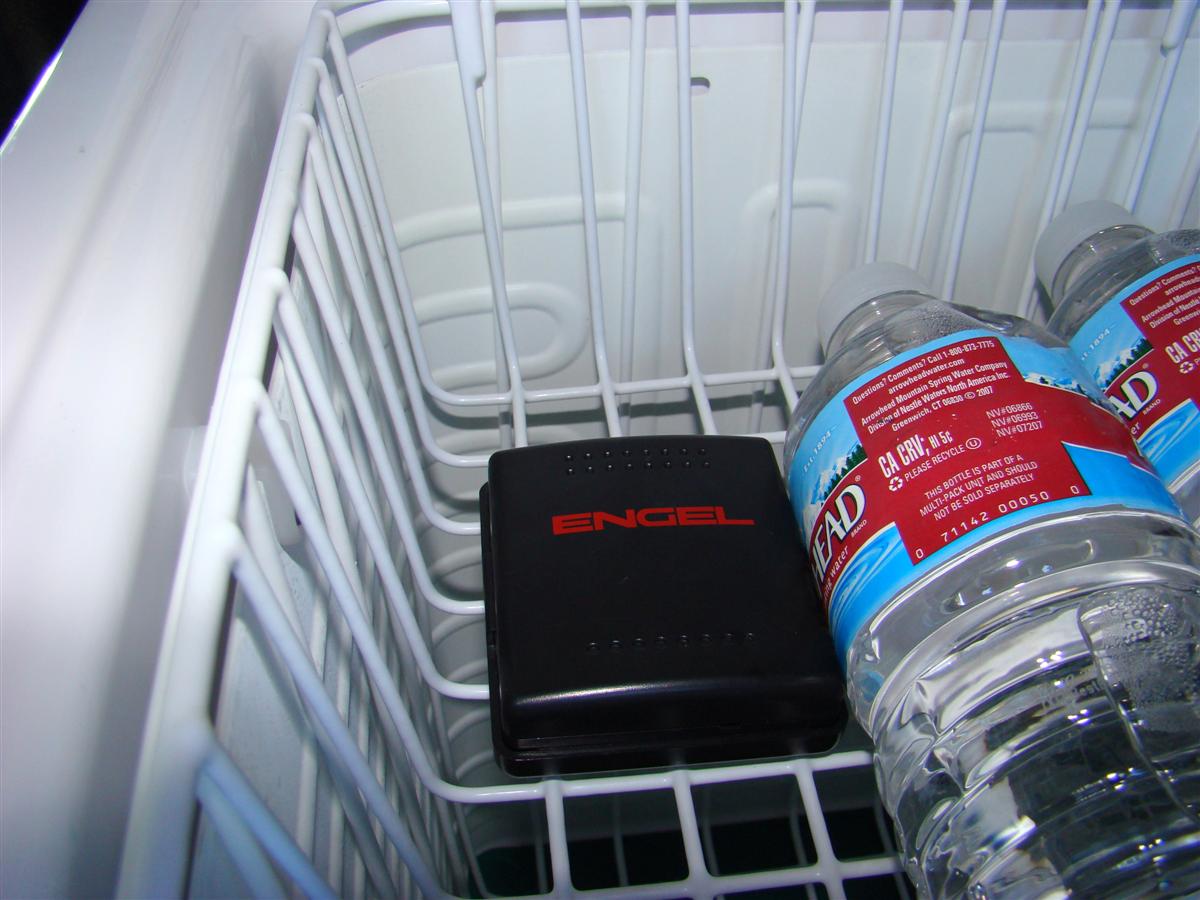
First up is the new Engel Wireless Thermometer that I bought from Wil at Sierra Expeditions.
First pictures shows the transmitter next to the receiver for size comparison.
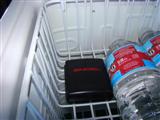
Second picture shows the transmitter sitting in the fridge.
I did not use the supplied Velcro to attach it anywhere, as I want the option of putting it where I want once the grub is packed inside the fridge.
Third picture shows the receiver that can display the time, outside temperature, and the fridge temperature.
It is off by a few degrees (higher on the Engel unit) compared to the readout that comes stock on the ARB fridge.
Not sure which is the more accurate, I guess I could get one of these dial gauge thermometers and set it inside to check it out.
I find the range on this though is not eighty feet like they claim, in fact when I had the receiver up on my dash it would not pick up the temp of the fridge, it showed the old temp from when sitting in my home.
These need to be real close, hence why I used the Velcro and stuck the receiver onto the fridge.


Links:
Engel Wireless Thermometer
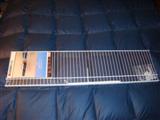
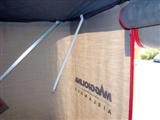
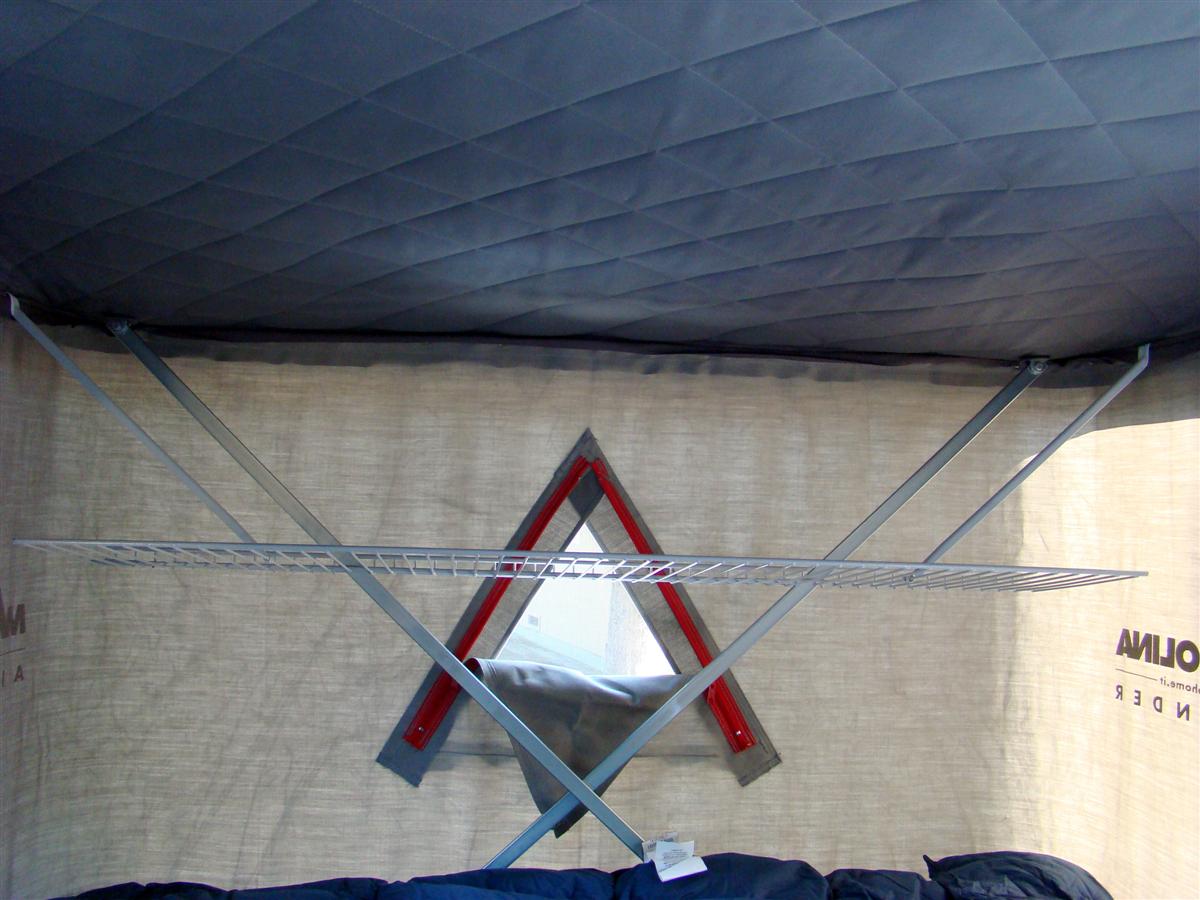
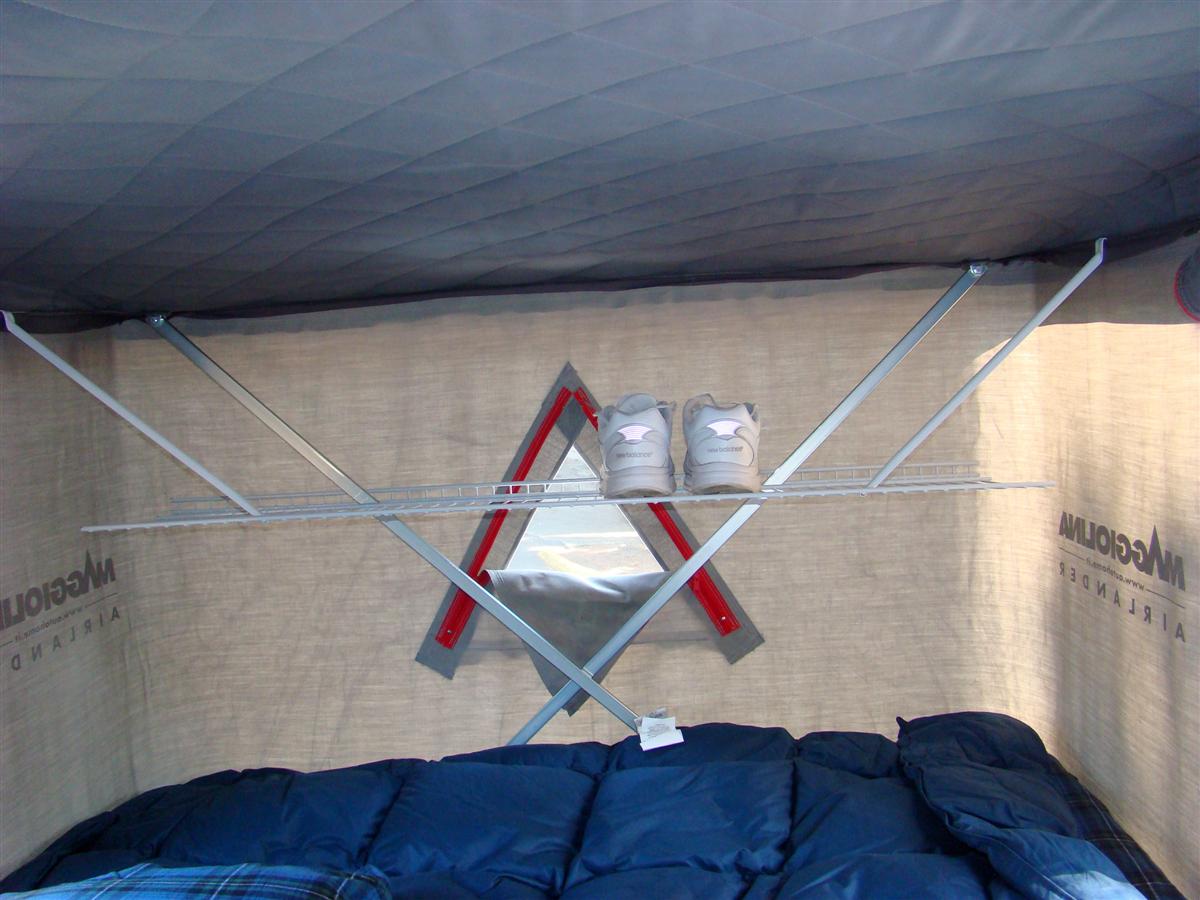
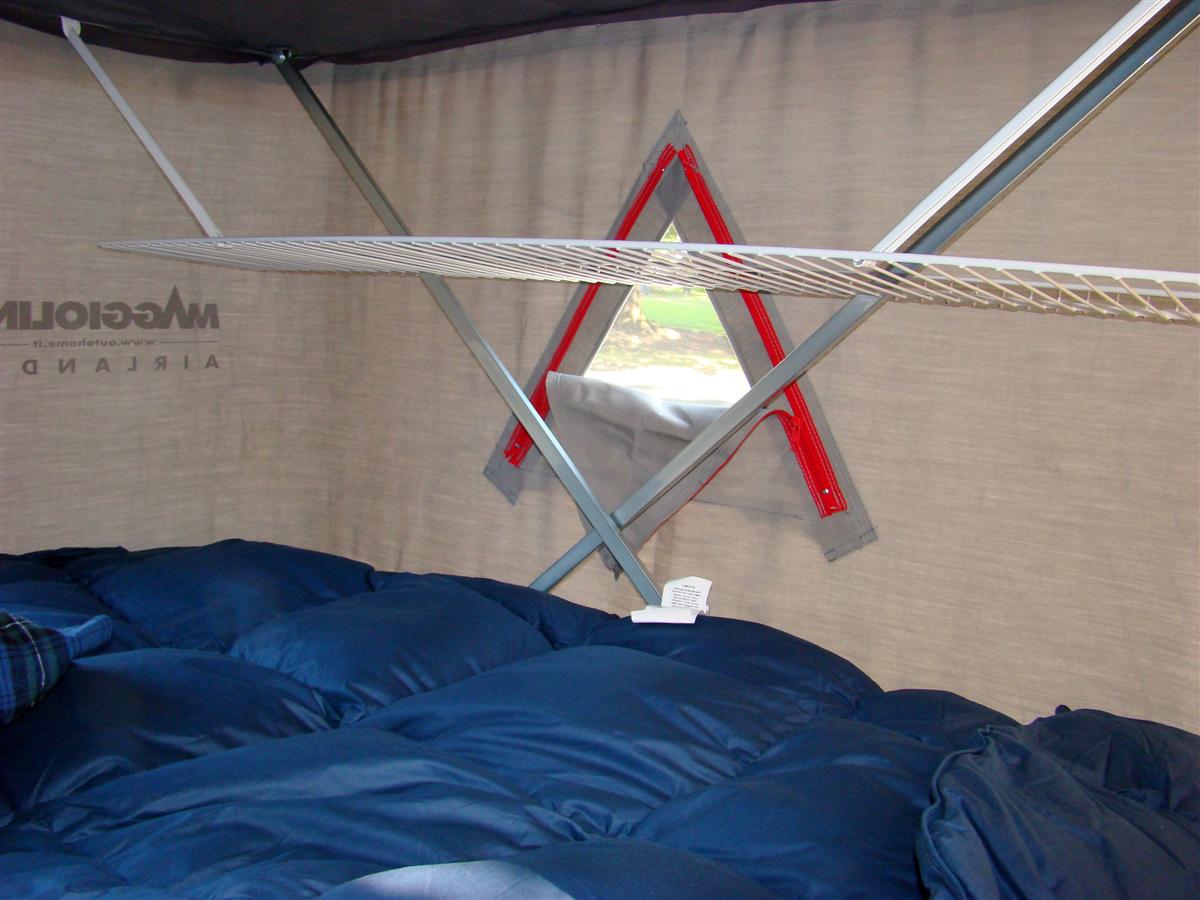
Next up is the "Bjorno Maggiolina roof top tent mod.
Saw a thread over on fjcruiserforums.com by Bjorno who has the exact same tent model I do, the AutoHome Maggiolina AirLand medium.
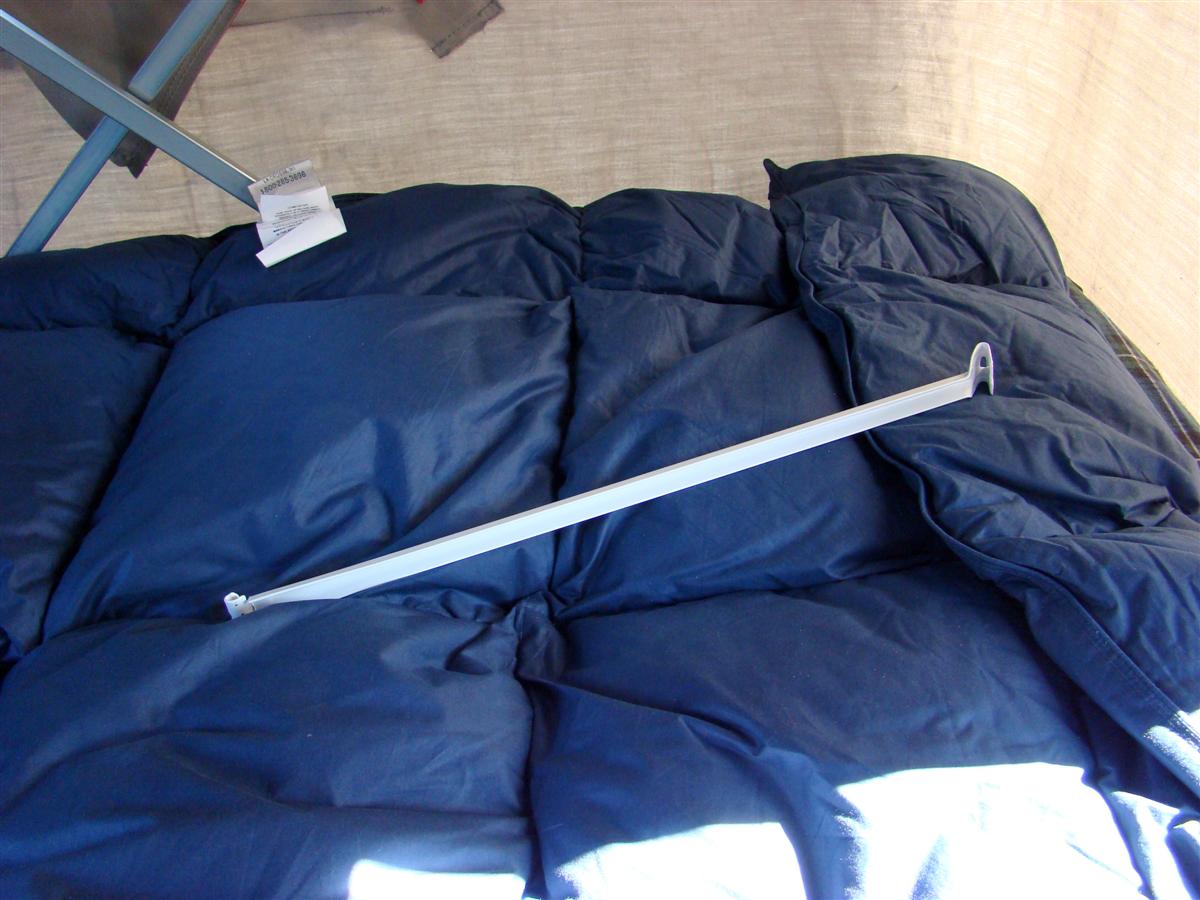
I found camping in mine last year there is no storage space in the tent, and having a shelf like this is nice to put your shows up on.
The shelf is to small to put my BadBags duffel on, and way to heavy too.
But it can be used to store other stuff besides shoes/boots.
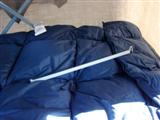
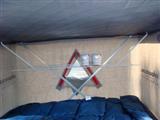
I was gong to try and install mine without cutting out the thirteen ribs like he did, but I would have had to tie the shelf with something to the lifting mechanism of the tent, and that would be kind of a pain.
His method worked out pretty good.
I cut the thirteen ribs out, and set the 16" arms along the tenth inward support rib.
This puts it at an almost level position.
Pretty simple to do, you just bend the tabs over with some adjustable pliers so they will anchor into the top of the roof top tents area which is made that way to hold the custom pockets that AutoHome sells (comes stock on the higher priced Maggiolina models) to put up there to use as pockets to hold stuff in.
Before I put my dirty shoes into a dishpan and stored it on the bed.
Kind of in the way while I slept, this will be nicer not bumping into it during the night.
I can put my Cabelas LED lantern up there, a box of nosewipes, flashlight, or other stuff up there that normally lays on the bed and gets kicked around.
Here are a few pictures of the installation.


Links:
Bjorno's thread on how he made the shelf
ClosetMaid shelf model 51041 from Lowe's
Bjorno's was a different part number, but it appears to be the exact same one as his.
First up is the new Engel Wireless Thermometer that I bought from Wil at Sierra Expeditions.
First pictures shows the transmitter next to the receiver for size comparison.
Second picture shows the transmitter sitting in the fridge.
I did not use the supplied Velcro to attach it anywhere, as I want the option of putting it where I want once the grub is packed inside the fridge.
Third picture shows the receiver that can display the time, outside temperature, and the fridge temperature.
It is off by a few degrees (higher on the Engel unit) compared to the readout that comes stock on the ARB fridge.
Not sure which is the more accurate, I guess I could get one of these dial gauge thermometers and set it inside to check it out.
I find the range on this though is not eighty feet like they claim, in fact when I had the receiver up on my dash it would not pick up the temp of the fridge, it showed the old temp from when sitting in my home.
These need to be real close, hence why I used the Velcro and stuck the receiver onto the fridge.


Links:
Engel Wireless Thermometer
Next up is the "Bjorno Maggiolina roof top tent mod.
Saw a thread over on fjcruiserforums.com by Bjorno who has the exact same tent model I do, the AutoHome Maggiolina AirLand medium.
I found camping in mine last year there is no storage space in the tent, and having a shelf like this is nice to put your shows up on.
The shelf is to small to put my BadBags duffel on, and way to heavy too.
But it can be used to store other stuff besides shoes/boots.
I was gong to try and install mine without cutting out the thirteen ribs like he did, but I would have had to tie the shelf with something to the lifting mechanism of the tent, and that would be kind of a pain.
His method worked out pretty good.
I cut the thirteen ribs out, and set the 16" arms along the tenth inward support rib.
This puts it at an almost level position.
Pretty simple to do, you just bend the tabs over with some adjustable pliers so they will anchor into the top of the roof top tents area which is made that way to hold the custom pockets that AutoHome sells (comes stock on the higher priced Maggiolina models) to put up there to use as pockets to hold stuff in.
Before I put my dirty shoes into a dishpan and stored it on the bed.
Kind of in the way while I slept, this will be nicer not bumping into it during the night.
I can put my Cabelas LED lantern up there, a box of nosewipes, flashlight, or other stuff up there that normally lays on the bed and gets kicked around.
Here are a few pictures of the installation.


Links:
Bjorno's thread on how he made the shelf
ClosetMaid shelf model 51041 from Lowe's
Bjorno's was a different part number, but it appears to be the exact same one as his.
Jul 12, 2009 | 03:24 PM
#296
Contributing Member
Joined: Mar 2003
Posts: 11,334
Likes: 0
From: COTKU,Ontario,Canada
The metal in the ARB probably attenuates the signal transmission which is why the rec. needs to be closer.
just make sure any footwear is dry and mud free... other wise there will be some sloppy rain indoors all night... you might not mind but that sort of thing annoys the ladies as you well know...
just make sure any footwear is dry and mud free... other wise there will be some sloppy rain indoors all night... you might not mind but that sort of thing annoys the ladies as you well know...
May 3, 2010 | 12:20 PM
#297
Thread Starter
Co-Founder/Administrator
iTrader: (1)
Joined: May 2002
Posts: 32,242
Likes: 21
From: Auburn, Washington
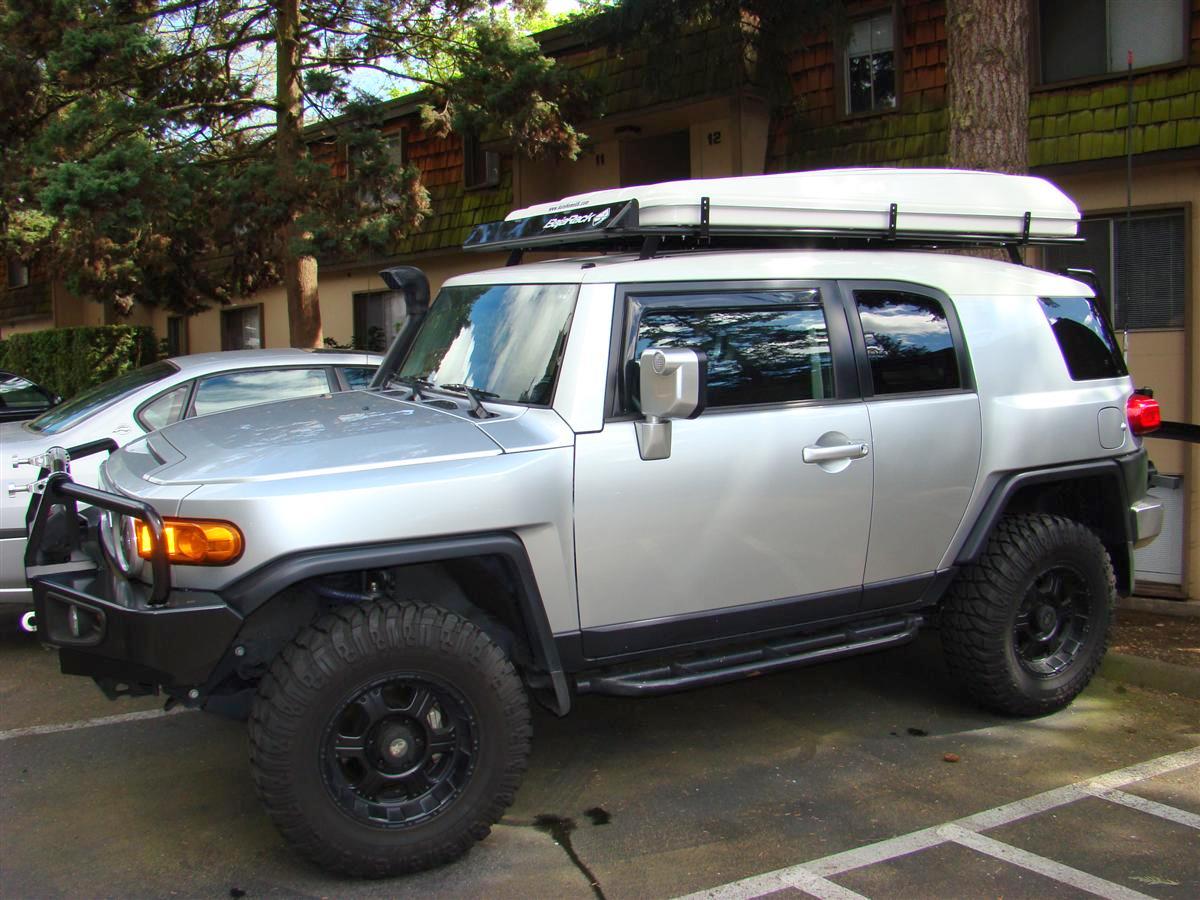
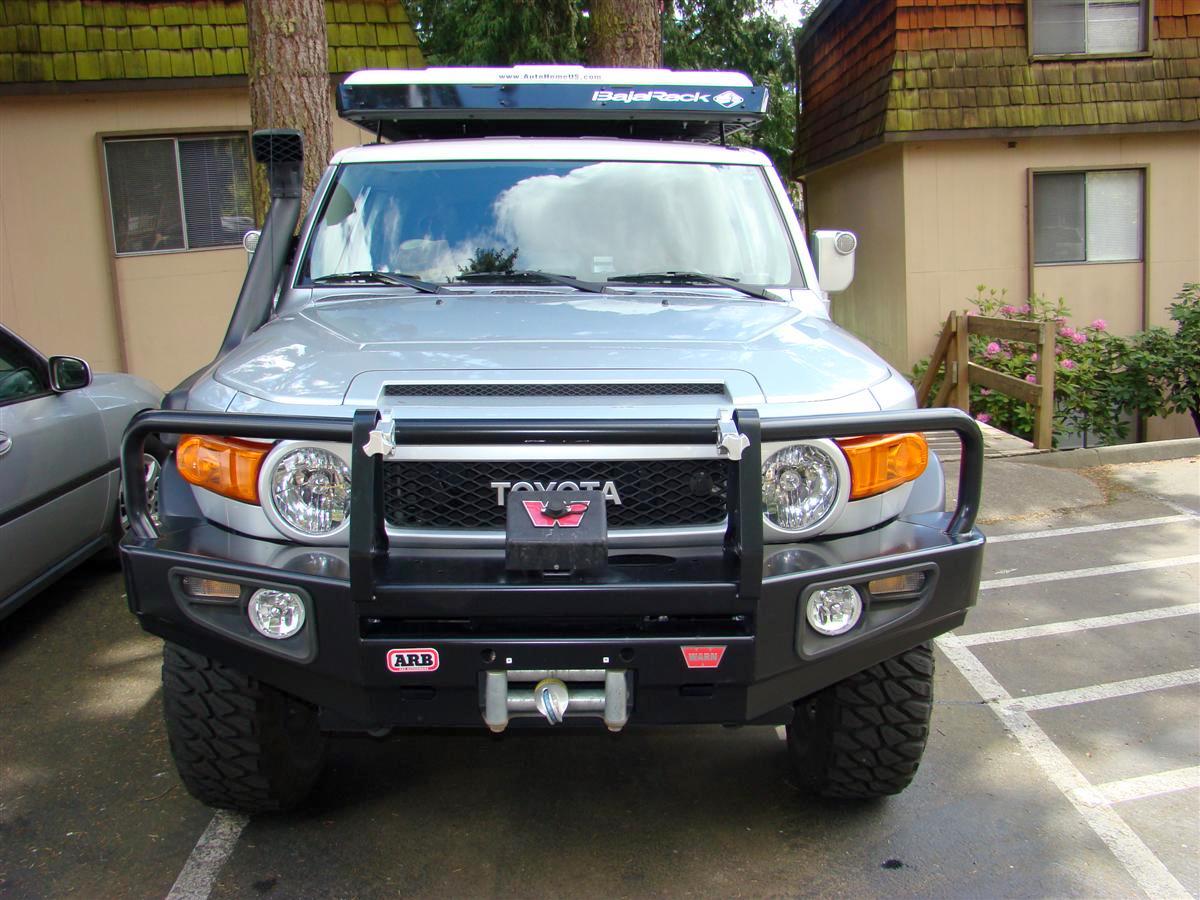
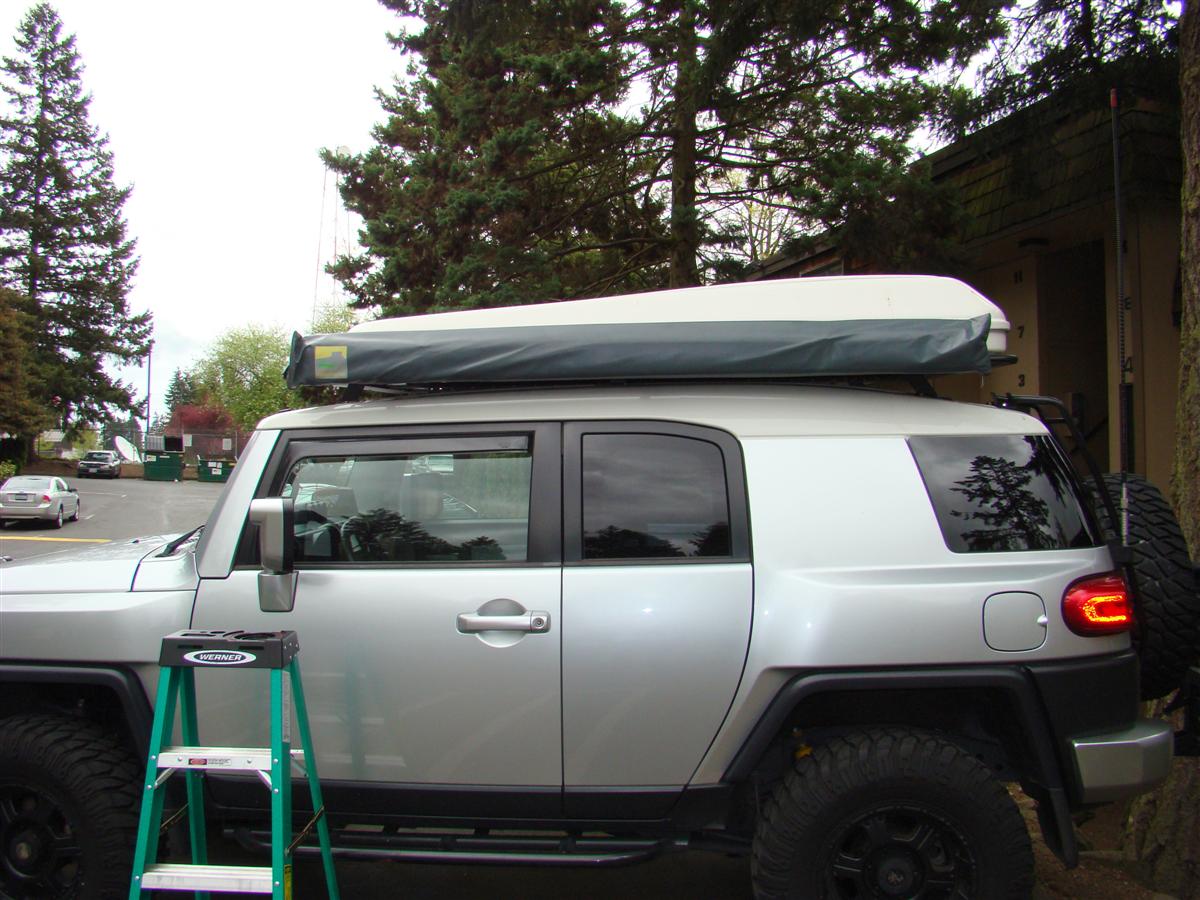
BajaRack MG model Installed 4-28-2010
Much of this info is already in a separate thread for the new rack, but I need to update my buildup thread with the info.
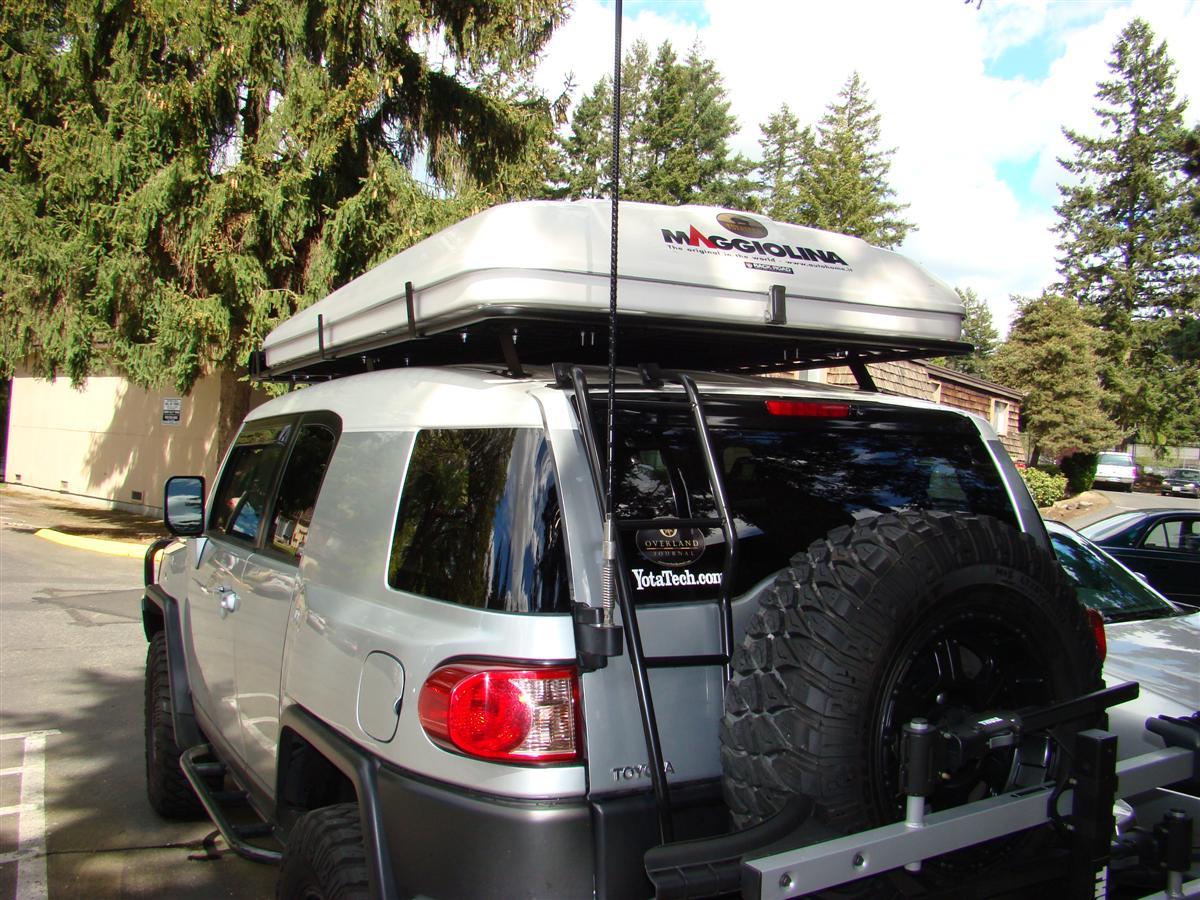
Been running my Maggiolina AirLand roof top tent for a little over two years on the stock FJ Cruisers rack.
While it works, it is not the best as in the COG is very high, and I get buffeted around on the freeway at speeds over 50 MPH when there is any amount of wind.
Last year we had a discussion at fjcruiserforums.com about a possible rack made just for the Maggiolina and Columbus style tents from Autohome.
Others have come up with ideas to get the tent lowered, but I wanted a specific off the shelf rack you could buy instead of fabbing one up to do this.
BajaRacks out of California stepped up last year and came up with a design.
It is all flat with no basket setup to contain any cargo on top, its sole purpose is to carry an AutoHome fiberglass shell tent which takes up most of the length and width of the rack.
In March of this year I decided it was time to jump on a new rack to make my rig safer while driving, and also to have the tent look more streamlined on the rig.
The new rack fulfills both criteria for me.
I ordered the new rack through Mike at AutoHome tents who is a reseller for BajaRacks.
The rack and awning brackets were shipped directly from BajaRacks though.
Mike will be stocking these new "MG" (Maggiolina) style racks shortly for both FJ Cruiser owners, and also for Land Cruiser 80 series owners.
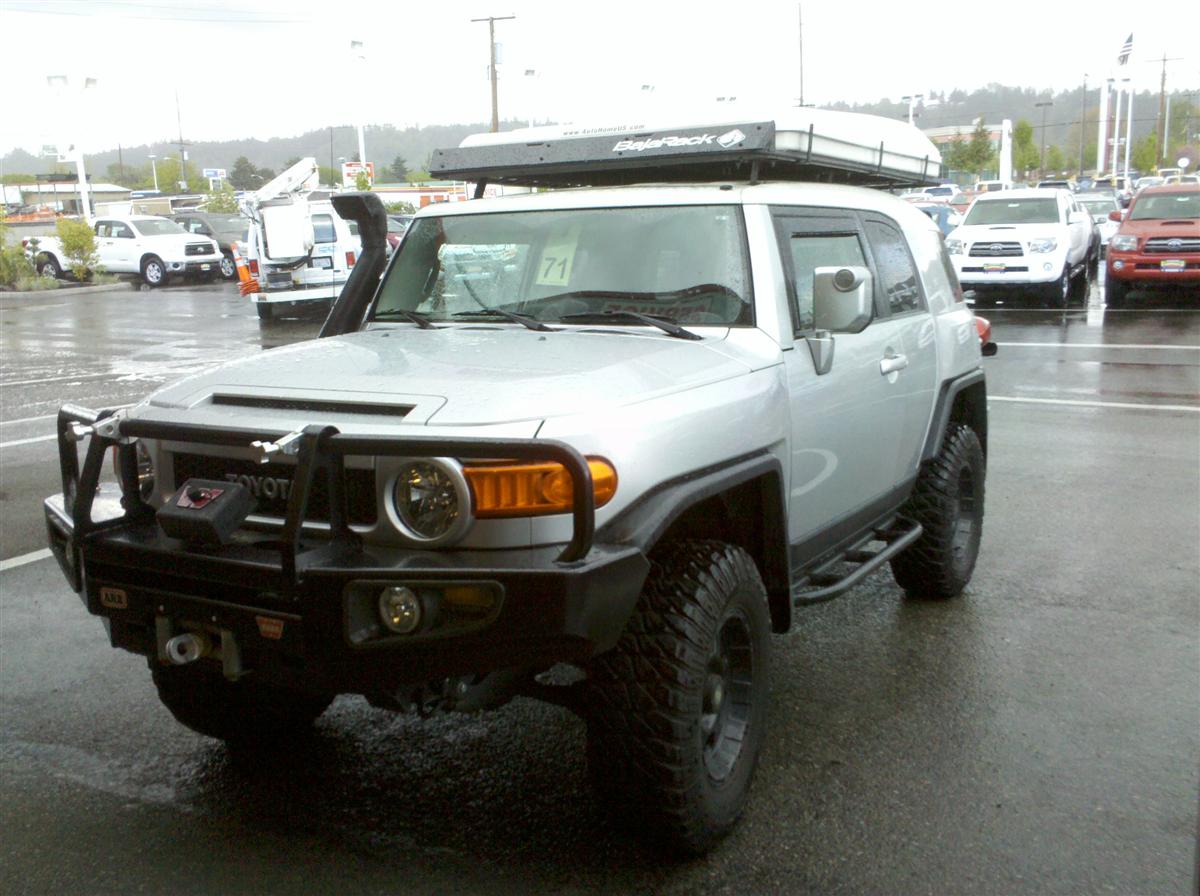
Here are a few shots of the old set, and a few shots of BajaRack's owner Sergio's FJ Cruiser with the naked rack and a Maggiolina Extreme borrowed from Frenchie, a member over at expeditionportal.com.
His tent was used to design the new rack.


Also ordered from BajaRack was a set of three awning brackets made to mount an awning that has tracks on the back of the case like my Campinglab and the ARB style ones have.
Here are a few pics from BajaRack of them.
I had the rack and awning brackets shipped to my dealer, Doxon Toyota of Auburn, WA.
If I had a home with a garage I would have attempted the installation myself, but since I live in an apartment complex, I am somewhat limited on what I can accomplish here.
I dropped my rig off at Toyota on Tuesday and they provided me with a free loaner car.
The next day I called around 11 am to inquire how the installation was going, and the tech had hit a snag.
They wanted me to come down, so I left work a few hours early, and I just caught the tech as he was going to lunch.
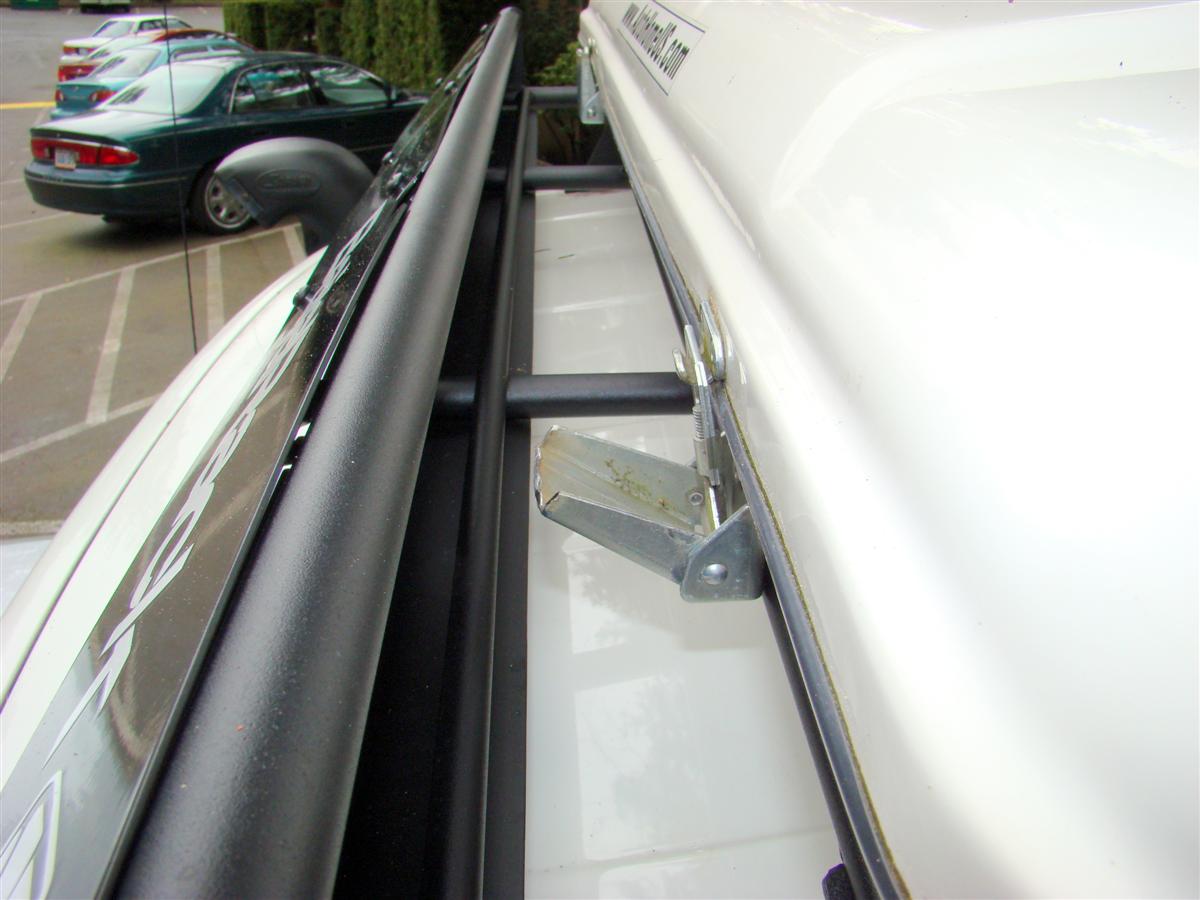
The service manager and I walked over to their new service bay (talk about nice!) and Scott the tech who was working on my rig showed me the front two hinges for the lid were hitting a front horizontal bar right behind the wind deflector when you tried to release the hinges.
He went to lunch and I called up BajaRack's who suggested we try moving the tent back some.
The service manager and I went back to the service area and slid it back some.
No good, as they just hit the other bar one position back.
A tech in the next bay said they already tried that.
Of course they did, I would have done the same.
Another call to BajaRacks and they asked me to snap a picture for them from my Droid.
As soon as they saw it they knew what was going on.
My latches are more than an inch longer than Frenchie's latches.
A call into Mike at AutoHome's US distributor here in the US resulted in me learning that some latches are different lengths for various models.
No way BajaRacks could have known this.
After lunch Scott and I discussed a plan.
We did not want to cut out that horizontal bar, so he suggested grinding down the latches.
This would solve the problem and the latches would still work, even without the little curved area which you would normally grab to swing the latch down to unlock it.
A little over an hour later my rig pulled up to the service waiting area where I was, and it looked great!
The only thing I had to redo later was the rear awning bracket mount.
It was up against the rear foot pad mount for the rack, thus not letting its vertical tab to stick out like the other two, so it was very close to the fiberglass shell of the tent, and would have thrown off the alignment of the three mounts when the awning was attached by me later.
I was able to on Sunday to unbolt the bottom half of the bracket and move it out of the way, then twist the upper part sideways with the bolt in it still to remove it from between the racks tubing.
It was a good thing I could get it out this way.
The only other alternative would have been to loosen the tent mounts in their tracks and jack the tent up a few inches so I could pull the bolts out.
The way I did it was a timesaver for sure.
Once I repositioned the awning bracket, I used the old 10mm bolts and nuts from the Campinglab awning brackets to insert into the awnings tracks.
I did pick up six new stainless steel flat washers to go behind the nut.
This way the nut would not grind off any of the brackets powdercoating.
I hope the info here can provide FJ Cruiser owners a good design now to mount a roof top tent lower to their roof.
I see no reason why this would not work with other tents too, although if you wanted to carry other cargo on top of the rack, you would need sides on it somewhere.
Below are some pictures from the time it rolled out of the shop at Toyota, and also at my home.
First up is showing the unmodified latch hitting the bar.
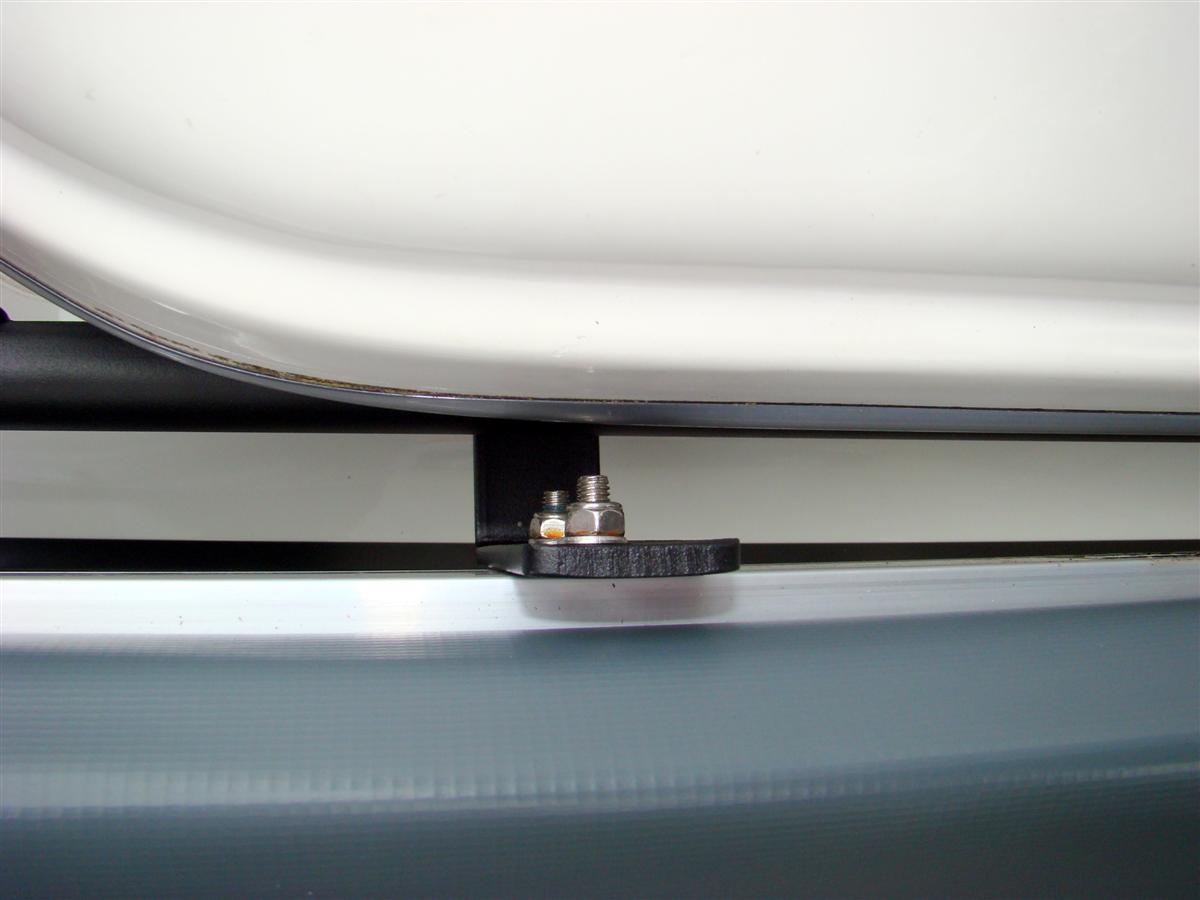
In a later picture you can see the latch after it has been shortened.

Awning mounted to the brackets
Links:
BajaRack
AutoHome US site
Doxon Toyota
Been running my Maggiolina AirLand roof top tent for a little over two years on the stock FJ Cruisers rack.
While it works, it is not the best as in the COG is very high, and I get buffeted around on the freeway at speeds over 50 MPH when there is any amount of wind.
Last year we had a discussion at fjcruiserforums.com about a possible rack made just for the Maggiolina and Columbus style tents from Autohome.
Others have come up with ideas to get the tent lowered, but I wanted a specific off the shelf rack you could buy instead of fabbing one up to do this.
BajaRacks out of California stepped up last year and came up with a design.
It is all flat with no basket setup to contain any cargo on top, its sole purpose is to carry an AutoHome fiberglass shell tent which takes up most of the length and width of the rack.
In March of this year I decided it was time to jump on a new rack to make my rig safer while driving, and also to have the tent look more streamlined on the rig.
The new rack fulfills both criteria for me.
I ordered the new rack through Mike at AutoHome tents who is a reseller for BajaRacks.
The rack and awning brackets were shipped directly from BajaRacks though.
Mike will be stocking these new "MG" (Maggiolina) style racks shortly for both FJ Cruiser owners, and also for Land Cruiser 80 series owners.
Here are a few shots of the old set, and a few shots of BajaRack's owner Sergio's FJ Cruiser with the naked rack and a Maggiolina Extreme borrowed from Frenchie, a member over at expeditionportal.com.
His tent was used to design the new rack.
Also ordered from BajaRack was a set of three awning brackets made to mount an awning that has tracks on the back of the case like my Campinglab and the ARB style ones have.
Here are a few pics from BajaRack of them.
I had the rack and awning brackets shipped to my dealer, Doxon Toyota of Auburn, WA.
If I had a home with a garage I would have attempted the installation myself, but since I live in an apartment complex, I am somewhat limited on what I can accomplish here.
I dropped my rig off at Toyota on Tuesday and they provided me with a free loaner car.
The next day I called around 11 am to inquire how the installation was going, and the tech had hit a snag.
They wanted me to come down, so I left work a few hours early, and I just caught the tech as he was going to lunch.
The service manager and I walked over to their new service bay (talk about nice!) and Scott the tech who was working on my rig showed me the front two hinges for the lid were hitting a front horizontal bar right behind the wind deflector when you tried to release the hinges.
He went to lunch and I called up BajaRack's who suggested we try moving the tent back some.
The service manager and I went back to the service area and slid it back some.
No good, as they just hit the other bar one position back.
A tech in the next bay said they already tried that.
Of course they did, I would have done the same.
Another call to BajaRacks and they asked me to snap a picture for them from my Droid.
As soon as they saw it they knew what was going on.
My latches are more than an inch longer than Frenchie's latches.
A call into Mike at AutoHome's US distributor here in the US resulted in me learning that some latches are different lengths for various models.
No way BajaRacks could have known this.
After lunch Scott and I discussed a plan.
We did not want to cut out that horizontal bar, so he suggested grinding down the latches.
This would solve the problem and the latches would still work, even without the little curved area which you would normally grab to swing the latch down to unlock it.
A little over an hour later my rig pulled up to the service waiting area where I was, and it looked great!
The only thing I had to redo later was the rear awning bracket mount.
It was up against the rear foot pad mount for the rack, thus not letting its vertical tab to stick out like the other two, so it was very close to the fiberglass shell of the tent, and would have thrown off the alignment of the three mounts when the awning was attached by me later.
I was able to on Sunday to unbolt the bottom half of the bracket and move it out of the way, then twist the upper part sideways with the bolt in it still to remove it from between the racks tubing.
It was a good thing I could get it out this way.
The only other alternative would have been to loosen the tent mounts in their tracks and jack the tent up a few inches so I could pull the bolts out.
The way I did it was a timesaver for sure.
Once I repositioned the awning bracket, I used the old 10mm bolts and nuts from the Campinglab awning brackets to insert into the awnings tracks.
I did pick up six new stainless steel flat washers to go behind the nut.
This way the nut would not grind off any of the brackets powdercoating.
I hope the info here can provide FJ Cruiser owners a good design now to mount a roof top tent lower to their roof.
I see no reason why this would not work with other tents too, although if you wanted to carry other cargo on top of the rack, you would need sides on it somewhere.
Below are some pictures from the time it rolled out of the shop at Toyota, and also at my home.
First up is showing the unmodified latch hitting the bar.
In a later picture you can see the latch after it has been shortened.
Awning mounted to the brackets
Links:
BajaRack
AutoHome US site
Doxon Toyota

 Aug 25, 2010 | 05:59 AM
#299
Thread Starter
Co-Founder/Administrator
iTrader: (1)
Joined: May 2002
Posts: 32,242
Likes: 21
From: Auburn, Washington
Thanks!
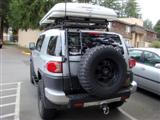
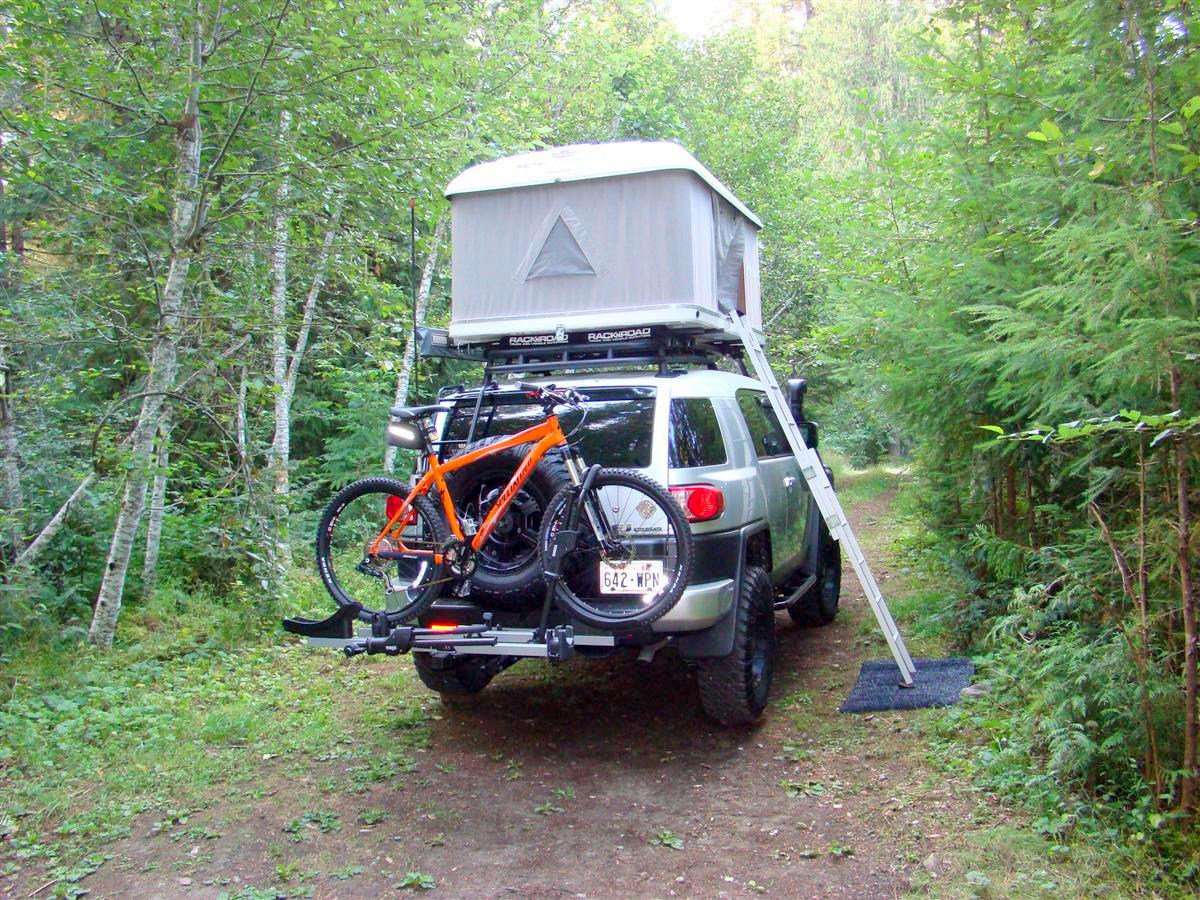
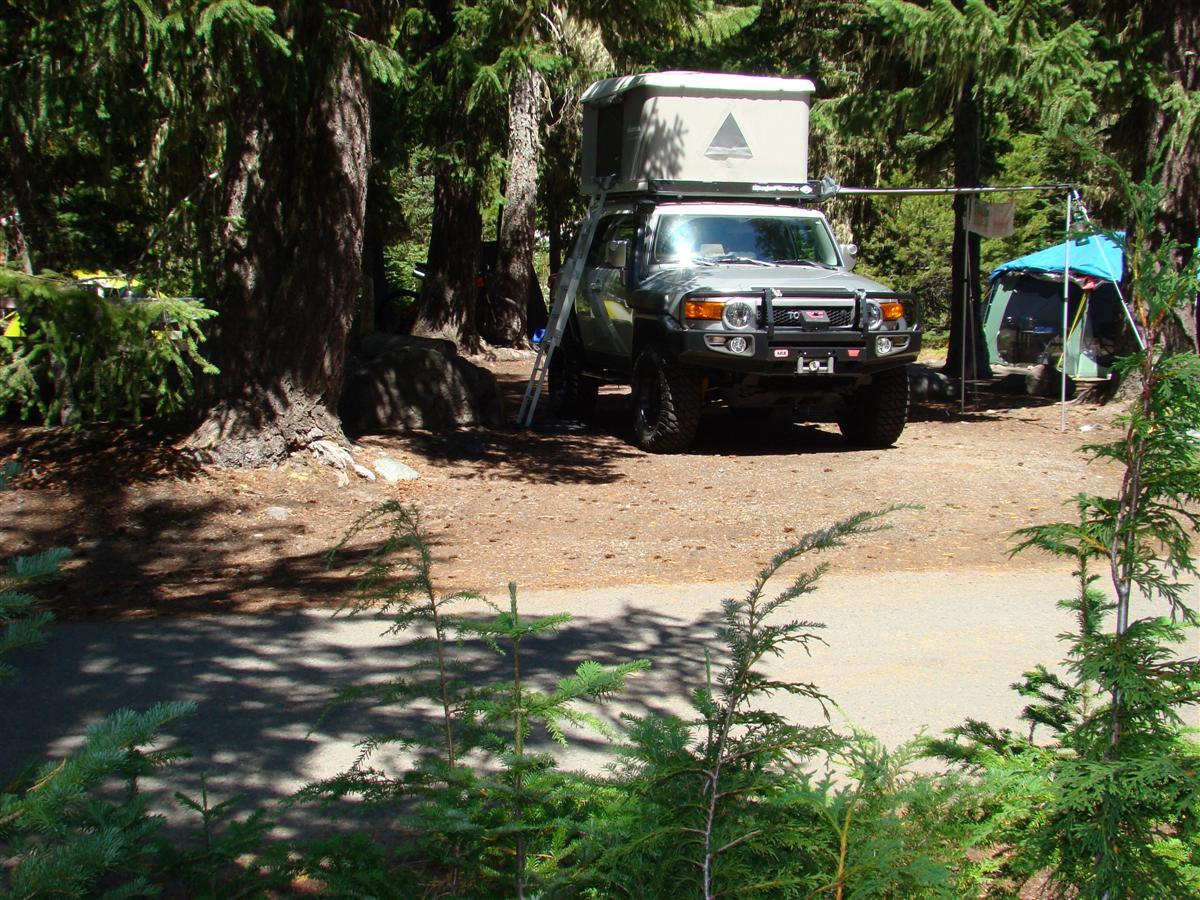
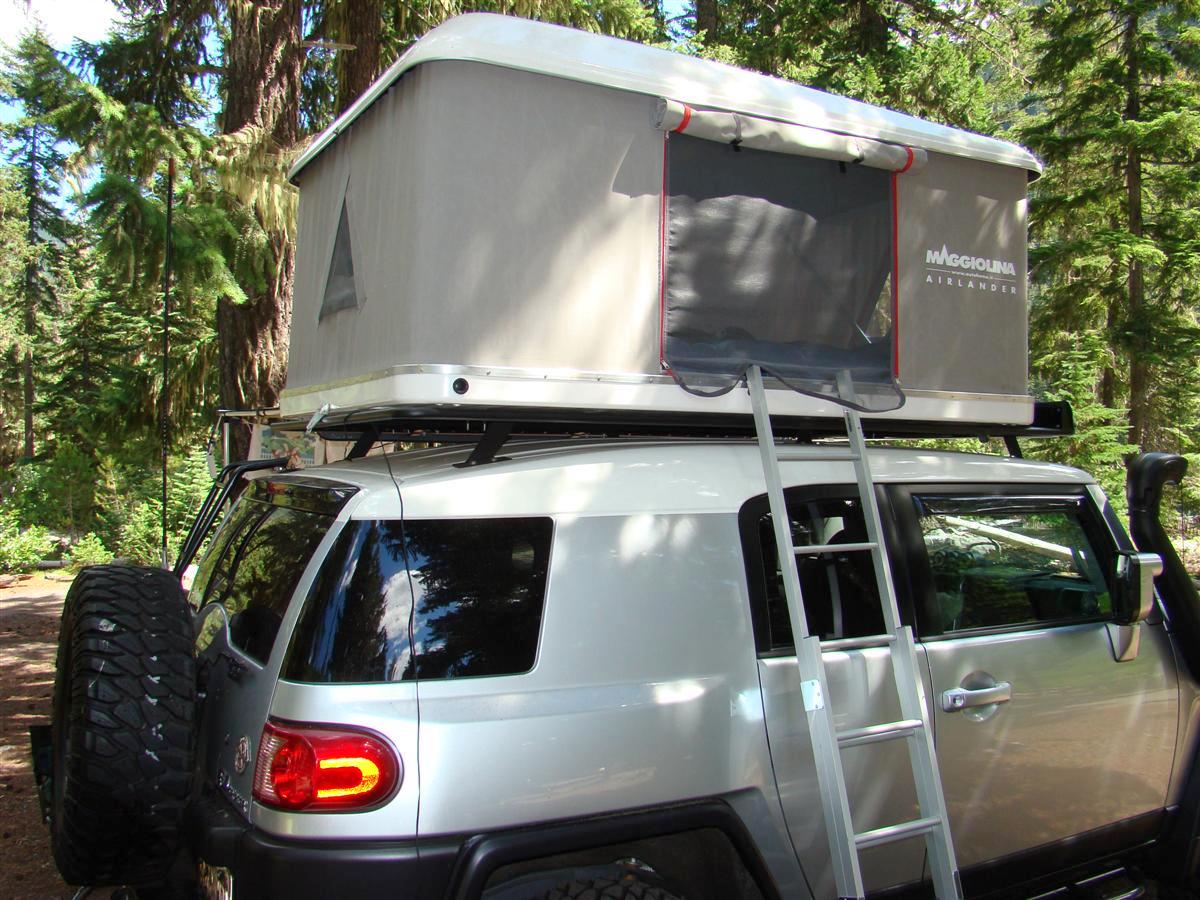
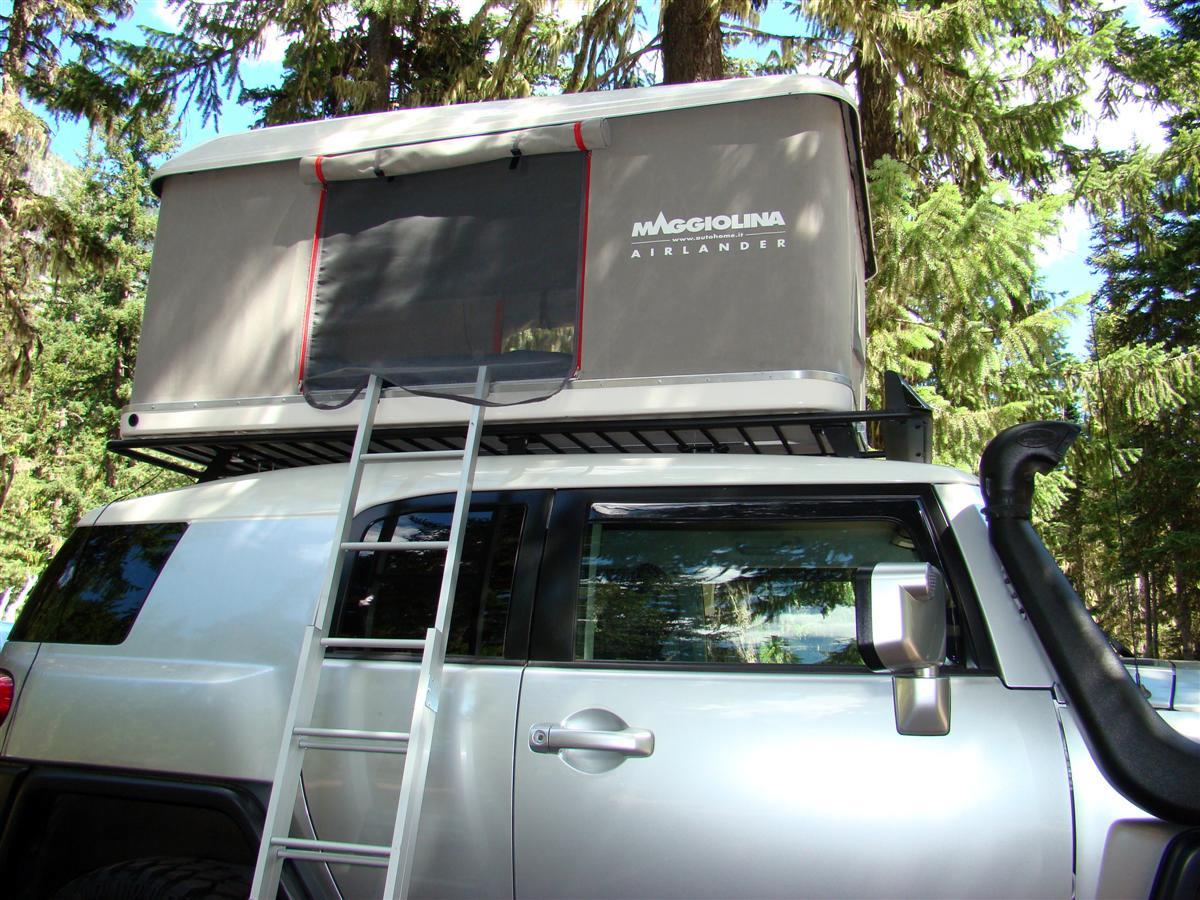
A few updated pictures in the wild of my new BajaRack that was added in April.
The new rack is working out very well for me.
Still get blown around a bit with a high cross wind, but it is not bad like before when the tent was sitting up much higher on the factory rack.

A few updated pictures in the wild of my new BajaRack that was added in April.
The new rack is working out very well for me.
Still get blown around a bit with a high cross wind, but it is not bad like before when the tent was sitting up much higher on the factory rack.


