
URBAN ASSAULT'S 1999 4Runner Build-up Thread
 Aug 22, 2012 | 07:17 PM
#41
Thread Starter
Registered User
Joined: Nov 2011
Posts: 86
Likes: 0
From: Atlanta, GA
 Looks like a great time... I'ma have to get back out asap! haha... CV Reboot first

Good luck with the CV. The inevitable weak link of us IFS'rs. I have tried to bomb proof mine, but I still wheel with 2 spares.
Thanks again!
Dec 12, 2012 | 11:06 AM
#43
Thread Starter
Registered User
Joined: Nov 2011
Posts: 86
Likes: 0
From: Atlanta, GA
A few updates. I finally got around to updating the stereo in the 4Runner. My factory head unit had the cassette/cd combo from the 90�s and the factory speakers were just tired. I opted for a Kenwood Unit with the integrated Garmin GPS, Bluetooth, Iphone integration, Pandora, DVD, Sirius, etc.
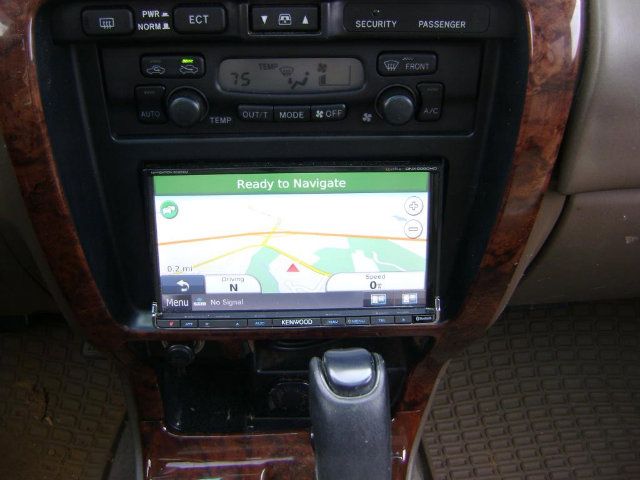
I also replaced my climate control bulbs (most were burned out) with �cool blue� led�s from superbright. We will see how long they last.
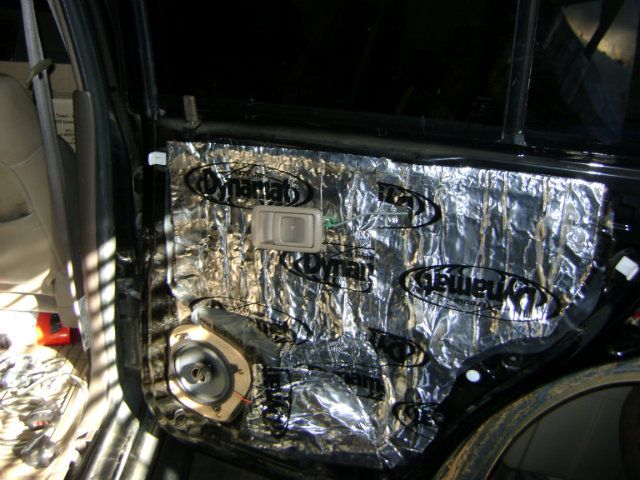
I replaced factory speakers with Alpine speakers and lined doors with Dynamat. Road noise is significantly reduced and the speakers are a dramatic improvement.
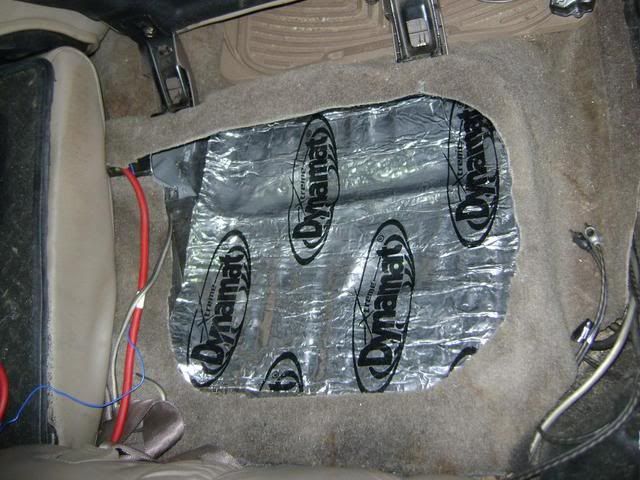
I used the factory jack compartment for the amps. I clearanced out the mounting tabs and removed some carpet from the top and from the front ports of the compartment to improve ventilation, though there is plenty of room in there. I then lined the compartment floor with Dynamat for a smooth mounting surface.
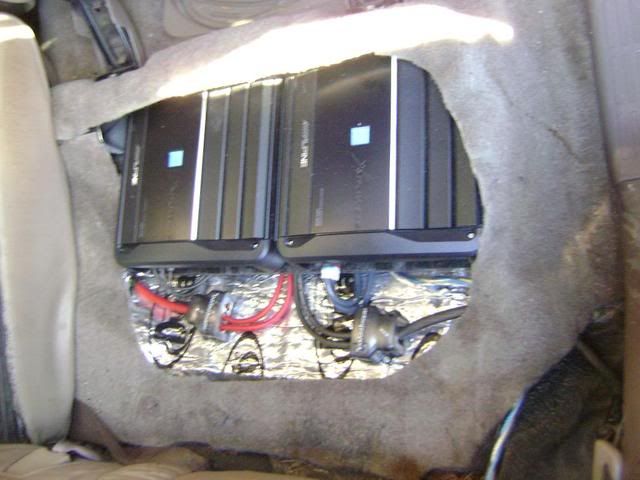
The amps are Alpine Class D�s which mean they are more efficient and generate virtually no heat. After over an hour of use they are barely warm to the touch. Mounted and wired (sounds easy but took me forever):
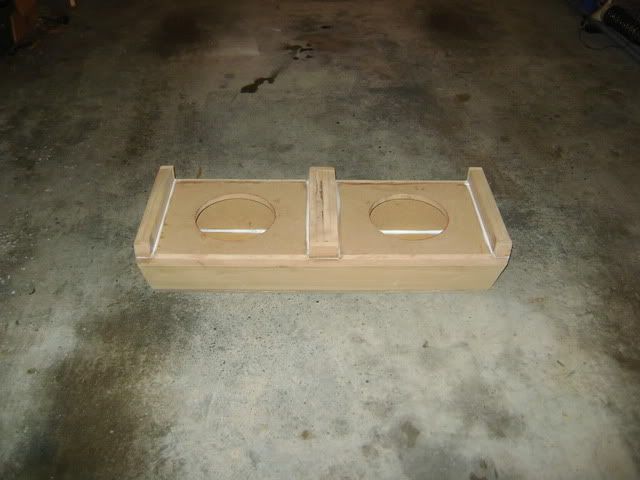
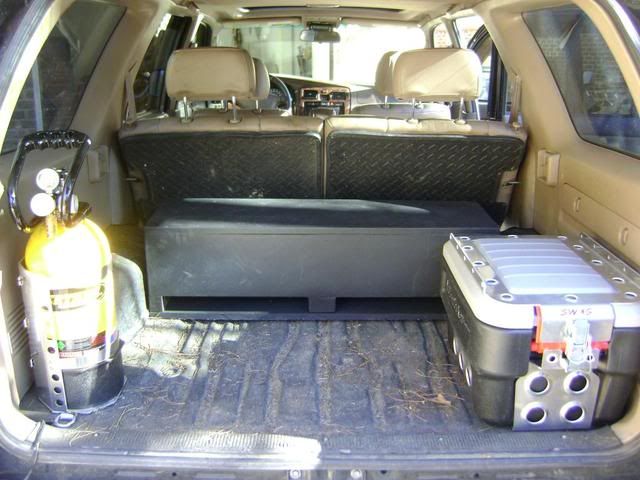
I debated a long time as to where/how to incorporate subwoofers. I did not want to sacrifice much cargo space, and they had to be tough. I frequently have camping/wheeling gear, tools, firewood, stuff for the yard, and/or bikes etc in the back. I read all about guys fiberglassing subs into the cargo panels. Though, even with grill guards, I bet the subs or even the fiberglass would get damaged in my cargo area. In addition, they had to be fairly stealth. So I decided on a downfiring sub box. This way I could still stack on top and the sub cones would be protected. I had 2 -10� low-profile Rockford Fosgate subs from another vehicle. The box was built around their specs.
Box upside down without the baseplate:
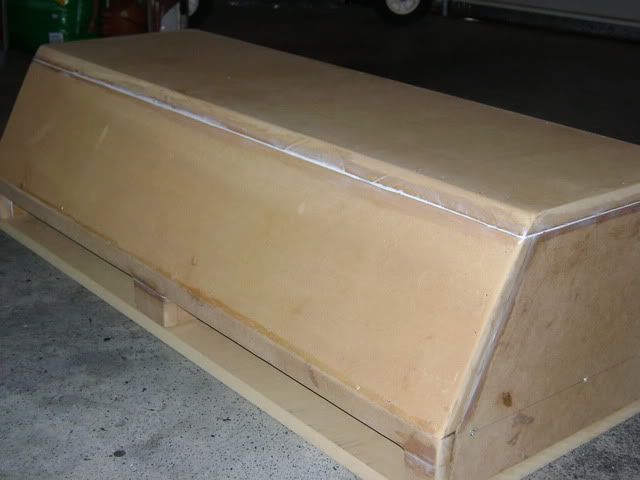
Box upright with the baseplate:
Screwed, glued, and sealed �� MDF. Angled to follow the lines of the backseat and fit between the wheel wells.
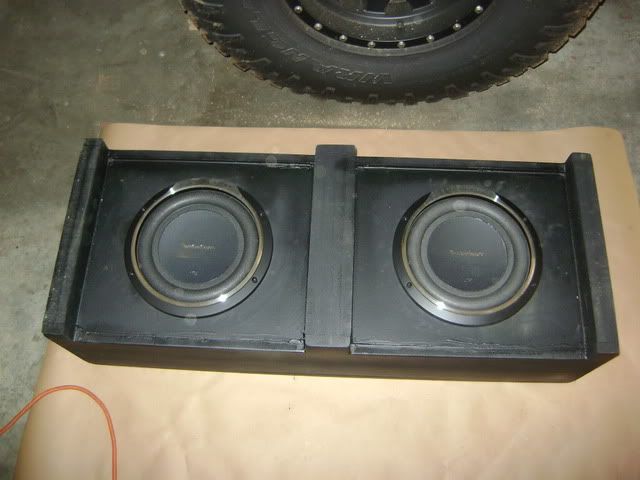
Covered with Bed Liner like everything else in the cargo area and subs installed:
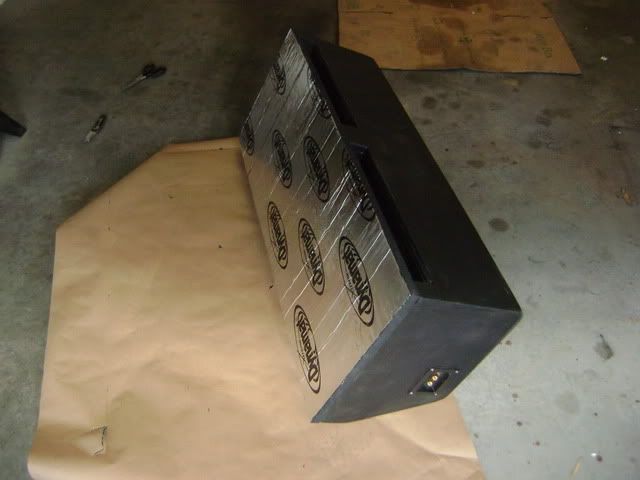
The base-plate was covered with Dynamat so there would be no rattles, and would conform to the ribbed floor:
With backseat up:
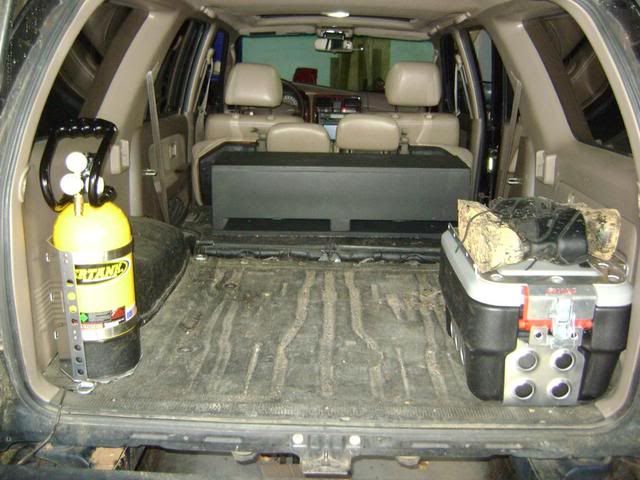
With backseat down:
I am extremely pleased with the performance of this setup. I wanted quality sound and bass, though at mild to moderate volumes. I do not claim to be an audiophile. I am sure there are things I could have done different for better hz�s or db�s or other scientific audio measurements that I do not care to understand. I am lovin� this setup.
Obviously I lost some precious cargo space, though the box is beef and I can stack on top. I may add some tie-downs to the top of the box and work on some quick release latches for the floor. On the last wheelin� trip I used a ratchet strap in case I rolled the thing.
I have some new wheelin� pics and a few more build updates as well. This post took longer than I planned so will post more later.
Thanks for checking in!
I also replaced my climate control bulbs (most were burned out) with �cool blue� led�s from superbright. We will see how long they last.
I replaced factory speakers with Alpine speakers and lined doors with Dynamat. Road noise is significantly reduced and the speakers are a dramatic improvement.
I used the factory jack compartment for the amps. I clearanced out the mounting tabs and removed some carpet from the top and from the front ports of the compartment to improve ventilation, though there is plenty of room in there. I then lined the compartment floor with Dynamat for a smooth mounting surface.
The amps are Alpine Class D�s which mean they are more efficient and generate virtually no heat. After over an hour of use they are barely warm to the touch. Mounted and wired (sounds easy but took me forever):
I debated a long time as to where/how to incorporate subwoofers. I did not want to sacrifice much cargo space, and they had to be tough. I frequently have camping/wheeling gear, tools, firewood, stuff for the yard, and/or bikes etc in the back. I read all about guys fiberglassing subs into the cargo panels. Though, even with grill guards, I bet the subs or even the fiberglass would get damaged in my cargo area. In addition, they had to be fairly stealth. So I decided on a downfiring sub box. This way I could still stack on top and the sub cones would be protected. I had 2 -10� low-profile Rockford Fosgate subs from another vehicle. The box was built around their specs.
Box upside down without the baseplate:
Box upright with the baseplate:
Screwed, glued, and sealed �� MDF. Angled to follow the lines of the backseat and fit between the wheel wells.
Covered with Bed Liner like everything else in the cargo area and subs installed:
The base-plate was covered with Dynamat so there would be no rattles, and would conform to the ribbed floor:
With backseat up:
With backseat down:
I am extremely pleased with the performance of this setup. I wanted quality sound and bass, though at mild to moderate volumes. I do not claim to be an audiophile. I am sure there are things I could have done different for better hz�s or db�s or other scientific audio measurements that I do not care to understand. I am lovin� this setup.
Obviously I lost some precious cargo space, though the box is beef and I can stack on top. I may add some tie-downs to the top of the box and work on some quick release latches for the floor. On the last wheelin� trip I used a ratchet strap in case I rolled the thing.
I have some new wheelin� pics and a few more build updates as well. This post took longer than I planned so will post more later.
Thanks for checking in!
Dec 12, 2012 | 12:28 PM
#44
Contributing Member


Joined: Sep 2005
Posts: 8,246
Likes: 497
From: mo
Nice! Like those hold-downs in the far back, been thinking on something sort of vaguely and a little like the one on the right for my tool box.
As far as the snorkel, what about an 'interior' version since you'd need one few and far between? I saw a thread on it somewhere and thought it interesting...they kept it maybe in the engine compartment or more reasonably inside the fender and went through the firewall to the cab if I remember correctly. Wish I could remember more.
As far as the snorkel, what about an 'interior' version since you'd need one few and far between? I saw a thread on it somewhere and thought it interesting...they kept it maybe in the engine compartment or more reasonably inside the fender and went through the firewall to the cab if I remember correctly. Wish I could remember more.
Dec 12, 2012 | 05:53 PM
#45
Thread Starter
Registered User
Joined: Nov 2011
Posts: 86
Likes: 0
From: Atlanta, GA
Nice! Like those hold-downs in the far back, been thinking on something sort of vaguely and a little like the one on the right for my tool box.
As far as the snorkel, what about an 'interior' version since you'd need one few and far between? I saw a thread on it somewhere and thought it interesting...they kept it maybe in the engine compartment or more reasonably inside the fender and went through the firewall to the cab if I remember correctly. Wish I could remember more.
As far as the snorkel, what about an 'interior' version since you'd need one few and far between? I saw a thread on it somewhere and thought it interesting...they kept it maybe in the engine compartment or more reasonably inside the fender and went through the firewall to the cab if I remember correctly. Wish I could remember more.
With regards to the snorkel, I remember seeing the same or similar. Maybe on a 2nd gen. I still kick around ideas for snorkel innovation. There has to be a better way. It is still on the list. Though, most of my recent searches have been dedicated toward a certain 3 letter project
 Dec 12, 2012 | 08:02 PM
#46
Wow, going 'Crazy Al!' on us, eh? hehe... No, seriously... it looks great, man.. Good ideas! I saw this recently and shared it with a buddy... he's thinking of slapping it in there..........
Like that idea you created....... Great way to keep them up off the floor and safe from FEET, ...and so on,
I too love the strap down bracket.... VERY nice.
Like that idea you created....... Great way to keep them up off the floor and safe from FEET, ...and so on,
I too love the strap down bracket.... VERY nice.
Dec 19, 2012 | 10:37 AM
#47
Thread Starter
Registered User
Joined: Nov 2011
Posts: 86
Likes: 0
From: Atlanta, GA
Wow, going 'Crazy Al!' on us, eh? hehe... No, seriously... it looks great, man.. Good ideas! I saw this recently and shared it with a buddy... he's thinking of slapping it in there..........
http://www.amazon.com/4-Runner-Unloa...fer+enclosures
Like that idea you created....... Great way to keep them up off the floor and safe from FEET, ...and so on,
I too love the strap down bracket.... VERY nice.
http://www.amazon.com/4-Runner-Unloa...fer+enclosures
Like that idea you created....... Great way to keep them up off the floor and safe from FEET, ...and so on,
I too love the strap down bracket.... VERY nice.
I saw those sub enclosures also. The reviews are not very good and they are pretty pricey. And, I have some crazy cargo ideas which may come to fruition in the future, which puts me back to square 1.
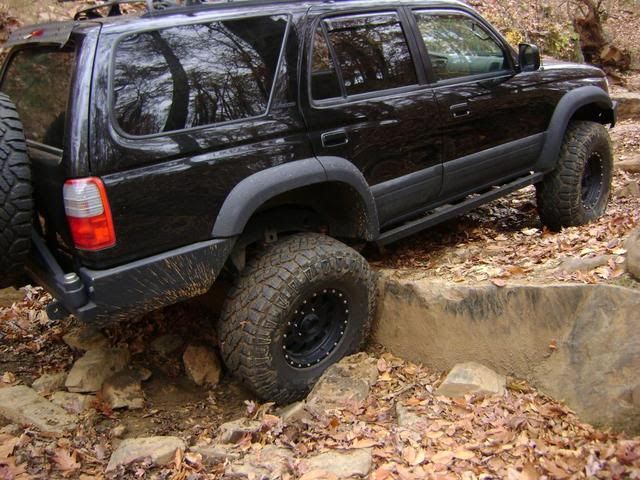
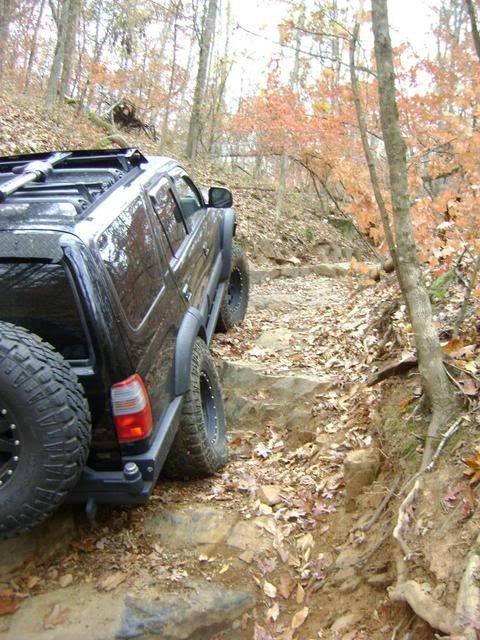
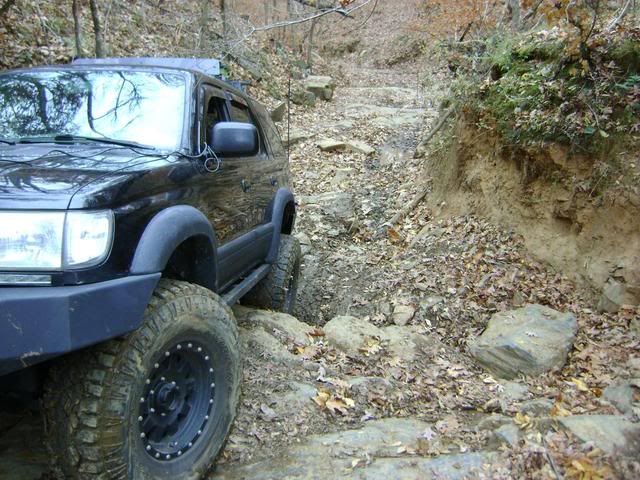
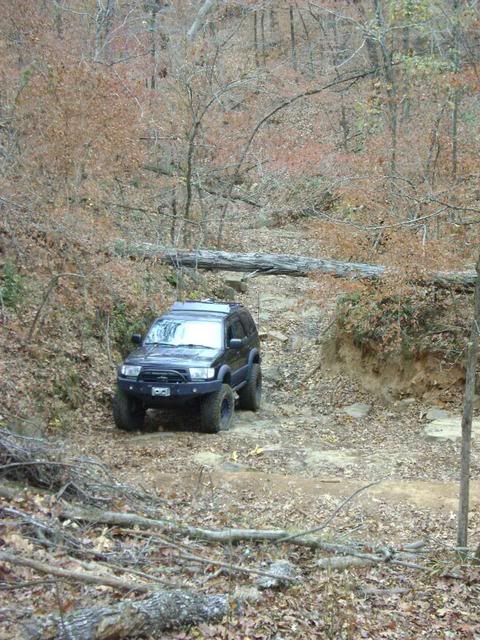
And a few wheelin pics from a trail ride last month:
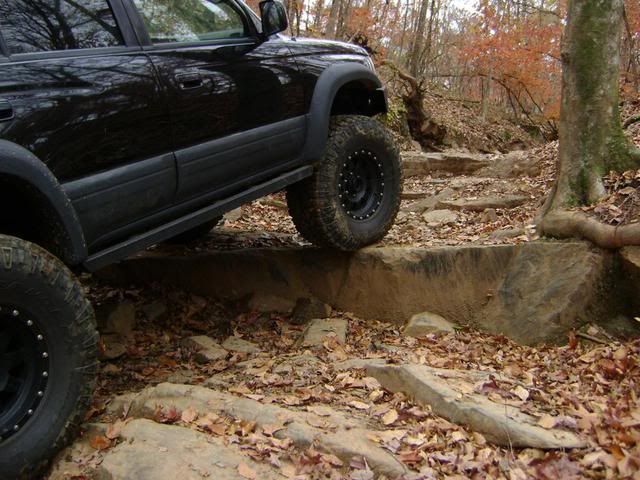
Had to bump up that ledge. I thought sure I would break something but survived. I did get some deep grooves on my lower links, but did not bend them. Will be adding some skid plates to the links ASAP! I just saw where JasoninTn bent his links while wheeling. Sorry J. Hopefully you can piece it back together. I will either make skids or purchase the Toytec skids for the lower links.
The trail is called "The Slippery Nipple". It is a series of granite stairsteps crawling up a dry riverbed. Some of the steps are 3-4ft high.
Some scars on my links and the Lotus skids did their job and show the effects. Also noticed some scars on my e-locker housing. I will be picking up the Inchworm elocker protector. The elocker is too expensive to not protect. Also, the Lil Skips Fuel Tank Skid has some deep gouges on it. It held up beautifully. I would hate to see what that would have done to my stock fuel tank skid. I will get some pics of that soon.
Thanks for checkin' in.
Jan 3, 2013 | 07:46 AM
#49
Thread Starter
Registered User
Joined: Nov 2011
Posts: 86
Likes: 0
From: Atlanta, GA
After the last wheeling trip I noticed some deep scratches on my rear lower links (see pics in previous posts). They did not bend, though I have seen where others' have. A few ounces (or pounds in this case) of protection goes a long way. I thought about fab'n up my own armor out of dom tubing or angle iron but Toytec has the exact product and they are pretty. They were on sale before Christmas so I grabbed them. Here is the link:
http://www.toyteclifts.com/index.php...mart&Itemid=72
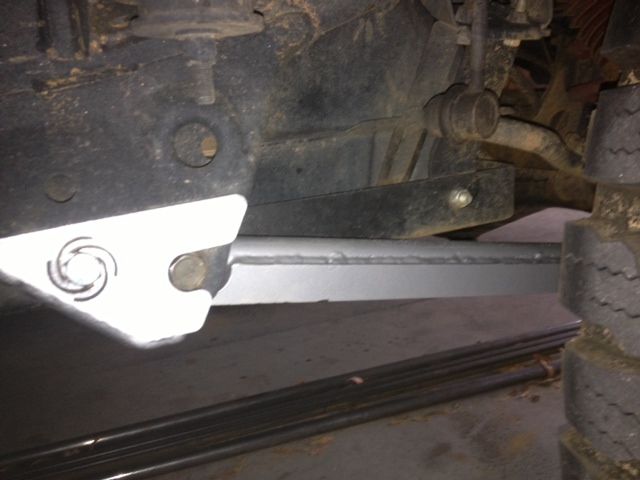
They are cut from solid steel, super thick, and a precise fit. They are weld on, but I am always looking for an excuse to use the welder.
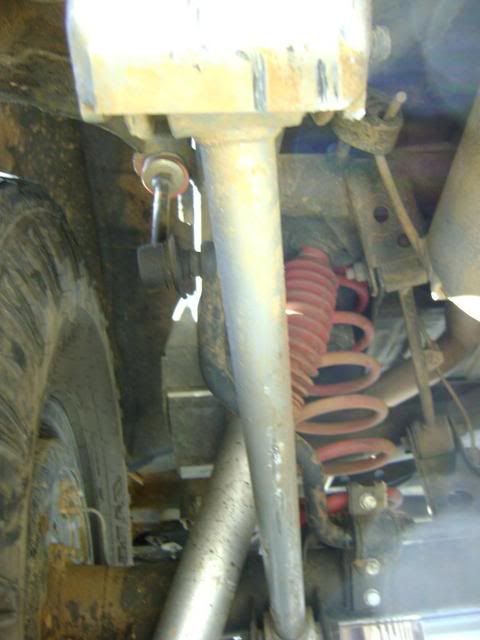
The stock 'weak' link (pun intended):
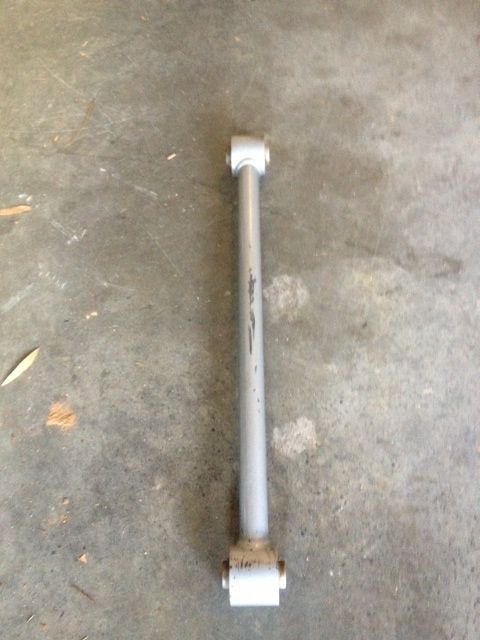
Fitted with the skid and welded top and bottom:
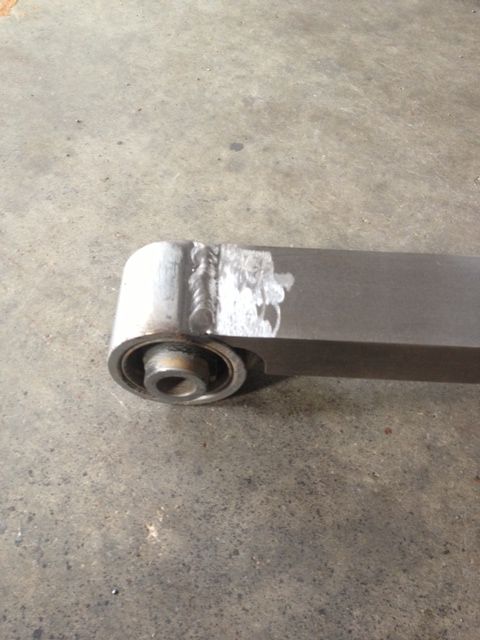
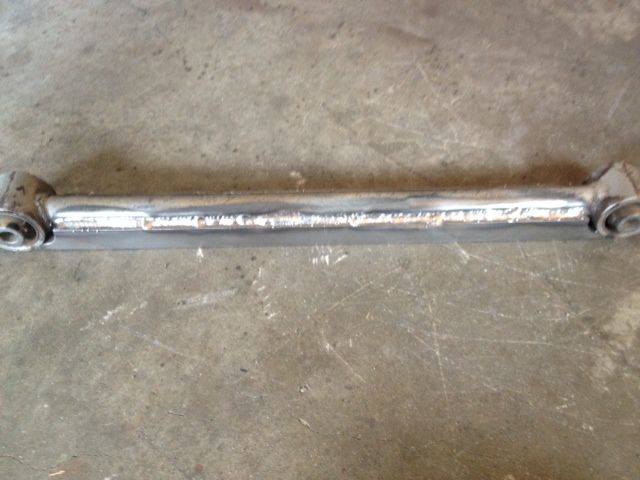
Some stitch welds would likely be more than adequate. However I always over kill everything and burned them in solid. It made for good practice since both materials are super thick.
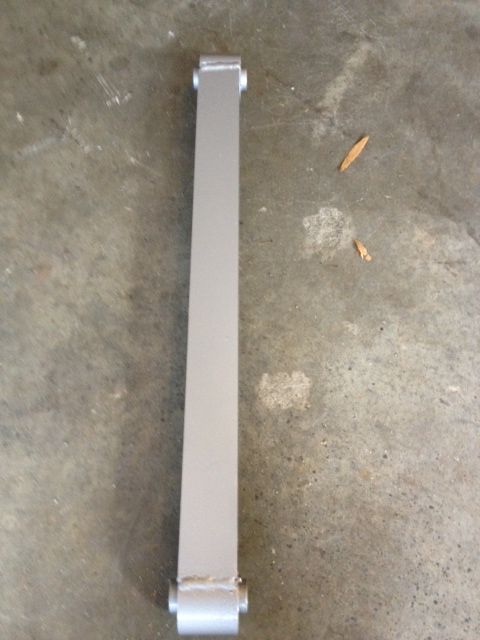
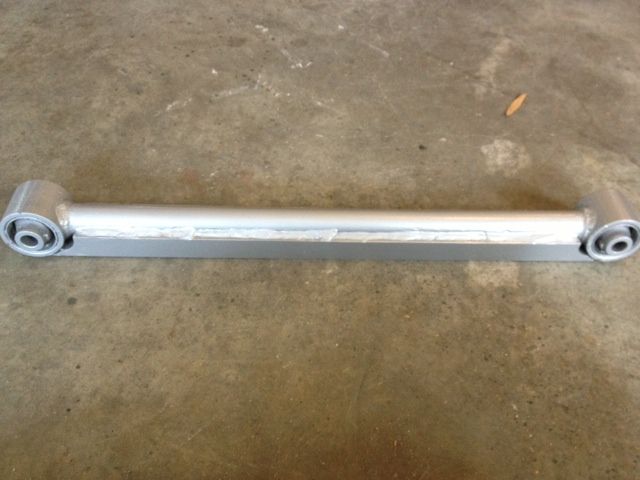
Painted with Rustoleum Hammered Finish Silver and re-installed:
No longer the 'weak link'. I will feel a lot better about dragging these over the rocks.
Thanks for checking in!
http://www.toyteclifts.com/index.php...mart&Itemid=72
They are cut from solid steel, super thick, and a precise fit. They are weld on, but I am always looking for an excuse to use the welder.
The stock 'weak' link (pun intended):
Fitted with the skid and welded top and bottom:
Some stitch welds would likely be more than adequate. However I always over kill everything and burned them in solid. It made for good practice since both materials are super thick.
Painted with Rustoleum Hammered Finish Silver and re-installed:
No longer the 'weak link'. I will feel a lot better about dragging these over the rocks.
Thanks for checking in!
Jan 7, 2013 | 07:27 AM
#50
Thread Starter
Registered User
Joined: Nov 2011
Posts: 86
Likes: 0
From: Atlanta, GA
I recently tried Texas Ace's Seafoam and MMO treatment. I am very pleased with the result. You can read his write up here: https://www.yotatech.com/forums/f2/s...y-work-243376/
I did just the MMO, and Seafoam. I didn't do the water portion. I put the Marvel Mystery Oil in a couple hundred miles prior to my oil change, and did the Seafoam treatment on same day as oil change. I have 300k on my engine. All is well, but I'm sure it is tired. Over the past few months, while at idle, I have noticed just a subtle, intermittent stutter or misfire. Very subtle. In fact most people do not notice it, even after I call it out. "There it was! Did you feel it?! - No. Nothing" is the usual response. And spark plugs, sensors etc are all good. I was guessing injector. Anyway, after the SF/MMO it is purring smooth. Now, I'm not claiming you pour some juice in a Volkswagen and drive off with a Porsche, but there is a noticeable difference. After 300k miles, I notice every difference.
TA's write up is better, but here is a brief pictorial for fun.

I used a 6" piece of aquarium hose as an extension and used the PCV hose to suction the SF into the intake. This sucks! No, I mean that in a good way. There is a lot of suction from the PCV hose. I introduced a little at a time at about 2000RPM for roughly 1/2 the can. Then I gave it a big enough drink to stall it out. I believe TA recommended letting it sit for an hour or more. I twiddled my thumbs, tried to be patient, threw the tennis ball to the dog (or at the dog - she is old) but couldn't wait any longer. Elapsed time probably 20min. After flooding it out with the Seafoam the restart is a little rough. And that is when you get the smoke! Warn your neighbors or family members and tell them not to call 911, everything is under control, nothing to see here. But it is a lot of smoke.


After smoking out the neighborhood, I thought I would just drive it around to burn off what was left of the seafoam. There is a Community Garden at the top of my street that I have to drive past. I sheepishly waved and mouthed the word, "Sorry" as I crop dusted them with the smoke. They are a pretty peaceful bunch that hangs out there but I imagine even they found a few middle fingers to show me. I 'imagine', because I sure couldn't see them thru the thick white smoke. Within a few minutes the smoke stopped and I was running as smooth as ever. I poured the remaining Seafoam in the gas tank. I will likely do this a couple of times a year. I may do it at night next time though so the neighbors don't freak out. I will keep an eye on the scan gauge and look for any improvement in mpg etc.
Thanks TA for the write-up.
I did just the MMO, and Seafoam. I didn't do the water portion. I put the Marvel Mystery Oil in a couple hundred miles prior to my oil change, and did the Seafoam treatment on same day as oil change. I have 300k on my engine. All is well, but I'm sure it is tired. Over the past few months, while at idle, I have noticed just a subtle, intermittent stutter or misfire. Very subtle. In fact most people do not notice it, even after I call it out. "There it was! Did you feel it?! - No. Nothing" is the usual response. And spark plugs, sensors etc are all good. I was guessing injector. Anyway, after the SF/MMO it is purring smooth. Now, I'm not claiming you pour some juice in a Volkswagen and drive off with a Porsche, but there is a noticeable difference. After 300k miles, I notice every difference.
TA's write up is better, but here is a brief pictorial for fun.
I used a 6" piece of aquarium hose as an extension and used the PCV hose to suction the SF into the intake. This sucks! No, I mean that in a good way. There is a lot of suction from the PCV hose. I introduced a little at a time at about 2000RPM for roughly 1/2 the can. Then I gave it a big enough drink to stall it out. I believe TA recommended letting it sit for an hour or more. I twiddled my thumbs, tried to be patient, threw the tennis ball to the dog (or at the dog - she is old) but couldn't wait any longer. Elapsed time probably 20min. After flooding it out with the Seafoam the restart is a little rough. And that is when you get the smoke! Warn your neighbors or family members and tell them not to call 911, everything is under control, nothing to see here. But it is a lot of smoke.
After smoking out the neighborhood, I thought I would just drive it around to burn off what was left of the seafoam. There is a Community Garden at the top of my street that I have to drive past. I sheepishly waved and mouthed the word, "Sorry" as I crop dusted them with the smoke. They are a pretty peaceful bunch that hangs out there but I imagine even they found a few middle fingers to show me. I 'imagine', because I sure couldn't see them thru the thick white smoke. Within a few minutes the smoke stopped and I was running as smooth as ever. I poured the remaining Seafoam in the gas tank. I will likely do this a couple of times a year. I may do it at night next time though so the neighbors don't freak out. I will keep an eye on the scan gauge and look for any improvement in mpg etc.
Thanks TA for the write-up.
Jan 7, 2013 | 10:33 AM
#51
Sweet pics, .... sweet smoke(ok, not so sweet, more like dirty pool water being boiled, lol).... And still.... one of my favorite 3rd Gens! Looking at a Taco for fixing up. 3.4 Auto/Prerunner, 164K..... Not sure yet, dude may be backing out of selling it. I just wanna fix it up for someone. I WILL be needing your input on the 3.4, buddy.... 'You'll hear a knock... You'll come to the door..... THERE I'LL BE, pencil and paper in hand... YES, THAT'S RIGHT, YOU CAN'T GET RID OF ME!!!!' haha.
Happy New Year, Dudah!
Happy New Year, Dudah!
Jan 11, 2013 | 07:20 AM
#52
Thread Starter
Registered User
Joined: Nov 2011
Posts: 86
Likes: 0
From: Atlanta, GA
Sweet pics, .... sweet smoke(ok, not so sweet, more like dirty pool water being boiled, lol).... And still.... one of my favorite 3rd Gens! Looking at a Taco for fixing up. 3.4 Auto/Prerunner, 164K..... Not sure yet, dude may be backing out of selling it. I just wanna fix it up for someone. I WILL be needing your input on the 3.4, buddy.... 'You'll hear a knock... You'll come to the door..... THERE I'LL BE, pencil and paper in hand... YES, THAT'S RIGHT, YOU CAN'T GET RID OF ME!!!!' haha.
Happy New Year, Dudah!
Happy New Year, Dudah!

Hopefully the deal comes thru for you.
Jan 17, 2013 | 01:27 PM
#53
Registered User
Joined: Dec 2008
Posts: 2,391
Likes: 1
From: tecumseh nebraska
Nice ride! Love the leds and rigid lightbar. Also the spare carrier looks great.So you are running toytec and sonoran for a lift? Just curious. Have you ever replaced your timing belt? I was contemplating on doing mine on the 97 runner. Also would like to do a sonoran lift
Jan 18, 2013 | 07:16 AM
#55
Thread Starter
Registered User
Joined: Nov 2011
Posts: 86
Likes: 0
From: Atlanta, GA
Nice ride! Love the leds and rigid lightbar. Also the spare carrier looks great.So you are running toytec and sonoran for a lift? Just curious. Have you ever replaced your timing belt? I was contemplating on doing mine on the 97 runner. Also would like to do a sonoran lift
I've changed the spare tire position a few times trying to get it as close to the vehicle as possible. It is a lot of weight on the tail. I recently added some gussets to the spare carrier to give me a bit more peace of mind while bombing down rough fire roads.
Yes. Toytec coilovers up front and landcruiser springs in the rear with the adjustable panhard from Sonoran. It works for now, though suspension may evolve over the next few years. I love the coilovers in the front, wish I had co's in the rear, too.
Yes! Change your timing belt. I have changed mine every 100,000 miles. Change the water pump while you are in there also. Cheap insurance versus the alternative.
This site is great for ideas. I've stolen....errrr been inspired by lots of ideas on Yotatech.
Thanks again! I really appreciate it.


Thread
Thread Starter
Forum
Replies
Last Post
RedRunner_87
95.5-2004 Tacomas & 96-2002 4Runners (Build-Up Section)
84
Jun 1, 2021 01:51 PM
crashburnoveride
86-95 Trucks & 4Runners
1
Jul 10, 2015 06:39 AM
cyclist231
95.5-2004 Tacomas & 96-2002 4Runners
2
Jul 7, 2015 12:56 PM


