
URBAN ASSAULT'S 1999 4Runner Build-up Thread
 May 1, 2012 | 05:59 PM
#22
Thread Starter
Registered User
Joined: Nov 2011
Posts: 86
Likes: 0
From: Atlanta, GA
Thanks. I seriously considered making it myself. Though, sometimes I start thinking, how much is time worth? And, if somebody has already invented the wheel, and has put quality thought/craftmanship into it, I will support him/her.
I may make one (with more holes for heat dissipation) for the cat/muffler side. This will tie in to the modular full-skid idea.
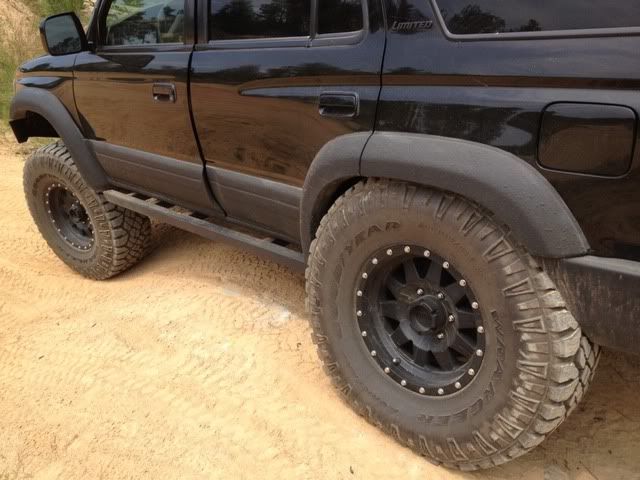
However, I am quickly becoming conscious of how heavy my truck is becoming. I believe the fuel tank skid was approx. 45lbs. Add that to the Budbuilts, plate bumpers, winch, 35" spare, sliders, and all the cargo. I get just as excited about bits and pieces that can be removed, as I do about new bits and pieces.
I may make one (with more holes for heat dissipation) for the cat/muffler side. This will tie in to the modular full-skid idea.
However, I am quickly becoming conscious of how heavy my truck is becoming. I believe the fuel tank skid was approx. 45lbs. Add that to the Budbuilts, plate bumpers, winch, 35" spare, sliders, and all the cargo. I get just as excited about bits and pieces that can be removed, as I do about new bits and pieces.
May 3, 2012 | 05:24 PM
#24
Have you actually driven up on a scale yet to see how much it weighs with all the mods? Mine weighs 5000 lbs, I bet yours isn't far behind.
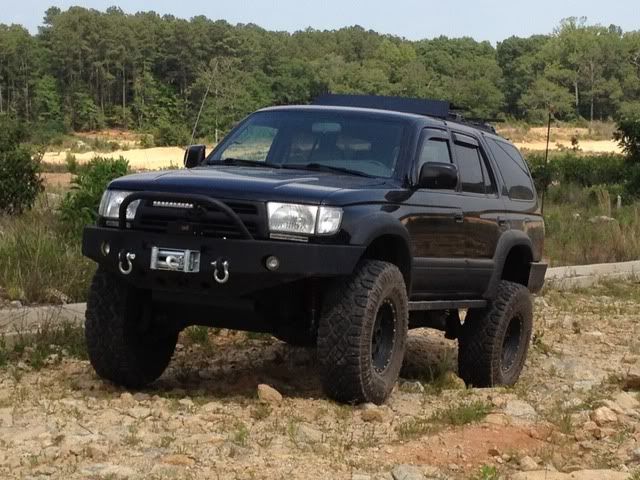
Your undercarriage sure is clean, it looks brand new!
Your undercarriage sure is clean, it looks brand new!
May 7, 2012 | 07:22 AM
#25
Thread Starter
Registered User
Joined: Nov 2011
Posts: 86
Likes: 0
From: Atlanta, GA
Thanks! The undercarriage is clean, because I accidentally did this to my truck:
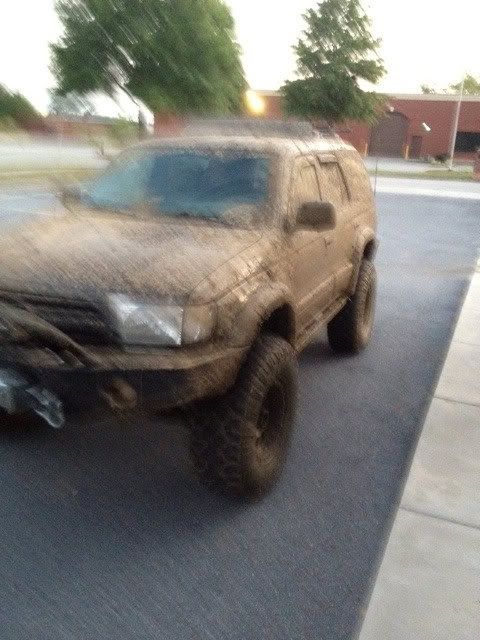
It took hours to clean. It was thick like caramel. I put on a swim suit, laid on my creeper and worked from back to front with a pressure washer.
I hate mud. I try to avoid it. I do not understand those who love it and seek it. In this part of the country, there are some great hill climbs, but after the descent, there is usually mud. Take the good with the bad.
May 7, 2012 | 07:30 AM
#26
Thread Starter
Registered User
Joined: Nov 2011
Posts: 86
Likes: 0
From: Atlanta, GA
Thanks! Most of my ideas were inspired by others on this forum as well. I try to put a little spin on each idea to evolve it. Let me know if you need any info. Thanks again!
Jun 4, 2012 | 11:20 AM
#27
Thread Starter
Registered User
Joined: Nov 2011
Posts: 86
Likes: 0
From: Atlanta, GA
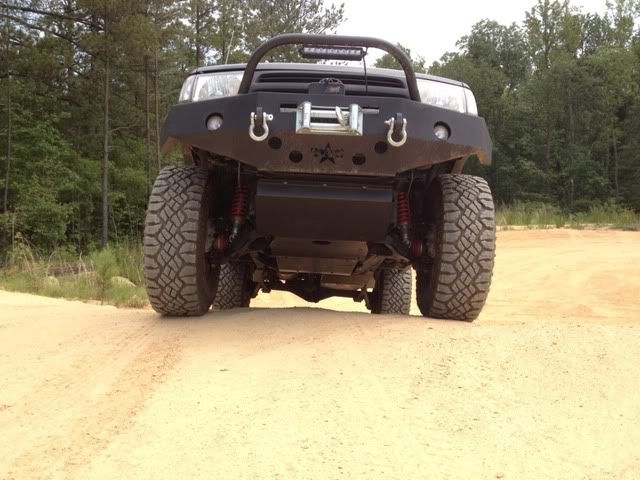
I made a few changes to the sway bar and the adjustable coil overs, and then took it out for a quick test run.
The suspension always acts like the old judges scale, with the 2 trays hanging in balance. You can't change one side without affecting the other. Therefore, a 1" sway bar drop bracket in the front (4crawler.com), and coil-over adjustment has me rubbing in the back again. Will need some more trimming on the rear bumper.
My fire hydrant pose:

And while I had the skid plate off for the sway bar, I gave Bud a quick re-paint:
I have a few more projects going as well. I hope to post up some pics soon. Thanks!
The suspension always acts like the old judges scale, with the 2 trays hanging in balance. You can't change one side without affecting the other. Therefore, a 1" sway bar drop bracket in the front (4crawler.com), and coil-over adjustment has me rubbing in the back again. Will need some more trimming on the rear bumper.
My fire hydrant pose:
And while I had the skid plate off for the sway bar, I gave Bud a quick re-paint:
I have a few more projects going as well. I hope to post up some pics soon. Thanks!
Jun 11, 2012 | 08:24 PM
#28
Holy Crapoli! That thing is SICK! haha. Very nice work, man.... I've been coveting one of these model 4Runners for a long time... Would LOVE to get one to this level, if I can ever get my hands on one worth buying/worth what they're asking, lol.
I've not always loved the 'all black' thing.... Some vehicles, it just doesn't look right/they've not done it right... I'D GRATEFULLY roll this thing!
Look forward to seeing whatEVER is next, Steve!
I've not always loved the 'all black' thing.... Some vehicles, it just doesn't look right/they've not done it right... I'D GRATEFULLY roll this thing!
Look forward to seeing whatEVER is next, Steve!
Jun 12, 2012 | 12:57 PM
#30
Thread Starter
Registered User
Joined: Nov 2011
Posts: 86
Likes: 0
From: Atlanta, GA
Holy Crapoli! That thing is SICK! haha. Very nice work, man.... I've been coveting one of these model 4Runners for a long time... Would LOVE to get one to this level, if I can ever get my hands on one worth buying/worth what they're asking, lol.
I've not always loved the 'all black' thing.... Some vehicles, it just doesn't look right/they've not done it right... I'D GRATEFULLY roll this thing!
Look forward to seeing whatEVER is next, Steve!
I've not always loved the 'all black' thing.... Some vehicles, it just doesn't look right/they've not done it right... I'D GRATEFULLY roll this thing!
Look forward to seeing whatEVER is next, Steve!
Thanks for checking in.
Last edited by Urban Assault; Jun 12, 2012 at 05:40 PM.
Jun 19, 2012 | 01:52 PM
#33
Thread Starter
Registered User
Joined: Nov 2011
Posts: 86
Likes: 0
From: Atlanta, GA
Thank you! I love working on, and evolving the truck and would do it regardless. However it is great to receive compliments like this, and get a thumbs up on the road.
I am not sure this really qualifies as a "build" but I installed a Wheelskins Leather Steering Wheel Cover. My factory leather in the 12o'clock position looked really bad from sun exposure and the wear and tear from my hand. The install is time consuming, but is not difficult.
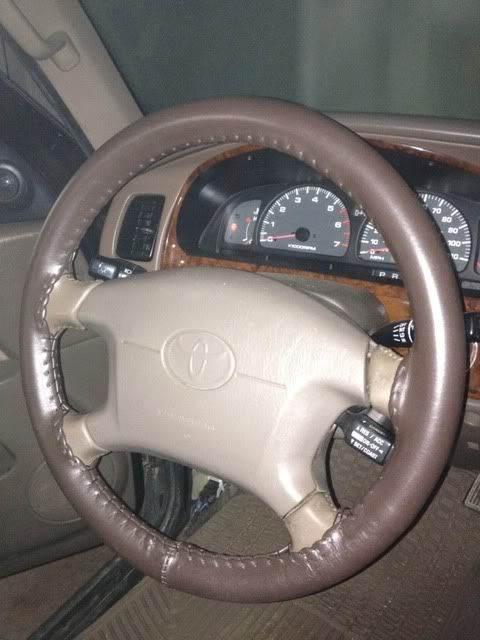
It took over an hour, but I was not keeping track. The kit comes with the leather cover, needle and leather cord. Yes, you stitch it yourself. I get a bit of catharsis out of projects like this, so I do not mind the work.
The needle did break with about 4 inches left to lace. I had to "MacGyver" a paper clip to finish up. You kids can ask your Dad about that.
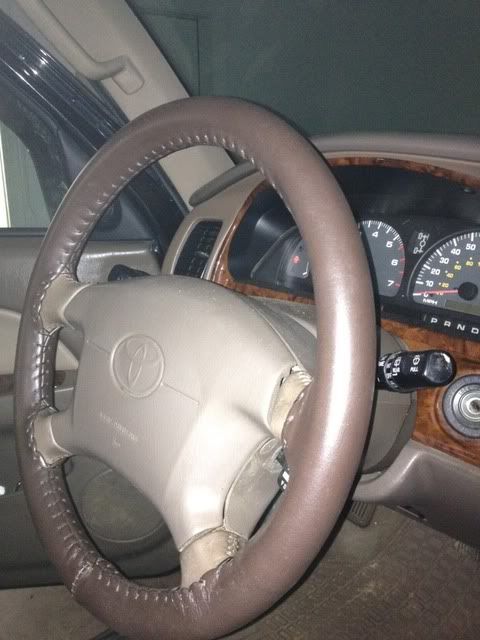
I love the way it looks and feels. I see hand stitched leather steering wheel covers on Italian super-cars. Same feeling, until you step on the gas of course. They have tan, which would have matched the factory leather, though I liked the contrast of the dark brown.
More to come soon, which actually involves some fab and better qualifies for the 'build' thread.
Thanks!
I am not sure this really qualifies as a "build" but I installed a Wheelskins Leather Steering Wheel Cover. My factory leather in the 12o'clock position looked really bad from sun exposure and the wear and tear from my hand. The install is time consuming, but is not difficult.
It took over an hour, but I was not keeping track. The kit comes with the leather cover, needle and leather cord. Yes, you stitch it yourself. I get a bit of catharsis out of projects like this, so I do not mind the work.
The needle did break with about 4 inches left to lace. I had to "MacGyver" a paper clip to finish up. You kids can ask your Dad about that.
I love the way it looks and feels. I see hand stitched leather steering wheel covers on Italian super-cars. Same feeling, until you step on the gas of course. They have tan, which would have matched the factory leather, though I liked the contrast of the dark brown.
More to come soon, which actually involves some fab and better qualifies for the 'build' thread.
Thanks!
Jun 19, 2012 | 03:29 PM
#34
Contributing Member


Joined: Sep 2005
Posts: 8,246
Likes: 497
From: mo
I had one on the Bronco II and will prolly get a wheelskin for the 4Runner when it comes time. Had the truck for 10 years-ish and the cover was really durable and looked good for almost all of those years. Nice!
Jul 30, 2012 | 01:46 PM
#38
Thread Starter
Registered User
Joined: Nov 2011
Posts: 86
Likes: 0
From: Atlanta, GA
I used the Hella Dayline DRL's
These: http://www.myhellalights.com/index.p...unning-lights/
I got them from polyperformance.com because I had a coupon and a gift certificate.
I fab'd them into the little trim piece just below the headlight. First I removed the little trim piece, and cut out the dimensions of the lens using a dremel cut-off wheel. Mounted the light from behind the trim piece and attached using small 1.25" L brackets from Lowes. Sorry I don't have any pics of the install as I did it before I was a Yotatech member.
Ha! Sorry I've been neglecting my thread. I usually wheel all summer, and upgrade/repair all winter. I have a few projects going but nothing too exciting (cargo area stuff). Will post-up soon. Thanks for the prompt!
Aug 16, 2012 | 06:38 PM
#39
Thread Starter
Registered User
Joined: Nov 2011
Posts: 86
Likes: 0
From: Atlanta, GA
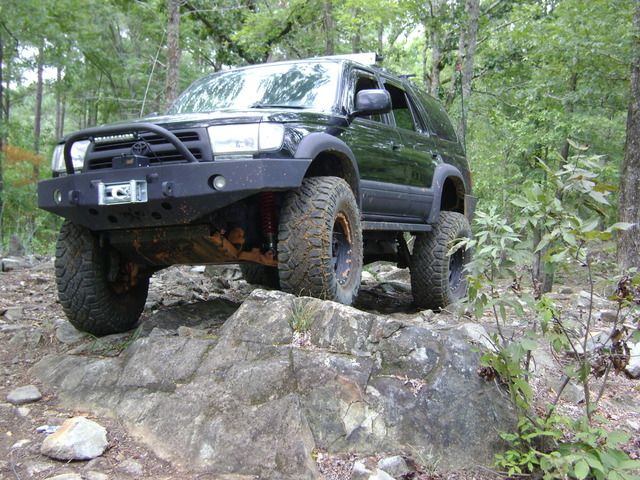
Just a quick update:
My schedule opened up a bit this week (I have been waiting for this) and I snuck out to an offroad park about 1.5hr away. I had a great day out (because it was not work) and my rig performed perfectly.
I went to Durhamtown off road park. Their website is here:
http://www.durhamtownoffroad.com/
Here are a few pics:
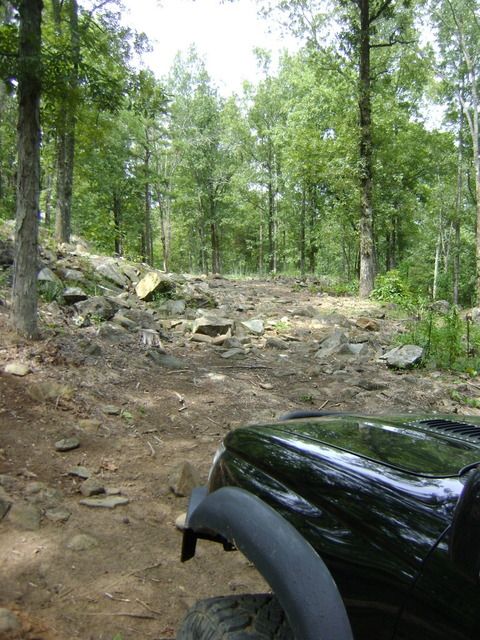
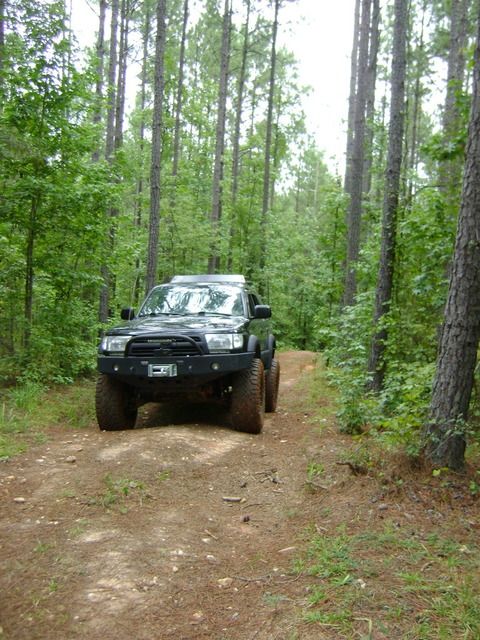
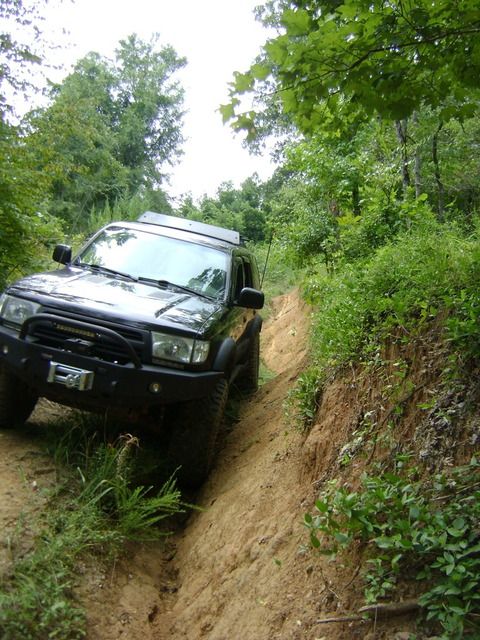
Pictures never do it justice. This is a steep down hill section leading to a dry creek bed.
I did a more in depth trail report here:
https://www.yotatech.com/forums/f100...eorgia-257590/
Thanks for checkin' in.
My schedule opened up a bit this week (I have been waiting for this) and I snuck out to an offroad park about 1.5hr away. I had a great day out (because it was not work) and my rig performed perfectly.
I went to Durhamtown off road park. Their website is here:
http://www.durhamtownoffroad.com/
Here are a few pics:
Pictures never do it justice. This is a steep down hill section leading to a dry creek bed.
I did a more in depth trail report here:
https://www.yotatech.com/forums/f100...eorgia-257590/
Thanks for checkin' in.
 Looks like a great time... I'ma have to get back out asap! haha... CV Reboot first


