
PismoJoe's 2002 Tacoma Build-Up
 May 17, 2011 | 06:07 PM
#1
Thread Starter
Registered User
Joined: Jan 2010
Posts: 2,259
Likes: 84
From: Pismo Beach, California
PismoJoe's 2002 Tacoma Build-Up
Hey guys! Welcome to my Tacoma Build Thread
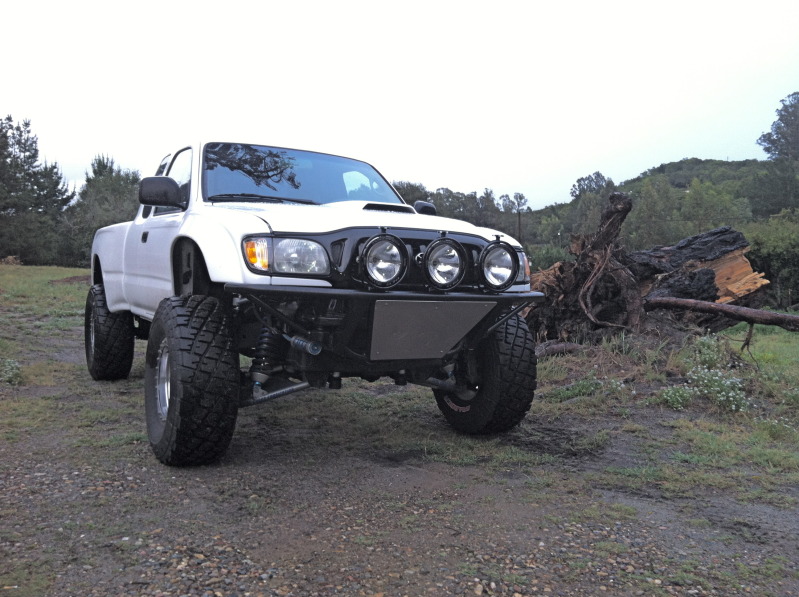
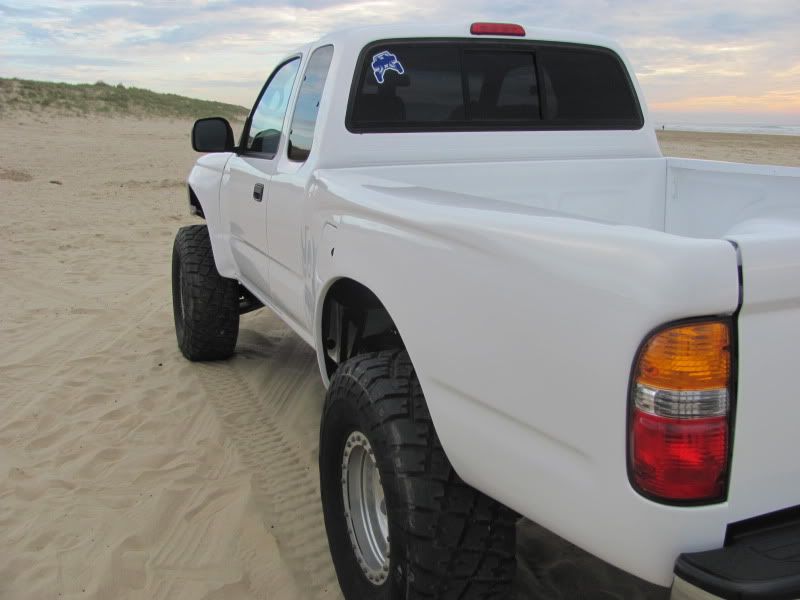
The truck is a 2002 Tacoma, 3RZ-FE, 5 Spd., 4WD, SR5
I bought this truck stock in late 2006, and since then I have been working on turning it into a capable rig.

Current Specs
Suspension/Steering
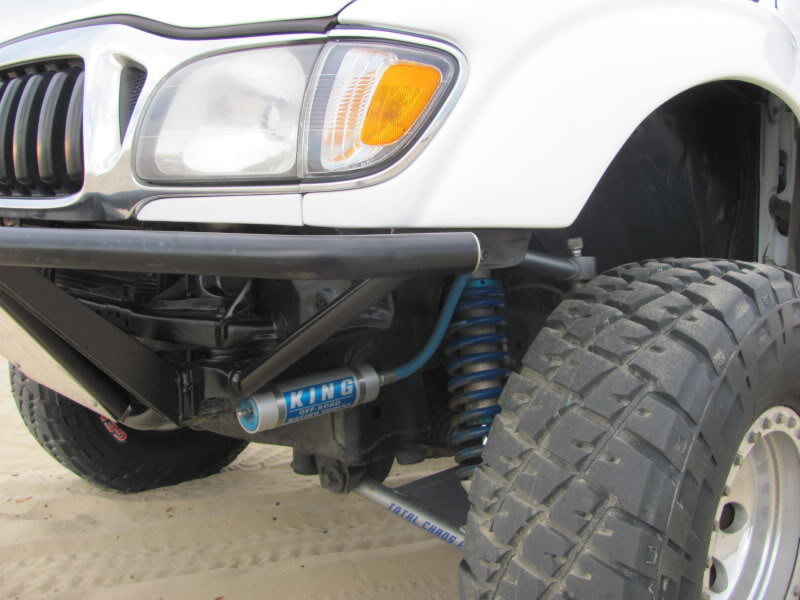
-Total Chaos 4WD Long Travel Kit
-Total Chaos Coil Bucket Gussets
-Total Chaos Spindle Gussets
-Total Chaos Heim Joint Steering
-Icon 9" x 2.5" Diameter Coil Overs
-Icon 9" x 2.5" Diameter 2-Tube Bypass Secondaries
-Icon 18" x 2.5" Diameter 4-Tube Bypass secondaries (2 compression tubes)
-Deaver F62 Leaf Pack with CCP shackles and hangers
Body
-Central Coast Prerunners Front Engine Cage
-Central Coast Prerunners Aluminum Paneled Wheel Wells
-Central Coast Prerunners Front Bumper/Rear Bumper/Bedside Supports
-Glassworks Fiberglass Hood, Fenders, Bedsides
-3 Baja Designs 8" LaPaz HID Lights (2 Driving, 1 Pencil)
-Front Wheel Tub
-Crown Steel Braided & Extended Brake Lines F&R
-Black Grille/Corer Marker Light Swap
-Painted in 2012 By Sierra Auto Body (Stock Color 040)
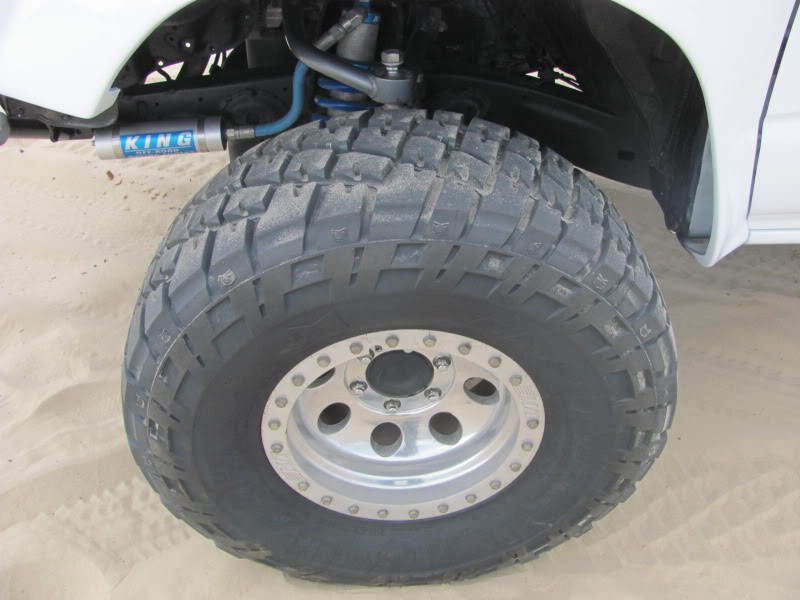
-15x8 MT Classic Locks
-33x10.5 BFG All Terrains
-Odyssey Battery
-Craftsman low-pro Aluminum Racing Jack
-Powertank with X-Flo valve upgrade
-Full size spare w/ mount that is completely removable
Drivetrain
-Stock 3RZ
-W59 Transmission
-Factory E-Locker Swapped
-Modified Tundra Front Axles
-4.88 Gears
-Manual Hub Conversion
-K&N FIPK Intake
-Flowmaster 40 Series, Cut & Dumped
-Toyota Parts ALWAYS used for repairs
Interior
-10" JL Audio Stealthbox
-Sony CDX-M9900
-Sony 500 Watt Single Channel Amp (Sub)
-Lanzar 1200 Watt 4 Channel Amp (F&R Speakers)
-JBL 3-Way Speakers F&R With Crossovers
-Digital Power Capacitor
-Otherwise Stock
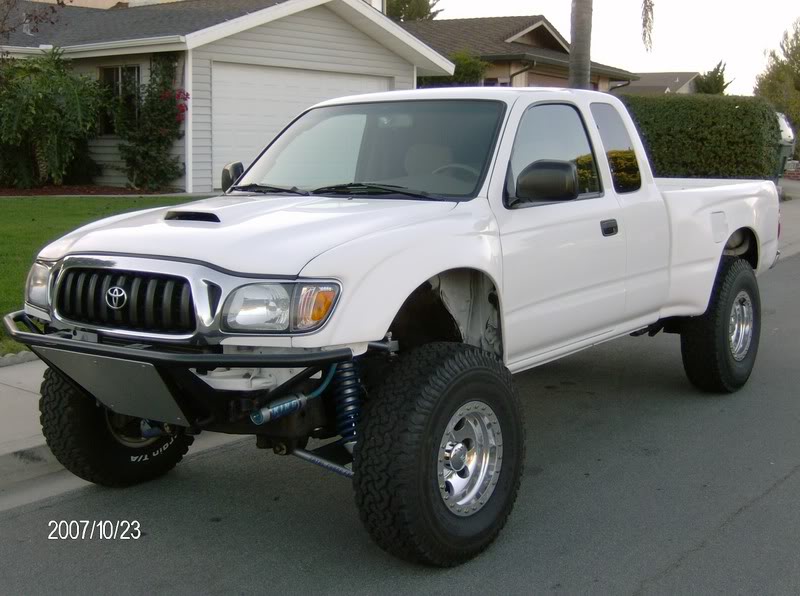
I believe this is the earliest picture that I have, before the Deaver J59's and bilsteins. Somehwere I have a few when it was stock, but I think they are still on an old phone somewhere.
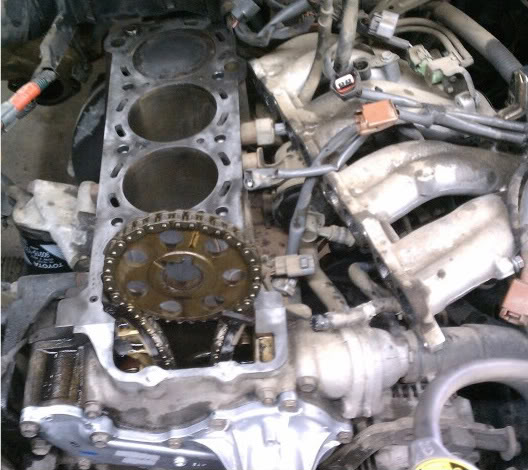
After driving the truck for about 10k, my head was done. The PO did not do the valve adjustments at 60k, so at 110k, it was time for a new head.
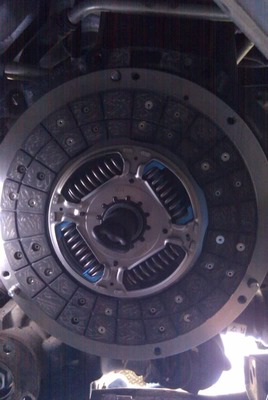
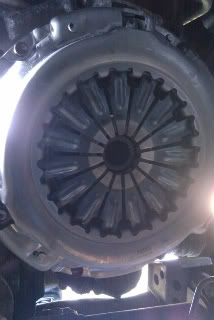
Shortly after, my pressure plate took a dump. New clutch FTW!!
Now that the truck is driving well, I turned my attention to what I always wished my truck had: an E-Locker.
I lucked out and found front and rear 4.56 thirds (code 04, w/ rear e-locker) at a local auto salvage yard.
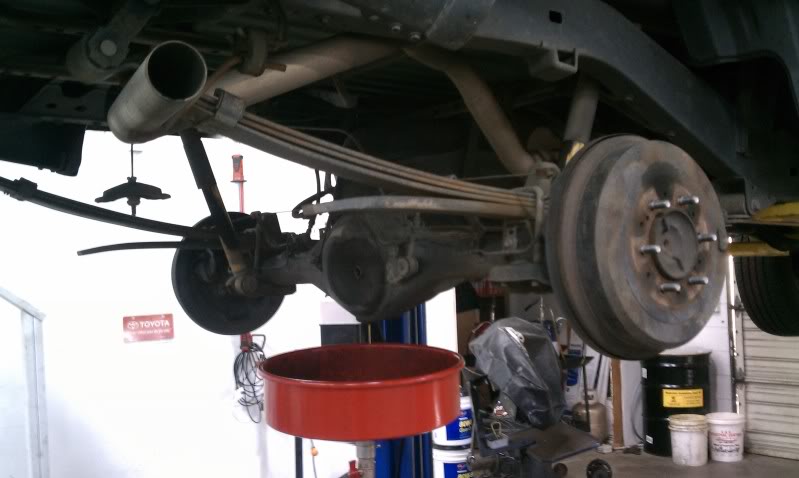
Swap Swap time! I went in on a parts truck with a friend of mine, a 2000 tacoma with the TRD package. He wanted the motor, I just wanted the axle housing and wiring to make the swap easier.
Prepping the parts truck
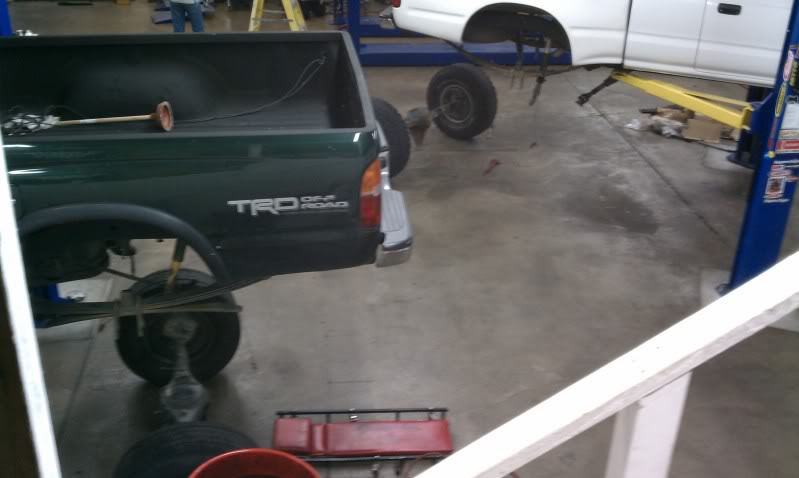
BAM!
Swap Swap!!
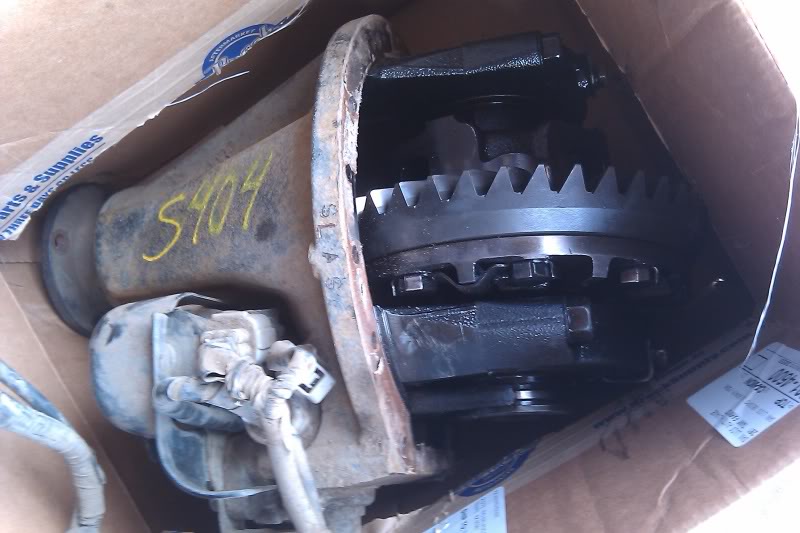
Every TRD tacoma, 95.5-04 has the 4.10 R&P. This is removed in order to install my salvage yard 4.56 e-locker third.
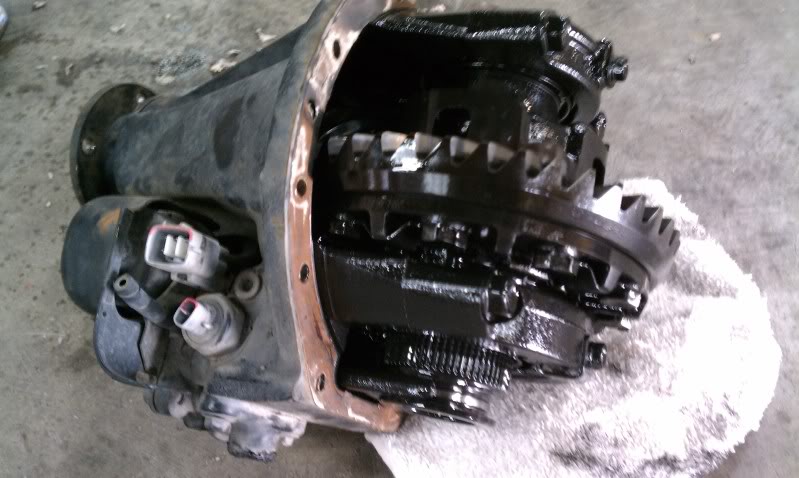
4.10's coming out (with the switch intact cough cough Logan )
)
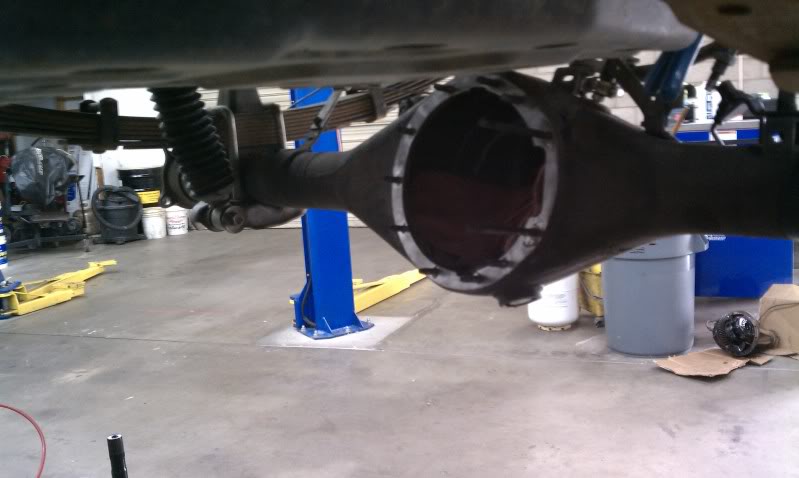
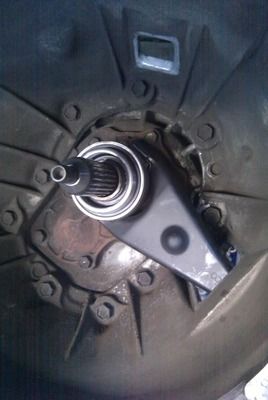
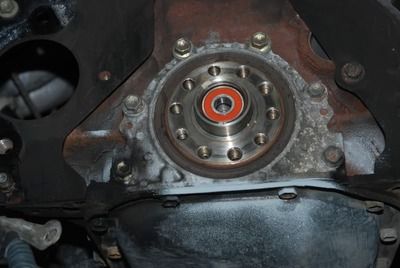
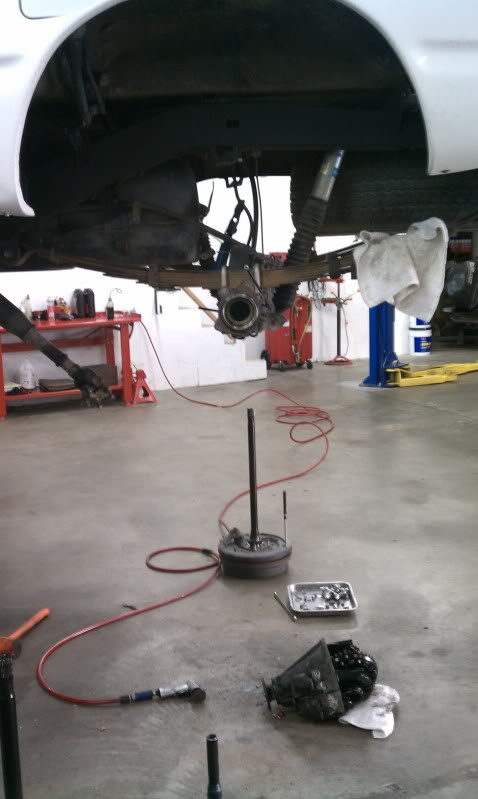
Axle housing prepped for FIPG and 4.56 third
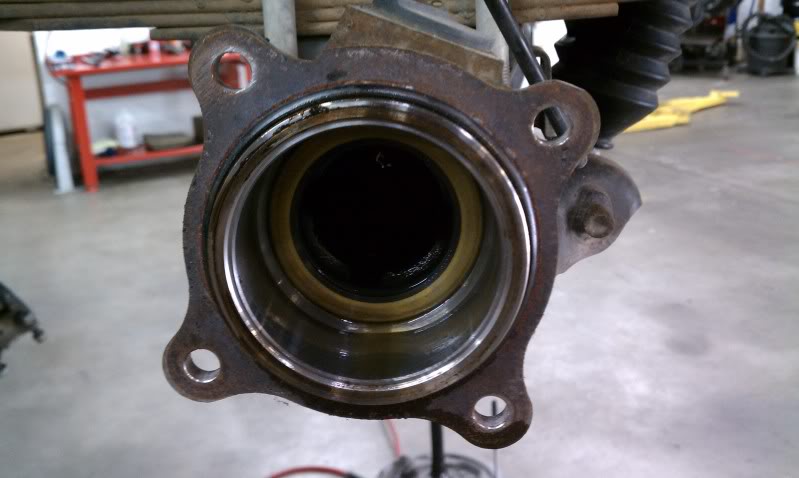
New Axle Seals installed, lubed with seal glide and ready for axle installation
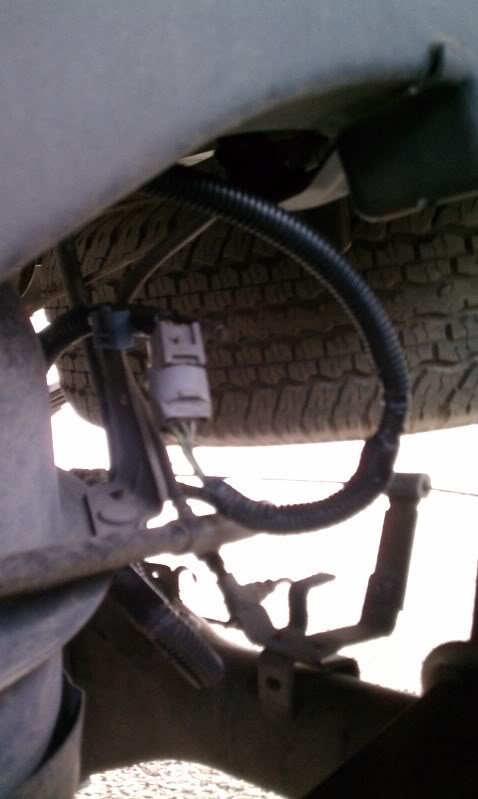
Now, for the wiring. Luckily for me, my tacoma was equipped with the cab wiring for the elocker. Everything was there, expect at connection "BN7" the locker wiring was not pinned out to the female side.
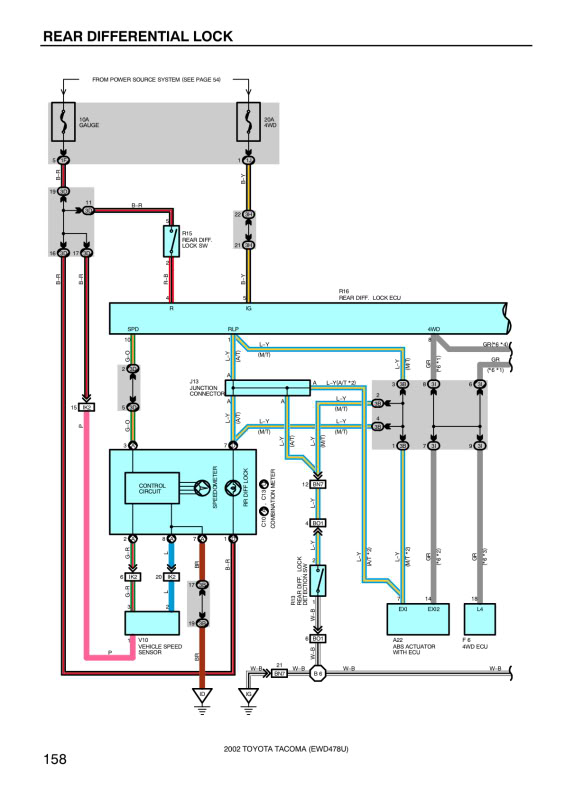
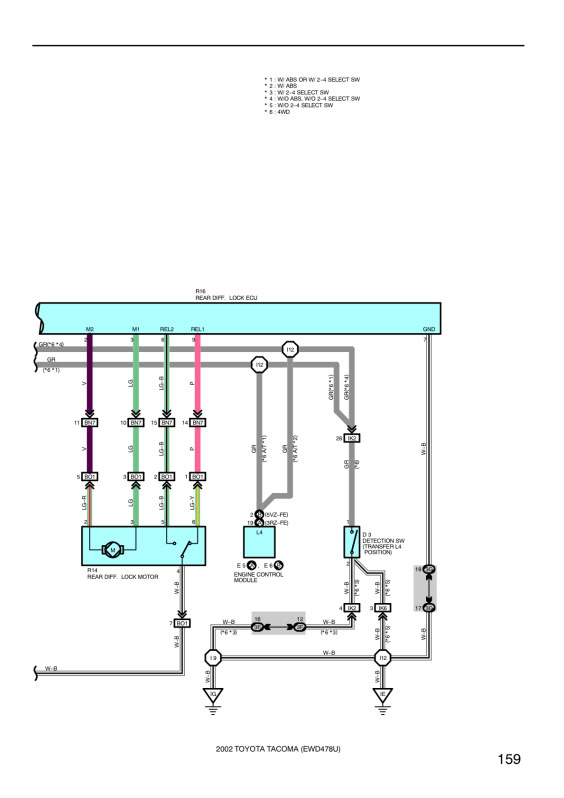
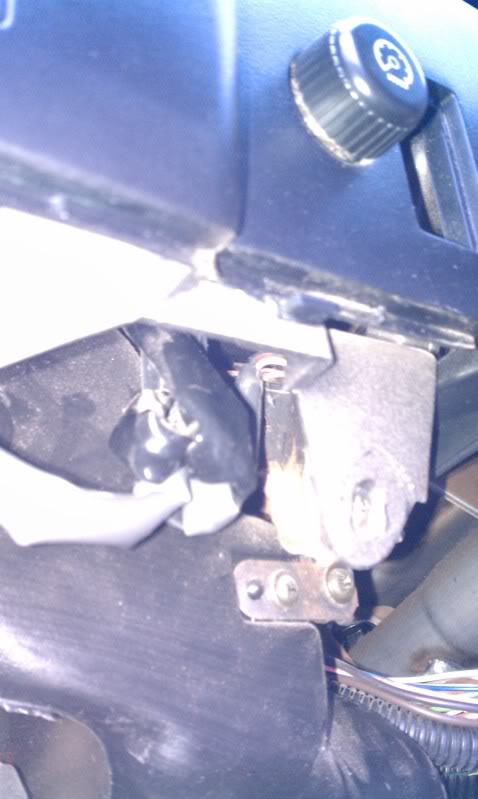
Diff Lock switch wiring was taped from the facoty
Here, connection "BN7" can be seen. I could have simply pinned out the wires to the female end of the connector, but upon a further inspection discovered that the pins are plated differently, and are different sizes.
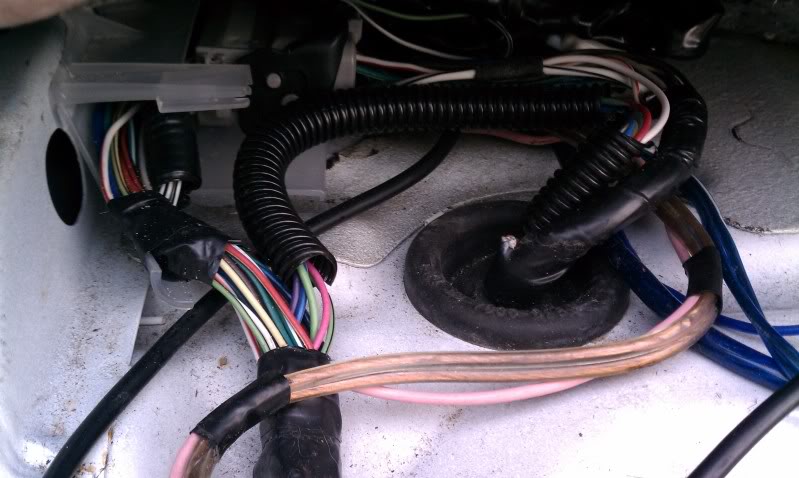
Instead, I clipped the wires from the "BN7" connector, and ran my own harness to the locker motor.
Gray wire mod done
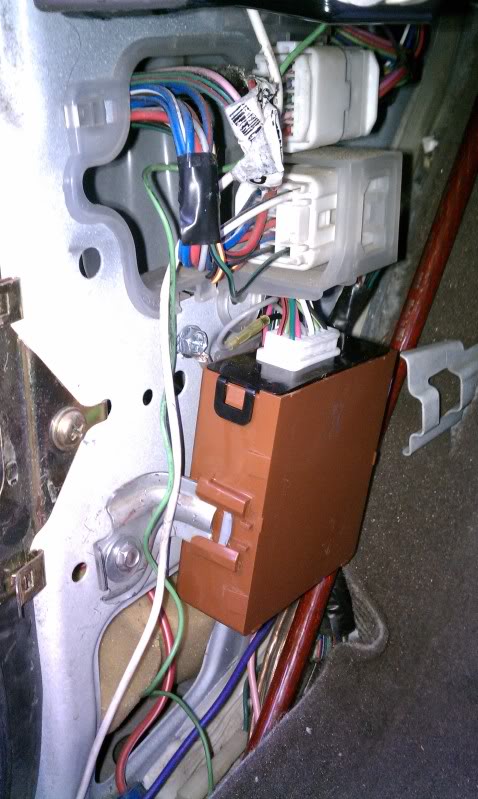
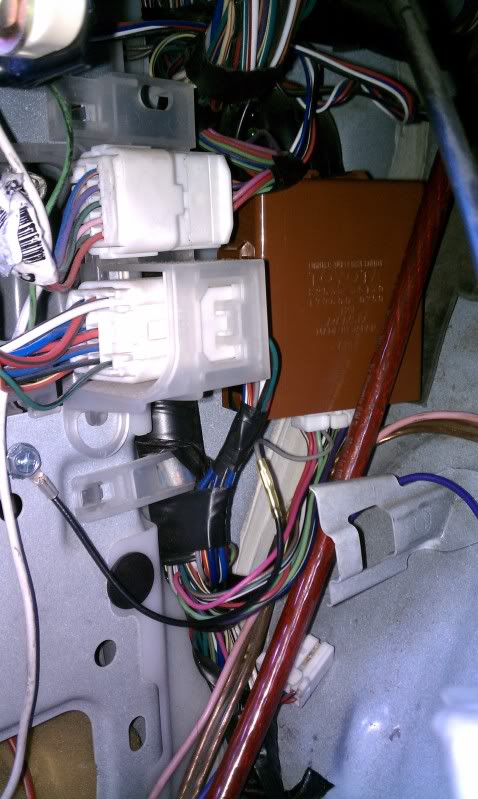
Permanent Diff Lock ECU Mounting
Installed and wired up.
Left myself plenty of room on the harness, as I will be doing LT in the rear soon.
More to come!
The truck is a 2002 Tacoma, 3RZ-FE, 5 Spd., 4WD, SR5
I bought this truck stock in late 2006, and since then I have been working on turning it into a capable rig.
Current Specs
Suspension/Steering
-Total Chaos 4WD Long Travel Kit
-Total Chaos Coil Bucket Gussets
-Total Chaos Spindle Gussets
-Total Chaos Heim Joint Steering
-Icon 9" x 2.5" Diameter Coil Overs
-Icon 9" x 2.5" Diameter 2-Tube Bypass Secondaries
-Icon 18" x 2.5" Diameter 4-Tube Bypass secondaries (2 compression tubes)
-Deaver F62 Leaf Pack with CCP shackles and hangers
Body
-Central Coast Prerunners Front Engine Cage
-Central Coast Prerunners Aluminum Paneled Wheel Wells
-Central Coast Prerunners Front Bumper/Rear Bumper/Bedside Supports
-Glassworks Fiberglass Hood, Fenders, Bedsides
-3 Baja Designs 8" LaPaz HID Lights (2 Driving, 1 Pencil)
-Front Wheel Tub
-Crown Steel Braided & Extended Brake Lines F&R
-Black Grille/Corer Marker Light Swap
-Painted in 2012 By Sierra Auto Body (Stock Color 040)
-15x8 MT Classic Locks
-33x10.5 BFG All Terrains
-Odyssey Battery
-Craftsman low-pro Aluminum Racing Jack
-Powertank with X-Flo valve upgrade
-Full size spare w/ mount that is completely removable
Drivetrain
-Stock 3RZ
-W59 Transmission
-Factory E-Locker Swapped
-Modified Tundra Front Axles
-4.88 Gears
-Manual Hub Conversion
-K&N FIPK Intake
-Flowmaster 40 Series, Cut & Dumped
-Toyota Parts ALWAYS used for repairs
Interior
-10" JL Audio Stealthbox
-Sony CDX-M9900
-Sony 500 Watt Single Channel Amp (Sub)
-Lanzar 1200 Watt 4 Channel Amp (F&R Speakers)
-JBL 3-Way Speakers F&R With Crossovers
-Digital Power Capacitor
-Otherwise Stock
I believe this is the earliest picture that I have, before the Deaver J59's and bilsteins. Somehwere I have a few when it was stock, but I think they are still on an old phone somewhere.
After driving the truck for about 10k, my head was done. The PO did not do the valve adjustments at 60k, so at 110k, it was time for a new head.
Shortly after, my pressure plate took a dump. New clutch FTW!!
Now that the truck is driving well, I turned my attention to what I always wished my truck had: an E-Locker.
I lucked out and found front and rear 4.56 thirds (code 04, w/ rear e-locker) at a local auto salvage yard.
Swap Swap time! I went in on a parts truck with a friend of mine, a 2000 tacoma with the TRD package. He wanted the motor, I just wanted the axle housing and wiring to make the swap easier.
Prepping the parts truck
BAM!
Swap Swap!!
Every TRD tacoma, 95.5-04 has the 4.10 R&P. This is removed in order to install my salvage yard 4.56 e-locker third.
4.10's coming out (with the switch intact cough cough Logan
) Axle housing prepped for FIPG and 4.56 third
New Axle Seals installed, lubed with seal glide and ready for axle installation
Now, for the wiring. Luckily for me, my tacoma was equipped with the cab wiring for the elocker. Everything was there, expect at connection "BN7" the locker wiring was not pinned out to the female side.
Diff Lock switch wiring was taped from the facoty
Here, connection "BN7" can be seen. I could have simply pinned out the wires to the female end of the connector, but upon a further inspection discovered that the pins are plated differently, and are different sizes.
Instead, I clipped the wires from the "BN7" connector, and ran my own harness to the locker motor.
Gray wire mod done
Permanent Diff Lock ECU Mounting
Installed and wired up.
Left myself plenty of room on the harness, as I will be doing LT in the rear soon.
More to come!
Last edited by PismoJoe; Jun 5, 2013 at 09:40 AM.
May 18, 2011 | 06:03 PM
#4
Thread Starter
Registered User
Joined: Jan 2010
Posts: 2,259
Likes: 84
From: Pismo Beach, California
Got a little video of the successful locker swap 
http://www.youtube.com/watch?v=swAHAmjWO1w
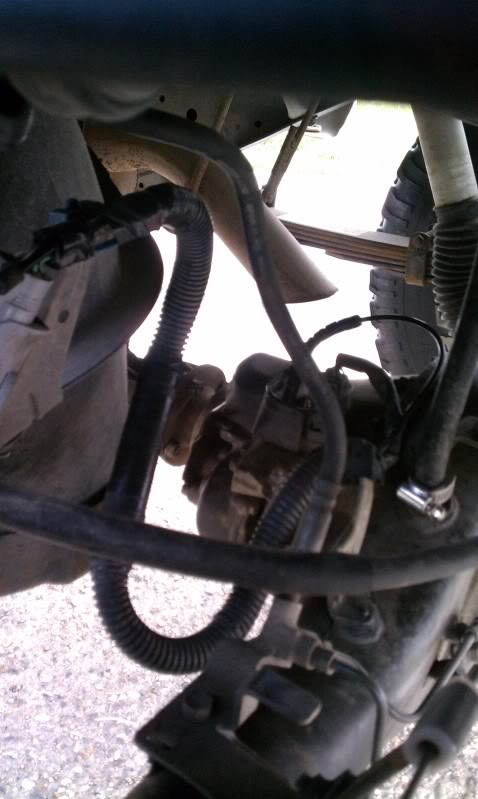
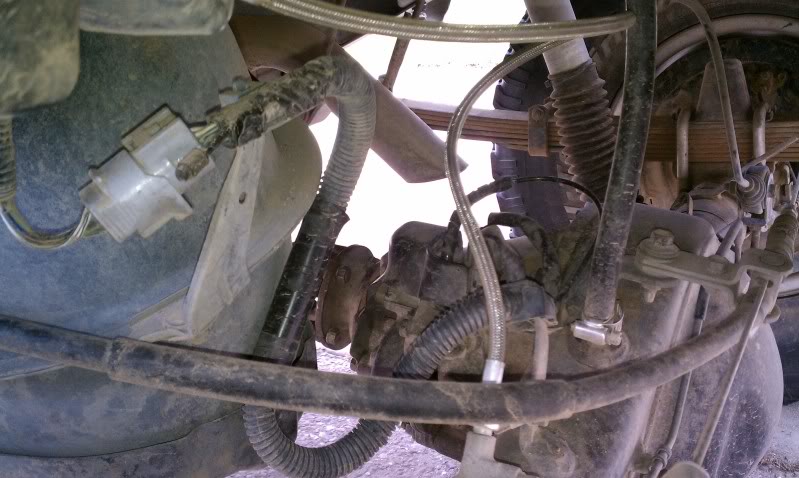
Also installed a Crown rear brake line. With my stock axle and Deaver 8 leafs, the stock line worked perfectly. When I swapped to the E-locker housing, it was too short.
Also threw on a new IAC recently. Mine was nasty!
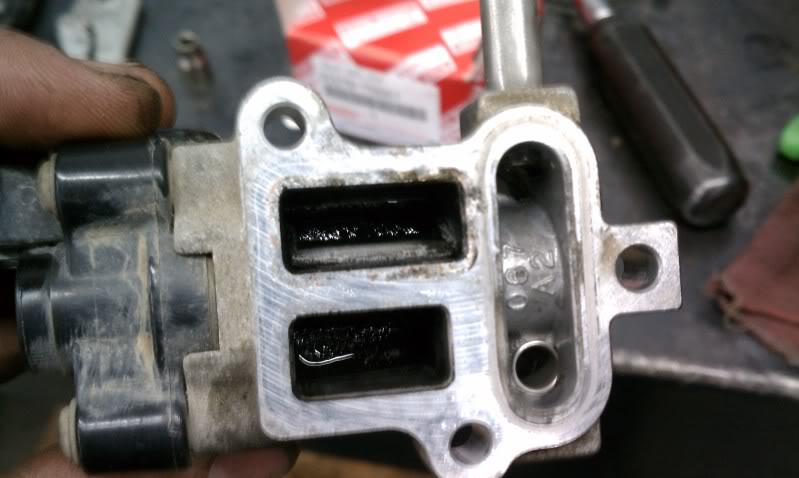
Compared to the new one:
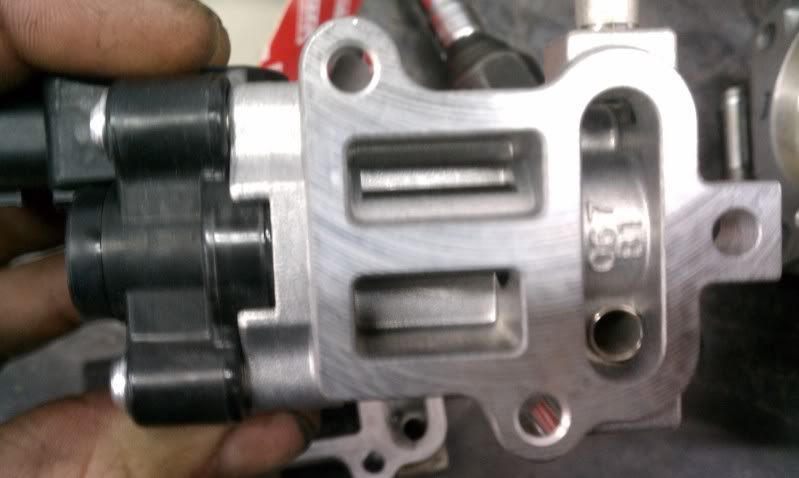
mmmm no more idle issues

http://www.youtube.com/watch?v=swAHAmjWO1w
Also installed a Crown rear brake line. With my stock axle and Deaver 8 leafs, the stock line worked perfectly. When I swapped to the E-locker housing, it was too short.
Also threw on a new IAC recently. Mine was nasty!
Compared to the new one:
mmmm no more idle issues


Trending Topics
Dec 5, 2011 | 11:55 PM
#10
Thread Starter
Registered User
Joined: Jan 2010
Posts: 2,259
Likes: 84
From: Pismo Beach, California
Thanks man!
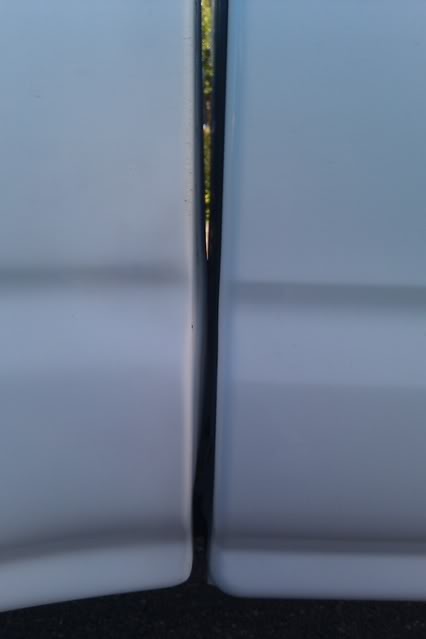
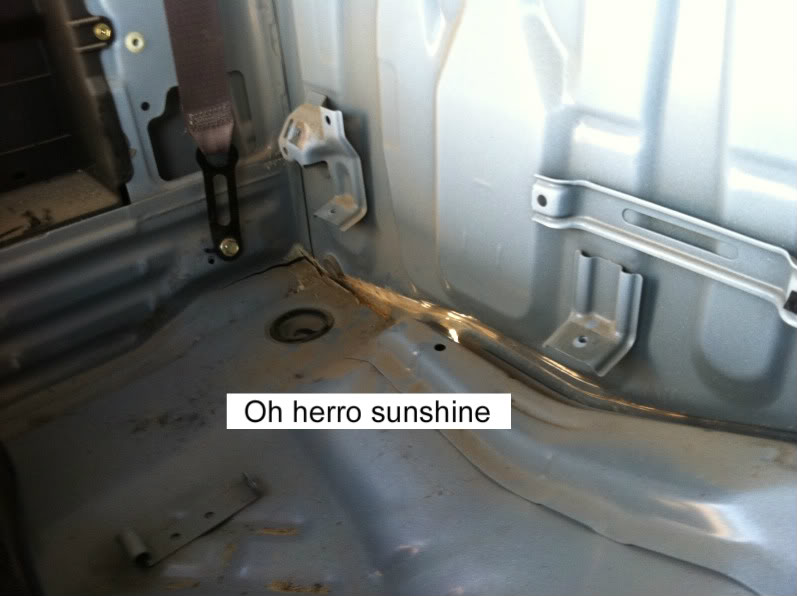
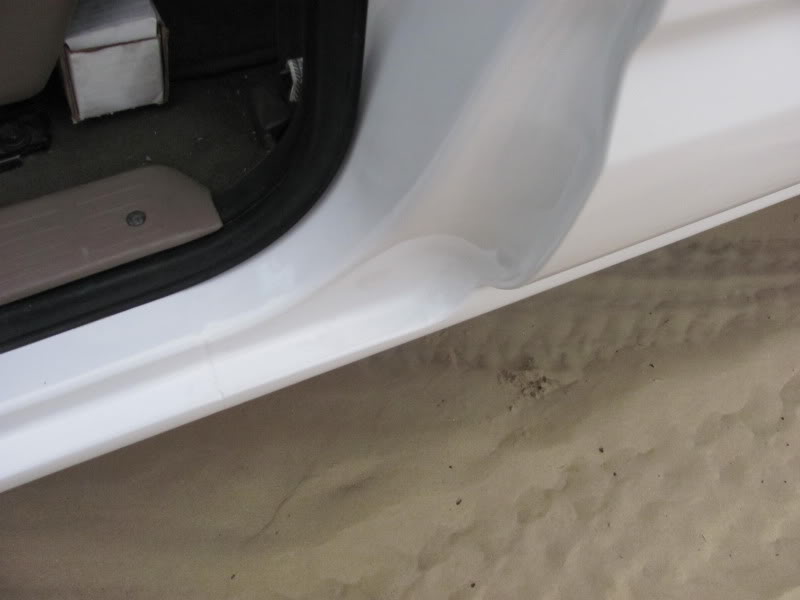
Got some updates...fixed my sinking cab issue!
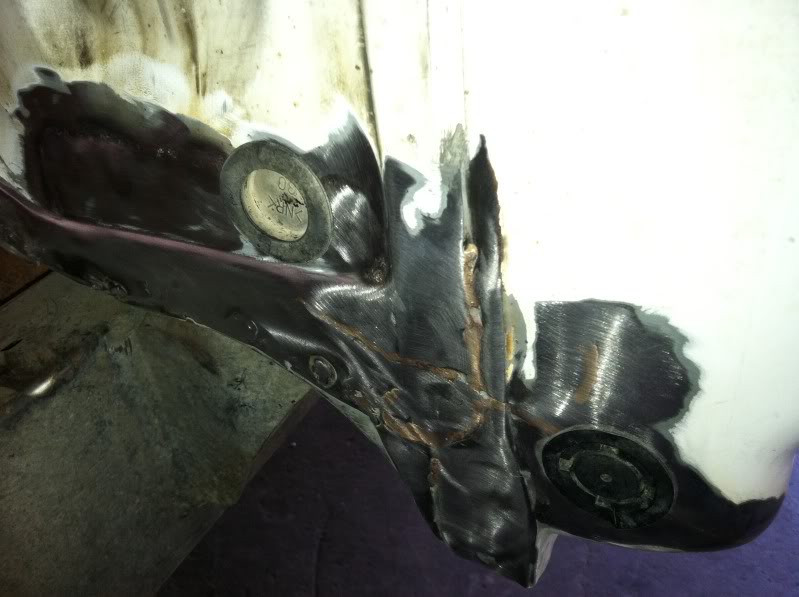
Before:
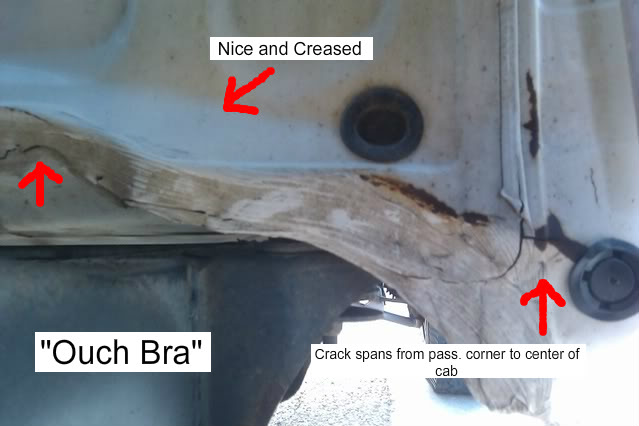
Spot welds came off center from the factory on the passenger side, most even failing to penetrate through the metal. SMH Toyota
The Inside
Pretty descent cracks going on
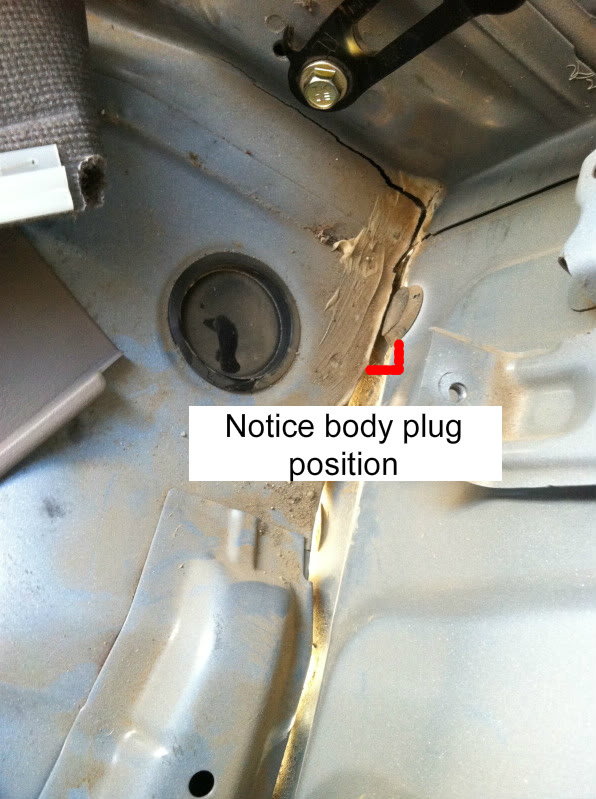
Fix Time
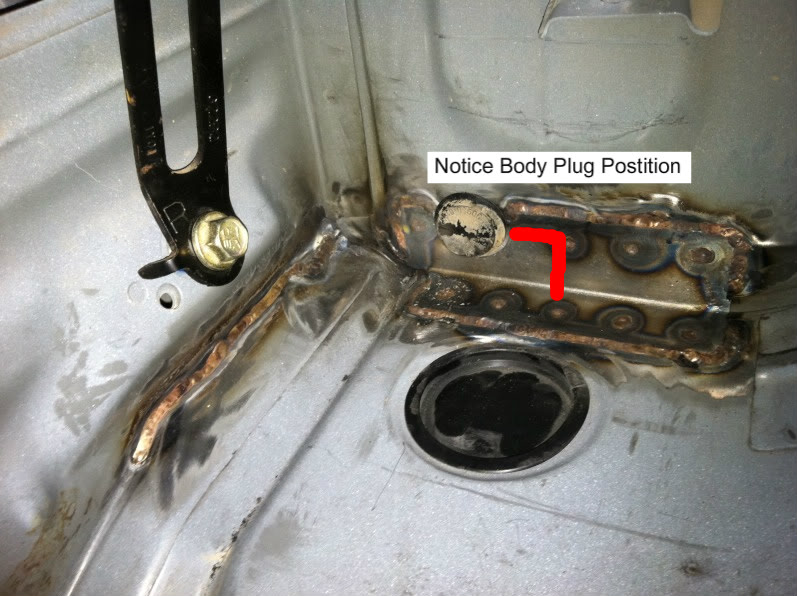
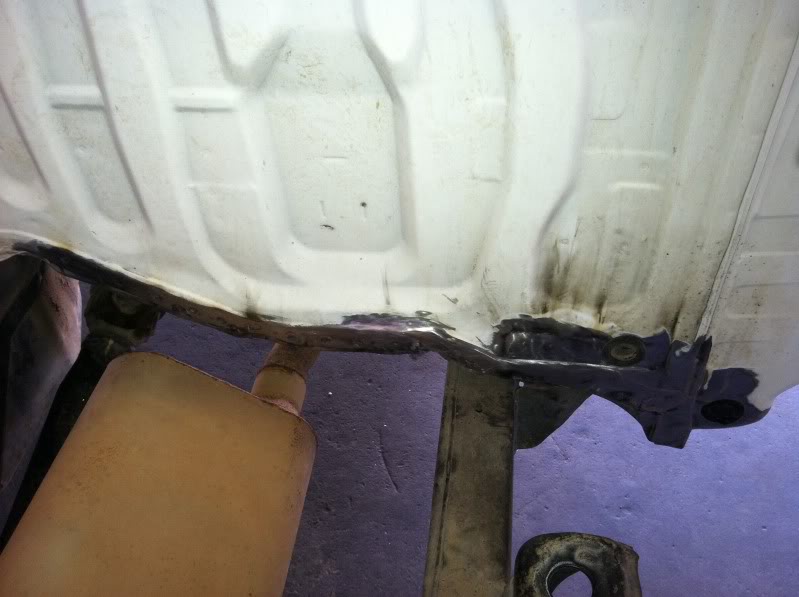
I was able to prop the factory bottle jack in a position to jack the cab back up to its stock position
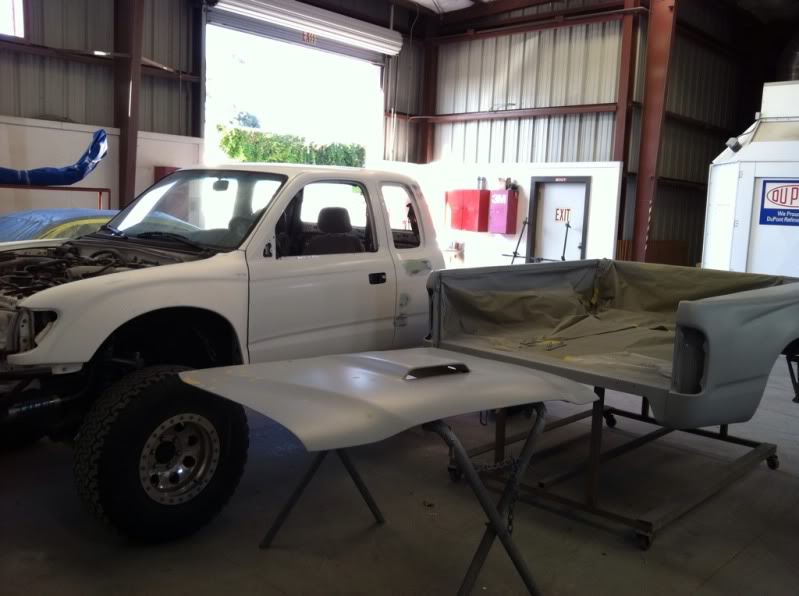
Now time for some paint!
Got some updates...fixed my sinking cab issue!
Before:
Spot welds came off center from the factory on the passenger side, most even failing to penetrate through the metal. SMH Toyota
The Inside
Pretty descent cracks going on
Fix Time
I was able to prop the factory bottle jack in a position to jack the cab back up to its stock position
Now time for some paint!
 Dec 9, 2011 | 08:32 PM
#15
Thread Starter
Registered User
Joined: Jan 2010
Posts: 2,259
Likes: 84
From: Pismo Beach, California
Thanks Logan 
Yeah its really nice having access to a shop! It's even nicer that it's an independent Toyota/Lexus/Scion specialty shop, so I am very lucky indeed!
Yeah its really nice having access to a shop! It's even nicer that it's an independent Toyota/Lexus/Scion specialty shop, so I am very lucky indeed!
Last edited by PismoJoe; Dec 10, 2011 at 11:03 PM.
Jan 2, 2012 | 05:03 PM
#17
Thread Starter
Registered User
Joined: Jan 2010
Posts: 2,259
Likes: 84
From: Pismo Beach, California
Got the rear dyno-matted!! Its a flashing material for roofing, but very similar to dyno matt. 2 layers all around the rear of the cab.
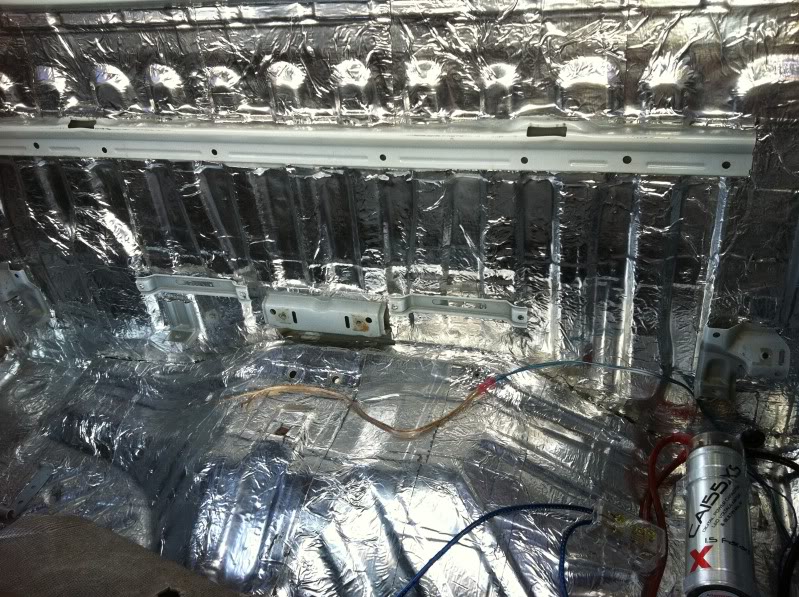
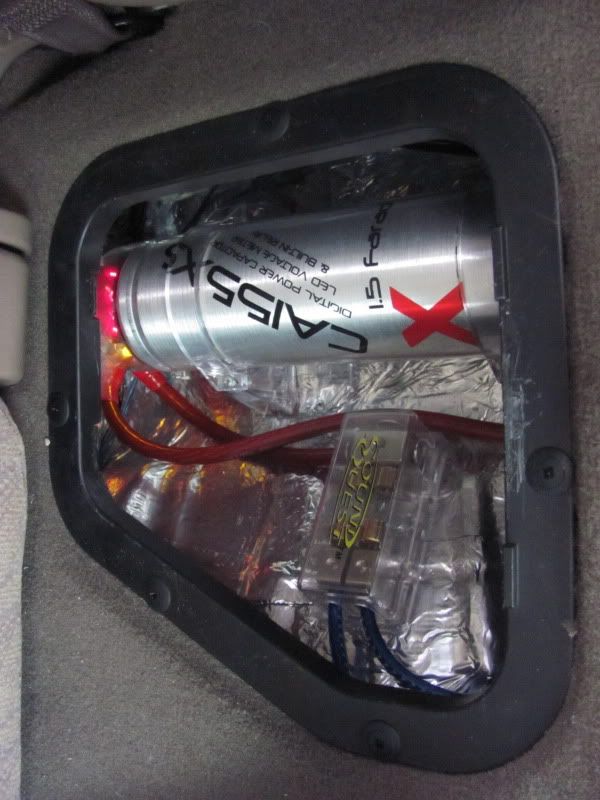
Also took this opportunity to remount the capacitor and clean up the stereo wiring.
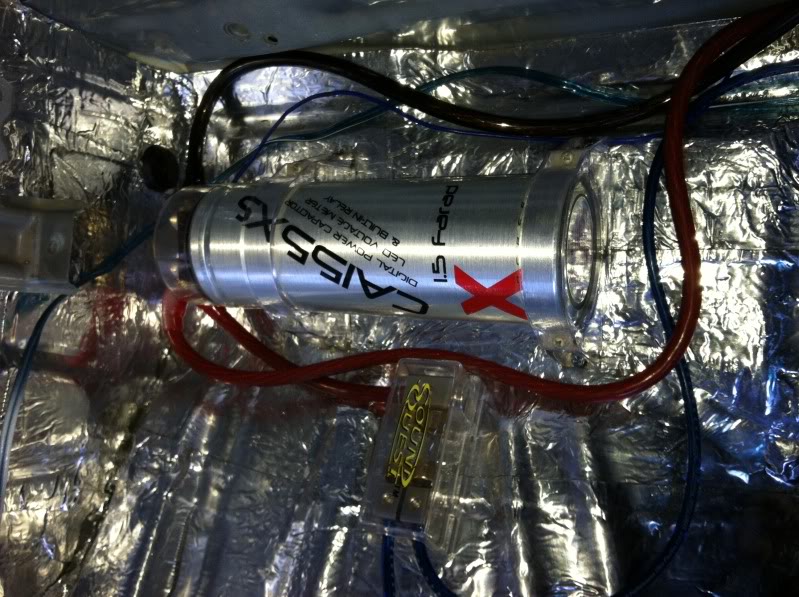
All bolted down nice and snug now! Originially was held in by 2 self-tapping screws. Now is mounted with 4 bolts and washers from underneath, sealed with silicone. Fuse box is bolted down and sealed too!
Also took this opportunity to remount the capacitor and clean up the stereo wiring.
All bolted down nice and snug now! Originially was held in by 2 self-tapping screws. Now is mounted with 4 bolts and washers from underneath, sealed with silicone. Fuse box is bolted down and sealed too!
Last edited by PismoJoe; Jan 2, 2012 at 05:14 PM.
Jan 2, 2012 | 05:09 PM
#18
Thread Starter
Registered User
Joined: Jan 2010
Posts: 2,259
Likes: 84
From: Pismo Beach, California
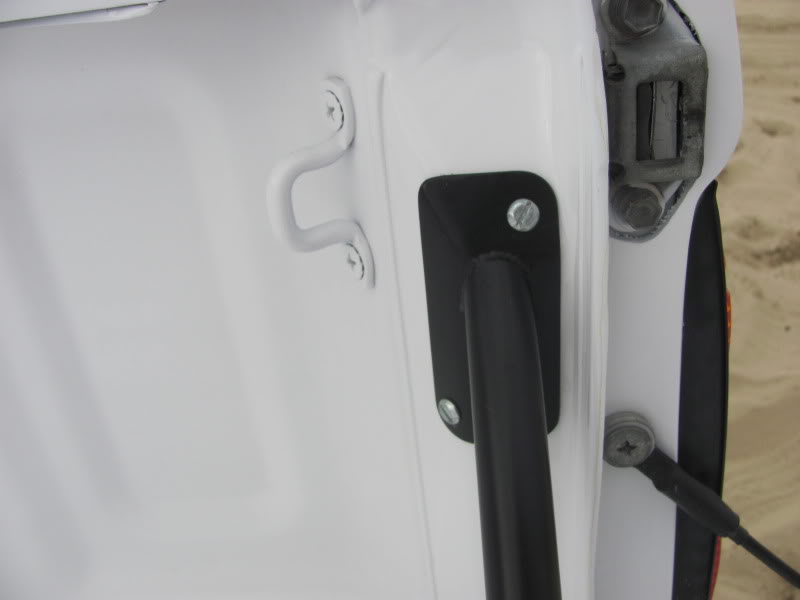
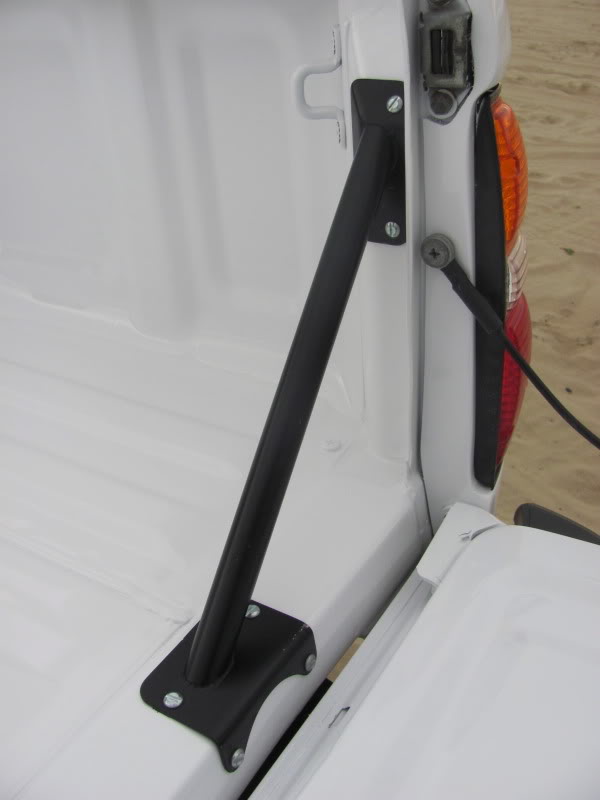
GD it Troy, here's teh bed supports.
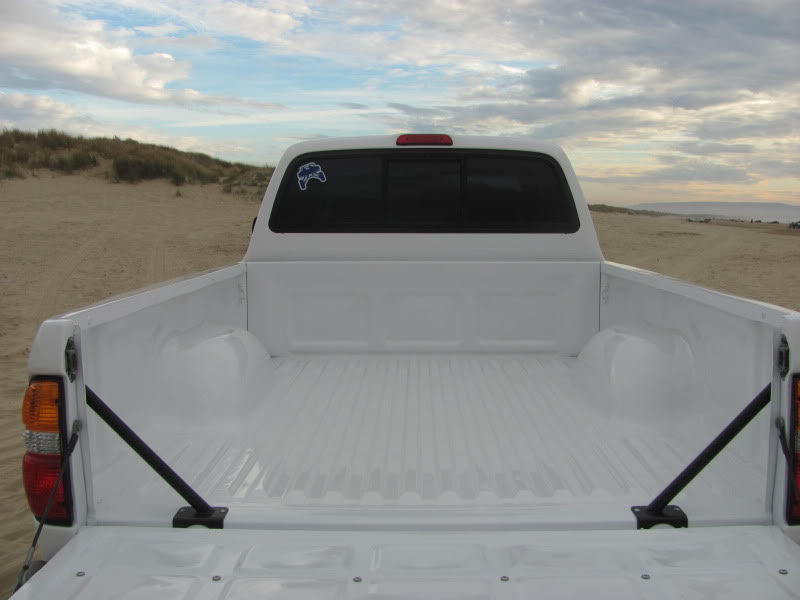
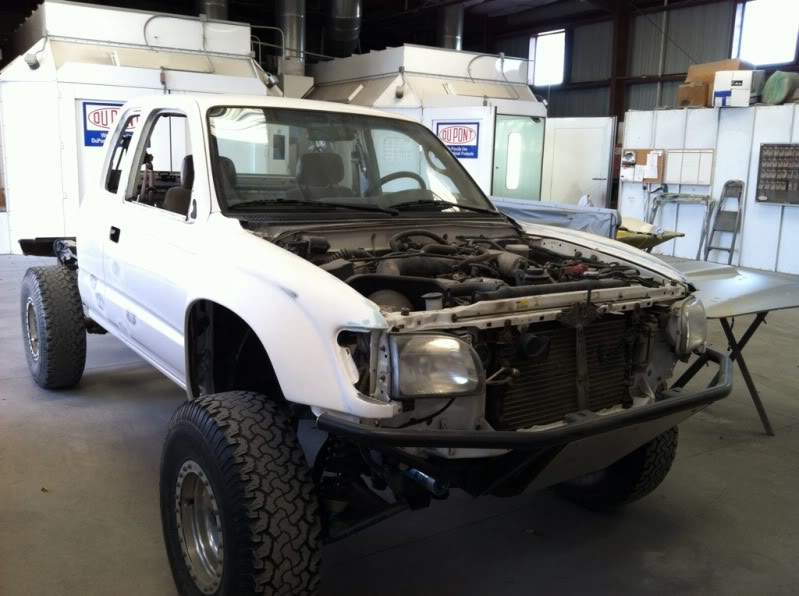
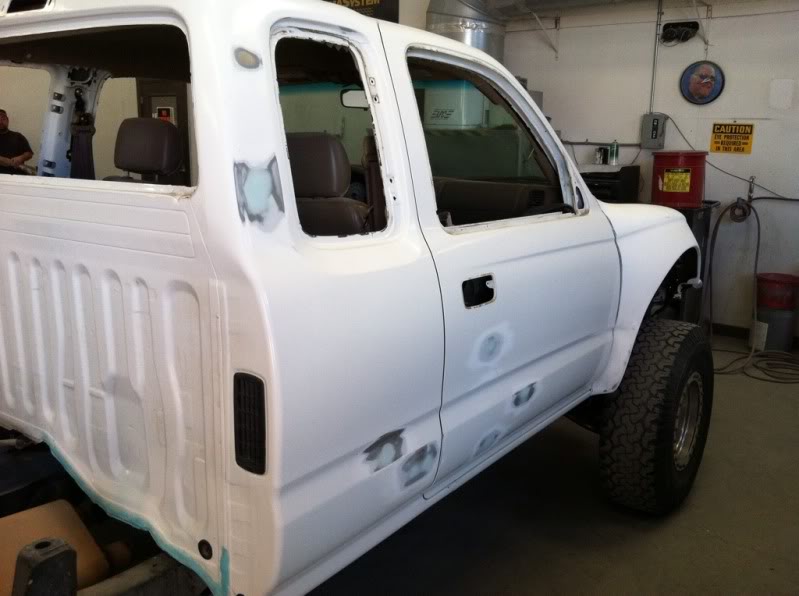
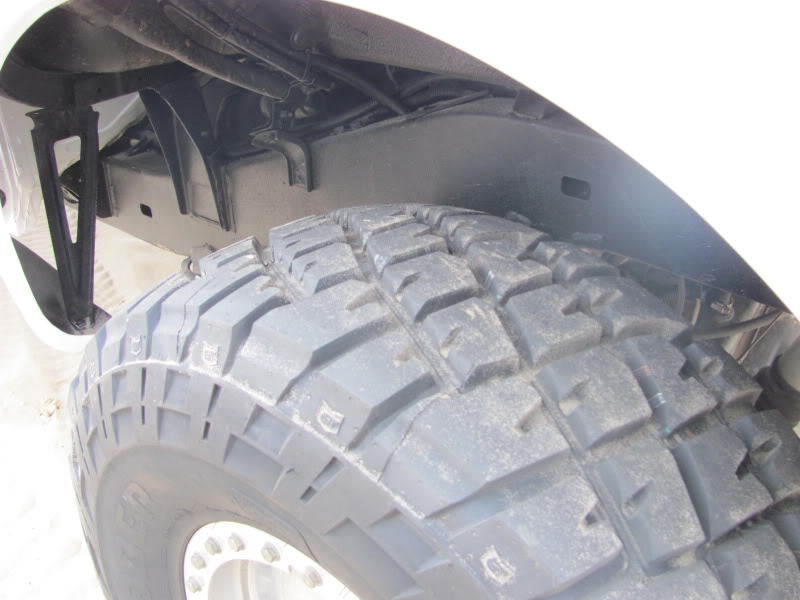
Here's a few shots of the truck after the paint job. I also picked up some new tires! General Grabber Red Letters, 33x12.5
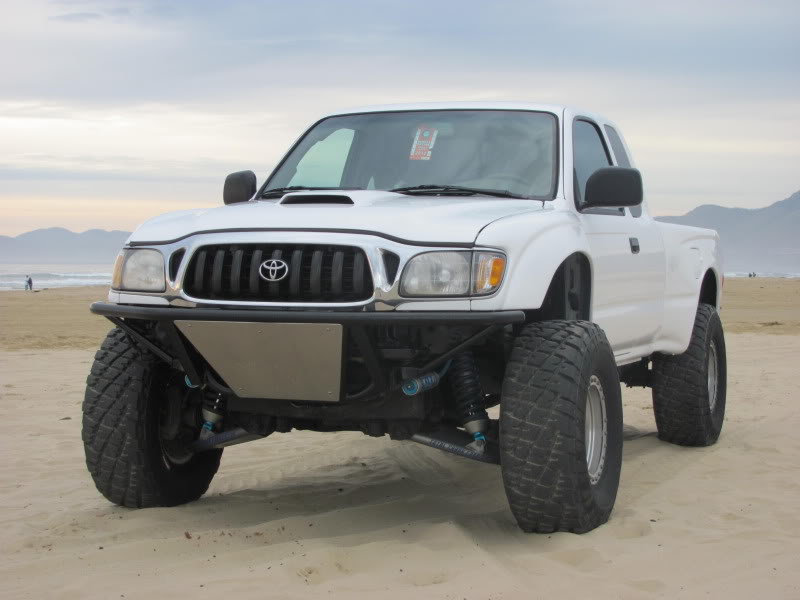
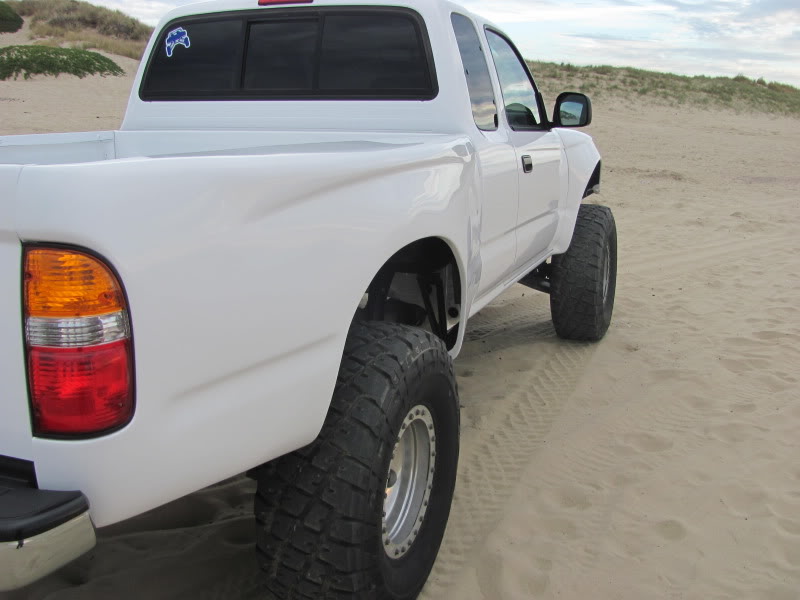
Painted the wheel wells and sub cowl black, way cleaner look!
Had the door jams painted, under the hood as well. Fiberglass components were sealed from the underside.
Here's a few shots of the truck after the paint job. I also picked up some new tires! General Grabber Red Letters, 33x12.5
Painted the wheel wells and sub cowl black, way cleaner look!
Had the door jams painted, under the hood as well. Fiberglass components were sealed from the underside.
Last edited by PismoJoe; Jan 2, 2012 at 05:15 PM.


