
Temperature Control LED Conversion Write-up
 Mar 29, 2009 | 03:53 PM
#1
Thread Starter
Registered User
iTrader: (1)
Joined: Jun 2007
Posts: 416
Likes: 0
From: Anne Arundel County, MD
Temperature Control LED Conversion Write-up
AS PROMISED, i just put in my LED bulbs behind the temperature control, and shifter. Didnt do the cigarette light because it need to be soldered in. Again, this was on my 2002 4runner and may be differenet on other years.
You will need,
1 - #74 Bulb for the shifter
2 - Type B Neo Wedges for the rear window button and ECT power button
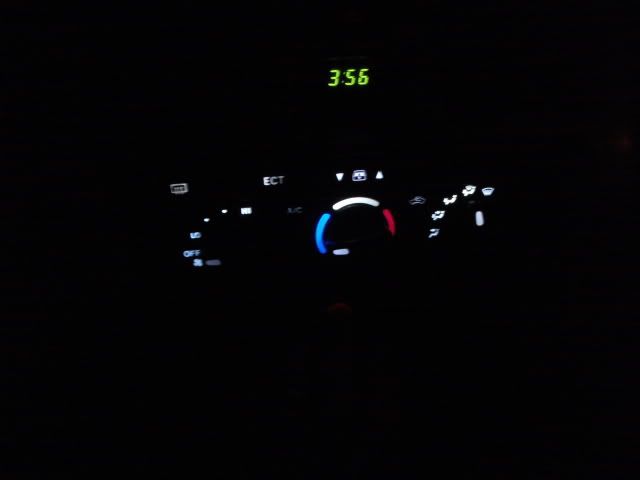
3 - Type A Neo Wedges for behind the temperature control
Tools,
Philips screwdriver
Flathead screw driver
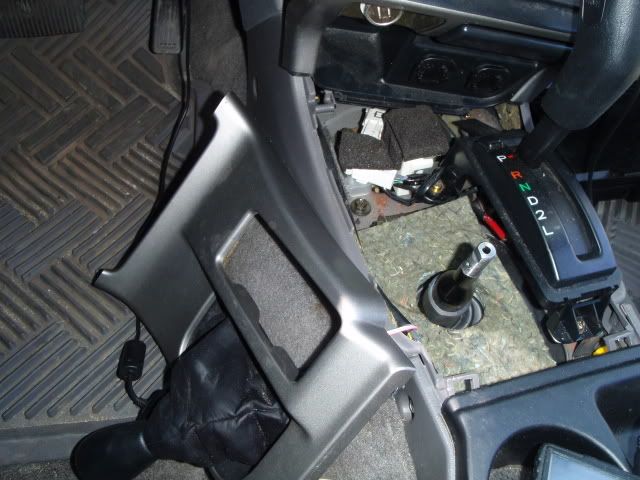
1. Pull the trim around the Temp Control off, by putting a hand in each vent and pulling toward you.
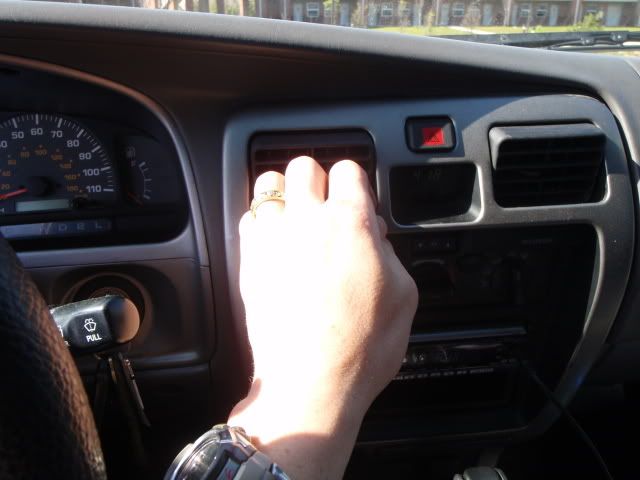
2. Now that you can kind of see behind it, disconnect the 9 connections,
One for the hazards button, one for the clock, one for the rear window defrost, one for the rear window up down button, , one for the cigarette lighter, one for the cigarette lighter bulb, one for the ashtray bulb and two for the 12v plugs at the bottom. Some vehicles may not have these.
3. Set center trim aside.
4. Take the screw out of the 4WD knob.
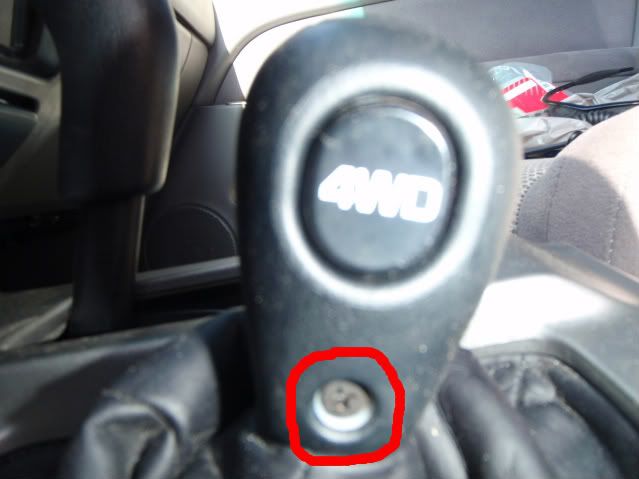
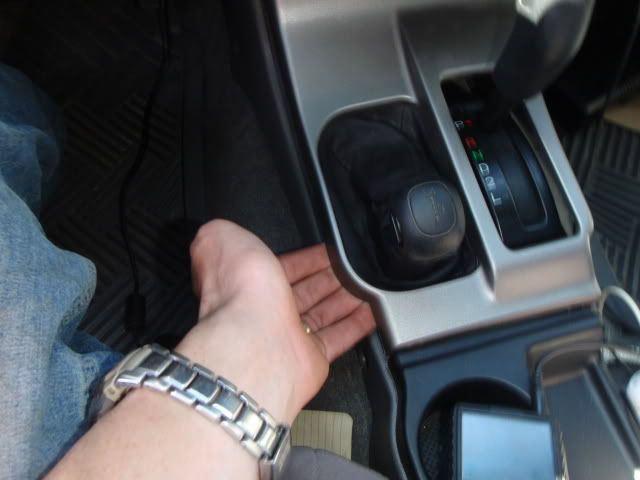
5. Pull the shifter trim piece up from the front and wiggle the back out, I didnt disconnect the 4wd cable. I just set the trim piece on the floor by my feet.

6. Remove the three control knobs.
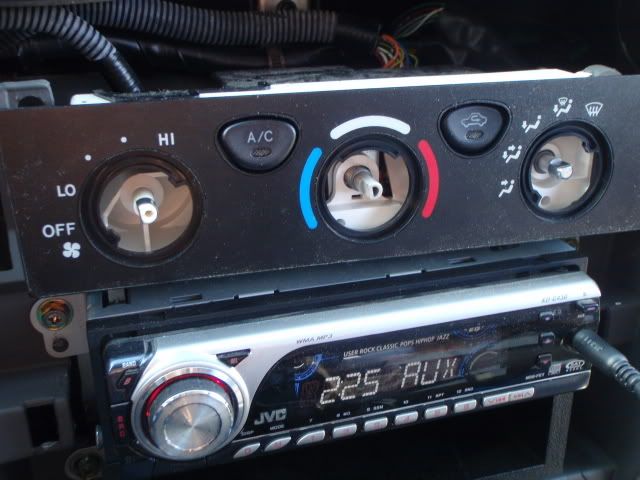
7. Gently pull the black piece off of the control housing.
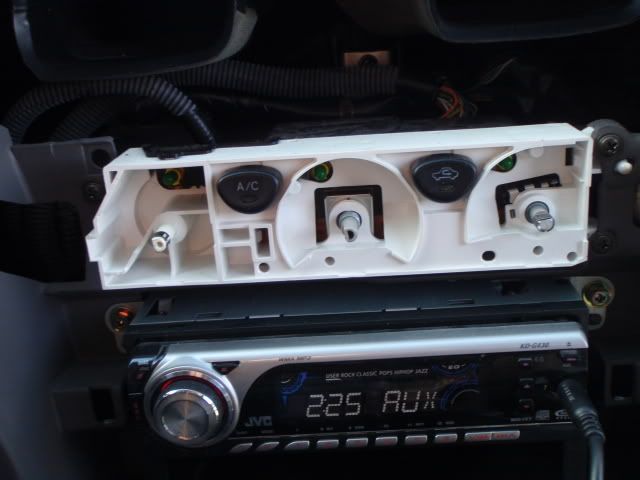
8. Remove the three screws for the control housing.
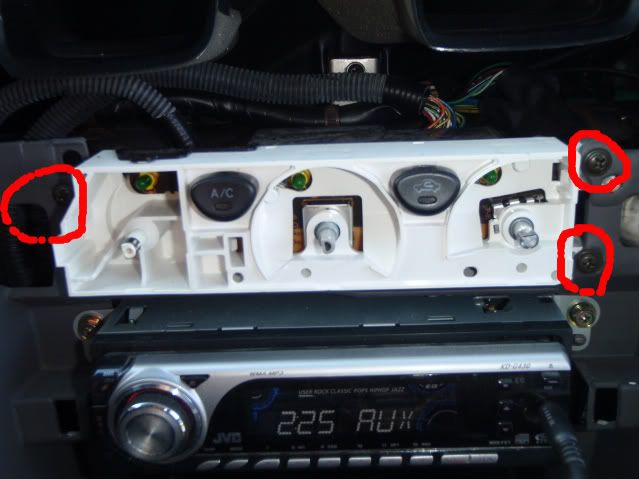
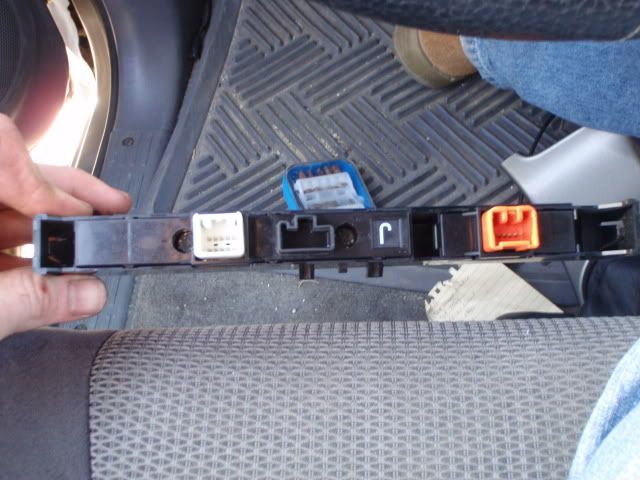
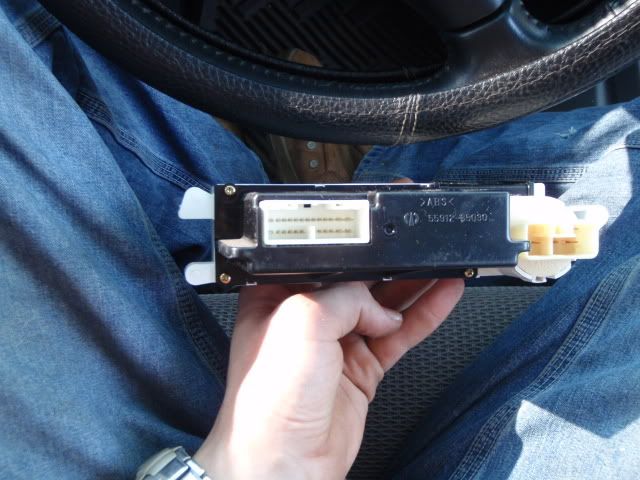
9. Lift the control housing up and pull it out towards you, disconnect the two connections on the back of it.
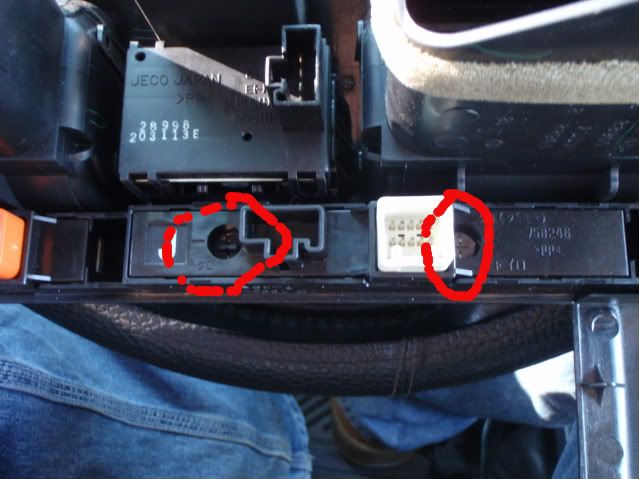
10. Remove the three screws on the back of the control housing, and the one little clip on the top right of it.
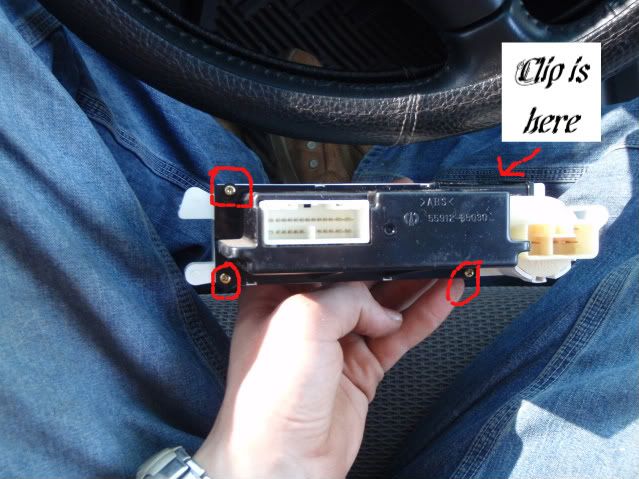
11. You now have this, the yellow plugs are the bulbs.
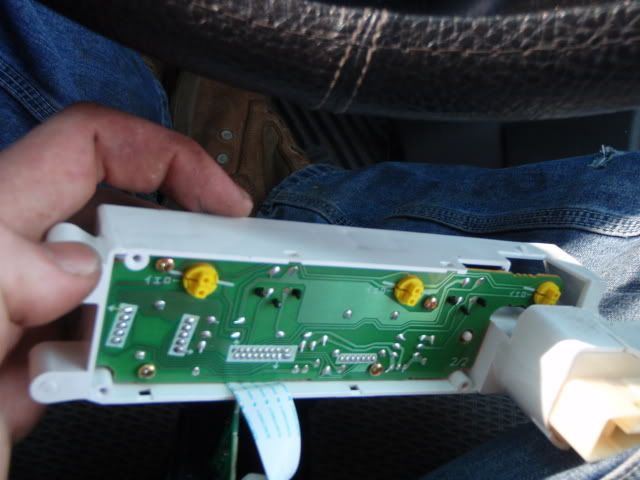
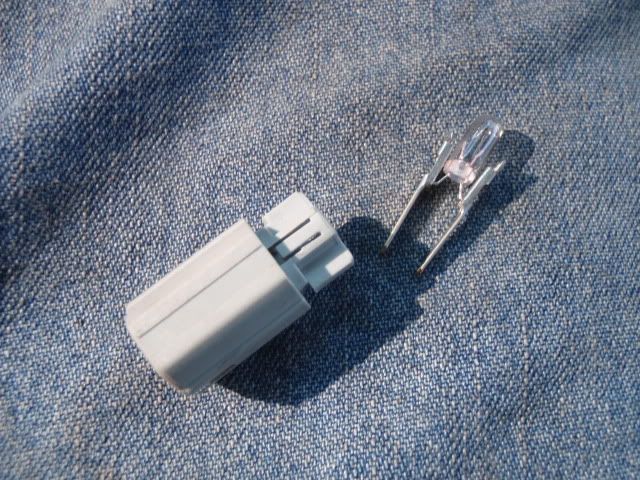
12. Give each bulb a little left twist and remove them.
13. Insert new bulbs and give them a right twist with a the flat head screw driver.
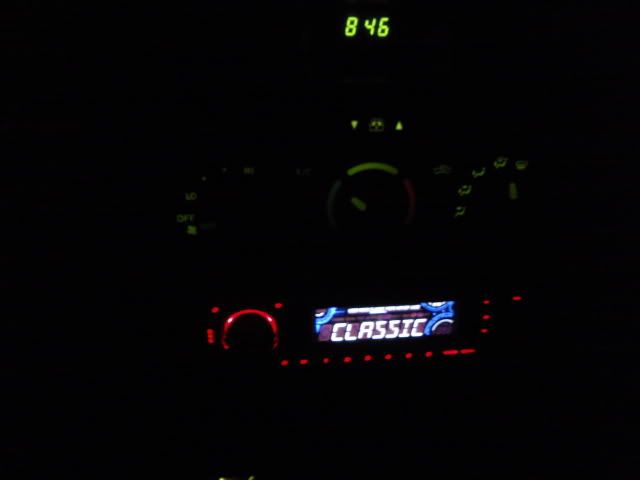
14. Plug the Control housing back in and turn the lights on, if the lights dont light up, unplug the two connections, and give remove the bulbs turn them 180 degrees and put them back in.
15. Retest lights, all should work.
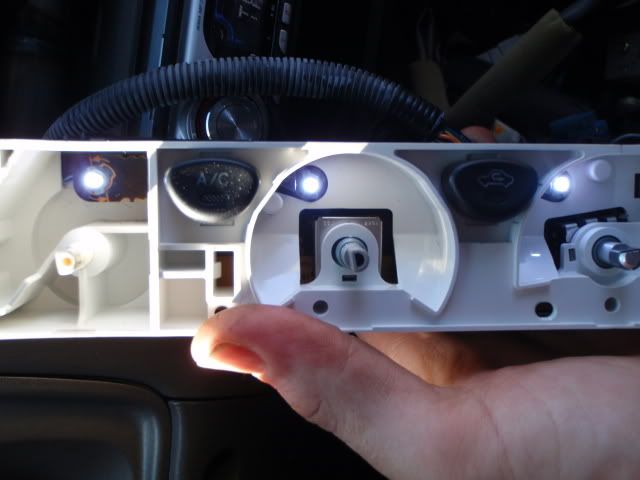
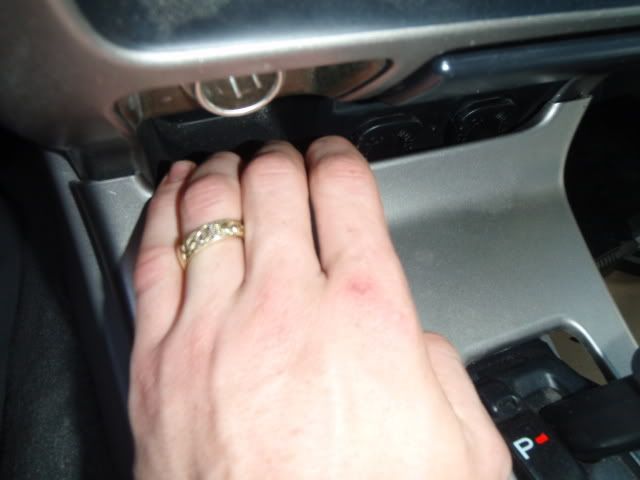
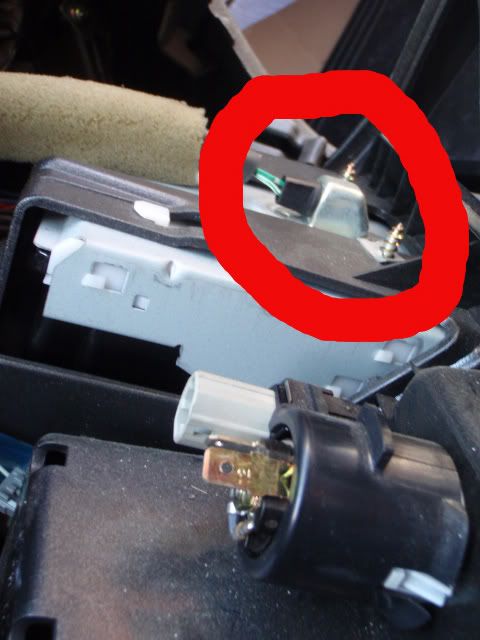
16. Remove the strip from the center trim piece that holds the rear window control and defroster and ECT power button. There is a clip on each side of it that hold it in. The bulbs are circled in red.
17. To make getting the neo wedges in and out of this piece as easy as possibly i removed the piece that holds the bulbs from the above center piece.
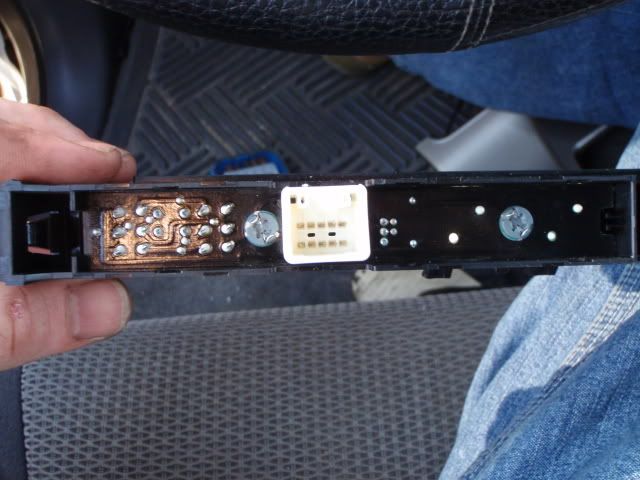
18. Then remove the circuit board that holds the bulbs.
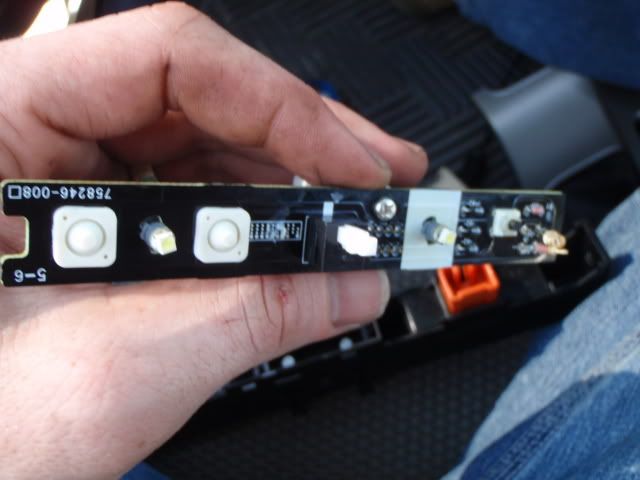
19. Replace the two bulbs, plug it in to its connection in the center, turn the lights on. If they do not work, remove them, rotate them 180 degrees and retest.
20. Put the circuit board back into its holder, and the holder back into the center piece from the trim. And then the center piece back into the trim.
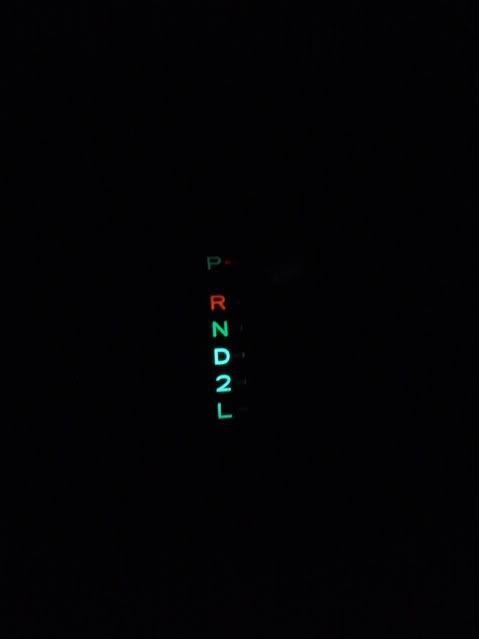
21. On the bottom of the shifter is a single #74 bulb that rovides light for the letters.
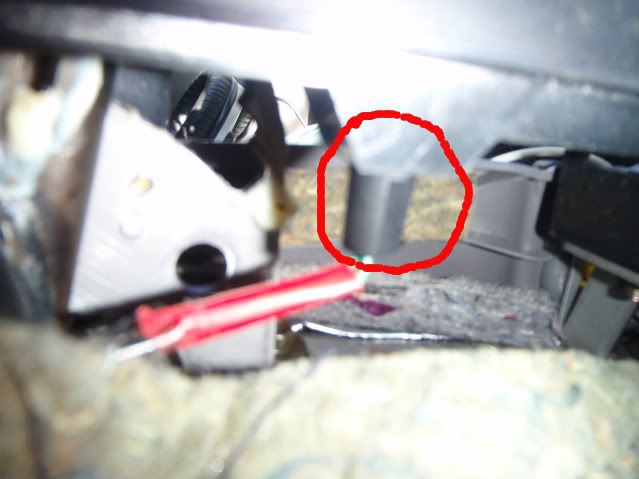
22. With a little twist it will come out.
23. Replace halogen bulb with LED, and turn lights on. If it doesnt light pull the bulb out and rotate it 180 degrees and turn lights on again. Should light.
24. Reinsert bulb holder into shifter.
25. Put shifter trim back on and insert screw into 4WD lever.
26. Put back cover onto control housing.
27. Remount Control housing into center above stereo.
28. Put Control housing face back on.
29. Re connect all the connections on the back of the center trim piece.
30. Re insert center trim piece. And your done.
Things i didnt do, i didnt replace the cigarette lighter bulb because it looked like this.
Also did not do the ashtray bulb, but if you wanted to add a #74 to your list.
I reccomend getting three of each wedge incase one doesnt work or one gets broken. Also i will put up before and after pictures in a little bit after i go down and take some more pictures. Any questions please ask.
The clock can not be changed with out some serious work.
-WYO
You will need,
1 - #74 Bulb for the shifter
2 - Type B Neo Wedges for the rear window button and ECT power button
3 - Type A Neo Wedges for behind the temperature control
Tools,
Philips screwdriver
Flathead screw driver
1. Pull the trim around the Temp Control off, by putting a hand in each vent and pulling toward you.
2. Now that you can kind of see behind it, disconnect the 9 connections,
One for the hazards button, one for the clock, one for the rear window defrost, one for the rear window up down button, , one for the cigarette lighter, one for the cigarette lighter bulb, one for the ashtray bulb and two for the 12v plugs at the bottom. Some vehicles may not have these.
3. Set center trim aside.
4. Take the screw out of the 4WD knob.
5. Pull the shifter trim piece up from the front and wiggle the back out, I didnt disconnect the 4wd cable. I just set the trim piece on the floor by my feet.
6. Remove the three control knobs.
7. Gently pull the black piece off of the control housing.
8. Remove the three screws for the control housing.
9. Lift the control housing up and pull it out towards you, disconnect the two connections on the back of it.
10. Remove the three screws on the back of the control housing, and the one little clip on the top right of it.
11. You now have this, the yellow plugs are the bulbs.
12. Give each bulb a little left twist and remove them.
13. Insert new bulbs and give them a right twist with a the flat head screw driver.
14. Plug the Control housing back in and turn the lights on, if the lights dont light up, unplug the two connections, and give remove the bulbs turn them 180 degrees and put them back in.
15. Retest lights, all should work.
16. Remove the strip from the center trim piece that holds the rear window control and defroster and ECT power button. There is a clip on each side of it that hold it in. The bulbs are circled in red.
17. To make getting the neo wedges in and out of this piece as easy as possibly i removed the piece that holds the bulbs from the above center piece.
18. Then remove the circuit board that holds the bulbs.
19. Replace the two bulbs, plug it in to its connection in the center, turn the lights on. If they do not work, remove them, rotate them 180 degrees and retest.
20. Put the circuit board back into its holder, and the holder back into the center piece from the trim. And then the center piece back into the trim.
21. On the bottom of the shifter is a single #74 bulb that rovides light for the letters.
22. With a little twist it will come out.
23. Replace halogen bulb with LED, and turn lights on. If it doesnt light pull the bulb out and rotate it 180 degrees and turn lights on again. Should light.
24. Reinsert bulb holder into shifter.
25. Put shifter trim back on and insert screw into 4WD lever.
26. Put back cover onto control housing.
27. Remount Control housing into center above stereo.
28. Put Control housing face back on.
29. Re connect all the connections on the back of the center trim piece.
30. Re insert center trim piece. And your done.
Things i didnt do, i didnt replace the cigarette lighter bulb because it looked like this.
Also did not do the ashtray bulb, but if you wanted to add a #74 to your list.
I reccomend getting three of each wedge incase one doesnt work or one gets broken. Also i will put up before and after pictures in a little bit after i go down and take some more pictures. Any questions please ask.
The clock can not be changed with out some serious work.
-WYO
Last edited by wyorunner; Mar 29, 2009 at 03:58 PM.


Trending Topics
Apr 2, 2009 | 07:41 AM
#9
Registered User
Joined: Sep 2002
Posts: 498
Likes: 0
From: Littleton, CO
lol I just noticed that the ECT button should be lit up. I have the same 02 SE 4Runner that I got almost 2 years ago and always thought it was weird that button didn't have a light. now I know!
I appreciate the write wyo, it will come in handy now when i replace those bulbs
I appreciate the write wyo, it will come in handy now when i replace those bulbs

Thread
Thread Starter
Forum
Replies
Last Post
1uzRunner
84-85 Trucks & 4Runners (Build-Up Section)
63
Nov 10, 2018 03:58 PM
aowRS
95.5-2004 Tacomas & 96-2002 4Runners
5
Sep 13, 2017 08:22 AM
potatopants
95.5-2004 Tacomas & 96-2002 4Runners
4
Sep 15, 2015 06:26 AM


