
Recoloring interior of 3rd gen 4runner...PICS included


 Mar 25, 2006 | 09:29 PM
#23
Thread Starter
Registered User
Joined: Oct 2003
Posts: 461
Likes: 0
From: Austin / Houston TX
I'm not sure yet but I may reupholster the seats with cloth or leather/swede. I had originally wanted to put in some celica seats for the front and just reupholster the rear seats. I'll get the headliner professionally done. The carpet I'm gonna try dying black or dark gray. If that doesnt work I'll get it professionally done too.
Mar 25, 2006 | 09:42 PM
#24
Contributing Member
Joined: Jan 2006
Posts: 362
Likes: 0
From: Chile
Originally Posted by tv4184
I'm not sure yet but I may reupholster the seats with cloth or leather/swede. I had originally wanted to put in some celica seats for the front and just reupholster the rear seats. I'll get the headliner professionally done. The carpet I'm gonna try dying black or dark gray. If that doesnt work I'll get it professionally done too.
Great JOB! it really takes guts to do what you're doing!
I've been thinking about doing my headliner with perforated vynil, kind'a like the vintage style headliners.

Last edited by TEPUI; Mar 25, 2006 at 09:44 PM.
Mar 25, 2006 | 10:34 PM
#25
Thread Starter
Registered User
Joined: Oct 2003
Posts: 461
Likes: 0
From: Austin / Houston TX
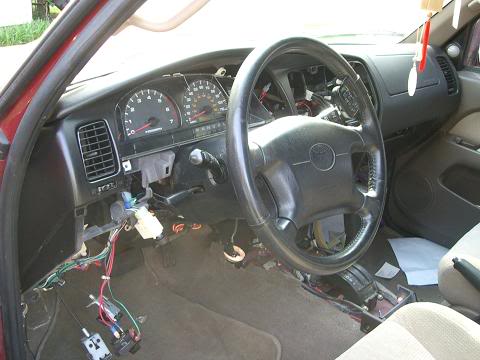
Day Three...better pictures
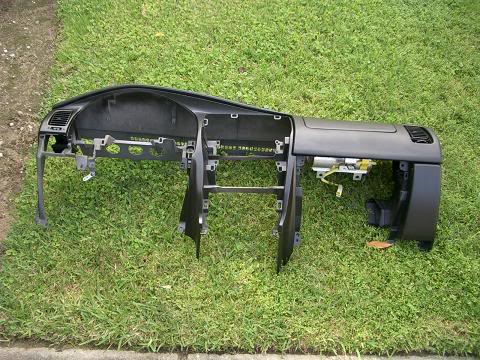
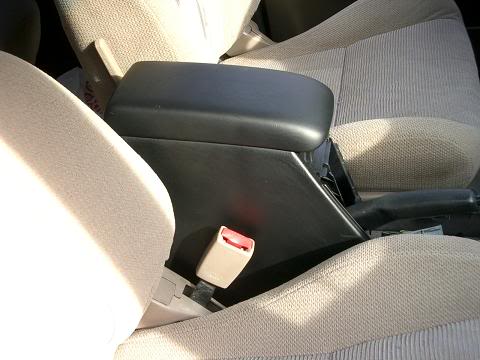
Here are some better shots of the dash board and some of the console. I test fitted the vinyl on the dashboard part...well it is part of the dash board so I basically dry assembled the parts back together. Here is the console shot.
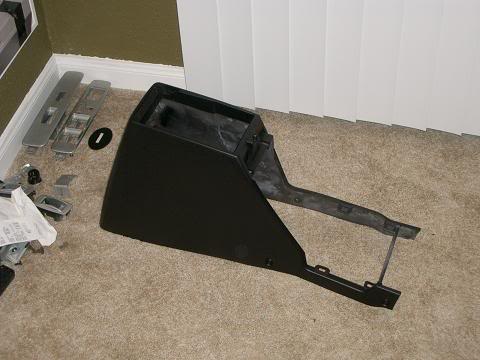
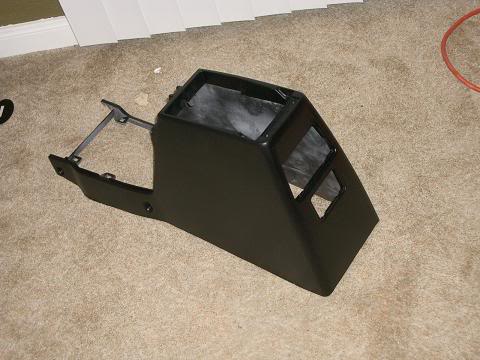
I took off all the parts of the console, insides, ashtray, and cup holder. For now I'll roll without the rear cupholder since mine fell apart long ago. Anyway here is the main dashboard. The money shots? Not really yet.
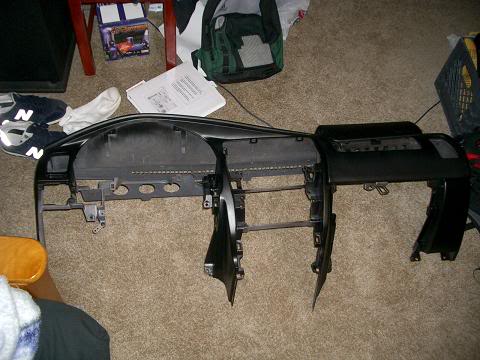

Thats it for now. Its cold out side and seems like the paint cured pretty well. I'm gonna let it set for a while before I reinstall it into the car. I'm gonna clean up some of the wiring thats behind the dash and a few other things while its out right now.
I took off all the parts of the console, insides, ashtray, and cup holder. For now I'll roll without the rear cupholder since mine fell apart long ago. Anyway here is the main dashboard. The money shots? Not really yet.
Thats it for now. Its cold out side and seems like the paint cured pretty well. I'm gonna let it set for a while before I reinstall it into the car. I'm gonna clean up some of the wiring thats behind the dash and a few other things while its out right now.
Last edited by tv4184; Apr 7, 2006 at 11:39 PM.
 Mar 26, 2006 | 08:42 AM
#29
Thread Starter
Registered User
Joined: Oct 2003
Posts: 461
Likes: 0
From: Austin / Houston TX
Originally Posted by waskillywabbit
Putting the dash back IN will be more fun than taking it out...ask me how I know. 

 Mar 26, 2006 | 08:58 AM
#31
I took my 3rd gen dash out at one time.
The 1st gen dash in the 85 won't be going back.
The 1st gen dash in the 87 might get swapped out to black since the 87 gray dash is cracked...just have to see...right now...as long as it runs and gets me back and forth to work...it'll stay as is...I got more junk to do to the 85 than I count count.
The 1st gen dash in the 85 won't be going back.
The 1st gen dash in the 87 might get swapped out to black since the 87 gray dash is cracked...just have to see...right now...as long as it runs and gets me back and forth to work...it'll stay as is...I got more junk to do to the 85 than I count count.
Mar 26, 2006 | 09:36 AM
#32

Contributing Member
Joined: Jun 2002
Posts: 1,570
Likes: 0
Woah, you're brave for doing that. I hope it turns out! Looks good so far!
I wanted black leather in my truck so bad when I ordered it, but it wasn't an option. I didn't like the tan leather so I settled on gray cloth.
I wanted black leather in my truck so bad when I ordered it, but it wasn't an option. I didn't like the tan leather so I settled on gray cloth.
Mar 29, 2006 | 08:31 AM
#33
what are you going to do about the door panels? i figure that since you already took the whole dash off might as well take a couple of door panels off to (and paint them of course). that just me though.
Mar 29, 2006 | 09:57 AM
#34
Thread Starter
Registered User
Joined: Oct 2003
Posts: 461
Likes: 0
From: Austin / Houston TX
I'm gonna get to them later. I just thought to do the dash right now since I had the bezel pieces off being repainted to charcoal gray already. I had to take the door panels off before. I won't be able to do it within the next month. I can only get the dash back in and get the truck running again.
Mar 29, 2006 | 12:25 PM
#36
Thread Starter
Registered User
Joined: Oct 2003
Posts: 461
Likes: 0
From: Austin / Houston TX
I'm using vinyl / fabric paint for the vinyl areas. The plastic is being preped with prepsol and then primered with duplicolor autobody primer. Then two layers of flat black universal black autobody paint is sprayed after a light sanding of the primer coat. I'm considering adding a layer of high temperature exhaust paint onto the dash in hopes of it withstanding the houston heat. Still debating about that right now. It won't withstand direct scratches with metal or solid objects and I won't know about the daily wear and tear yet. This is bascially a shot in the dark for me. I should have asked more import racers how they get theirs done but it won't be too much of a hassel to take everything out if I have to again. Thats if I have to. Now that the paint has cured, my friend and I have tried to scratch it directly and it hasn't scratched yet.
Mar 31, 2006 | 04:41 PM
#39
Thread Starter
Registered User
Joined: Oct 2003
Posts: 461
Likes: 0
From: Austin / Houston TX
Day Four - Part One
Ah yes the dashboard is complete. I had a little time after my final today to work some more. I cleaned up the interior a bit. Here are some shots again of the barren interior before I install the dashboard.
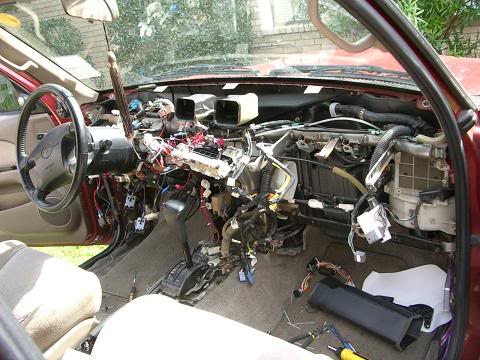

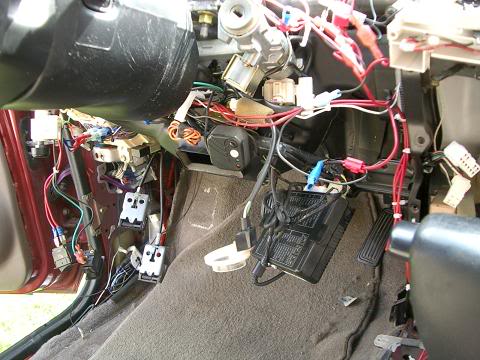
On ward to the next post. These pictures were also before I ziptied my wiring back together.
On ward to the next post. These pictures were also before I ziptied my wiring back together.
Last edited by tv4184; Apr 7, 2006 at 11:41 PM.
Mar 31, 2006 | 04:53 PM
#40
Thread Starter
Registered User
Joined: Oct 2003
Posts: 461
Likes: 0
From: Austin / Houston TX
Day Four - Part Deux
Here are a few shots of the dash outside and after it was installed. Some of the pictures don't make it look black but its pretty nice. The way it should look when it come out the factory? No offense to anyone thats a fan of the oak interior. Anyway here yall go.
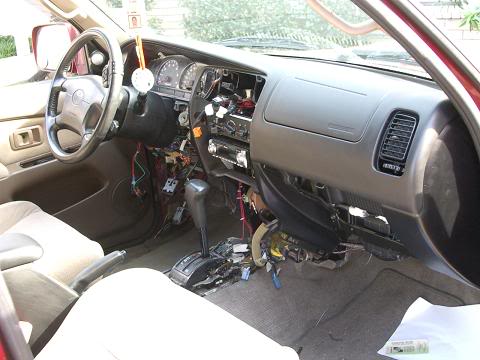
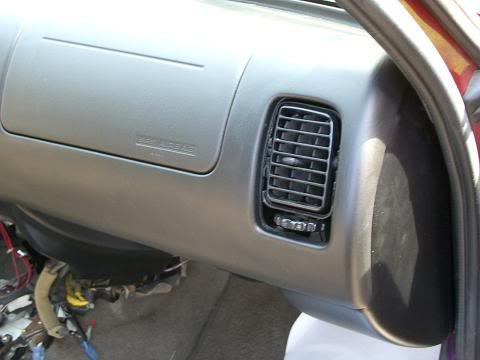
The gauge cluster was painted charcoal gray along with a few other pieces that go on the dash. But now in the sunlight it looks too dark and mistaken for black. I think I might have to shoot some pieces with gunmetal gray and see how that turns out. Otherwise the dash looks pretty good. It was a breeze getting it in too...much easier than removing it...
The gauge cluster was painted charcoal gray along with a few other pieces that go on the dash. But now in the sunlight it looks too dark and mistaken for black. I think I might have to shoot some pieces with gunmetal gray and see how that turns out. Otherwise the dash looks pretty good. It was a breeze getting it in too...much easier than removing it...
Last edited by tv4184; Apr 7, 2006 at 11:41 PM.


