
Operation: Olive Drab PATYWGN
 Aug 4, 2012 | 09:50 AM
#1
Operation: Olive Drab PATYWGN
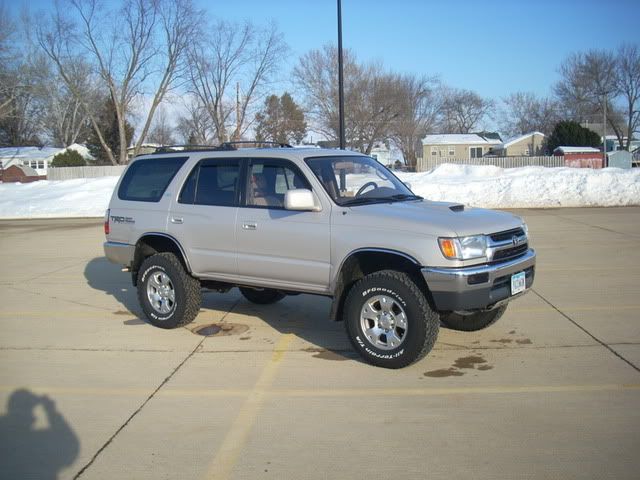
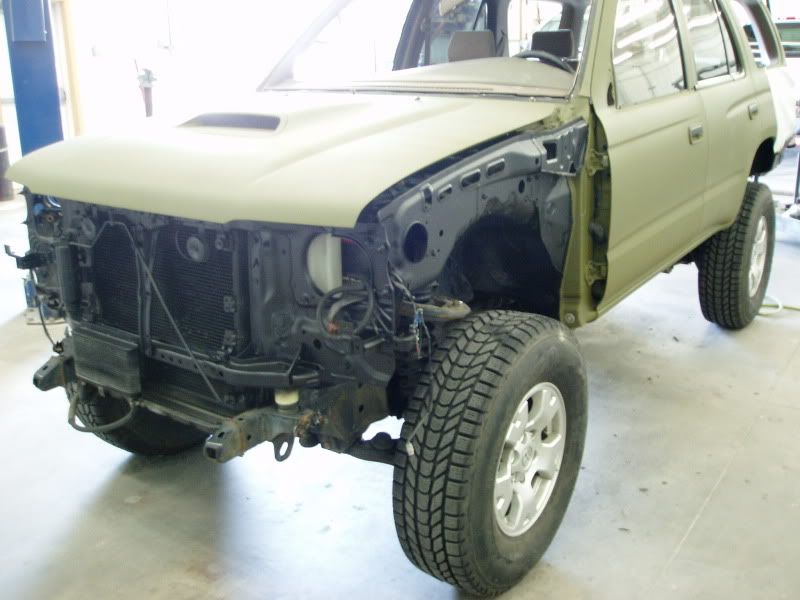
So the PATYWGN is starting to show it's age and I've always said that when rust started to creep in I'd either rattle can it black or army green. Now that I am a body tech at a body shop, I've decided to do it right and freshen the beast up while putting a new spin on her styling. Here is what she looked like up until a couple weeks ago:
Not bad, I know. But to fix the problem areas right I'd have to blend the paint into the quarters and roof and the expense of a pearl color plus clear coat would be very high. So, I decided to buy some two part single stage olive drab paint from TM9 Ordnance that is used on military vehicle restorations. I love the color, sprays nice, and coverage is fantastic.
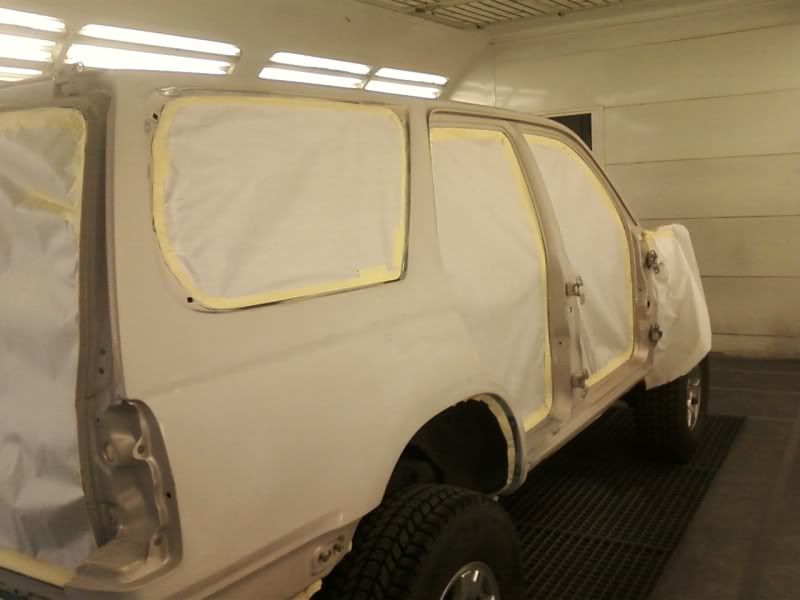
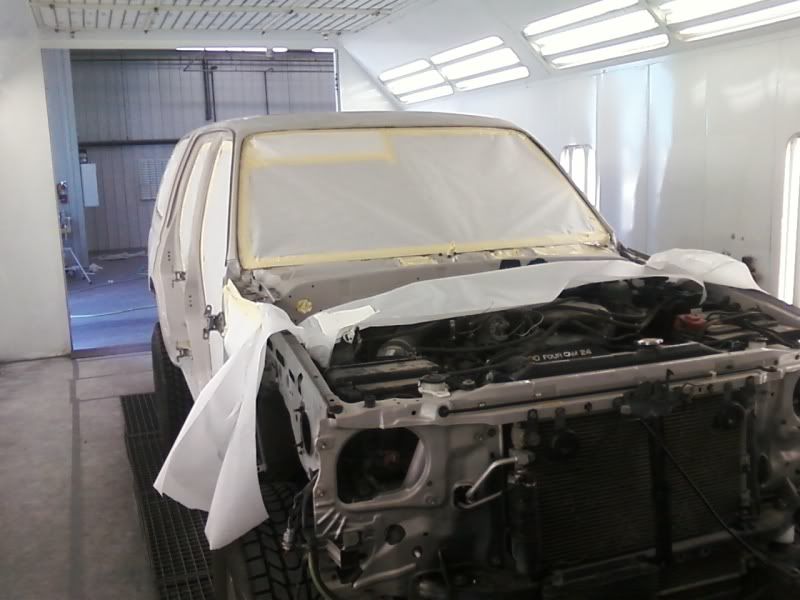
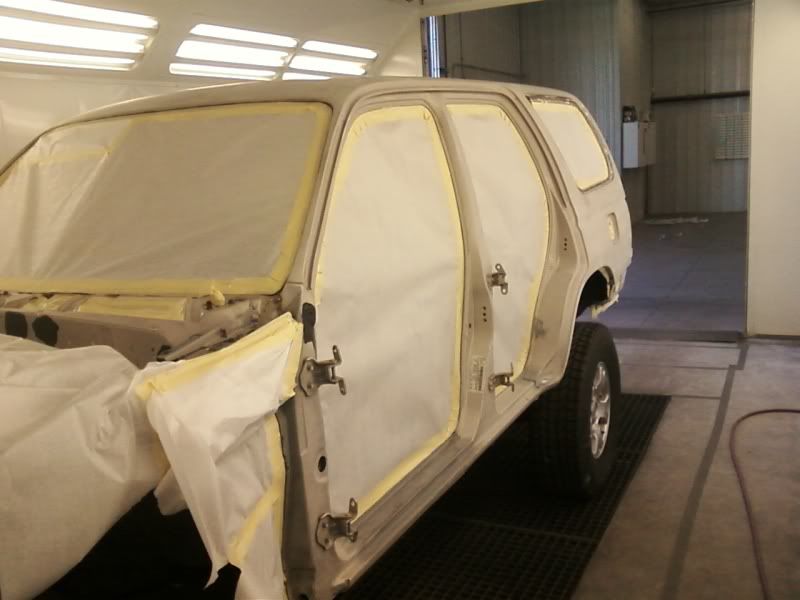
Here are some in progress pics so far, I've only got two doors painted but next week I'll get everything else sprayed and then on to re-assembly. Enjoy some gutted out 3rd gen goodness:

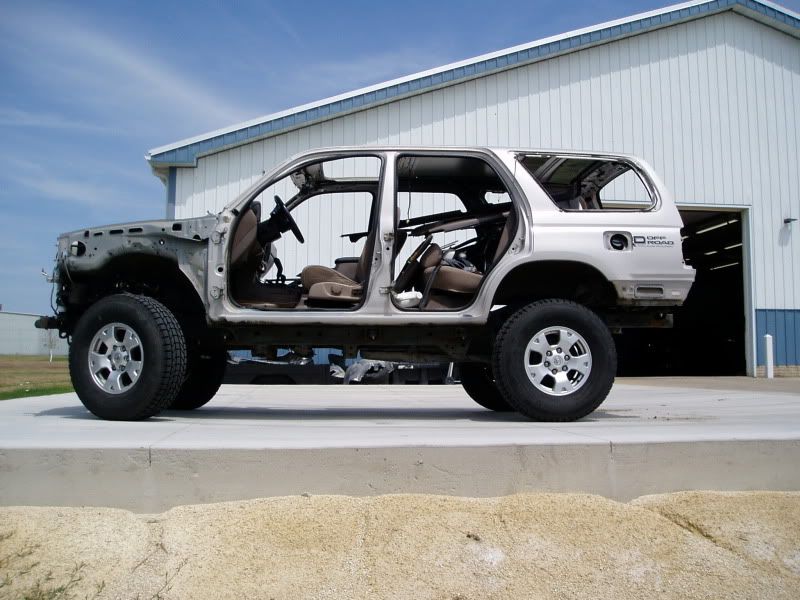
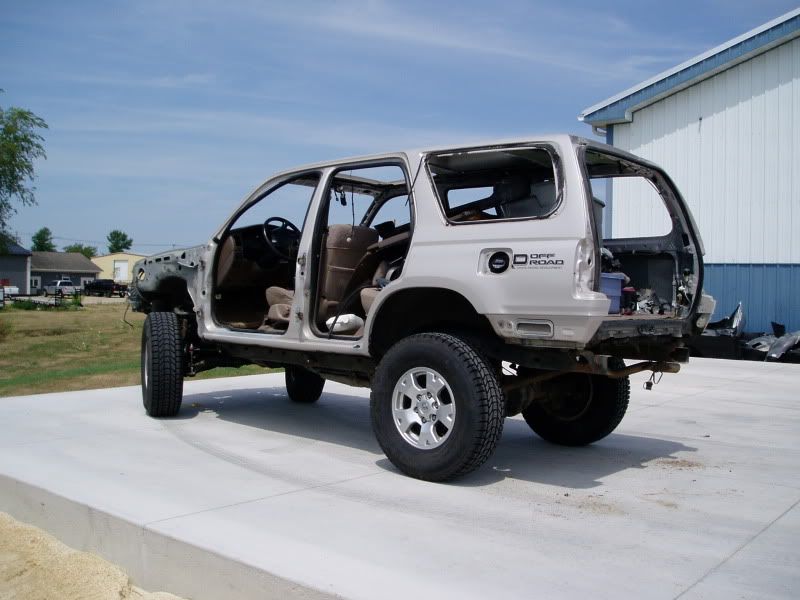
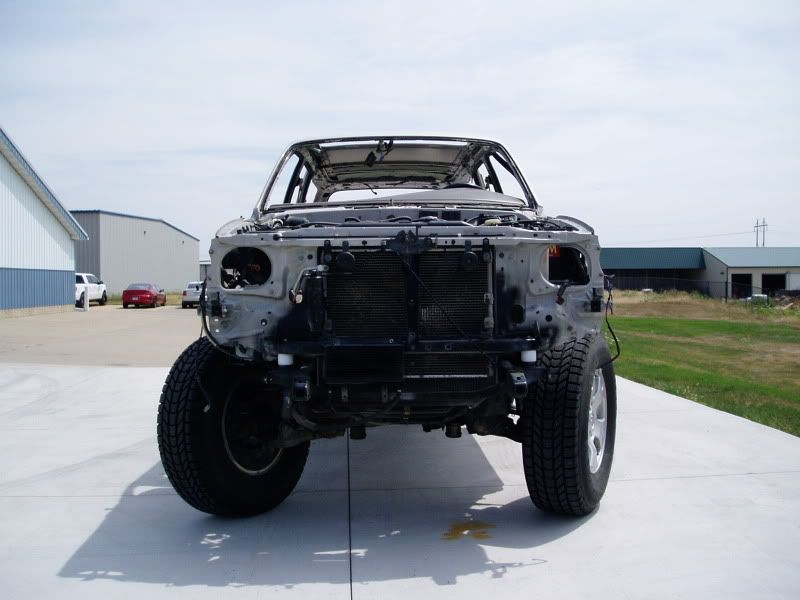
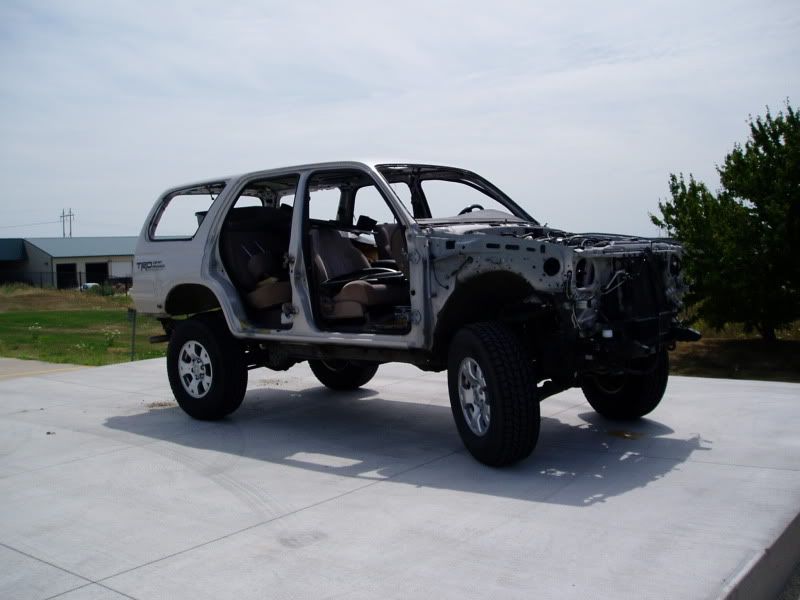

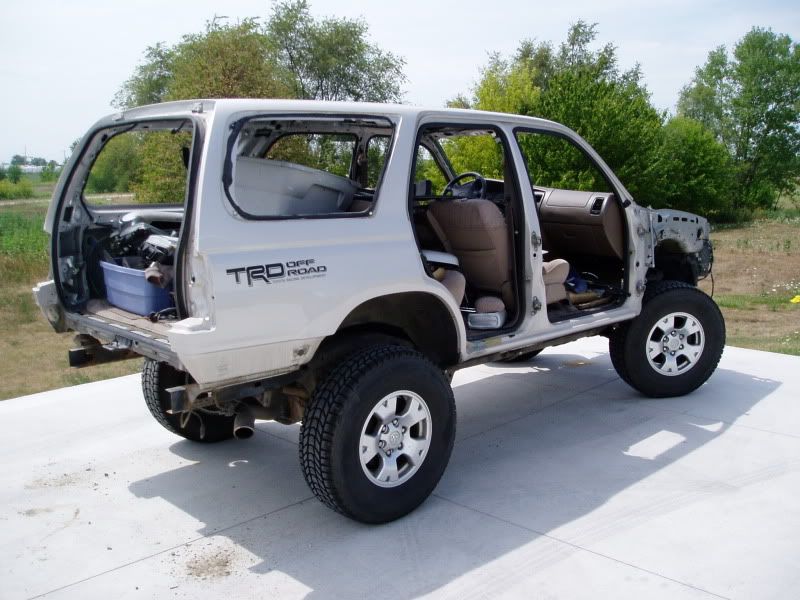
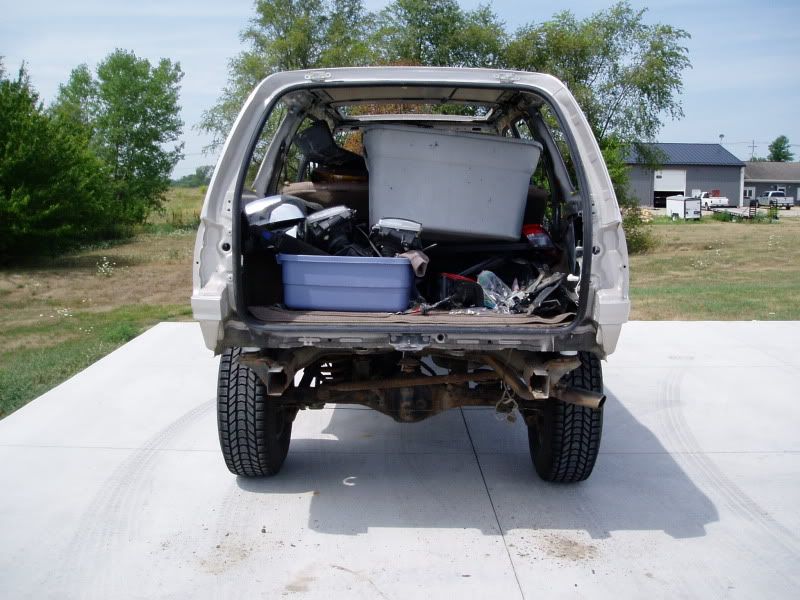
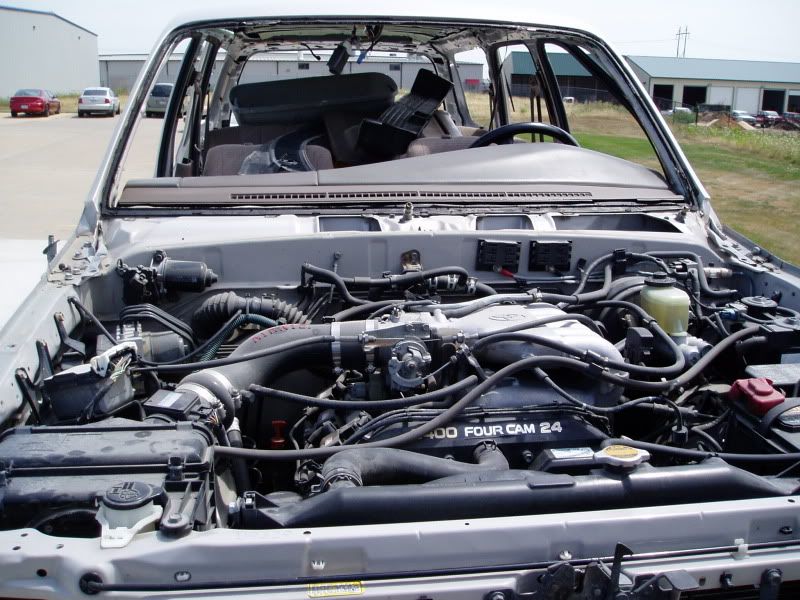
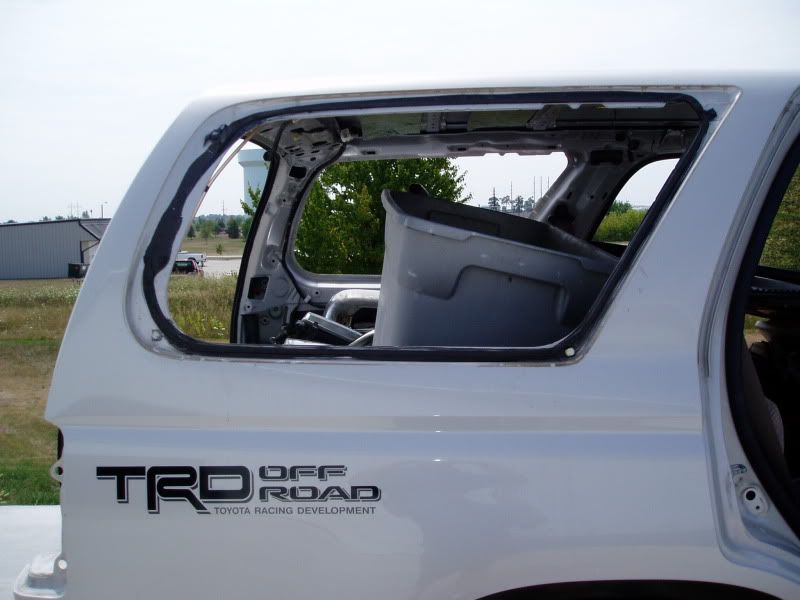

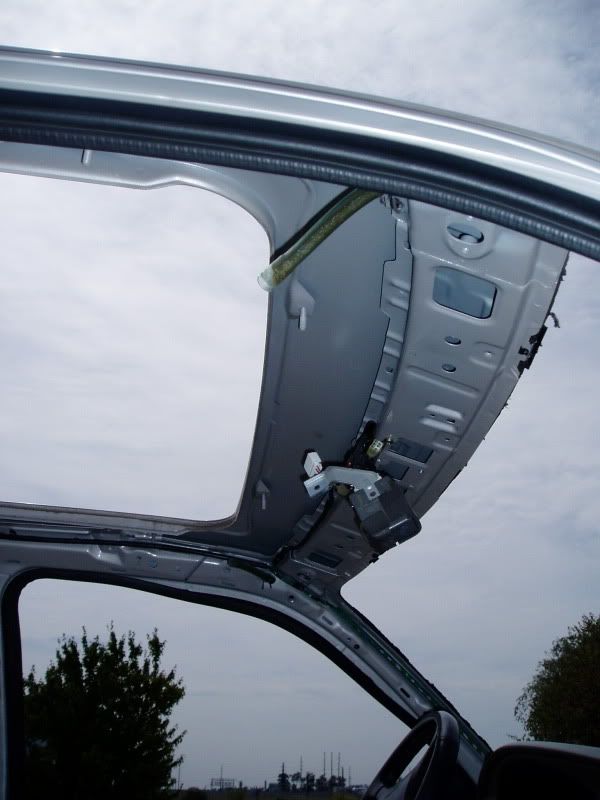
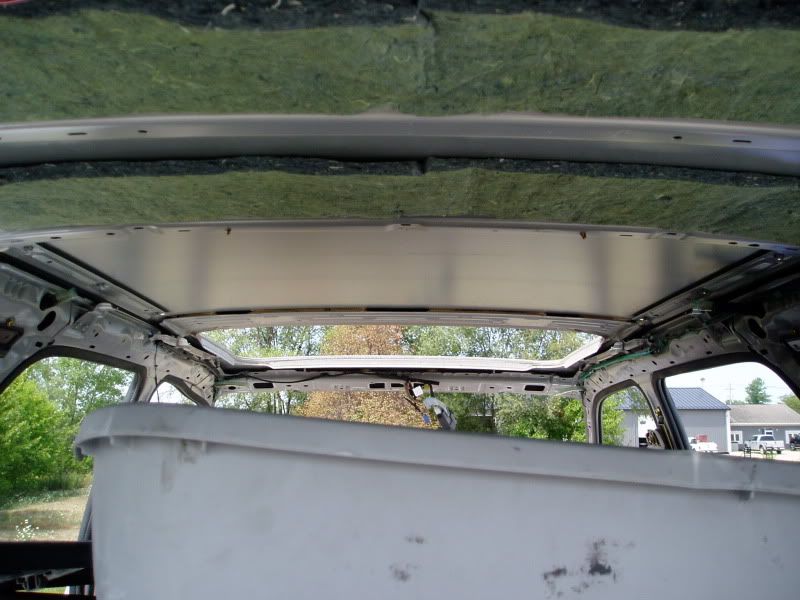
I've made some improvements along the way too that I'll share in the updated pictures posts. This is phase 1 of the project, phase 2 is building new front and rear bumpers, and phase 3 is new wheels and tires. After that I think I'll leave her alone for awhile and just enjoy driving her every day.
STAY TUNED...
Not bad, I know. But to fix the problem areas right I'd have to blend the paint into the quarters and roof and the expense of a pearl color plus clear coat would be very high. So, I decided to buy some two part single stage olive drab paint from TM9 Ordnance that is used on military vehicle restorations. I love the color, sprays nice, and coverage is fantastic.
Here are some in progress pics so far, I've only got two doors painted but next week I'll get everything else sprayed and then on to re-assembly. Enjoy some gutted out 3rd gen goodness:
I've made some improvements along the way too that I'll share in the updated pictures posts. This is phase 1 of the project, phase 2 is building new front and rear bumpers, and phase 3 is new wheels and tires. After that I think I'll leave her alone for awhile and just enjoy driving her every day.
STAY TUNED...
 Aug 5, 2012 | 08:18 AM
#6
Painting the body Monday night after work, should have new pics Tuesday night. I know, what a tease to start the thread now with no updates, sorry.
wii - Believe me, lots of people ask me why it's called the Panty Wagon so it's easily misread.
Wabbit - yeah, one of my co-workers asked if I just got back from Chicago.
wii - Believe me, lots of people ask me why it's called the Panty Wagon so it's easily misread.
Wabbit - yeah, one of my co-workers asked if I just got back from Chicago.
Trending Topics
Aug 24, 2012 | 09:23 AM
#8
Registered User
Joined: Apr 2007
Posts: 366
Likes: 0
From: San Diego, CA
Truck looks tough all stripped down. I need to think about paint on my truck too. I am thinking I will "De-Limited" it first by taking off flares and cladding.
Want to see how this is going to look though!
Want to see how this is going to look though!
 ...i have to wait to see some color!!
Aug 25, 2012 | 01:54 PM
...i have to wait to see some color!!
Aug 25, 2012 | 01:54 PM
#10
Sorry guys. I had a good friend pass away unexpectedly so I've been pretty consumed with that the last couple weeks.
The 4runner is 99% together and I'm driving it daily, just need to figure out my front wiper malfunction and a couple little annoyances. I'll have an update with *some* pics tonight, but I still need to get some glam shots maybe tomorrow and post them. Rest assured, there will be some color pics to wet your whistles tonight.
The 4runner is 99% together and I'm driving it daily, just need to figure out my front wiper malfunction and a couple little annoyances. I'll have an update with *some* pics tonight, but I still need to get some glam shots maybe tomorrow and post them. Rest assured, there will be some color pics to wet your whistles tonight.
Aug 25, 2012 | 02:33 PM
#11
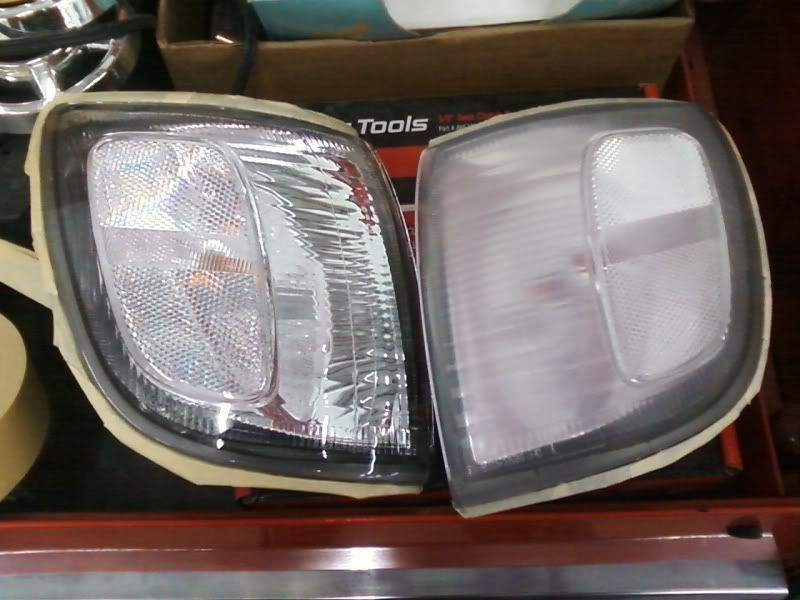
Ok first I did a little project to make it look a little more classic. I wanted orange side markers like the older Yotas like the Landcruisers etc. So I bought some clear side markers off ebay and scuffed them down with gray scotchbrite pads and masked them off.
Then I mixed up a few ounces of clear coat and added about 80% Kustom Shop Orange Glow basecoat and about 20% Kustom Shop Fire Orange basecoat to tint the clear like a candy paint job. I experimented with the amount of each color and how many coats and came up with this:
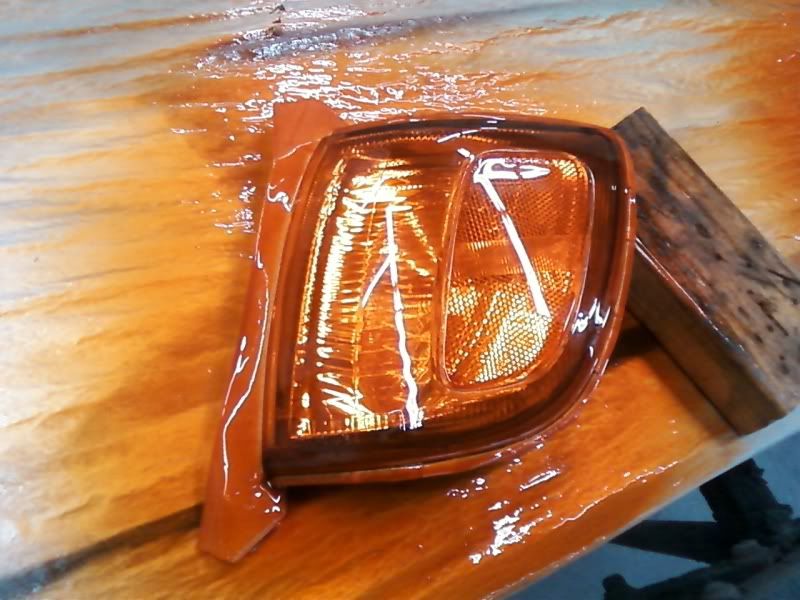
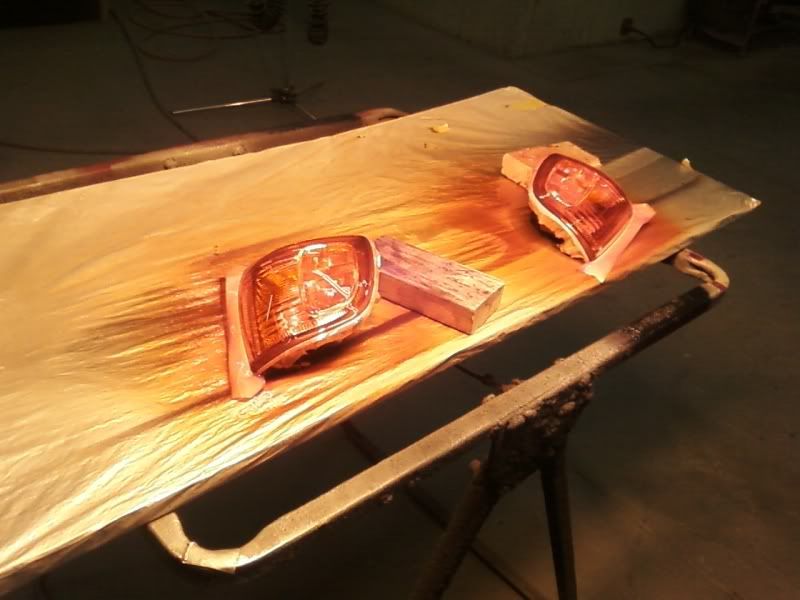
I let them cure over the weekend and unmasked them and got some sweet classic looking corner lenses. They came out great in my opinion. I can't take credit for the idea, years ago someone on Yotatech did something similar with a spray can product called "stained glass" or something which lead me down the path to do what I did.
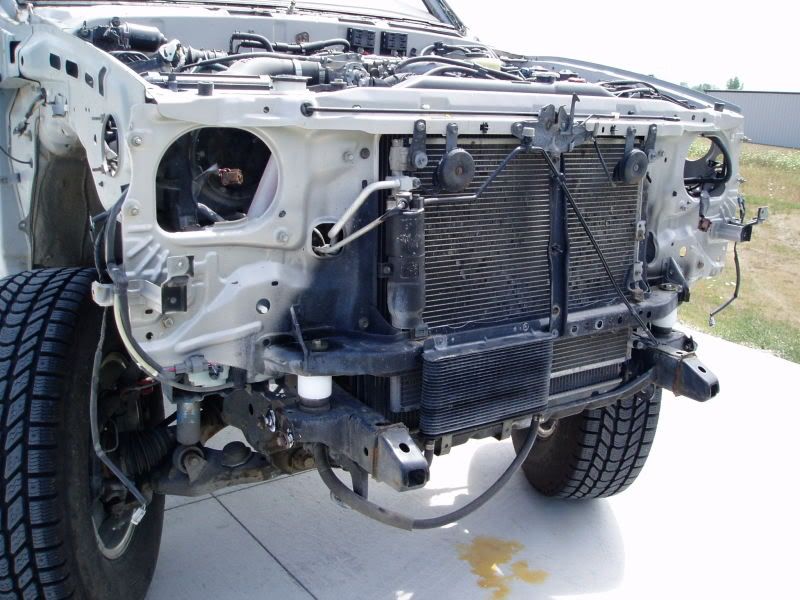
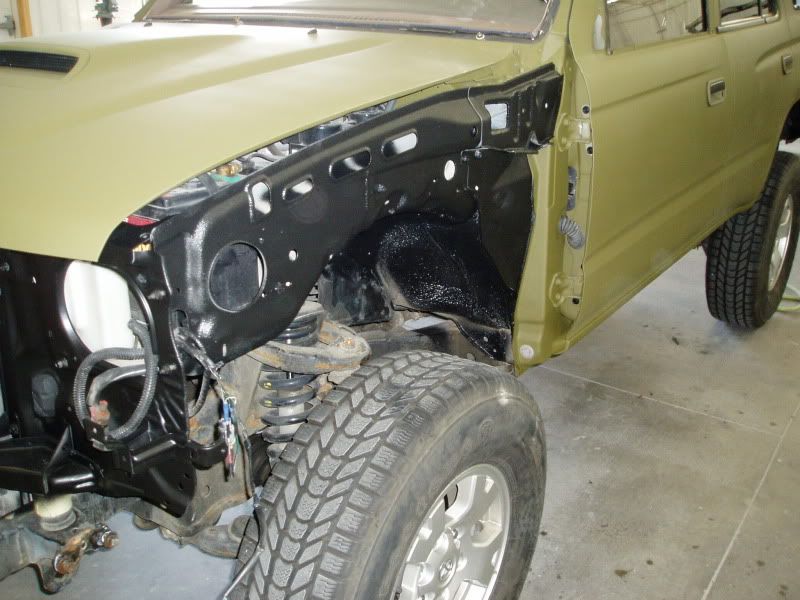
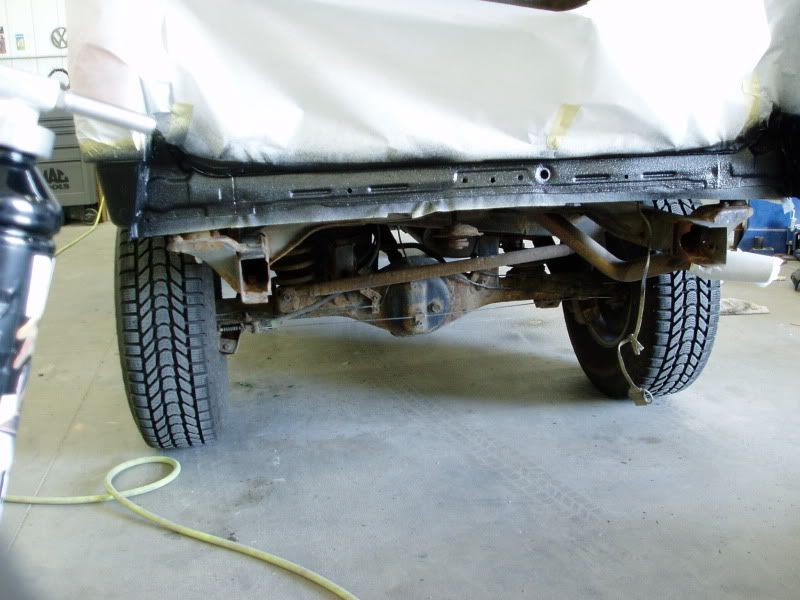
I also decided that I was going to try out a product for inside my wheel wells and if it turned out nice I would do something with my rockers and lower doors. The product is called Raptor Liner by U-POL. It is a 2 part catalyzed bed liner that is applied with a brush or compressed air powered undercoating gun. I chose to buy the gun, scuff the area to be sprayed, clean, and go to work! You still need to mask what you don't want overspray on but the overspray was pretty contained only showing up to about a foot from the sprayed area so you don't have to go crazy and mask the entire vehicle top to bottom. I coated the front aprons under the fenders, front inner fender wells, inside the fenders themselves while I had them off the vehicle, the rear fender wells, and the sides and rear under the stock rear bumper area. On to the pics:
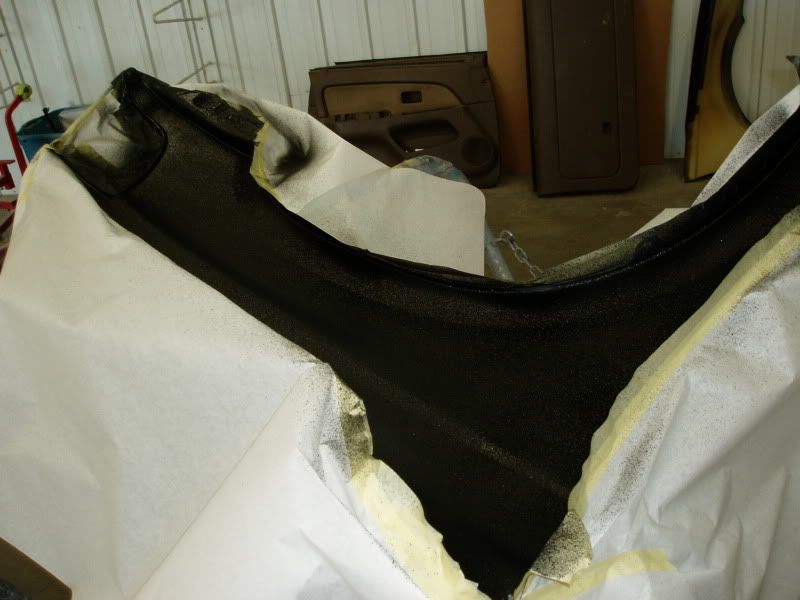

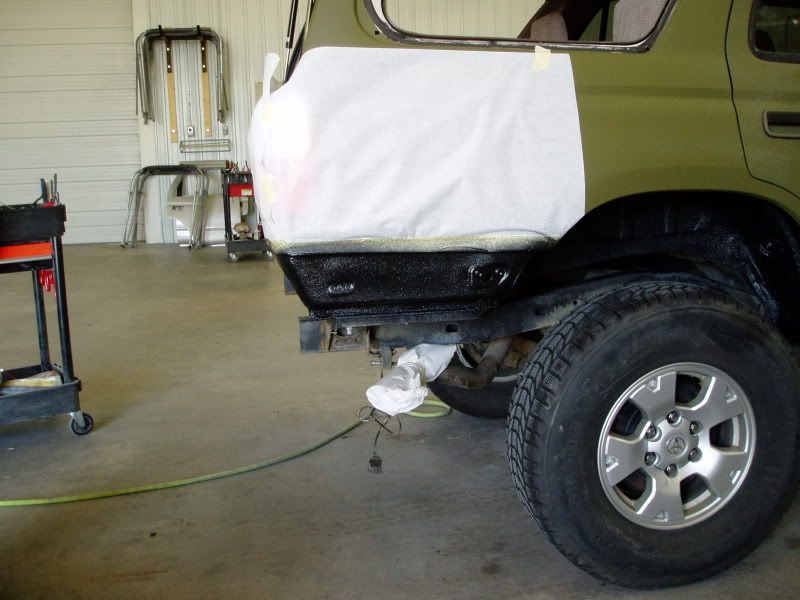
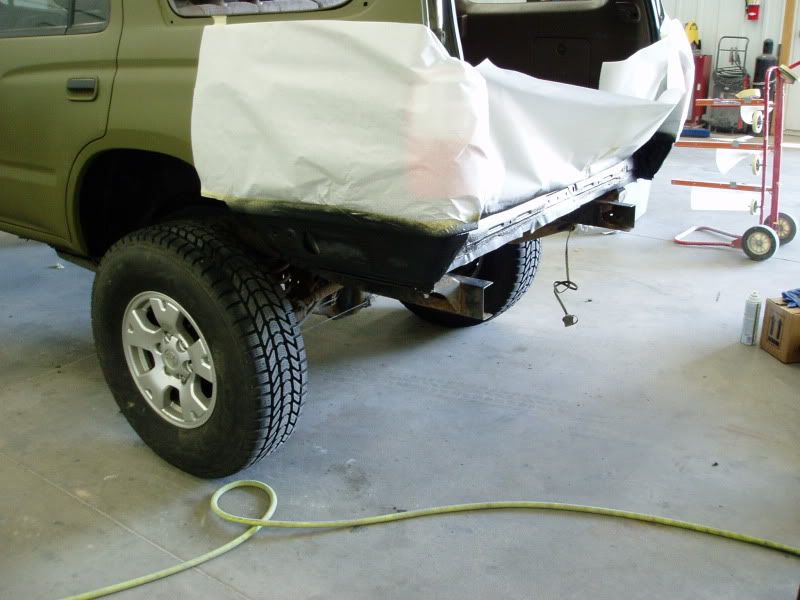
And a couple close ups to show the texture.
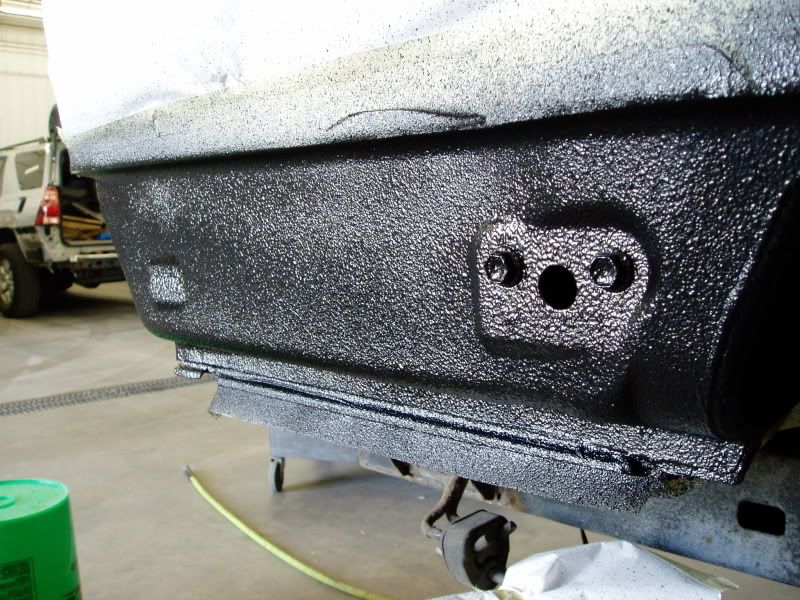
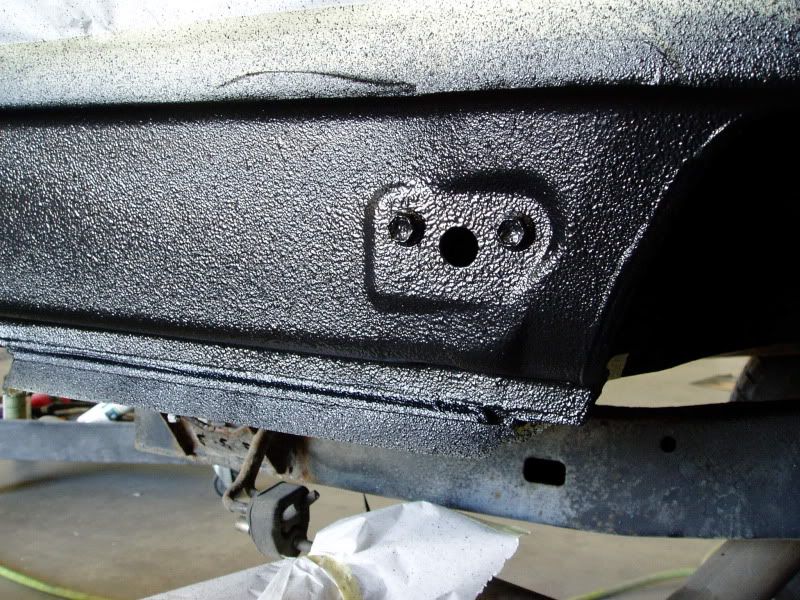
You can increase or decrease air pressure and spray closer or further away to create different textures. I chose an even not hugely clumpy texture. The directions also said to wait 1 hour between coats but the pot life of the product is only 1 hour so they want you to use more product and potentially waste a lot as well. It also states you can just clean the surface and shoot another coat directly over the old stuff once it's cured a few days. I still have 2 liters left so I'll eventually add some more down the road. I haven't done the rockers or lower doors yet as I want the new olive drab paint to cure fully before I put more stuff over it.
Then I mixed up a few ounces of clear coat and added about 80% Kustom Shop Orange Glow basecoat and about 20% Kustom Shop Fire Orange basecoat to tint the clear like a candy paint job. I experimented with the amount of each color and how many coats and came up with this:
I let them cure over the weekend and unmasked them and got some sweet classic looking corner lenses. They came out great in my opinion. I can't take credit for the idea, years ago someone on Yotatech did something similar with a spray can product called "stained glass" or something which lead me down the path to do what I did.
I also decided that I was going to try out a product for inside my wheel wells and if it turned out nice I would do something with my rockers and lower doors. The product is called Raptor Liner by U-POL. It is a 2 part catalyzed bed liner that is applied with a brush or compressed air powered undercoating gun. I chose to buy the gun, scuff the area to be sprayed, clean, and go to work! You still need to mask what you don't want overspray on but the overspray was pretty contained only showing up to about a foot from the sprayed area so you don't have to go crazy and mask the entire vehicle top to bottom. I coated the front aprons under the fenders, front inner fender wells, inside the fenders themselves while I had them off the vehicle, the rear fender wells, and the sides and rear under the stock rear bumper area. On to the pics:
And a couple close ups to show the texture.
You can increase or decrease air pressure and spray closer or further away to create different textures. I chose an even not hugely clumpy texture. The directions also said to wait 1 hour between coats but the pot life of the product is only 1 hour so they want you to use more product and potentially waste a lot as well. It also states you can just clean the surface and shoot another coat directly over the old stuff once it's cured a few days. I still have 2 liters left so I'll eventually add some more down the road. I haven't done the rockers or lower doors yet as I want the new olive drab paint to cure fully before I put more stuff over it.
Last edited by pattycakes77; Aug 25, 2012 at 02:43 PM.
Aug 25, 2012 | 02:43 PM
#12
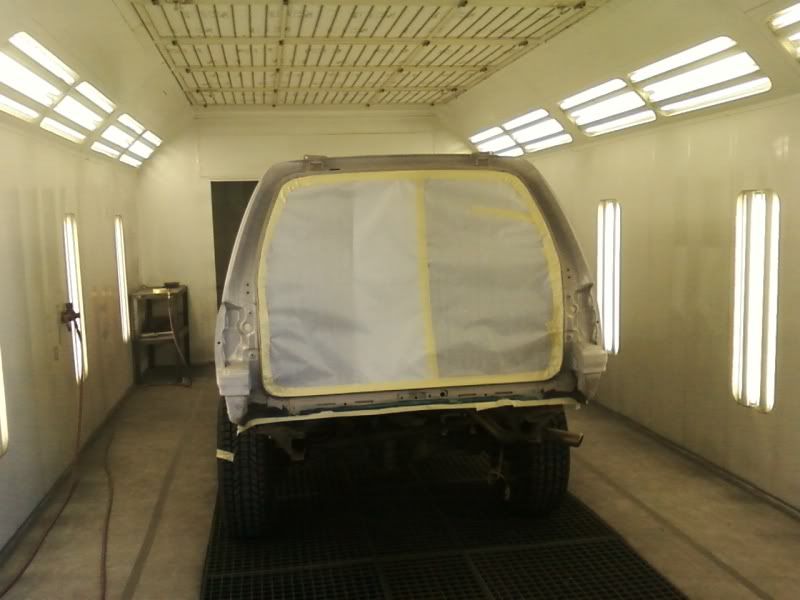
Here are some cell phone shots of the 4runner in the paint booth all masked up and scuffed ready for paint:
And a couple of the money shots of it all assembled in the shop, just to get you by until I get the glam shots up.
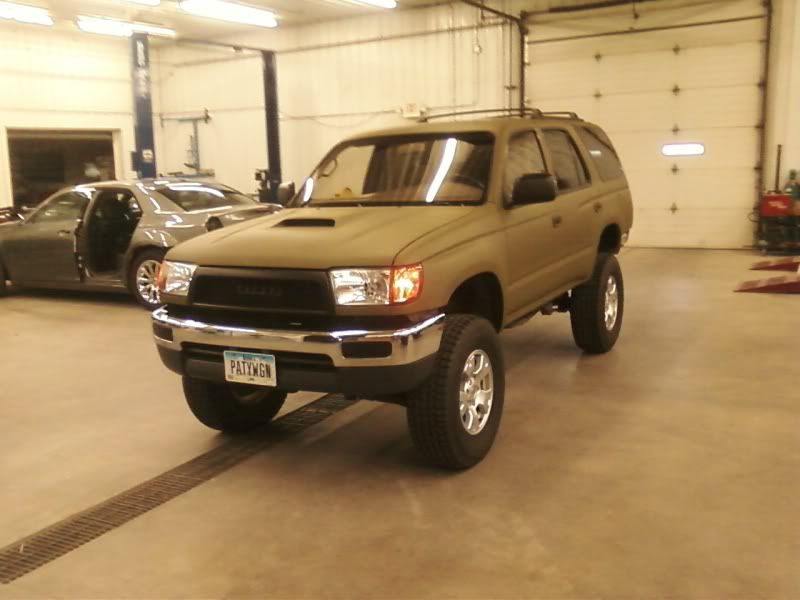
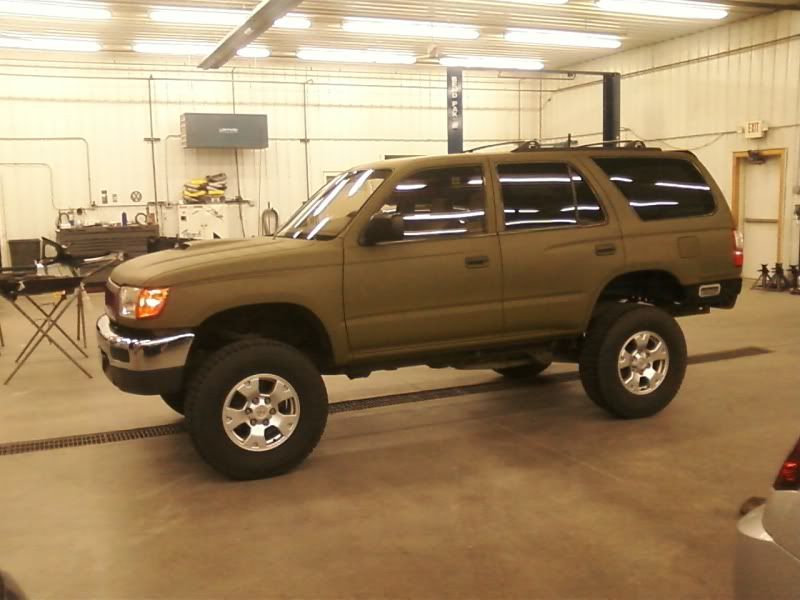
I put a 1.5" body lift on it too and didn't get time to modify the front bumper brackets so I know it looks horrid with that nasty gap! I also didn't put the rear bumper end caps on as I'm going to sell those and some other parts to buy the steel I need to make some new bumpers. So, Phase 1 is done, Phase 2 is Operation Beefy Bumpers, and Phase 3 is Operation Gnarly Wheels and Tires. Eventually Phase 4 is Operation Clean Up The Damned Undercarriage So It Doesn't Look So Freakin' BAD!!!!
Also of note, I fixed my half-assed Satoshi grill so it's all solid and looks much better. It's murdered out for the time being but I'm just going to add one more touch to highlight the "TOYOTA" letters in olive drab to accent it. I have one more trick up my sleeve for the quarter panels since I took off my TRD graphics for the paint job so stop back when I update it again.
Thanks for looking, hope you like it.
And a couple of the money shots of it all assembled in the shop, just to get you by until I get the glam shots up.
I put a 1.5" body lift on it too and didn't get time to modify the front bumper brackets so I know it looks horrid with that nasty gap! I also didn't put the rear bumper end caps on as I'm going to sell those and some other parts to buy the steel I need to make some new bumpers. So, Phase 1 is done, Phase 2 is Operation Beefy Bumpers, and Phase 3 is Operation Gnarly Wheels and Tires. Eventually Phase 4 is Operation Clean Up The Damned Undercarriage So It Doesn't Look So Freakin' BAD!!!!
Also of note, I fixed my half-assed Satoshi grill so it's all solid and looks much better. It's murdered out for the time being but I'm just going to add one more touch to highlight the "TOYOTA" letters in olive drab to accent it. I have one more trick up my sleeve for the quarter panels since I took off my TRD graphics for the paint job so stop back when I update it again.
Thanks for looking, hope you like it.
 Aug 25, 2012 | 04:23 PM
#15
Yeah, they don't look right all bright and shiny with flat everything else. I have my stock 6 spoke 4runner wheels that I'm going to paint flat black and mount these tires to (my winter tires) and run those until I can get a set of Pro Comp Series 98s and probably some HUGE Goodyear DuraTracs or maybe some BFG KM2s. Besides, having the bigger tires on there will help me gauge where the new bumpers will need to be too, good thinking!


