yotagoon's 1986 4runner Build
 Apr 25, 2013 | 05:40 PM
#43
Registered User
Joined: Dec 2008
Posts: 2,391
Likes: 1
From: tecumseh nebraska
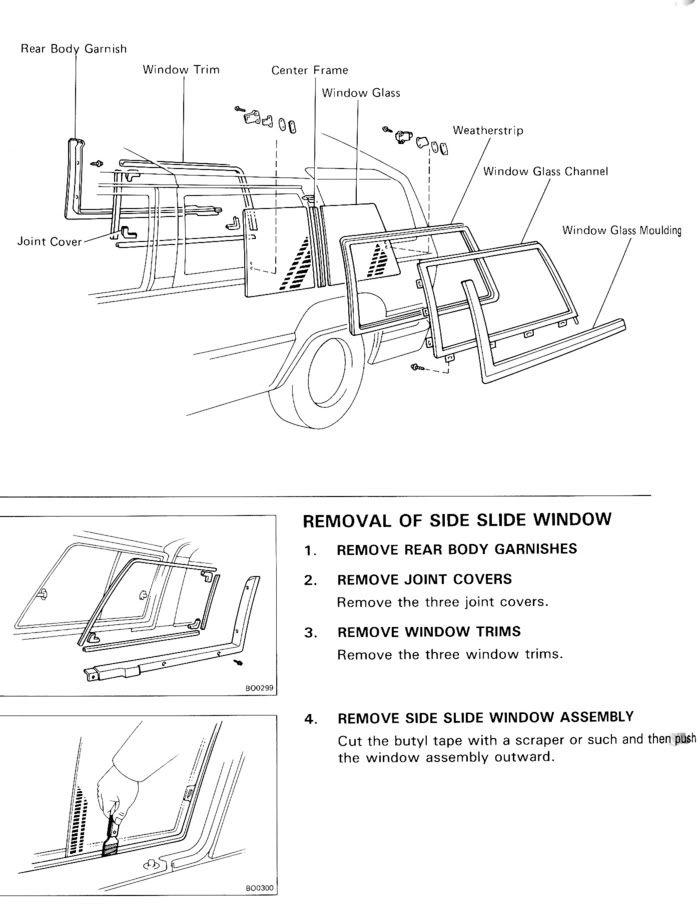
As far as the plastic peice that says 4runner on it thats attached to the cab, easy to remove. The black thin metal peices on the factory hard top i have not figured out how to remove.Terry said he knows how to do it which i need to learn because mine are rusted at the horizontal bottom runs towards the rear where i assuming is no drain for the water hence the rust holes. Kyle has a matching set off his runner that was rolled (now cracked eggshell style hardtop)but has great looking trim peices still which will be on mine when i figure out how to take them out with destroying them.
Apr 25, 2013 | 06:07 PM
#44
Thread Starter
Registered User
Joined: Dec 2012
Posts: 59
Likes: 0
From: Pittsboro, NC
I got the plastic 4 runner pieces off no problem. Terry i would be very great full for those pictures on the L pieces.
Had my buddy help get the dash back in tonight. I'll get some pictures posted soon. It looks pretty sweet.
Had my buddy help get the dash back in tonight. I'll get some pictures posted soon. It looks pretty sweet.
Apr 25, 2013 | 06:10 PM
#45
The whole window has to come out and the L trims are held in with some screws once the window is out. You have to take the interior plastic covers off that cover the bolts that you take out to take the cover off with.
The way I do it but isnt as clear in the FSM is on the passenger side I put my feet in the floorboard and my knees in the passenger rear seat. With my left elbow in the top most forward corner with my fore arm running the length of the top all the way to my fist/wrist.
I try to distribute pressure all along the top and maybe a little more on my elbow to start breaking the seal at the top forward corner and when I get a crack in the glue btween the fiberglass top and the glass assembly, I use a putty knife with my right hand and use it to help cut the glue and help break the seal.
Also before I start this, I open the front glass of the fiberglass cover so as I can be ready to hook my arm thru the opening to keep it from falling to the ground. If you can have somebody standing on the outside of the truck to help catch it, would be nice.
Slacker suggest using a heat gun to soften the glue. I have never had to reinstall the glass assembly, and I hear you can reuse the glue, but I have never done reinstall so you should check more into that.
I sent Jason in tn some of the plastic pieces and he installed them on his runner. He might have some tips for you on that. It has been along time since I removed them so not much help there.
Here is Slackers >>>http://www.toyotafiberglass.com/4runner_10.html Just use the oppstite arms on the oppisite side.
Apr 25, 2013 | 06:12 PM
#46
 Apr 25, 2013 | 06:15 PM
#48
No problem kornhuskerwizard.. I like my way doing it better then what the FSM says but I dont have to cut all of the seal to do it. I try to cut it enough to loosen it and then try to keep it on the glass assembly or the top. Which ever is the easiest to do. It is some sticky stuff and you dont want to get it on you,
Apr 28, 2013 | 08:23 PM
#50
Thread Starter
Registered User
Joined: Dec 2012
Posts: 59
Likes: 0
From: Pittsboro, NC
THANKS Terry! idk if i'm going to replace those L pieces right now but i'm sure i will at some point. Seems like it is difficoult enough with 2 healthy hands, i'd probably hurt my self trying that right now.
Welcome to the build junk4u. I painted it with rattle can rustoleum bed liner. You can get it at lowes for about 7 bucks a can.
I got the dash in the truck and buttoned up. Now i'm working on the seatbelts, seats, back panels, ect. My manifold should be coming tomorrow so hopefully this thing will run with in a week or 2.


 May 5, 2013 | 06:56 PM
#52
Thread Starter
Registered User
Joined: Dec 2012
Posts: 59
Likes: 0
From: Pittsboro, NC
Tinkered with the yota this weekend. My body guy told me about a POR 15 product he called por putty.http://www.por15.com/EPOXY-PUTTY/productinfo/PU/ He used it fill in the rust holes in the wind shield frame on his old bug and worked great for him so i'm giving it a try. I gave it a try and it's looking great. I'll get the pictures posed when i get it sanded down.
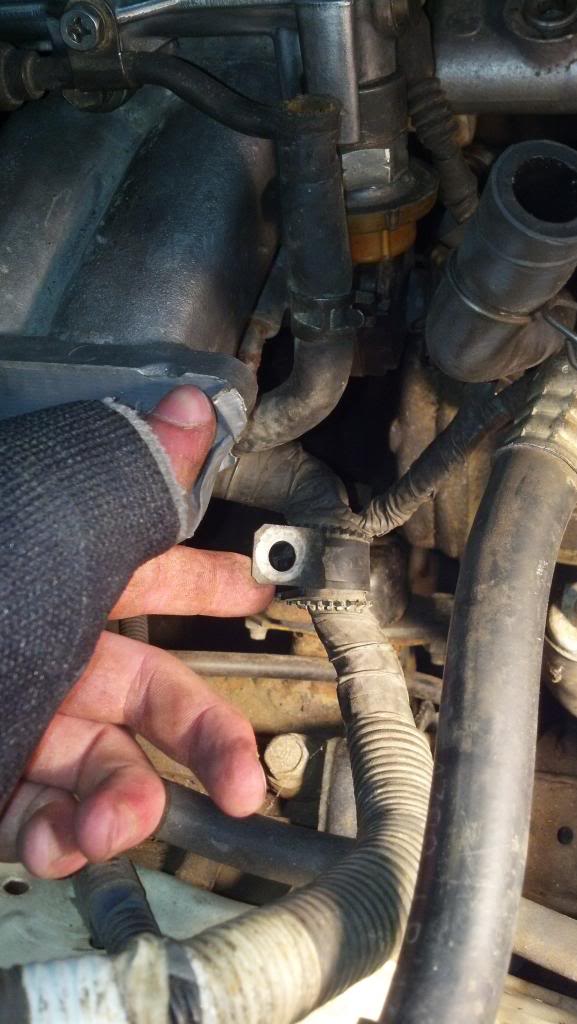
I've finally started putting everything back on the motor but all these plugs and grounds have me a bit confused. I'm a dumb ass and i didn't think to label as i disassembled.
Any one know the proper location for this ground? I think it comes out around the same spot the injector wires come out of the harness. I bolted it to the lower manifold.
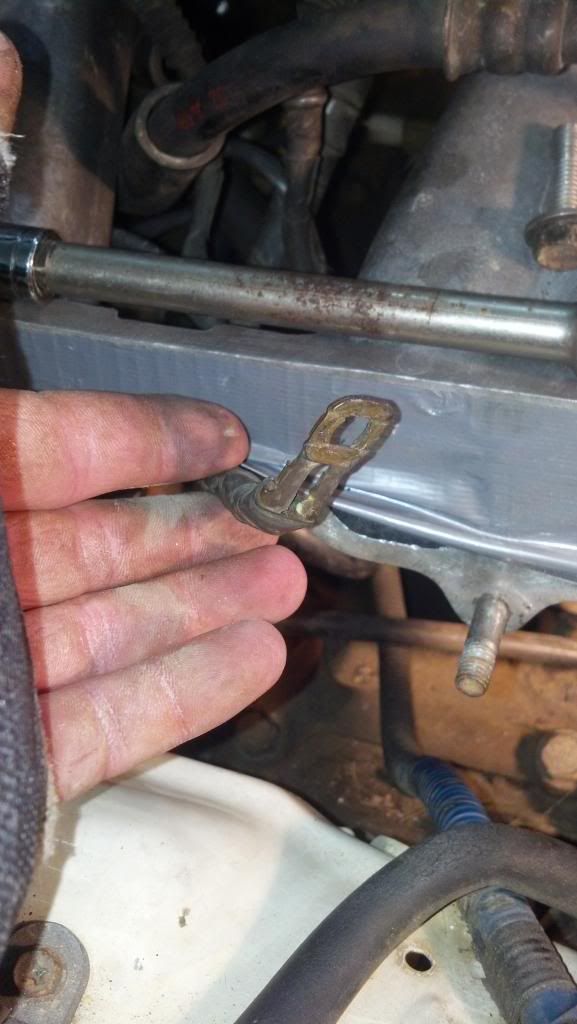
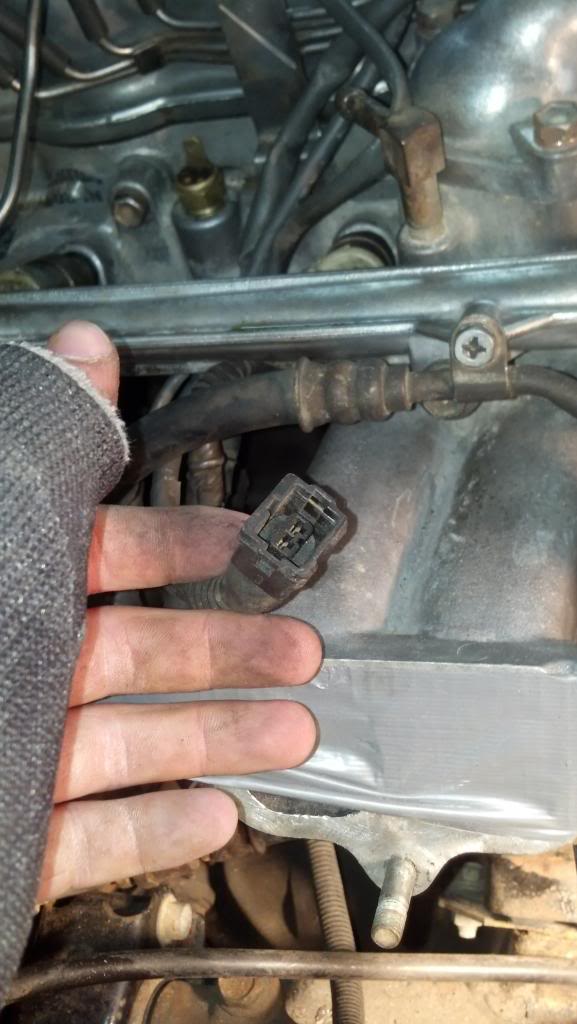
And here's another ground. I think?
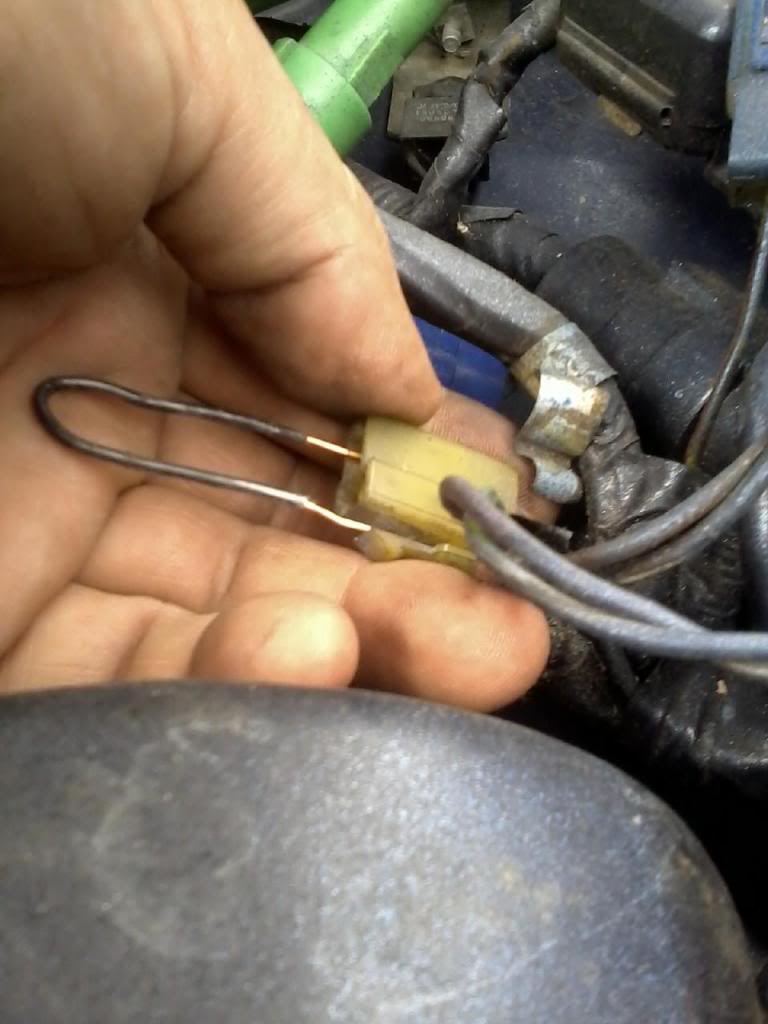
I'm thinking this is the plug that goes to the cold start injector or is the blue one?
I've finally started putting everything back on the motor but all these plugs and grounds have me a bit confused. I'm a dumb ass and i didn't think to label as i disassembled.
Any one know the proper location for this ground? I think it comes out around the same spot the injector wires come out of the harness. I bolted it to the lower manifold.
And here's another ground. I think?
I'm thinking this is the plug that goes to the cold start injector or is the blue one?
May 5, 2013 | 08:37 PM
#53
Registered User
Joined: Apr 2013
Posts: 8
Likes: 0
From: Garner, NC
Ground
The ground can go to any of your intake bolts that plug looksike to me it goes on the upper intake manifold if you haven't already figured those out I just rebuilt my pickup and had the same issues putting it back together
May 14, 2013 | 02:23 AM
#54
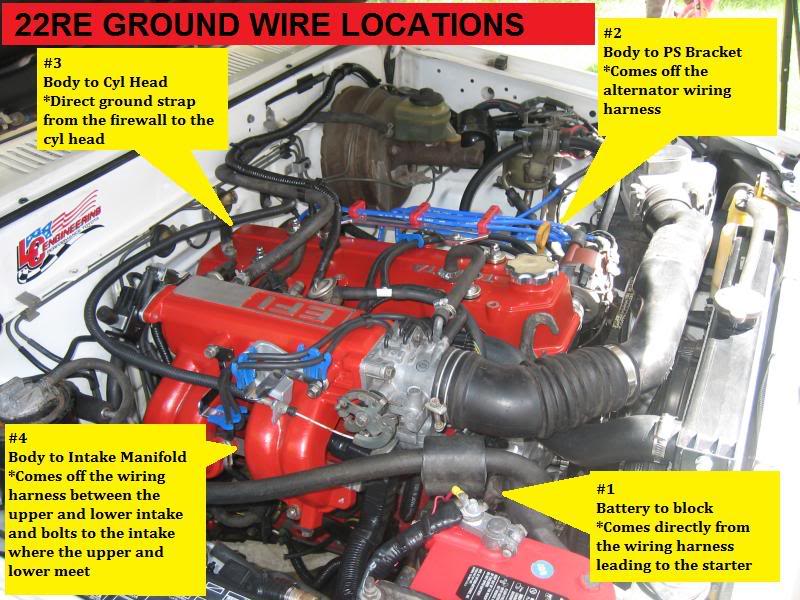
Your first picture is the ground that mounts on one of the back bolts of the intake manifold like in the picture below.
The second picture is just a support clamp for the harness. It goes on the front bolt of the intake manifold.
The third picture looks like your Cold Start Inject Timing Switch that is under the Thermostat area. You should have a green sensor setting to the right?? ( I think, could be on the left) of the Timing Switch. I can get a picture of it if need me to.
I remember having a cast just like that only it was on my right hand. It gets itchy and when they take it off, the skin is sensitive afterwards for a day or so. Hope it get better for you.
 [/
[/
The second picture is just a support clamp for the harness. It goes on the front bolt of the intake manifold.
The third picture looks like your Cold Start Inject Timing Switch that is under the Thermostat area. You should have a green sensor setting to the right?? ( I think, could be on the left) of the Timing Switch. I can get a picture of it if need me to.
I remember having a cast just like that only it was on my right hand. It gets itchy and when they take it off, the skin is sensitive afterwards for a day or so. Hope it get better for you.
[/
Jun 25, 2013 | 05:40 PM
#56
Thread Starter
Registered User
Joined: Dec 2012
Posts: 59
Likes: 0
From: Pittsboro, NC
I'm back!... again. I guess I get bored with my projects and have to take a few weeks off of them then get back going again. But anyways I have the motor all together or at least I though. It turns over and sounds normal while the starter is spinning but I can't get power to the fuel pump.  I'm searching right now to see if it is common for any of the relays in the efi system to go bad. I've checked all the fuses and their all good. I'm really wanting to get this thing on the road now since its summer!
I'm searching right now to see if it is common for any of the relays in the efi system to go bad. I've checked all the fuses and their all good. I'm really wanting to get this thing on the road now since its summer!
Jul 2, 2013 | 12:47 AM
#57
Your welcome junk4u.
I am having some issues as well and one is how to see if your pump is good. Here is one way to see if your pump is working. Also your COR which is behind the passenger front speaker could be the culprit and is your AFM working properly? When the flapper inside is moved it somehow kicks on the fuel pump. I think thru the COR relay but dont fully understand that circuit. I think the jumper wire bypasses the COR???
Copied from my 86 build.
Here is how you do a Fuel Pump Bypass on the 85/86.
Jumper wire the Yellow Plug on Drivers side. ( Jumper wire should be in both contacts for testing, I just didnt have it in for picture purposes and mostly a referece for me at a later time.)
With the jumper wire in and the key turned on, I was able to fill the cup up in about a minute or so. The return hose goes to where my finger is pointing. This is the metal line that I suggest taking an air hose and seeing if it is clear all the way to the fuel pump bracket. I have seen this line and the "J" line on the bracket clogged several times.

I am having some issues as well and one is how to see if your pump is good. Here is one way to see if your pump is working. Also your COR which is behind the passenger front speaker could be the culprit and is your AFM working properly? When the flapper inside is moved it somehow kicks on the fuel pump. I think thru the COR relay but dont fully understand that circuit. I think the jumper wire bypasses the COR???
Copied from my 86 build.
Here is how you do a Fuel Pump Bypass on the 85/86.
Jumper wire the Yellow Plug on Drivers side. ( Jumper wire should be in both contacts for testing, I just didnt have it in for picture purposes and mostly a referece for me at a later time.)

With the jumper wire in and the key turned on, I was able to fill the cup up in about a minute or so. The return hose goes to where my finger is pointing. This is the metal line that I suggest taking an air hose and seeing if it is clear all the way to the fuel pump bracket. I have seen this line and the "J" line on the bracket clogged several times.

Last edited by Terrys87; Jul 2, 2013 at 12:51 AM.
Oct 17, 2013 | 12:00 PM
#58
Thread Starter
Registered User
Joined: Dec 2012
Posts: 59
Likes: 0
From: Pittsboro, NC
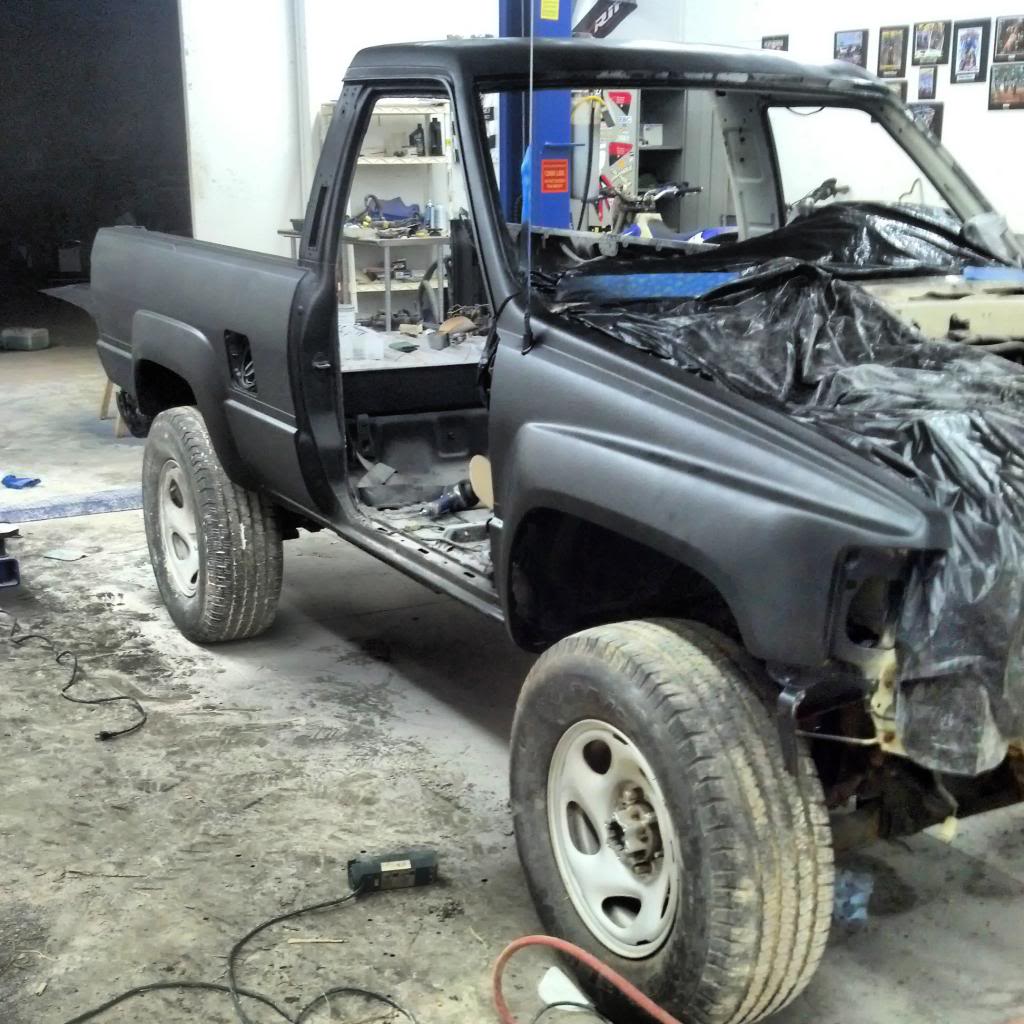
Back working on the truck again. I'm busting my ass on it when i'm home from school since I can finnaly see the light at the end of the tunnel. Here's some eye candy for you...
http://i1295.photobucket.com/albums/b638/yotagoon/IMG_20131008_001914_zpsb126ace1.jpg[/IMG]
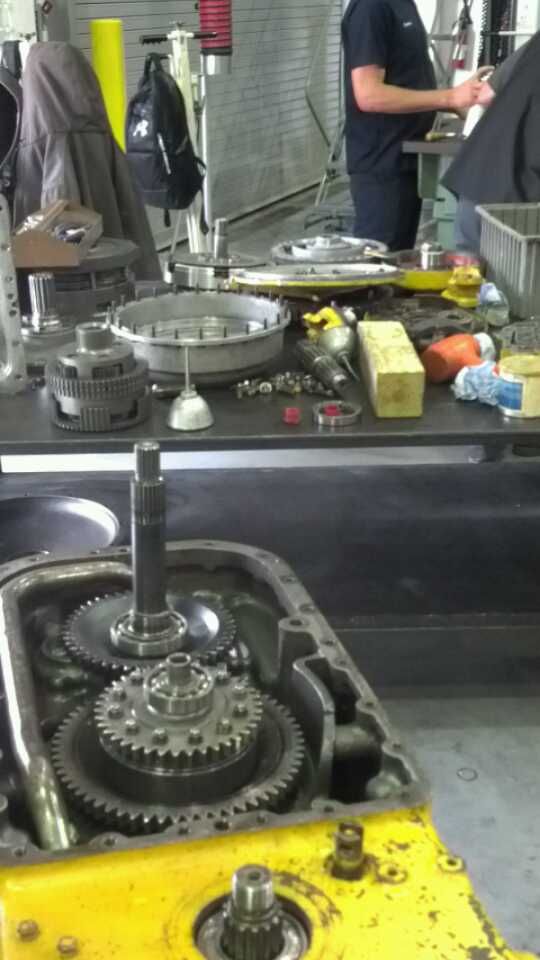
Here's some cool stuff from school. This is a transmission out of a john deere 544 front end loader

http://i1295.photobucket.com/albums/b638/yotagoon/IMG_20131008_001914_zpsb126ace1.jpg[/IMG]
Here's some cool stuff from school. This is a transmission out of a john deere 544 front end loader
Last edited by yotagoon; Oct 17, 2013 at 12:01 PM.