
xxxtreme22r's 1987 Pickup Build-Up Thread
 Mar 5, 2011 | 01:31 PM
#661
Damn, I sure am glad I don't live anywhere around you, some of the dealerships I have worked at wont even take east coast cars in on trade. Sucks you didnt get the springs on though.
Mar 5, 2011 | 01:33 PM
#662
Thread Starter
Registered User
Joined: Aug 2009
Posts: 13,574
Likes: 72
From: Wilkes-Barre, PA, USA
I'd be willing to bet, that the guy who repaired my frame 2 years ago right above those mounts had the same issue. There is two different bolts on each side. OEM one looks to still be in the drivers side. But not in the passengers side. He never did mention any problems though. And cutting the mount off to make it easier to free the bushing wouldn't have been an issue for him has the had to reweld that mount on anyway because it was already separated from the frame to begin with.
This is one of those reasons why I want to learn how to weld. Can't afford the $300 for the course though. Nor the money to buy a welder.
This is one of those reasons why I want to learn how to weld. Can't afford the $300 for the course though. Nor the money to buy a welder.
Mar 5, 2011 | 01:37 PM
#663
I am in the same boat, every time a welder comes up at a decent price the wife has other plans for the money like stuff for the kid.
Mar 5, 2011 | 01:49 PM
#664
True, Mr. Woods, ...and, even when they're 'EX' status.....they're still trying to take every spare dime you have for 'this or that'.....I SURE WISH most of it had gone to my kids! Grrr! hahaha.
Ok, so, DANGIT, BRANDON! Sorry to see you got hung up man! Glad you are getting it figured out though.
Ok, so, DANGIT, BRANDON! Sorry to see you got hung up man! Glad you are getting it figured out though.
Mar 5, 2011 | 01:59 PM
#665
YotaTech Milestone-Two Millionth Post
Joined: Jan 2009
Posts: 12,009
Likes: 122
From: Northeast Pennsylvania
went something like "i don't want your truck on fire in my garage".
even though i'm the one saying it, i wouldn't call today a dry-run at all.....we did alot of figuring out......1s and foremost, that the stands do need to be THAT high (i have tall stands) to allow the droop.
secondly.....pretty much perfected the technique for those u-bolts
3rd....probably should find some bump-stops ASAP.
4th....need air tools
5th....need it to be about 72 degrees out
so anyway.......yeah....as is my nature lately, i chickened out when it looked like this was gonna end up as you beached at my house or my house burning down.
anyone who doesn't live near us should just assume it's gonna take 3 times longer with rust on this stuff than it does where you live.
Mar 5, 2011 | 02:04 PM
#666
Thread Starter
Registered User
Joined: Aug 2009
Posts: 13,574
Likes: 72
From: Wilkes-Barre, PA, USA
and u-bolts in PA are not reusable. lol. Sorry Rob, I know ya said they are but.....
I wonder if I just grind down that tiny bit of a corner on the u-bolt it wouldn't affect the strength?
For the bump stops I had planned on putting them on the stopper that is attached to the frame. Basically upside down. But might after this rethink it. ANd possibly take kiobrown up on those bump stops as well.
Mar 5, 2011 | 03:24 PM
#667
YotaTech Milestone-Two Millionth Post
Joined: Jan 2009
Posts: 12,009
Likes: 122
From: Northeast Pennsylvania
so here's kinda what i think you should do before we meet again. Now that I've had time to think about it.
short list:
douche those u-bolts off(driver's side)......brush and floss them w/ PB Blaster. I honestly think the threads have changed shape due to corrosion, but in case they are still somewhere near normal, give them the business.
I have an angle grinder and plenty of wheels........but they are thick and the bolts are high.....not sure you can reach them.....1 way to find out. save your discs you have and use mine. i hesitated saying this at my house because of the fountain of sparks it will make. probably will cut like butter, but in this case, is faster better? if the sawzall will do the trick w/o sparks......use it.
cut those bolts, do what you gotta do to get this back out here....safely. i know you can't exactly twirl those u-bolt nuts on and off ....maybe install the other u-bolts in your leisure time.....you've done tougher by yourself.
check out what you can find about the t-bars.......find the worse case scenario too, since we seem to have gotten fairly good at that....."prepare for the worst, hope for the best"...the eternal universal motto of the ER. i think what i said about how to do it is likely the way to do it......to be honest, since cranking the t-bars and pounding the pinch weld are your only 2 options right now up front, it would probably be wise to approach this from the front end 1st.....just to see what we are up against. so i'm saying, see if you can or cannot crank those......and should you or should you not at this point.
cut those u-bolts
try to get a wrench on anything wrenchable.
Mar 5, 2011 | 03:54 PM
#668
YotaTech Milestone-Two Millionth Post
Joined: Jan 2009
Posts: 12,009
Likes: 122
From: Northeast Pennsylvania
Jason is aware of the PM.....I texted him too......he is knee deep in an alarm install right now and i guess also having a time of it. he said he DOES have them.......and I'm sure they are recognizable......not like what used ti be on your's....he will be in contact wit you
Mar 5, 2011 | 05:01 PM
#669
Thread Starter
Registered User
Joined: Aug 2009
Posts: 13,574
Likes: 72
From: Wilkes-Barre, PA, USA
thanks. I think the only thing I might get away with in my "driveway" is hacking those bolts off and drilling out the mount for that 3/4" hardware.
I'll look into the whole crank t-bar thing, I know some are against it, but like I said I have no clue as to where the springs are gonna put me in the back as far as height but I doubt it's gonna be to where I have to crank the t-bars that much.
I'll look into the whole crank t-bar thing, I know some are against it, but like I said I have no clue as to where the springs are gonna put me in the back as far as height but I doubt it's gonna be to where I have to crank the t-bars that much.
Mar 7, 2011 | 06:10 AM
#670
Thread Starter
Registered User
Joined: Aug 2009
Posts: 13,574
Likes: 72
From: Wilkes-Barre, PA, USA
I love when I confuse myself.
Now looking at greasable bolts there is only the option for 18mm bolts. Not 19mm. 19mm is closest to 3/4" hardware. Notice how 4craweler mentions the front spring hanger being 19mm (3/4") but also says the rear shackles are 18mm (3/4") hardware? Then also says if you want greasable bolts for the front hanger omit the sleeve and order the 18mm bolts?
Is he assuming the grease will take up the slack of the 1mm off? Or is it enough to even worry about? I bought those 3/4" bolts, but rethinking the whole greaseable bolt thing now and just want to be sure 18mm is the right size for the front and won't be too small.
This is also interesting http://www.pirate4x4.com/forum/showthread.php?t=790316 and a bit confusing as well. I wonder what the real ID is of the Energy Suspension bushings. As it seems to be different between the Daystars and the Trail-Gear bushings. Where TG is 18 ID and the Daystar is 19 ID.
Of course that thread also brings up to debate sleeve or no sleeve a well. Which I know I had said something to Jerry while we were there that you have to be careful torquing the front hanger down because there is no sleeve in there. Which is why I was gonna double nut the front bolts to lock it into place.
The 3/4" bolts I have fit nicely though the ES ones I got so I would assume that they are 19mm and not 18mm. Testing them with the rear bushings is a little tighter than the front bushings and would assume the rear shackle bushings would be 18mm. Maybe I will try to slide the shackle bolts though the front ES bushings and see exactly how loose the 18mm hardware is. I assume the new shackles I got are 18mm.
Dang I make things so complicated. hahaha.
Two sizes of bushings are common on Toyota trucks, 30mm OD and 40mm OD.
* The small 30mm OD bushings are used in the shackle hangers and rear springs eyes on the early trucks
o These are plain bushings, no sleeve, inside or outside, 18mm (or 3/4") ID
o Cost (per pair as in two bushing sets, enough to do two spring eyes or two shackle hangers) is:
+ $10.00/pr. for the narrow bushings (can be used in the spring eye or rear shackle hanger)
+ $15.00/pr. for the wider front "through-the-frame" shackle hanger bushing or the wider 3rd gen pickup or Tacoma shackle hangers
+ Add $5.00/pr. for bushing drilled to accept 3/4" hardware
* The large 40mm OD bushings are used in some spring eyes on the later trucks
o In OEM form, these bushings have an inner and outer sleeve and are pressed into the spring eye and need to be cut or pressed out to replace.
o The bushings have a removeable inner sleeve to allow use of either 14mm (9/16") 19mm (3/4") hardware
7. Does 4Crawler Offroad offer greasable shackle bolts?.
3. For example, on Toyota bushings, the sleeves have an ID of 14mm and an OD of 18mm and in the poly bushings, the sleeve is easily removeable. So, if you want a greaseable bolt in a normally sleeved bushing, simply order the poly replacement bushing, omit the sleeve when installing it and specify that the bolt for the shackle be made in 18mm instead of the stock 14mm size.
3. For example, on Toyota bushings, the sleeves have an ID of 14mm and an OD of 18mm and in the poly bushings, the sleeve is easily removeable. So, if you want a greaseable bolt in a normally sleeved bushing, simply order the poly replacement bushing, omit the sleeve when installing it and specify that the bolt for the shackle be made in 18mm instead of the stock 14mm size.
Is he assuming the grease will take up the slack of the 1mm off? Or is it enough to even worry about? I bought those 3/4" bolts, but rethinking the whole greaseable bolt thing now and just want to be sure 18mm is the right size for the front and won't be too small.
This is also interesting http://www.pirate4x4.com/forum/showthread.php?t=790316 and a bit confusing as well. I wonder what the real ID is of the Energy Suspension bushings. As it seems to be different between the Daystars and the Trail-Gear bushings. Where TG is 18 ID and the Daystar is 19 ID.
Of course that thread also brings up to debate sleeve or no sleeve a well. Which I know I had said something to Jerry while we were there that you have to be careful torquing the front hanger down because there is no sleeve in there. Which is why I was gonna double nut the front bolts to lock it into place.
The 3/4" bolts I have fit nicely though the ES ones I got so I would assume that they are 19mm and not 18mm. Testing them with the rear bushings is a little tighter than the front bushings and would assume the rear shackle bushings would be 18mm. Maybe I will try to slide the shackle bolts though the front ES bushings and see exactly how loose the 18mm hardware is. I assume the new shackles I got are 18mm.
Dang I make things so complicated. hahaha.
Last edited by xxxtreme22r; Mar 7, 2011 at 06:33 AM.
 Mar 7, 2011 | 09:51 AM
#673
HEY there, Brandon,  ,
,
Sorry man, I HATE those types of decisions as well! I wish I knew more on these, but for now, I slapped in the Zuk, so I'm at least not bottoming out and smashing my kidneys any longer, eh? hahaha. Some day, I'll worry about going "all new" or Modded in the rear.(DEFINITELY NOT OEM leaf pack!!! Something with longevity).....Probably not for a while.
BTW, I twisted my ankle pretty good, so I just gave up trying to keep up or add anything in mine for a couple days, lol. It's feeling better, already, but those, I think it's my Extensor Tendons, HOLY CRAPOLI, THE PAIN!...hahah... Yes, it's extensor, not extendor, hahaha. Anyway, rootin you on from my chair or hobbling around the kitchen! woot, woot!
, Sorry man, I HATE those types of decisions as well! I wish I knew more on these, but for now, I slapped in the Zuk, so I'm at least not bottoming out and smashing my kidneys any longer, eh? hahaha. Some day, I'll worry about going "all new" or Modded in the rear.(DEFINITELY NOT OEM leaf pack!!! Something with longevity).....Probably not for a while.
BTW, I twisted my ankle pretty good, so I just gave up trying to keep up or add anything in mine for a couple days, lol. It's feeling better, already, but those, I think it's my Extensor Tendons, HOLY CRAPOLI, THE PAIN!...hahah... Yes, it's extensor, not extendor, hahaha. Anyway, rootin you on from my chair or hobbling around the kitchen!
woot, woot!
Mar 7, 2011 | 10:09 AM
#674
Thread Starter
Registered User
Joined: Aug 2009
Posts: 13,574
Likes: 72
From: Wilkes-Barre, PA, USA
bababahahaha these guys are ruthless. http://www.pirate4x4.com/forum/showthread.php?t=775430 < disclaimer pirate links not family friendly. As if we didn't already know that. 
just researching these bolts a little more, came across that thread. I am glad I ain't that stupid to not research and realize these things actually have sleeves in the bushings.
just researching these bolts a little more, came across that thread. I am glad I ain't that stupid to not research and realize these things actually have sleeves in the bushings.
Mar 7, 2011 | 10:31 AM
#675
 ......GOOD LORD! lol. Yah, I wouldn't last a day there, ...I can't handle that kind of trash. Sure, the info is REALLY good sometimes, but worth it? HECK NO! lol.
 You close to gettin this sussed, homie?
 Mar 7, 2011 | 11:12 AM
#677
Yeah, I hear ya.... When I lived in Spokane, WA, it was one of the coldest couple winters in decades, and MAN it was NOT fun having to work on the snow mobiles and trucks in emergencies. Neither was septic work! lol. Anyway, I hope it calms down so you can get this done before inspection, etc.! I sure wish I could just ship you my All-weather 14x22 Easy Up with walls, you could pop on a propane heater and get'r'done,.....but alas, it would probably cost HUNDREDS to ship, hahaha. Any plans to get it back to Jerry's soon?
Mar 9, 2011 | 06:22 AM
#678
Thread Starter
Registered User
Joined: Aug 2009
Posts: 13,574
Likes: 72
From: Wilkes-Barre, PA, USA
only time you might hear me say this, but 8" is too big. I swear I measured and it said almost 7" and it was really 4".  That's what I gt for using a digital caliper instead of a tape measure I guess. ANyway, good thing, cus we woulda been stuck at Jerry's. Went back and saved myself $3 and got a set of 5" bolts instead. It's gonna be close to the tank but should work.
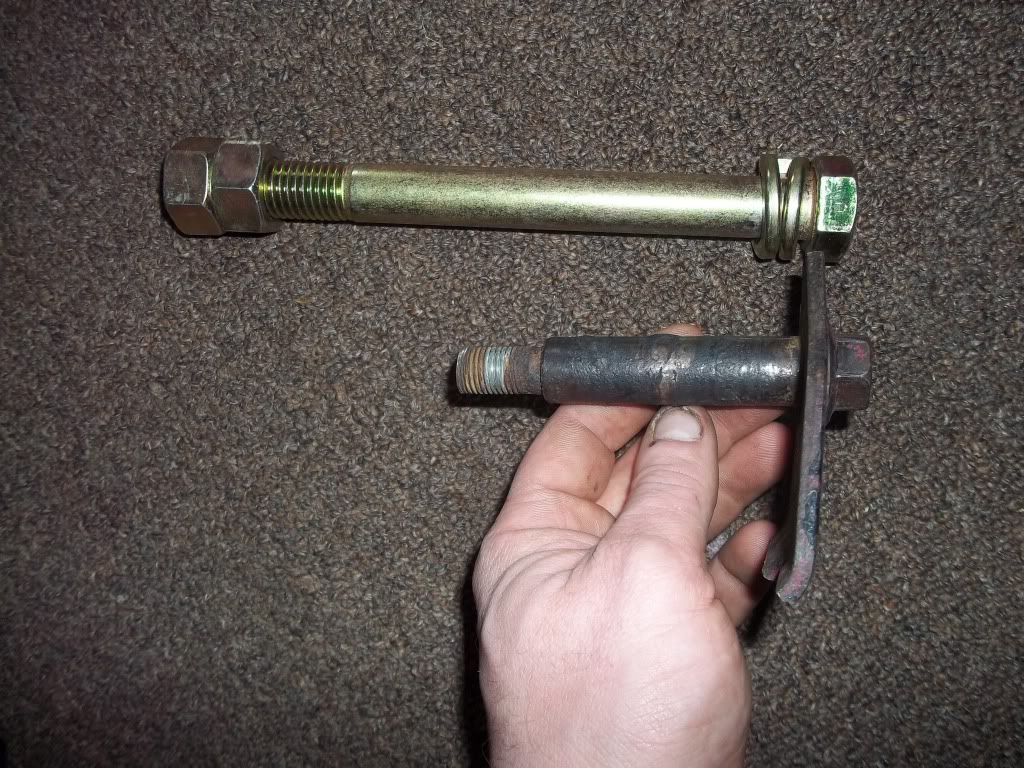
On a more positive note. 3 cutoff wheels and I WIN !!!!!! Note if using cut-off wheels 3" is too small as the arbor will hit the brack. Must use 4 or 4 1/2" wheels. This was done with my 18v hand drill BTW and not a rotozip, sawzall, or a grinder.
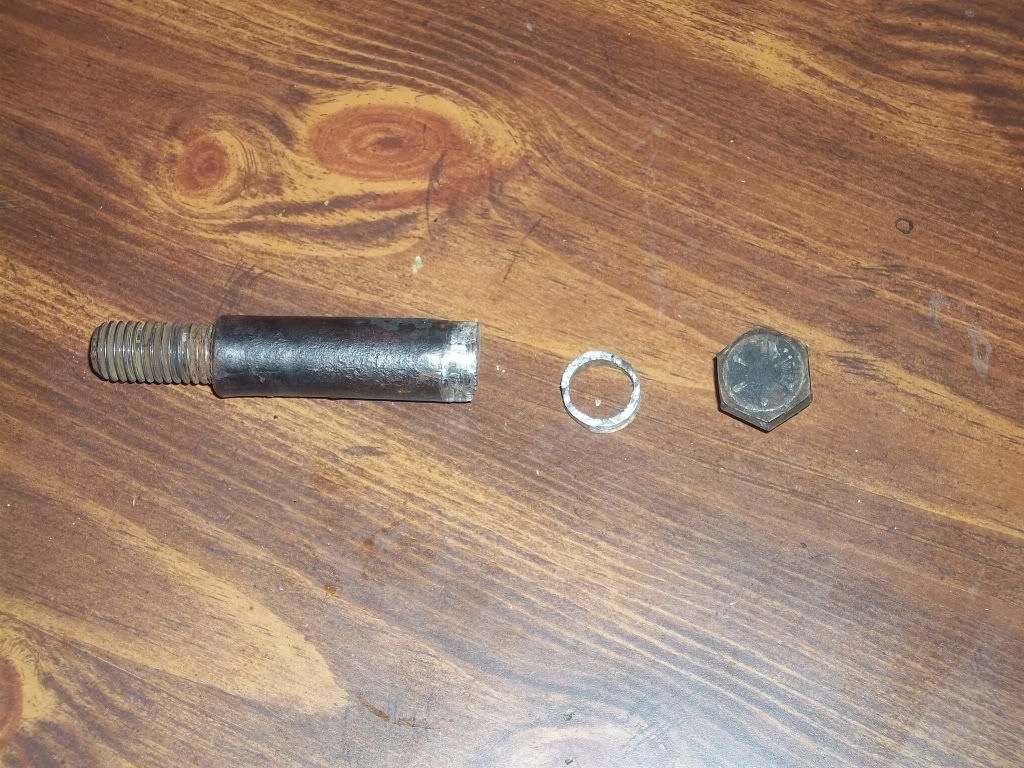
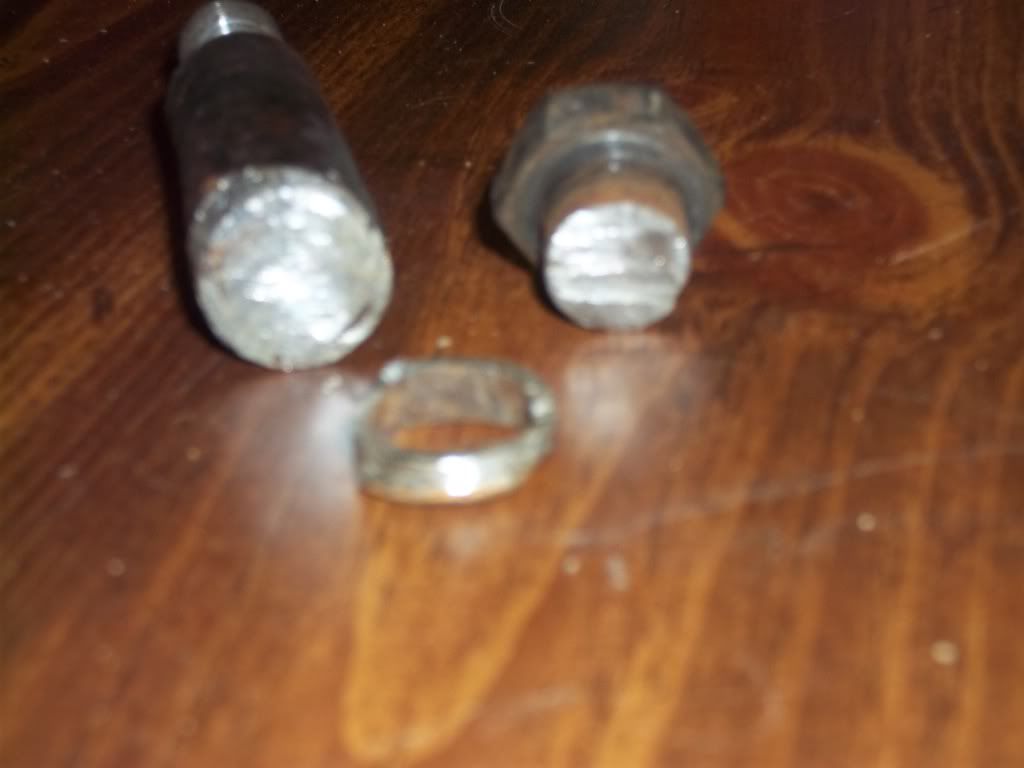
I kept the tires on for safety concerns but the frame is on a jackstand and the diff is ever so slightly held up with my hydraulic jack. A little pry on the leaf spring and on the back side of the bolt was plenty to grab the bolt from the outside with a pair of pliers to get it out of the bushing.
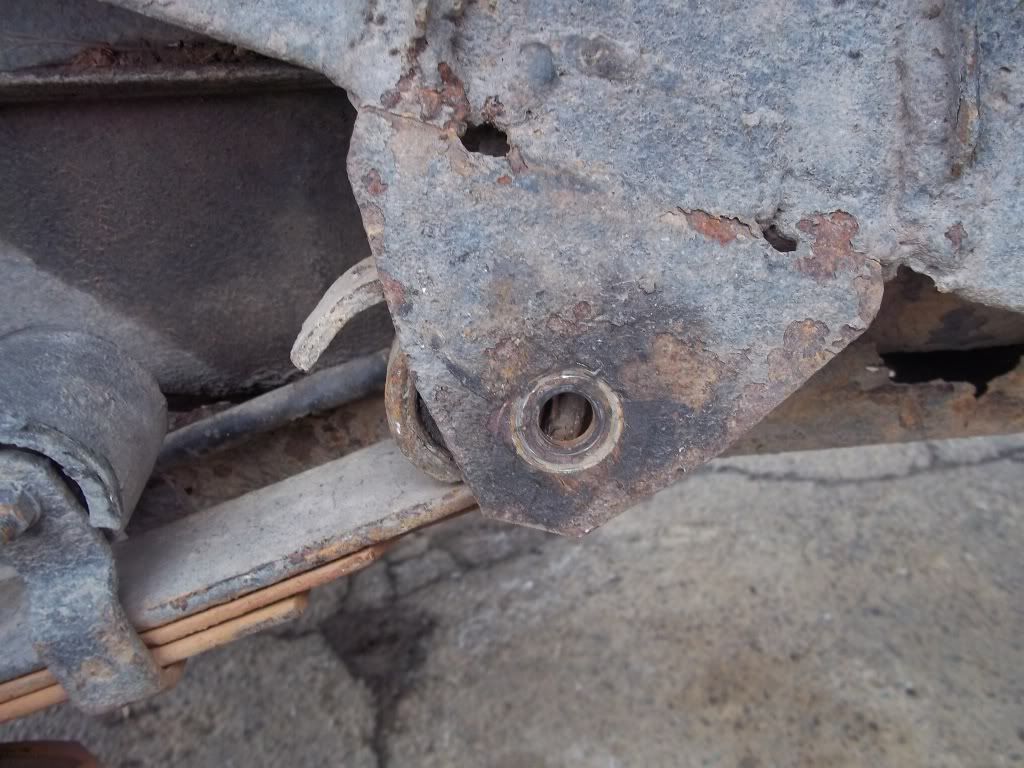
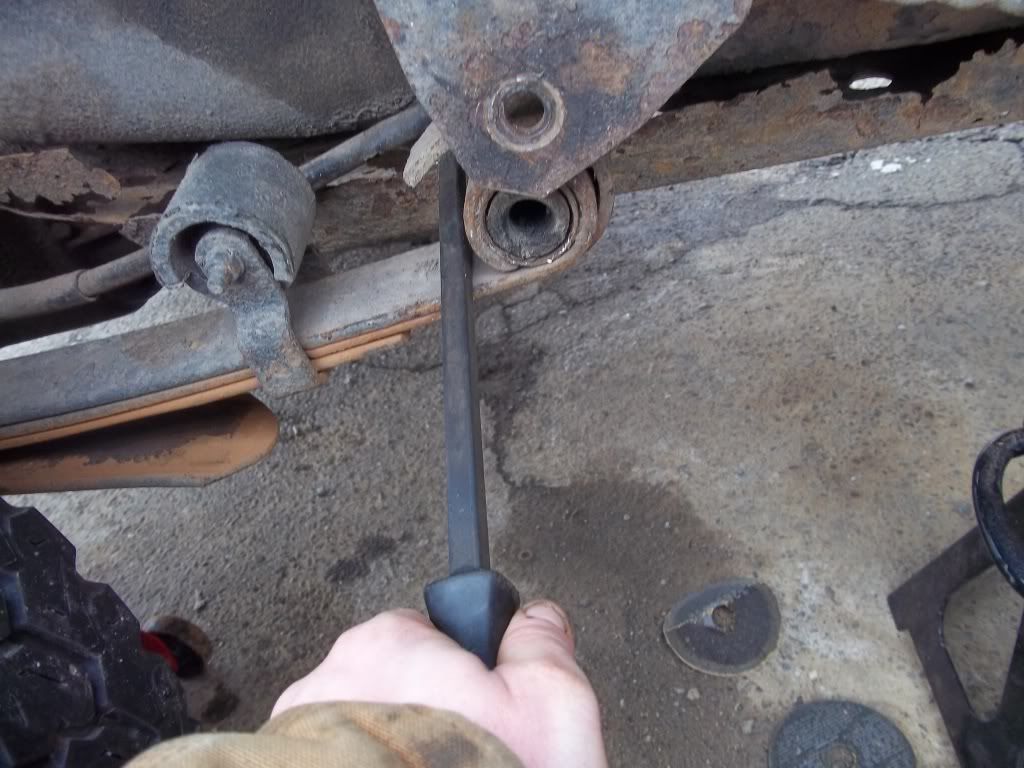
Still have to drill out the holes in the mount to 3/4" yet.
Now let's just hoe the other side is a little easier and the bolt slides out of the sleeve like it's supposed to. But not counting on anything.
That's what I gt for using a digital caliper instead of a tape measure I guess. ANyway, good thing, cus we woulda been stuck at Jerry's. Went back and saved myself $3 and got a set of 5" bolts instead. It's gonna be close to the tank but should work. On a more positive note. 3 cutoff wheels and I WIN !!!!!! Note if using cut-off wheels 3" is too small as the arbor will hit the brack. Must use 4 or 4 1/2" wheels. This was done with my 18v hand drill BTW and not a rotozip, sawzall, or a grinder.
I kept the tires on for safety concerns but the frame is on a jackstand and the diff is ever so slightly held up with my hydraulic jack. A little pry on the leaf spring and on the back side of the bolt was plenty to grab the bolt from the outside with a pair of pliers to get it out of the bushing.
Still have to drill out the holes in the mount to 3/4" yet.
Now let's just hoe the other side is a little easier and the bolt slides out of the sleeve like it's supposed to. But not counting on anything.


