When you click on links to various merchants on this site and make a purchase, this can result in this site earning a commission. Affiliate programs and affiliations include, but are not limited to, the eBay Partner Network.
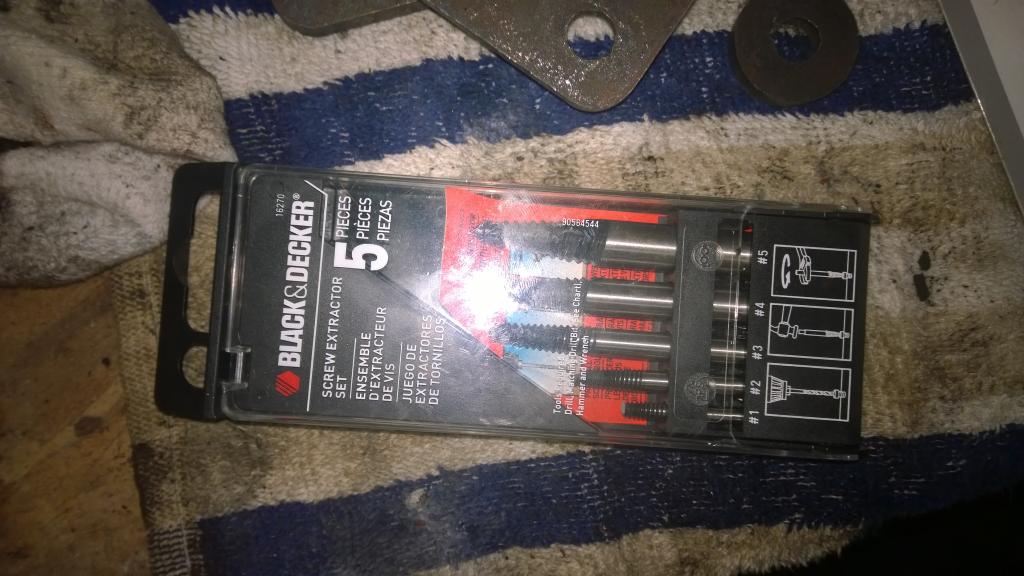
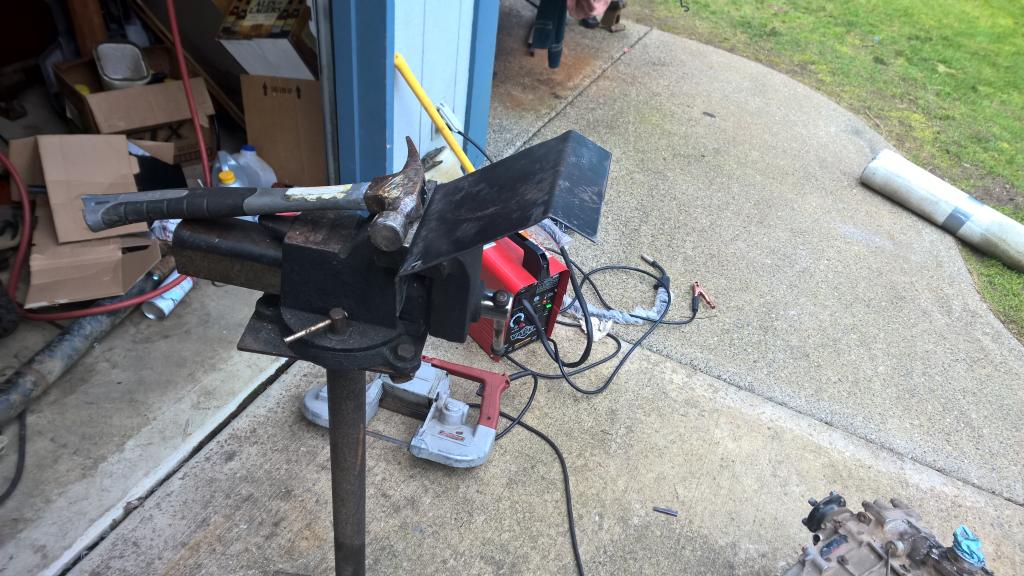
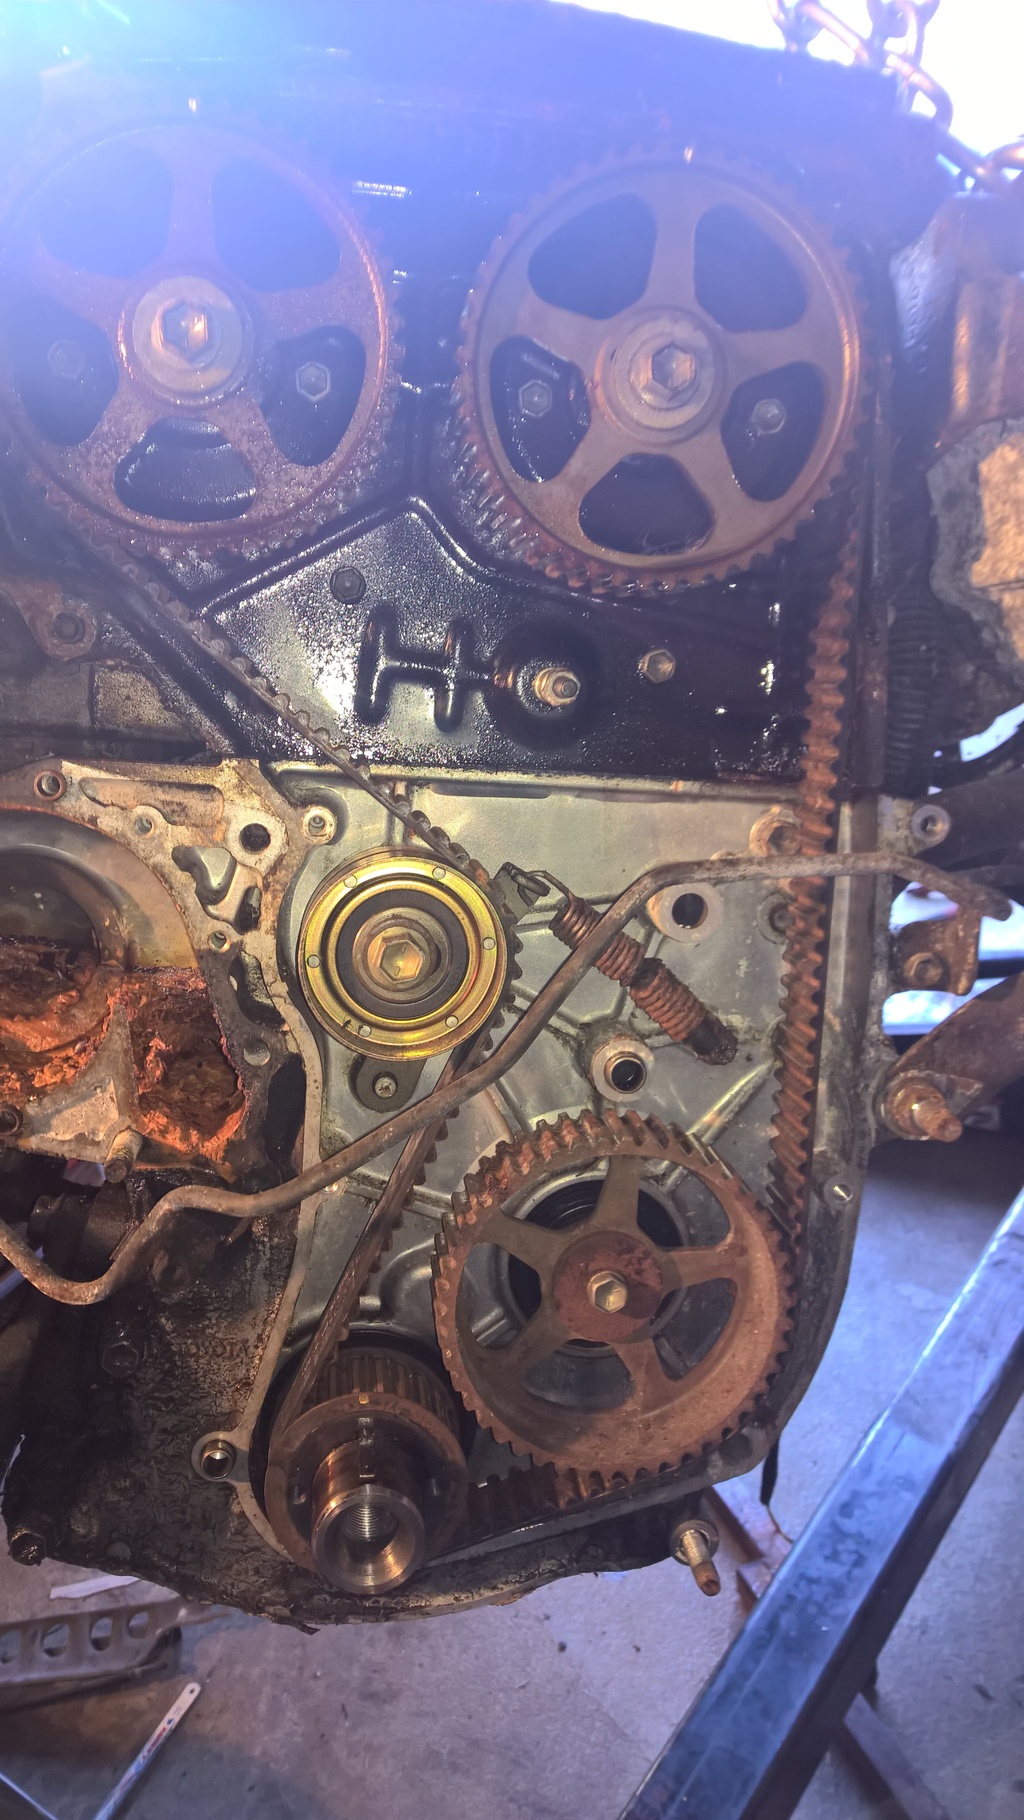
Got an hour with the motor last night. My parts came in and i was chomping at the bit to get them put on! only got to plugs and valve cover. In the process i decided i would take the timing belt cover off and access the thermostat. Bottom thermostat cover bolt snapped off immediately with very little torque. I had a little bit to grab with the vice grips but that too quickly snapped. So out came the drill. Quickly drilled through the bolt and figured, why not use that set of extractors that you have had exactly zero success with in the past?
If you look closely, there are three broken extractors...and the third one broke last night in the drilled out bolt. Luckily, I knew from previous experience that you cannot drill extractor bits. They are hardened steel and they will ruin every drill bit you throw at them. Thus, I had to drill around the bit and eventually pluck it out...It made quite the mess...(BTW, these extractors are going in the trash. I am never using them again. Drill out and re-thread from here on out.)
there is enough material to put a threaded insert in so no big deal, just annoying.
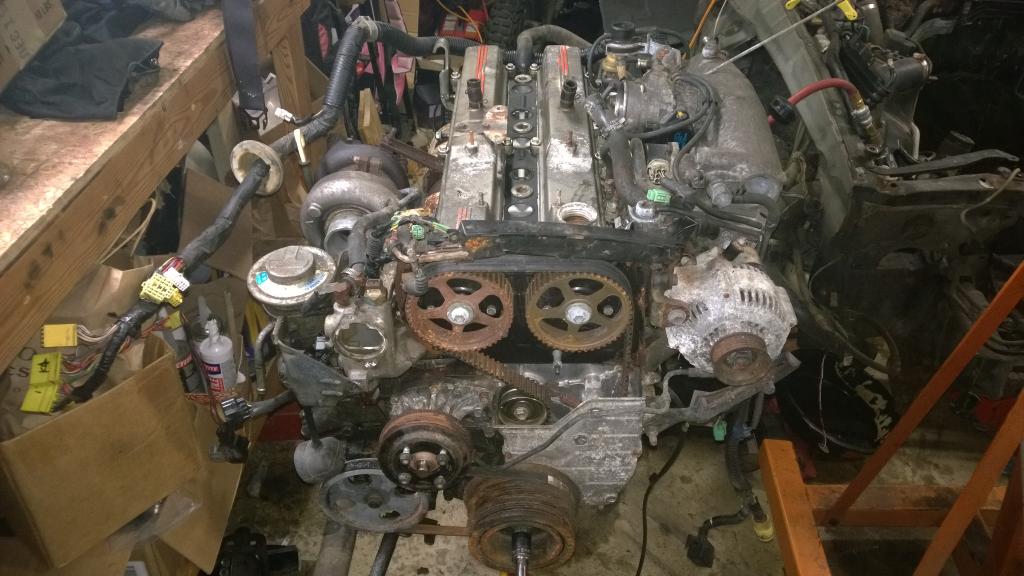
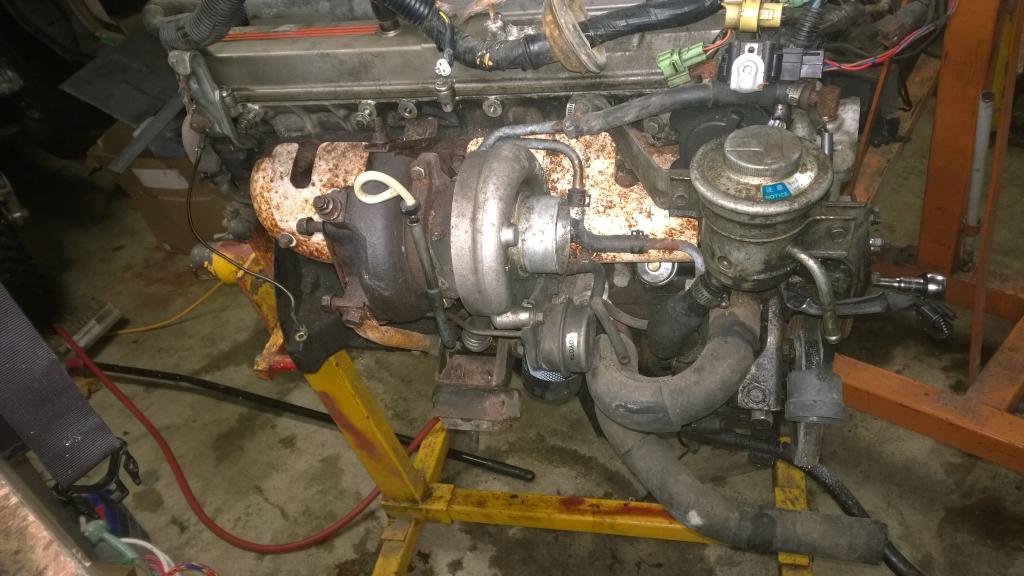
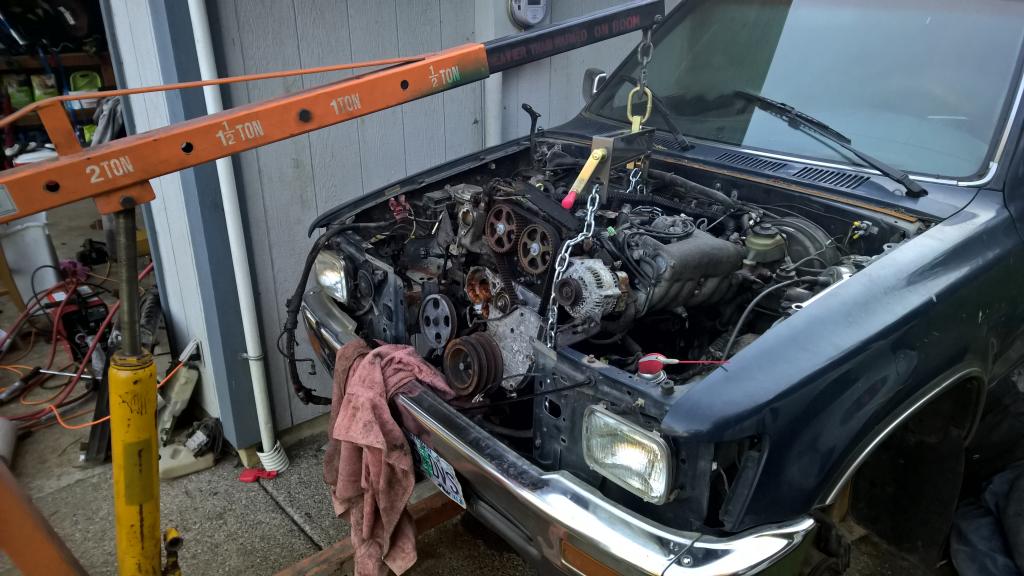
Since i will be working on the engine in the coming days to get it ready to put in the truck, It struck me on just how far deteriorated it is...I took pics and the flash really makes the rust 'pop'. I'm kind of embarrassed to even be considering using this engine at this point, but it is the only one i got. That being said, I am starting the look out for a new 7mgte to replace this one as it is just going to be problem after problem. It will however be extremely useful in that i can do anything i want to it and not worry about ruining anything as well as get all my mounts and plumbing set up so when i put a new 7mgte in it is a simply plug and play affair; do it in a weekend or quicker.
I will be deleting the EGR system, hopefully this Saturday. I was going to do a timing belt kit, as this timing belt is likely 15-20 years old but the 7mgte is a non interference engine and i want to hear this thing run before I put any more money into it. After putting the plugs in i cranked it over with a 19mm socket. Lots of leaking past the rings and hardly any compression. Hopefully it is just the rings kind of stuck to the pistons and when it runs the heat and oil loosens them up.
Huge weekend and Presidents day.
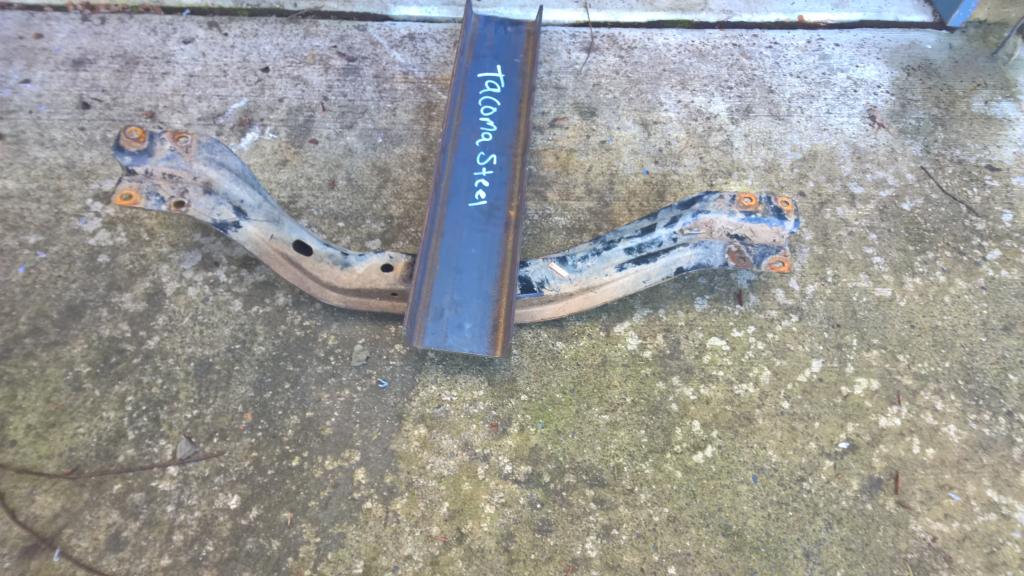
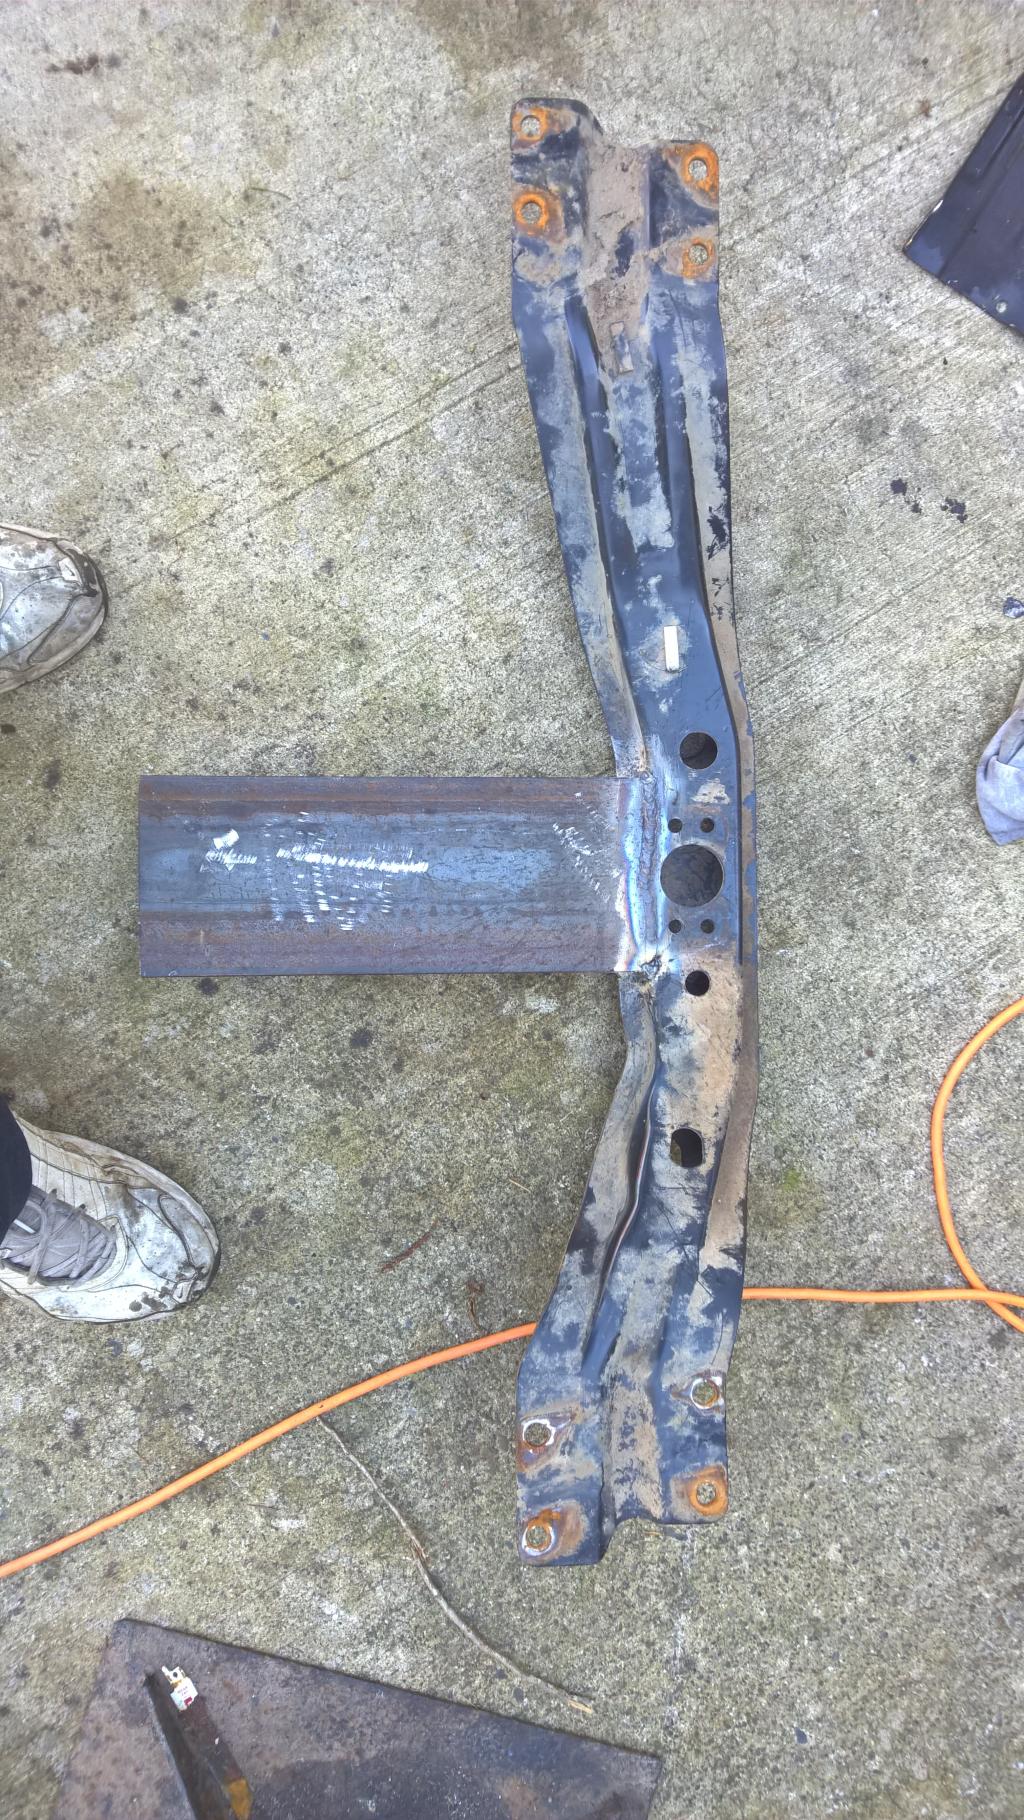
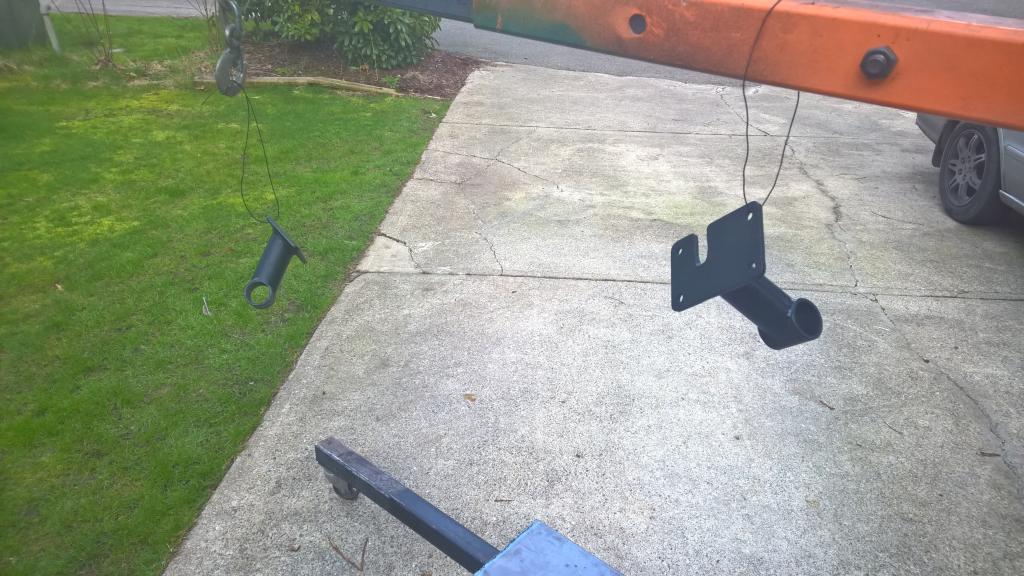
First i stopped by Tacoma Steel on Friday and got remnant scraps of 16 gauge, 1" pipe, and a U shaped piece of Iron, all for $15.
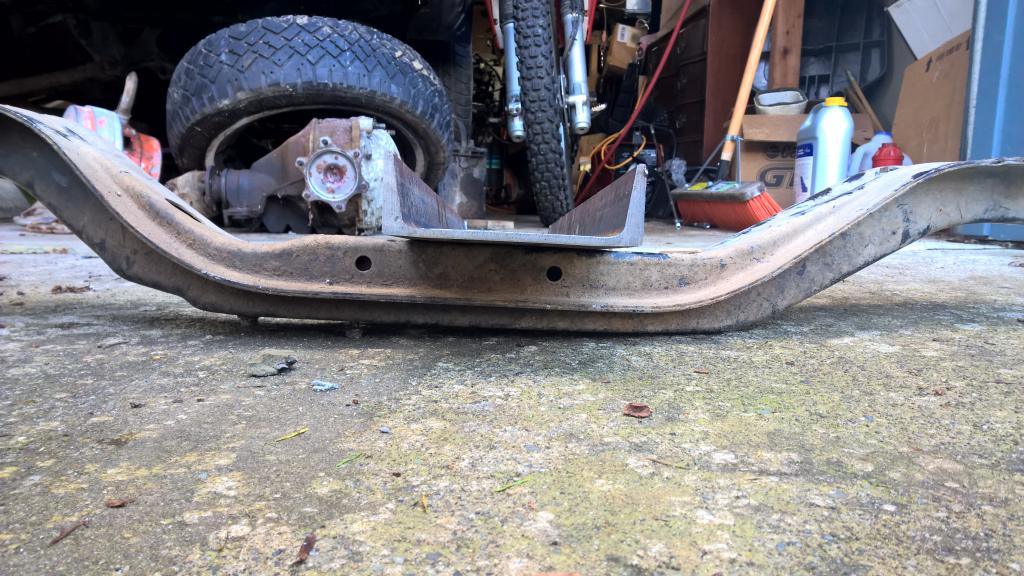
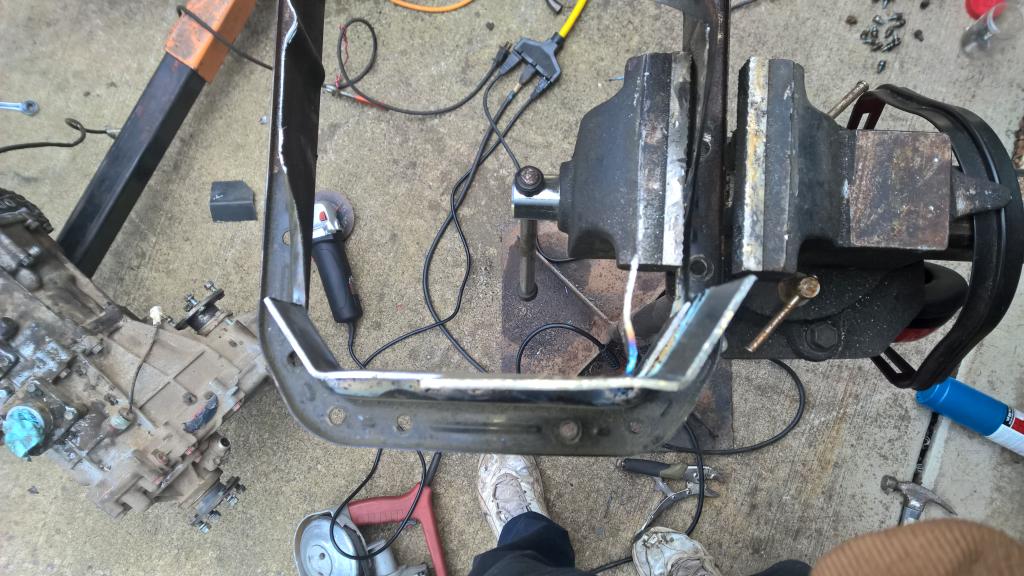
Here is the U shaped Iron That will be used as my transmission mount.
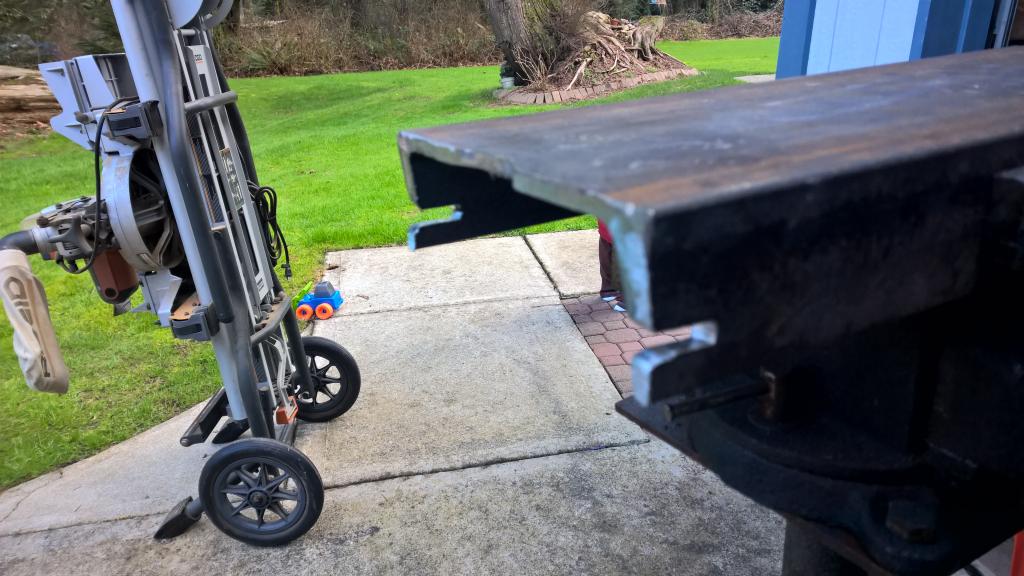
Here it is notched out so it will fit nicely for welding on the transmission support
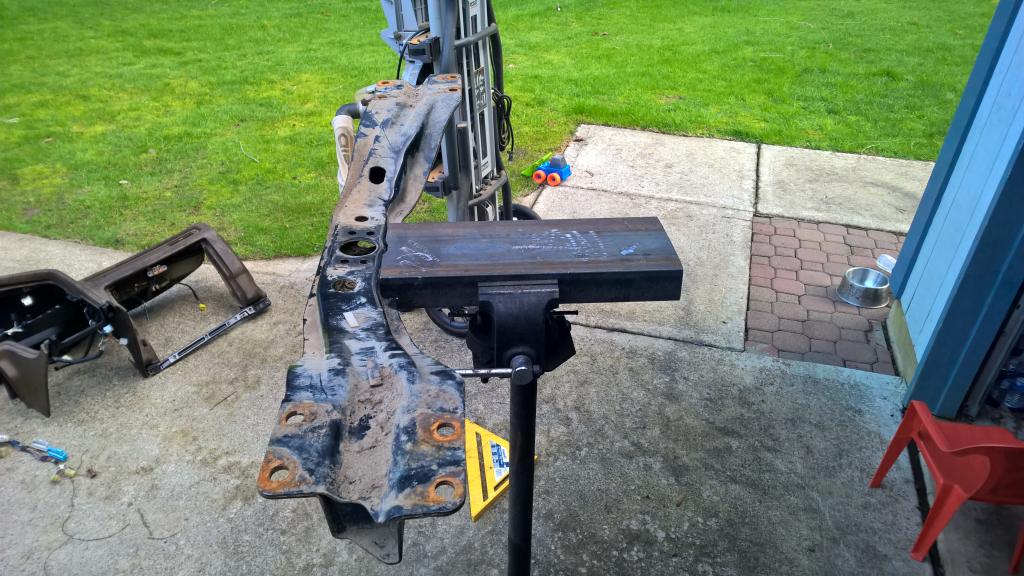
And here prior to welding
And welded
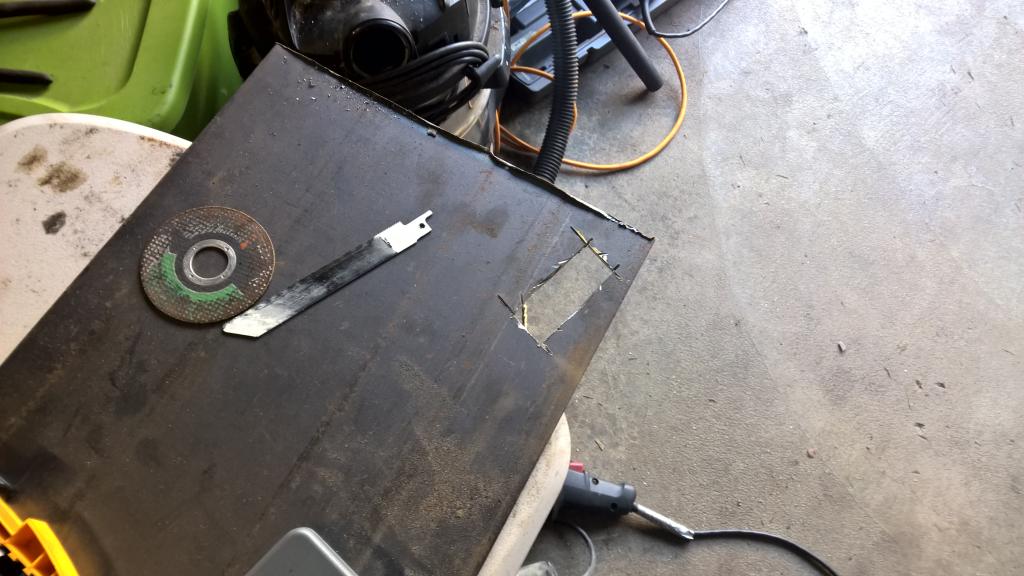
Used some 1/8" steel for a block off plate for the EGR system.
I will be threading the exhaust port and ordered an Aluminum pipe plug to block it off.
Next i mated the engine to the transmission. I purchased a clutch alignment tool which made it a breeze in getting everything together.
Then I had some help come by and...
(Notice I took the water pump off, I bought a timing belt kit and water pump so its in the process of being replaced. It looks really bad and hopefully a good flush with the hose will clear most of the gunk out.
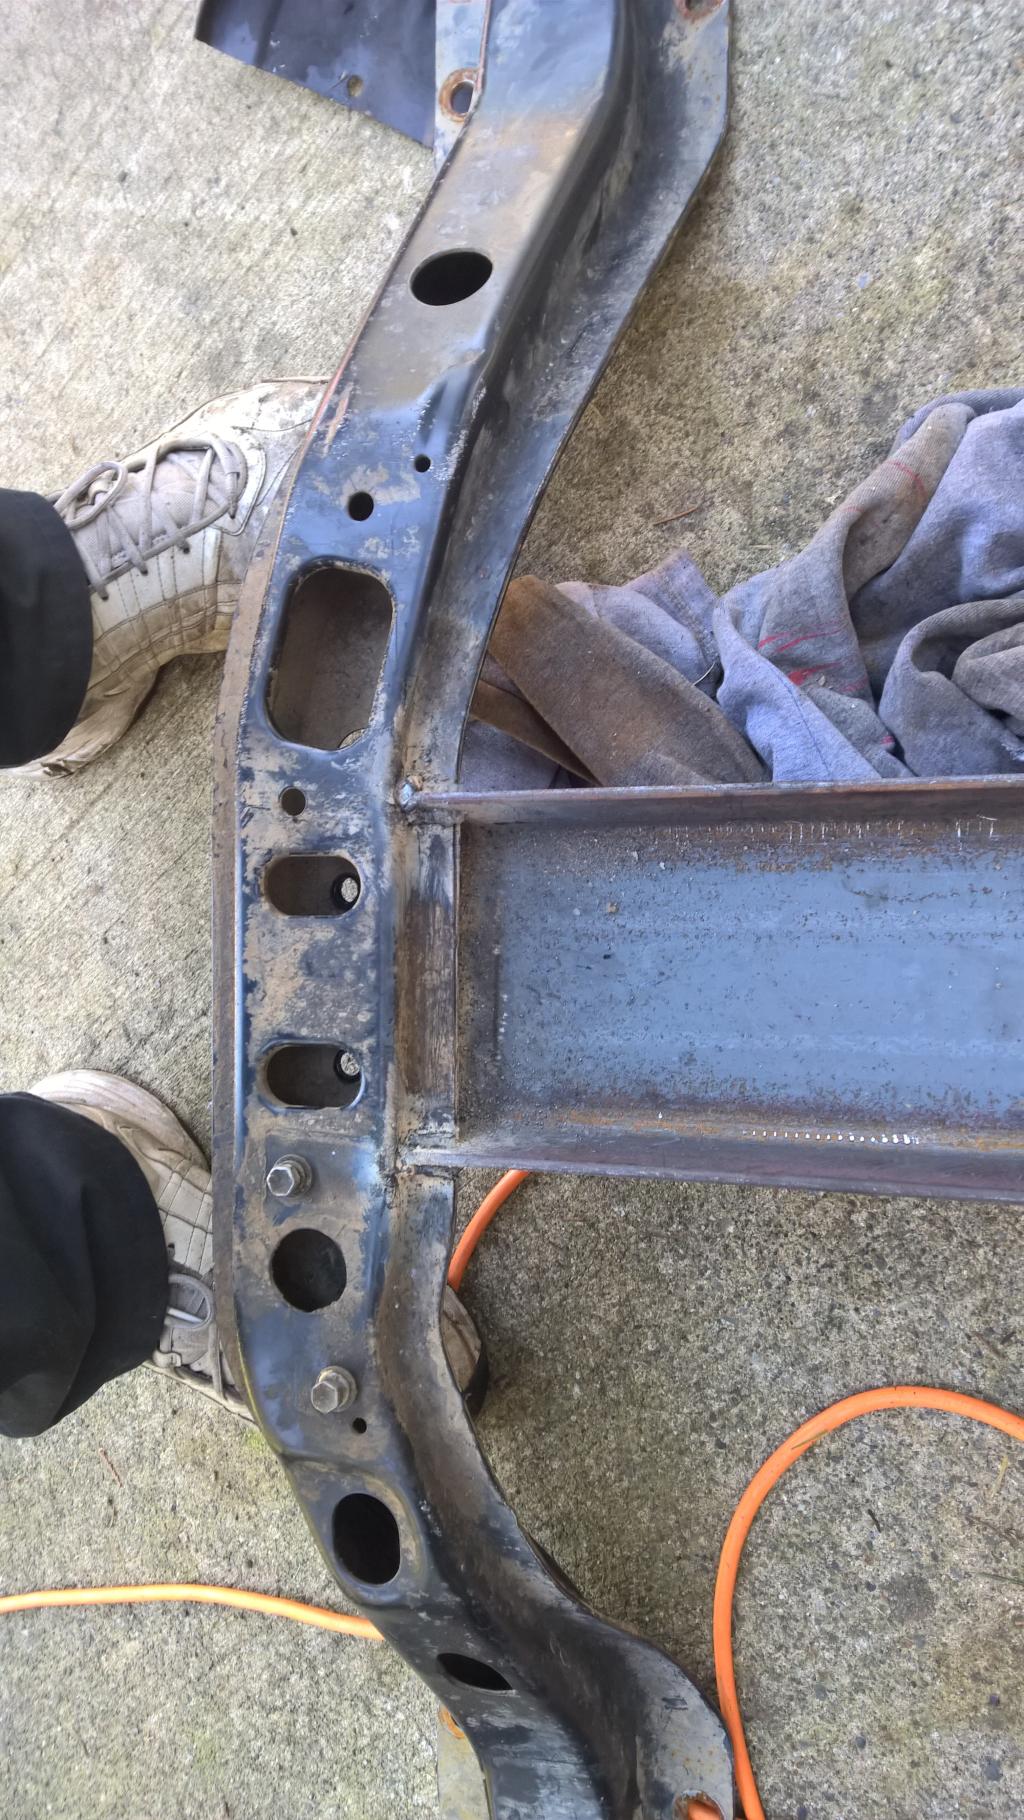
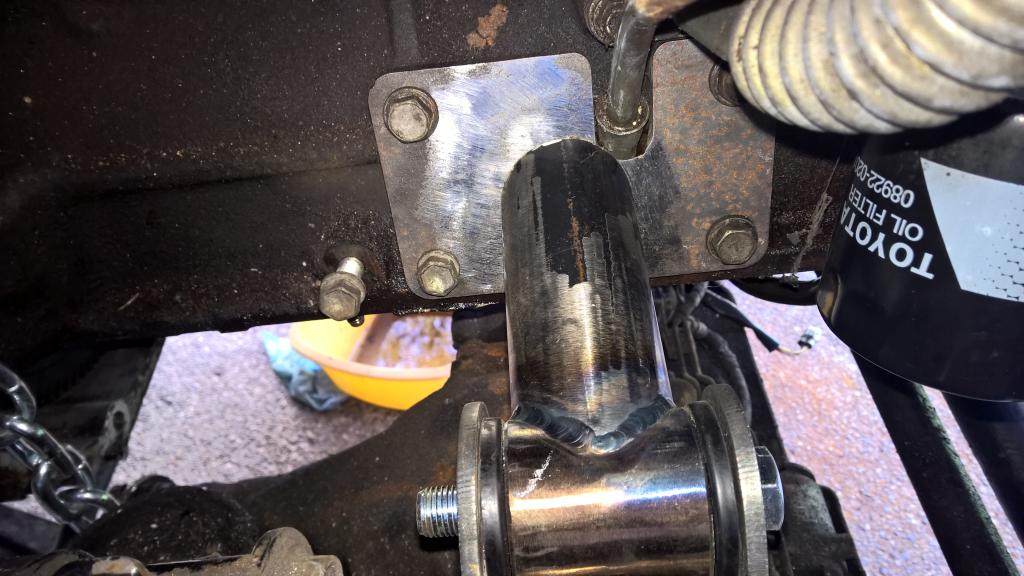
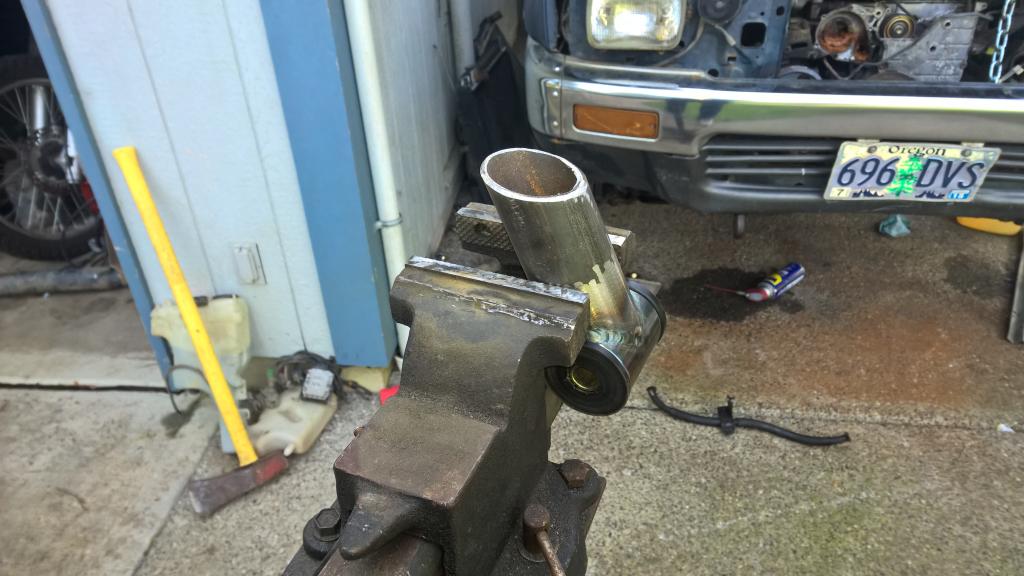
My friend made a bracket/bar out of 1" steel square pipe that fit across the bottom of the engine where the #1 crank is located. This allowed us to put the engine in sans engine mounts and have it all lined up properly. Prior to putting the engine in, we welded (tacked) the engine mount brackets in the engine bay. Since he did this to his truck he knew they went as far back on the mounting pad as possible. Then with the plate bolted to the engine side I was able to slowly cut away the pipe until i got it to be a perfect fit. Then tack weld it, remove it, and fully weld it.
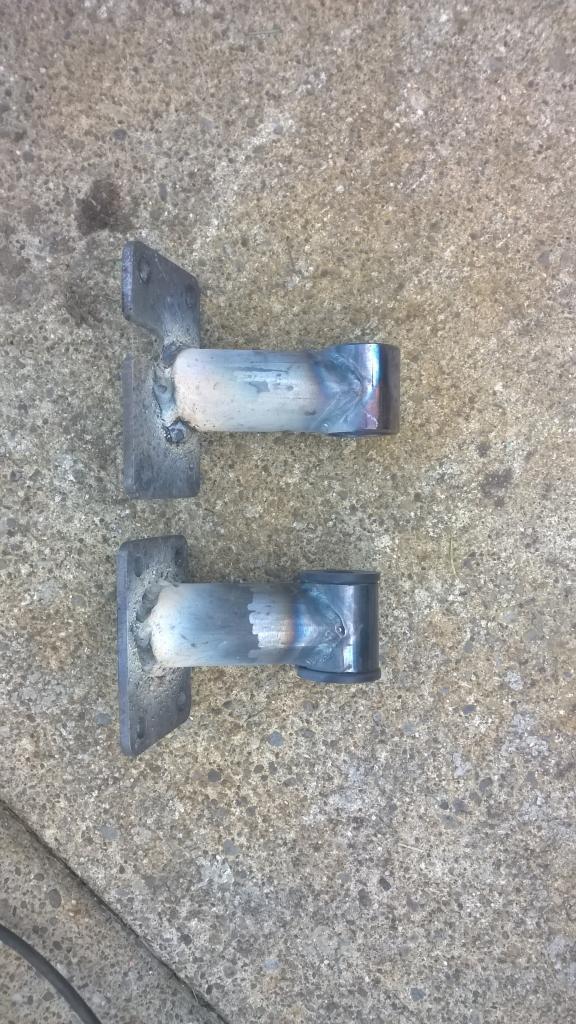
Here is the passenger side. If anyone wants these metal brackets made, My friend has them saved on his plasma table and Im sure he would be willing to sell them. They bolt right up to the 7mgte engine and the mounting tabs weld right on the truck mounting platform as far back as you can. very straight forward.
Here it is out of the truck ready to grind more material off and get a good fit.
All welded! (I'm not a good welder)
And painted, hanging to dry.
I didnt take a picture, but we had to bang a lot, really hard, on the brake booster to get the 7m back far enough. We also ground off as much material as we dared on the intake to get as much extra clearance as possible.
This pushed the transmission back a good 4-6 inches...
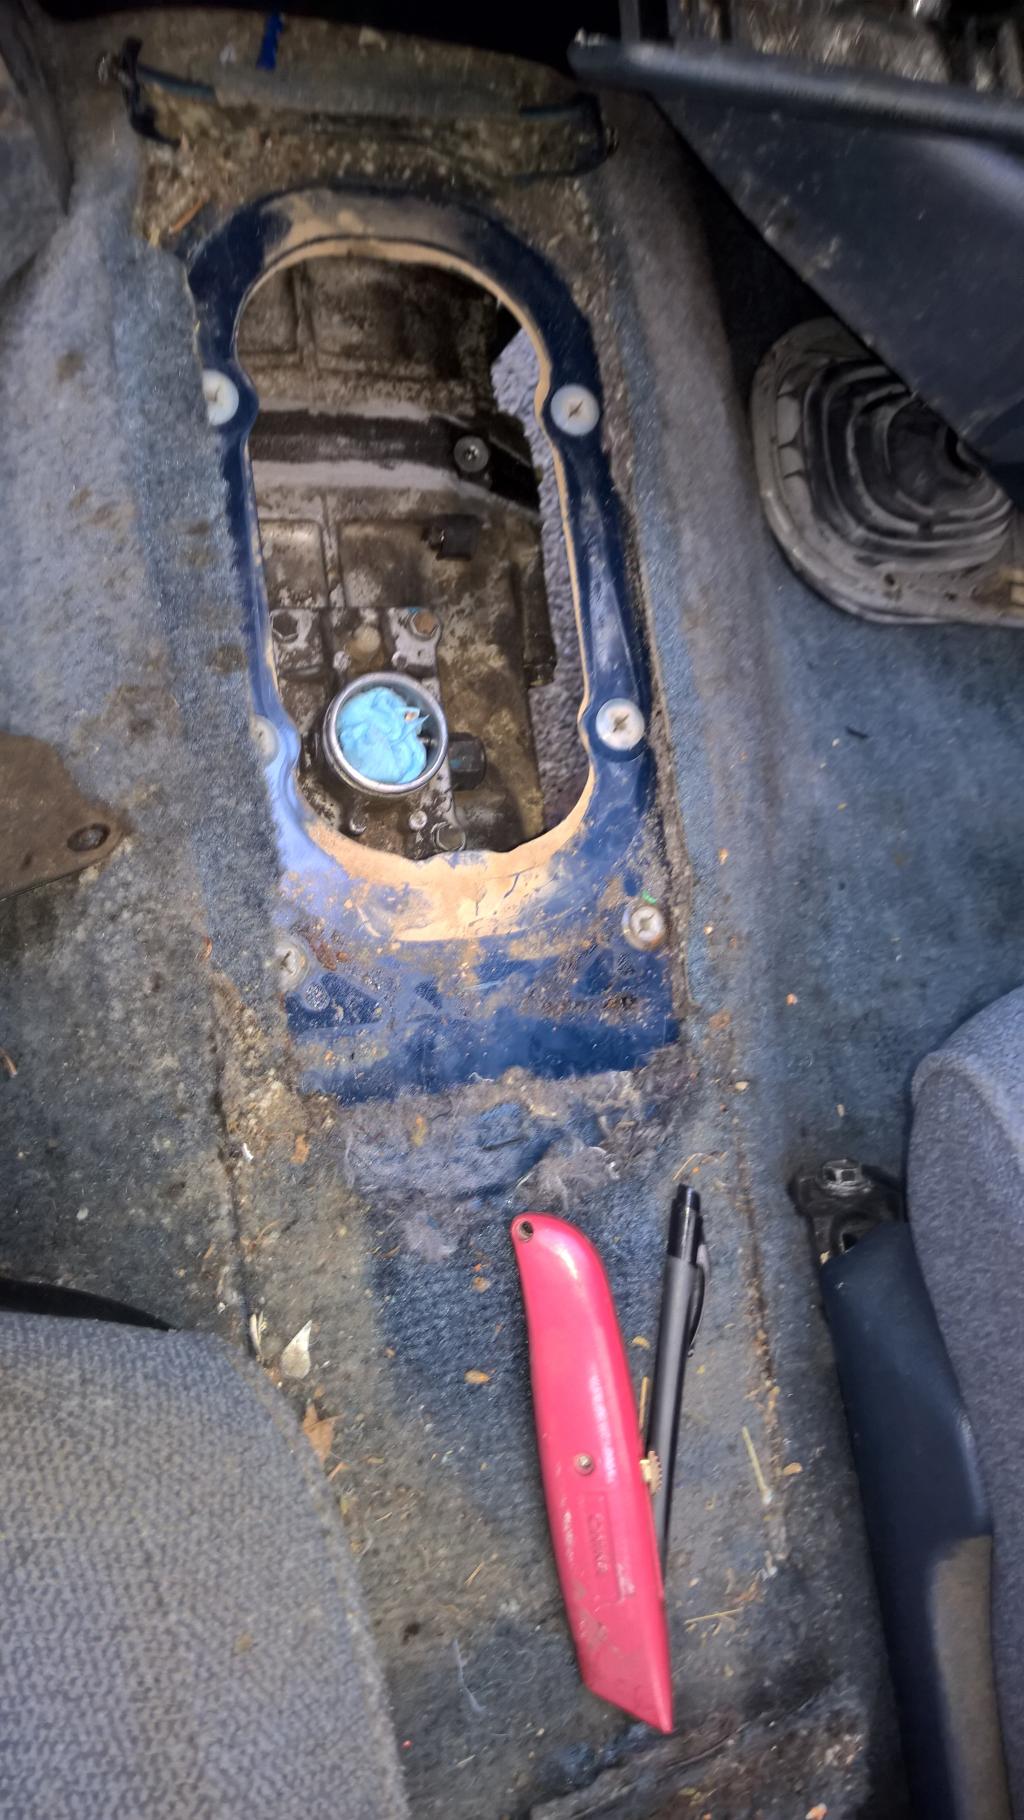
So removing the center console, and freehand with the sawzall, you get...
And...
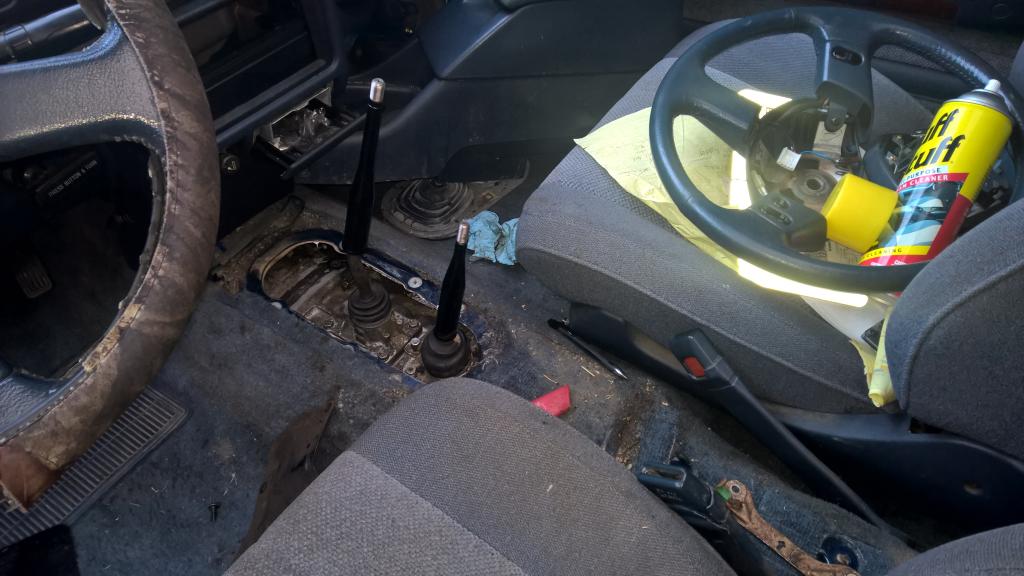
We bent the shifter when we had the press so it is more up and down, i really like it.
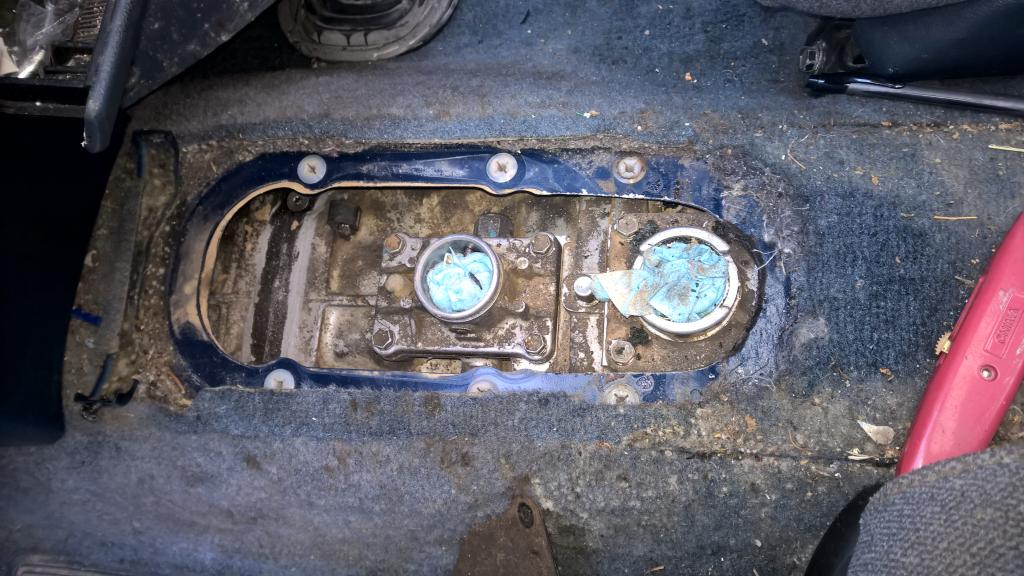
So now, i am needing to buy a 2 1/8 hole saw to cut the transmission mount hole and get it all together. Hopefully today, I can remove the engine, finish welding the mounting brackets for the engine mounts, and get the transmission mount cut. Once that is done, I can focus on the oil pan.
Got a little time yesterday. Got the Transmission mount drilled and cut off the excess material
When doing this i made sure to bolt the engine mounts up so that there was no alignment issues. Unfortunately, my passenger side mount is about 1/4" out of alignment vertically. I have no idea why but it's not a big deal, Easily overcome with the engine hanging from a hoist it will fit perfect. I think the error was i did not tac the opposite side of the pipe when i welded and the heat distortion pulled it out of alignment.
Another weekend with the truck. I feel i am pushing my luck with the wife but the sooner this is done, the better off i will be! I have a feeling when #2 kid comes next month i wont be so lucky with time on the truck...
First, I took pictures under the engine to gauge where i needed to cut the oil pan.
In this picture you can see the bar we used to set the engine on to make the mounts
I then marked my lines and went to town with my angle grinder. All of this work is being done with Zero experience other than youtube video's and general ideas of how this should be done...I have a cheap welder, a vice on a stand, vice grips, hammer, propane torch, grinder, sawzall and a hand held band saw that i am borrowing from my dad.
First i removed the engine and transmission together. this was quite easy to do myself. Then I cut the pan and then I lined it up in the engine bay how it will go to check if it was going to work
I also put the pan on the engine to make sure it would clear the crossover oil line and dip stick. It's close but will work.
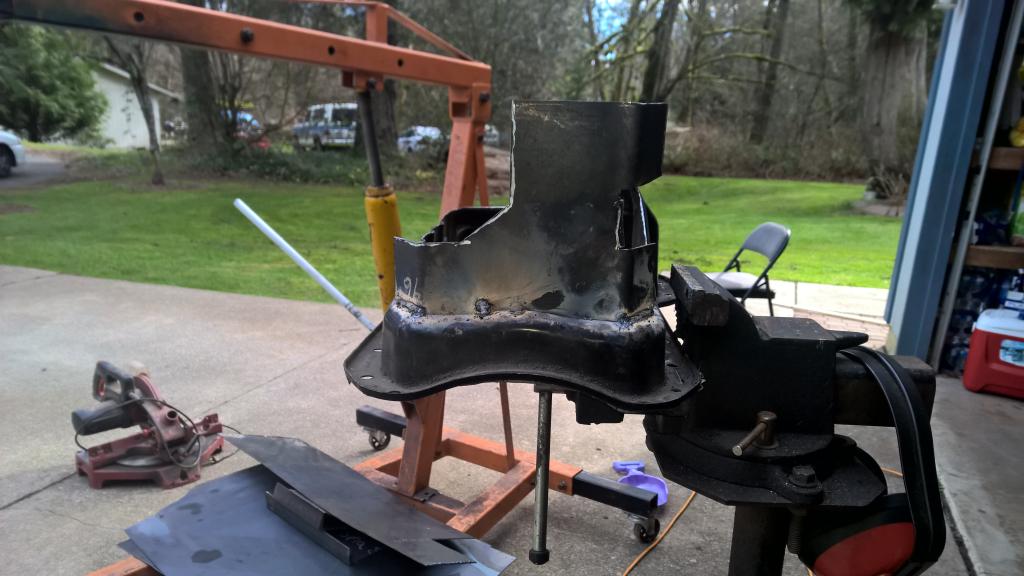
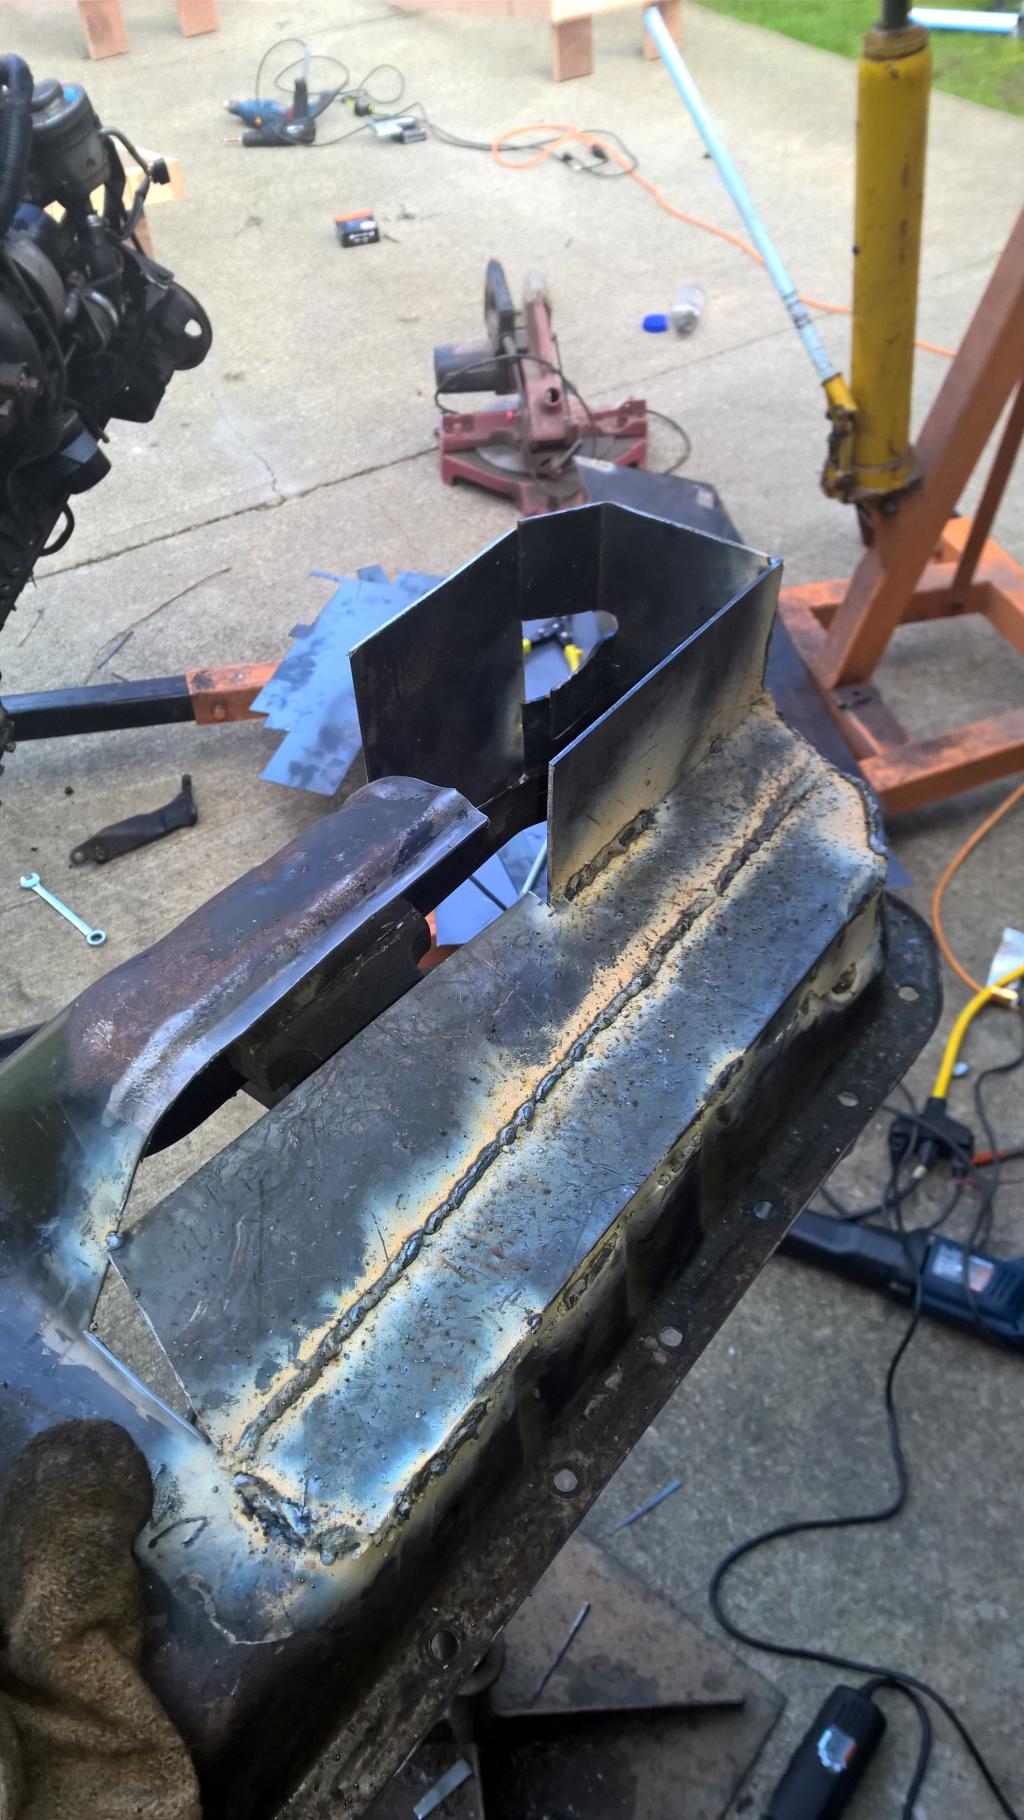
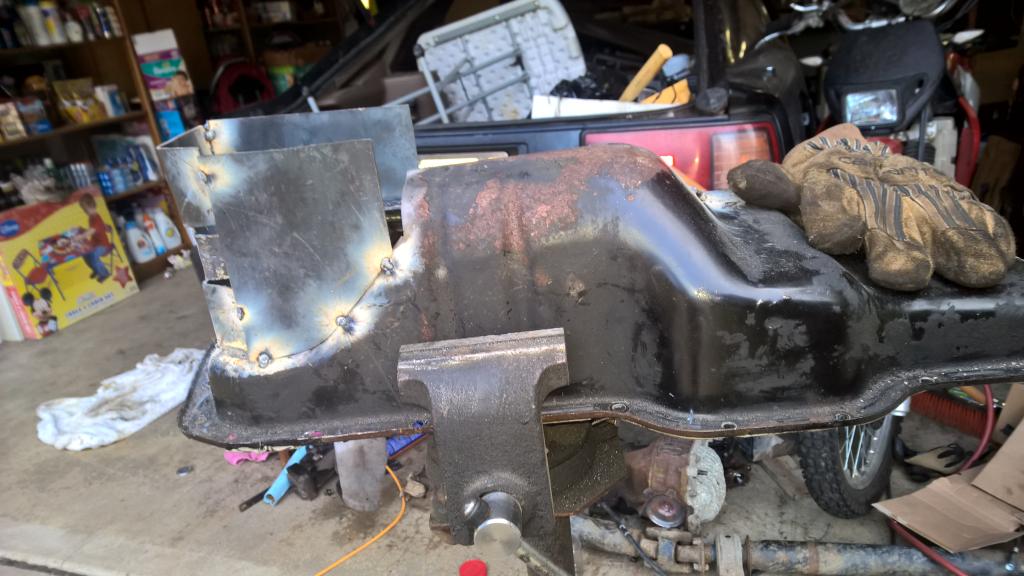
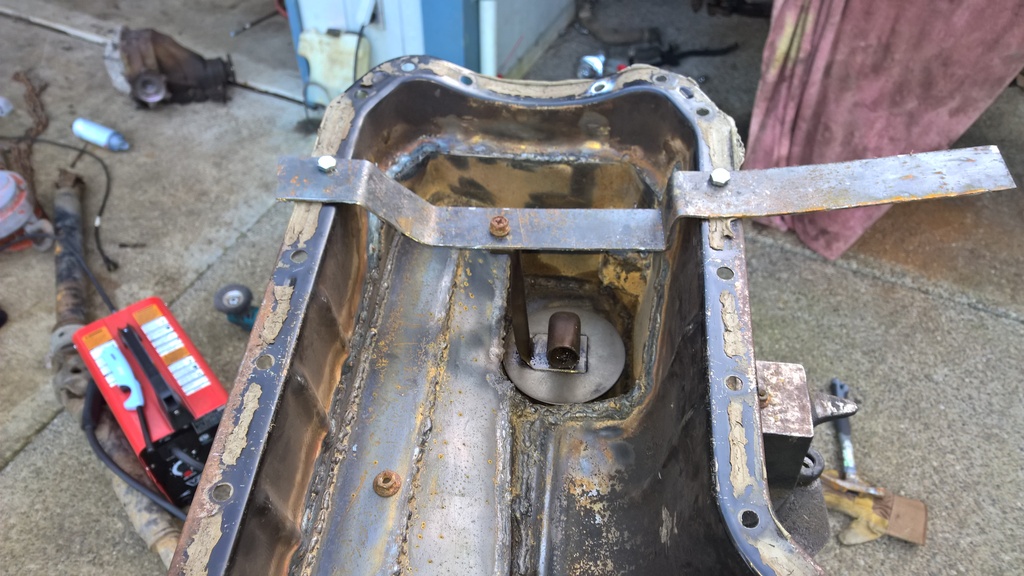
I started at the back of the oil pan and work from there. Since i am making this a rear sump and i need to maximize oil capacity I decided to make it extra deep. I wanted rigidity in the back so i went with bending a single piece of metal to fit.
I test fit the oil pan on the engine and checked if i could get the transmission support bolts in. I couldnt. I had to notch out one side of the piece to get clearance and i had to cut the other side by a large amount because of the differential.
Then.
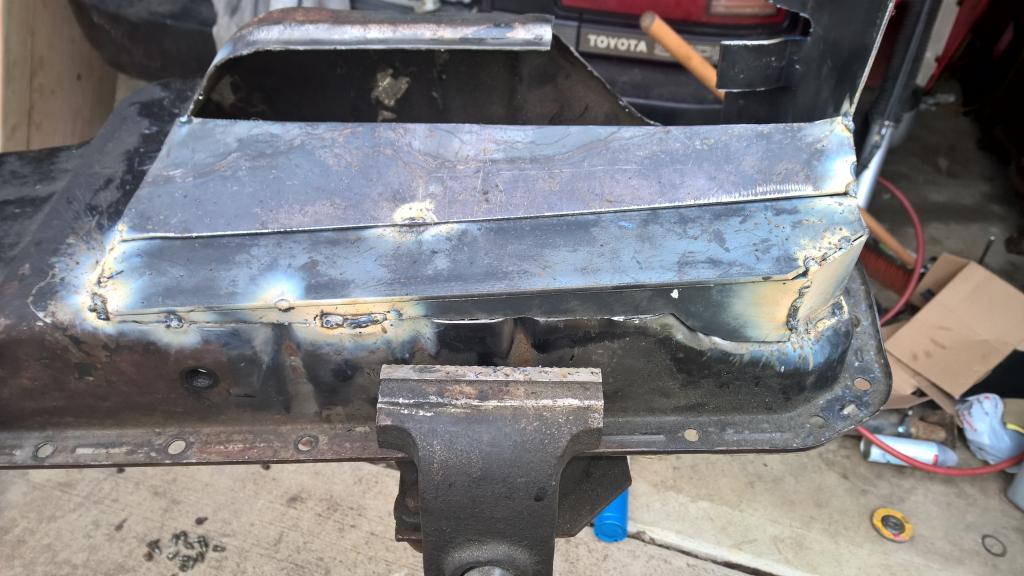
This is as far as i got all weekend. I had planned on the oil pan going much faster. It is tedious work and not something i really enjoyed. I have a little more left to do on it but its mostly done.
Pardon the welding, In the interest of time i welded pieces in that had some substantial gaps to be filled. This means multiple passes after things cool down to prevent melting through.
I am told that i should do some welds then stop before heating the whole pan up as it will warp it and make alignment on the engine off. Fixable but not ideal.
The oil pickup fits in the deep area like a glove. Plenty of clearance all around it and nice and deep. I should be able to have a good degree of freedom on negative incline without oil starvation.
My wife and i welcomed our second child to this world on Thursday. Kid was almost 4 weeks early but all is well and baby is home safe and sound. Two boys now which means i need to get this project wrapped up!
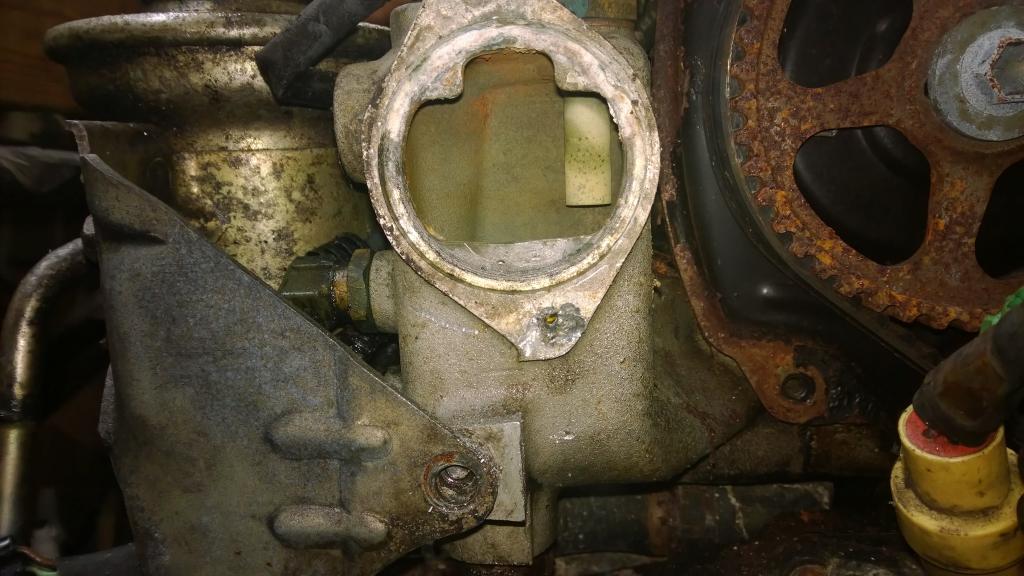
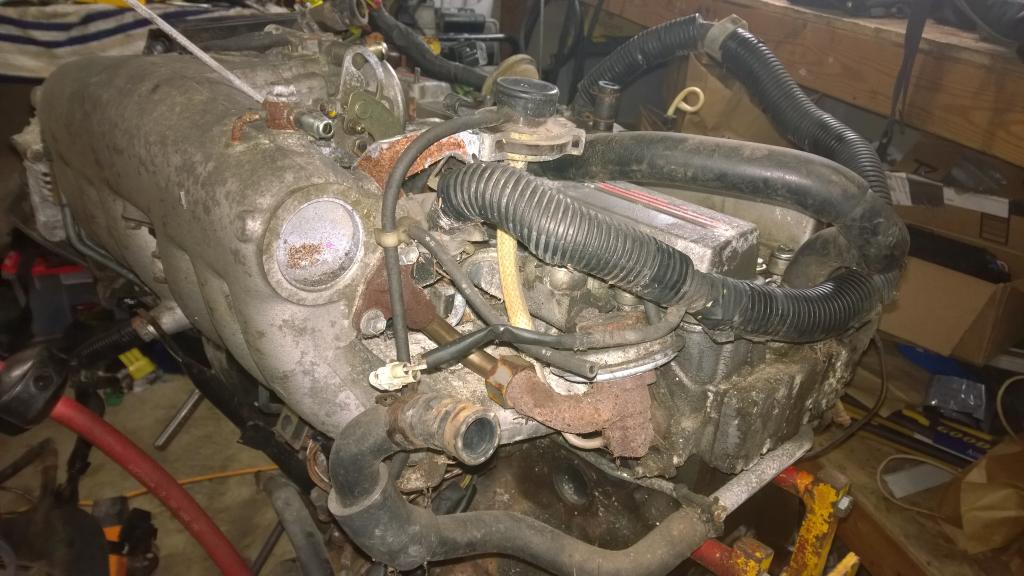
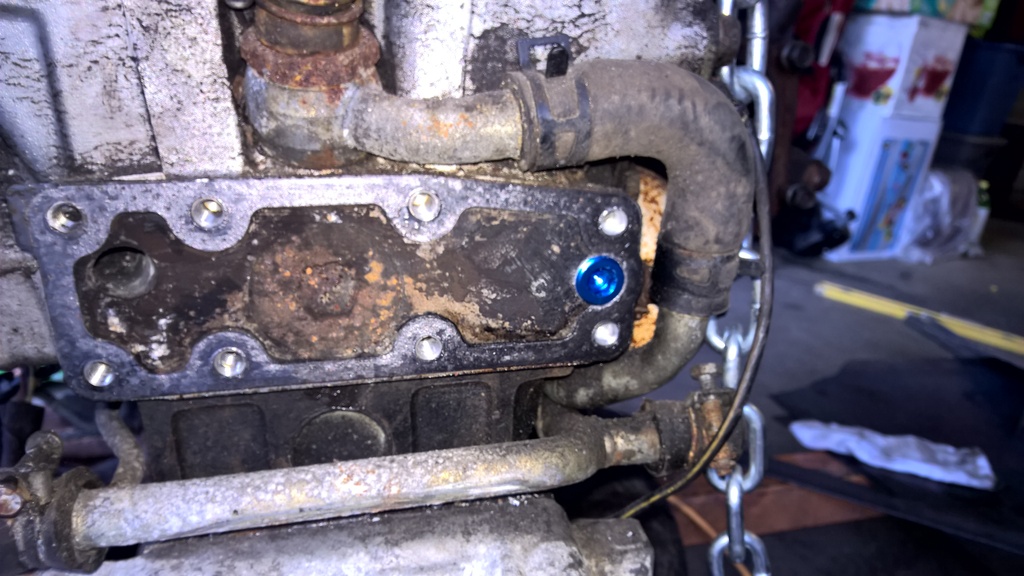
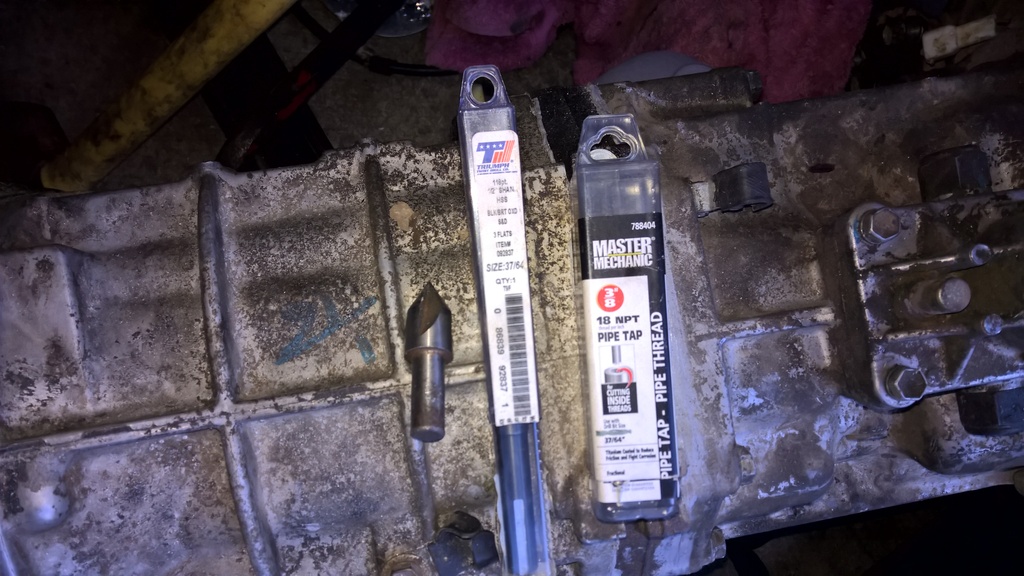
First the good news, Got the egr exhaust port drilled, tapped, and plugged.
Borrowed the tools from a friend and bought the plug off amazon. Aluminum plug is important so that it will expand and contract the same as the housing around it (which is also aluminum).
Here are the tools i used
The not so good news.
After spending hours and a roll of welding wire, My oil pan still leaked terribly. I decided to reach out to a local welder and he agreed to use a tig over the welds and make it water tight. He has a waiting list but i am hopeful to get it within a week.
The ugly.
Well, its not good or bad, just looks ugly, I made a bracket (using the term bracket loosely here) to line up my oil pickup in the pan. I used oil pan bolt holes as locators to ensure the oil pickup goes in the right place. I will then bolt the bracket and oil pickup to the engine and fab the pipe in place to connect the pickup to the engine.
I also sold the entire front suspension of my parts car and the brakes on all 4 corners. Parts were selling like hot cakes over the weekend. So got a lot off quality time tearing the supra apart but that doesnt have anything really to do with getting my project moving along. Oh, and i also completed my masters thesis so that's out of the way too.
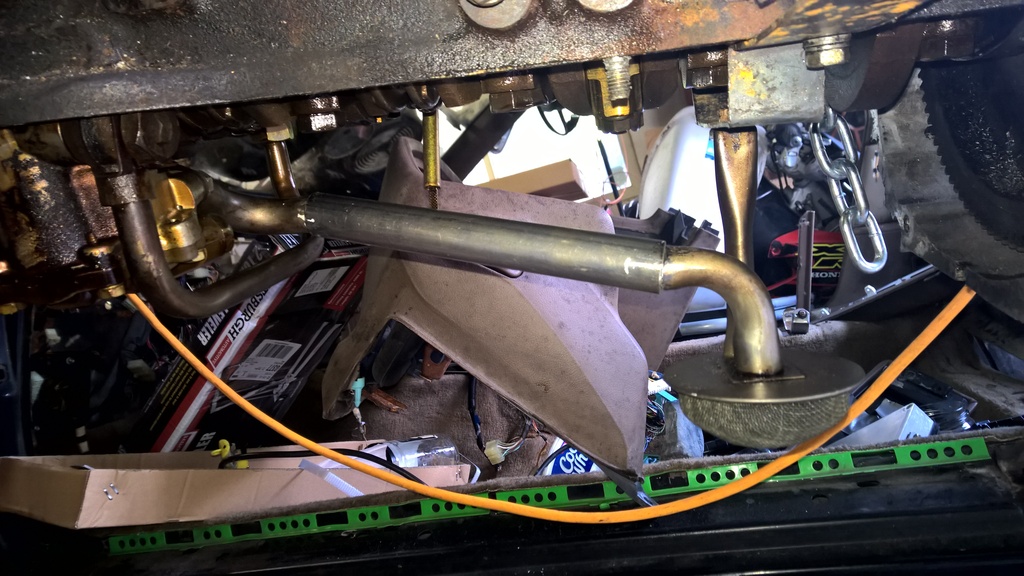
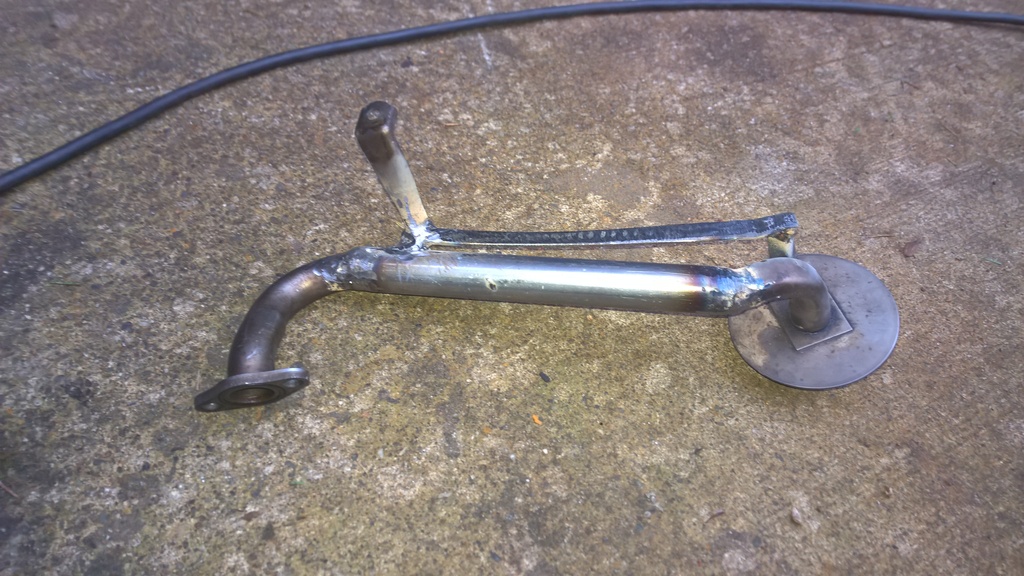
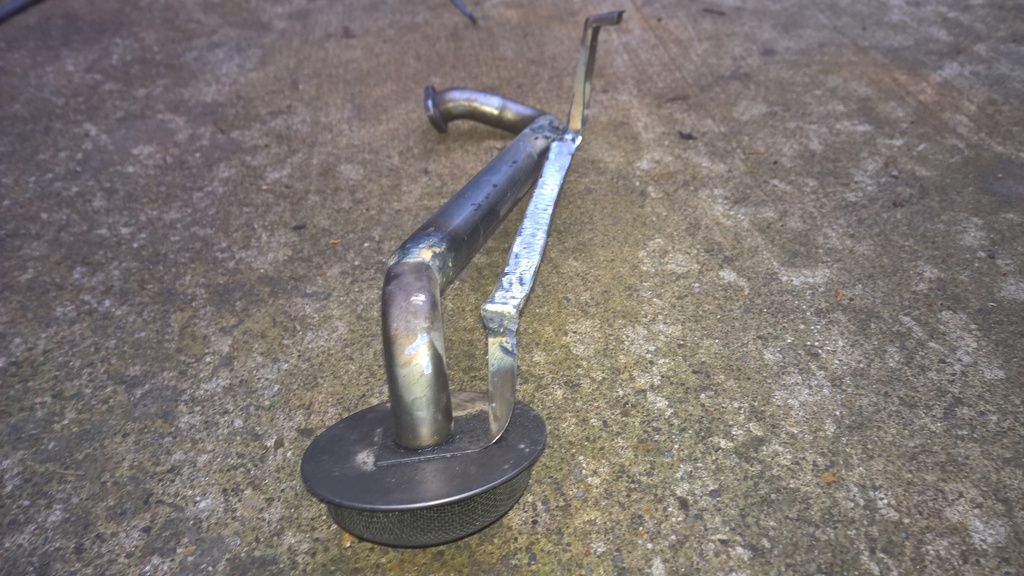
Finished the Oil pickup tube.
Bolted the pickup to the engine with my makeshift bracket. Then cut and fit the pipe between the two ends
I tacked them in place, removed, welded (grinded and rewelded a number of times till it was water tight) and then put back in without the bracket. I then fabricated a piece of 1/8" metal that used the stock bracing locations to add additional support.
Waiting on the oil pan now. Considering getting the clutch and fuel lines ran before putting the engine in.
Oil pan will be completed tomorrow. Guy said it was like swiss cheese so I definitely fubar'd it. Anyway. I got a good amount of work done but it was all stuff that didn't really have a time table. Used some aluminum flux wire to weld in the hole in the thermostat housing where i had to drill out the broken bolt and broken extractor. No idea if it will hold but so far so good. If it doesn't, it's easy enough to access when the engine is put in the truck for follow up repairs. I also cut out the battery pan from the supra and welded it in the truck. The truck battery is too tall but looking on the interstate batteries website it looks like i have options for a shorter battery. I also cut the whole front end of the supra off which gave me a lot more room in the garage to stack stuff in...lol. I need to spring clean when this engine is finally put in the truck...lets see, i also put on the plug wires, coil packs, the clutch fork, clutch slave, and took off the fuel/brake lines from the supra. I bent the truck clutch line to set where the R154 clutch is. I went to bolt on the starter but damn, I lost one of the bolts so i need to pick another one up at the hardware store. I also called on getting a fuel line made. Looks like i can get one made that will allow me to not touch any of the fuel lines of the truck which will be a huge bonus.
Only hold up was the timing belt tensioner spring was almost rusted through so i had to order a new one. Cant bolt up the front of the engine till i get that on there.
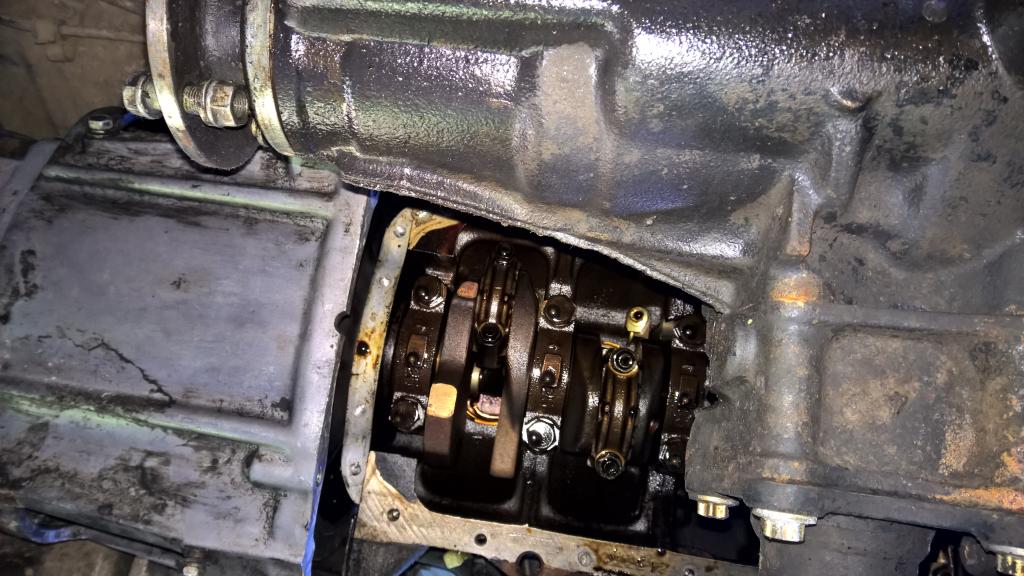
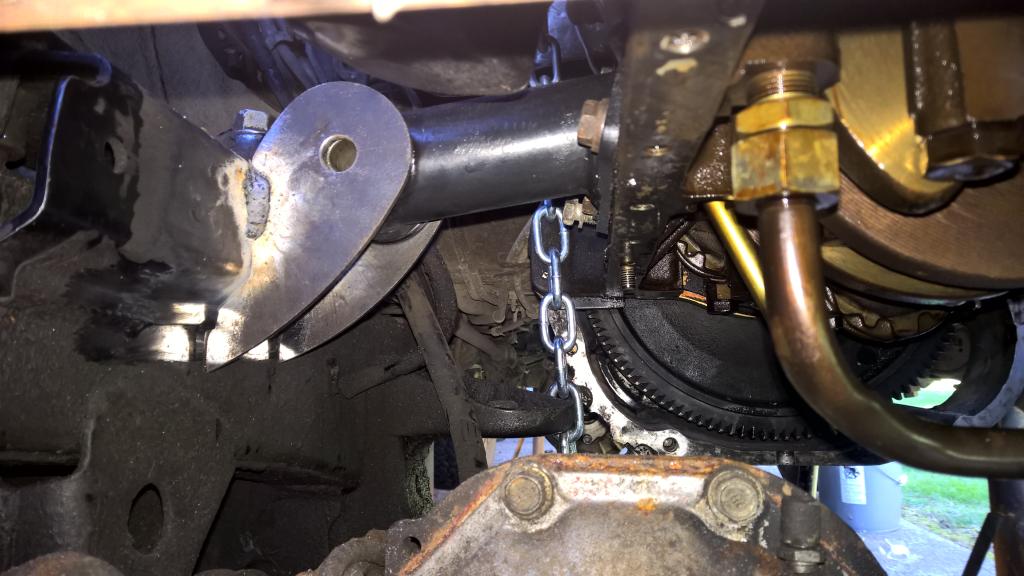
Big weekend. Got the engine installed. Was a pain, the oil pan was deeper than stock and was really hard to get it to clear over the front dif. It eventually was jockied in (by myself) and bolted up. Unfortunately, I decided to save time on my oil pan and made it by eyeballing it. Well, I am a good inch off from it fitting with the front dif. I plan on just lowering the differential until i am able to make a new oil pan that will fit with the stock dif mounts. More on that plan later.
I am about to order my exhaust from mandrel-bends.com which will be about $300. I'm ordering 3" tubing. 3 90 degree 3 18 degree 2 45 degree and 4 feet of straight. Also 4 flanges, 4" flex tube, and a muffler. Total cost with shipping is right around $300.
Wow, now that's some work. Nice fab, I'm not capable of such things. Any updates?
YES.
First: Goodies were shipped, my first "big purchase" of the build. $300 of exhaust delivered
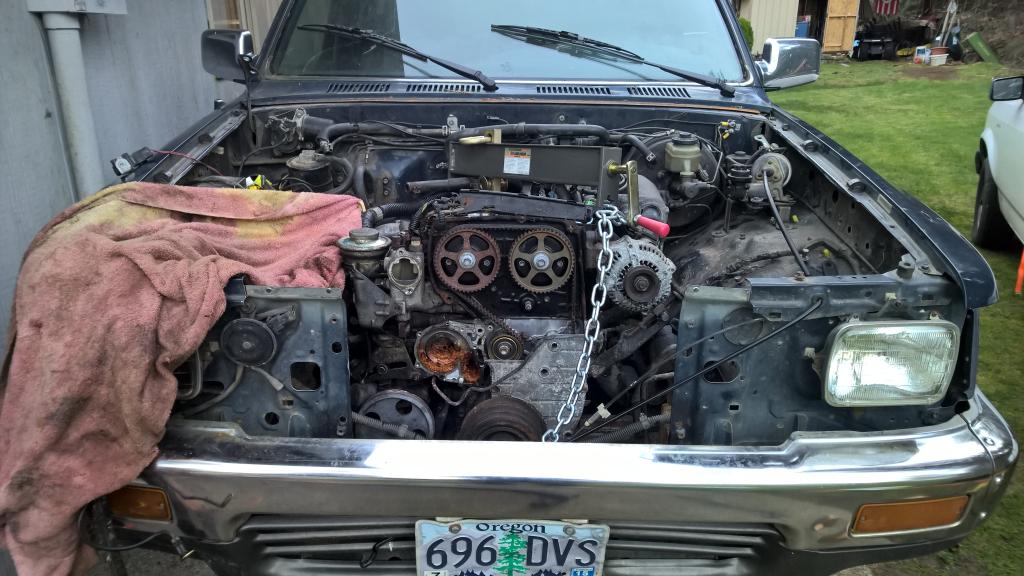
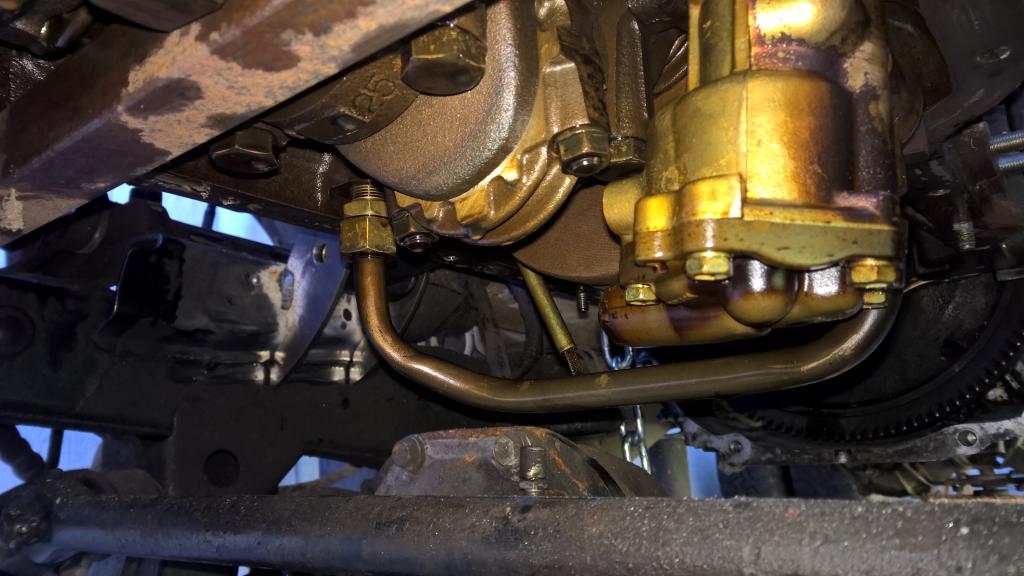
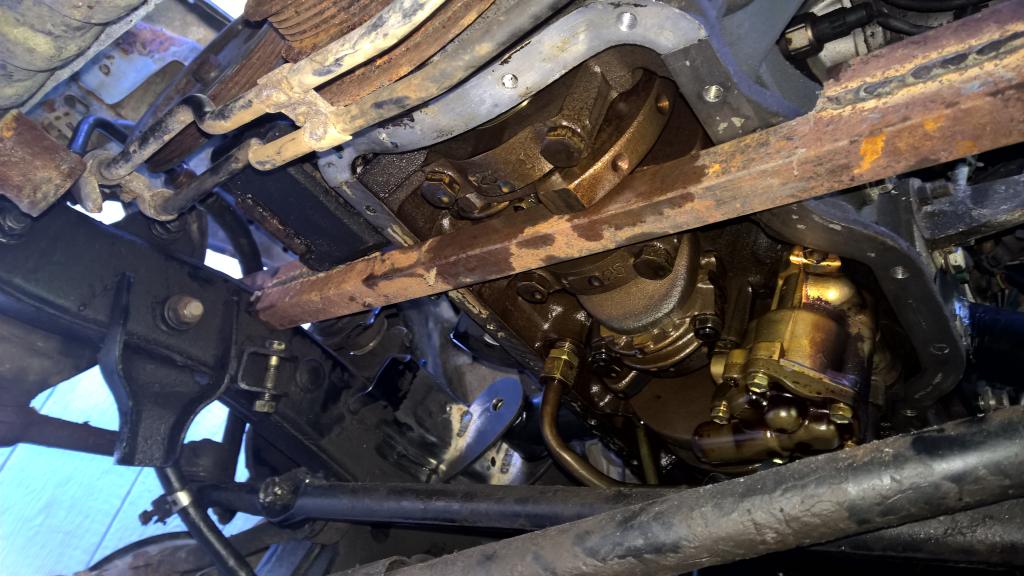
Pics of engine in the truck
So initially I thought i was just going to redo the whole oil pan so i found and bought one for $20. I think i will go that route down the road but after cooling off a bit i think i will just calmly mark where it need clearance and fix it. In the meantime, I will be working this week on getting the exhaust system put in, flush the engine, get fuel hooked up, intercooler and start on electrical.
Not sure if i mentioned this in my previous post. I am not running an oil cooler as i dont have anywhere to hook it up. To keep the oil from spewing out of the pipe, I cut a bolt to fit in place of the pressure spring and tightened the cap down. This does not allow oil to be blown out of the engine.
The engine has been started and sounds great! But a lot happened between my last post and this video.
I had to make many more modifications to my oil pan and couldnt get it water tight. Incredibly frustrating. I ended up relying on a buddy to weld it up. Even he had a hard time but eventually it got done.
Next I worked on getting the intercooler and intercooler piping in its place. This included making a new radiator support crossmember.
Then i persuaded my expert to come by and figure out the wiring. This ended up being a much bigger pain in the ass than anticipated. He had all the documentation for a 90+ truck and 90+ 7mgte. My truck is a 1989 and a 1987 7mgte. Sadly this made most of his info useless. On top of that, we couldn't find a service manual for a 1989 pickup anywhere. Best we got was a few pages from a 1988 but even that was different! Bah! He was able to get most of the wires to the right places and it ended up being good enough to start! Sadly it will only run if the key remains in the start position, the key in the run position will kill the fuel pump, but jumping the fuel pump and starting the truck will run great!
Things on my to do list
Figure out electrical (Need a 1989 service manual with electrical diagrams)
Finish radiator crossmember and finalize intercooler piping (waiting on parts)
Got the electrical figured out. I bought a new multimeter that had a continuity feature. I was able to identify the proper wire to go from the supra ECU to the truck fuel relay. That made it work like a charm. Engine sounds great...verdict is still out on it but i am much more encoraged...no rod knock or valve chatter. If the head gasket is bad, It isnt showing yet. I will do a rebuild on the engine but hopefully i can do that over a weekend in a few months so the truck would be down for a short while only.
Made the exhaust. Going to weld it up this weekend. (it is tacked only right now.)
I also finished up the radiator cross member. Have a long list of things to accomplish but they are small like putting hose clamps on, fluids, and other misc projects that should take 10-20 min each. It all adds up but there is very little fab work remaining.
The exhaust looks good. Want to come build the exhaust for my 4.3 swap? lol After I weld the passenger side shock hoop on, Ill start on my exhaust.
Building exhaust sucks so much...Especially when you dont know what the hell you are doing...Felt so good to tack on the final piece!
I will tell you how i went about doing it though...the 7mgte down pipe goes down the passenger side...the 3vze goes down the drivers side. It is a tight fit getting it to fit in there. I found this exhaust routing and matched it...I would give credit but i forgot where i found these pics...
I got the down pipe in place. Then i fabricated the intermediate piece but did not weld it to the flange's. Then i made the terminal piece including muffler and hung it. Then i was able to hold the intermediate piece in its spot and tack to the flanges that were bolted to the down pipe and terminal exhaust sides. This allowed me to precisely place it where i wanted and once tacked it doesnt touch anything. It took quite a few hours to build and it will be another hour or two with a good welder to get it finished.
Yeah Im not really looking forward to the exhaust. Unfortunately for me, my exhaust dumps on both sides of the motor. Im going to do the Y pipe after the tcase. Ive already got both sides pointed straight back so Im hoping the rest wont be too bad. Ive been meaning to pick up some 2-bolt flanges, but haven't yet. So if no parts stores around me have them, then Ill just without for now. Ill add them later when the exhaust has to come out for some work.
Yeah Im not really looking forward to the exhaust. Unfortunately for me, my exhaust dumps on both sides of the motor. Im going to do the Y pipe after the tcase. Ive already got both sides pointed straight back so Im hoping the rest wont be too bad. Ive been meaning to pick up some 2-bolt flanges, but haven't yet. So if no parts stores around me have them, then Ill just without for now. Ill add them later when the exhaust has to come out for some work.
I have had mixed feedback on 2 bolt flanges...actually, mostly negative. Turns out they are notorious for getting loose and leaking. If i were to do this again i would try to find 3 bolt flanges. On the plus side, Since i am running 3" piping and there is a turbo upstream i think the back pressure in the exhaust should be pretty low so not a lot of push to blow through the joints. I bought all my exhaust through Mandrel-bends.com . They were great on prices and shipping! Also amazing selection!
 02-11-2015, 09:13 AM