
Trailbreaker's '94 4Runner Bulidup Thread
 Apr 6, 2013 | 03:14 PM
#1
Thread Starter
Registered User
Joined: Mar 2007
Posts: 8
Likes: 0
From: Idaho
Trailbreaker's '94 4Runner Bulidup Thread
While I don't consider myself a hardcore off-roader, I do find myself in situations where a locking diff could make my life easier. This thread will reflect that driving style, so don't be disappointed that I'm not putting 38" swampers on a 6" lift. While I can definitely appreciate that type of use, it's not for me. This is a fishing/camping/hunting rig that reliably gets me where I want to go, and my mods will reflect a light-use style. With that in mind, rock on!
My first rig was a '95 4Runner with 220+K miles purchased in '05. It lasted me through high school and half way through college. After 266+K, its various mechanical issues sunk my budget. I was so impressed with the body style and handling that I knew my next vehicle would be a 2nd gen 4Runner stuffed with all the goodies I could get. After 3 months of searching, I ended up finding this beauty on the Bend, OR, Craigslist.
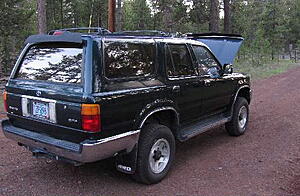


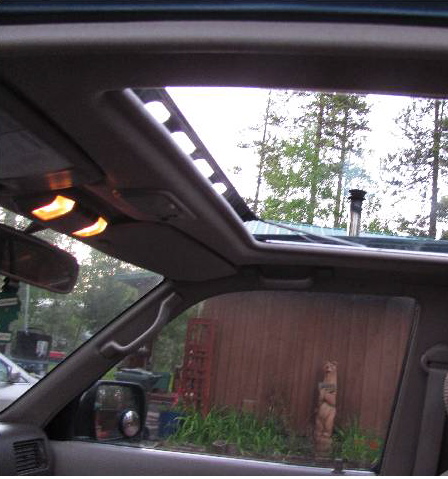
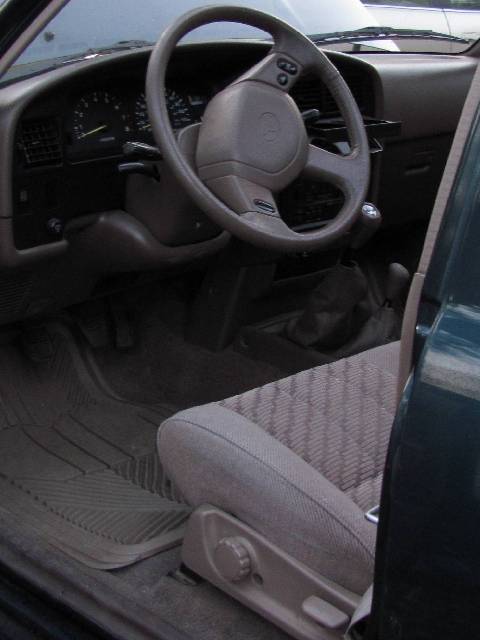
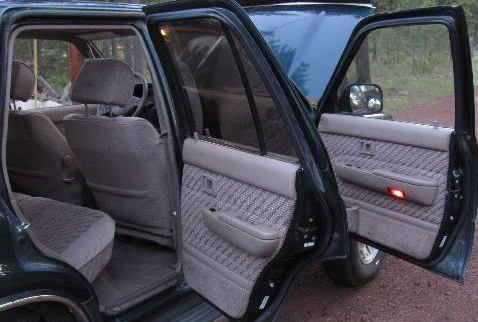
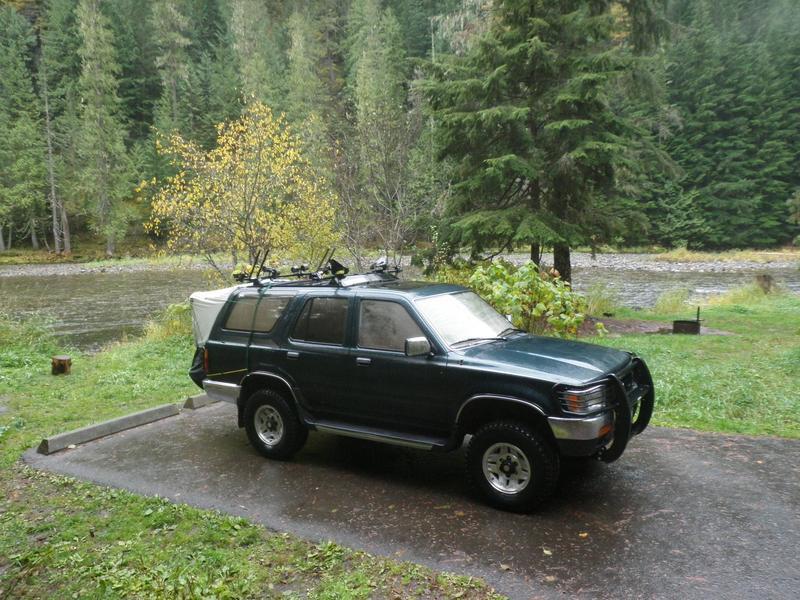
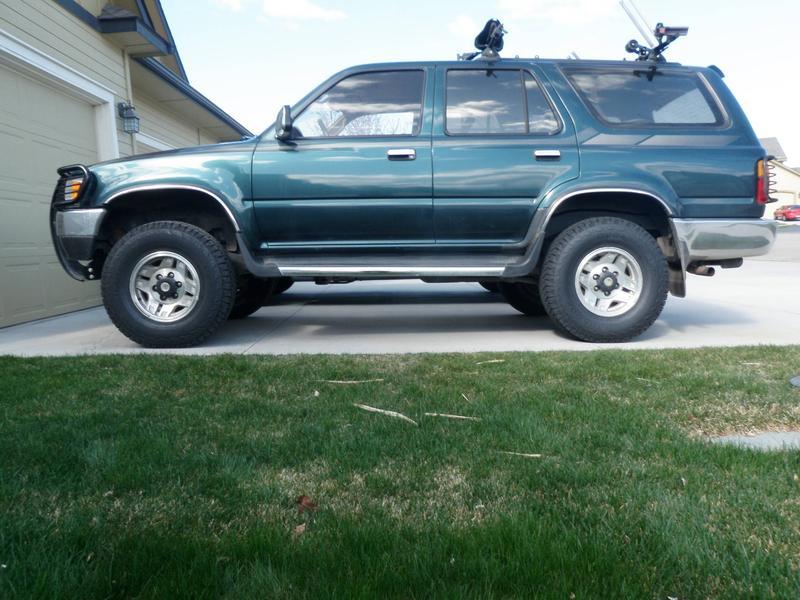
STOCK 1994 4Runner with 97K miles (rear sag fixed)
5spd manual trans., sun roof, map lights, a/c, all electronics working
Barely even a scratch in or out...
I lived in Moscow, ID, at the time, so 610 miles later (detour in Boise), I was on the owner's doorstep with a check in hand. After all the paperwork was transferred, I was back home by the end of the weekend with a brand new rig. I slapped my Yakima rack on it, set the dial to adventure, and three years later the 4Runner is still going strong (more on those three years to come).
(Whitebird Pass in springtime, just south of Grangeville, ID)
My first rig was a '95 4Runner with 220+K miles purchased in '05. It lasted me through high school and half way through college. After 266+K, its various mechanical issues sunk my budget. I was so impressed with the body style and handling that I knew my next vehicle would be a 2nd gen 4Runner stuffed with all the goodies I could get. After 3 months of searching, I ended up finding this beauty on the Bend, OR, Craigslist.

STOCK 1994 4Runner with 97K miles (rear sag fixed)
5spd manual trans., sun roof, map lights, a/c, all electronics working
Barely even a scratch in or out...
I lived in Moscow, ID, at the time, so 610 miles later (detour in Boise), I was on the owner's doorstep with a check in hand. After all the paperwork was transferred, I was back home by the end of the weekend with a brand new rig. I slapped my Yakima rack on it, set the dial to adventure, and three years later the 4Runner is still going strong (more on those three years to come).
(Whitebird Pass in springtime, just south of Grangeville, ID)
Last edited by trailbreaker; Apr 14, 2013 at 09:27 AM.
Apr 7, 2013 | 11:44 AM
#2
Thread Starter
Registered User
Joined: Mar 2007
Posts: 8
Likes: 0
From: Idaho
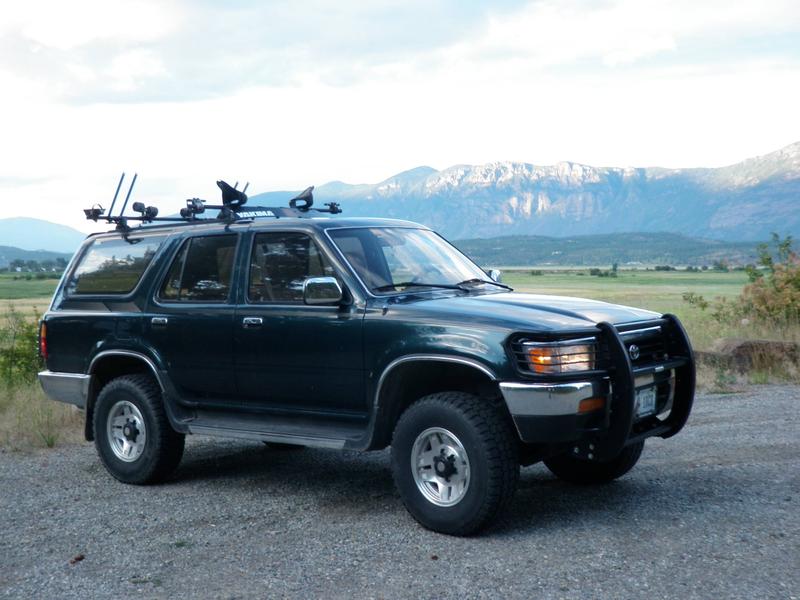
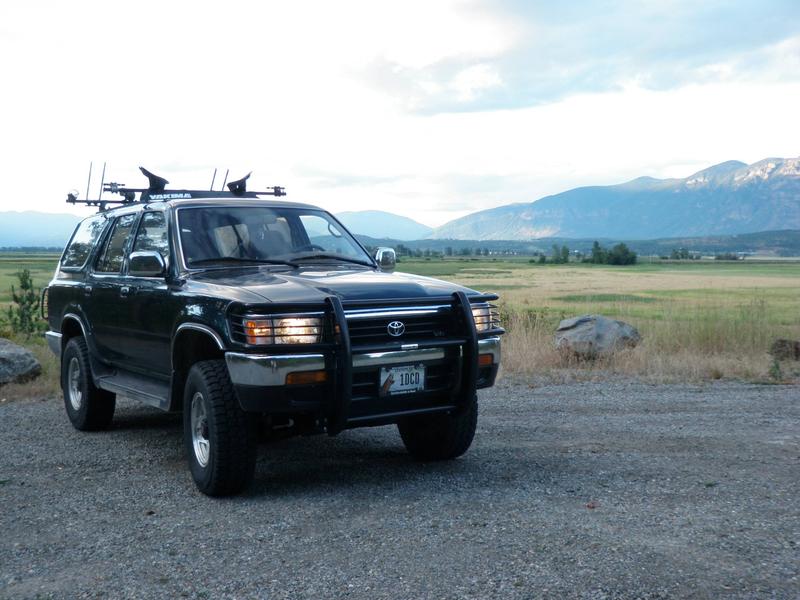
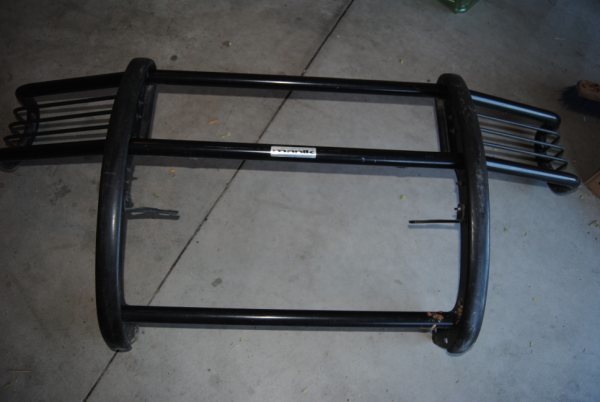
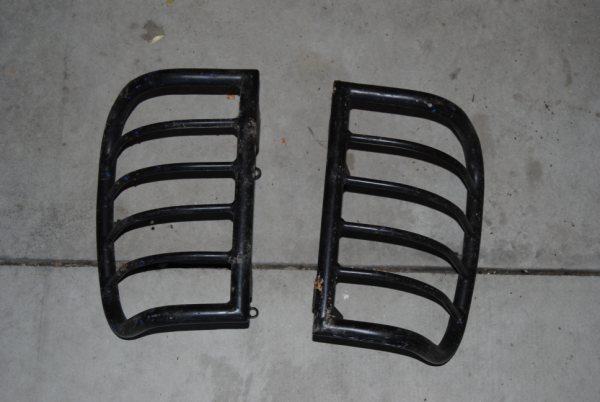
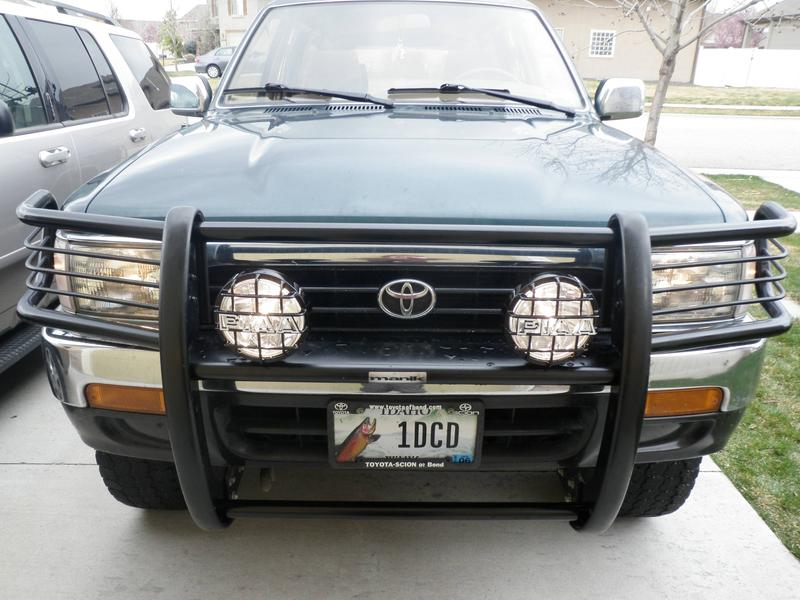
Bush Guard and Tail Light Covers (3rd gen model on 2nd gen 4Runner)
For some reason, the movie "Jurassic Park" engrained the need for a brush guard/bumper in my subconscious mind.

I've always wanted to get one, and the new 4Runner seemed like a good opportunity. Would I have rather purchased a bumper? Yes; however, a) I couldn't drop $1000+ on an ARB, b) I couldn't FIND an ARB in my area, and c) I assumed a brush guard weighed less, which would fit my style of vehicle use. I have heard that brush guards can amplify the damage in a wreck by distributing the force of impact across the vehicle where it would have been concentrated otherwise, but honestly it was the little things (branches, rocks, low impact hazzards) that were out to get me more often than not. I also wasn't planning on adding a winch (too much electrical load without mods, too much $$$ for limited use, and weight). The brush guard fit my needs of a glorified light bar with minimal, but noticeable, protection.
I found a 3rd gen 4Runner model of the Manik brush guard and tail light covers on Craigslist for $88 combined. It was too good of a deal to pass up, even if it wasn't a perfect fit. I knew the actual proportions between the two models should be similar enough to make it work. I would just need a set of custom mounting brackets.
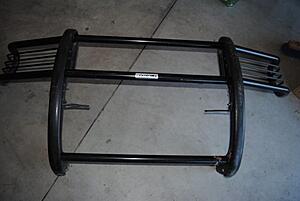
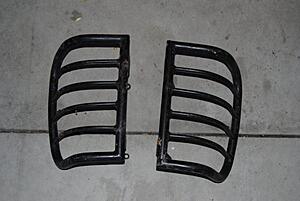
Unfortunately, I had limited shop experience, no garage, and absolute ignorance of anything welding. Because of the obvious lack of fab shops in the Moscow, ID, area, I drove up to Spokane to work with Luke Shuman of Hazzard Fab Worx. A couple of hours later, I had some sturdy brackets and a 3rd gen Brush Guard on my 2nd gen 4Runner. It fit perfectly. The tail light covers were installed with sheet metal screws, and they do stick out a bit more than I'd like, but I'm not going to accidentally knock one out with a canoe, so to that end, mission accomplished.
(The great North Idaho a few miles south of BC, Canada)
I've always wanted to get one, and the new 4Runner seemed like a good opportunity. Would I have rather purchased a bumper? Yes; however, a) I couldn't drop $1000+ on an ARB, b) I couldn't FIND an ARB in my area, and c) I assumed a brush guard weighed less, which would fit my style of vehicle use. I have heard that brush guards can amplify the damage in a wreck by distributing the force of impact across the vehicle where it would have been concentrated otherwise, but honestly it was the little things (branches, rocks, low impact hazzards) that were out to get me more often than not. I also wasn't planning on adding a winch (too much electrical load without mods, too much $$$ for limited use, and weight). The brush guard fit my needs of a glorified light bar with minimal, but noticeable, protection.
I found a 3rd gen 4Runner model of the Manik brush guard and tail light covers on Craigslist for $88 combined. It was too good of a deal to pass up, even if it wasn't a perfect fit. I knew the actual proportions between the two models should be similar enough to make it work. I would just need a set of custom mounting brackets.
Unfortunately, I had limited shop experience, no garage, and absolute ignorance of anything welding. Because of the obvious lack of fab shops in the Moscow, ID, area, I drove up to Spokane to work with Luke Shuman of Hazzard Fab Worx. A couple of hours later, I had some sturdy brackets and a 3rd gen Brush Guard on my 2nd gen 4Runner. It fit perfectly. The tail light covers were installed with sheet metal screws, and they do stick out a bit more than I'd like, but I'm not going to accidentally knock one out with a canoe, so to that end, mission accomplished.
(The great North Idaho a few miles south of BC, Canada)
Last edited by trailbreaker; Apr 7, 2013 at 03:15 PM.
Apr 7, 2013 | 03:09 PM
#4
Thread Starter
Registered User
Joined: Mar 2007
Posts: 8
Likes: 0
From: Idaho
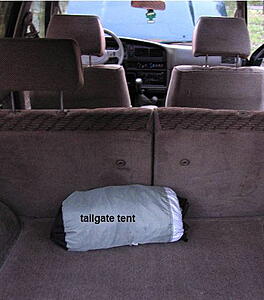
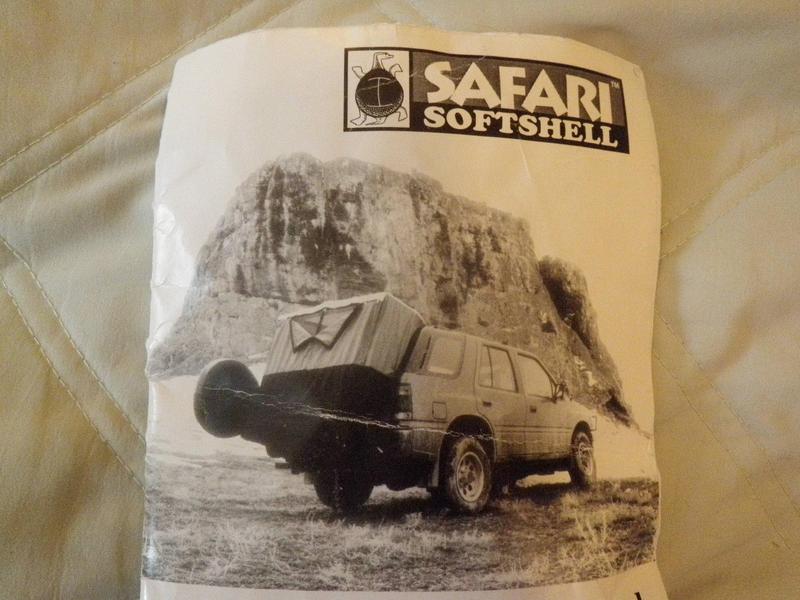
Safari Softshell Tailgate Tent for Isuzu Rodeo Adapted to 2nd Gen 4Runner
Aside from this 4Runner’s awesome condition and options, it came with another unexpected treat; a Safari Softshell Tailgate Tent!
** I came to find out that the manufacturer is an Idaho company that makes many models for many vehicles.
Check them out ** HERE **
It's intended for use with an early '90s Isuzu Rodeo, which has both a hatch window and a tailgate.
I obviously wanted to adapt it to my 4Runner, and the previous owner had built a frame to support the tent in lieu of a rear hatch window. I wanted this tent to be secure and sealed, though, specifically to keep insects out as much as possible. I had to make some connection cables to accomplish a snug fit (black topped box).
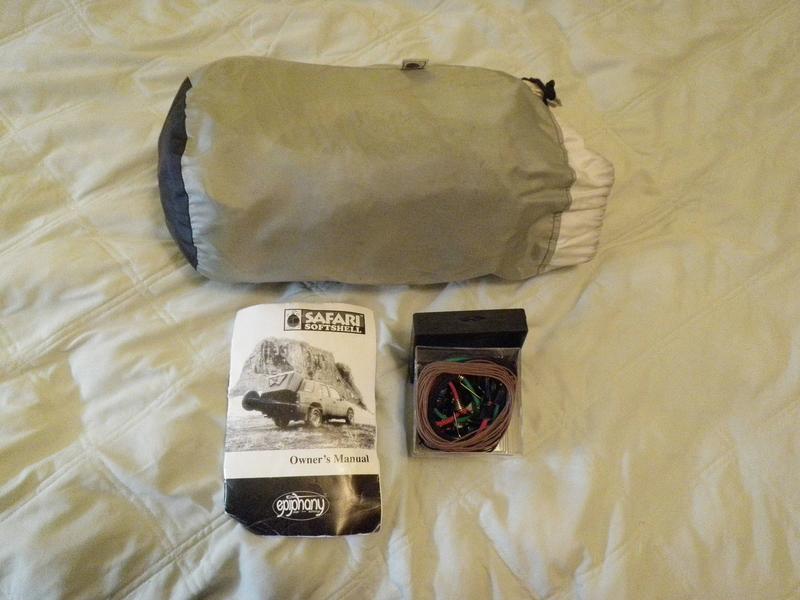
The PVC pipe, which breaks down into 3 pieces for easy storage, adequately framed the tent to the tailgate, but it was not secured. I added two sets of strings that torqued the bar into a solid position.

I then attached whitewater straps from the back of the roof rack through the frame behind the rear wheel for anchoring the tent's "clips".

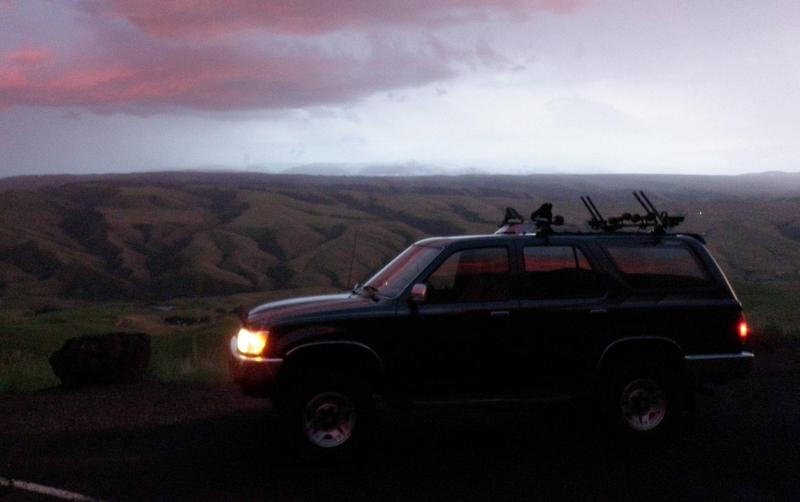
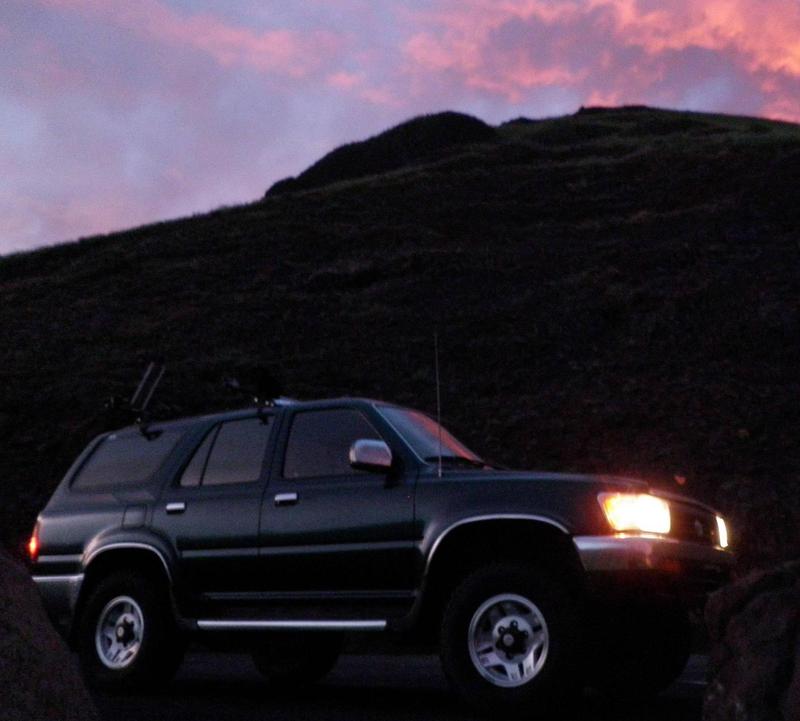
I modded some bungee cords with electrical tape to "clip" into the bungee that keeps the truck-facing portion of the tent snug around the body. I also added e-tape to the opposite end of the bungee (clips to the whitewater strap) to protect the vehicle's paint job. After attaching the 4 chords on each side of the vehicle, I have an extended bed that breaths and keeps bugs/water out. This is the finished product:
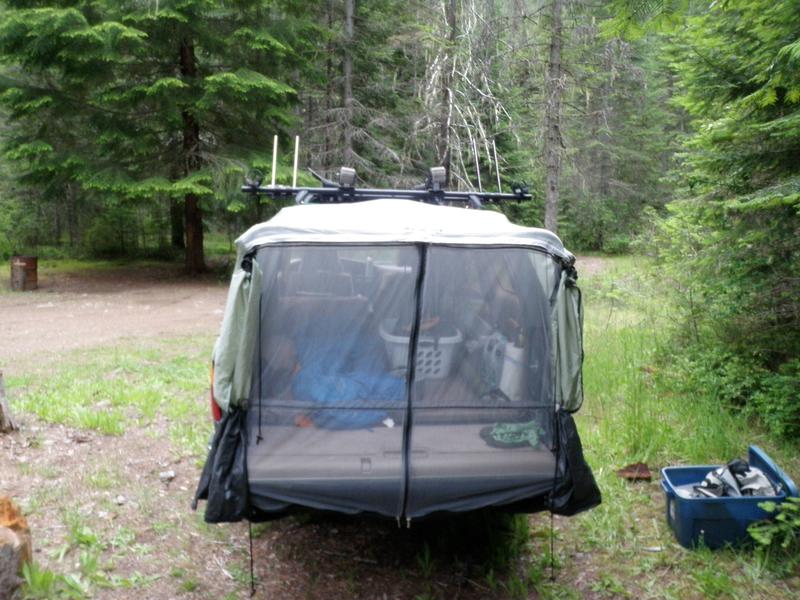
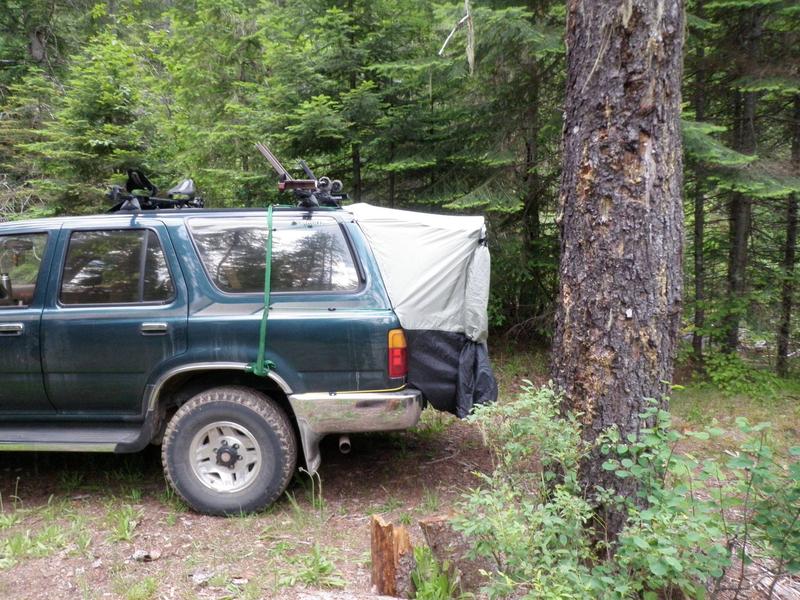
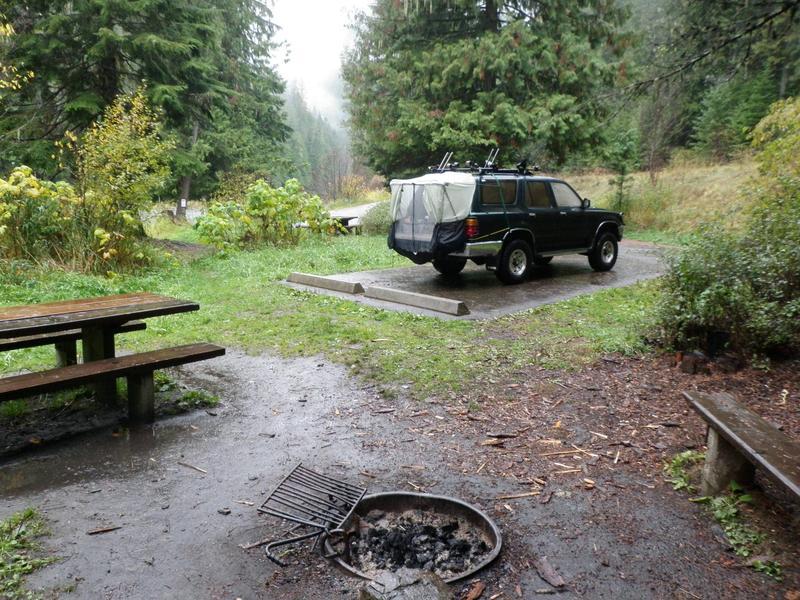
(Pictures from the St Joe River area near Avery, ID)
No more foggy windows after a night in the 4Runner! I'm a relatively small person (5'8"), so I can fit in the 4Runner with the tailgate up, but with not even an inch to spare. Even I can appreciate the extra foot room and storage space. I found that keeping hiking boots within reach while sleeping in the 4Runner is surprisingly hard if you don't want to track mud on everything you own; now I can just keep an old blanket on the tailgate and take off my shoes before hitting the sac. At least in the rainy Pacific Northwest, I like being able to sleep without pitching a tent, and this tailgate tent is a great compromise between time spent setting up a sleeping area and the feeling of sleeping in an open space. I don't know if they still make these, but if you have any questions on specs, feel free to comment or PM me!
** I came to find out that the manufacturer is an Idaho company that makes many models for many vehicles.
Check them out ** HERE **

It's intended for use with an early '90s Isuzu Rodeo, which has both a hatch window and a tailgate.
I obviously wanted to adapt it to my 4Runner, and the previous owner had built a frame to support the tent in lieu of a rear hatch window. I wanted this tent to be secure and sealed, though, specifically to keep insects out as much as possible. I had to make some connection cables to accomplish a snug fit (black topped box).
The PVC pipe, which breaks down into 3 pieces for easy storage, adequately framed the tent to the tailgate, but it was not secured. I added two sets of strings that torqued the bar into a solid position.
I then attached whitewater straps from the back of the roof rack through the frame behind the rear wheel for anchoring the tent's "clips".
I modded some bungee cords with electrical tape to "clip" into the bungee that keeps the truck-facing portion of the tent snug around the body. I also added e-tape to the opposite end of the bungee (clips to the whitewater strap) to protect the vehicle's paint job. After attaching the 4 chords on each side of the vehicle, I have an extended bed that breaths and keeps bugs/water out. This is the finished product:
(Pictures from the St Joe River area near Avery, ID)
No more foggy windows after a night in the 4Runner! I'm a relatively small person (5'8"), so I can fit in the 4Runner with the tailgate up, but with not even an inch to spare. Even I can appreciate the extra foot room and storage space. I found that keeping hiking boots within reach while sleeping in the 4Runner is surprisingly hard if you don't want to track mud on everything you own; now I can just keep an old blanket on the tailgate and take off my shoes before hitting the sac. At least in the rainy Pacific Northwest, I like being able to sleep without pitching a tent, and this tailgate tent is a great compromise between time spent setting up a sleeping area and the feeling of sleeping in an open space. I don't know if they still make these, but if you have any questions on specs, feel free to comment or PM me!
Last edited by trailbreaker; May 6, 2013 at 08:25 PM.
Apr 7, 2013 | 05:16 PM
#5
Thread Starter
Registered User
Joined: Mar 2007
Posts: 8
Likes: 0
From: Idaho
Wiring for iPod Radio Transmitter
When I bought my �95 4Runner in 2005, I decided to use an iTrip type transmitter to play my iPod in the truck instead of buying a new audio deck. It worked and kept my iPod charged via USB cigarette adapter, but plugging my iPod Touch with a case on into the transmitter was out of the question. When I bought my �94 4Runner in 2010, I decided to stick with the transmitter but streamline it for ease of use. I purchased a 30 pin extender cable from radio shack and fed both the power cable and the 30 pin cable into the glove box. From there, I could plug in the adapter (in the winter, if the adapter gets cold, it crackles; plus, I like taking it with me from time to time to play in other folk�s rigs, so I didn�t want to permanently install it.).
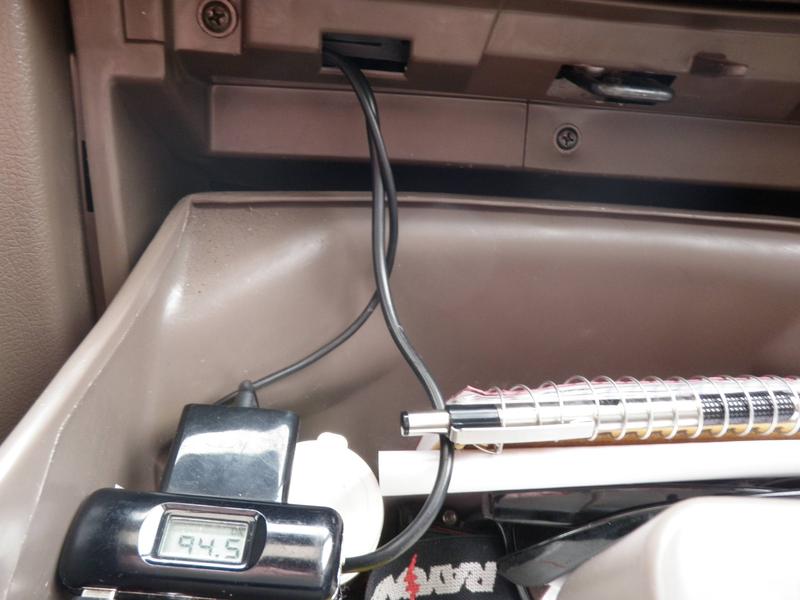
I found that the ashtray may as well have been designed to be an iPod holder, so I have the cables coming out of the base of the dash on the passenger side of the cab. They then run up to the cig lighter and the iPod.
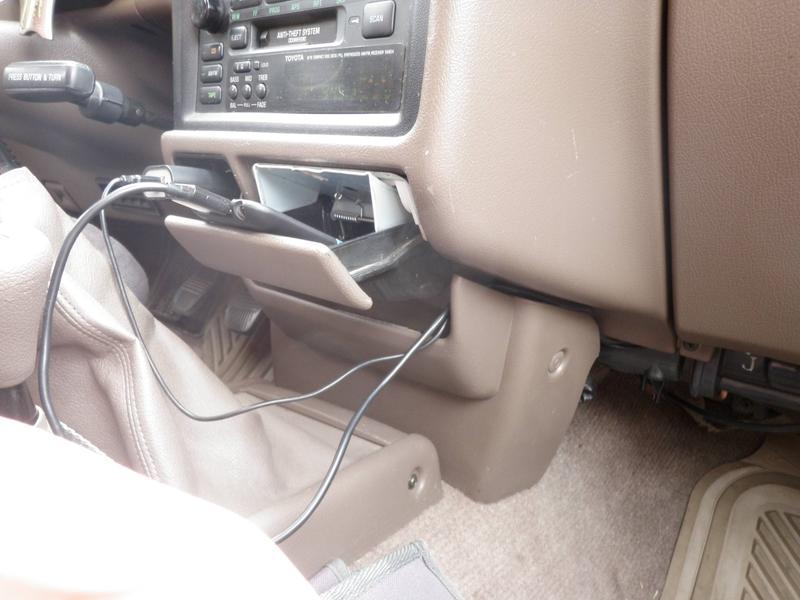
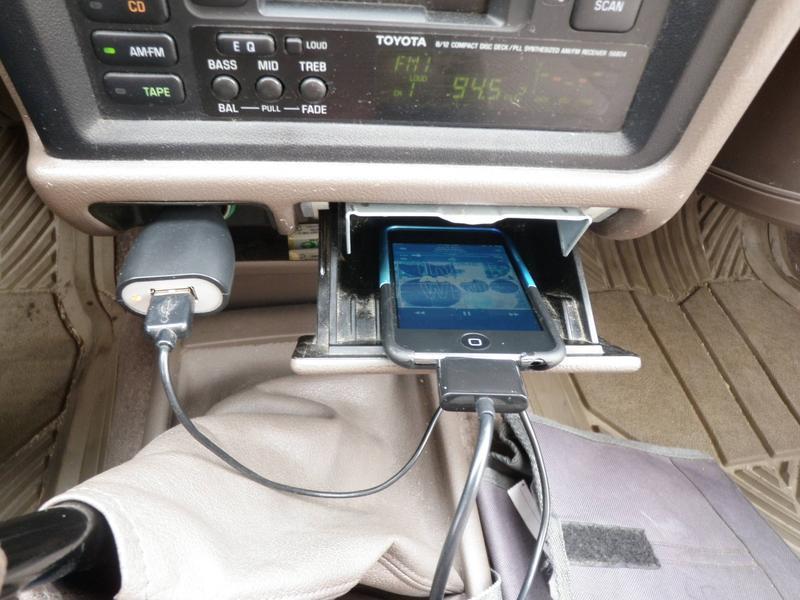
Here�s the whole setup:
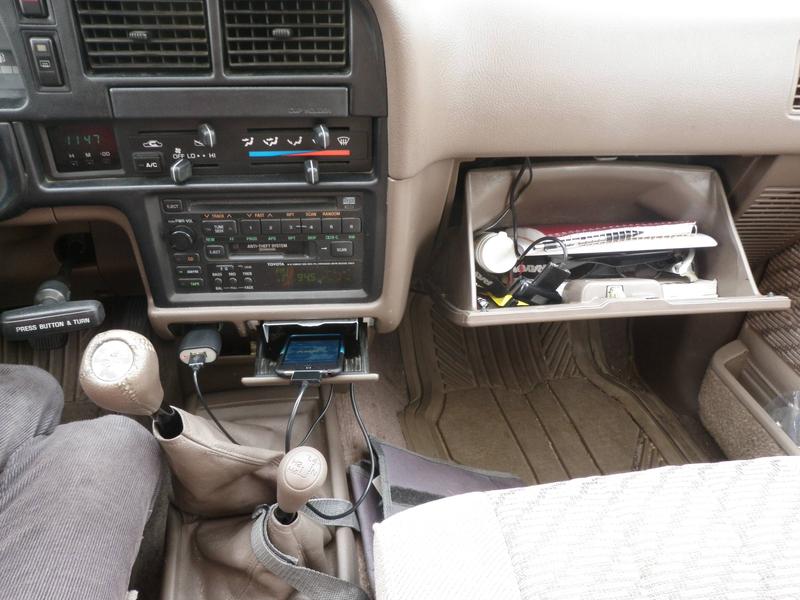
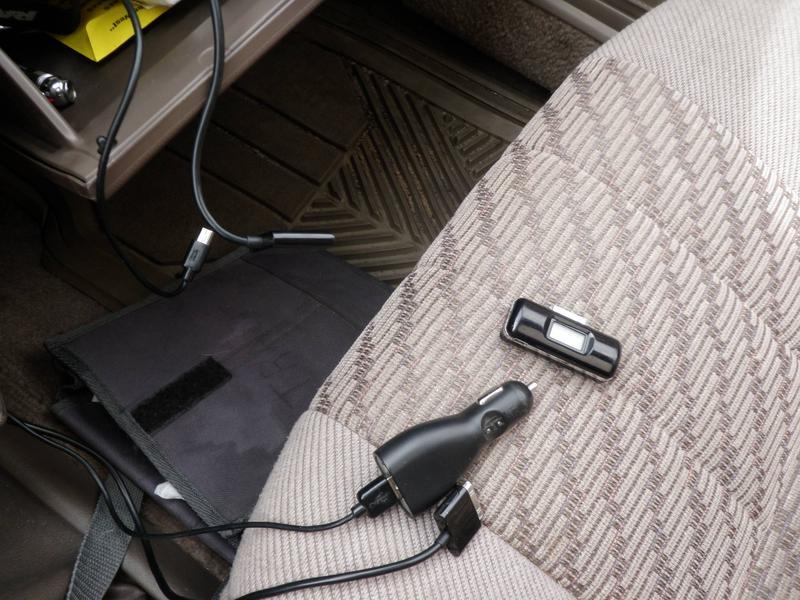
It allows me to pull my iPod all the way up to the cup holder if I need to, but I mostly just reach into the ashtray and tap to skip ahead. The iPod will charge as it transmits as well. It�s a good setup for me, at least. I also added some Kenwood 4� 3 way speakers into the stock boxes (I blew out the stocks trying to match the volume with driving all the windows down at 70 mph ). It made a noticeable difference in sound quality, but it wasn�t like I added an amp. Good enough for me, though!
I found that the ashtray may as well have been designed to be an iPod holder, so I have the cables coming out of the base of the dash on the passenger side of the cab. They then run up to the cig lighter and the iPod.
Here�s the whole setup:
It allows me to pull my iPod all the way up to the cup holder if I need to, but I mostly just reach into the ashtray and tap to skip ahead. The iPod will charge as it transmits as well. It�s a good setup for me, at least. I also added some Kenwood 4� 3 way speakers into the stock boxes (I blew out the stocks trying to match the volume with driving all the windows down at 70 mph
). It made a noticeable difference in sound quality, but it wasn�t like I added an amp. Good enough for me, though!

Trending Topics
Apr 7, 2013 | 07:50 PM
#8
Thread Starter
Registered User
Joined: Mar 2007
Posts: 8
Likes: 0
From: Idaho
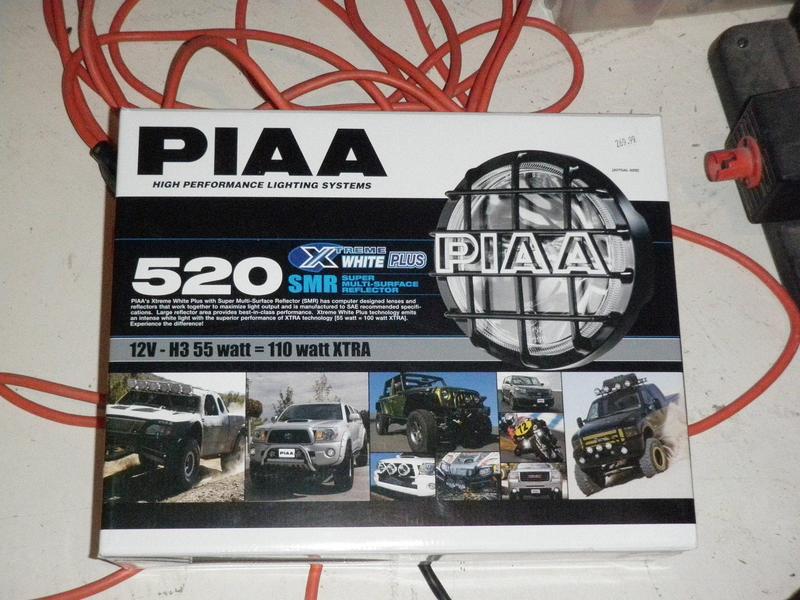
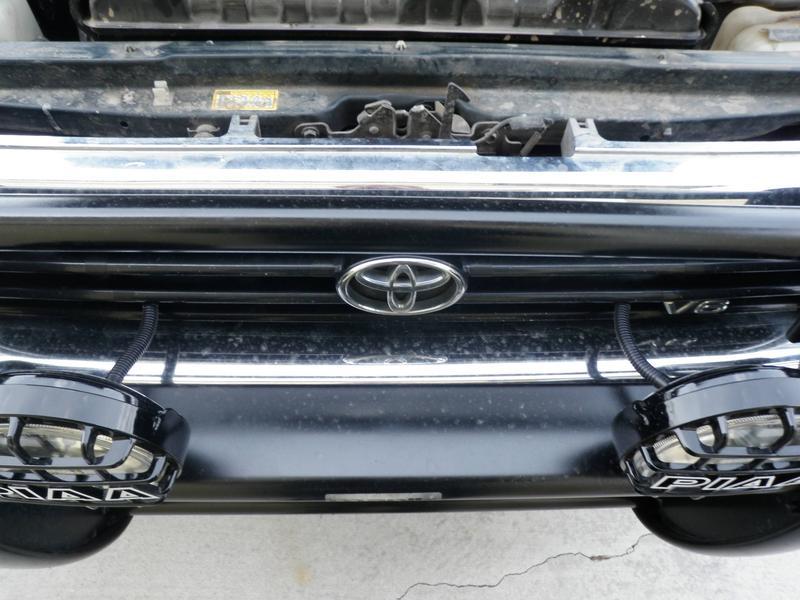
PIAA 520 Xtreme White Driving Lamps Install
Well last weekend (30-31 Mar 13), I finally converted my brush guard from a fashion statement to a glorified light bar. It only took over 2 years  . I picked up some PIAA lamps from Buck’s 4x4 shop here in Boise (made the move to the city a while back). I like to support the local shops and appreciate the service I can get with real people on hand. I find it worth the extra money compared to buying online and throwing the dice. To each there own, though, for sure.
I have never performed real mods on my actual system before (while installing lights is minor, tearing into the circuits and ripping panels is kinda scary the first time around). But A BIG THANKS to all you here on Yotatech for your write-ups and such. The net is an amazing thing, and I’ve fixed or modded a boatload of stuff because generous people like you post a how-to. With your help, I’m glad to say the install was big success!
The Kit: PIAA 520 Xtreme White Driving Lights
I decided on the driving lights over the fogs because of the percentage of use I was hoping to get. Fogs are great for blizzards, and let me tell you, we have 'em, but drivers are great for deer and other road hazards (drunks on rural highways? Yep...), which happen 8 months out of the year instead of 4. If worst comes to worse and the drivers don't cut it for weather, then I'll add a set of 510 ion crystal fogs on the bottom bar of the brush guard, but I wan't to see how these 520s perform first.
The kit comes with two lamps and a premade wire harness including a relay and toggle stitch (boo!) that you’re apparently suppose to snake out your steering column and 3M paste it to your dash like a cheap dorm-room poster. For some people who just want the lights, I can see that being acceptable, but I wanted something that looked a little cleaner. I swung by O’Reilly’s Auto Parts for a rocker switch, some wire/connectors/splicers, a fuse tap, and some wire guard (the black, ribbed tube with a slit to feed in the wire). The switch had a ground, load, and supply, nothing more or less. It was nothing hardcore, but enough to make the job pass as a factory install.
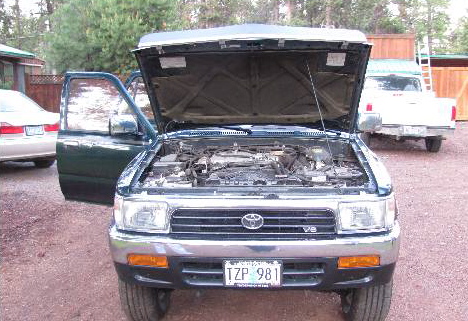
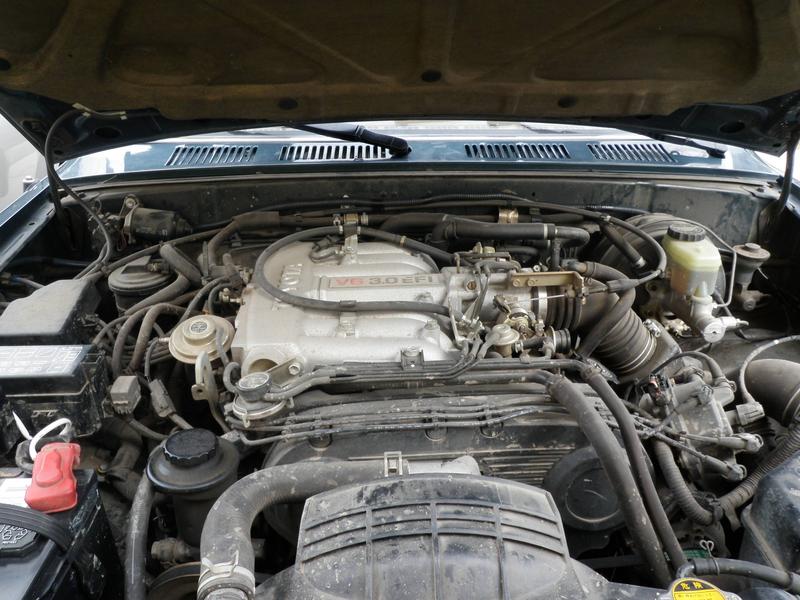
Prep Work:
I started by disconnecting and removing the battery (neg then pos for disconnect) and cleaning up corrosion with a mixture of baking soda and water (baking soda is basic and neutralizes battery acid). I then unbolted the inner plastic wheel housings/fenders so I could access the mounting/feeding holes on the engine bay sidewalls. I mounted the relay between the sidewall and the fuse box on the passenger side.
Lamp Wires:
I fed the lamp wires between the grill and the wiper fluid container with the factory wiring, eventually pulling them out at the base of the plastic grill on either corner. I e-taped the wire for the driver’s side light into the open horizontal spaces in the grill. I thought e-tape would look tacky, but it’s very clean; better than zip ties IMO.
*UPDATE (4/14/13): Added wire guard to lamp wires running through the grill
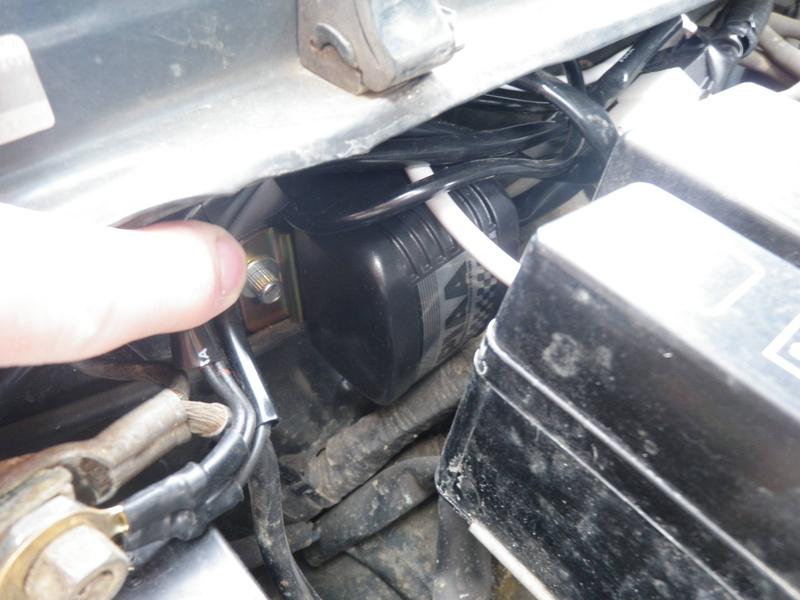
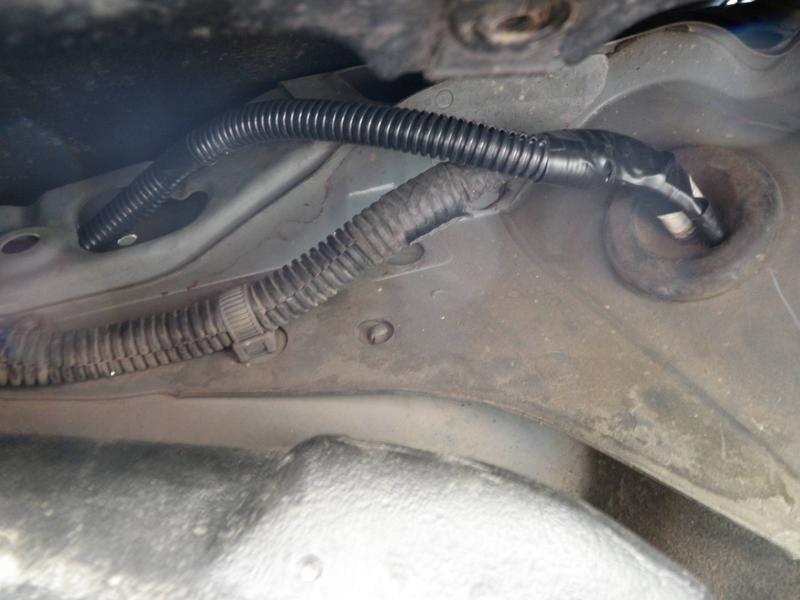
Switch Wires: Engine Bay
I fed all three switch wires (load, source, and ground) into the wire guard and crossed over from the fuse box to the brake fluid housing by going under the wiper motor and following the lines on the back wall of the engine bay. With 5 ft. of guard, the wires were exposed just past the brake fluid housing. I would suggest using 10 ft. of wire guard for the install, but I wasn’t about to go back to O’Reilly’s for $5 worth of wire guard when my truck was disassembled (I will be putting some on later, though). I also had to cut off the toggle switch at about 8" past the brake fluid housing, so that’s where you’re going to want to start splicing wire (18 ga) with the harness for the extra length to reach the cab.
*UPDATE (4/14/13): Added wire guard to uncovered portion of switch wiring.
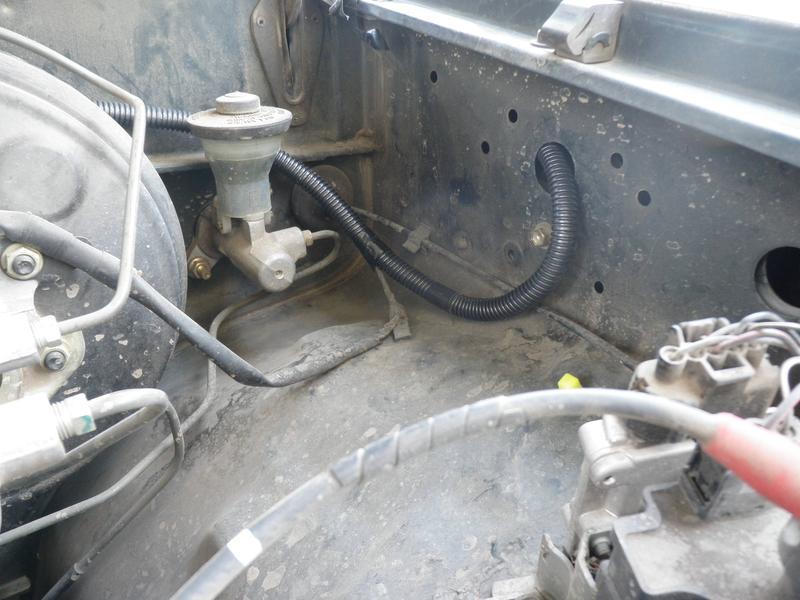
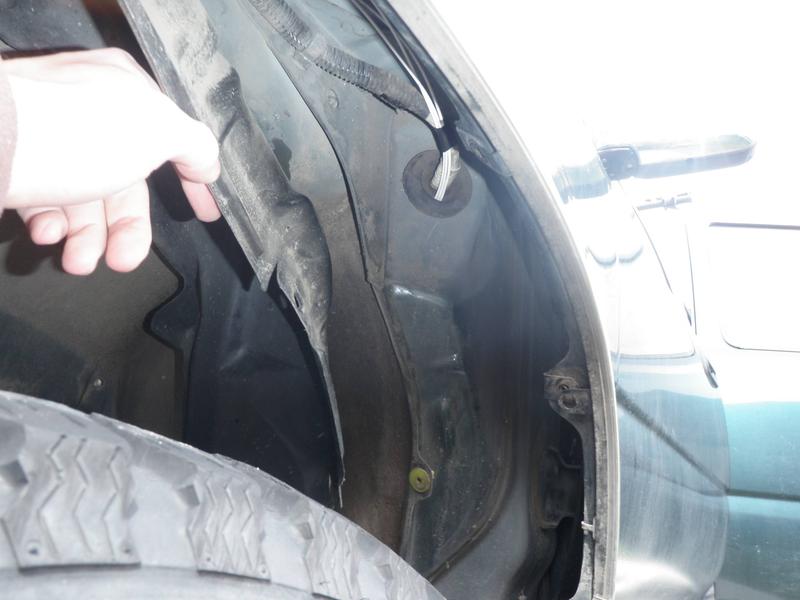
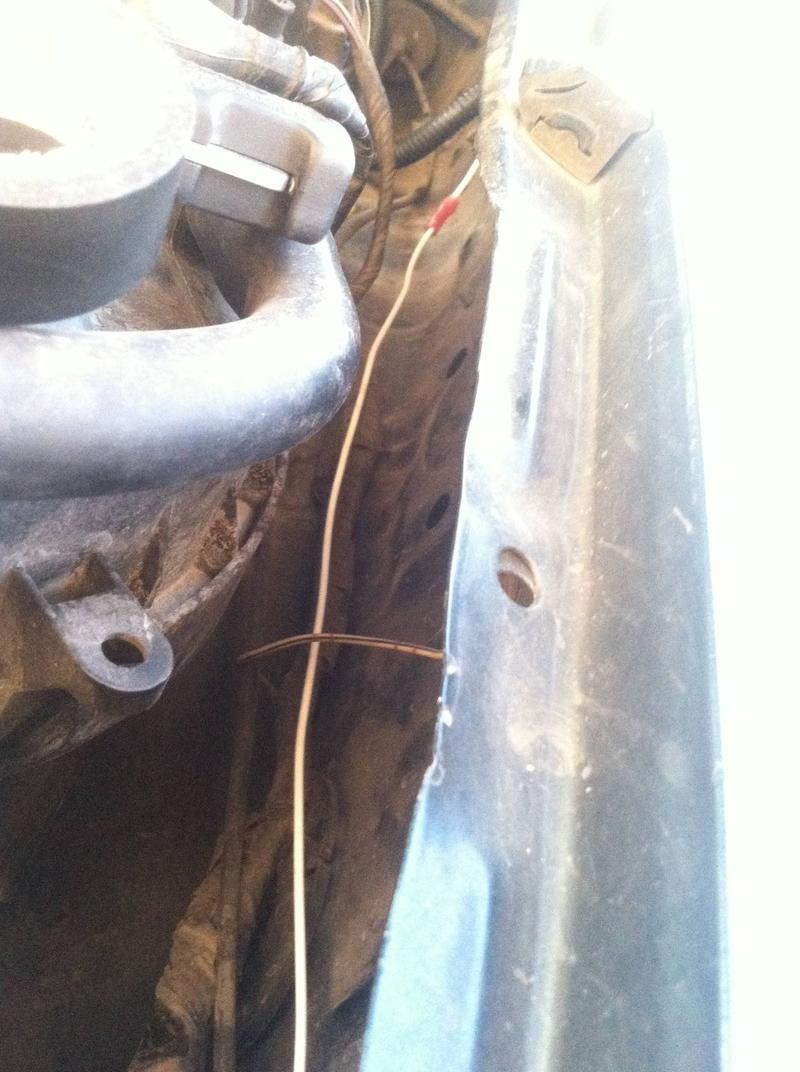
Switch Wires: Grommet
On the driver side wheel well, there is a grommet (rubber stopper that allows wires to pass though a hole into the cab while keeping the cab sealed from the elements) that I feed the three switch wires through. I took my roll of wire, uncut, and fed the free end through a hole in the driver’s side engine bay sidewall down into the wheel well and let it hang loose at the grommet. I then took a sturdy, long piece of coat-hanger-like wire and carefully poked it through the grommet between the existing wire set and the edge of the indent in the grommet. I went between the factory wires and the edge instead of directly below to keep from poking into the factory wiring and to keep a better seal around my added wires (a fresh hole makes a circular seal, but going directly under the factory wires makes a hump, which can let water slip by around the edges). I used a piece of wire that was smaller than the one I was pulling through (18 ga) to make a good seal. Once I pushed most of my lead wire through, I attached it to my electrical wire with a good twist and pinch from a set of pliers. I got in the cab and pulled the lead wire through with the electrical wire in tow.
*UPDATE (4/14/13): Added wire guard to uncovered portion of switch wiring.

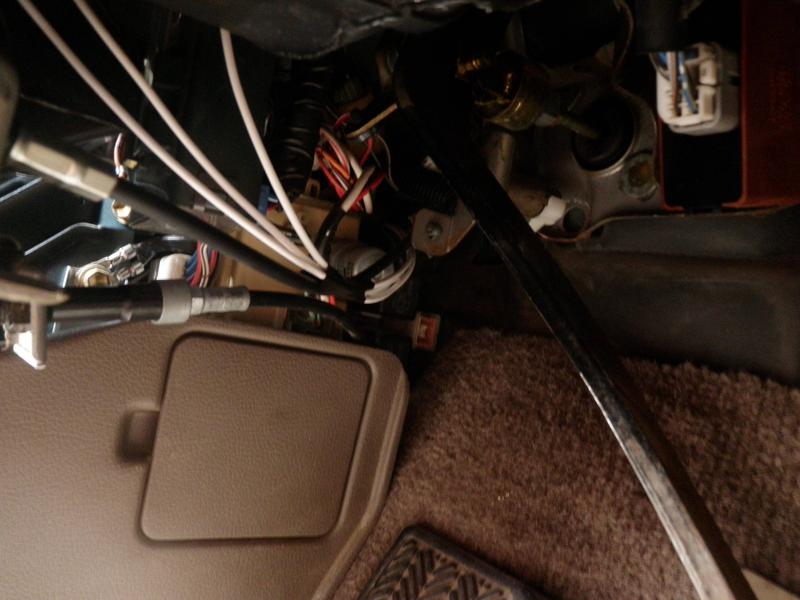
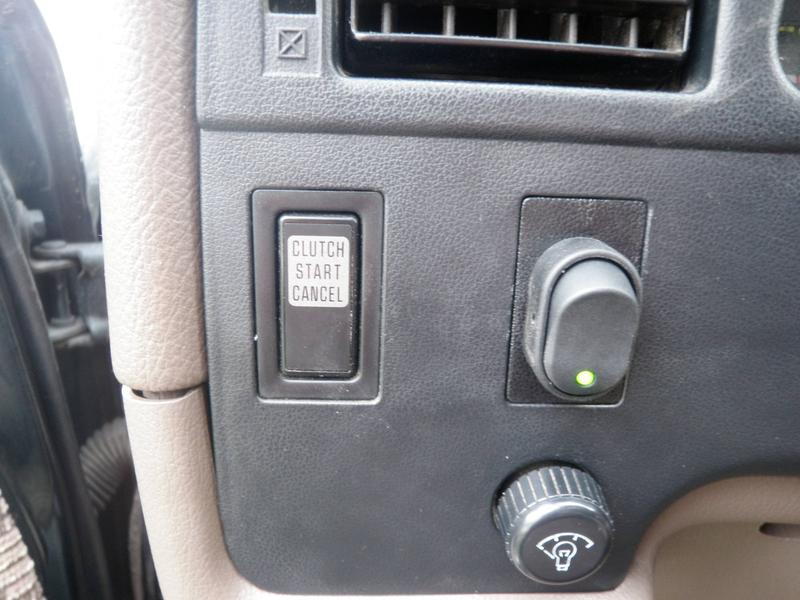
Switch Wires: Cab
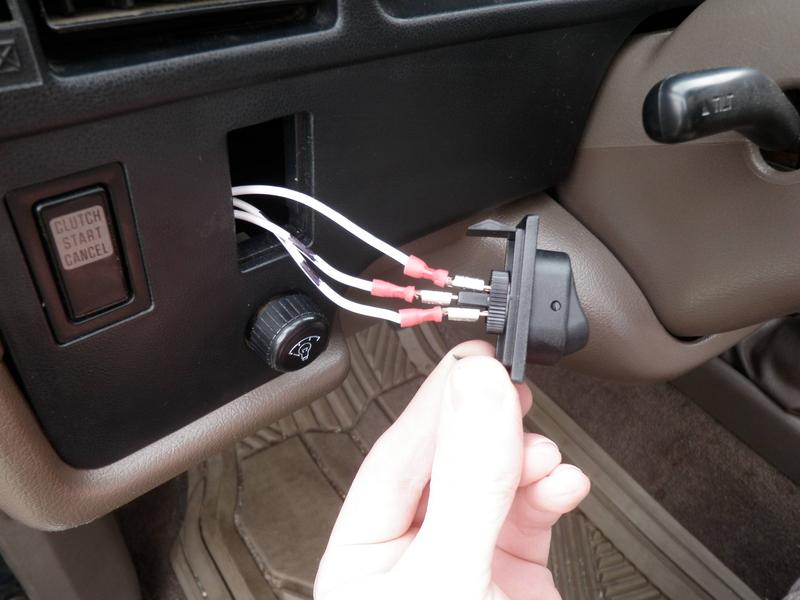
I pulled off the cab panel below the steering wheel and pulled out the corner of the black panel surrounding the gauge cluster to get at the empty port next to the clutch start cancel (I believe this is where the idle switch is in the Hilux Surf diesels, really wish I could get one in the states). After punching out the placeholder and feeding the electrical wire up through the side (close to the 4” speaker), I got a good feel for how much wire I needed and then cut it from the coil in the engine bay. I just repeated this process 2 more times for the other wires, MAKING SURE I MARKED THEM in some way so I knew which end in the engine bay corresponded to the end in the cab. Once the wires were in place, I spliced up the ends in the engine bay with the loose ends from the wiring harness.
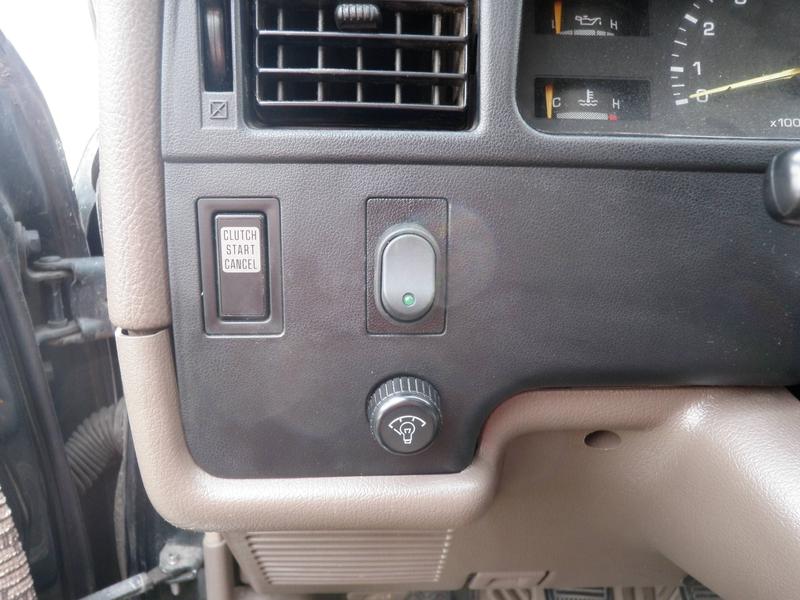
Switch Wires: Switch
I wanted to mount the switch in the black placeholder for the idle switch next to the clutch start cancel, so I popped it out and drilled a hole just big enough to fit the switch through. Once the switch was in place, I spliced the proper connectors to the wire from the engine bay and attached the ground, load, and supply (relay source) to the proper points on the switch. I popped it back in and put the cab back together, e-taping the loose wires where I saw fit to make it look clean.
Relay Source: Headlight High Beam Tap *UPDATE (5/6/2013): Changed source from fuse tap to high beams tap
Now comes the all-important point where I had to decide where I wanted my relay power source to draw from.
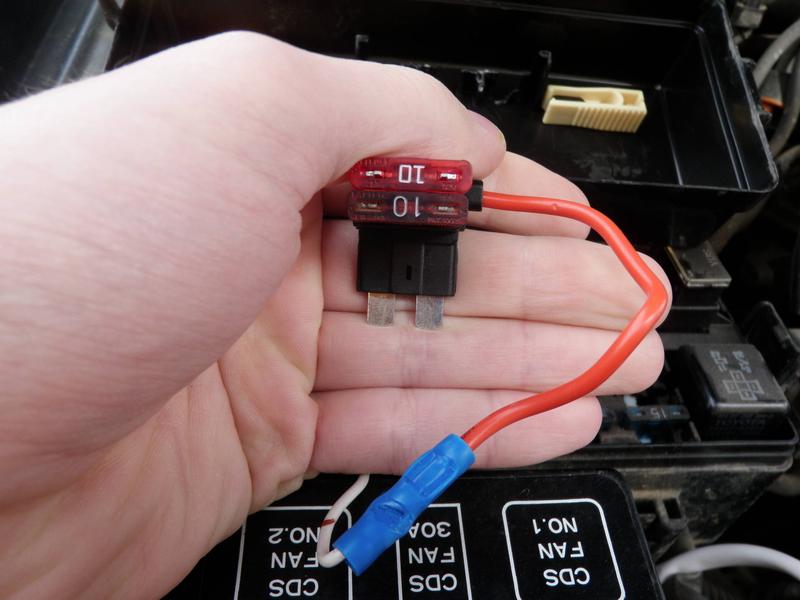
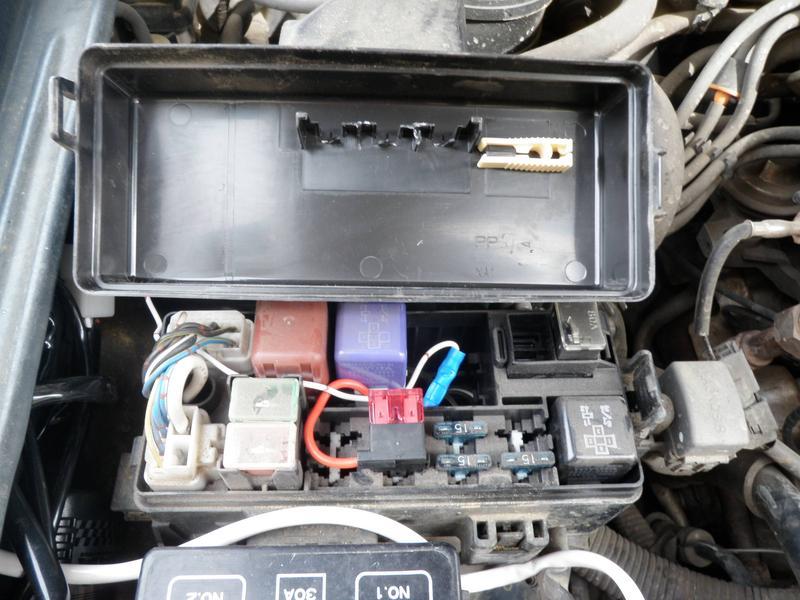
Many people will splice into the low/high beams for fog/driving lights respectively. Initially, I wanted the ability to turn on my lamps whenever I desired. I purchased this awesome fuse tapper to source my relay with my left (driver) headlight. With this, as long as my headlights were on, I could turn on my lamps. I had to knock out the spare fuse holders in my factory fuse box to get the fuse tap to fit, but I’m ok with keeping spares in the glove box or kick panel.
However, after only a few night driving experiences, I found it surprisingly difficult to flick off the switch and the brights in a reasonable amount of time (it's especially difficult with a 5 spd because it requires changing driving hands). Considering that my driving lights are meant to provide maximum brightness, I didn't see the benefit of running them without brights, so i decided to change my source. It took me quite a while to get all the tap info lined up, but once I found a wire diagram (model/year specific; what works on my rig isn't the general rule for all trucks), it was fairly straight forward.
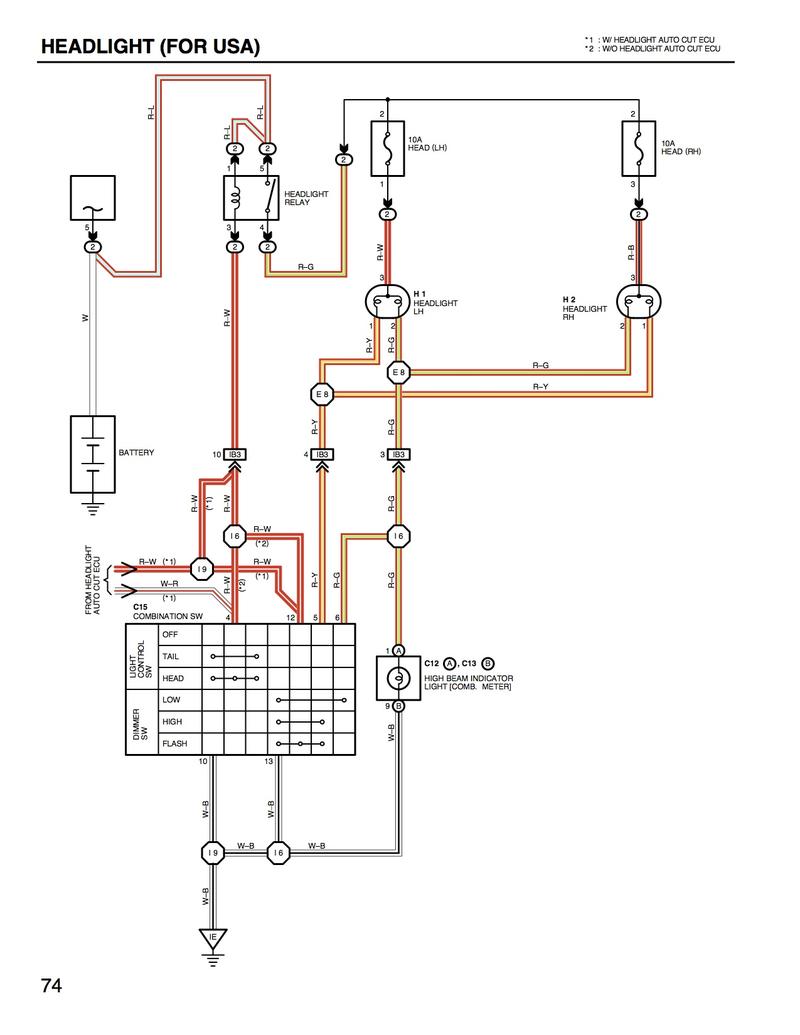
This model of light in the 2nd gens is an H4 from what I understand.
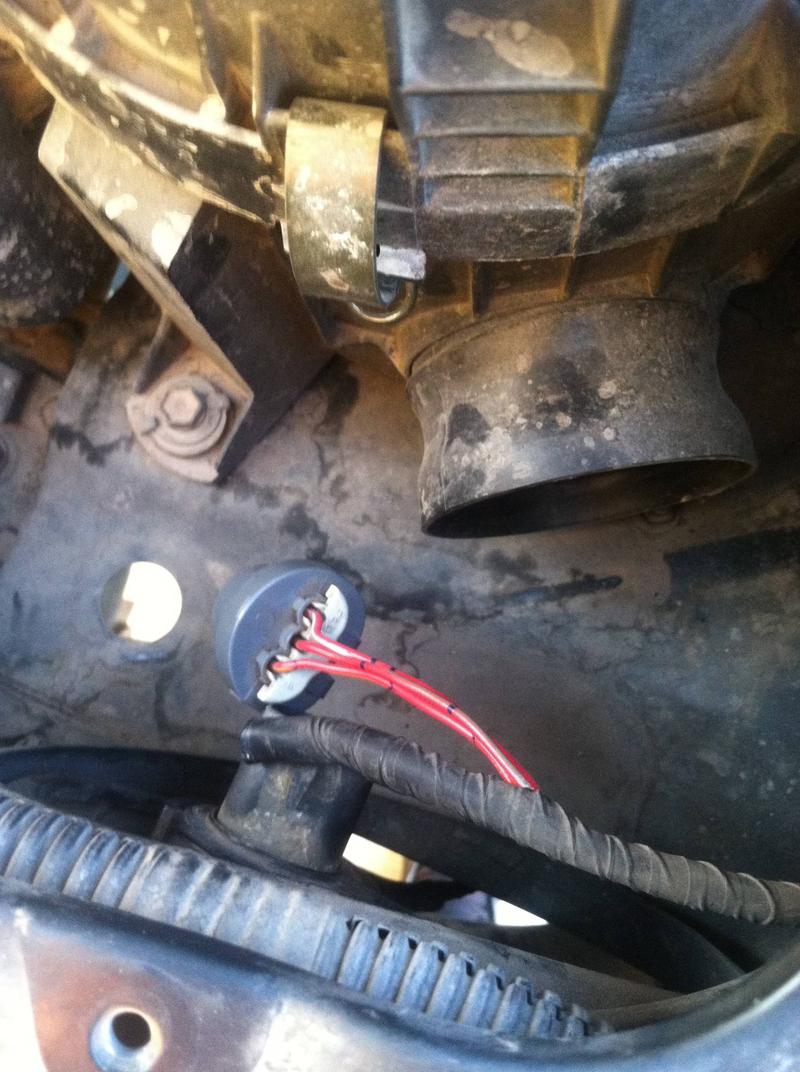
It has a reverse ground, which threw some people off when tapping. I just followed the diagram and my intuition. I tapped into the center red/green wire as, according to the diagram, it controls the blue "brights" dash indicator. PIAA supplied a slick clamp splice in their kit. I'd suggest using it to keep the splice clean and solid.
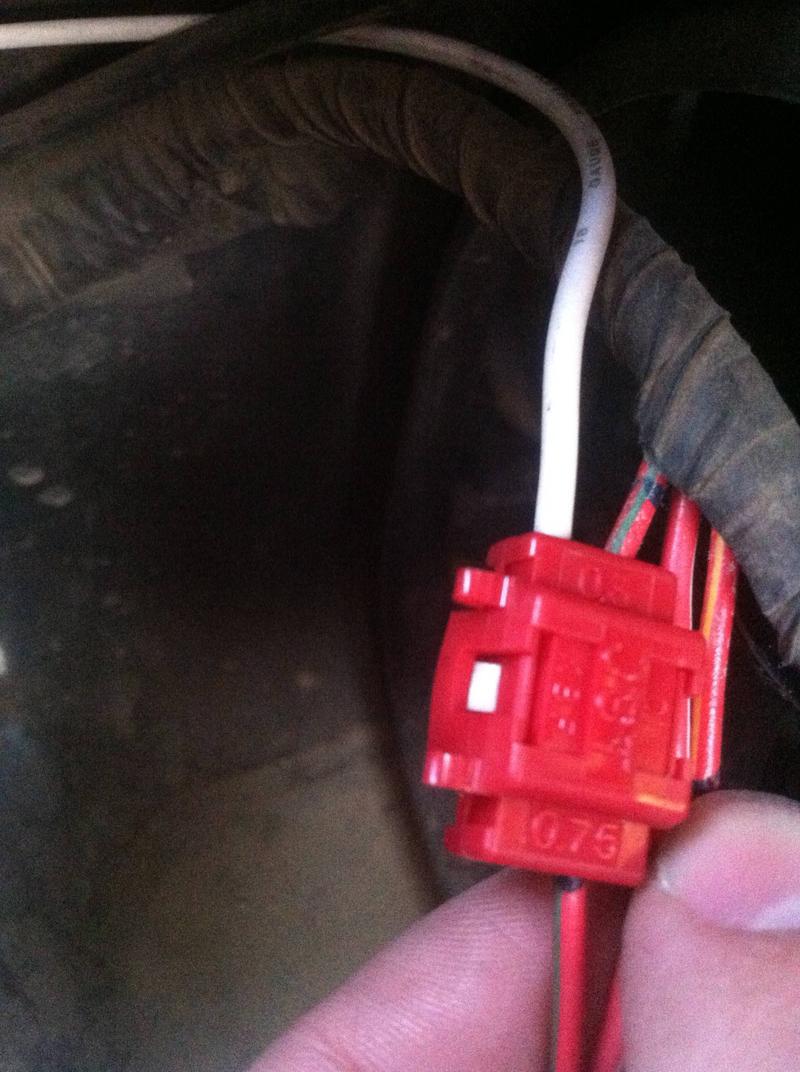
From there, I severed the fuse tap wire (will be using it for fogs soon) an spliced my switch source to the brights tap.
I took some e-tape to the clamp tap and the new source wire just to seal and secure everything. Now my driving lights can be disengaged by simply dimming the brights.
Finish:
From there, all I had to do was reinstall the battery, mount the lamps on the brush guard, and aim ‘em exactly how I wanted them to project. I'd suggest driving out on a country road for a half an hour or so and getting a beam pattern how you want rather than parking in front of a wall; perfect aiming angle is menial since you shouldn't be running driving lamps into opposing traffic. Even this relatively simple mounting/wiring process made me feel pretty good about myself. There’s just something about figuring a black box out and manipulating it, especially on your truck. Here’s to many more successful mods in the future!
*UPDATE (5/6/2013): It takes some time to line these up. I'd suggest going out into the country and adjusting them as you drive until you're comfortable with the beam patten; just aiming them at a wall won't do you much good...

(Low beams only )
)
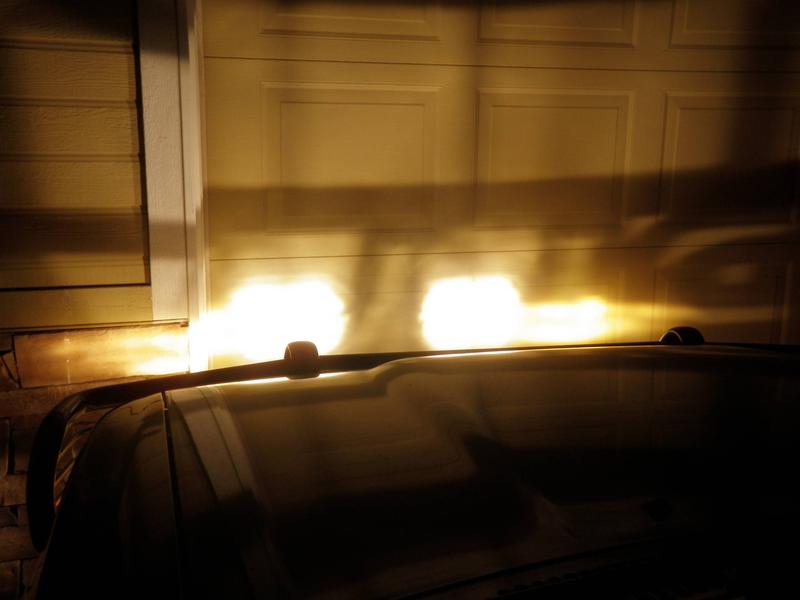
(Low beams with lamps! )
. I picked up some PIAA lamps from Buck’s 4x4 shop here in Boise (made the move to the city a while back). I like to support the local shops and appreciate the service I can get with real people on hand. I find it worth the extra money compared to buying online and throwing the dice. To each there own, though, for sure. I have never performed real mods on my actual system before (while installing lights is minor, tearing into the circuits and ripping panels is kinda scary the first time around). But A BIG THANKS to all you here on Yotatech for your write-ups and such. The net is an amazing thing, and I’ve fixed or modded a boatload of stuff because generous people like you post a how-to. With your help, I’m glad to say the install was big success!
The Kit: PIAA 520 Xtreme White Driving Lights
I decided on the driving lights over the fogs because of the percentage of use I was hoping to get. Fogs are great for blizzards, and let me tell you, we have 'em, but drivers are great for deer and other road hazards (drunks on rural highways? Yep...), which happen 8 months out of the year instead of 4. If worst comes to worse and the drivers don't cut it for weather, then I'll add a set of 510 ion crystal fogs on the bottom bar of the brush guard, but I wan't to see how these 520s perform first.
The kit comes with two lamps and a premade wire harness including a relay and toggle stitch (boo!) that you’re apparently suppose to snake out your steering column and 3M paste it to your dash like a cheap dorm-room poster. For some people who just want the lights, I can see that being acceptable, but I wanted something that looked a little cleaner. I swung by O’Reilly’s Auto Parts for a rocker switch, some wire/connectors/splicers, a fuse tap, and some wire guard (the black, ribbed tube with a slit to feed in the wire). The switch had a ground, load, and supply, nothing more or less. It was nothing hardcore, but enough to make the job pass as a factory install.
Prep Work:
I started by disconnecting and removing the battery (neg then pos for disconnect) and cleaning up corrosion with a mixture of baking soda and water (baking soda is basic and neutralizes battery acid). I then unbolted the inner plastic wheel housings/fenders so I could access the mounting/feeding holes on the engine bay sidewalls. I mounted the relay between the sidewall and the fuse box on the passenger side.
Lamp Wires:
I fed the lamp wires between the grill and the wiper fluid container with the factory wiring, eventually pulling them out at the base of the plastic grill on either corner. I e-taped the wire for the driver’s side light into the open horizontal spaces in the grill. I thought e-tape would look tacky, but it’s very clean; better than zip ties IMO.
*UPDATE (4/14/13): Added wire guard to lamp wires running through the grill
Switch Wires: Engine Bay
I fed all three switch wires (load, source, and ground) into the wire guard and crossed over from the fuse box to the brake fluid housing by going under the wiper motor and following the lines on the back wall of the engine bay. With 5 ft. of guard, the wires were exposed just past the brake fluid housing. I would suggest using 10 ft. of wire guard for the install, but I wasn’t about to go back to O’Reilly’s for $5 worth of wire guard when my truck was disassembled (I will be putting some on later, though). I also had to cut off the toggle switch at about 8" past the brake fluid housing, so that’s where you’re going to want to start splicing wire (18 ga) with the harness for the extra length to reach the cab.
*UPDATE (4/14/13): Added wire guard to uncovered portion of switch wiring.
Switch Wires: Grommet
On the driver side wheel well, there is a grommet (rubber stopper that allows wires to pass though a hole into the cab while keeping the cab sealed from the elements) that I feed the three switch wires through. I took my roll of wire, uncut, and fed the free end through a hole in the driver’s side engine bay sidewall down into the wheel well and let it hang loose at the grommet. I then took a sturdy, long piece of coat-hanger-like wire and carefully poked it through the grommet between the existing wire set and the edge of the indent in the grommet. I went between the factory wires and the edge instead of directly below to keep from poking into the factory wiring and to keep a better seal around my added wires (a fresh hole makes a circular seal, but going directly under the factory wires makes a hump, which can let water slip by around the edges). I used a piece of wire that was smaller than the one I was pulling through (18 ga) to make a good seal. Once I pushed most of my lead wire through, I attached it to my electrical wire with a good twist and pinch from a set of pliers. I got in the cab and pulled the lead wire through with the electrical wire in tow.
*UPDATE (4/14/13): Added wire guard to uncovered portion of switch wiring.
Switch Wires: Cab
I pulled off the cab panel below the steering wheel and pulled out the corner of the black panel surrounding the gauge cluster to get at the empty port next to the clutch start cancel (I believe this is where the idle switch is in the Hilux Surf diesels, really wish I could get one in the states). After punching out the placeholder and feeding the electrical wire up through the side (close to the 4” speaker), I got a good feel for how much wire I needed and then cut it from the coil in the engine bay. I just repeated this process 2 more times for the other wires, MAKING SURE I MARKED THEM in some way so I knew which end in the engine bay corresponded to the end in the cab. Once the wires were in place, I spliced up the ends in the engine bay with the loose ends from the wiring harness.
Switch Wires: Switch
I wanted to mount the switch in the black placeholder for the idle switch next to the clutch start cancel, so I popped it out and drilled a hole just big enough to fit the switch through. Once the switch was in place, I spliced the proper connectors to the wire from the engine bay and attached the ground, load, and supply (relay source) to the proper points on the switch. I popped it back in and put the cab back together, e-taping the loose wires where I saw fit to make it look clean.
Relay Source: Headlight High Beam Tap *UPDATE (5/6/2013): Changed source from fuse tap to high beams tap
Now comes the all-important point where I had to decide where I wanted my relay power source to draw from.
Many people will splice into the low/high beams for fog/driving lights respectively. Initially, I wanted the ability to turn on my lamps whenever I desired. I purchased this awesome fuse tapper to source my relay with my left (driver) headlight. With this, as long as my headlights were on, I could turn on my lamps. I had to knock out the spare fuse holders in my factory fuse box to get the fuse tap to fit, but I’m ok with keeping spares in the glove box or kick panel.
However, after only a few night driving experiences, I found it surprisingly difficult to flick off the switch and the brights in a reasonable amount of time (it's especially difficult with a 5 spd because it requires changing driving hands). Considering that my driving lights are meant to provide maximum brightness, I didn't see the benefit of running them without brights, so i decided to change my source. It took me quite a while to get all the tap info lined up, but once I found a wire diagram (model/year specific; what works on my rig isn't the general rule for all trucks), it was fairly straight forward.
This model of light in the 2nd gens is an H4 from what I understand.
It has a reverse ground, which threw some people off when tapping. I just followed the diagram and my intuition. I tapped into the center red/green wire as, according to the diagram, it controls the blue "brights" dash indicator. PIAA supplied a slick clamp splice in their kit. I'd suggest using it to keep the splice clean and solid.
From there, I severed the fuse tap wire (will be using it for fogs soon) an spliced my switch source to the brights tap.
I took some e-tape to the clamp tap and the new source wire just to seal and secure everything. Now my driving lights can be disengaged by simply dimming the brights.
Finish:
From there, all I had to do was reinstall the battery, mount the lamps on the brush guard, and aim ‘em exactly how I wanted them to project. I'd suggest driving out on a country road for a half an hour or so and getting a beam pattern how you want rather than parking in front of a wall; perfect aiming angle is menial since you shouldn't be running driving lamps into opposing traffic. Even this relatively simple mounting/wiring process made me feel pretty good about myself. There’s just something about figuring a black box out and manipulating it, especially on your truck. Here’s to many more successful mods in the future!
*UPDATE (5/6/2013): It takes some time to line these up. I'd suggest going out into the country and adjusting them as you drive until you're comfortable with the beam patten; just aiming them at a wall won't do you much good...
(Low beams only
)(Low beams with lamps
! )
Last edited by trailbreaker; May 6, 2013 at 08:19 PM.


 Apr 13, 2013 | 11:46 AM
#11
Thread Starter
Registered User
Joined: Mar 2007
Posts: 8
Likes: 0
From: Idaho
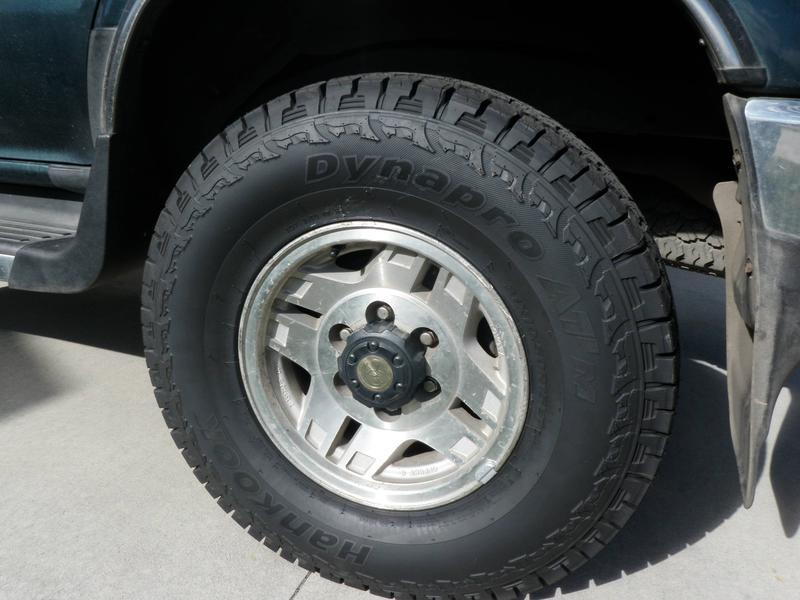
Death, Taxes, Tires: The Inevitable Need for New Rubber
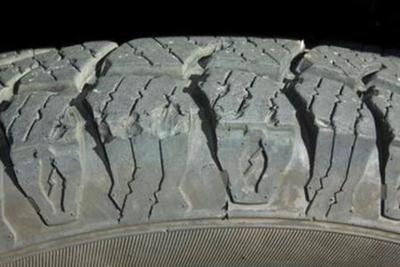
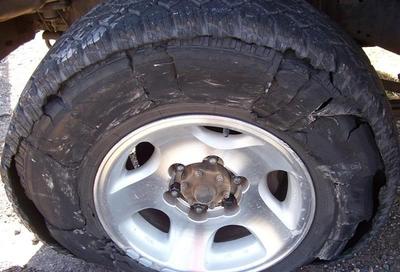
Do you know what this picture means?
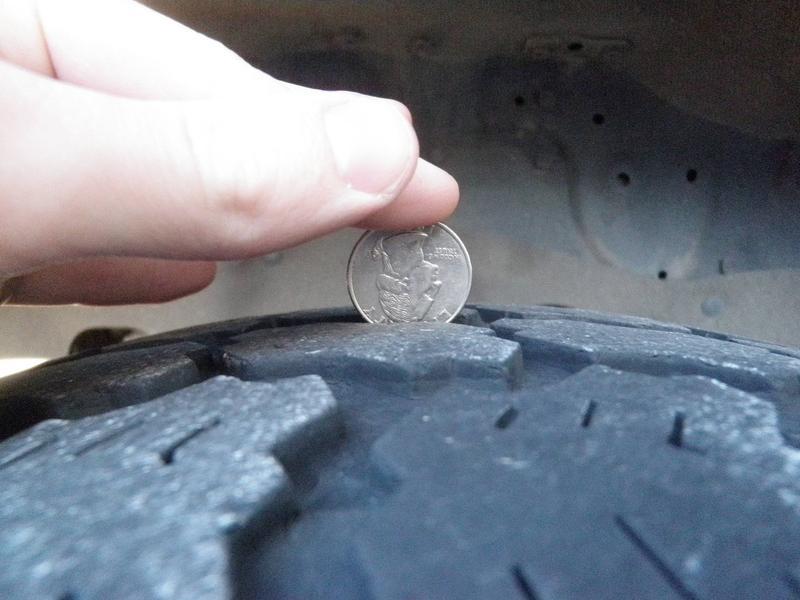
The time has finally come (OK it came a long time ago; the cash has come!) for me to buy my FIRST SET OF NEW TIRES ever. Yes, over the course of 7 years and 2 4Runners, I have not needed a new set of tires. Living in a small college town means one fill-up every couple of months, so multiply that by about 5 years with a new 4Runner in the middle and that should about explain it.
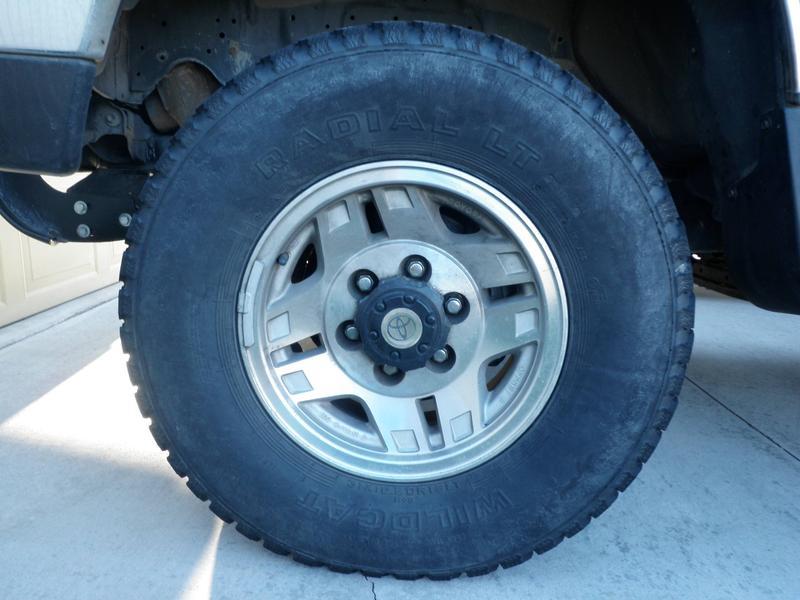
Anyway, I am a researcher, especially when it comes to my truck. I needed a tire that first and foremost performed well in the snow and ice. While I've never needed studs (black ice is a rare case here), I did need tread that cleared build-up and sipes that could gip on pack. Flash snow storms and residual snow from November to April aren't uncommon on the highways and backroads of Idaho; I didn't want to get caught with my pants down. I also wanted a tire that was relatively quiet on the highway. The cab of a 2nd gen 4Runner isn't well insulated against noise. If you don't believe me, ask my late OEM 4" speakers (replaced with Kenwood KFC-1062S 4" 3-ways - $50; noticeable improvement and a cheap/quick swap). My previous Wildcat Radial LTs, despite their awesome traction in the snow, just roared over 50 mph, especially with the windows down. Because I do most of my driving on the pavement (80%+), an A/T tire fit my driving style and needs the best. I still wanted something aggressive enough to handle some light mud with a sidewall that had grip and protection from puncture (we have lots of clay and pumice in these parts, which make for slip-n-slide and blown sidewalls respectively). The USFS/BLM roads here can be quite unforgiving. I know this is a lot to ask from a single tire, but I was convinced that there was something out there that fit the bill.
I compared many different tires when making my decision:
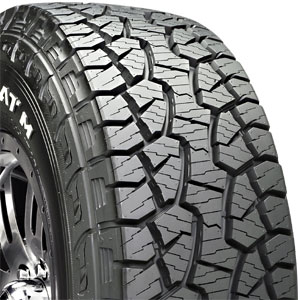
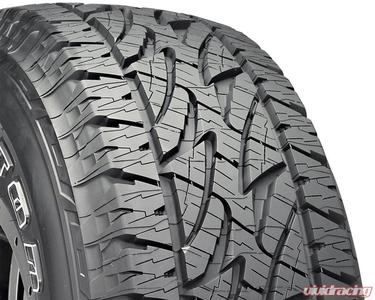
Hankook Dynapro ATM
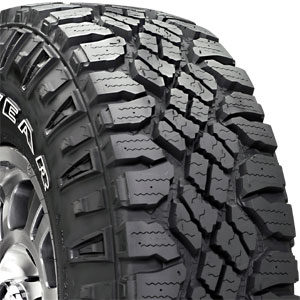
Goodyear Wrangler DuraTrac
General Grabber AT 2
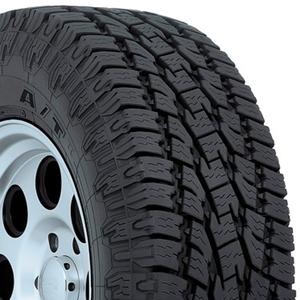
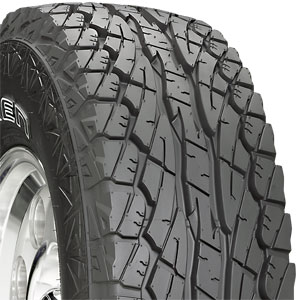
Toyo Open Country AT 2
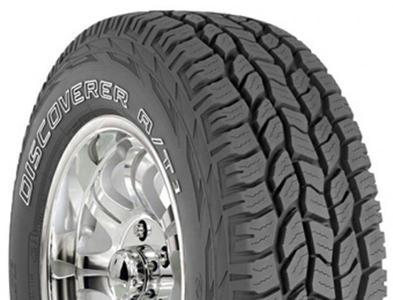
Cooper Discoverer AT 3
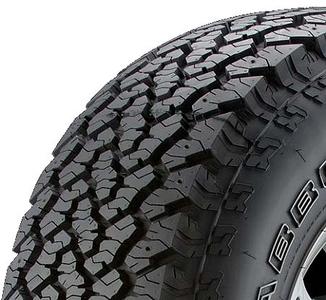
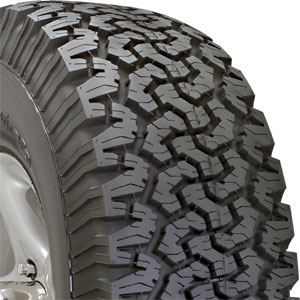
BFGoodrich AT KO
Falken Wildpeak AT
Bridgestone Dueler AT Revo 2
Yokohama Geolander AT S
Big-O Bigfoot AT
Hankook Dynapro ATM
Goodyear Wrangler DuraTrac
General Grabber AT 2
Toyo Open Country AT 2 / (Nitto Terra Grapplers – no r15)
Cooper Discoverer AT 3 / STT
BFGoodrich AT KO (Available in 32s)
Falken WildPeak AT (Available in 32s)
Bridgestone Dueler Revo 2
Yokohama Geolander AT S
Big-O Bigfoot AT - unimpressed
Big-O Bigfoot AT – downright dangerous (read full thread if you must)
(Concerning the Bigfoot, I don’t like to shoot a product down without first-hand experience, but with the stuff I’ve read, I want to tell anyone who’s considering this tire that it’s downright dangerous: DO NOT BUY IT! I know people who own them and haven't had issues, but I'm certainly not rolling the dice with my life on such a sketchy product.)
The Toyo's had mixed reviews with snow/ice (some raved about weather handling, other returned them because it was so bad), the BFGs had a closed tread design making snow cleaning at low rotation speeds difficult, the Generals had the same issue to a lesser extent (but excellent reviews none the less; I may try them in the future), the Falkens were too much of a street tire, the Yokohamas might be on the Chinese rubber ban list according to the salesman at Big-O who cut them from his inventory (super cheap at Commercial Tire too, like they were trying to get them out the door ASAP before a ban on sale was issued; could be the rumor mill, some people rave about the yoks, and I don't want to flag them as dangerous, but I didn't want to put the effort into finding out for sure when I wasn't particularly sold anyway), and a quick Bigfoot google search will show nothing but chunking and other horror stories. The Coopers (especially) and the Revos (leaning more towards a street tire from what I hear) both had good reviews, but I never heard anyone rave about them like a gift from the 4x4 gods. It was always like "Yeah, I have this tire and it doesn't suck", never, "OMFGBFFBBQGeyeZ this tire is teh sick-zor!".
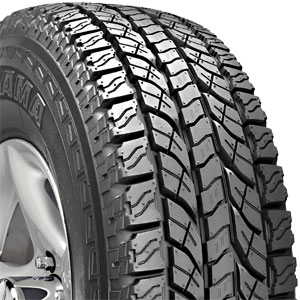
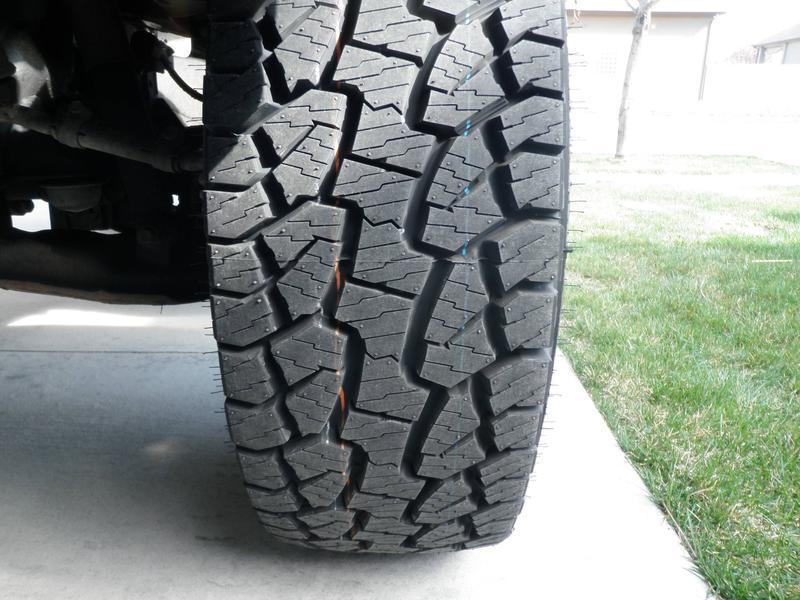
In the end, considering my particular driving style, it came down to the DuraTracs and the DynaPros. Both could throw snow, mud, etc., had acceptable dirt/rut-road capabilities, were highway worthy, and had a loyal fan base. My local Discount Tire had the DuraTracs listed at about $800 and the DynaPros at about $700 (Big-O quoted me $1000+ on both; hogwash). In the end, though, I had heard of issues with the DuraTrac's tread on some highway conditions (basically built like a M/T), including the "I'm driving on a waterbed" feeling. Because of my 80%+ pavement time, the ultra-aggressive DuraTracs were a little much for me. The DynaPros also had a ton of tech packed in, such as tiered side groves for rock ejection, scalloped and angled groves for more surface contact and debris evacuation, deep sipes for wet/snow traction, wider tread than most, rim cushions, and a rugged sidewall tread that increased traction in deep stuff (mud/snow) and protected against sidewall puncture. Both tires only came in C load for 31x10.5xr15, so extra sidewall protection was very appealing (I heard many a wheeler curse the DuraTrac C loads for sidewall puncture and recommend E or nothing).
So with that in mind, I dropped the ~$750 for the Hankook DynaPro ATM 31x10.5xr15s at my local Discount Tire. They had my rig in the parking lot in under 30 min (I'll see if everything was balanced right soon enough), but great service if I do say so myself, especially with the price to boot. I haven't put a lot of driving time on them yet, but I can grip very well in dry conditions, have much more throttle response than I had with the Wildcats, and can hold a pleasant conversation at 75+ mph. I will update my experience as I get more time with this tire. Here's hoping I get the 50K tread life that both the warranty and most other users have guaranteed!

The time has finally come (OK it came a long time ago; the cash has come!) for me to buy my FIRST SET OF NEW TIRES ever. Yes, over the course of 7 years and 2 4Runners, I have not needed a new set of tires. Living in a small college town means one fill-up every couple of months, so multiply that by about 5 years with a new 4Runner in the middle and that should about explain it.
Anyway, I am a researcher, especially when it comes to my truck. I needed a tire that first and foremost performed well in the snow and ice. While I've never needed studs (black ice is a rare case here), I did need tread that cleared build-up and sipes that could gip on pack. Flash snow storms and residual snow from November to April aren't uncommon on the highways and backroads of Idaho; I didn't want to get caught with my pants down. I also wanted a tire that was relatively quiet on the highway. The cab of a 2nd gen 4Runner isn't well insulated against noise. If you don't believe me, ask my late OEM 4" speakers (replaced with Kenwood KFC-1062S 4" 3-ways - $50; noticeable improvement and a cheap/quick swap). My previous Wildcat Radial LTs, despite their awesome traction in the snow, just roared over 50 mph, especially with the windows down. Because I do most of my driving on the pavement (80%+), an A/T tire fit my driving style and needs the best. I still wanted something aggressive enough to handle some light mud with a sidewall that had grip and protection from puncture (we have lots of clay and pumice in these parts, which make for slip-n-slide and blown sidewalls respectively). The USFS/BLM roads here can be quite unforgiving. I know this is a lot to ask from a single tire, but I was convinced that there was something out there that fit the bill.
I compared many different tires when making my decision:
Hankook Dynapro ATM
Goodyear Wrangler DuraTrac
General Grabber AT 2
Toyo Open Country AT 2
Cooper Discoverer AT 3
BFGoodrich AT KO
Falken Wildpeak AT
Bridgestone Dueler AT Revo 2
Yokohama Geolander AT S
Big-O Bigfoot AT
Hankook Dynapro ATM
Goodyear Wrangler DuraTrac
General Grabber AT 2
Toyo Open Country AT 2 / (Nitto Terra Grapplers – no r15)
Cooper Discoverer AT 3 / STT
BFGoodrich AT KO (Available in 32s)
Falken WildPeak AT (Available in 32s)
Bridgestone Dueler Revo 2
Yokohama Geolander AT S
Big-O Bigfoot AT - unimpressed
Big-O Bigfoot AT – downright dangerous (read full thread if you must)
(Concerning the Bigfoot, I don’t like to shoot a product down without first-hand experience, but with the stuff I’ve read, I want to tell anyone who’s considering this tire that it’s downright dangerous: DO NOT BUY IT! I know people who own them and haven't had issues, but I'm certainly not rolling the dice with my life on such a sketchy product.)
The Toyo's had mixed reviews with snow/ice (some raved about weather handling, other returned them because it was so bad), the BFGs had a closed tread design making snow cleaning at low rotation speeds difficult, the Generals had the same issue to a lesser extent (but excellent reviews none the less; I may try them in the future), the Falkens were too much of a street tire, the Yokohamas might be on the Chinese rubber ban list according to the salesman at Big-O who cut them from his inventory (super cheap at Commercial Tire too, like they were trying to get them out the door ASAP before a ban on sale was issued; could be the rumor mill, some people rave about the yoks, and I don't want to flag them as dangerous, but I didn't want to put the effort into finding out for sure when I wasn't particularly sold anyway), and a quick Bigfoot google search will show nothing but chunking and other horror stories. The Coopers (especially) and the Revos (leaning more towards a street tire from what I hear) both had good reviews, but I never heard anyone rave about them like a gift from the 4x4 gods. It was always like "Yeah, I have this tire and it doesn't suck", never, "OMFGBFFBBQGeyeZ this tire is teh sick-zor!".
In the end, considering my particular driving style, it came down to the DuraTracs and the DynaPros. Both could throw snow, mud, etc., had acceptable dirt/rut-road capabilities, were highway worthy, and had a loyal fan base. My local Discount Tire had the DuraTracs listed at about $800 and the DynaPros at about $700 (Big-O quoted me $1000+ on both; hogwash). In the end, though, I had heard of issues with the DuraTrac's tread on some highway conditions (basically built like a M/T), including the "I'm driving on a waterbed" feeling. Because of my 80%+ pavement time, the ultra-aggressive DuraTracs were a little much for me. The DynaPros also had a ton of tech packed in, such as tiered side groves for rock ejection, scalloped and angled groves for more surface contact and debris evacuation, deep sipes for wet/snow traction, wider tread than most, rim cushions, and a rugged sidewall tread that increased traction in deep stuff (mud/snow) and protected against sidewall puncture. Both tires only came in C load for 31x10.5xr15, so extra sidewall protection was very appealing (I heard many a wheeler curse the DuraTrac C loads for sidewall puncture and recommend E or nothing).
So with that in mind, I dropped the ~$750 for the Hankook DynaPro ATM 31x10.5xr15s at my local Discount Tire. They had my rig in the parking lot in under 30 min (I'll see if everything was balanced right soon enough), but great service if I do say so myself, especially with the price to boot. I haven't put a lot of driving time on them yet, but I can grip very well in dry conditions, have much more throttle response than I had with the Wildcats, and can hold a pleasant conversation at 75+ mph. I will update my experience as I get more time with this tire. Here's hoping I get the 50K tread life that both the warranty and most other users have guaranteed!
Last edited by trailbreaker; Apr 13, 2013 at 03:07 PM.

Thread
Thread Starter
Forum
Replies
Last Post
RedRunner_87
95.5-2004 Tacomas & 96-2002 4Runners (Build-Up Section)
84
Jun 1, 2021 01:51 PM
jon.r
General Vehicle Related Topics (Non Year Related)
8
Jul 11, 2015 03:34 PM
crashburnoveride
86-95 Trucks & 4Runners
1
Jul 10, 2015 06:39 AM


