
tinigunner11's 1986 4runner build


 Mar 28, 2013 | 03:02 PM
#22
Thread Starter
Registered User
iTrader: (1)
Joined: Sep 2011
Posts: 194
Likes: 1
From: johnstown, Colorado
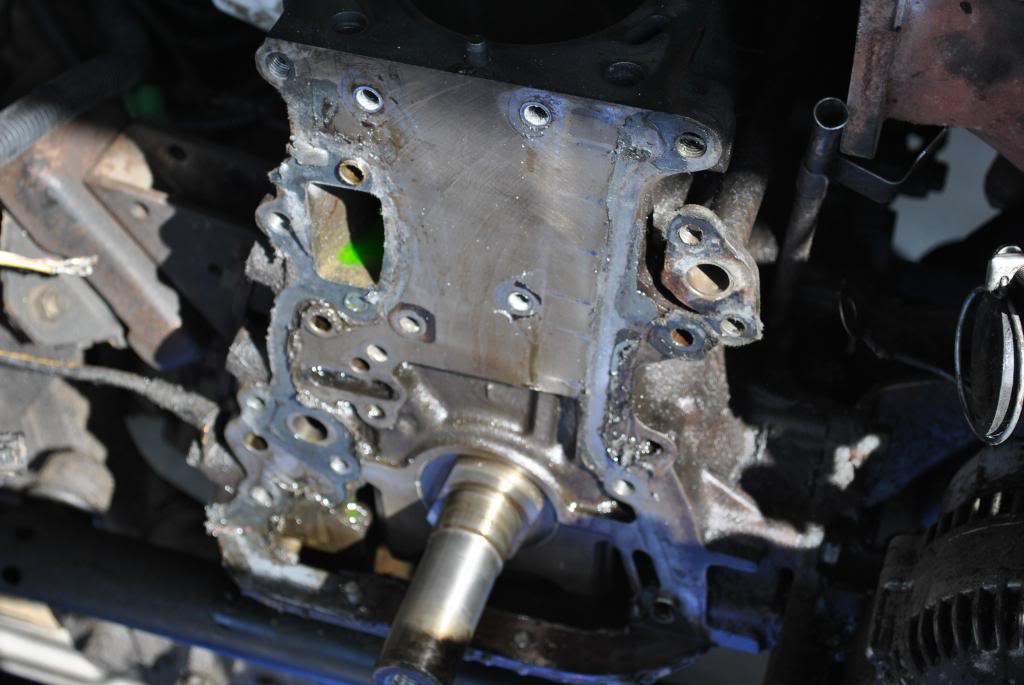
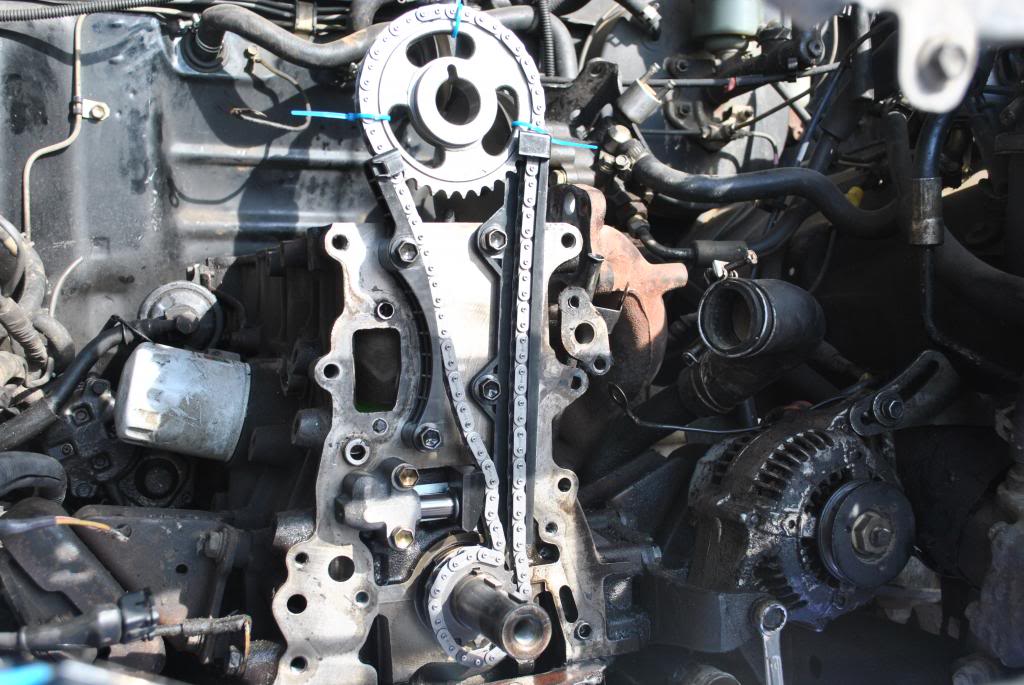
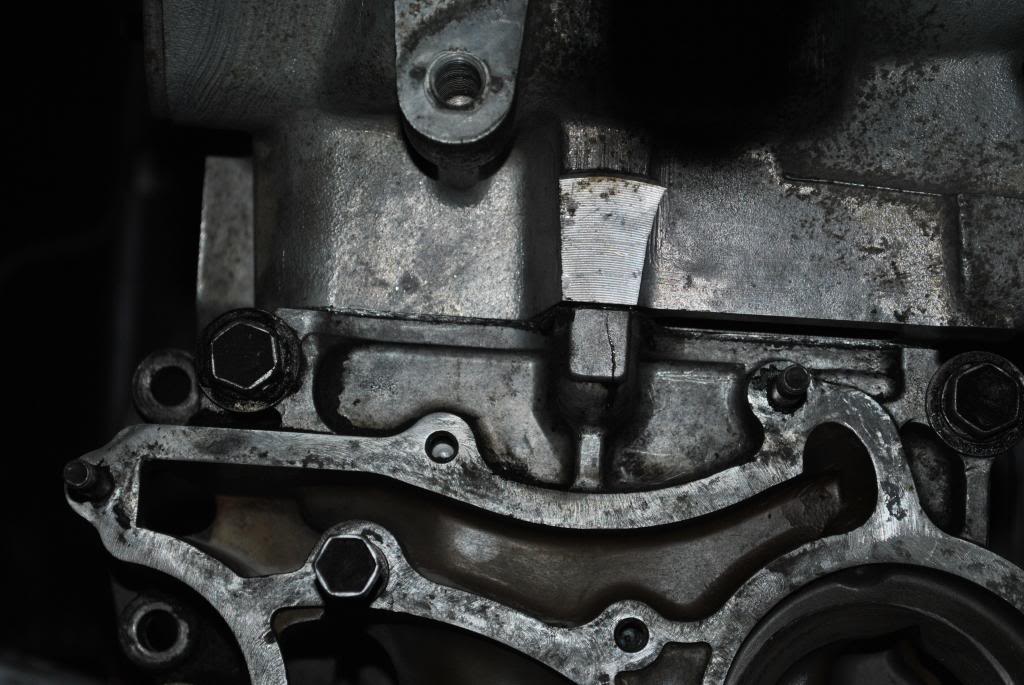
timing cover pulled and timing set installed
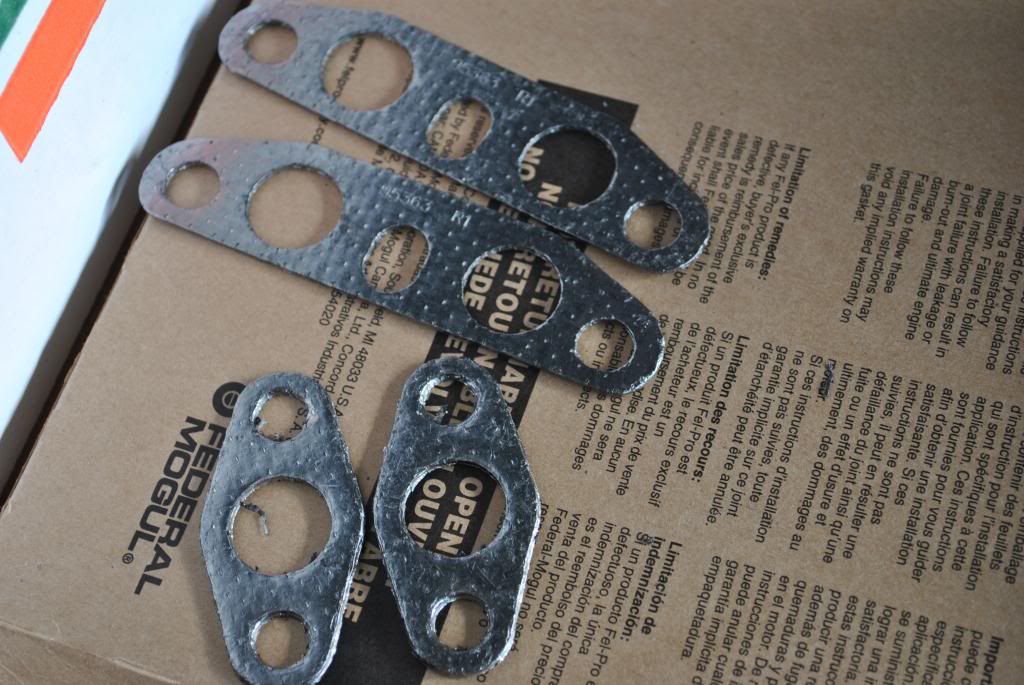
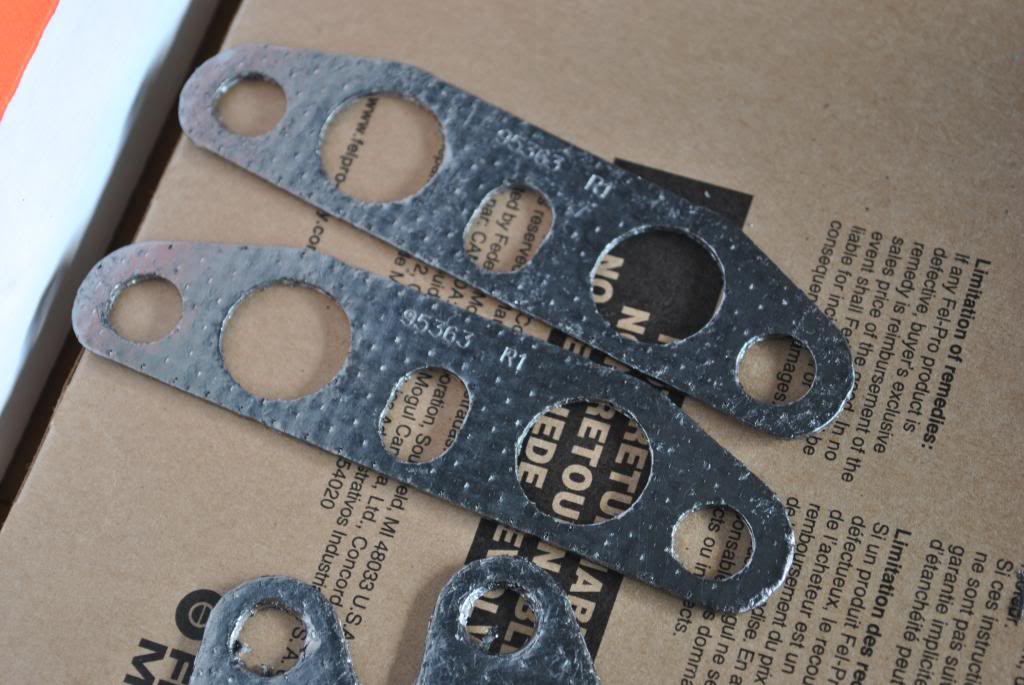
This afternoon was very productive. Finally got the stupid timing cover off, what a pain that was. then got the old gaskets scraped off, then realized that I hadn't bought new gaskets yet. But a quick call and trip to autozone solved that
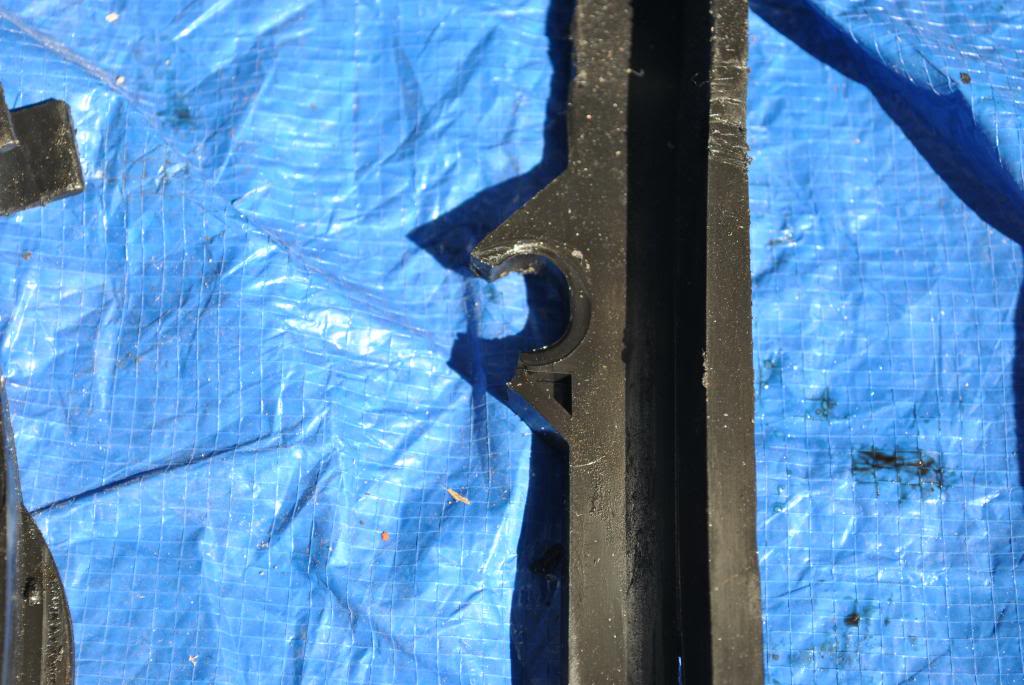
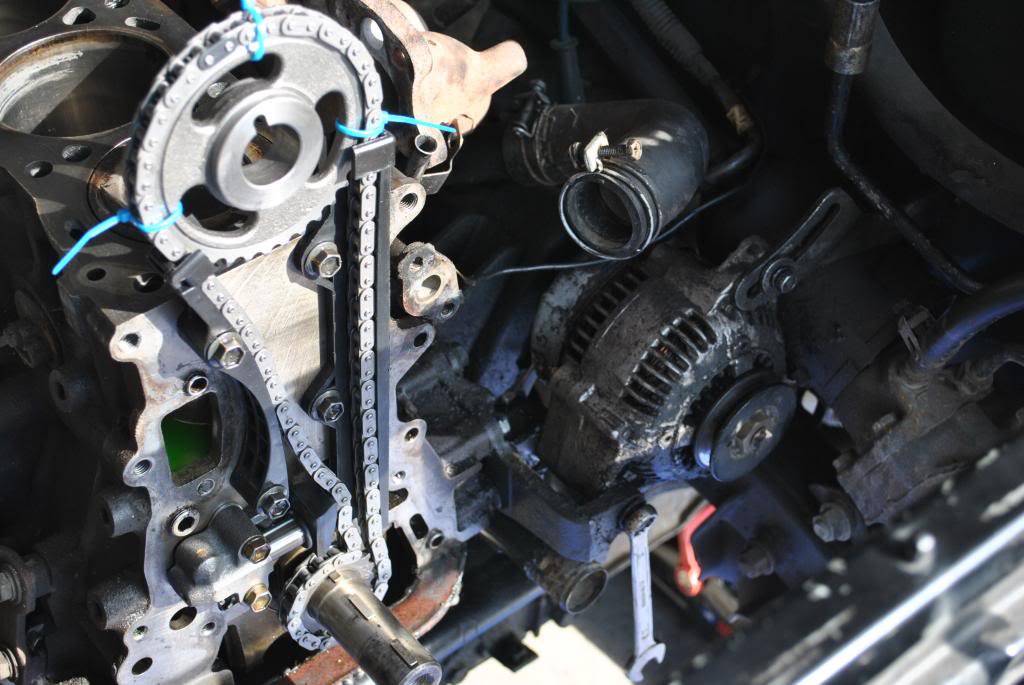
after I got the timing cover off and the chain out
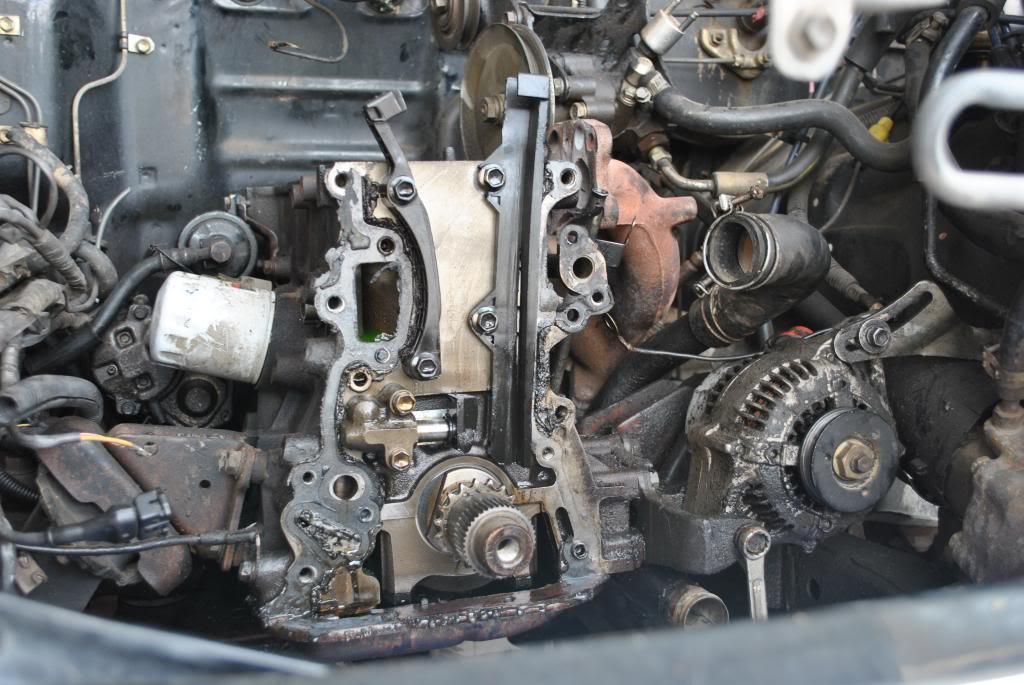
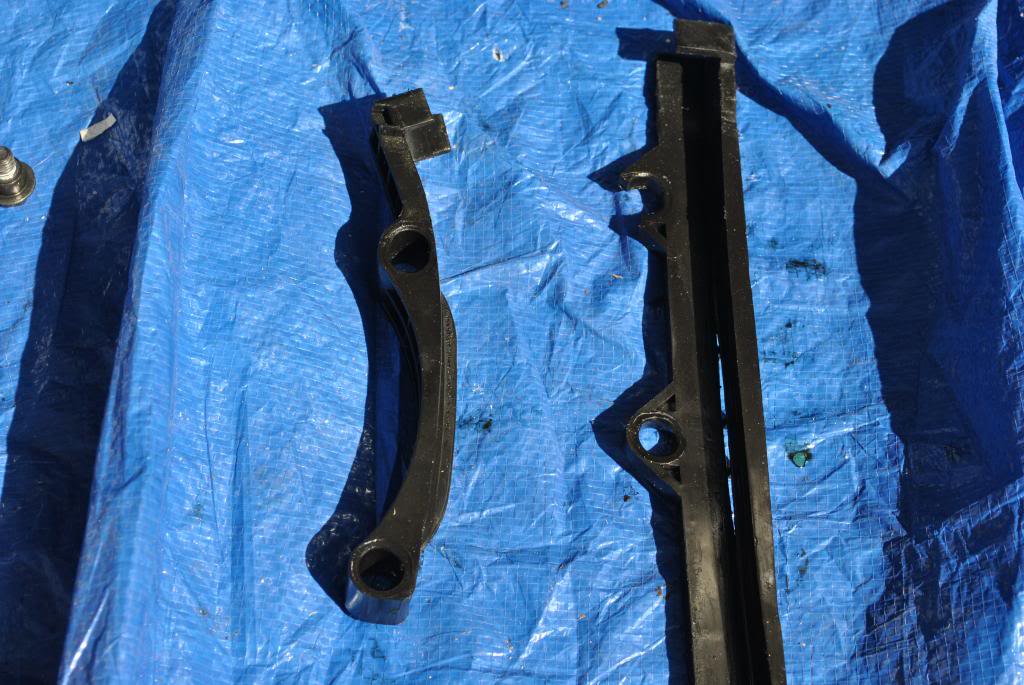
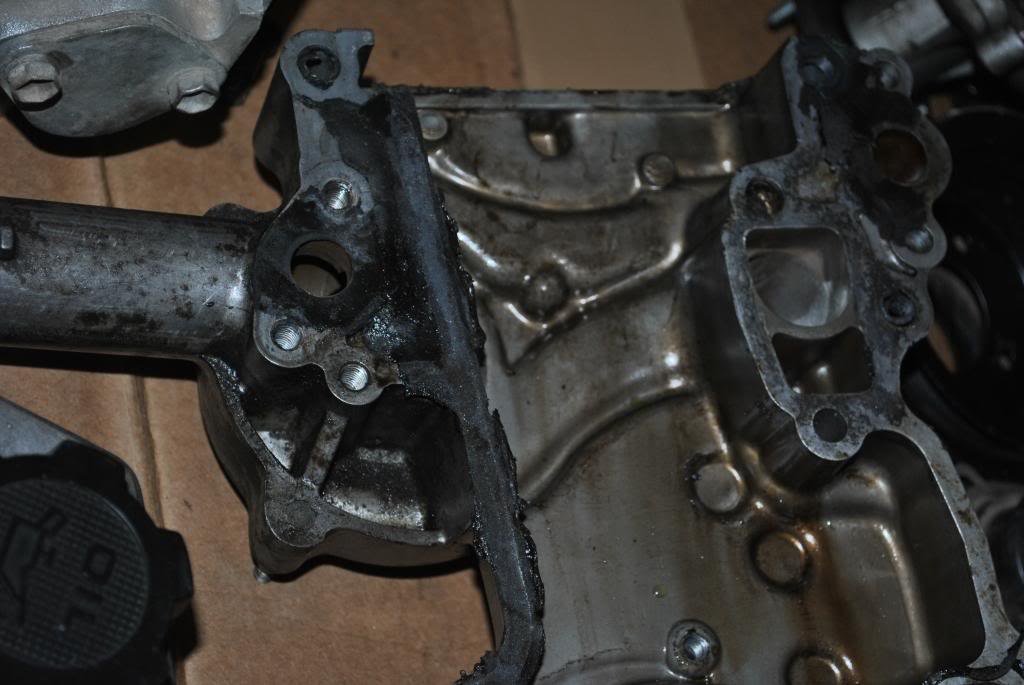
drivers side guide just starting to break
broken bolt hole
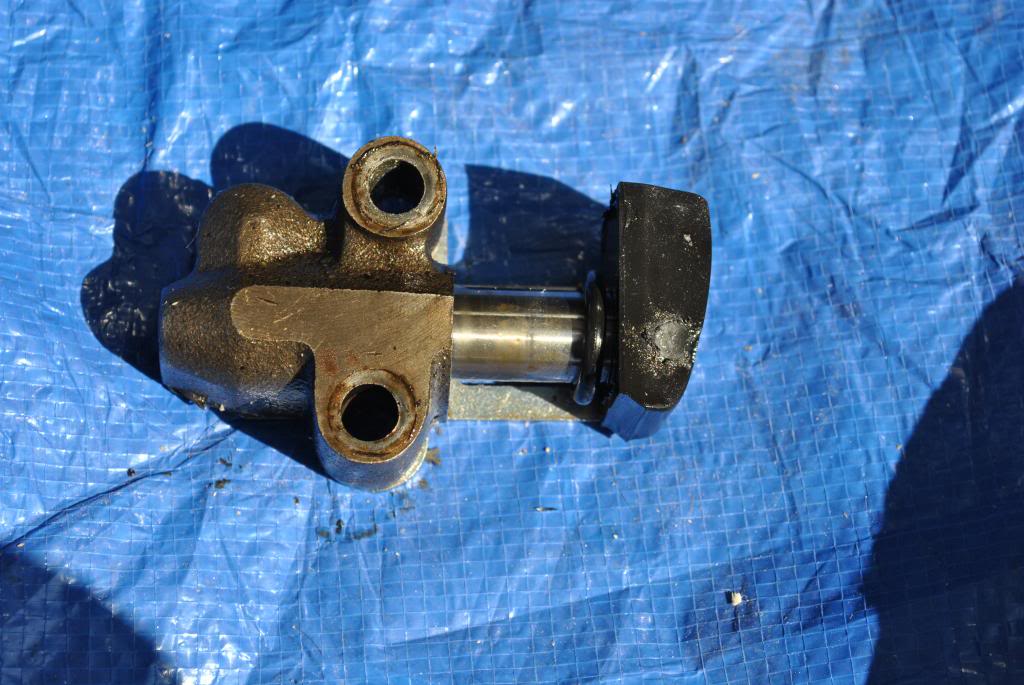
old tensioner
little wear
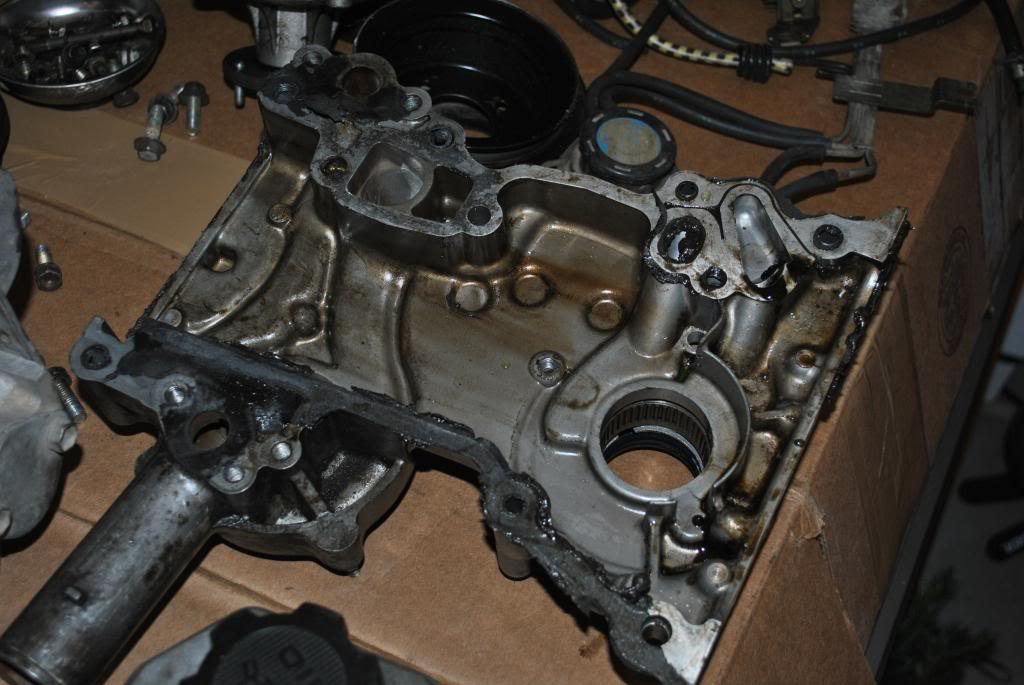
block before cleaning

just realized that I didn't take any pictures of it clean. sorry guys.
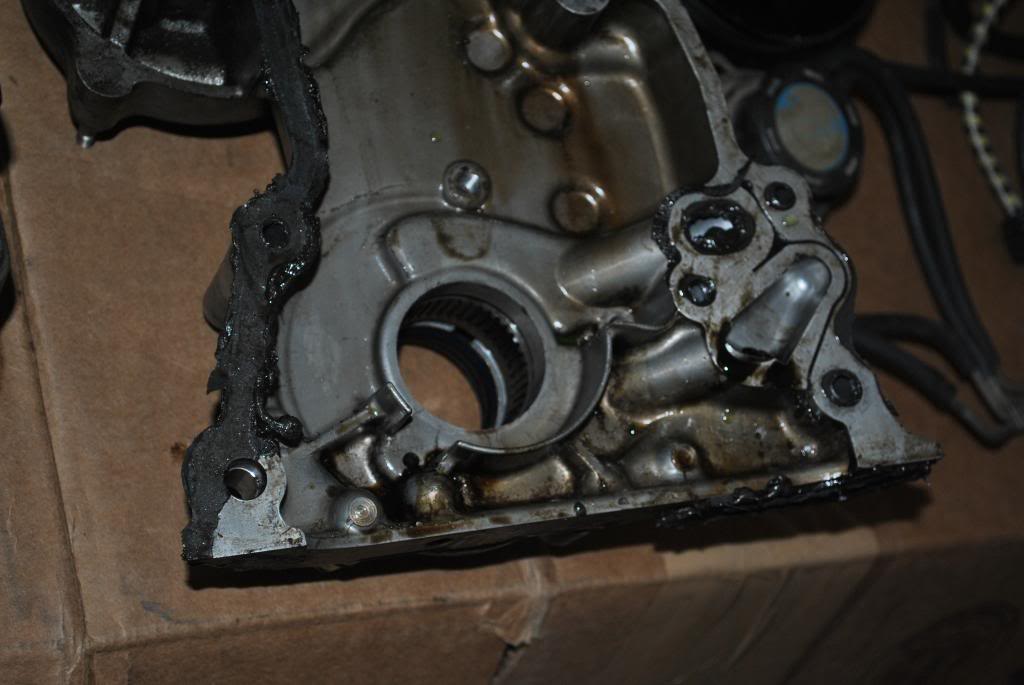
new timing set installed
I was taking a break so figured I'd update with what I've got done. going to see if I can get the timing cover and whatever else looks not too complicated. But before I go does anyone know what this white stuff is?
after I got the timing cover off and the chain out
drivers side guide just starting to break
broken bolt hole
old tensioner
little wear
block before cleaning
just realized that I didn't take any pictures of it clean. sorry guys.
new timing set installed
I was taking a break so figured I'd update with what I've got done. going to see if I can get the timing cover and whatever else looks not too complicated. But before I go does anyone know what this white stuff is?
 Mar 28, 2013 | 04:49 PM
#24
Registered User
iTrader: (2)
Joined: Dec 2009
Posts: 2,159
Likes: 7
From: Pleasanton, CA - SF Bay Area
Great work!!
Here is a good thread with photos that may help you figure out where stuff goes:
https://www.yotatech.com/forums/f116...r-22re-159781/
I'm finishing up a head install right now and the photos do help you figure out where things go....here are some more for coolant hoses and vacuum lines that I bookmarked for the same reason:
http://www.pirate4x4.com/forum/toyot...e-install.html
https://www.yotatech.com/forums/f116...m-22re-163946/
https://www.yotatech.com/forums/f116...6-22re-224640/
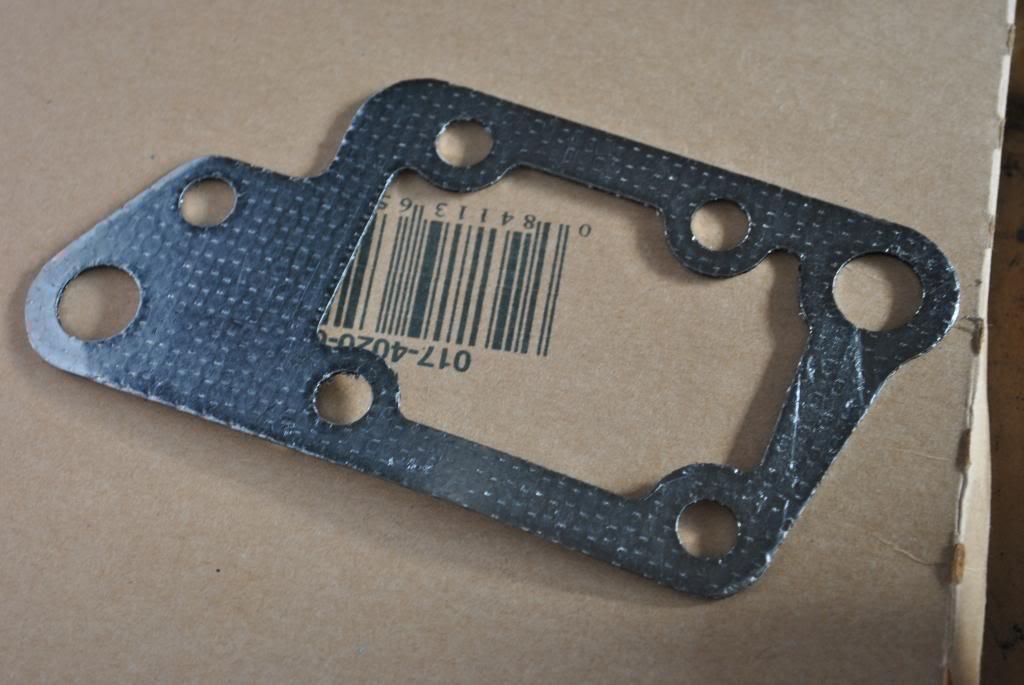
That square gasket is for the EGR cooling plate on the back of your head, right against the firewall.
I don't know about the cylinder wall scoring.
Another tip, be careful with putting the timing chain on and the cover and the head...you DON'T want to skip a tooth AFTER you have the timing cover on. I got mine but I had to take the timing cover off after first putting it on (and then the head). I would recommend doing the head first, then the timing cover, once you ensure the chain is lined up right.
You'll have to be extra careful with the head gasket so you don't bend or pinch it, but it's easier this way.
Keep the photos and questions coming - you may help me than I help you
Here is a good thread with photos that may help you figure out where stuff goes:
https://www.yotatech.com/forums/f116...r-22re-159781/
I'm finishing up a head install right now and the photos do help you figure out where things go....here are some more for coolant hoses and vacuum lines that I bookmarked for the same reason:
http://www.pirate4x4.com/forum/toyot...e-install.html
https://www.yotatech.com/forums/f116...m-22re-163946/
https://www.yotatech.com/forums/f116...6-22re-224640/
That square gasket is for the EGR cooling plate on the back of your head, right against the firewall.
I don't know about the cylinder wall scoring.
Another tip, be careful with putting the timing chain on and the cover and the head...you DON'T want to skip a tooth AFTER you have the timing cover on. I got mine but I had to take the timing cover off after first putting it on (and then the head). I would recommend doing the head first, then the timing cover, once you ensure the chain is lined up right.
You'll have to be extra careful with the head gasket so you don't bend or pinch it, but it's easier this way.
Keep the photos and questions coming - you may help me than I help you
Mar 28, 2013 | 05:07 PM
#25

Square one is the EGR cooler gasket. Located on the rear of the head. Pictured HERE
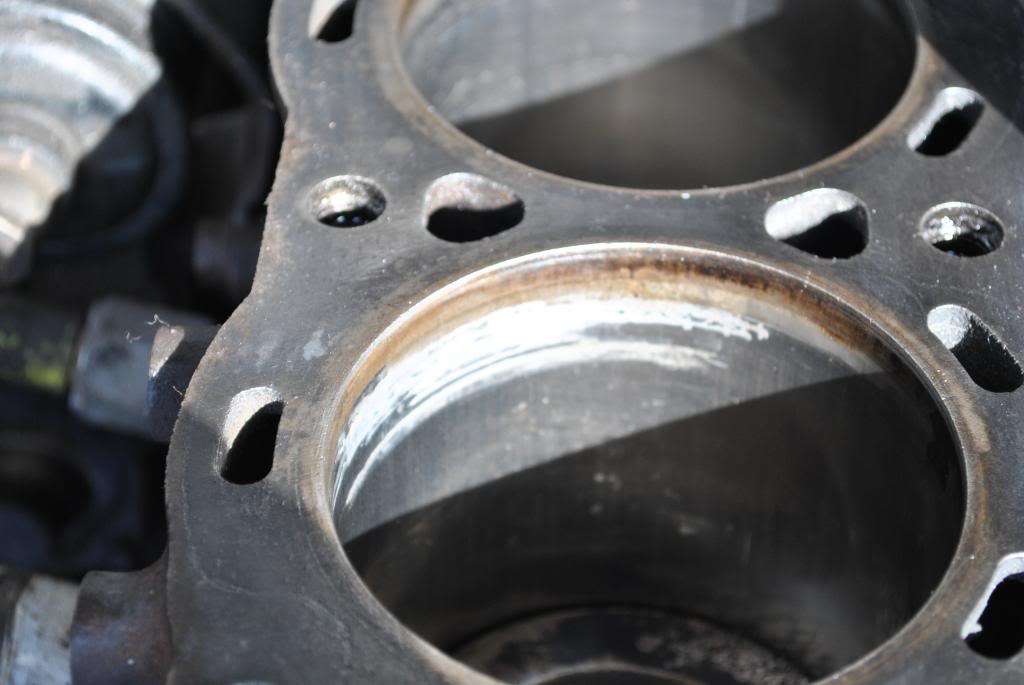
Hard to say what is going on with the cylinder damage w/o seeing and feeling it in person. Is it recessed, protruding or just discolored?
I've got concerns.
About the old tensioner. That looks drilled or damaged by the oil pump mounting bolt.
In the picture above when you removed this bolt the lock washer is shot(flat) and needs replaced, if these split type lockwashers have no spring left in them they're "done". This bolt might be the wrong one for that hole or stretched or maybe was over torqued, if it is interfering with the tensioner. Incase it' not obvious this is a bad thing
Oil pan. Recommend removing this to inspect for debris and cleaning out the sludge and checking the oil pickup tube filter screen. You have purchased an open engine and have no idea whats in there, you've also been scraping at that timing cover gasket and may have droped some in there. This is relativly cheap, just a bit of new FIPG( form in place gasket) and time. It's good for piece of mind, it also allows you to inspect the lower portion of the cylinder walls and that all the bearings are in good shape and where they should be and you will know the pump has a good clean pickup screen.
I've been poking around comparing timing covers and engine blocks and Philbert has posted
Here is 4crawlers walk thru of the timing chain replacement, take note he puts the head and cam sprcket on with the timing cover off. This will make it fool proof to have the proper valve/cam timing.
Not sure if it's covered in that howto/walkthru or the links posted for you. There is a trick to getting the timing cover inplace without damaging the head gasket. You'll need to guide the timing cover into place while holding the gasket to the head. Your choice of tool might differ from others, flat piece of sheet metal, pop can, putty knife, whatever you have on hand and works for you
I know you are on a tight budget. I'd seriously consider honing and new pistion and rings. Or just start budgeting for a new crate engine. I wouldn't expect this one to go another 200k miles.
Mar 28, 2013 | 05:12 PM
#26
Well apparently I hit submit not preview, no wonder it took so long to load
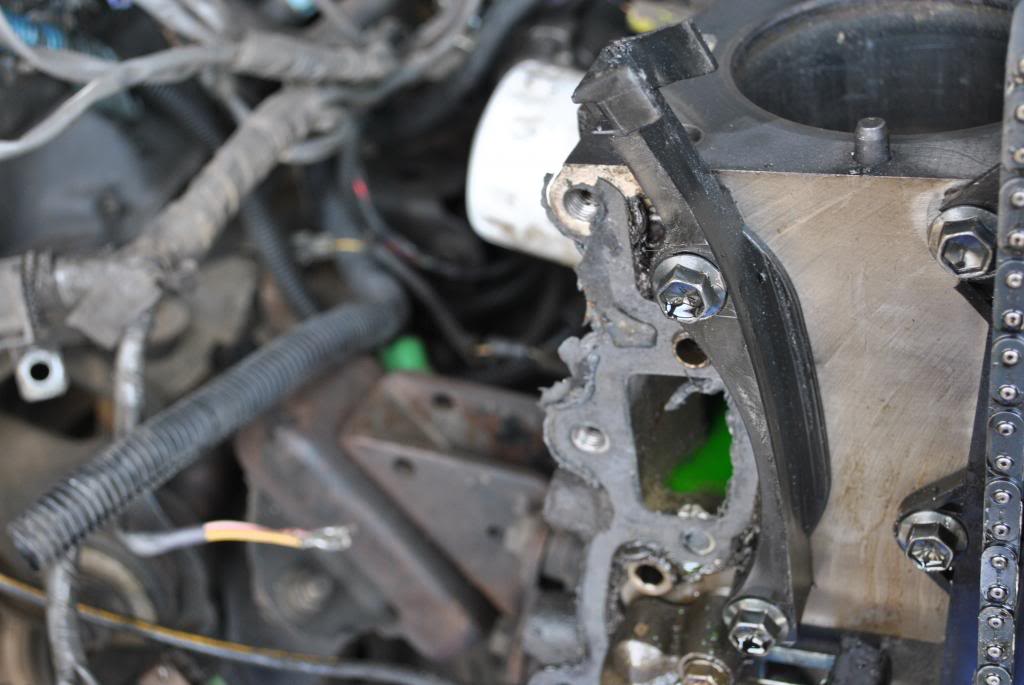
The "hidden bolts"
#1 between the head and timing cover, really isn't that hidden it's covered in the manual. This one is located at the front under the distributor gear, BEWARE it has a low torque rating 14lb iirc.
#2 is the allen head on the intake. I don't recall the warning on this one it's likely not visible and may have a different torque rating also.
Mar 29, 2013 | 08:47 AM
#27
Thread Starter
Registered User
iTrader: (1)
Joined: Sep 2011
Posts: 194
Likes: 1
From: johnstown, Colorado
Great work!!
Here is a good thread with photos that may help you figure out where stuff goes:
https://www.yotatech.com/forums/f116...r-22re-159781/
I'm finishing up a head install right now and the photos do help you figure out where things go....here are some more for coolant hoses and vacuum lines that I bookmarked for the same reason:
http://www.pirate4x4.com/forum/toyot...e-install.html
https://www.yotatech.com/forums/f116...m-22re-163946/
https://www.yotatech.com/forums/f116...6-22re-224640/
That square gasket is for the EGR cooling plate on the back of your head, right against the firewall.
I don't know about the cylinder wall scoring.
Another tip, be careful with putting the timing chain on and the cover and the head...you DON'T want to skip a tooth AFTER you have the timing cover on. I got mine but I had to take the timing cover off after first putting it on (and then the head). I would recommend doing the head first, then the timing cover, once you ensure the chain is lined up right.
You'll have to be extra careful with the head gasket so you don't bend or pinch it, but it's easier this way.
Keep the photos and questions coming - you may help me than I help you
Mar 29, 2013 | 09:21 AM
#28
Thread Starter
Registered User
iTrader: (1)
Joined: Sep 2011
Posts: 194
Likes: 1
From: johnstown, Colorado
Well apparently I hit submit not preview, no wonder it took so long to load
The "hidden bolts"
#1 between the head and timing cover, really isn't that hidden it's covered in the manual. This one is located at the front under the distributor gear, BEWARE it has a low torque rating 14lb iirc.
#2 is the allen head on the intake. I don't recall the warning on this one it's likely not visible and may have a different torque rating also.
Square one is the EGR cooler gasket. Located on the rear of the head. Pictured HERE
Hard to say what is going on with the cylinder damage w/o seeing and feeling it in person. Is it recessed, protruding or just discolored?
I've got concerns.
About the old tensioner. That looks drilled or damaged by the oil pump mounting bolt.
In the picture above when you removed this bolt the lock washer is shot(flat) and needs replaced, if these split type lockwashers have no spring left in them they're "done". This bolt might be the wrong one for that hole or stretched or maybe was over torqued, if it is interfering with the tensioner. Incase it' not obvious this is a bad thing
Oil pan. Recommend removing this to inspect for debris and cleaning out the sludge and checking the oil pickup tube filter screen. You have purchased an open engine and have no idea whats in there, you've also been scraping at that timing cover gasket and may have droped some in there. This is relativly cheap, just a bit of new FIPG( form in place gasket) and time. It's good for piece of mind, it also allows you to inspect the lower portion of the cylinder walls and that all the bearings are in good shape and where they should be and you will know the pump has a good clean pickup screen.
I've been poking around comparing timing covers and engine blocks and Philbert has posted
Here is 4crawlers walk thru of the timing chain replacement, take note he puts the head and cam sprcket on with the timing cover off. This will make it fool proof to have the proper valve/cam timing.
Not sure if it's covered in that howto/walkthru or the links posted for you. There is a trick to getting the timing cover inplace without damaging the head gasket. You'll need to guide the timing cover into place while holding the gasket to the head. Your choice of tool might differ from others, flat piece of sheet metal, pop can, putty knife, whatever you have on hand and works for you
I know you are on a tight budget. I'd seriously consider honing and new pistion and rings. Or just start budgeting for a new crate engine. I wouldn't expect this one to go another 200k miles.
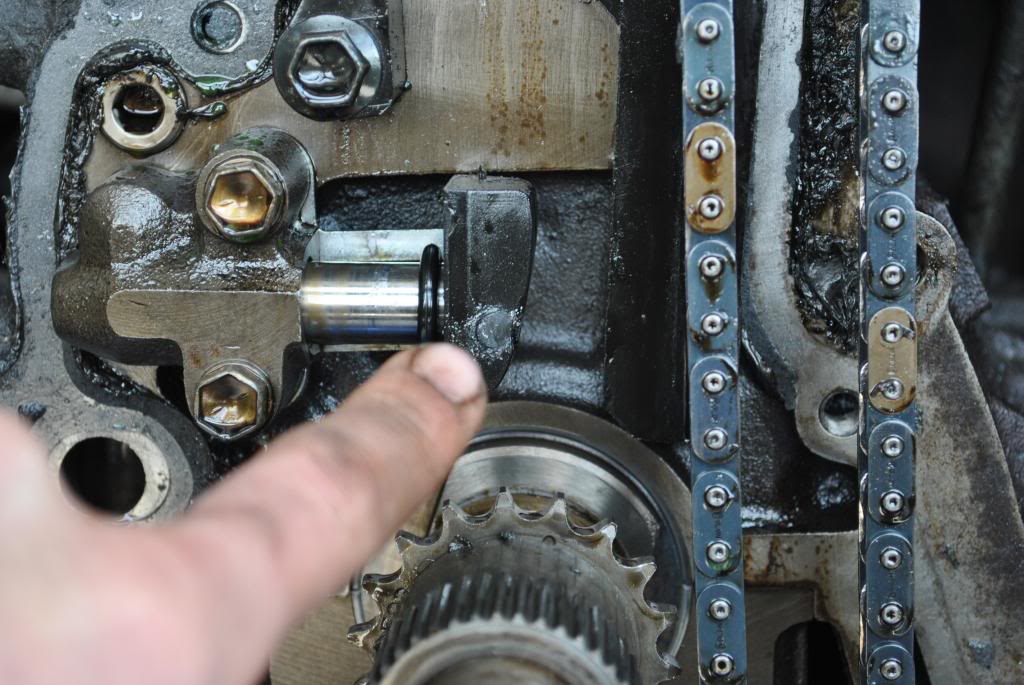
 Is this the bolt with the flat lock washer this bolt?
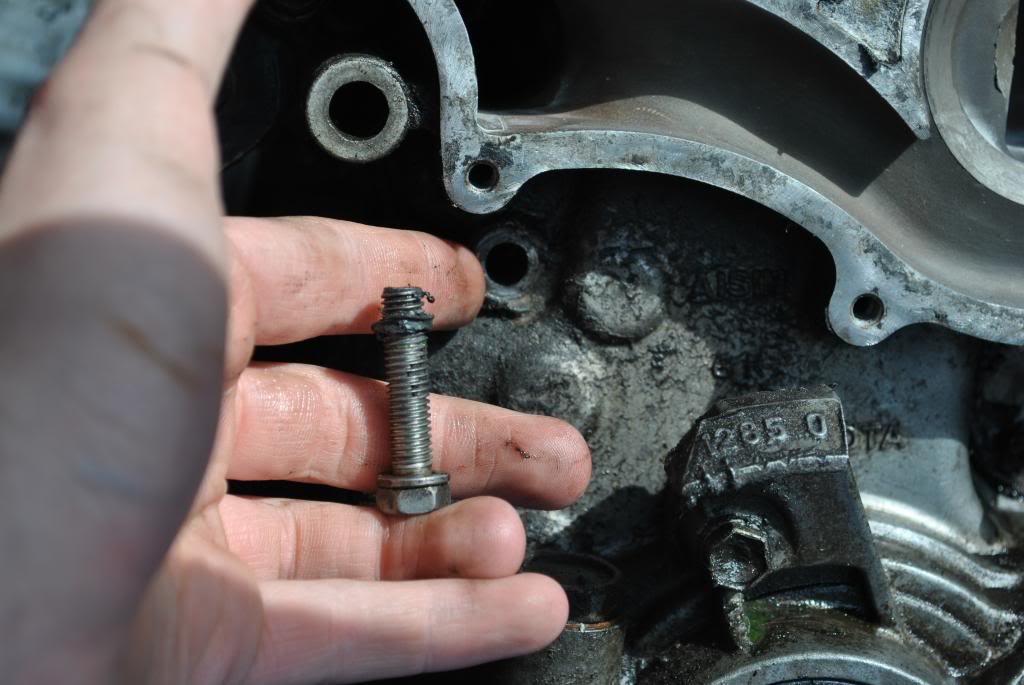
As for the oil pan. I've been reading a few walkthroughs and it sounds pretty simple and just time consuming. Can you do it with out dropping the front diff? I understand that it's easier but is it necessary?
Now for cylinder #2. the white inside is not recessed or protruding, it's smooth to the touch and is just discolored. I'll get better pictures. I've had the thought that I'd need new pistons from the start, but I've been told that I do and that I don't
 so it's always sorta been on my to-do list. Do you have any recommendations to a good machine shop?
 okay last thing
I knew about the allen bolt in the intake I had to let my grandpa know about it because he couldn't get it off  thank you yotatech
Mar 30, 2013 | 01:57 AM
thank you yotatech
Mar 30, 2013 | 01:57 AM
#29
The bolt that could contact the tensioner is the upper left on the oil pump, still in place in the picture. Not actually sure those are lockwashers, some of the pics look like maybe they are some don't, the LCE bolt kit doesn't look like lock washers either.
There are some threads on the oil pan, some can get it, some can't, some don't even try. It's a juggling act to get the tube off and on while racing the gasket glue
The chewed up piston will run. Honestly it takes a bit to make any engine not want to run, it is it's primary and sole purpose and it wants to do it even when it shouldn't. But it's going to be an issue at some point, localized overheating can cause warping cracking and pre-detonations all of which will tend to want to break or bent things.
You can either do it "right, now" or "RIGHT NOW!", the first one you can drive to the moon and back the second one you better be driving it to someplace that makes you cash and stashing it away.
Sorry I don't have any recent experience with machine shops, All the guys I've worked with I expect are long retired off stroking long grey beards and counting thier pensions. There are a few hits on google up in your area, try asking over at addicted and see if they'll recommend anyone local. When I was apprenticing we got all our stuff at one of the performance shops my boss used to work for. I don't think they are still around or they moved or they're too old and fuddy-duddy to do WWW. Was something American USA ish coloradoany. Personally I'd poke around at the racetrack pit area and see who's using who, but thats the closest source of any recent first hand knowledge for me out here on the plains.
Apr 1, 2013 | 08:03 PM
#31
Thread Starter
Registered User
iTrader: (1)
Joined: Sep 2011
Posts: 194
Likes: 1
From: johnstown, Colorado
Thanks for tuning in jagger! I was at a stand still because I didnt have a torque wrench, so my grandpa left me one. But it was a 1/2 drive and I don't have any sockets to fit that so I made a trip to harbor freight and pick one up for myself
 got my guides and tensioner torqued to specs and planning getting some more done tomorrow. I'm arguing with myself whether or not to drop the pan. I know I should but I also just want this thing to be done and out of my dads garage. how's the shine runner coming?
so I made a trip to harbor freight and pick one up for myself got my guides and tensioner torqued to specs and planning getting some more done tomorrow. I'm arguing with myself whether or not to drop the pan. I know I should but I also just want this thing to be done and out of my dads garage. how's the shine runner coming?
Apr 2, 2013 | 12:07 AM
#32
I have never pulled the pan off with it in the truck. I hear it is a pain in the rear so I just pull the motor. I usually have had mine out and know the steps that it is just quicker and easier for me that way that I can have one out easier and can do a better job while having it out. So dont have any info for you on that.
The clicker type torque wrench is so much better then the old style needle wrench. What a difference and how much nicer it is. One great improvement on torque wrenches.
The clicker type torque wrench is so much better then the old style needle wrench. What a difference and how much nicer it is. One great improvement on torque wrenches.
Apr 2, 2013 | 03:46 AM
#33
Registered User
Joined: Dec 2008
Posts: 2,391
Likes: 1
From: tecumseh nebraska
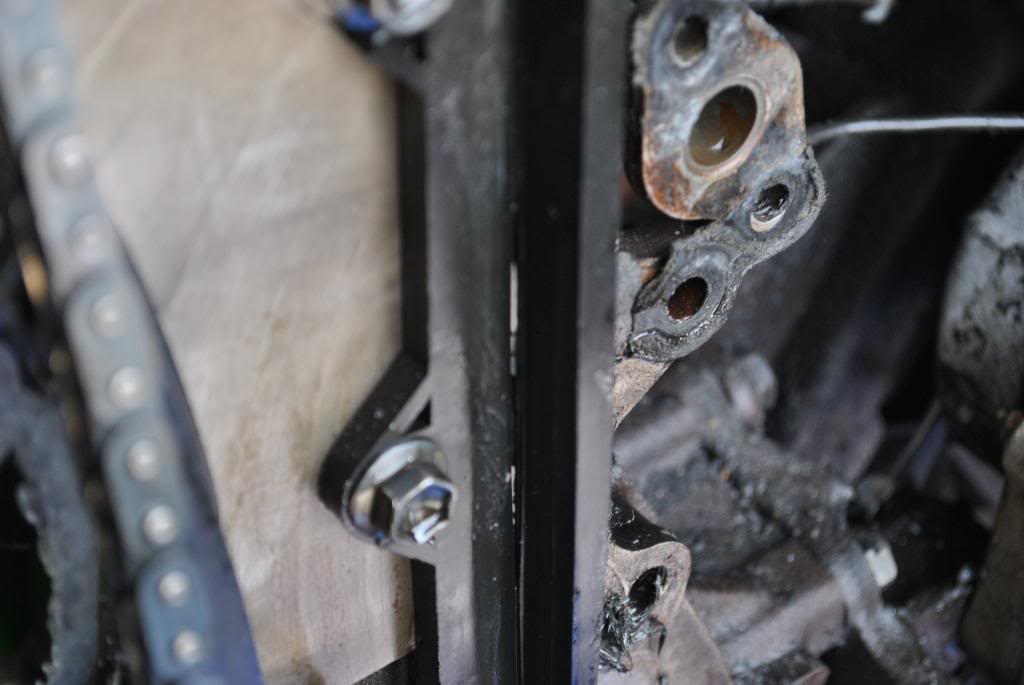
Hidden bolt is usually the one under the valve cover, make sure and get your lengths right on the oil pump otherwise if long bolt is in short hole it will contact your new chain.
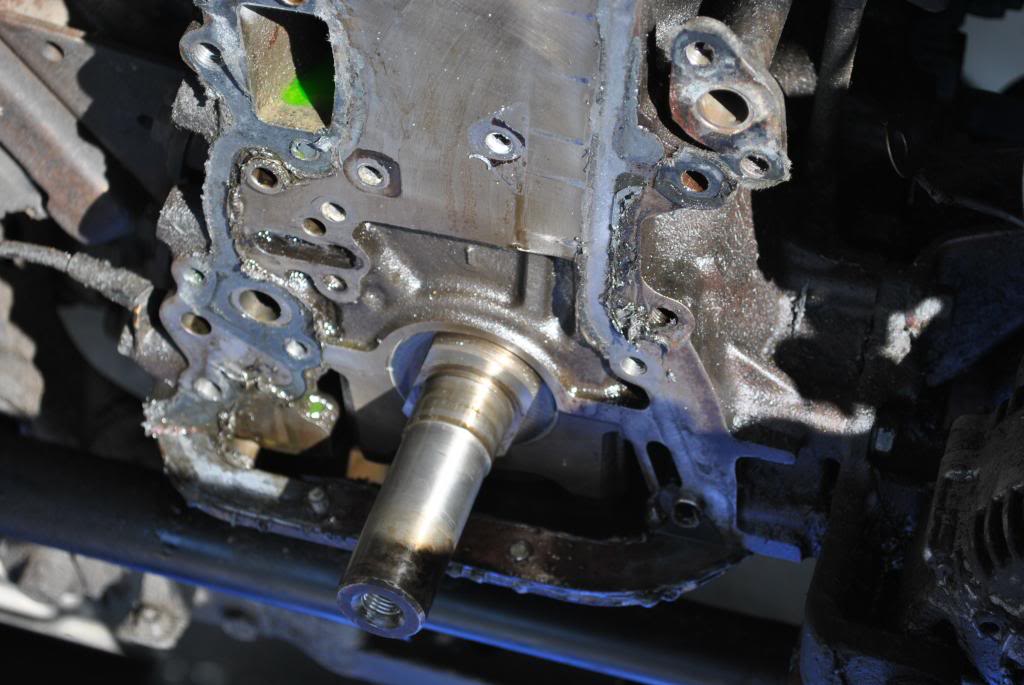
Looks like a factory lower radiator hose with the crappy factory clamps...Better throw a new one on with new clamps.
Looks like your on your way!! Keep up the good work
Looks like a factory lower radiator hose with the crappy factory clamps...Better throw a new one on with new clamps.
Looks like your on your way!! Keep up the good work
Apr 2, 2013 | 05:21 PM
#34
Registered User
Joined: Jan 2013
Posts: 104
Likes: 0
From: Peterborough Ontario
Thanks for tuning in jagger! I was at a stand still because I didnt have a torque wrench, so my grandpa left me one. But it was a 1/2 drive and I don't have any sockets to fit that so I made a trip to harbor freight and pick one up for myself got my guides and tensioner torqued to specs and planning getting some more done tomorrow. I'm arguing with myself whether or not to drop the pan. I know I should but I also just want this thing to be done and out of my dads garage. how's the shine runner coming?
so I made a trip to harbor freight and pick one up for myself got my guides and tensioner torqued to specs and planning getting some more done tomorrow. I'm arguing with myself whether or not to drop the pan. I know I should but I also just want this thing to be done and out of my dads garage. how's the shine runner coming? They are only looney sized so i will patch those up quick!
Apr 8, 2013 | 10:49 AM
#35
Thread Starter
Registered User
iTrader: (1)
Joined: Sep 2011
Posts: 194
Likes: 1
From: johnstown, Colorado
its been a while
It's been a while since I've updated the thread and got to work on the runner. But I'm here now!
Getting ready to install the head and the head gakset. got the head bolt holes cleaned out as best as I could. I also got me egr valve gasket installed and oil pump o-ring and crank seal replaced.
Torque specs for it: http://forum.ih8mud.com/79-95-toyota...ification.html
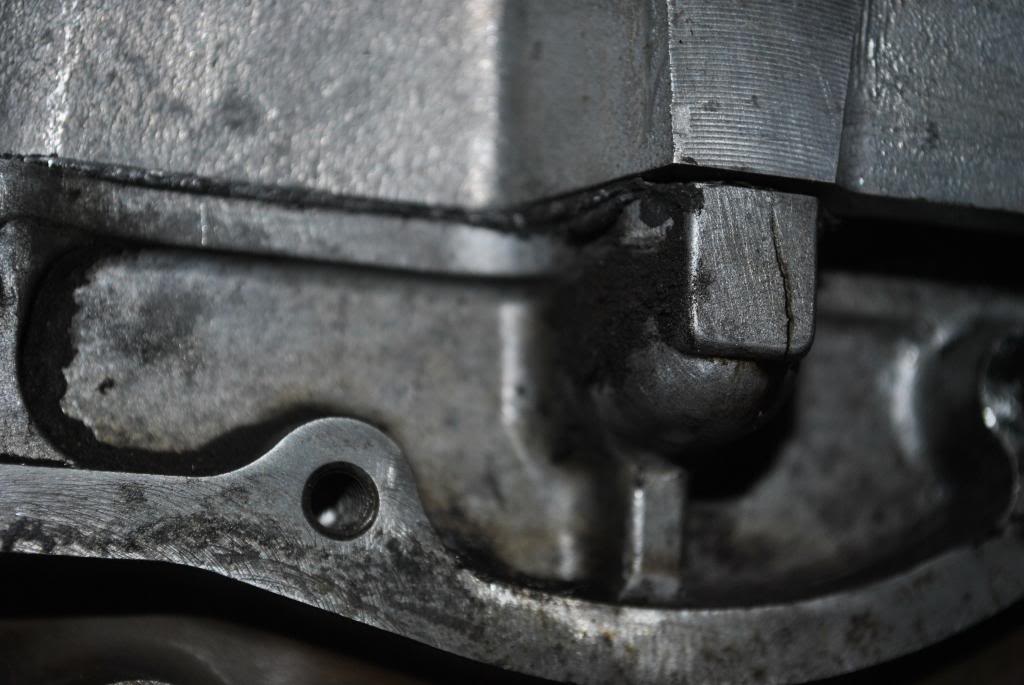
but now for the oil pump bolt problem that CO noticed for me. I did a test fit with the timing cover and that bolt is definitely going to hit my new tensioner The bolt was there when I removed the oil pump/timing cover. so I'm a little stummped.
Heres the bolt

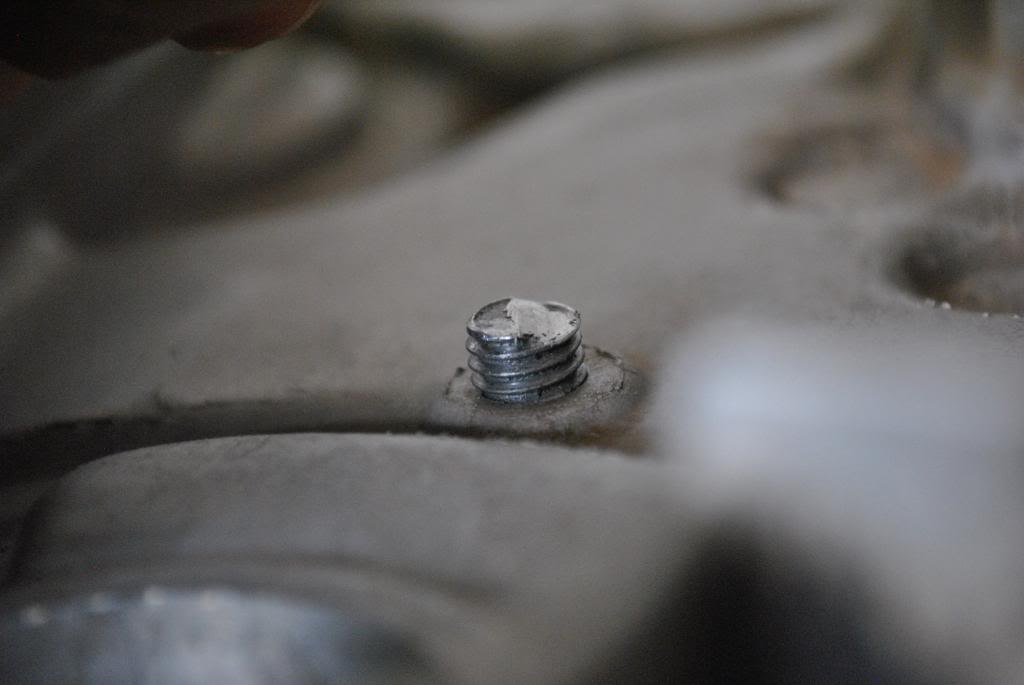
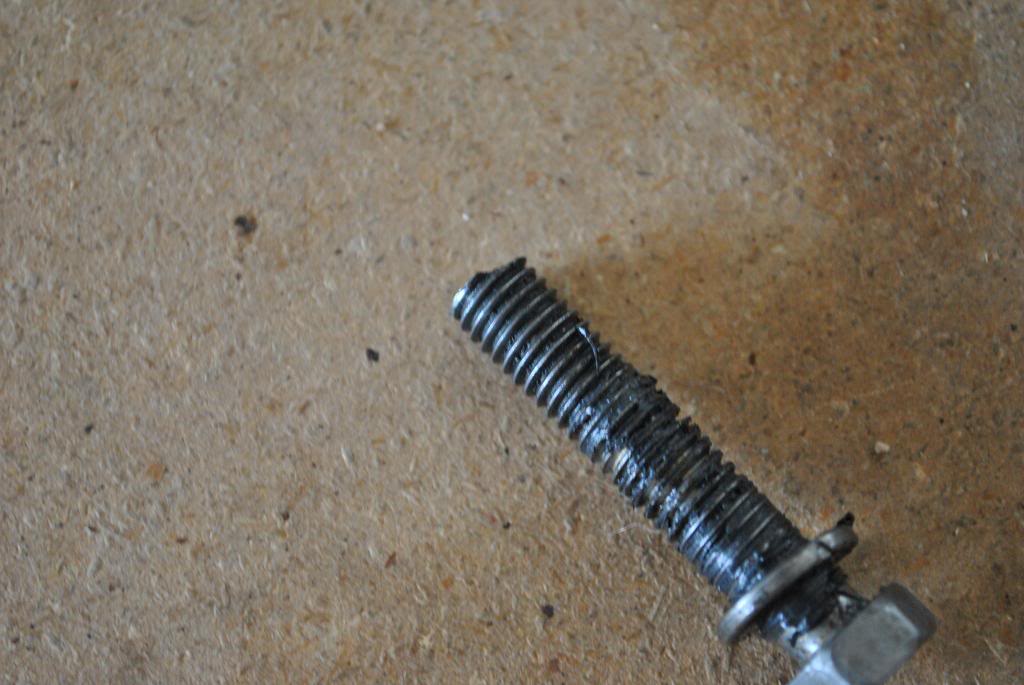
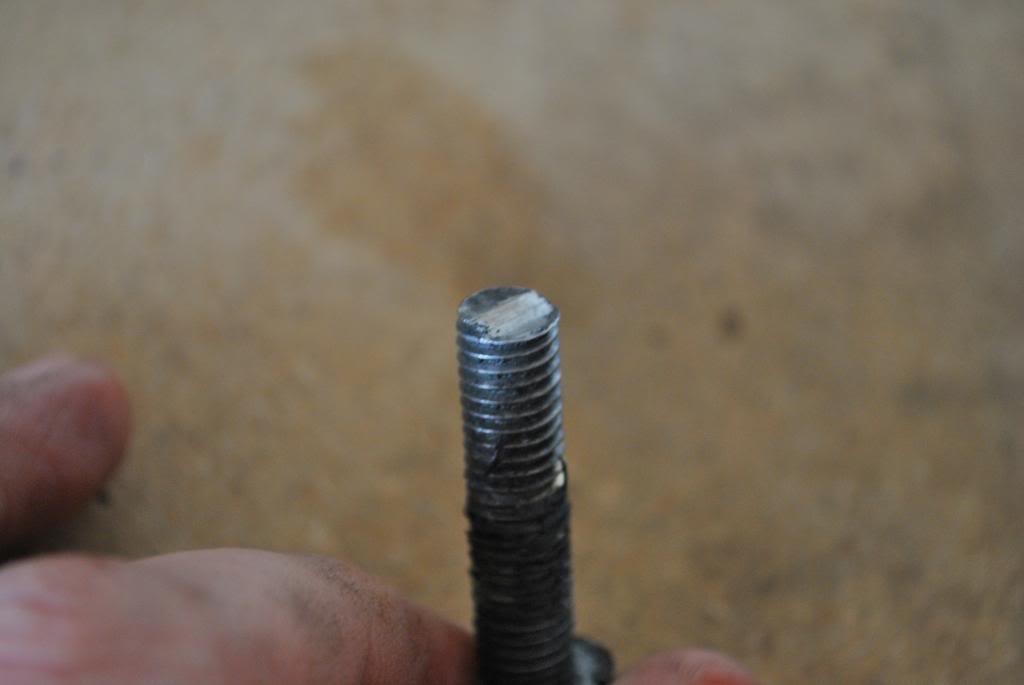
it looks like its been cut.
It looks like I have the same problem that this guy did.
https://www.yotatech.com/forums/f116...-bolts-219076/
He solved it by switching the top bolt (the long one in my case) with the lower left bolt of the oil pump. should I do that? will it fix my problem?
Getting ready to install the head and the head gakset. got the head bolt holes cleaned out as best as I could. I also got me egr valve gasket installed and oil pump o-ring and crank seal replaced.
Torque specs for it: http://forum.ih8mud.com/79-95-toyota...ification.html
but now for the oil pump bolt problem that CO noticed for me. I did a test fit with the timing cover and that bolt is definitely going to hit my new tensioner
The bolt was there when I removed the oil pump/timing cover. so I'm a little stummped.Heres the bolt
it looks like its been cut.
It looks like I have the same problem that this guy did.
https://www.yotatech.com/forums/f116...-bolts-219076/
He solved it by switching the top bolt (the long one in my case) with the lower left bolt of the oil pump. should I do that? will it fix my problem?
Apr 8, 2013 | 07:34 PM
#36
http://lcengineering.com/LCNewslette...are-Kit_lg.jpg
Says it's a M8-35mm. My local tractor shop sells hardware by the pound and it's the way I'd go, all new bolts washers and split ring lock washers.
Those are precoated bolts and either need replaced or the coating redone. (Wish i'd of noticed this when I did my water pump I'd of bought all new ones, fingers crossed none of them sieze up)
Apr 10, 2013 | 03:26 PM
#37
Thread Starter
Registered User
iTrader: (1)
Joined: Sep 2011
Posts: 194
Likes: 1
From: johnstown, Colorado
Nothing can ever be easy
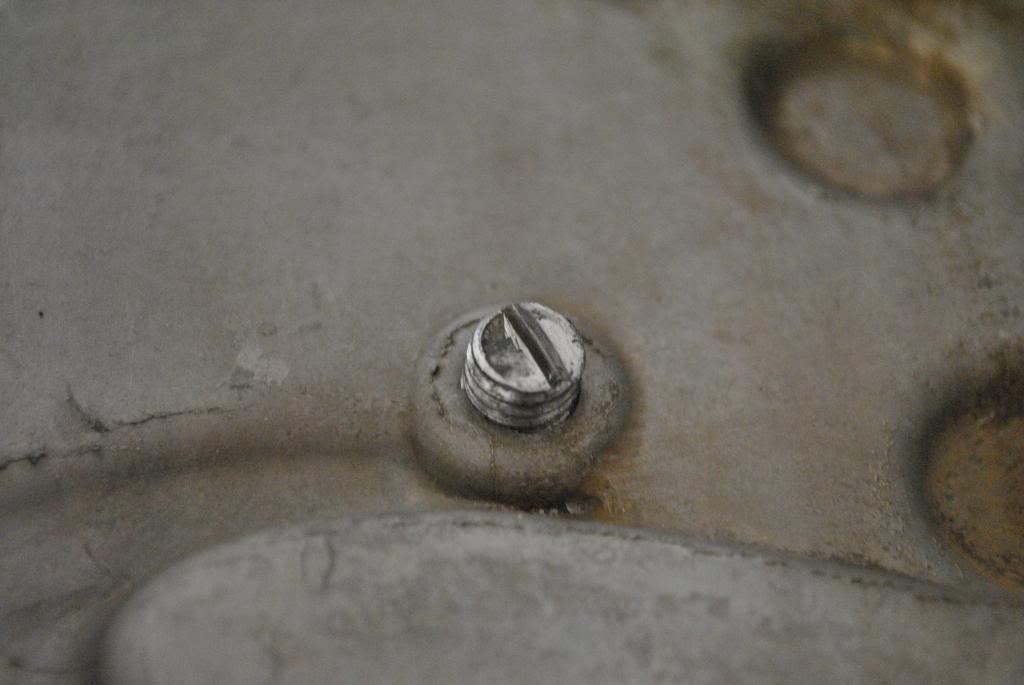
well I was working like a dog today on the truck , getting everything put back where it should be. Was just getting the timing cover buttoned back up when it was time to put that "hidden" bolt back in. I was crankin away just having a ball when I hear a light "POP" and saw a small trickle of oil coming from the top of the cover

So now I'm enjoying chatting with Ted over at engnbldr ordering up me a new one.
, getting everything put back where it should be. Was just getting the timing cover buttoned back up when it was time to put that "hidden" bolt back in. I was crankin away just having a ball when I hear a light "POP" and saw a small trickle of oil coming from the top of the coverSo now I'm enjoying chatting with Ted over at engnbldr ordering up me a new one.
Apr 10, 2013 | 03:44 PM
#38
Registered User
Joined: Mar 2013
Posts: 45
Likes: 0
From: South Bend, IN
That bolt got me too on reinstallation. Only I was putting on a brand new timing cover... 
Always sucks to hit hang-ups like this. Especially when you're just about done...
Ted will take care of you. Just Keep on wrenching buddy. You'll be glad you did!
Zack
Always sucks to hit hang-ups like this. Especially when you're just about done...
Ted will take care of you. Just Keep on wrenching buddy. You'll be glad you did!
Zack
Apr 10, 2013 | 11:28 PM
#40
That one gets alot of people, 14lb's you hit that really fast with a not very long ractchet bar.
I know you already ordered a new one but in the future. Bust out the dremel with a diamond bit and cut a flat head slot in it and they tend to come right out. Last one I did actually vibrated out from the dremel so i just kept pushing on one side and worked it out that way. If the break off deep enough you can just zip a shorter bolt in on top of the broken one.
Don't forget to fill that leaky PITA up with rtv around the upper threads on the bolt. Yeah I really hate that hole, it's the old love hate thing, I hate leaks and it loves to leak there when the oil puddles up.


