Terrys87 86 4Runner with a 2nd Chance
 11-20-2012, 08:31 AM
#861
Super Moderator
Staff
Thread Starter
iTrader: (1)
Join Date: Aug 2008
Location: Anderson Missouri
Posts: 11,788
Likes: 0
Received 22 Likes
on
20 Posts
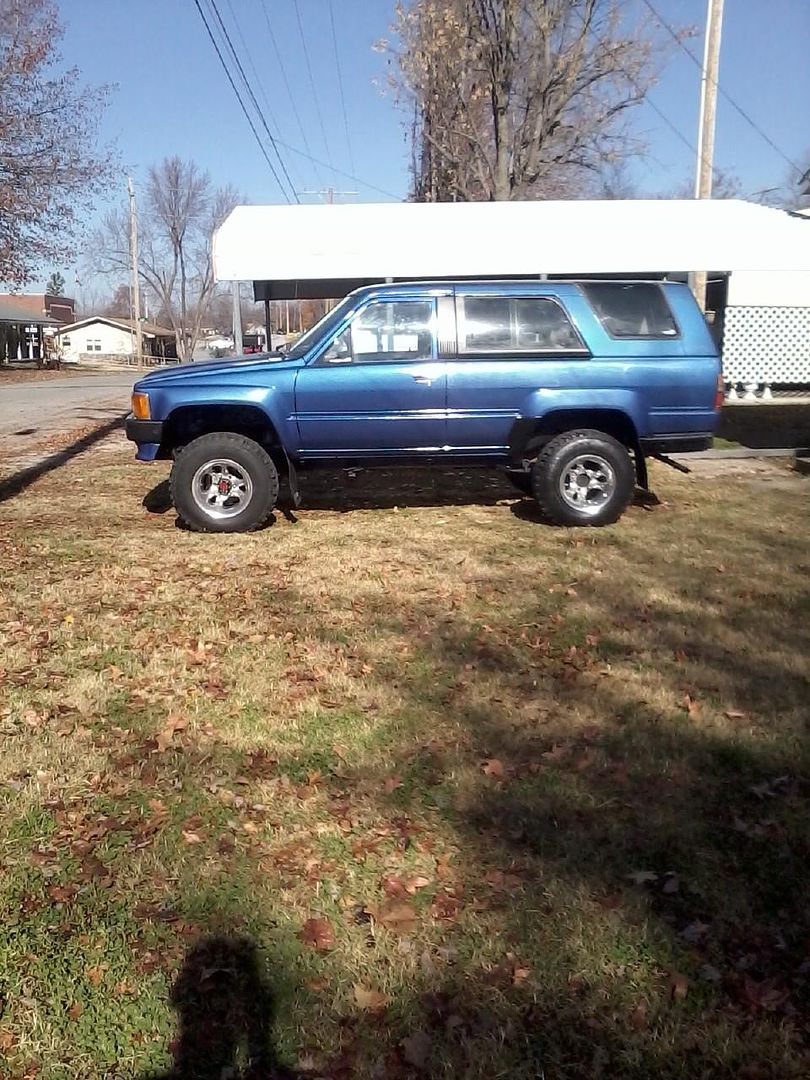
I got all the wheels shined up. Will do them again when I get some more polish and I do have a polishing ball somewhere that I need to find. I also found two O2 sensors out in the shed and took the best looking of the two and put it on. I would like to have put a new one on and I will eventually do that as I slowly but surely get all of the new tune up parts put on. So far I just have plugs, wires, cap, rotor,air filter and fuel filter so there isnt much left.
I did take it on a long run and didnt get a Check Engine Light so that has got to be a good thing. I use what I have until I can get to where I can put on new stuff. I flushed the system the other day and now my radiator drain plug has a small leak. Just need to get a new gasket for the drain cock. A few steps forward and one little one back. Guess that is the way that it goes.
Sunglare urggh.. I ran out of tire shine also. Mostly a pic for me to remember when I got to this stage.
 11-20-2012, 09:00 AM
#862
Terry, no kidding, it's looking better and better! It's so funny though..... For some reason, I thought to myself, "Oh no, he's not going to like how they got all shiny", ......only cuz I just get a NOT SO 'super custom/shiny bling' vibe from ya.... BUT, then I thought, "Uhhh, yeah, he CLEARLY wants them shinier, Mark..... thus, the polishing and not painting them other colors! lol.
Such a trip... I saw an aftermarket paint job on one, yesterday, SAME THING! ANDDDDDDDD, ... HE HAD VERY SIMILAR RIMS... They were just like that..... but 4 slots though. He had them painted that same Stainless/Carbony color Grego used.... It looked really good. Matched well with the VERY slight purple tint in there I think.
Wow, you did a REALLY good job on bringing those to a 'POP'-shine, buddy!
11-20-2012, 10:28 AM
#863
Registered User
shes gorgeous terry I WANT HER! trade ya a slightly incomplete red one for her! LOL
as for the wheels if the tarnish is a bit heavyer in spots using a tiny bit of paint polishing compound on it clean off then puff an polish will help
as for the wheels if the tarnish is a bit heavyer in spots using a tiny bit of paint polishing compound on it clean off then puff an polish will help
11-20-2012, 01:02 PM
#864
Registered User
Hey terry I got some stuff I used to polish my crotch rocket frame that will work great on the wheels its made in Germany I cant think of the name of it at the moment but it is awesome way better than mothers!!!!! After I get home next week I will find it and shoot you the name.
11-20-2012, 01:14 PM
#865
Registered User
Hey terry I got some stuff I used to polish my crotch rocket frame that will work great on the wheels its made in Germany I cant think of the name of it at the moment but it is awesome way better than mothers!!!!! After I get home next week I will find it and shoot you the name.
is the polish called Flitz???? or Wenol???
By the way your runner looks very nice Terry
11-20-2012, 07:23 PM
#867
Registered User
runner looks better everytime I see it man. the wheels are looking great like cyberhorn said you can use rubbing compound to cut the tuff stuff but they dont look like they need much. keep up the good work buddy.
11-22-2012, 06:05 PM
#868
Super Moderator
Staff
Thread Starter
iTrader: (1)
Join Date: Aug 2008
Location: Anderson Missouri
Posts: 11,788
Likes: 0
Received 22 Likes
on
20 Posts
Terry, no kidding, it's looking better and better! It's so funny though..... For some reason, I thought to myself, "Oh no, he's not going to like how they got all shiny", ......only cuz I just get a NOT SO 'super custom/shiny bling' vibe from ya.... BUT, then I thought, "Uhhh, yeah, he CLEARLY wants them shinier, Mark..... thus, the polishing and not painting them other colors! lol.
Such a trip... I saw an aftermarket paint job on one, yesterday, SAME THING! ANDDDDDDDD, ... HE HAD VERY SIMILAR RIMS... They were just like that..... but 4 slots though. He had them painted that same Stainless/Carbony color Grego used.... It looked really good. Matched well with the VERY slight purple tint in there I think.
Wow, you did a REALLY good job on bringing those to a 'POP'-shine, buddy!
Such a trip... I saw an aftermarket paint job on one, yesterday, SAME THING! ANDDDDDDDD, ... HE HAD VERY SIMILAR RIMS... They were just like that..... but 4 slots though. He had them painted that same Stainless/Carbony color Grego used.... It looked really good. Matched well with the VERY slight purple tint in there I think.
Wow, you did a REALLY good job on bringing those to a 'POP'-shine, buddy!
Hey terry I got some stuff I used to polish my crotch rocket frame that will work great on the wheels its made in Germany I cant think of the name of it at the moment but it is awesome way better than mothers!!!!! After I get home next week I will find it and shoot you the name.
Thanks Jason...I started on it January 11th, so I am seeing how far I can get it befroe then. Just a little personal test for myself. I am happy with the results so far and I took a 2 or 3 month break from it during the summer so I am trying to do some catch up on it.
11-22-2012, 06:23 PM
#869
Super Moderator
Staff
Thread Starter
iTrader: (1)
Join Date: Aug 2008
Location: Anderson Missouri
Posts: 11,788
Likes: 0
Received 22 Likes
on
20 Posts
I just got back form my inlaws. Before I got into Toyotas, I was working on a 64 Chevy pickup. It orgianlly came with a 6 cylinder (230 or 235 dont remember now) with a 3 speed on the tree. I found the truck at a city wide garage sale and wanted to fix something up. The 67-72 Chevy trucks are a little more pricer so thought I would try something a little different. I also bought a wrecked 83 3/4 ton Chevy truck that had a 350 with a 4 bolt main and 4 barrell and a Turbo 400 tranny. I put the 83 drive train into the 64 and found a 65 auto rear end for it.
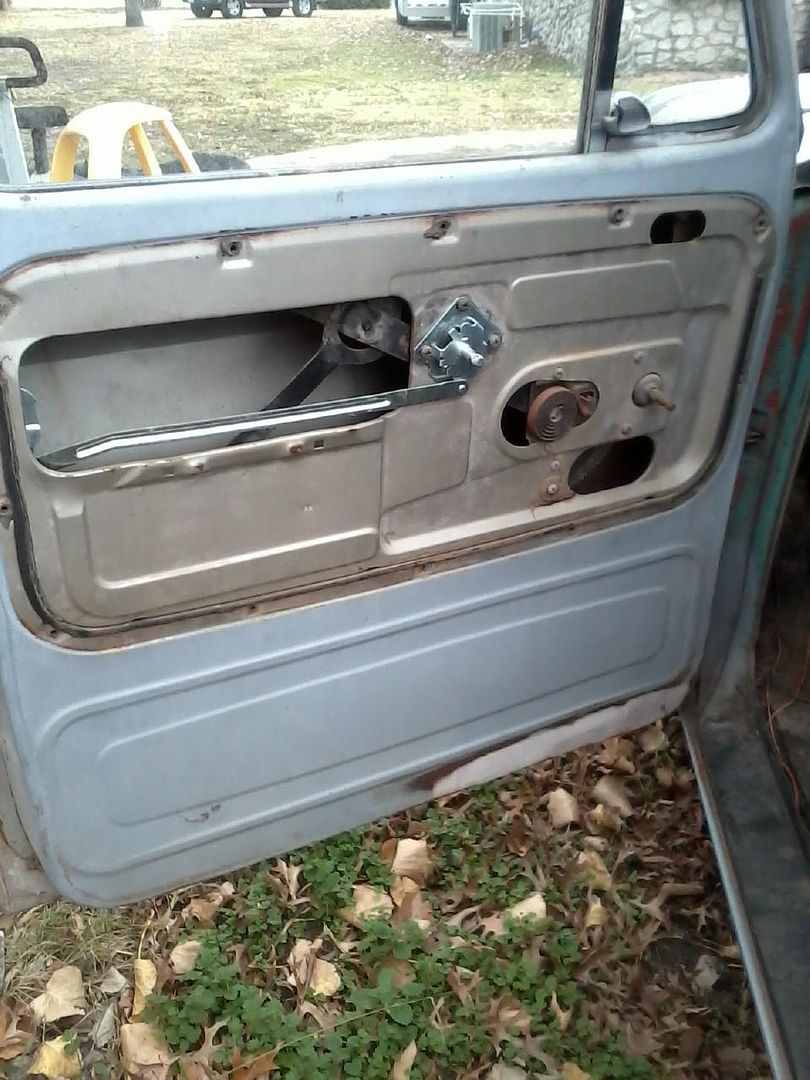
From LMC, I bought new bumpers, grill, rear mounted gas tank, new door mechanisims, inner and outer fenders to eliminate any rust and had new rockers and cab corners welded in. I was going to do this truck up right. This was several years ago and right after I got it running and ready for paint, gas went thru the roof and it only gets about 10 miles to the gallon and for what I had into it, as afraid I wouldnt get out of it what I had into it so I gave it to my father in law. Well my mother inlaw just wont let him put the money into it to finish it up.
While there today, I got some pics of it and will probably be getting it back this coming spring. I will finish it up and sell it when done. I was into Fords, Chevys and Dodges befroe I switched over to Toyotas. Gas prices made me switch and I bought my 87 flat bed for economy and then really got to liking Toyotas.
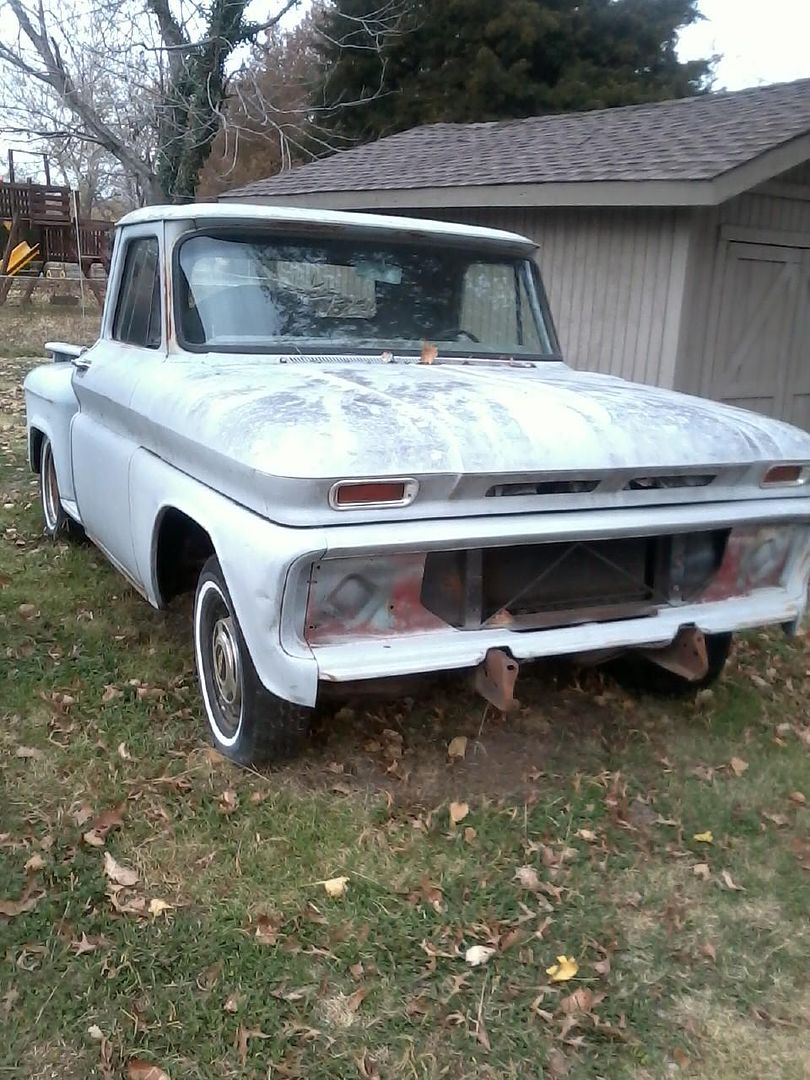
64 Chevy Truck, I was wanting to put a short wide bed on it but wasnt able to find one. A fender without the tire mount was expensive.

New rear mouneted tank and new dual exhaust. Covered to keep them protected.
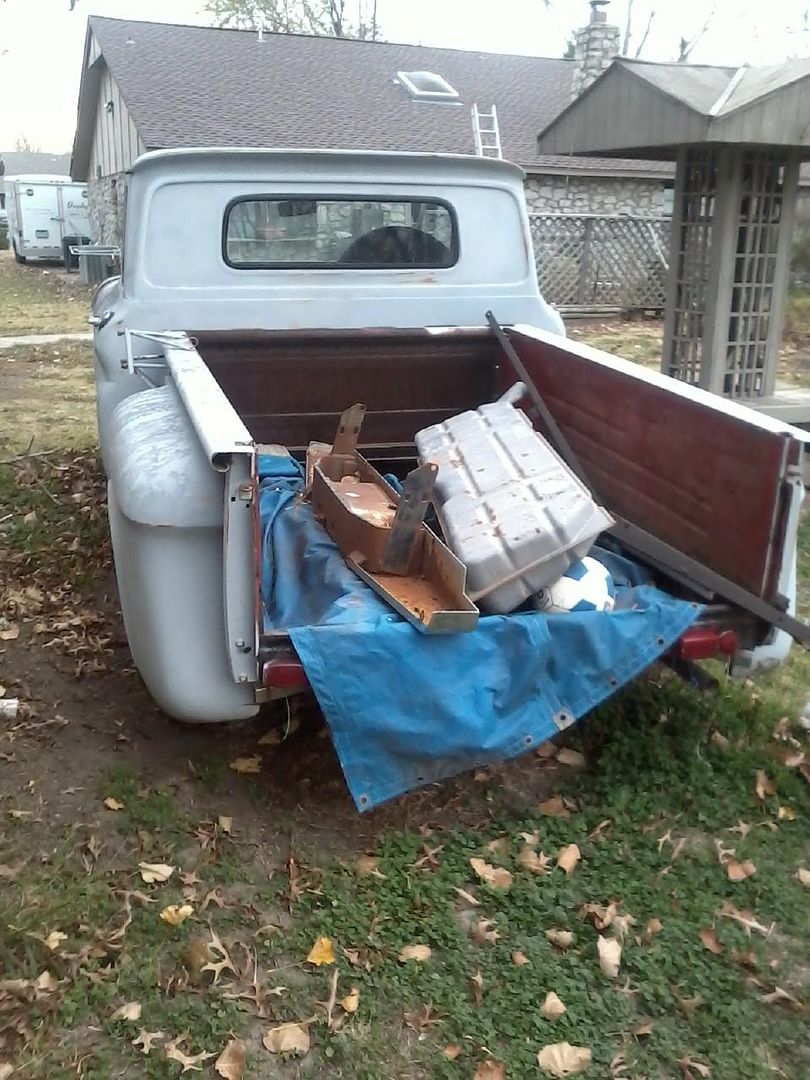
I do have new grill,bumper, and blinker lights.
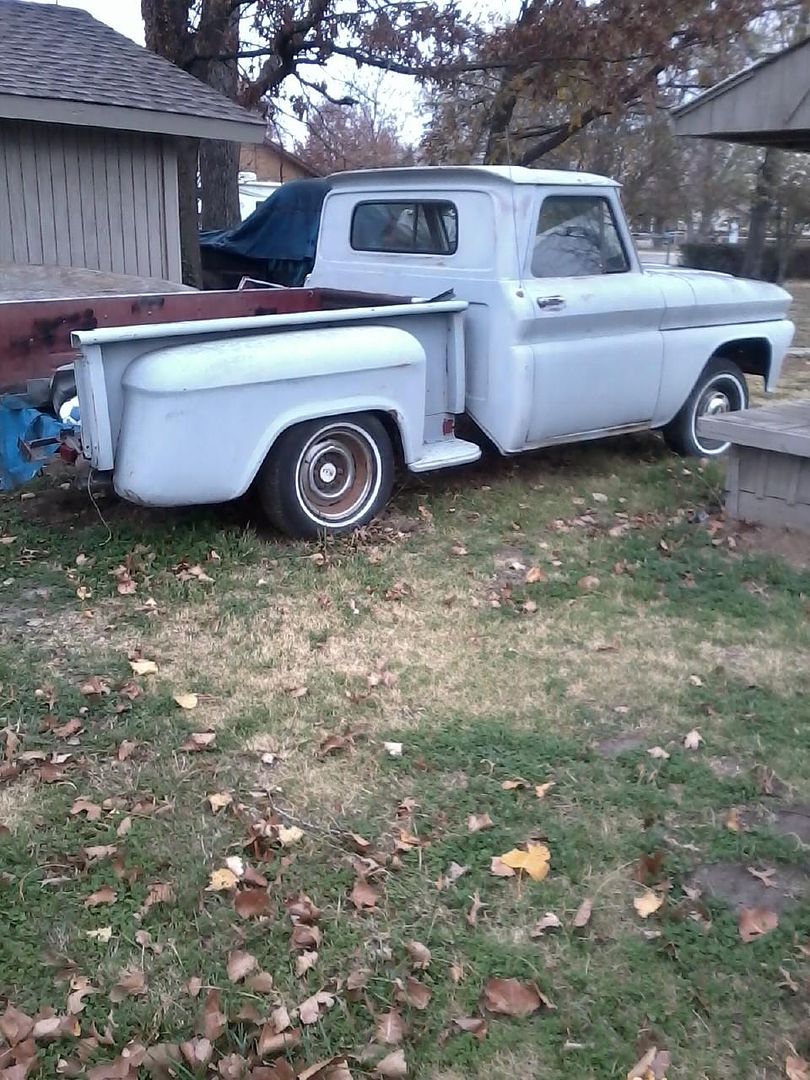
Side view
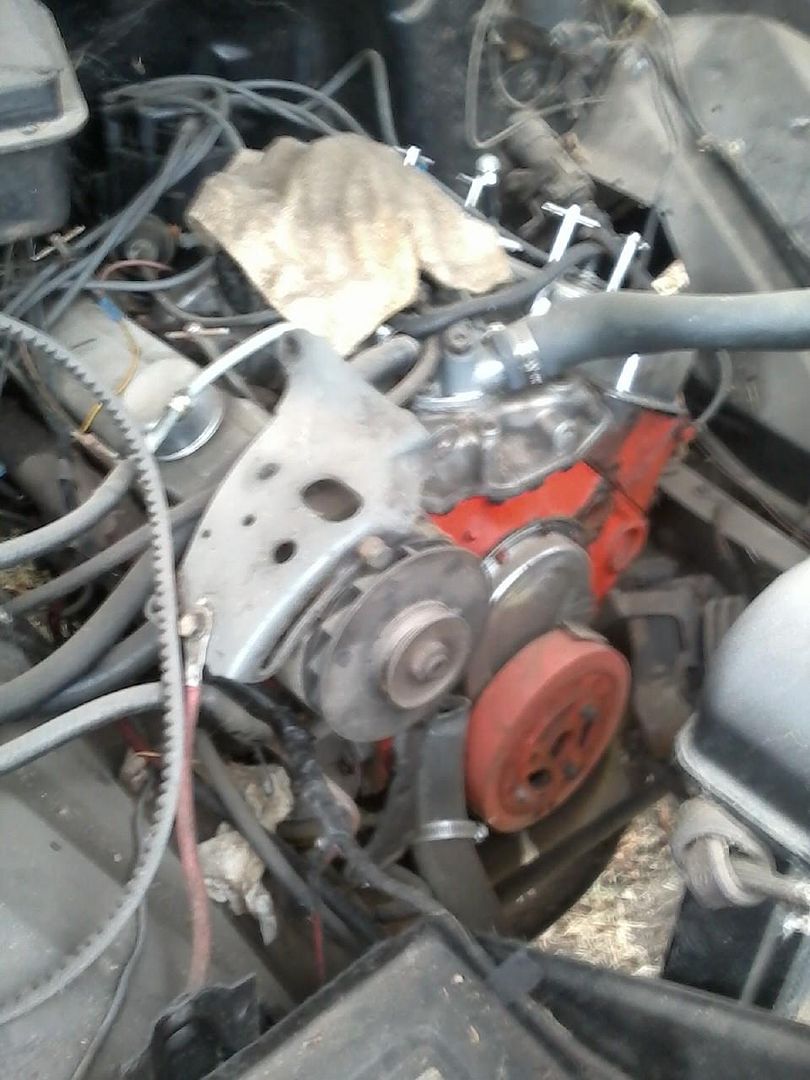
Rebuilt 350 and new battery tray in bottom of pic.
New door handles with new windshield and rubber seal. I didnt take any short cuts on this truck.
From LMC, I bought new bumpers, grill, rear mounted gas tank, new door mechanisims, inner and outer fenders to eliminate any rust and had new rockers and cab corners welded in. I was going to do this truck up right. This was several years ago and right after I got it running and ready for paint, gas went thru the roof and it only gets about 10 miles to the gallon and for what I had into it, as afraid I wouldnt get out of it what I had into it so I gave it to my father in law. Well my mother inlaw just wont let him put the money into it to finish it up.
While there today, I got some pics of it and will probably be getting it back this coming spring. I will finish it up and sell it when done. I was into Fords, Chevys and Dodges befroe I switched over to Toyotas. Gas prices made me switch and I bought my 87 flat bed for economy and then really got to liking Toyotas.
64 Chevy Truck, I was wanting to put a short wide bed on it but wasnt able to find one. A fender without the tire mount was expensive.
New rear mouneted tank and new dual exhaust. Covered to keep them protected.
I do have new grill,bumper, and blinker lights.
Side view
Rebuilt 350 and new battery tray in bottom of pic.
New door handles with new windshield and rubber seal. I didnt take any short cuts on this truck.
Last edited by Terrys87; 12-14-2014 at 12:48 AM.
11-23-2012, 02:01 PM
#871
Super Moderator
Staff
Thread Starter
iTrader: (1)
Join Date: Aug 2008
Location: Anderson Missouri
Posts: 11,788
Likes: 0
Received 22 Likes
on
20 Posts
Hello Cyberhorn... Now that I can paint I think I can turn for a nice little profit. I have learned some ways of cleaning up the interior and really dont have much more to do to it to get looking nice. This will be the last 73-late 80s 350 motor that I rebuild. No matter what you do, you cant get any descent mileage out of them. The drive train is alot more powerful then what the body or frame would stand up to though. He started to stick in a heavier duty radiator and that is about where he stopped. I would like to see him finish it up as I know he would really enjoy it. But I am not holding my breath on that.
11-23-2012, 02:03 PM
#872
Super Moderator
Staff
Thread Starter
iTrader: (1)
Join Date: Aug 2008
Location: Anderson Missouri
Posts: 11,788
Likes: 0
Received 22 Likes
on
20 Posts
To keep up with my one little accomplishment a day or week, I started getting the rest of the interior in to start forming back into shape. Mistys runner might slow things down for a few days, but dont think it will be much.
11-23-2012, 07:47 PM
#874
Super Moderator
Staff
Thread Starter
iTrader: (1)
Join Date: Aug 2008
Location: Anderson Missouri
Posts: 11,788
Likes: 0
Received 22 Likes
on
20 Posts
Hello Cyberhorn...They dont have markings on them. On Vinyl, I put a small dab of sealer on the srew tabs. I am missing the passenger pocket and the 2nd gens are larger so I will be upgrading to those ebentually.
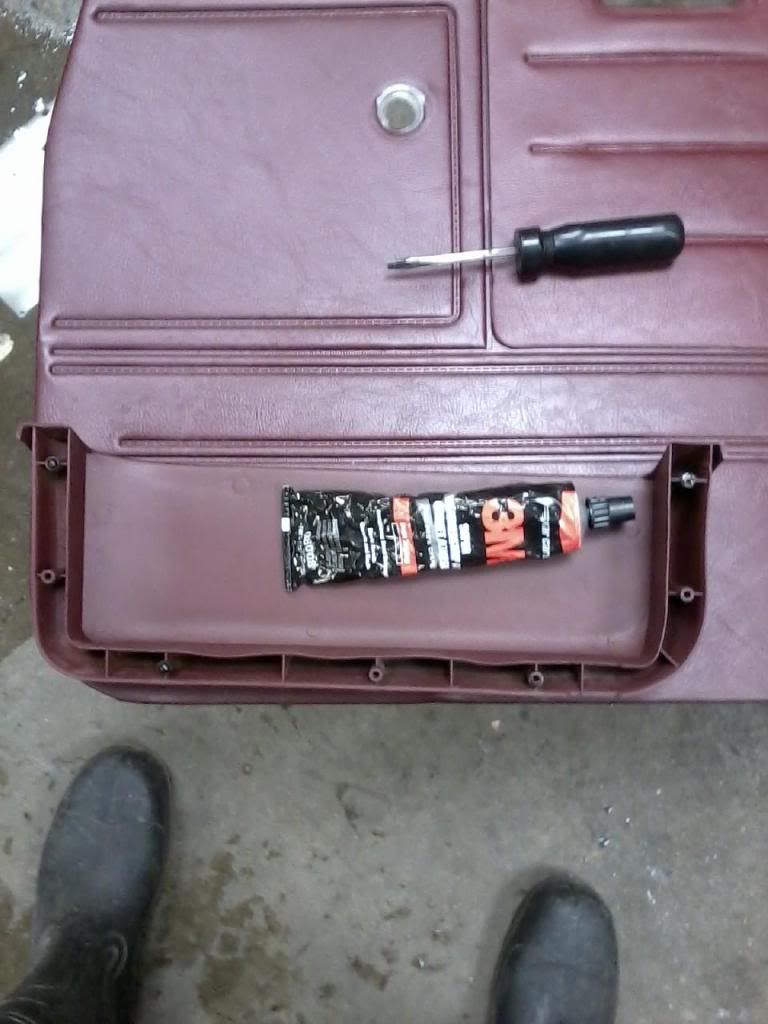
Here is how I did the 88. Not sure how I will mark on mark on carpet.
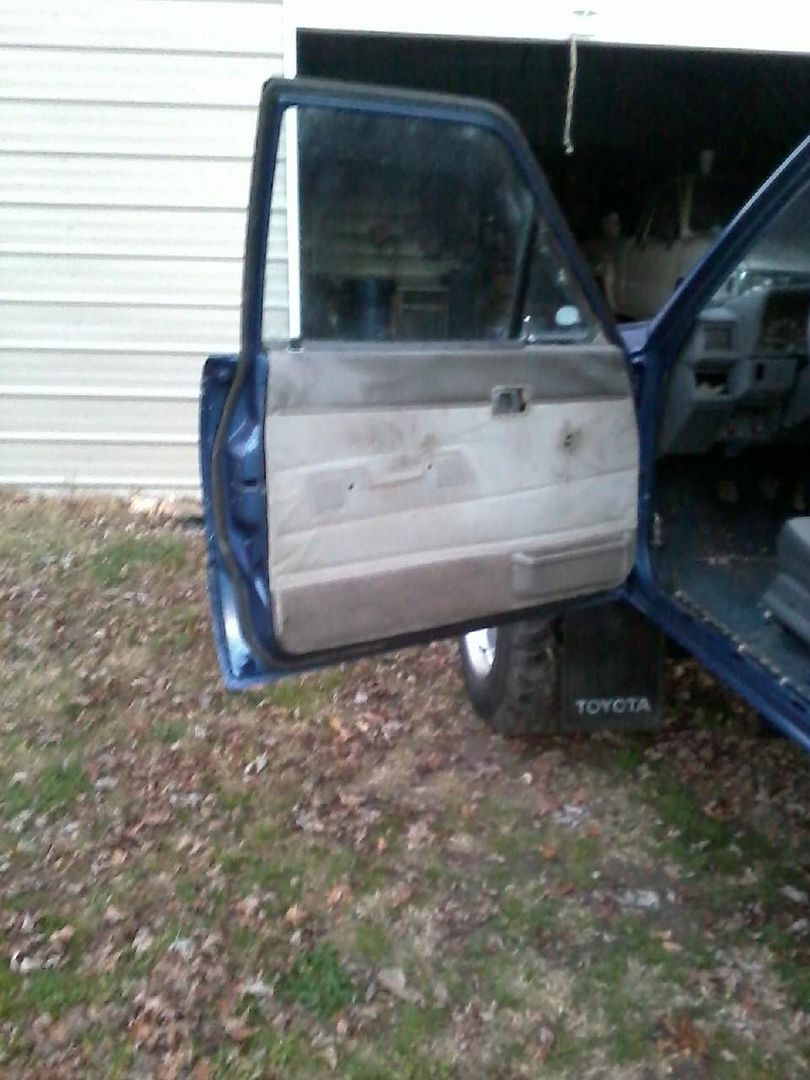
I took a door pocket and had to take a cut off wheel and knock down the tall tabs. On the Runner I pulled it from it was only being held by 4 screws. Haynes Manual has a great descrition for getting your door panel off.
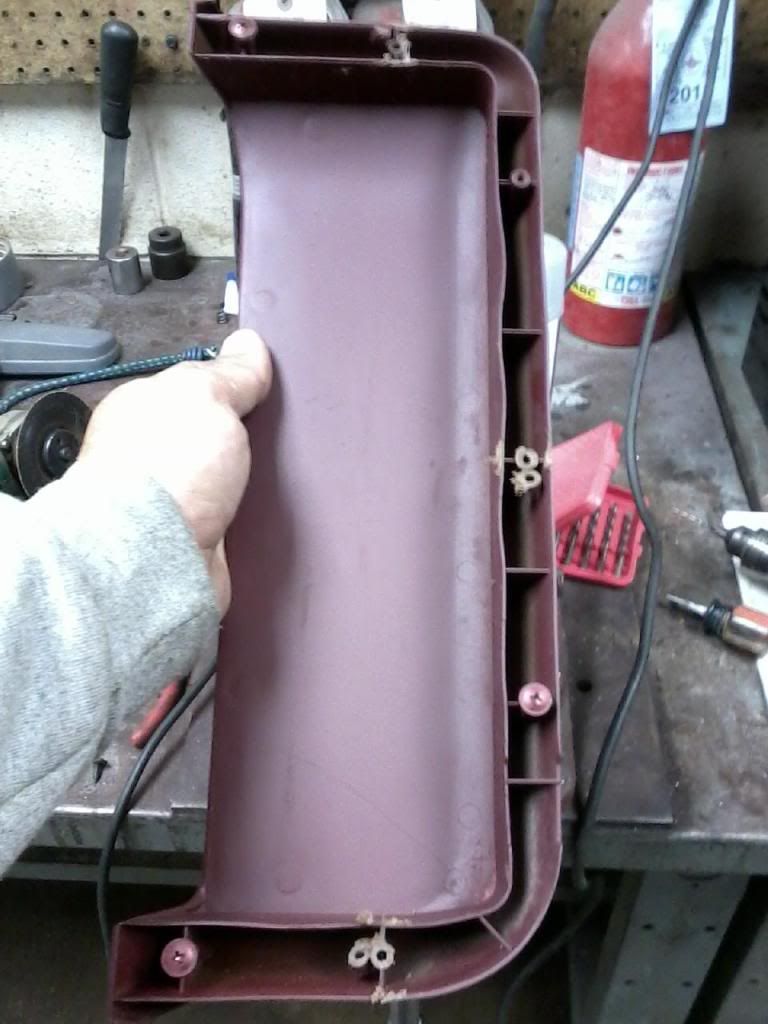
I then figured where I wanted it and put a dab of weater seal on the screw holes and set it where I wanted it so as to know where to make the screw holes. I used about the smallest drill bit I had and made a small hole and ran the screws in from the back side then mounted it to the door panel.
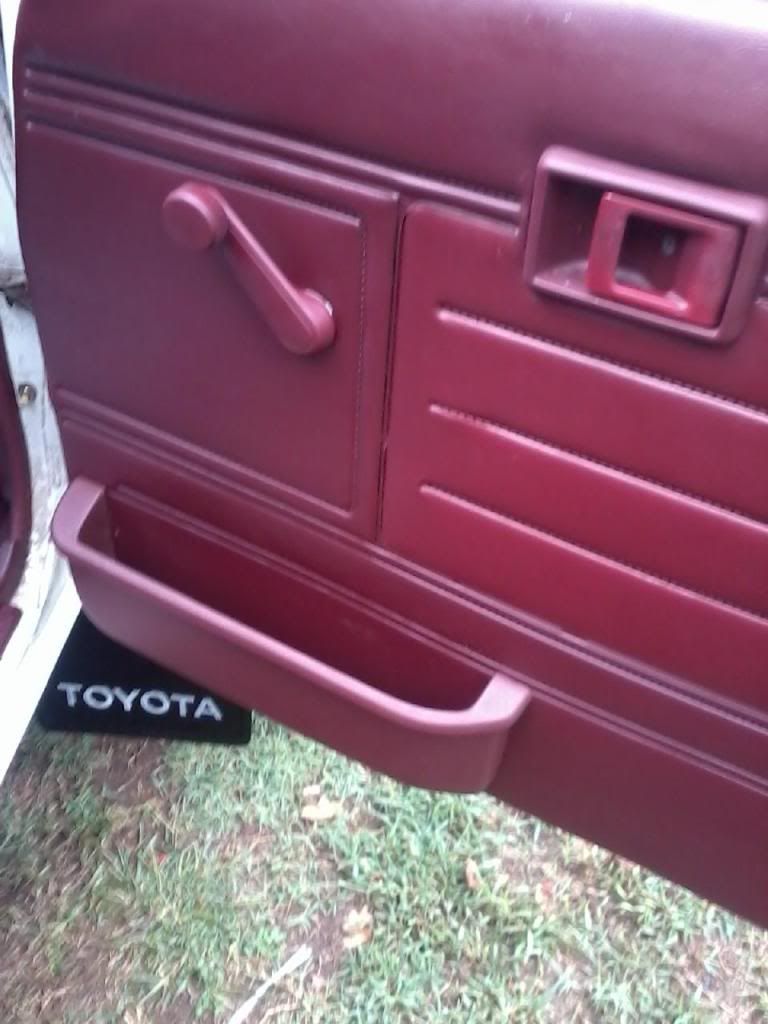
Here it is done and is the way the 2nd gen was mounted. Wont take heavy items but will work for what I need. I got it off of a brown truck and did have to paint it.
Here is how I did the 88. Not sure how I will mark on mark on carpet.
I took a door pocket and had to take a cut off wheel and knock down the tall tabs. On the Runner I pulled it from it was only being held by 4 screws. Haynes Manual has a great descrition for getting your door panel off.
I then figured where I wanted it and put a dab of weater seal on the screw holes and set it where I wanted it so as to know where to make the screw holes. I used about the smallest drill bit I had and made a small hole and ran the screws in from the back side then mounted it to the door panel.
Here it is done and is the way the 2nd gen was mounted. Wont take heavy items but will work for what I need. I got it off of a brown truck and did have to paint it.
11-23-2012, 10:14 PM
#876
Registered User
WowTerry youve been really busy. Nice job. Dang you have so many projects going on right now. You're crazy. Great job though. I'm really digging That blue 4runner
11-24-2012, 08:10 AM
#877
Registered User
Join Date: Oct 2012
Location: Elliot Lake, ont
Posts: 7
Likes: 0
Received 0 Likes
on
0 Posts
Sorry for not getting back but have been busy all over. My real problem with my 87 is the frame. I've ripped her down to it now. Left the motor and tranny in, took the cab off and dismantled the entire back end. The main rails are rotted out both sides from the torsion bar mounts right back to the rear spring mounts on the inside and bottom. I started to cut out the bad metal on the inside and bottom full stretch. The cross bar that was under the cab is bad too. Any advice on where I could get another cross bar? Is it possible? Or should I just scrap the frame completely and part the truck out? The cabs in good shape and she runs perfect. Before I started the teardown lol!
Any advice would be great.
Cheers!
Any advice would be great.
Cheers!
11-24-2012, 11:11 AM
#878
Super Moderator
Staff
Thread Starter
iTrader: (1)
Join Date: Aug 2008
Location: Anderson Missouri
Posts: 11,788
Likes: 0
Received 22 Likes
on
20 Posts
Hello Cyberhorn...When I do go to install side pockets withcarpet on them, I think what I am going to do is take some small finishing nails and put them into the screw holes of the pockets and with the door panel clips removed try and use them as little puches to poke thru the carpet. I will lay on concrete and lightly tap it unti they start to puch thru.
Hello Redeth005..The Chevy was about 5 years ago. I am about to get the 88 pickup and Mistys just needs a little repair. Then I will be down to one project again. I was going to keep the 88 pickup for myself til I came across my 85 Extra Cab. Once I get the 88 pickup done and Mistys going again. I will start to tinker with my 85 extra cab. I am getting down to the more expensive things now on my 86 Runner so it will slow down and I can find alot to do on the 85 for little or no cost. Just like to stay busy. Dont care for sitting in the house all day. lol
Hello Redeth005..The Chevy was about 5 years ago. I am about to get the 88 pickup and Mistys just needs a little repair. Then I will be down to one project again. I was going to keep the 88 pickup for myself til I came across my 85 Extra Cab. Once I get the 88 pickup done and Mistys going again. I will start to tinker with my 85 extra cab. I am getting down to the more expensive things now on my 86 Runner so it will slow down and I can find alot to do on the 85 for little or no cost. Just like to stay busy. Dont care for sitting in the house all day. lol
 11-24-2012, 11:26 AM
#880
Super Moderator
Staff
Thread Starter
iTrader: (1)
Join Date: Aug 2008
Location: Anderson Missouri
Posts: 11,788
Likes: 0
Received 22 Likes
on
20 Posts
Hello shaheen1969...Fierohink rebuilt his frame. If you are a great welder and trust your welds, I would say go for it. If it the main crossmember under the cab, I would suggest the bone yard. Another option would be to do a frame swap. I have done and helped on several frame swaps and really they aren not anything to be worried about. If you can pull a motor and tranny, you have the skills to do a frame swap. I suggest getting a rolling frame with both axles whether it be a solid axle or IFS. Otherwise it just takes a little more time to move the axles over.
If all goes well, I might be getting an 85 Runner frame from a guy parting out a rolled runner. I wont know more til later next week as he is still trying to buy it for parts for his. I will paint his truck for him. If I get the frame, I will be doing a frame swap. I am not into the solid axle thing, but from my fairly recent experience, a solid axle rides alot smoother and that was a surprise for me. I want mine to be a nice riding truck as I plan on it being my main daily driver that I could take on long trips. I wont do the Solid Axle Swap (SAS) but a Solid Axle Frame Swap (SAFS). I dont need the toughness or height for crawling. A SAS doesnt fit into my needs or wants.
Here is the steps needed to do a frame swap and am sure I havent missed much on it. Once you get the body off and go to put it onto the new frame, you will feel like a pro and have alot more confidence in getting it back together. The first time was the same for me. Really nervous, but once I sat the body on the frame, wasnt even worried. If you have a rolling frame that is ready to go, it can be done easily in a weekend. I started on a Saturday morning and was done on a Sunday evening. Took some long hours as I only had the basic of tools. Now with some air tools, it will speed things up alot.
Copied....
Steps for a frame/body swap.
I have talked to a couple of other people on here about doing frame swap or body swaps. I have done two and tried to write out a nice way of doing this. I did the swaps before finding Yotatech and wish I would of taken pictures. I figured I would put this in my thread so if others do a search on it, it might make finding this thread easier and so I can call it up quick if I need it. I havent done a 4runner but the steps would be about the same. If you can pull a motor or tranny you can swap bodies/frames. It s very doable and nothing to be afraid of.
I did the 22re's. Apparently a 3.0 and 22res frame arent interchangeable without redoing the motor mounts. I am sure everythign here would apply to a 3.0, but I havent done this so will not say for sure. 84-88 Pickup frames and 89-95 frames are not interchange able from what I have been told.
On the 84-89 4runner behind the Drivers rear tire is a wire disconnect point, for the tailgate and lights that would make separating the wires for body removal. Im sure a 90-95 4Runner would be the same, but I havent done one so cant say for sure.
Fierohinks has some pic in his thread for some ideas and what things will look like. https://www.yotatech.com/forums/f116...s-pics-228184/
Dutchbelly has some good pics of doing a Frame swap...... https://www.yotatech.com/forums/f199...ild-up-234352/
I didnt have a lift, so if you were going to leave the drive train in, there are some steps that would be different and I will try and write them up as best as I can at a later time.
First I center the Steering Wheel and remove the motor and tranny. If you have a lift and can get the body high enough this would really help, but this is how I have to do this.
Getting the Steering Wheel and wheels straight just makes it alot easier for later. When I take the cab off and put it back on is when I install and remove the Steering Rod is probably the most hardest. You may find another way, but this works for me.
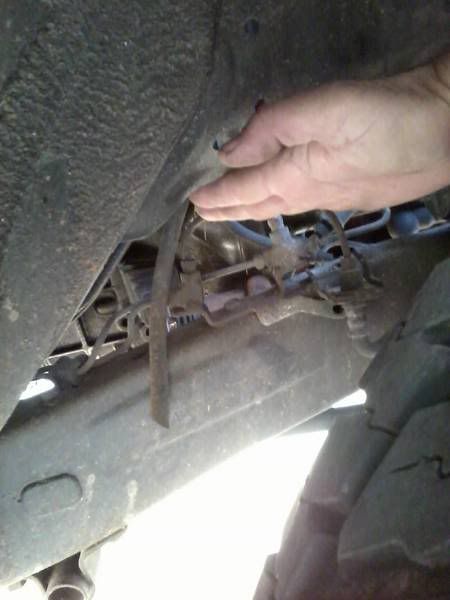
Then on the frame by the right front tire you have 2 brake lines to disconnect. This is the best place to do it as it keeps the lines on the cab intact and the frame lines will stay intact. This will take care of your brake issues. ( Pic at bottom)
I then disconnect the Wiring harness under the Passenger side seat and this will let the cab come off with out any problems other than you front blinkers and I take the Front Bumper off just so I dont have to lift the cab so high. Leave the wiring harness to the Tail lights/ Fuel Pump on the back half of the frame til later. You can get it when you take the bed off. All of your electrical and computer wires will come with the cab. This is set up quite nice. Just mark all of your wires and such when you pull your motor. When you pull your motor, you will have taken care of alot of other steps like fuel lines.
You have 6 bolts that hold the cab to the frame. The cab and front end come off in one piece. I already have the hood off. I leave fenders, doors, and interior in. 2 bolts by the Radiator, 2 bolts behind the front tires, and 2 bolts toward the rear of the cab is all that hold the cab to the frame. You can tell them as they sit on the outside of the frame and have rubber bushings. You may have to lift your carpet to hold them with wrench to take the nut off.
You have 8-10 bolts that hold the bed on. They have a tab that sticks in the bed so you dont have to have a wrench to hold the top. You should take some PB Blaster a nite or two ahead of time before you do this as most or all of the bolts will break. They are special so you will need to get some from Toyota or the salvage. This is a good time to remove the 3 screws that hold your gas tank fill tube to the bed or body of a 4Runner. Also I have had problems of these nuts backing off when I have had a bed bolt off before so I would suggest using locktite. I use 4 concrete blocks and set the bed on these with the floor of the bed on the blocks so I dont have to worry about damaging the bed sides.
Once all of this is done, I use some concrete blocks and 4x4 wood to support the cab. If your rocker panels are in good shape you can rest it on the wood. If not you might want to support it using blocks of wood between the 4x4 and floor. I set the concrete blocks about a foot from the cab to clear the front tires. This way could be a little unstable so be careful or you might have some other way of doing this. Here is whereI get 3 other guys to help lift the cab. 2 lifting and 2 setting up the stand for the cab. The back is heavy, but the front is light. I go about a foot high off of the frame for everything to clear, but work the frame out slowly and make sure it is high enough. I back the frame out as the front part of the frame is lower than the back part.
I get the new frame with axles in them or you can just put yours in. Put the wiring harness for the back part of the truck and fuel tank in and hopefully you will have brake lines and fuel lines already on or you will get to do that too. Try and get a frame with this stuff already on It will save you a lot of time. Put your exhaust in before you move the new frame under the cab.
Before I start all of this, I try to have the new frame prepped as far as I can. Without counting motor/tranny removal and having the frame ready. I have done this in about 20 total hours using basic tools in a weekend by myself except lifting the cab and body. Cutting torch for bolts, air tools, and a lift would be soooo nice. If you can get the body high enough it would make swapping alot easier, but I dont have access to a lift so this is how I do it. The first time I did this I was intimidated, but by the time I had the old frame out I wasnt in the least bit concerened. If you can pull a motor and tranny out, you wont have any problems. You will be quite surprised when you do it. Any questions that come up, feel free to ask.
If you are going to use a lift and keep the drive train in you will need to
Disconnect your fuel line from fuel filter.
Remove your electrical lines from your injectors and sensors.
Disconnect your electrical lines from your transmission, O2 sensor and transfer case.
I mentioned it earlier, but remove 3 screws that hold your fuel tank to the bed/ body. You can remvoe the lines at the tank, but I feel this is easier.
On a 4Runner you will have to go up between the body an frame and remove 2 bolts to get the fuel filler assembly out.
These are some steps that are different from pulling the motor. Im sure there are more steps but this will get you started in the right direction.
Here is a great place to disconnect your brake and clutch line. By the Passenger front tire.
If all goes well, I might be getting an 85 Runner frame from a guy parting out a rolled runner. I wont know more til later next week as he is still trying to buy it for parts for his. I will paint his truck for him. If I get the frame, I will be doing a frame swap. I am not into the solid axle thing, but from my fairly recent experience, a solid axle rides alot smoother and that was a surprise for me. I want mine to be a nice riding truck as I plan on it being my main daily driver that I could take on long trips. I wont do the Solid Axle Swap (SAS) but a Solid Axle Frame Swap (SAFS). I dont need the toughness or height for crawling. A SAS doesnt fit into my needs or wants.
Here is the steps needed to do a frame swap and am sure I havent missed much on it. Once you get the body off and go to put it onto the new frame, you will feel like a pro and have alot more confidence in getting it back together. The first time was the same for me. Really nervous, but once I sat the body on the frame, wasnt even worried. If you have a rolling frame that is ready to go, it can be done easily in a weekend. I started on a Saturday morning and was done on a Sunday evening. Took some long hours as I only had the basic of tools. Now with some air tools, it will speed things up alot.
Copied....
Steps for a frame/body swap.
I have talked to a couple of other people on here about doing frame swap or body swaps. I have done two and tried to write out a nice way of doing this. I did the swaps before finding Yotatech and wish I would of taken pictures. I figured I would put this in my thread so if others do a search on it, it might make finding this thread easier and so I can call it up quick if I need it. I havent done a 4runner but the steps would be about the same. If you can pull a motor or tranny you can swap bodies/frames. It s very doable and nothing to be afraid of.
I did the 22re's. Apparently a 3.0 and 22res frame arent interchangeable without redoing the motor mounts. I am sure everythign here would apply to a 3.0, but I havent done this so will not say for sure. 84-88 Pickup frames and 89-95 frames are not interchange able from what I have been told.
On the 84-89 4runner behind the Drivers rear tire is a wire disconnect point, for the tailgate and lights that would make separating the wires for body removal. Im sure a 90-95 4Runner would be the same, but I havent done one so cant say for sure.
Fierohinks has some pic in his thread for some ideas and what things will look like. https://www.yotatech.com/forums/f116...s-pics-228184/
Dutchbelly has some good pics of doing a Frame swap...... https://www.yotatech.com/forums/f199...ild-up-234352/
I didnt have a lift, so if you were going to leave the drive train in, there are some steps that would be different and I will try and write them up as best as I can at a later time.
First I center the Steering Wheel and remove the motor and tranny. If you have a lift and can get the body high enough this would really help, but this is how I have to do this.
Getting the Steering Wheel and wheels straight just makes it alot easier for later. When I take the cab off and put it back on is when I install and remove the Steering Rod is probably the most hardest. You may find another way, but this works for me.
Then on the frame by the right front tire you have 2 brake lines to disconnect. This is the best place to do it as it keeps the lines on the cab intact and the frame lines will stay intact. This will take care of your brake issues. ( Pic at bottom)
I then disconnect the Wiring harness under the Passenger side seat and this will let the cab come off with out any problems other than you front blinkers and I take the Front Bumper off just so I dont have to lift the cab so high. Leave the wiring harness to the Tail lights/ Fuel Pump on the back half of the frame til later. You can get it when you take the bed off. All of your electrical and computer wires will come with the cab. This is set up quite nice. Just mark all of your wires and such when you pull your motor. When you pull your motor, you will have taken care of alot of other steps like fuel lines.
You have 6 bolts that hold the cab to the frame. The cab and front end come off in one piece. I already have the hood off. I leave fenders, doors, and interior in. 2 bolts by the Radiator, 2 bolts behind the front tires, and 2 bolts toward the rear of the cab is all that hold the cab to the frame. You can tell them as they sit on the outside of the frame and have rubber bushings. You may have to lift your carpet to hold them with wrench to take the nut off.
You have 8-10 bolts that hold the bed on. They have a tab that sticks in the bed so you dont have to have a wrench to hold the top. You should take some PB Blaster a nite or two ahead of time before you do this as most or all of the bolts will break. They are special so you will need to get some from Toyota or the salvage. This is a good time to remove the 3 screws that hold your gas tank fill tube to the bed or body of a 4Runner. Also I have had problems of these nuts backing off when I have had a bed bolt off before so I would suggest using locktite. I use 4 concrete blocks and set the bed on these with the floor of the bed on the blocks so I dont have to worry about damaging the bed sides.
Once all of this is done, I use some concrete blocks and 4x4 wood to support the cab. If your rocker panels are in good shape you can rest it on the wood. If not you might want to support it using blocks of wood between the 4x4 and floor. I set the concrete blocks about a foot from the cab to clear the front tires. This way could be a little unstable so be careful or you might have some other way of doing this. Here is whereI get 3 other guys to help lift the cab. 2 lifting and 2 setting up the stand for the cab. The back is heavy, but the front is light. I go about a foot high off of the frame for everything to clear, but work the frame out slowly and make sure it is high enough. I back the frame out as the front part of the frame is lower than the back part.
I get the new frame with axles in them or you can just put yours in. Put the wiring harness for the back part of the truck and fuel tank in and hopefully you will have brake lines and fuel lines already on or you will get to do that too. Try and get a frame with this stuff already on It will save you a lot of time. Put your exhaust in before you move the new frame under the cab.
Before I start all of this, I try to have the new frame prepped as far as I can. Without counting motor/tranny removal and having the frame ready. I have done this in about 20 total hours using basic tools in a weekend by myself except lifting the cab and body. Cutting torch for bolts, air tools, and a lift would be soooo nice. If you can get the body high enough it would make swapping alot easier, but I dont have access to a lift so this is how I do it. The first time I did this I was intimidated, but by the time I had the old frame out I wasnt in the least bit concerened. If you can pull a motor and tranny out, you wont have any problems. You will be quite surprised when you do it. Any questions that come up, feel free to ask.
If you are going to use a lift and keep the drive train in you will need to
Disconnect your fuel line from fuel filter.
Remove your electrical lines from your injectors and sensors.
Disconnect your electrical lines from your transmission, O2 sensor and transfer case.
I mentioned it earlier, but remove 3 screws that hold your fuel tank to the bed/ body. You can remvoe the lines at the tank, but I feel this is easier.
On a 4Runner you will have to go up between the body an frame and remove 2 bolts to get the fuel filler assembly out.
These are some steps that are different from pulling the motor. Im sure there are more steps but this will get you started in the right direction.
Here is a great place to disconnect your brake and clutch line. By the Passenger front tire.


