
rocket's 1992 4Runner Build-Up Thread (totaled)
 Sep 17, 2005 | 08:23 AM
#21
Contributing Member
Joined: Oct 2004
Posts: 1,817
Likes: 0
From: B'ham, WA
Originally Posted by rocket
Not sure what you mean...the picture i took of the skid and crossmember dont do them justice. My camera picked up way too much "detail". All the skribble marks you see on the skid are just finished up grind marks of where its engraved 'BudBuilt' and both chunks of metal are smooth as butter.
 Sep 18, 2005 | 12:53 AM
#22
Thread Starter
Contributing Member
iTrader: (1)
Joined: Apr 2005
Posts: 4,683
Likes: 0
From: Colorado
ahh yes... I don't think i'm going that far but i considered it.
Heres some pics that Bud sent. Its a bellypan that connects the front IFS skid to the crossmember.
http://www.budbuilt.com/new/images/BBBELLYPAN1.JPG
http://www.budbuilt.com/new/images/BBBELLYPAN2.JPG
http://www.budbuilt.com/new/images/BBBELLYPAN3.JPG
http://www.budbuilt.com/new/images/BBBELLYPAN4.JPG
Well i learned a few bad things today. My rear A-arm sub-frame is spread apart by 1/4". I measured in at 17.25" but according to the Total Chaos IFS truss i picked up yesterday the correct size should be 17". Hopefully it's something i can fix. Another thing is my BudBuilt skid plate wont bolt up if i use the IFS truss which is a must have on any 2nd gen. I'm thinking about cutting the skid plate 5 inches shorter so i'll have enough room to fit the truss.
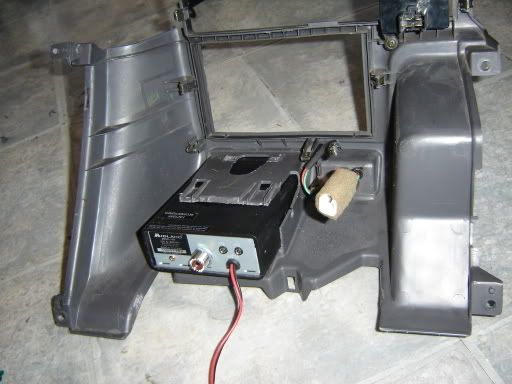
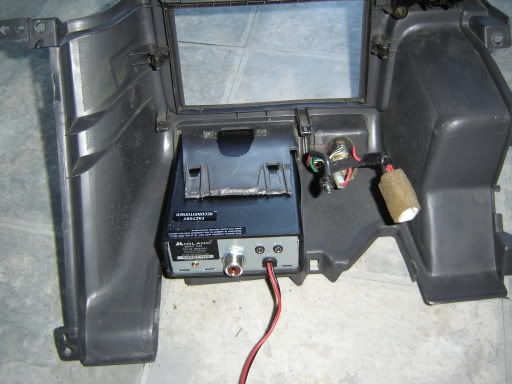
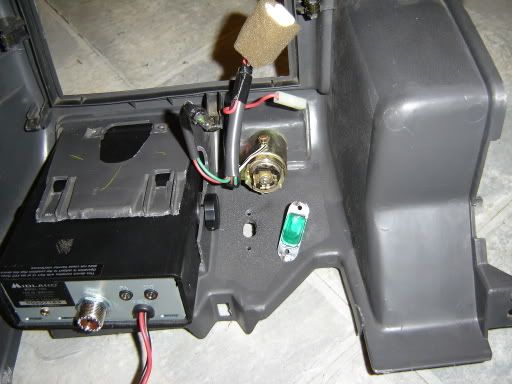
Some better news is i finshed the BL today and got my CB in place.
Ash tray out:
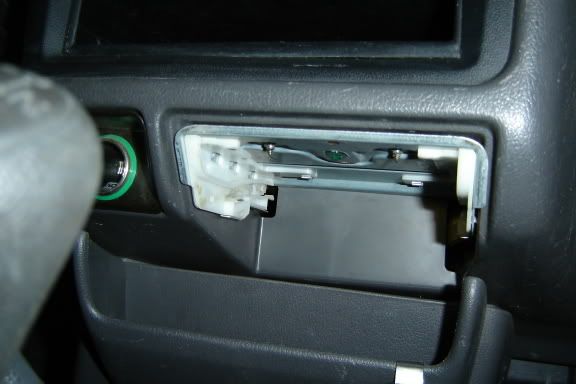
Pocket piece out:
Glove box out:
Popped the ignition trim piece:
Pulled off the temperature control knobs and pannel:

Main center trim piece out:
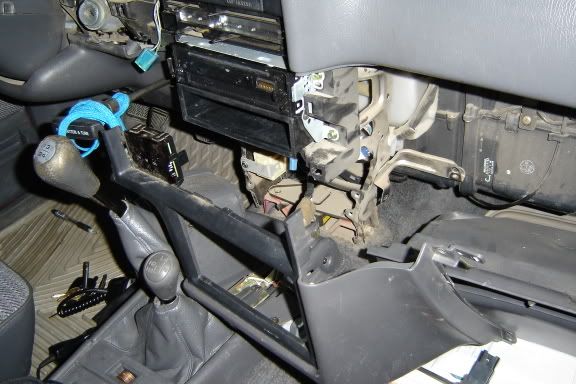
I've had this peice out few times before when i installed the head unit and i recently discovered that the ashtray light comes on when my head lights are on. So this is where i started thinking more than just the CB...
Ashtray/light bracket off:
Setting the CB in place but now it's time for the Dremel:
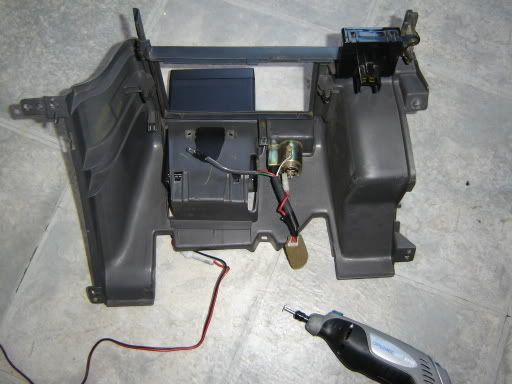
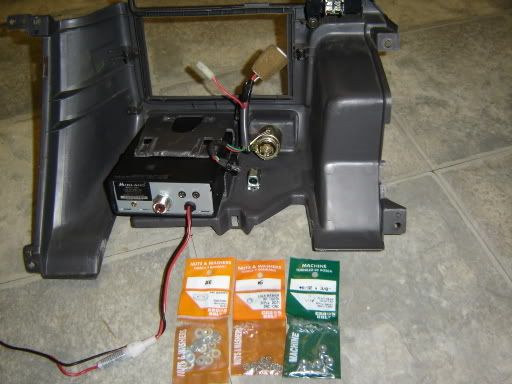
Perfect fit:
Heres some pics that Bud sent. Its a bellypan that connects the front IFS skid to the crossmember.
http://www.budbuilt.com/new/images/BBBELLYPAN1.JPG
http://www.budbuilt.com/new/images/BBBELLYPAN2.JPG
http://www.budbuilt.com/new/images/BBBELLYPAN3.JPG
http://www.budbuilt.com/new/images/BBBELLYPAN4.JPG
Well i learned a few bad things today. My rear A-arm sub-frame is spread apart by 1/4". I measured in at 17.25" but according to the Total Chaos IFS truss i picked up yesterday the correct size should be 17". Hopefully it's something i can fix. Another thing is my BudBuilt skid plate wont bolt up if i use the IFS truss which is a must have on any 2nd gen. I'm thinking about cutting the skid plate 5 inches shorter so i'll have enough room to fit the truss.
Some better news is i finshed the BL today and got my CB in place.
Ash tray out:
Pocket piece out:
Glove box out:
Popped the ignition trim piece:
Pulled off the temperature control knobs and pannel:
Main center trim piece out:
I've had this peice out few times before when i installed the head unit and i recently discovered that the ashtray light comes on when my head lights are on. So this is where i started thinking more than just the CB...
Ashtray/light bracket off:
Setting the CB in place but now it's time for the Dremel:
Perfect fit:
Last edited by rocket; Oct 31, 2005 at 01:11 AM.
Sep 18, 2005 | 01:12 AM
#23
Thread Starter
Contributing Member
iTrader: (1)
Joined: Apr 2005
Posts: 4,683
Likes: 0
From: Colorado
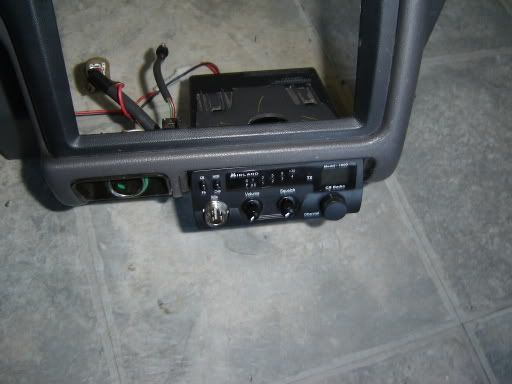
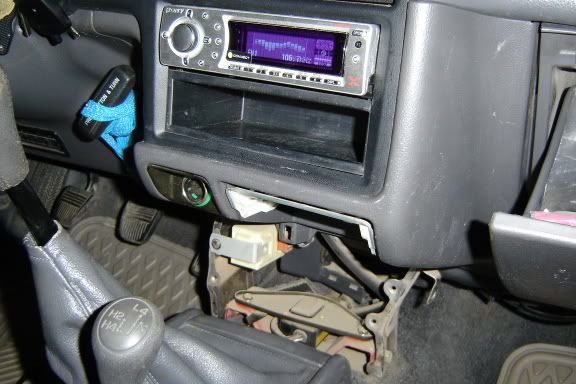
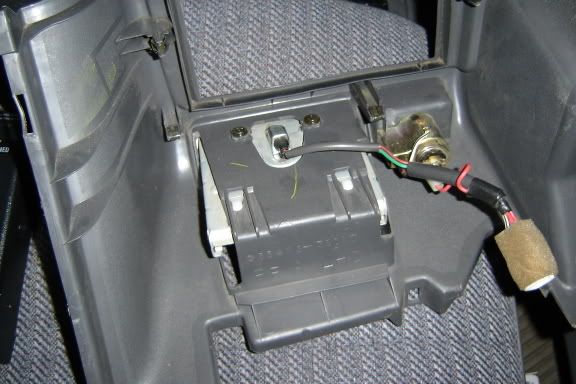
I secured the CB by drilling one hole and it was enough to keep it in place. The next picture shows how it's mounted with one bolt.
I could'nt let the ashtray light go to waste so i came up with a plan.
I slightly grinded the rivets that held the light mount on the ashtray bracket and removed it. I then cut out a hole in the main trim peice (for the light) and more holes to mount it.
Light installed:
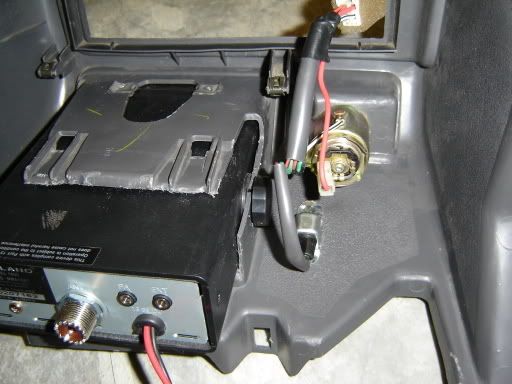
I used #6 hardware (3/8" flat head slotted screws, flat washers, and lock tooth washers) to mount it. The scuff mark you see next to the light was a mishap of the Dremel getting outta control:

Last edited by rocket; Sep 18, 2005 at 02:39 AM.
Sep 18, 2005 | 01:24 AM
#24
Thread Starter
Contributing Member
iTrader: (1)
Joined: Apr 2005
Posts: 4,683
Likes: 0
From: Colorado
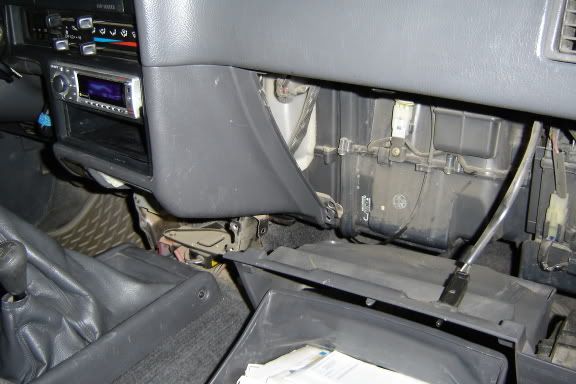
Heres a couple pics while finishing up my BL and bushings on the passenger side.
Front mount:
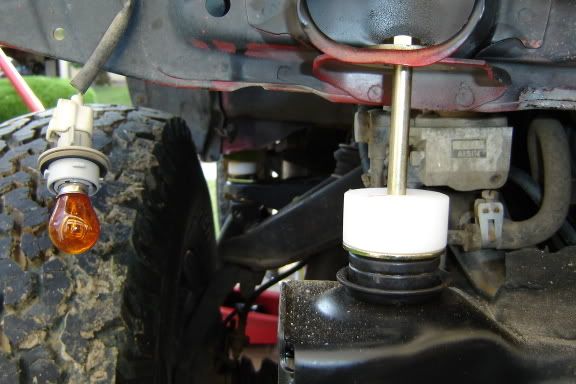
Rear mount:
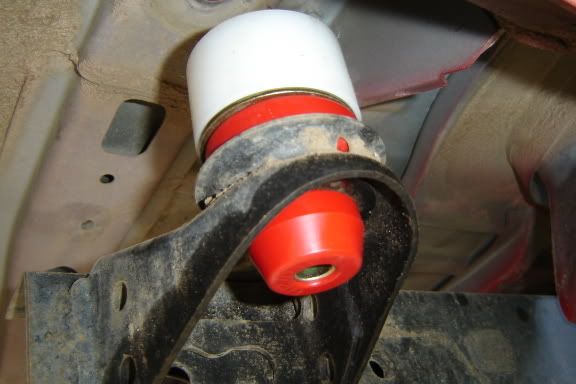
Side view: The red lower bushing is upside down but i realized it before i bolted everything together

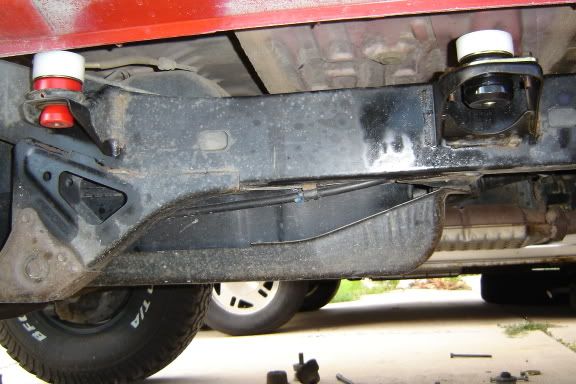
Front mount:
Rear mount:
Side view: The red lower bushing is upside down but i realized it before i bolted everything together
 Nov 7, 2005 | 11:47 AM
#28
Registered User
Joined: Sep 2002
Posts: 11,199
Likes: 2
From: Pittsburgh, PA
Originally Posted by rocket
ahh yes... I don't think i'm going that far but i considered it.
Heres some pics that Bud sent. Its a bellypan that connects the front IFS skid to the crossmember.
http://www.budbuilt.com/new/images/BBBELLYPAN1.JPG
http://www.budbuilt.com/new/images/BBBELLYPAN2.JPG
http://www.budbuilt.com/new/images/BBBELLYPAN3.JPG
http://www.budbuilt.com/new/images/BBBELLYPAN4.JPG
Well i learned a few bad things today. My rear A-arm sub-frame is spread apart by 1/4". I measured in at 17.25" but according to the Total Chaos IFS truss i picked up yesterday the correct size should be 17". Hopefully it's something i can fix. Another thing is my BudBuilt skid plate wont bolt up if i use the IFS truss which is a must have on any 2nd gen. I'm thinking about cutting the skid plate 5 inches shorter so i'll have enough room to fit the truss.
You should be able to make your own truss that will clear the Budbuilt skid and bellypan.
 Oct 12, 2010 | 08:34 AM
#30
Registered User
Joined: Jan 2010
Posts: 268
Likes: 1
From: Sacramento
Great build thread man, subscribed! Im also planning on
getting the budbuilt skid plate and crossmember, my
question is, for the crossmember to work, do you have to
do the drivetrain lift or no? I've been emailing budbuilt, but they havent given me a response on
an out the door price for the skid plate and the crossmember. I'm
ready to buy! lol I'll email him again in a couple minutes.
Last edited by Jaino240; Oct 12, 2010 at 08:37 AM.


Thread
Thread Starter
Forum
Replies
Last Post
RedRunner_87
95.5-2004 Tacomas & 96-2002 4Runners (Build-Up Section)
84
Jun 1, 2021 01:51 PM
Avenged
95.5-2004 Tacomas & 96-2002 4Runners
4
Jul 9, 2015 07:55 AM


