
rocket's 1992 4Runner Build-Up Thread (totaled)
 Sep 14, 2005 | 12:49 AM
#1
Thread Starter
Contributing Member
iTrader: (1)
Joined: Apr 2005
Posts: 4,683
Likes: 0
From: Colorado
rocket's 1992 4Runner Build-Up Thread (totaled)
(A little overdue)
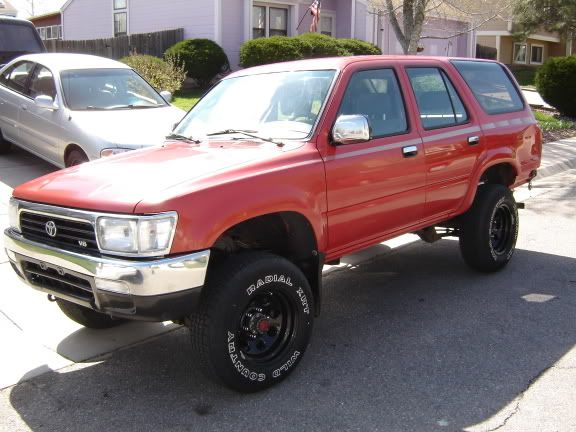
Thought I'd finally start this since i plan on doing a lot of mods. I purchased it bone stock (besides the new rims it came with) end of March '05 with the intentions of building a moderate off road rig. I joined the forum shortly after and been saving money ever since. Let the fun begin...
The first week i owned it, i went out to "test" the 4 wheel drive at a big landscaping construction site. I ended up coming down off a steep drop and wacked the factory rear bumper. It hit hard enough to shove the right side up about 2 inches and put a small dent in the tail gate. When i got home i noticed one of my 4 mud flaps was also missing. I decided it was time to take off the bumper along with the 3 remaining mudflaps and that was the beginning of my empty wallet
6 months later with countless hours/days of research, and many thanks to YT members, i've learned unbelieveable amounts of information in a very short time. Truely insurmountable.
Okay, enough of that and onto the pictorials...
First picture i took after taking off the rear bumper and mud flaps. The dent you see was there when i bought it which since then has been pounded out. My first mod (if you wanna call it that) was the clear corners:
Front flaps off:
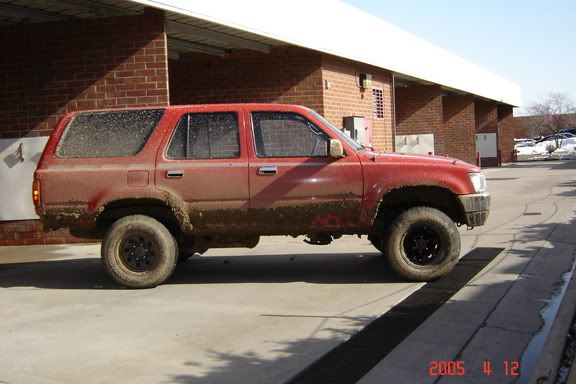
First time playin' in mud while rollin' on 235's :pig:
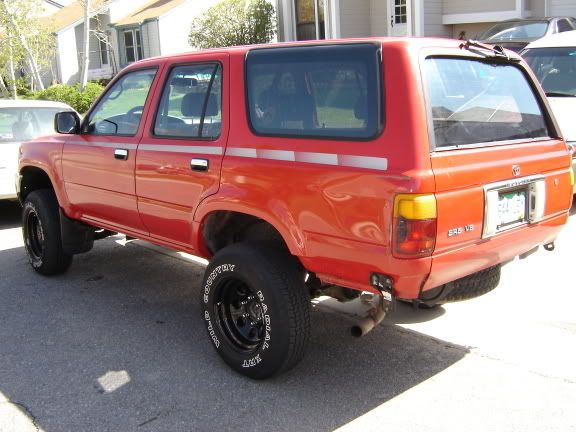
New Hilux Surf tail lights:
Thought I'd finally start this since i plan on doing a lot of mods. I purchased it bone stock (besides the new rims it came with) end of March '05 with the intentions of building a moderate off road rig. I joined the forum shortly after and been saving money ever since. Let the fun begin...
The first week i owned it, i went out to "test" the 4 wheel drive at a big landscaping construction site. I ended up coming down off a steep drop and wacked the factory rear bumper. It hit hard enough to shove the right side up about 2 inches and put a small dent in the tail gate. When i got home i noticed one of my 4 mud flaps was also missing. I decided it was time to take off the bumper along with the 3 remaining mudflaps and that was the beginning of my empty wallet
6 months later with countless hours/days of research, and many thanks to YT members, i've learned unbelieveable amounts of information in a very short time. Truely insurmountable.
Okay, enough of that and onto the pictorials...
First picture i took after taking off the rear bumper and mud flaps. The dent you see was there when i bought it which since then has been pounded out. My first mod (if you wanna call it that) was the clear corners:
Front flaps off:
First time playin' in mud while rollin' on 235's :pig:
New Hilux Surf tail lights:
Sep 14, 2005 | 01:15 AM
#3
Thread Starter
Contributing Member
iTrader: (1)
Joined: Apr 2005
Posts: 4,683
Likes: 0
From: Colorado
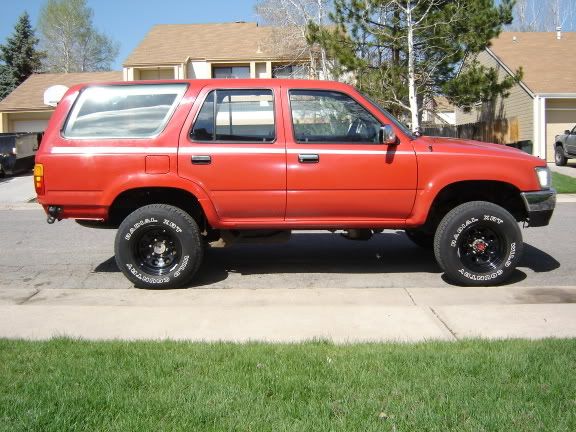
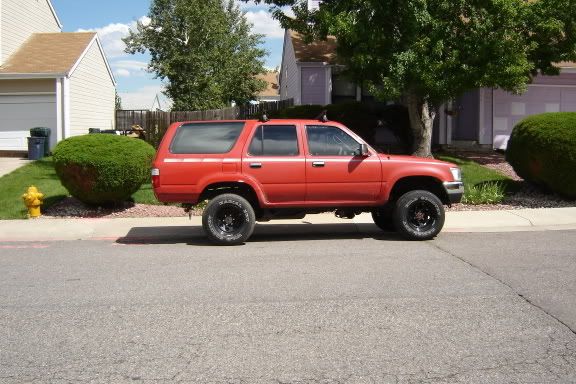
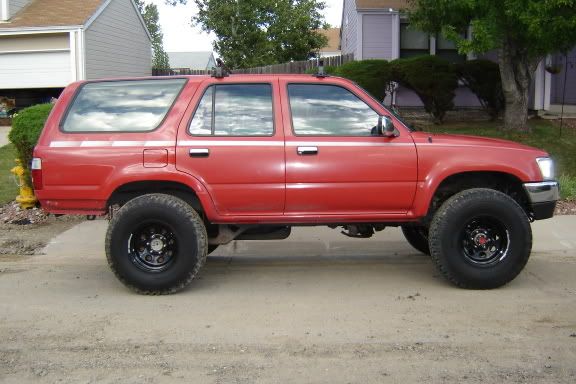
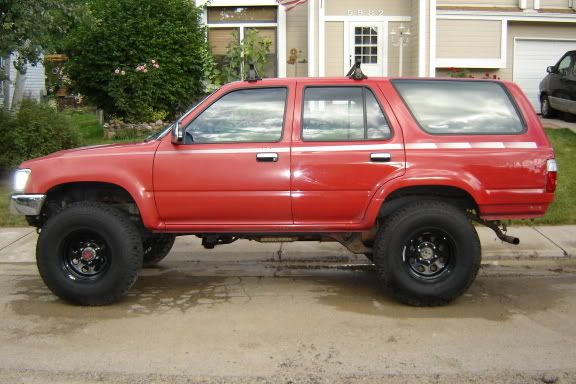
Got tires 2 weeks ago.
Here they are, 33x10.5x15 with NO lift:

Spent about 6 hours pounding that dent out. Some body work and paint job will come later. Notice the 2 shades of red...that was'nt noticeable when i bought it 6 months ago:
Here they are, 33x10.5x15 with NO lift:
Spent about 6 hours pounding that dent out. Some body work and paint job will come later. Notice the 2 shades of red...that was'nt noticeable when i bought it 6 months ago:
 Sep 14, 2005 | 03:51 PM
#6
Thread Starter
Contributing Member
iTrader: (1)
Joined: Apr 2005
Posts: 4,683
Likes: 0
From: Colorado
I'm half way through installing a 4Crawler BL and new polyurethane body mount bushings.
Everything in order from front to rear:

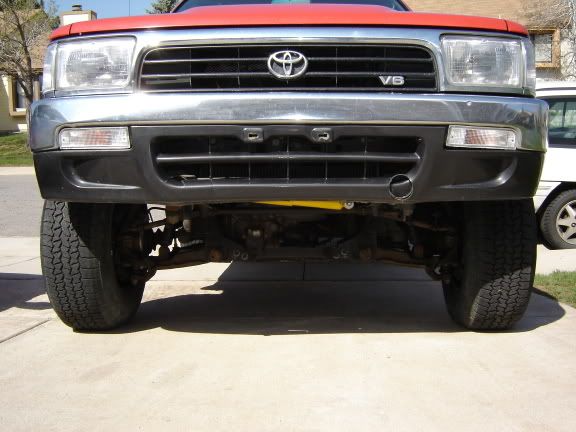
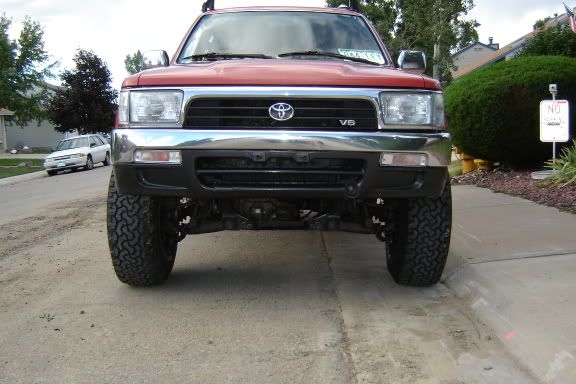
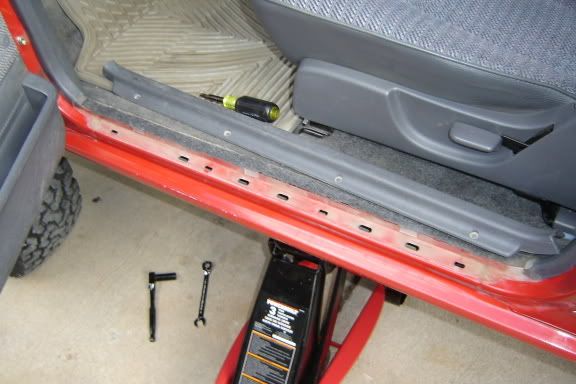
I took off the plastic valance a few days ago and highly recommend using ratcheting wrenches otherwise it would have been a major PITA.
The bumper has 3 bolts on each side.
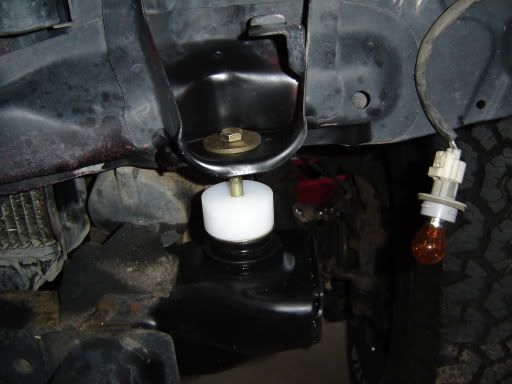
Seeing how the front bushing and BL block goes together.
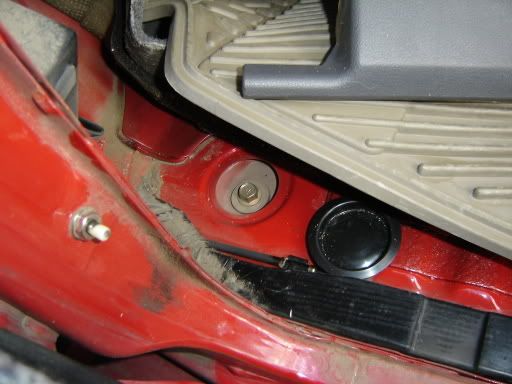
Near the pedals.
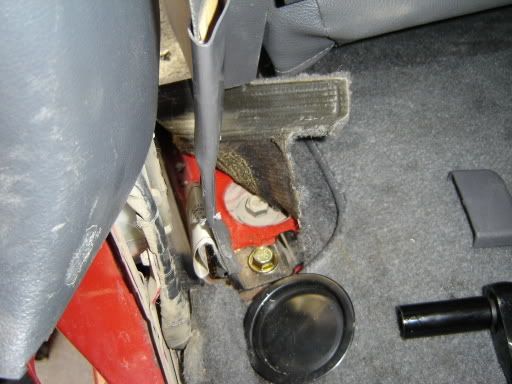
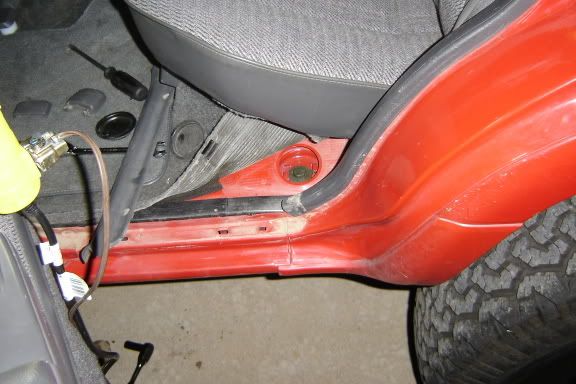
Behind the front seat. Theres really no need to take out the seats.
Next to the back seat.
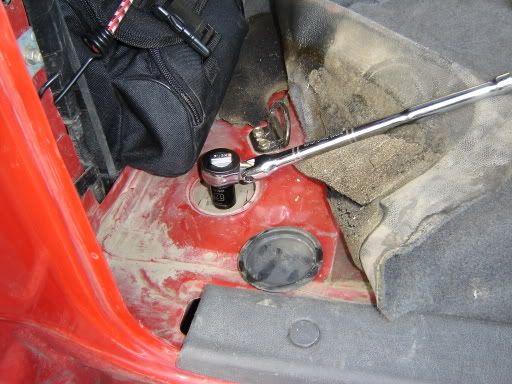
And finally in the rear cargo area. My side pannel was already off and theres no need to remove it.
Everything in order from front to rear:
I took off the plastic valance a few days ago and highly recommend using ratcheting wrenches otherwise it would have been a major PITA.
The bumper has 3 bolts on each side.
Seeing how the front bushing and BL block goes together.
Near the pedals.
Behind the front seat. Theres really no need to take out the seats.
Next to the back seat.
And finally in the rear cargo area. My side pannel was already off and theres no need to remove it.
Sep 14, 2005 | 03:51 PM
#7
Thread Starter
Contributing Member
iTrader: (1)
Joined: Apr 2005
Posts: 4,683
Likes: 0
From: Colorado
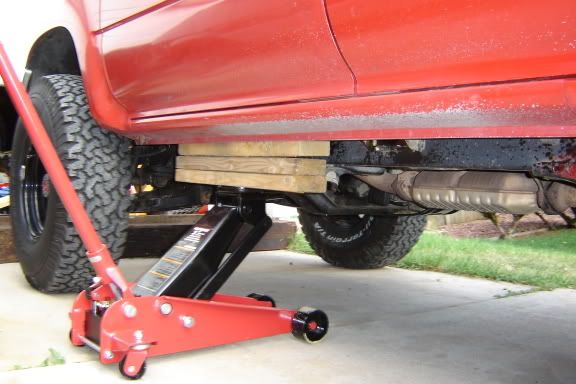
I sprayed PB Blaster on most of the hardware before starting which helped a lot. All 4 nuts underneath the body easily came unscrewed by just using the weight of the ratchet held on top of each bolt. No help was needed 
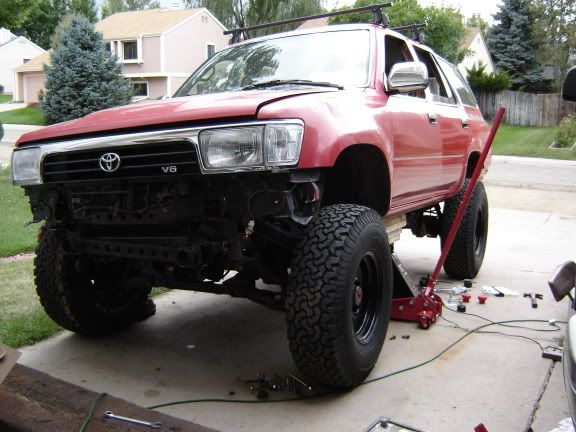
I used a 3 Ton jack with seven 2x4s. The bushings have hard-to-reach bolts on one of the mounts so i lifted it as high as possible to gain easier access.
Taking old bushing off:
Putting new ones on:
I used a 3 Ton jack with seven 2x4s.
The bushings have hard-to-reach bolts on one of the mounts so i lifted it as high as possible to gain easier access. Taking old bushing off:
Putting new ones on:
Last edited by rocket; Sep 14, 2005 at 04:12 PM.
Trending Topics
Sep 14, 2005 | 04:10 PM
#8
Thread Starter
Contributing Member
iTrader: (1)
Joined: Apr 2005
Posts: 4,683
Likes: 0
From: Colorado
Originally Posted by potsy
did those 33's rub alot with no lift?
But w/out a lift, i never took it off road because i knew rubbing would be an issue.
 Sep 16, 2005 | 12:49 AM
#14
Thread Starter
Contributing Member
iTrader: (1)
Joined: Apr 2005
Posts: 4,683
Likes: 0
From: Colorado
*Just for the record*
Everything i've done thus far I'm doing for the first time so I'm continuing this thread with many pictures, how-to's, and explanations for others.
Of coarse i'll still have questions a long the way but for now I'm keeping at it. Being that i'm mechanically inclined helps with just about anything
Well a little progress was made today. I went back and forth from finishing up the BL and body mount bushings to half way installing a CB.
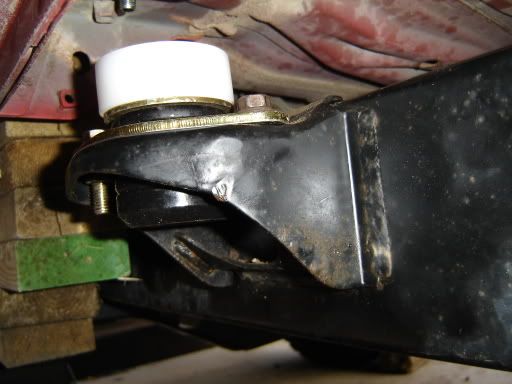
If you replace your factory bushings, be sure to use some kind of penetrating spray on the nuts/bolts and let it soak for awhile. Heres why:
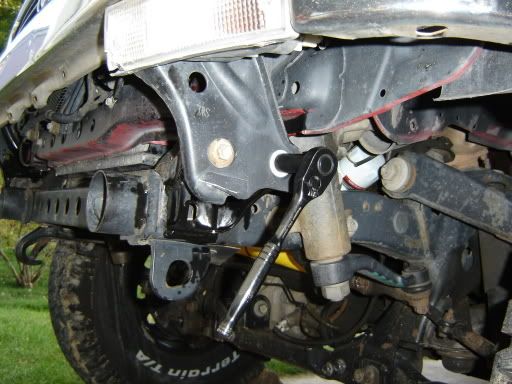
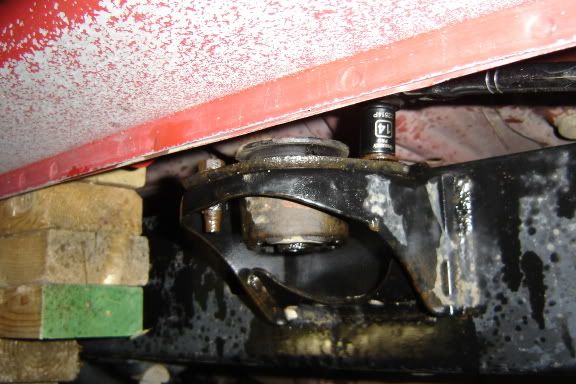
My '92 has very little rust but with age, comes locked-up bolts. On one side, theres two body mounts that have 2 separate bolts holding the bushings in place. One of the grade 8 bolts (where i ran into problems) actually bent sometime after breaking it loose. I did'nt realize it untill it was painfully half way out. When the bolt got towards the end, it did nothing but spin and stripped in place.
This is where i stopped:
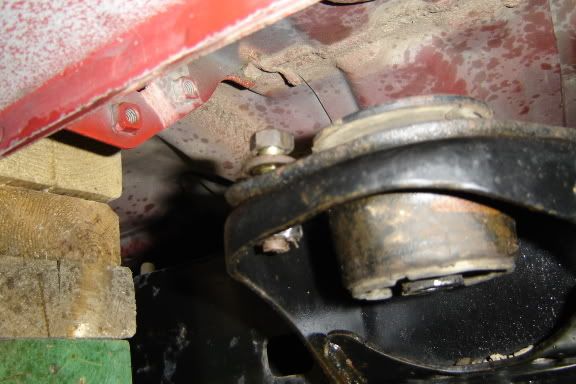
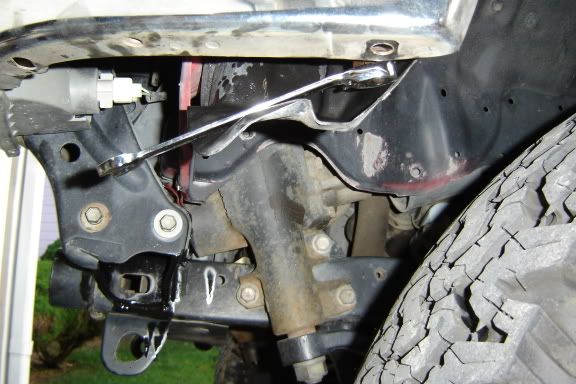
The next day i had no choice but to hacksaw the bolt (not fun) and then bust loose the factory spot welded nut. I put around 100lbs+ of torque on the nut and when it broke, it sent me flying back but luckily i was ready for it.
You can kinda see in this pic, the new nut/bolt that i replaced:
Everything i've done thus far I'm doing for the first time so I'm continuing this thread with many pictures, how-to's, and explanations for others.
Of coarse i'll still have questions a long the way but for now I'm keeping at it. Being that i'm mechanically inclined helps with just about anything
Well a little progress was made today. I went back and forth from finishing up the BL and body mount bushings to half way installing a CB.
If you replace your factory bushings, be sure to use some kind of penetrating spray on the nuts/bolts and let it soak for awhile. Heres why:
My '92 has very little rust but with age, comes locked-up bolts. On one side, theres two body mounts that have 2 separate bolts holding the bushings in place. One of the grade 8 bolts (where i ran into problems) actually bent sometime after breaking it loose. I did'nt realize it untill it was painfully half way out. When the bolt got towards the end, it did nothing but spin and stripped in place.
This is where i stopped:
The next day i had no choice but to hacksaw the bolt (not fun) and then bust loose the factory spot welded nut. I put around 100lbs+ of torque on the nut and when it broke, it sent me flying back but luckily i was ready for it.
You can kinda see in this pic, the new nut/bolt that i replaced:
Sep 16, 2005 | 02:25 AM
#15
Thread Starter
Contributing Member
iTrader: (1)
Joined: Apr 2005
Posts: 4,683
Likes: 0
From: Colorado
Originally Posted by Dekri
Lookin good! If you ever need any help with anything I'm just a few miles away, and now I know exactly where you live  .
.
. lol Thanks! I'll be sure to ask if/when the time comes. I'm currently staying at my parents house due to moving, helping them out, and building my rig while i can.
Originally Posted by Cebby
Great writeup! What are the part numbers for the poly body mount bushings?
Sep 16, 2005 | 02:42 AM
#16
Thread Starter
Contributing Member
iTrader: (1)
Joined: Apr 2005
Posts: 4,683
Likes: 0
From: Colorado
Originally Posted by anthony1
Looks good ...good job.
For wheeling, you gonna need some suspension lift to prevent teh 33's from rubbing.
For wheeling, you gonna need some suspension lift to prevent teh 33's from rubbing.
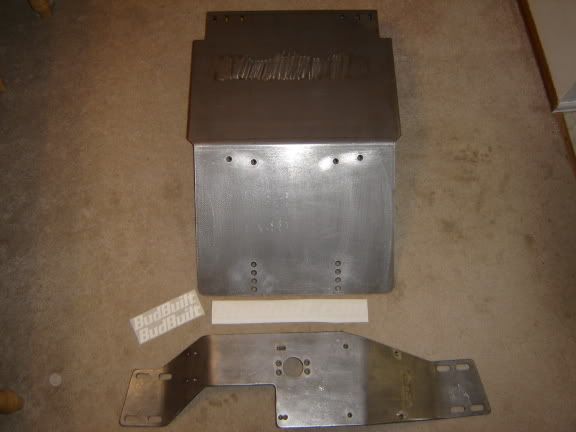
I'm getting ahead of myself but heres what i got a few days ago thanks to www.trdparts4u.com

And heres what came in today, a BudBuilt skid plate and drivetrain lift crossmember:
 Sep 16, 2005 | 08:07 AM
#18
Contributing Member
Joined: Oct 2004
Posts: 1,817
Likes: 0
From: B'ham, WA
Ooh purdy! Rig is lookin good, its always fun to heap on a bunch of mods at one time...what else is required for a drive trian lift? you have to lift the motor and tranny with new mounts right? Are you going to skin the bottom so its nice and smooth and flat?
Sep 17, 2005 | 02:08 AM
#20
Thread Starter
Contributing Member
iTrader: (1)
Joined: Apr 2005
Posts: 4,683
Likes: 0
From: Colorado
Originally Posted by Napoleon047
if you want some balljoint spacers, ill have mine for sale in a month or so
Originally Posted by Silver_Truck
Ooh purdy! Rig is lookin good, its always fun to heap on a bunch of mods at one time...what else is required for a drive trian lift? you have to lift the motor and tranny with new mounts right?

From what i was told, 2nd gen 4Runners are problematic because you can't easily change the pinion angle like on a leaf sprung truck by simply adding shims. Depending on how much drivetrain lift you want and vehical application, lifting the motor is'nt necessary.
At first I wanted a 1" DT lift since i got a 1" BL but after talking to Bud and 4crawler, i decided to "play it safe" just incase. I did'nt want to worry about possible vibration problems and have to add motor mount spacers so i went with 7/8" of DT lift. I know thats minimal compared to an inch but every little bit counts. That along with the crossmember itself will give me around 3" of DT ground clearance and with much better protection than the stock junk.
BudBuilt can make a crossmember with however much DT lift you want.

Are you going to skin the bottom so its nice and smooth and flat?
Originally Posted by potsy
what OME part #'s did you get?
N98 -front shocks
OME901 -coils
OMESD33 -streering stabilizer
303003 -torsion bars
Last edited by rocket; Sep 17, 2005 at 02:10 AM.


