Project daily driver 1991 4Runner
 08-19-2019, 06:48 AM
#41
Registered User
Thread Starter

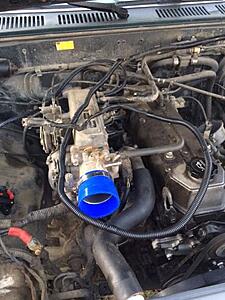
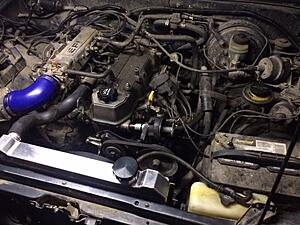
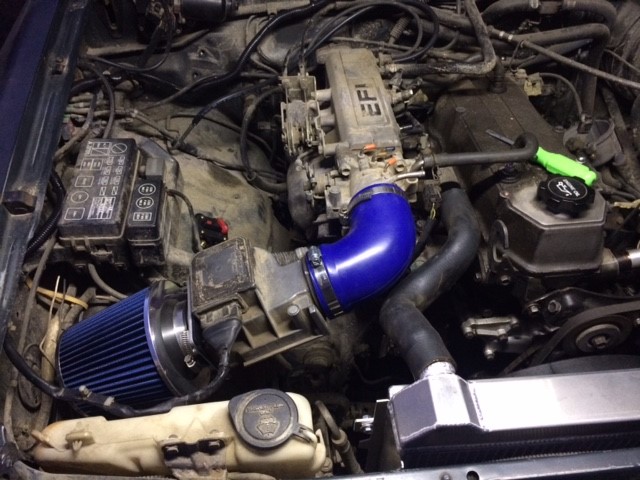
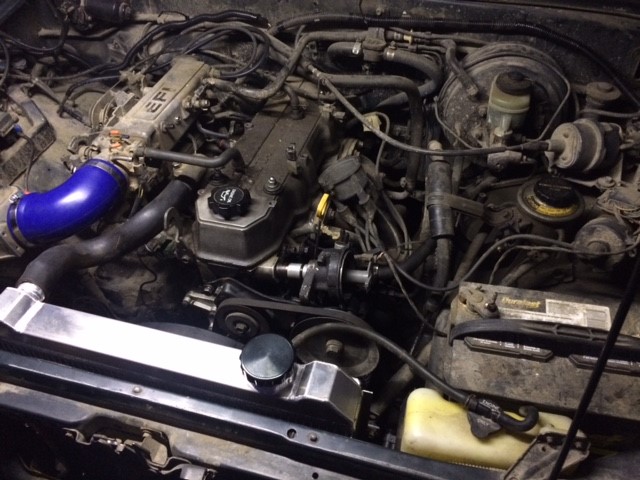
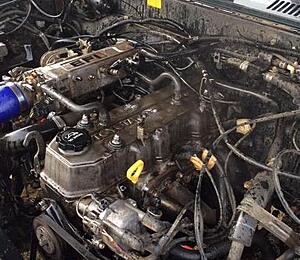
like I posted, I didn't have to cut and extend the wiring to move the AFM to the passenger side, I was able to separate the harness from the loom and reroute it. picked up some 3/8" split loom and spiral taped the wires up, came out pretty good and there is definitely enough harness to reroute.
just a simple elbow and a cone filter with an adapter is needed
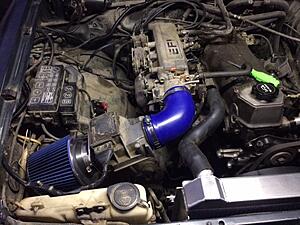
I need to build a battery tray but test fitting the battery in the driver side
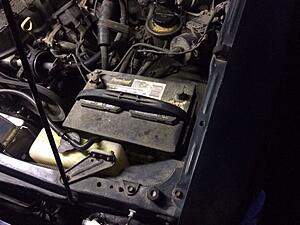
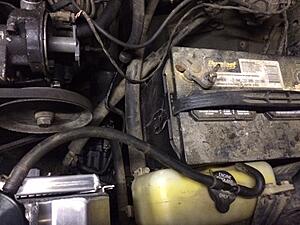
ya I know my distributor is hangin out lol

just a simple elbow and a cone filter with an adapter is needed
I need to build a battery tray but test fitting the battery in the driver side


ya I know my distributor is hangin out lol

The following users liked this post:
5 Fists (08-19-2019)
 08-26-2019, 07:06 AM
#43
Registered User
Thread Starter
Friday took the family to the fair so we could check on my sons photo exhibits, he got 3 1st place ribbons and 1 2nd place.
Saturday was the last rodeo of the season

Sunday we had to go back to fair to pickup his photos exhibits. Then it was getting the door latch replaced on the TJ, changing the oil in the TJ and the oil and fuel filter in the Cummins. Then i was finally able to get some work done on the 4Runner.
finished building the battery cables, mounted the circuit breaker, mounted a power junction on the passenger side. It is tempting to yank the engine just to be able to clean the engine bay lol.


The following users liked this post:
5 Fists (08-26-2019)
09-01-2019, 06:28 PM
#44
Registered User
Thread Starter
Yesterday I got the coolant hoses put on, filled it with antifreeze and the thermostat housing started leaking. I knew it was a possibility with how my broken bolt repair went. I am going to try a quick fix for now but a friend of mine has a spare manifold for me once I can pick it up from him. Set the engine to TDC and installed the distributor, wired in the fan controller for the electric fan, put the battery in, tried to fire it up but no luck. the starter seems to be sluggish and almost hanging up. I need to follow RAD4Runners starter relay fix and see if it fixes it, I also need to check my fuses and fuel delivery because there was not even a spit or sputter but it was late and getting dark so I just closed up last night.
Today was honey-do lists and homework, tomorrow morning is our local States day parade and festivities so maybe in the afternoon I can put a little time in the 4Runner again.
Today was honey-do lists and homework, tomorrow morning is our local States day parade and festivities so maybe in the afternoon I can put a little time in the 4Runner again.
Last edited by warrpath4x4; 09-01-2019 at 06:32 PM.
10-03-2019, 08:25 AM
#45
Registered User
Thread Starter
Took a vacation day yesterday, worked around the house and put some time into the 4Runner. Got it running for the first time in a year, had to set and reset the timing but finally got it to fire up. I still need to actually set the timing but my thermostat housing fix didnt work and i had a geyser of antifreeze shooting out, I ordered a lower intake manifold off Ebay for it, still need to finish my electric fan install and replace steering components and it should be drive-able once again.

The following users liked this post:
5 Fists (10-03-2019)
 10-03-2019, 12:11 PM
#47
Registered User
Thread Starter
Figured since I will be in there I may as well add some Bosch 4-hole injectors, found a refurbished set on Ebay with good reviews for $40. all the parts should be here by the 11th, were going camping that weekend so it will be after that before i can get it put back together and timed.
10-08-2019, 07:40 AM
#48
Registered User
Thread Starter
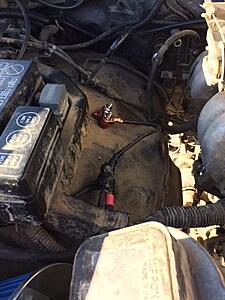
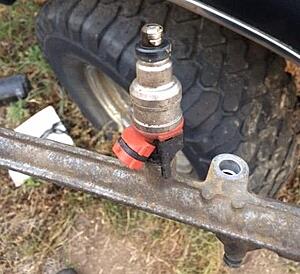
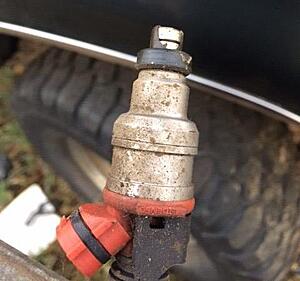
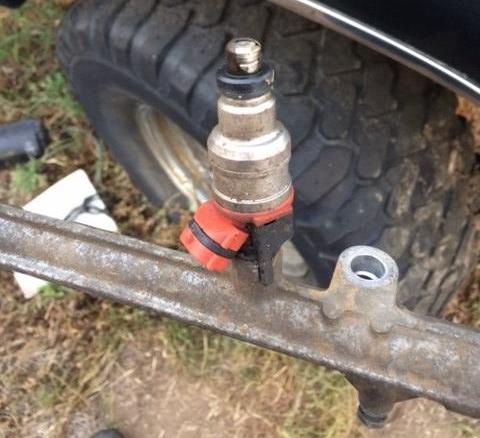
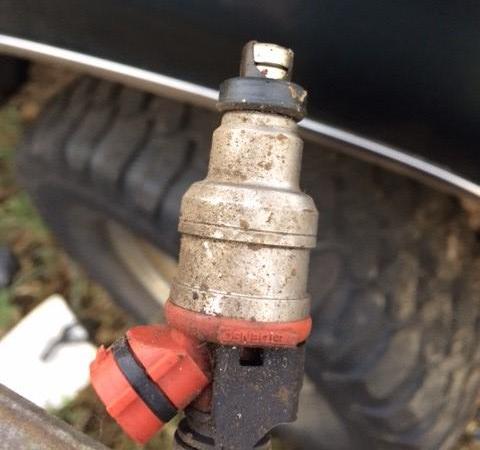
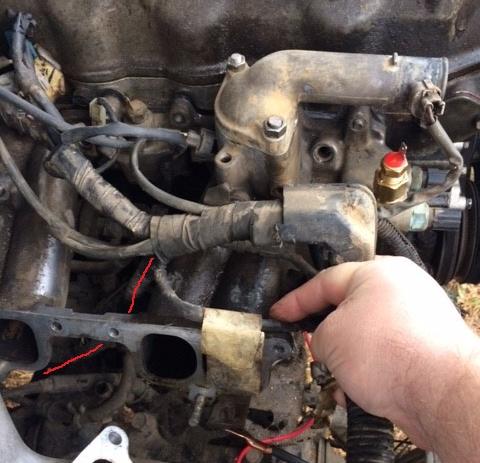
My new(ish) lower intake will be here this week so Saturday I went out and started tearing that side apart, when I was removing the injectors I made sure to twist them so they were free moving and there was no resistance in them. I pulled the rail and they all came out of the intake easily, but number 2 came out like this. surprisingly it wasn't leaking.
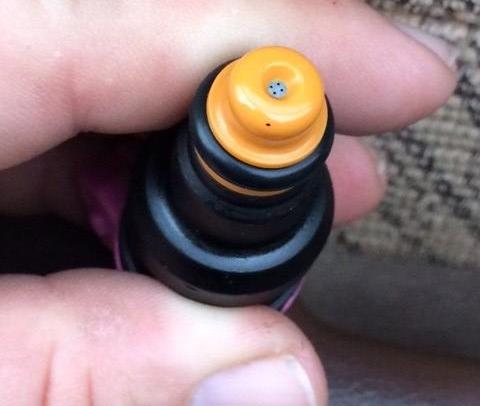
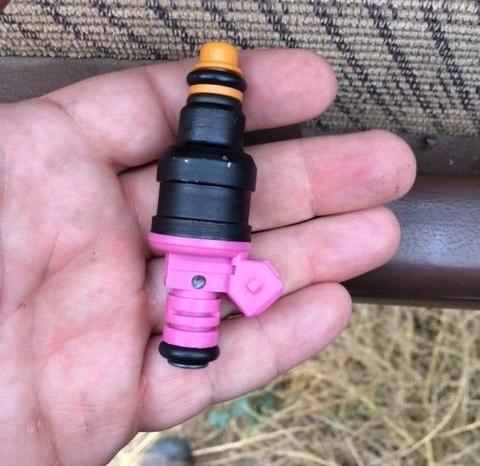
My new 4 hole injectors showed up yesterday, glad I had already planned on replacing them. My pink injectors lol


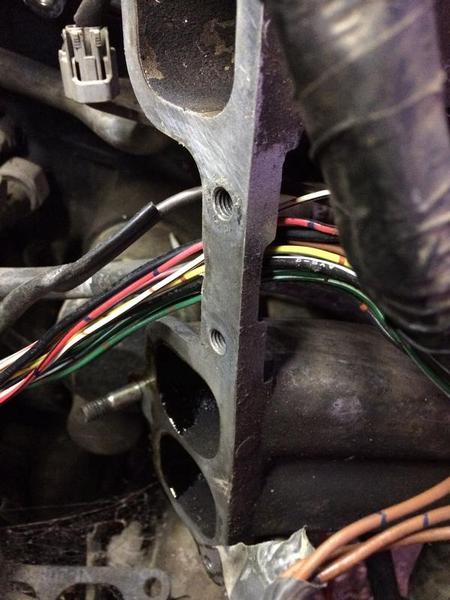
One issue i have ran into is the wiring harness runs right through the middle of the lower intake, how did they expect it to be removed?
My new 4 hole injectors showed up yesterday, glad I had already planned on replacing them. My pink injectors lol
One issue i have ran into is the wiring harness runs right through the middle of the lower intake, how did they expect it to be removed?
 10-08-2019, 11:30 AM
#49
Registered User
Very cool. I will have to look into these 4 hole injectors, sounds like a lot of guys upgrade to Bosch 4 holes or Flamethrowers. So you swap out the injectors, then unplug the EFI fuse to reset the computer mixture? Then all good to go?
Last edited by 5 Fists; 10-08-2019 at 01:29 PM.
10-08-2019, 03:08 PM
#50
Registered User
Thread Starter
This will be the first time installing these on a Toyota, i have put 4 hole injectors on a couple of jeeps. To my knowledge you don't need to pull any fuse or anything, just install them and go.
The following users liked this post:
5 Fists (10-09-2019)
10-10-2019, 06:47 AM
#53
Registered User
Thread Starter
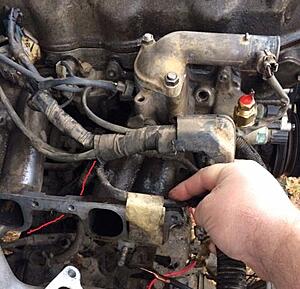
I would like to kick a Toyota engineer in the nuts that thought this up. lets run a 13 wire harness through the middle of the intake manifold so it cant be removed with stripping 8 feet of harness out. well i am gonna cut the manifold between these 2 bolt holes.
The "easy" way to change the fuel filter, I am moving it to the wheel well like i did in the Frankenstein 1st gen
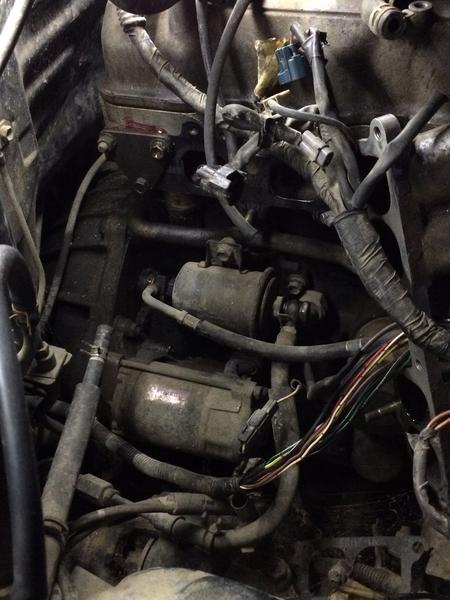
The "easy" way to change the fuel filter, I am moving it to the wheel well like i did in the Frankenstein 1st gen
Last edited by warrpath4x4; 10-10-2019 at 06:52 AM.
10-23-2019, 08:26 AM
#54
Registered User
Thread Starter
I figured since i had the intake off it was a good time to install a block heater and change and move the fuel filter to the inner fender. Its almost all back together, just need to put a couple hoses on and fill it with coolant and it will be running again. I removed the front bumper so i can install the winch mount.
first time in a year the grill has been back on
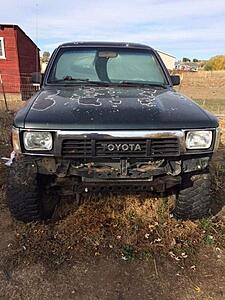
first time in a year the grill has been back on

The following users liked this post:
5 Fists (10-23-2019)
10-28-2019, 09:41 AM
#56
Registered User
Thread Starter
ITS ALIVE!!!!!!!!!
Yesterday I was able to get the new-new injectors put it, the pink ones I ordered would not fit even though the ad said they would. So I ordered a different set, 4 hole, and these ones went right in. got the rest of the intake put back together, block heater installed, filled with coolant, pitman arm installed, oil changed. It fires right up, drove it around the driveway, BUT the idle is drastically jumping from 1500-2000 RPM, while sitting I give it throttle and it just bogs down and will not build rpm's, unplug the TPS and the rpm's shoot up to redline. the other week when I had it running (and leaking coolant) the rpm's were fine and had throttle response but I realized I had not hooked the coolant lines up to the IACV, I am going to bypass the IAC again and see if it fixes the problem.
but it runs and fires right up each time I start it.
10-29-2019, 08:19 AM
#57
Registered User
Thread Starter
Bypassed the IAC last night, same issue. I need to test the TPS but that's not gonna happen until Wednesday at the earliest. Still fired right up though on the first crank.
11-04-2019, 07:13 AM
#58
Registered User
Thread Starter
I put about 15 minutes into this yesterday before it got dark at 2 lol. Makes a big difference when the TPS is installed right (i think i had the TPS tangs on the wrong side of the throttle lever tangs) and then get it adjusted correctly. Fired right up, smooth idle, throttle response is back, just a couple small things and it will be drivable. Then its will be done with the repair stage and move on to the accessories stage.
11-06-2019, 09:50 AM
#59
Registered User
Thread Starter
Yesterdays project was spark plugs, cap, rotor, wires, and timing.
No issue with changing parts but there is something off about the timing, it runs just fine but the timing mark on the damper is about the 8 o'clock range with the timing light on it. I noticed this when setting the TDC, I couldn't go off the timing mark and had to go off of the piston itself. Not sure if this damper is off a different year or if the pulley has moved on the damper or what.
No issue with changing parts but there is something off about the timing, it runs just fine but the timing mark on the damper is about the 8 o'clock range with the timing light on it. I noticed this when setting the TDC, I couldn't go off the timing mark and had to go off of the piston itself. Not sure if this damper is off a different year or if the pulley has moved on the damper or what.
11-18-2019, 06:28 AM
#60
Registered User
Thread Starter
re-aligned my steering wheel to the steering box to the pitman arm yesterday, installed the new steering stabilizer and the idler arm and bracket. did some more timing adjustments and cleaned it out (started looking like a tool box).
Then drove it to town and filled it up with gas!! runs pretty good but i still need to do some more adjusting on the idle, when i come up to a stop it stumbles and wants to die but corrects itself.
Then drove it to town and filled it up with gas!! runs pretty good but i still need to do some more adjusting on the idle, when i come up to a stop it stumbles and wants to die but corrects itself.


