
PismoJoe's 1986 4Runner Build-Up Thread
 Apr 25, 2010 | 12:31 AM
#1
Thread Starter
Registered User
Joined: Jan 2010
Posts: 2,259
Likes: 84
From: Pismo Beach, California
PismoJoe's 1986 4Runner Build-Up Thread
This is the beginning...1986 4Runner Resurrection
The Rig: 1986 4Runner SR5 22RE: Pretty much stock, Downey intake, Magnaflow Cat Back Exhaust
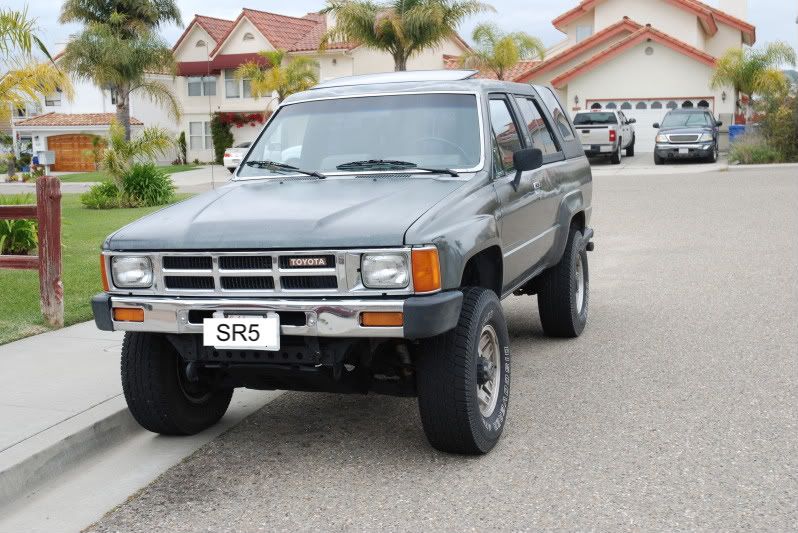
I traded a Honda CRF50 w/ an 88 kit for the rig about 6 months ago, and after about 10 successful long trips, the head gasket went at 235k on the clock.
Originally, I planned to do a top end refreshment because of cash, but the cylinder walls looked a little rough so I'm just gonna go all the way...
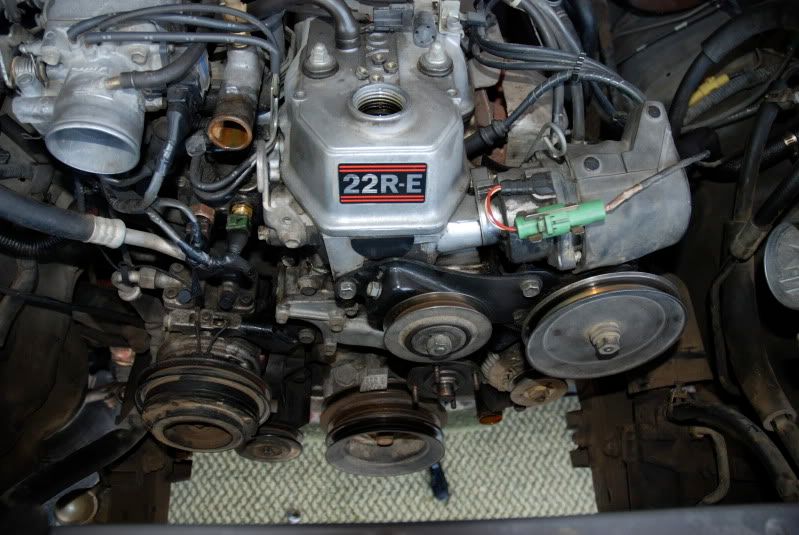
I plan to get an ENGNBLDR performance head, cam, all new upper gaskets, timing cover, timing kit, water pump, oil pump, and the fuel injectors cleaned and flow tested with a thorough cleaning of all parts...
Before....
Belts, fan clutch and radiator out of the way
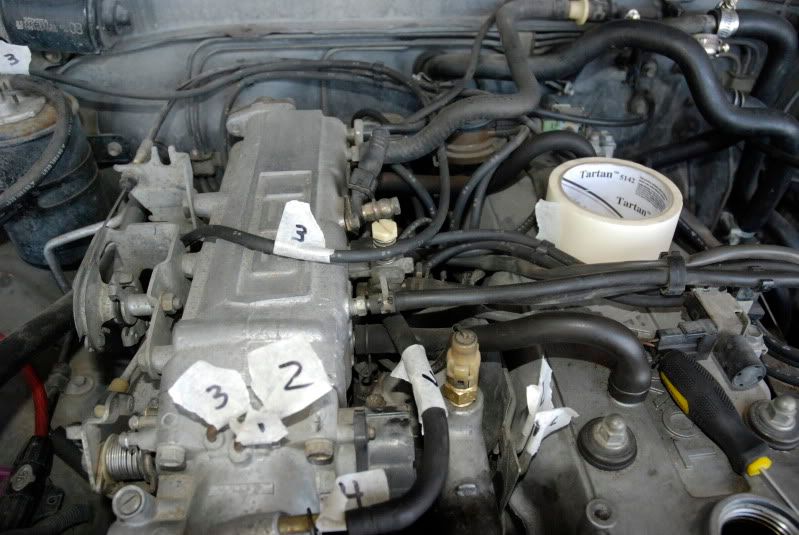
Don't forget to label....
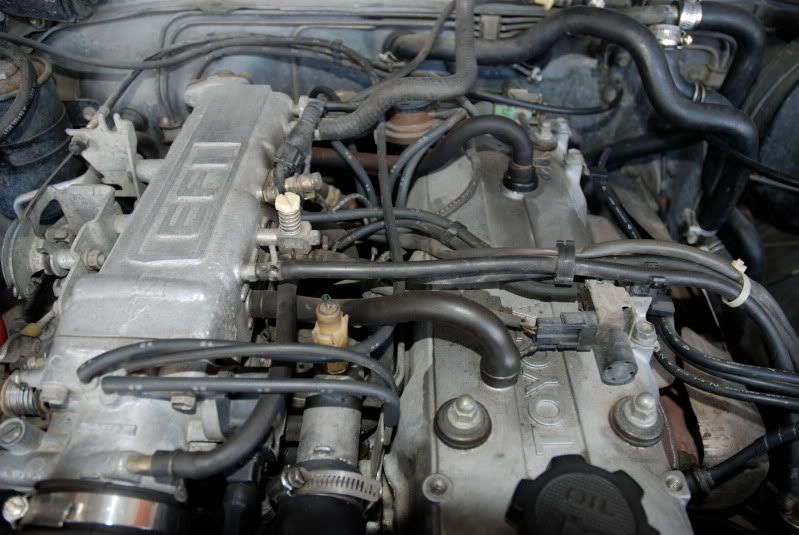
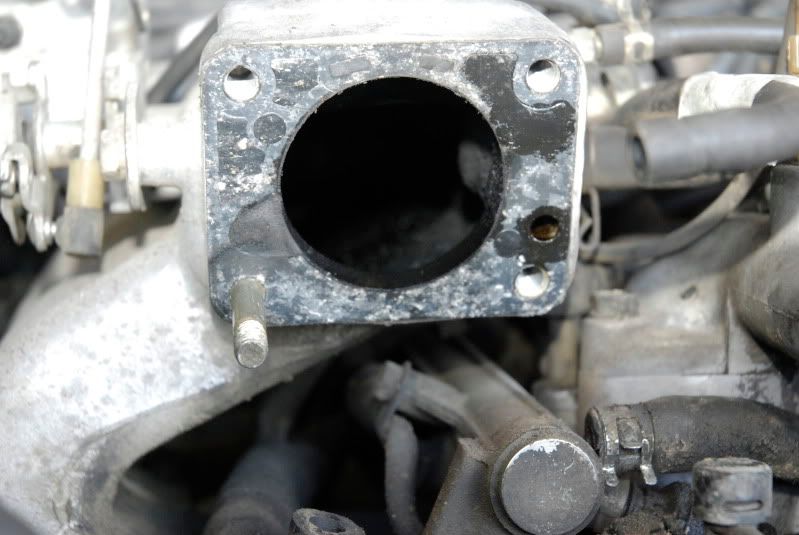
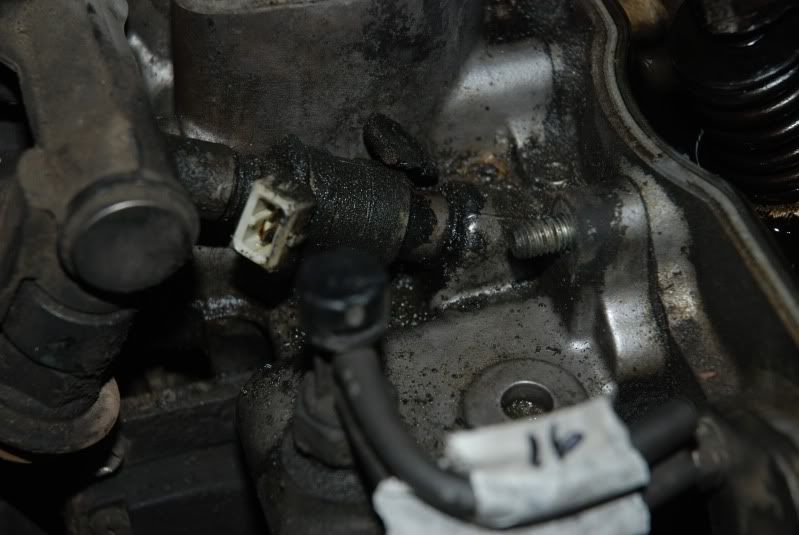
Peeking inside the intake plenum....needs some attention
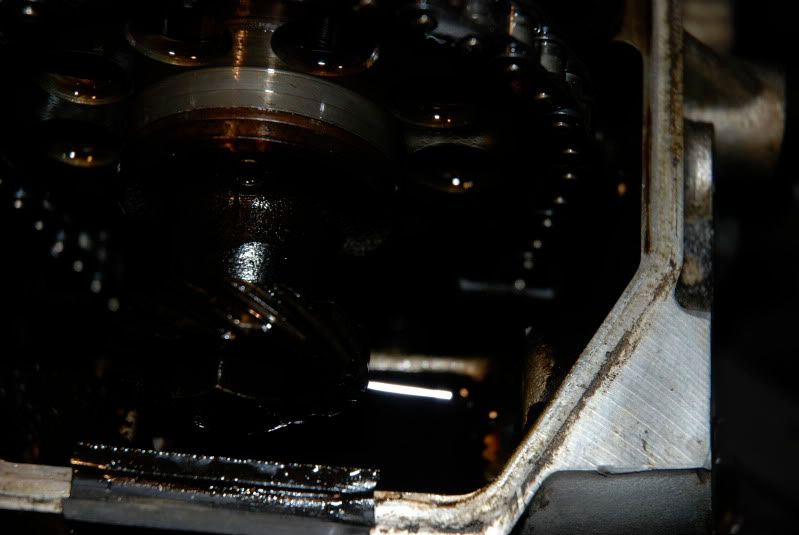
Valve cover removed, looking at timing chain wear (not a very good pic, but the chain was rubbing on the drivers side of the timing cover)
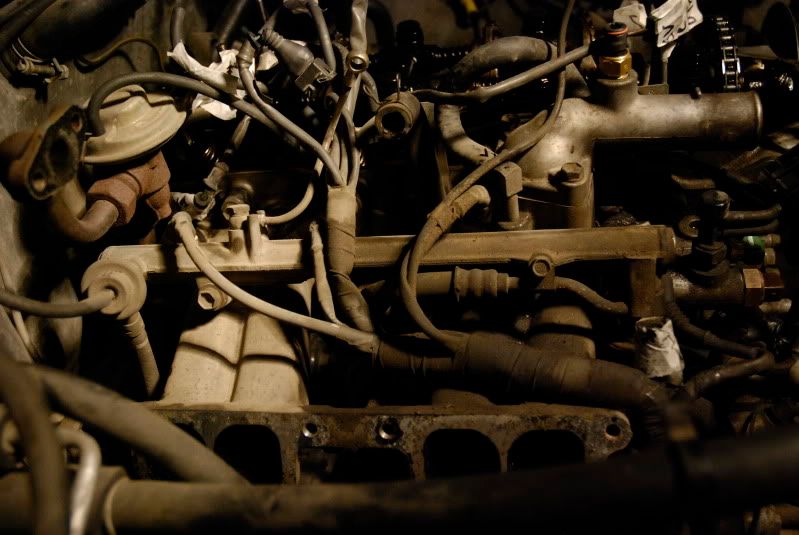
Top of the plenum removed, fuel rail exposed
All of the injectors were leaking from the bottom seals, #1 was the worst. I think this explains some of my hard starting issues lol
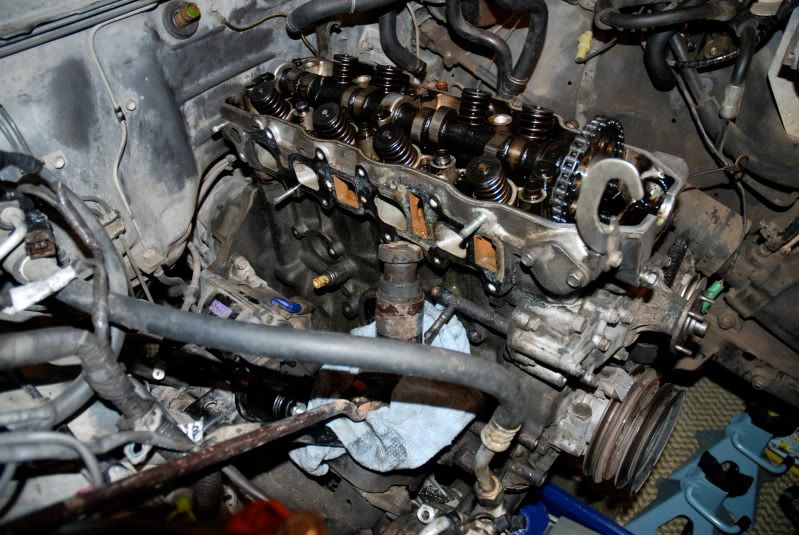
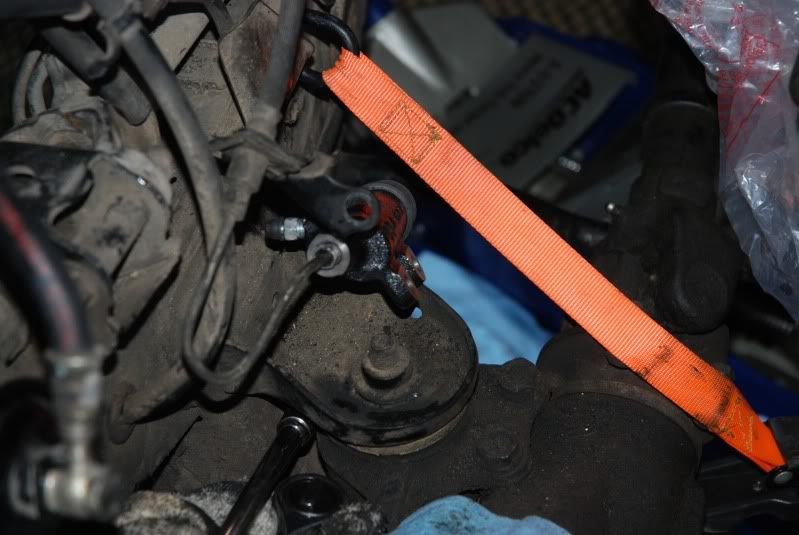
Getting ready to remove the cam and top timing sprocket (the jack is incase the head wants to be stubborn)
Thats all for today, I've been working non stop...I feel like I made good progress but I cant wait to see what my cylinders and pistons look like
The Rig: 1986 4Runner SR5 22RE: Pretty much stock, Downey intake, Magnaflow Cat Back Exhaust
I traded a Honda CRF50 w/ an 88 kit for the rig about 6 months ago, and after about 10 successful long trips, the head gasket went at 235k on the clock.
Originally, I planned to do a top end refreshment because of cash, but the cylinder walls looked a little rough so I'm just gonna go all the way...
I plan to get an ENGNBLDR performance head, cam, all new upper gaskets, timing cover, timing kit, water pump, oil pump, and the fuel injectors cleaned and flow tested with a thorough cleaning of all parts...
Before....
Belts, fan clutch and radiator out of the way
Don't forget to label....
Peeking inside the intake plenum....needs some attention
Valve cover removed, looking at timing chain wear (not a very good pic, but the chain was rubbing on the drivers side of the timing cover)
Top of the plenum removed, fuel rail exposed
All of the injectors were leaking from the bottom seals, #1 was the worst. I think this explains some of my hard starting issues lol
Getting ready to remove the cam and top timing sprocket (the jack is incase the head wants to be stubborn)
Thats all for today, I've been working non stop...I feel like I made good progress but I cant wait to see what my cylinders and pistons look like
Last edited by PismoJoe; May 6, 2010 at 04:05 PM.
Apr 25, 2010 | 03:16 PM
#3
Thread Starter
Registered User
Joined: Jan 2010
Posts: 2,259
Likes: 84
From: Pismo Beach, California
Nice!
Well, I did some more work today before work lol. Im about 10 hours in so far, I probably could have shaved some time off if all of the bolts and wire connections weren't married haha. I would recommend the jack method, you already have it and it fits nicely on the motor mount. A few cranks and pop no more head
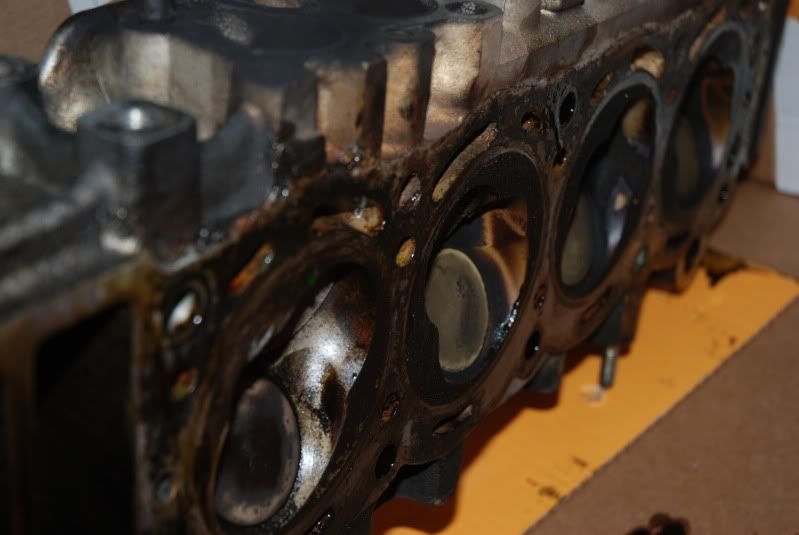
Anyways, heres the damage: head gasket failure in epic proportions. It also looks as if some form of "gasket sealer" has been ran through the system at one point
As I suspected, cylinder #1 was where the gasket failed the worst. When it was running, I could see coolant weeping through the exhaust manifold gasket. The coolant passages were about 90% blocked around #1. I think this caused it to run hot around that cylinder, thus causing gasket failure.
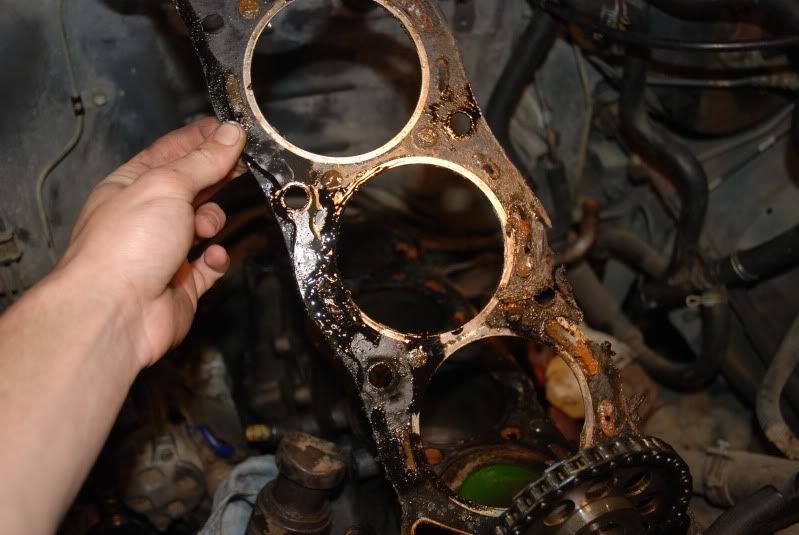
Gasket Sealer Residue.....
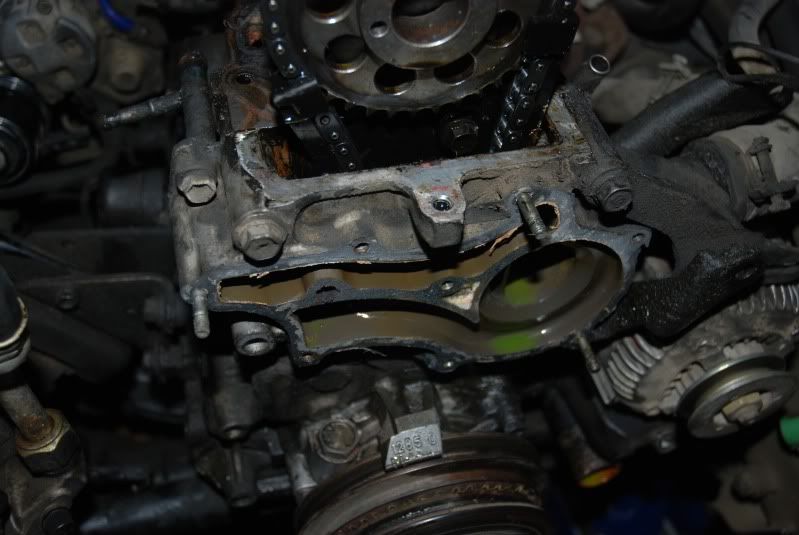
It appears that the timing was done at some point. The rails are in the early stages of breaking down, but they look pretty good for the most part. Notice that the job was done with the head on (you can see a silicone FIPG around the top of the timing cover)
Goodbye old cylinder head!!! There were two broken exhaust studs, one on the back bottom and one on the front bottom. After about 10 mins, it would seal up but the exhaust leak drove me nuts! Heres a look at the bottom:
More parts will be added to the pile...Timing cover and components will hopefully be off tomorrow....
Well, I did some more work today before work lol. Im about 10 hours in so far, I probably could have shaved some time off if all of the bolts and wire connections weren't married haha. I would recommend the jack method, you already have it and it fits nicely on the motor mount. A few cranks and pop no more head
Anyways, heres the damage: head gasket failure in epic proportions. It also looks as if some form of "gasket sealer" has been ran through the system at one point
As I suspected, cylinder #1 was where the gasket failed the worst. When it was running, I could see coolant weeping through the exhaust manifold gasket. The coolant passages were about 90% blocked around #1. I think this caused it to run hot around that cylinder, thus causing gasket failure.
Gasket Sealer Residue.....
It appears that the timing was done at some point. The rails are in the early stages of breaking down, but they look pretty good for the most part. Notice that the job was done with the head on (you can see a silicone FIPG around the top of the timing cover)
Goodbye old cylinder head!!! There were two broken exhaust studs, one on the back bottom and one on the front bottom. After about 10 mins, it would seal up but the exhaust leak drove me nuts! Heres a look at the bottom:
More parts will be added to the pile...Timing cover and components will hopefully be off tomorrow....
Apr 25, 2010 | 04:58 PM
#4
Registered User
Joined: Jan 2009
Posts: 263
Likes: 0
From: anson, texas
keep tearin into her. ill be following along soon enough but just to swap parts and freshen her up i mean mines only got 23000 miles on her lol. but i need some good seat of the pants kick. and also BUMMER on the HG failure gotta hate it ...
Apr 29, 2010 | 08:32 PM
#5
Thread Starter
Registered User
Joined: Jan 2010
Posts: 2,259
Likes: 84
From: Pismo Beach, California
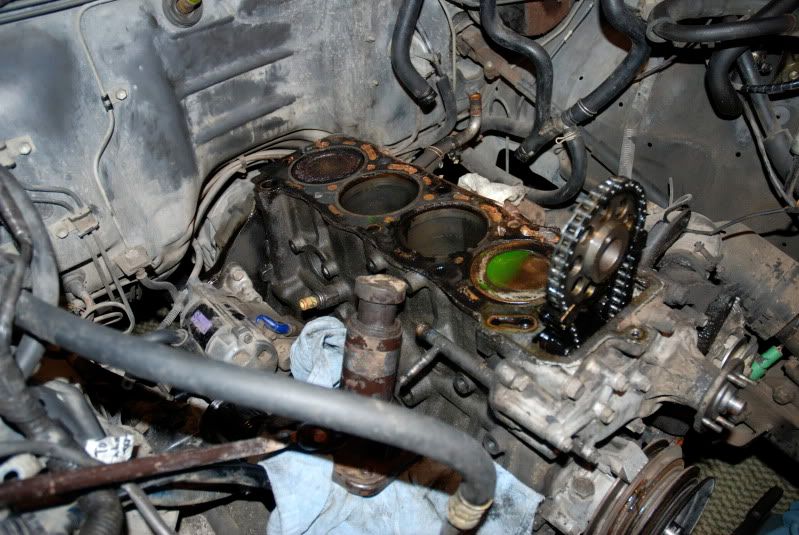
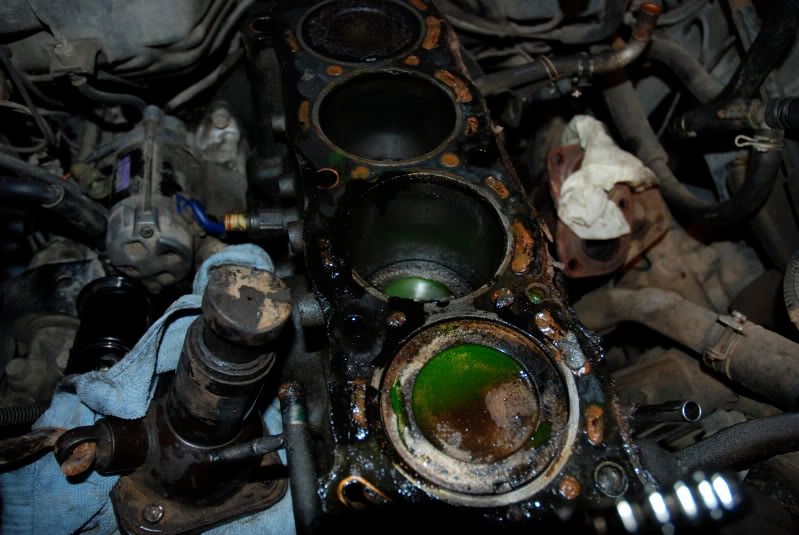
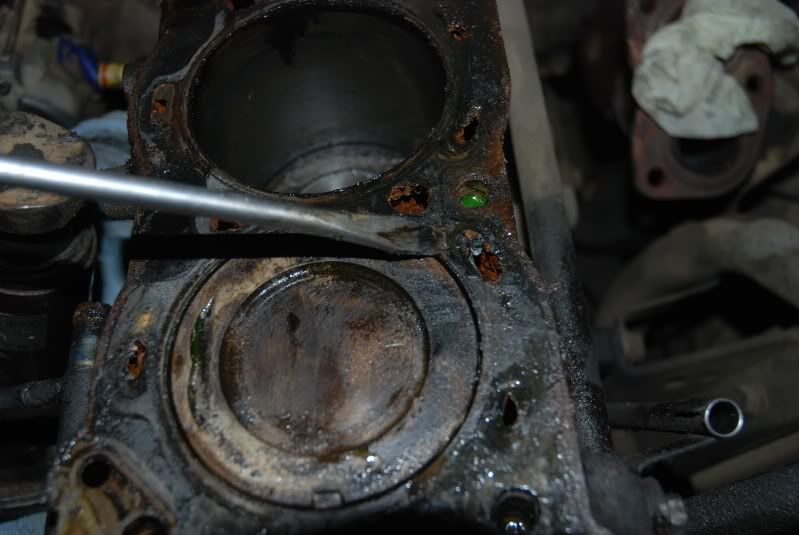
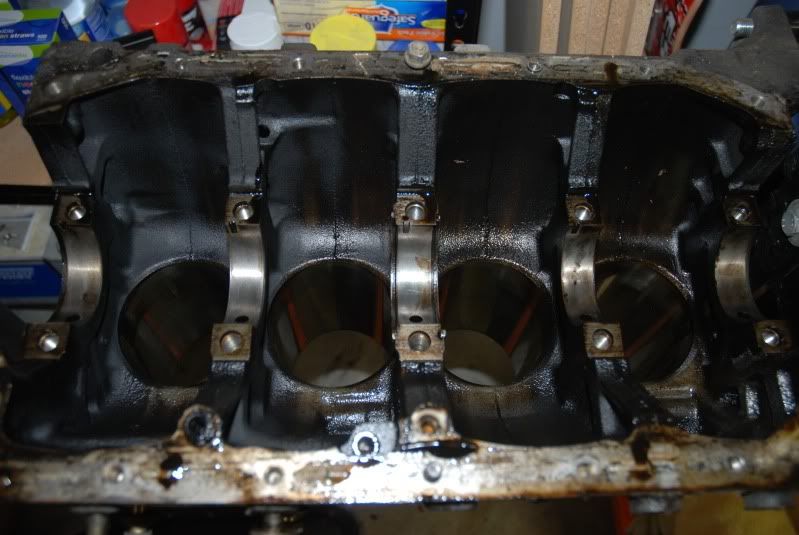
Ok, well it looks like I'm at the point of no return. Looking straight ahead at the cylinder walls, honing patterns are still clearly visible. So I'm thinking cool somehow it looks good in here. I flip a 180 (looking from the back to the front of the block) and #1 and #2 cylinders have some moderate/bad vertical scratch marks. No big deal, I figured I would end up doing a full rebuild....
I made some progress, but haven't had all the time in the world. First, I started attempting to get the crank pulley off. After researching, it seems like Roger's "bump start" method was the way to go. Little did I know that I was way too far into the teardown to do this. For some reason my starter wasn't getting power (it was all connected) so i thought F this!!!
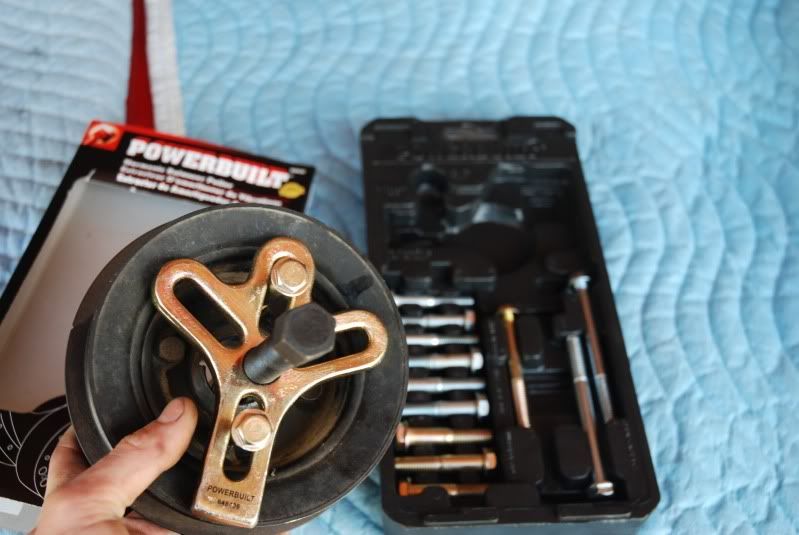
I put my tranny in 5th, and tugged on that crank bolt like it owed me money! popped right off lol I thought it would be way worse. Went in to Kragen to get a crank pulley puller, found one for $10 with a lifetime warranty!! SCORE!
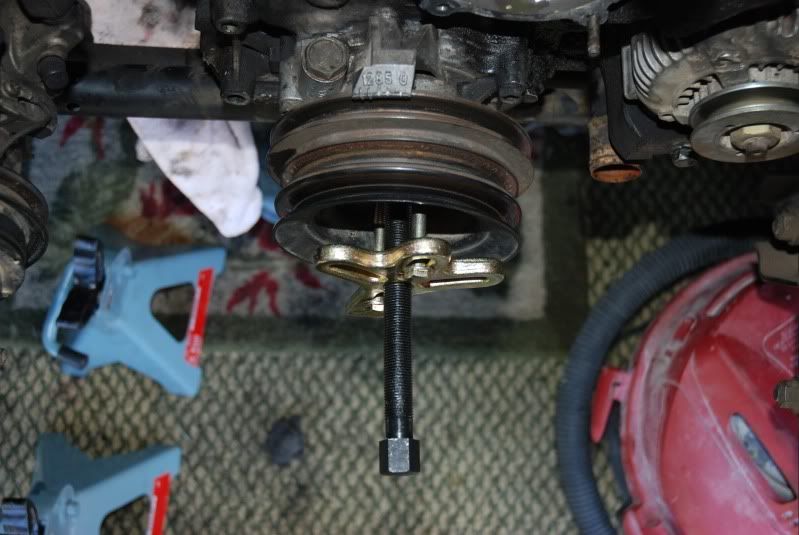
Crank puller installed
I see what superbleeder meant now by 'the infamous alternator bracket' that thing did not want to come off!
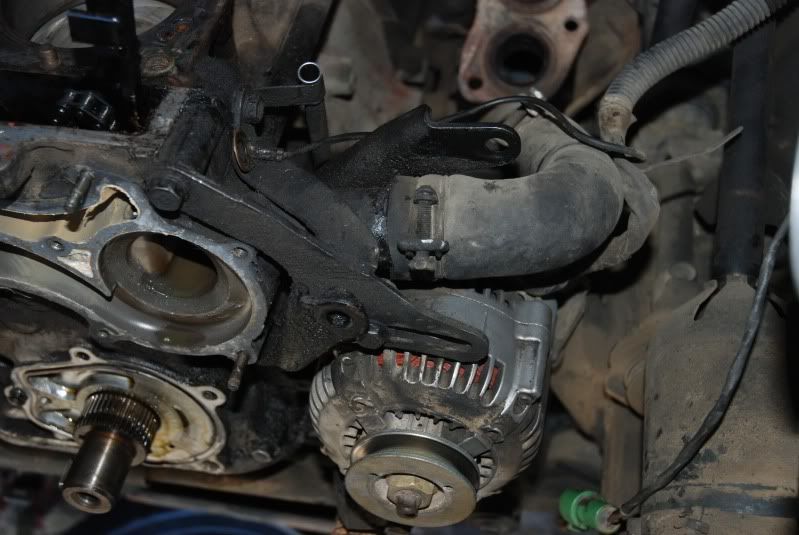
Oil pump, alternator removed

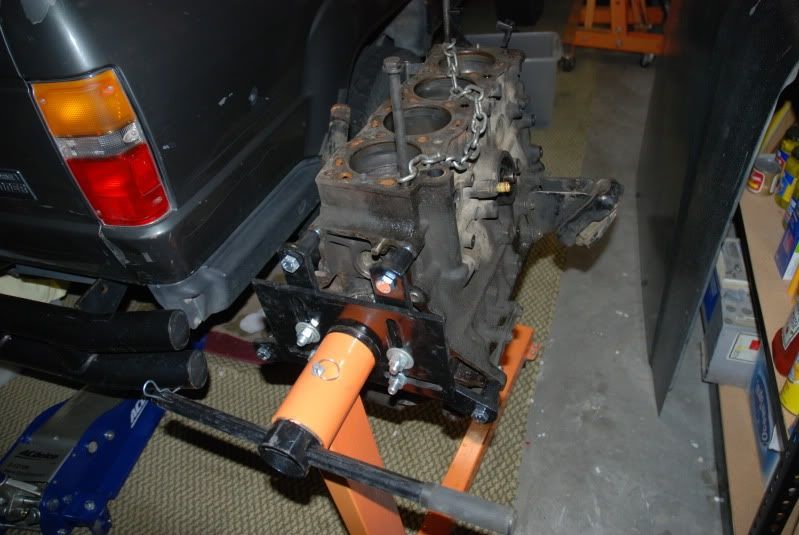
I got the starter off, all the heater hoses off, and all of the bell housing bolts off, and the tranny all supported up front. Pretty much I just have to unbolt the motor mounts and find an engine hoist. My friend has one but he's being really lame about letting me borrow it...I might have to rent one.
I made some progress, but haven't had all the time in the world. First, I started attempting to get the crank pulley off. After researching, it seems like Roger's "bump start" method was the way to go. Little did I know that I was way too far into the teardown to do this. For some reason my starter wasn't getting power (it was all connected) so i thought F this!!!
I put my tranny in 5th, and tugged on that crank bolt like it owed me money! popped right off lol I thought it would be way worse. Went in to Kragen to get a crank pulley puller, found one for $10 with a lifetime warranty!! SCORE!
Crank puller installed
I see what superbleeder meant now by 'the infamous alternator bracket' that thing did not want to come off!
Oil pump, alternator removed
I got the starter off, all the heater hoses off, and all of the bell housing bolts off, and the tranny all supported up front. Pretty much I just have to unbolt the motor mounts and find an engine hoist. My friend has one but he's being really lame about letting me borrow it...I might have to rent one.
May 1, 2010 | 08:23 PM
#6
Thread Starter
Registered User
Joined: Jan 2010
Posts: 2,259
Likes: 84
From: Pismo Beach, California
Today I made some solid progress. Danny came through with the engine hoist 
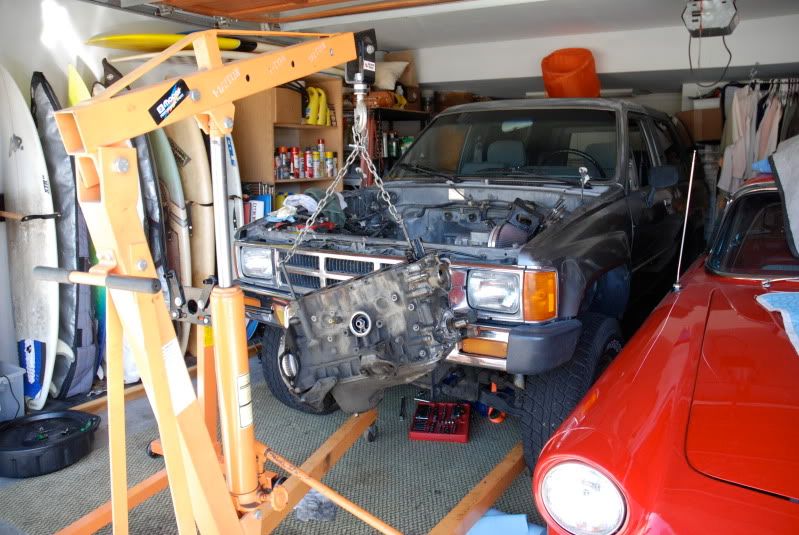
It was a little interesting with clearance issues lol but it barely fit with the garage door down.
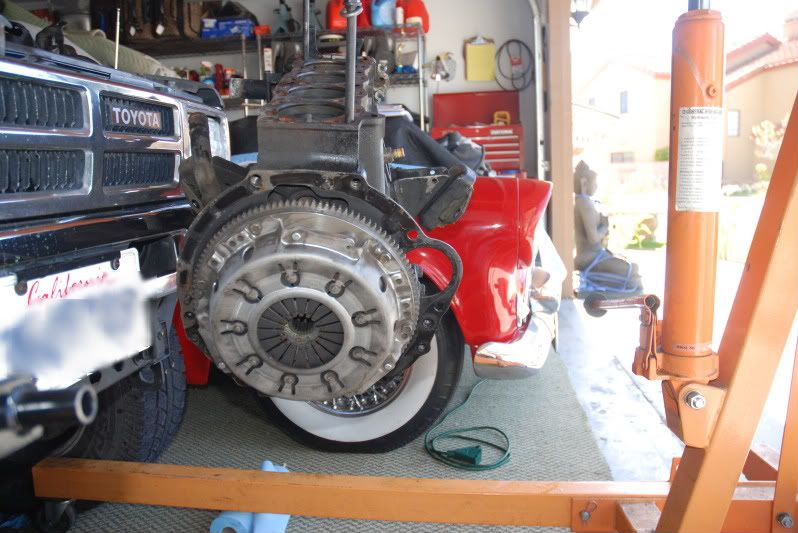
I always wondered if the PO really did put a clutch in it like he said he did, ha it turns out he did. Newer flywheel, clutch, and pressure plate. None of them were Aisin though
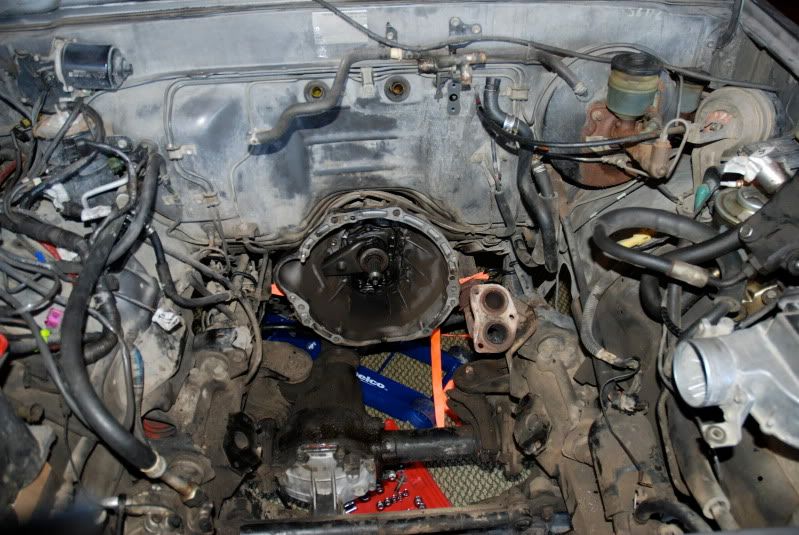
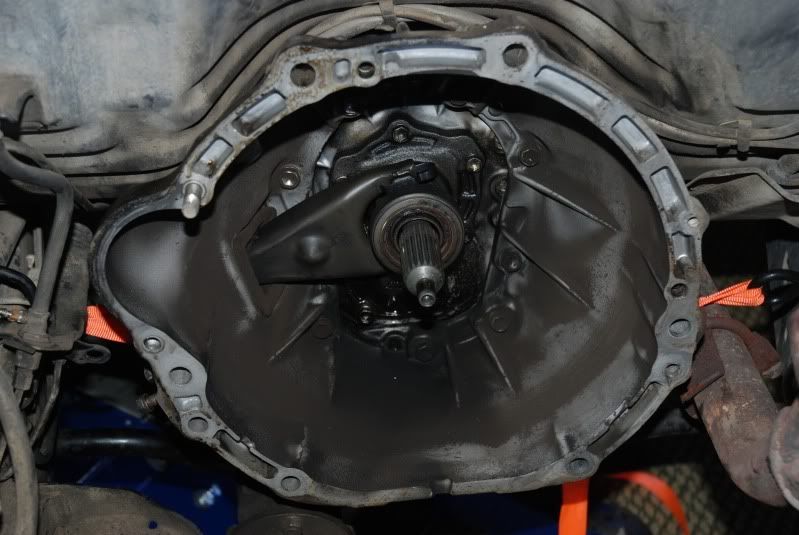
The obligatory empty bay shot
At a first glance I thought wow my input shaft seal is leaking like a siv! A closer look reveals that the PO used wayyy to much moly grease on the clutch fork, so all of that fluid shown is grease that flung everywhere.

Look at how much excess grease is gathered on the release bearing
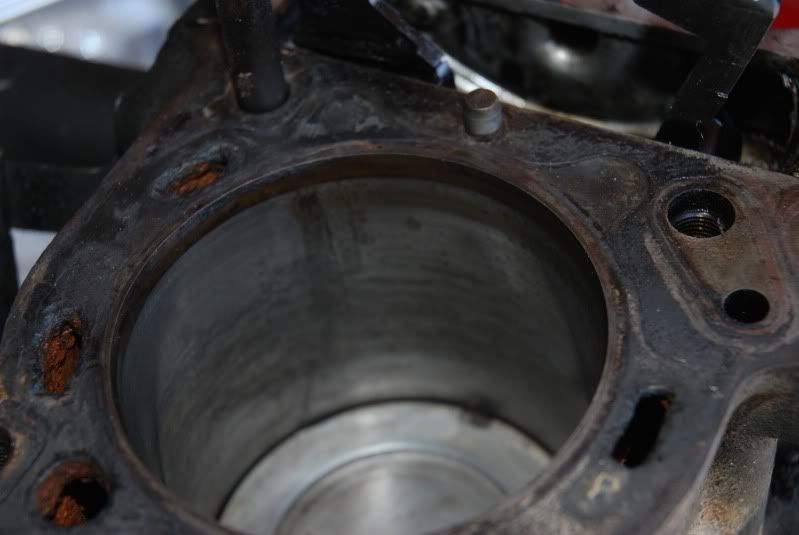
#2 minor vertical scratch marks
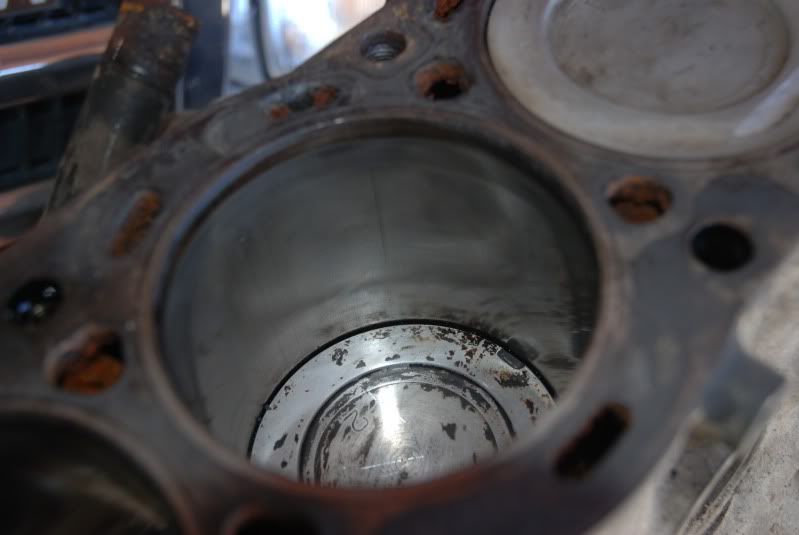
#1 Moderate/Bad Vertical scratch marks. This is where the head gasket failed the worst.
Nice little buildup of clutch dust
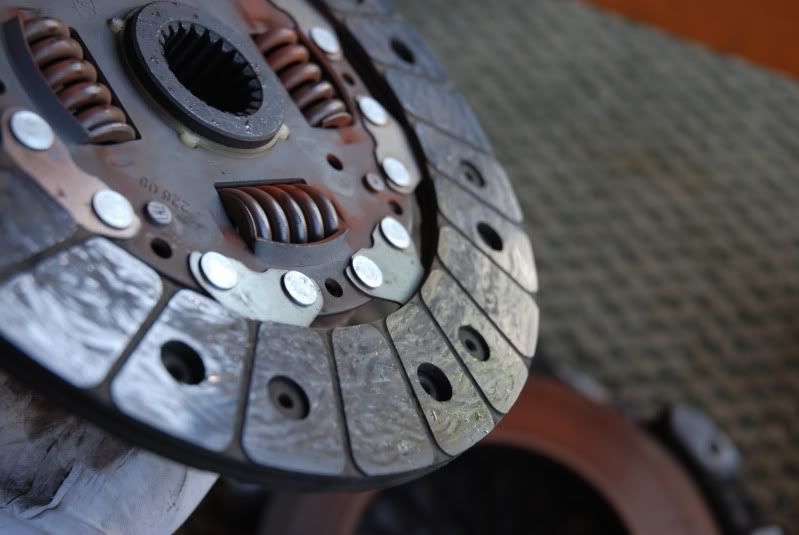
Looks like its about 1/2 worn
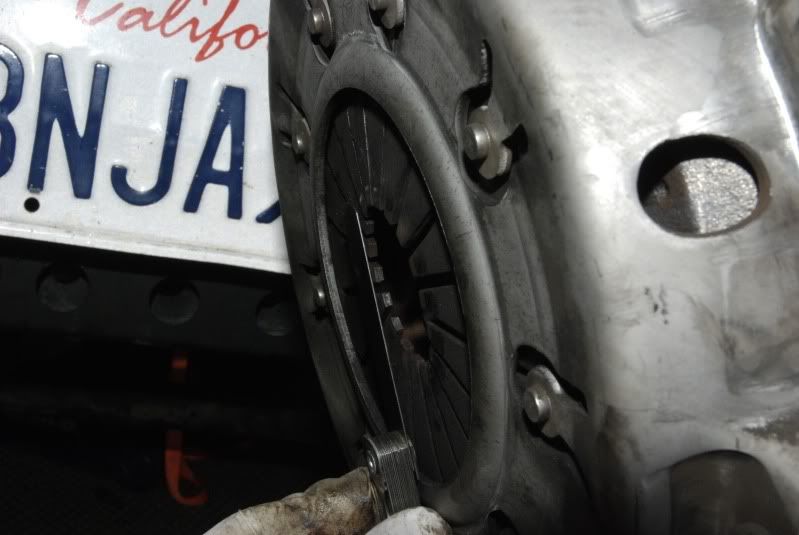
I don't know if the clutch was aligned improperly or the pressure plate was installed incorrectly, but the fingers were bent inward quite a bit
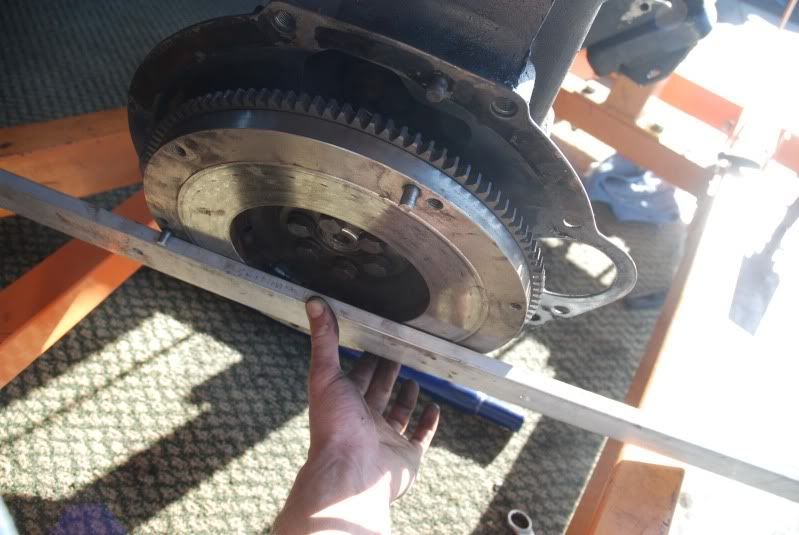
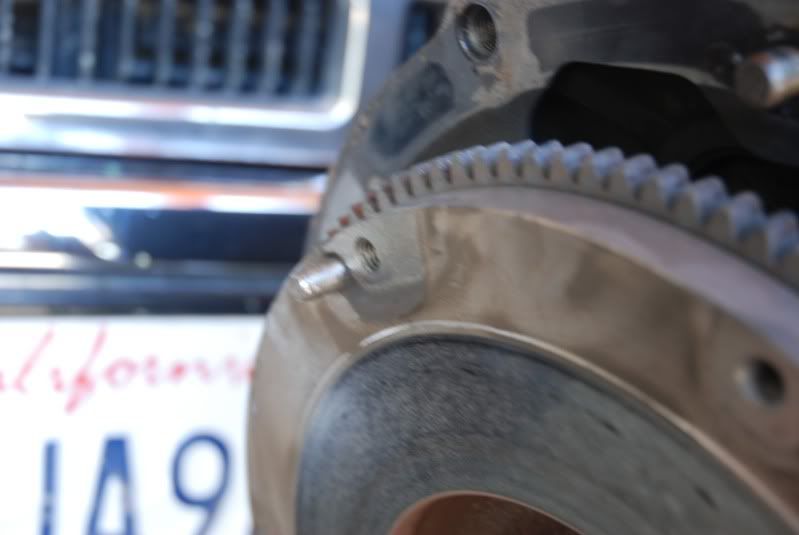
A good way to lock up the flywheel to break the torque of the flywheel bolts
Timing looking pretty good actually
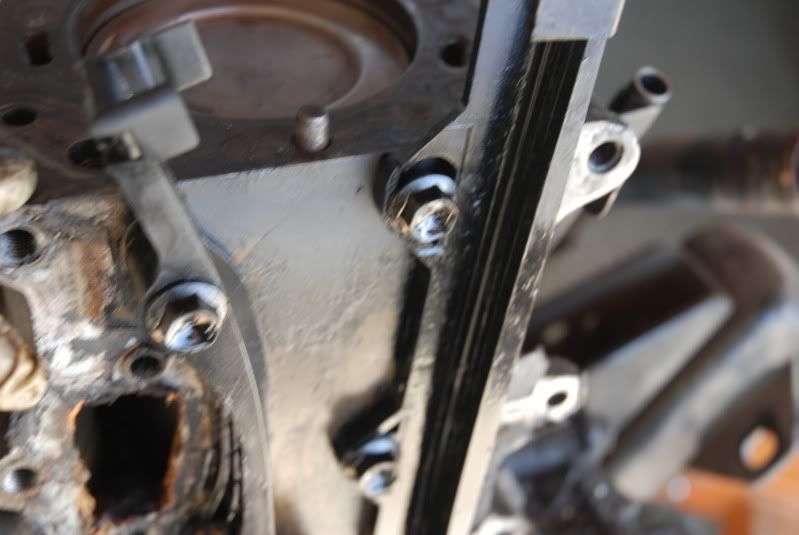
Wear and a cracked upper mount on the driver's side guide
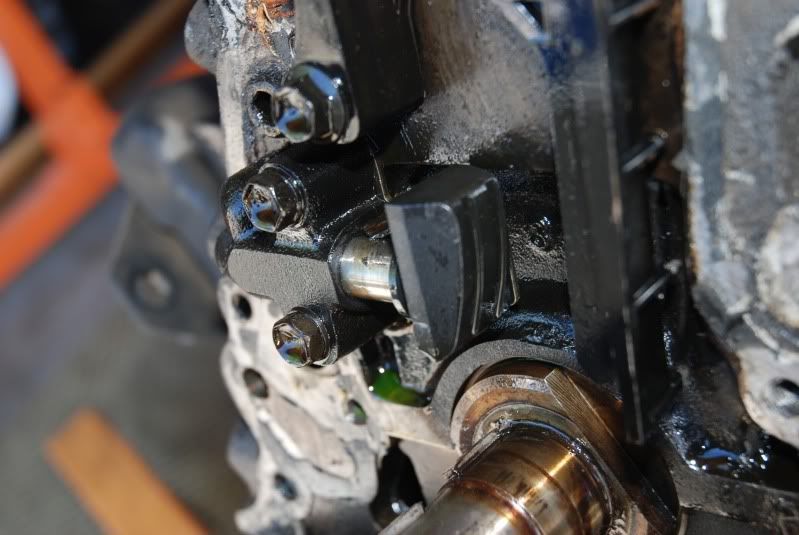
Chain Tensioner
Tomorrow, the tear down!
It was a little interesting with clearance issues lol but it barely fit with the garage door down.
I always wondered if the PO really did put a clutch in it like he said he did, ha it turns out he did. Newer flywheel, clutch, and pressure plate. None of them were Aisin though
The obligatory empty bay shot
At a first glance I thought wow my input shaft seal is leaking like a siv! A closer look reveals that the PO used wayyy to much moly grease on the clutch fork, so all of that fluid shown is grease that flung everywhere.
Look at how much excess grease is gathered on the release bearing
#2 minor vertical scratch marks
#1 Moderate/Bad Vertical scratch marks. This is where the head gasket failed the worst.
Nice little buildup of clutch dust
Looks like its about 1/2 worn
I don't know if the clutch was aligned improperly or the pressure plate was installed incorrectly, but the fingers were bent inward quite a bit
A good way to lock up the flywheel to break the torque of the flywheel bolts
Timing looking pretty good actually
Wear and a cracked upper mount on the driver's side guide
Chain Tensioner
Tomorrow, the tear down!
May 2, 2010 | 07:56 PM
#7
Registered User
Joined: Jan 2009
Posts: 263
Likes: 0
From: anson, texas
Lookin good Pismo... now i just need ur new parts for my motor... lol ill trade ya some toy porn.... na just makes me chomp at the bit a little to skip the suspension and dual cases and go straight to doing some motor mods
Trending Topics
May 3, 2010 | 11:22 AM
#8
Thread Starter
Registered User
Joined: Jan 2010
Posts: 2,259
Likes: 84
From: Pismo Beach, California
Haha I feel ya, I was gonna do an old man emu complete suspension kit until she took a dump. I figure at least the drivetrain should be good now, so the suspension can wait!
May 7, 2010 | 02:40 PM
#10
Thread Starter
Registered User
Joined: Jan 2010
Posts: 2,259
Likes: 84
From: Pismo Beach, California
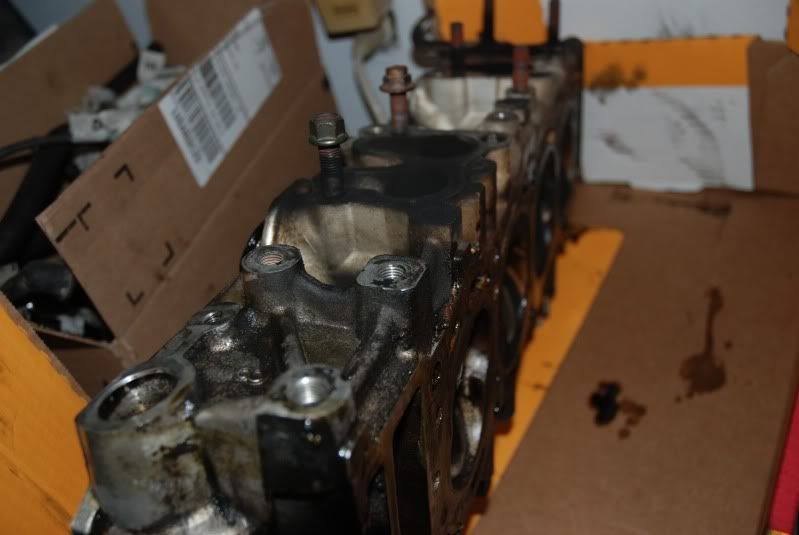
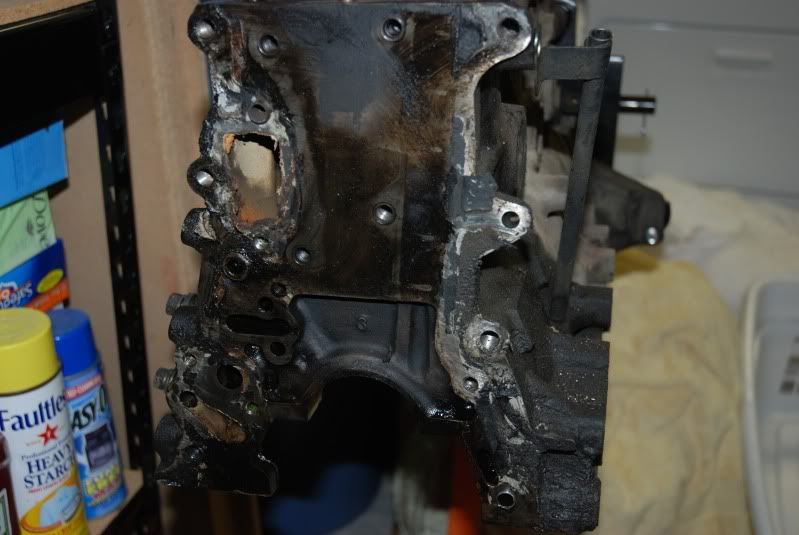
Got some quality work done today! Here's the outcome: a bare block!
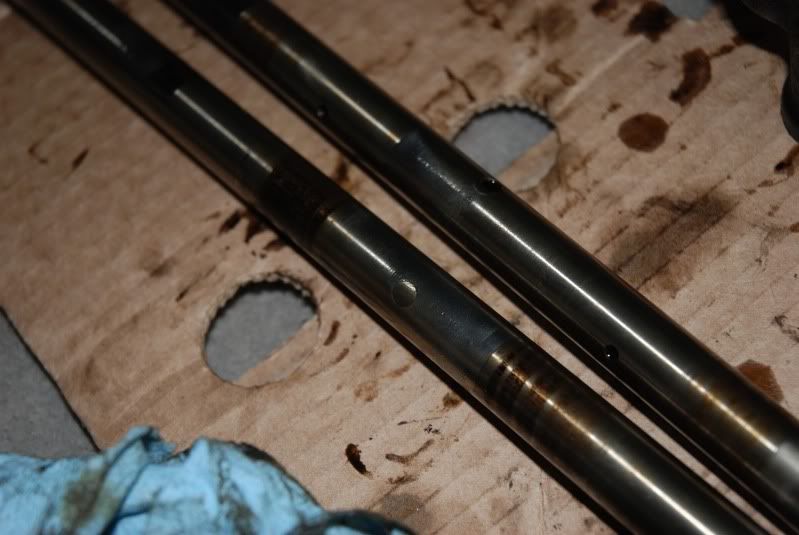
Got the Rocker Arm Assembly torn down. I'm shipping it to 22RE Performance in Chico to have it glass beaded,resurfaced, checked for ware, and re-assembled with new adjuster screws an higher oiling capacity rocker shafts.
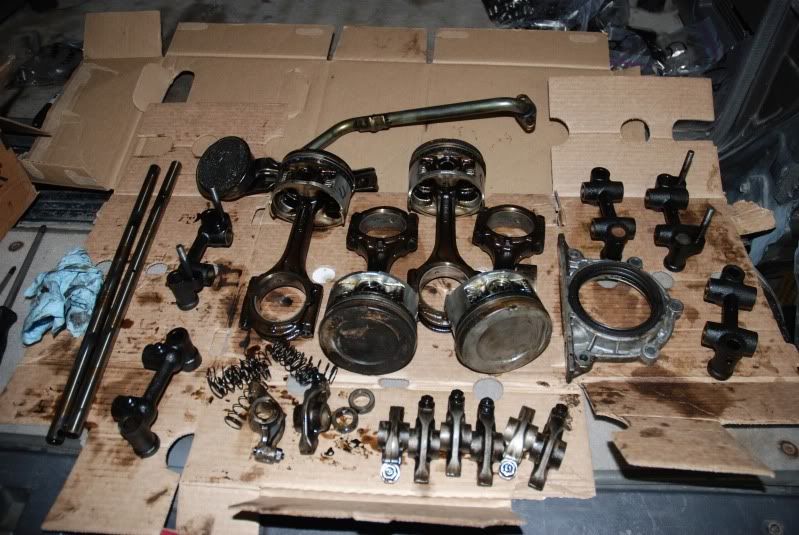
My worn rocker shafts
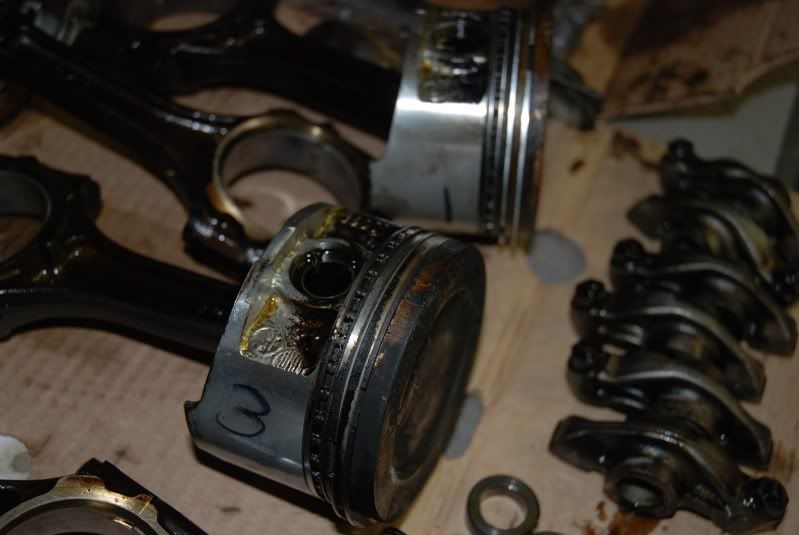
Up close of pistons (i know that they are numbered on the top but I don't want to scape off all of the carbon just to see what cylinder they go to!)
In the process of replacing both input shaft seals
Installed a new clutch master cylinder and clutch slave (OEM AISIN of course)
I have a new brake master cylinder just sitting there, but I'm gonna wait until I have the engine back in so that the vacuum booster will be working while I'm bleeding it and checking the pedal for proper pressure.
Pressure washed the clutch housing (if anything is leaking ill know for sure!)

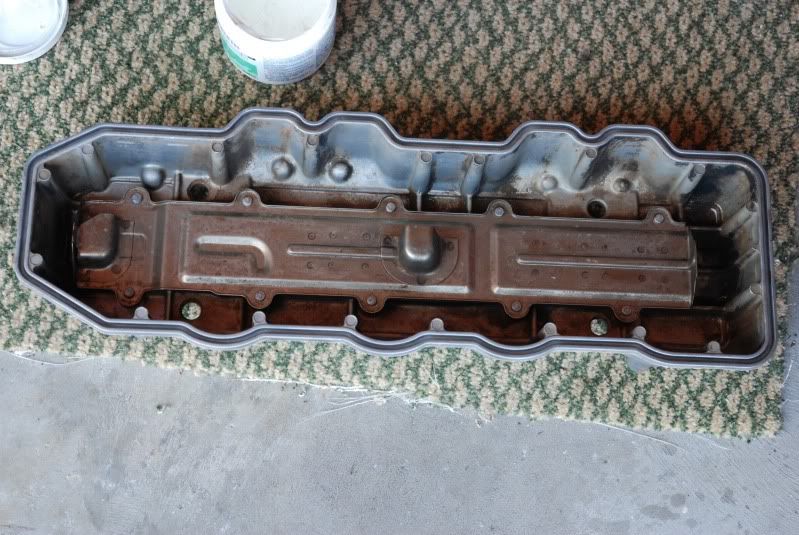
Pressure washed the valve cover
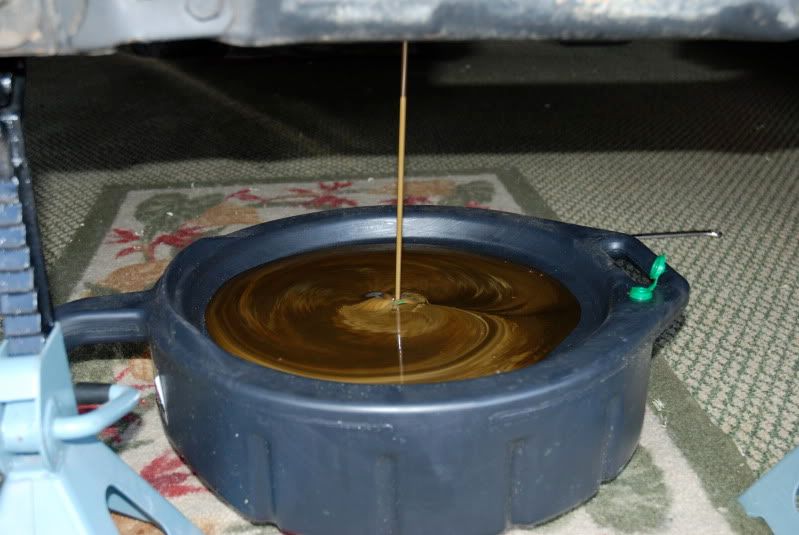
Look at all the crud that was in my block coolant drain plug!
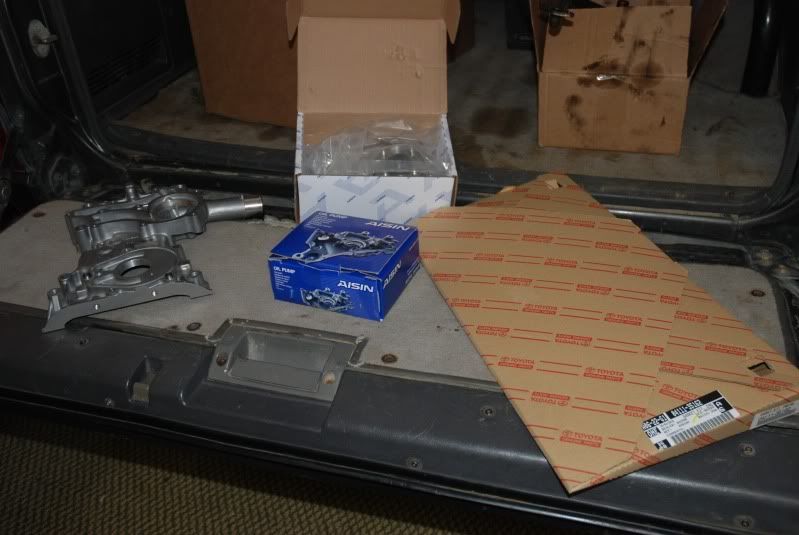
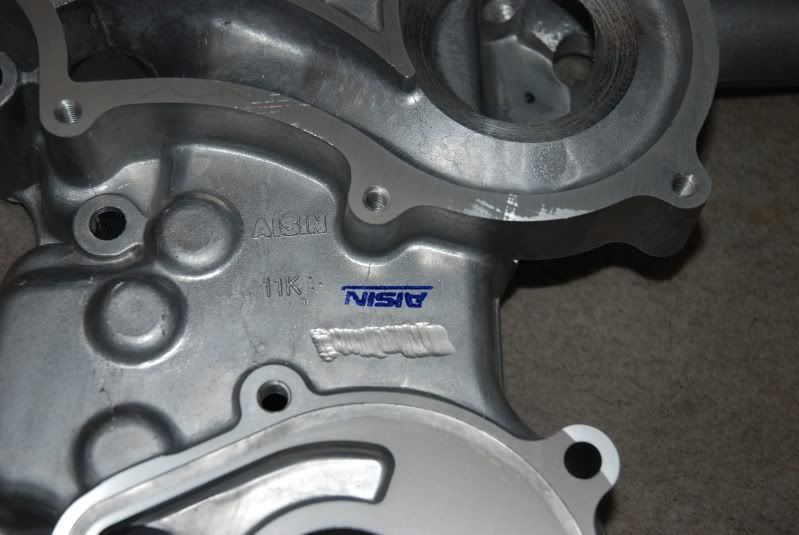
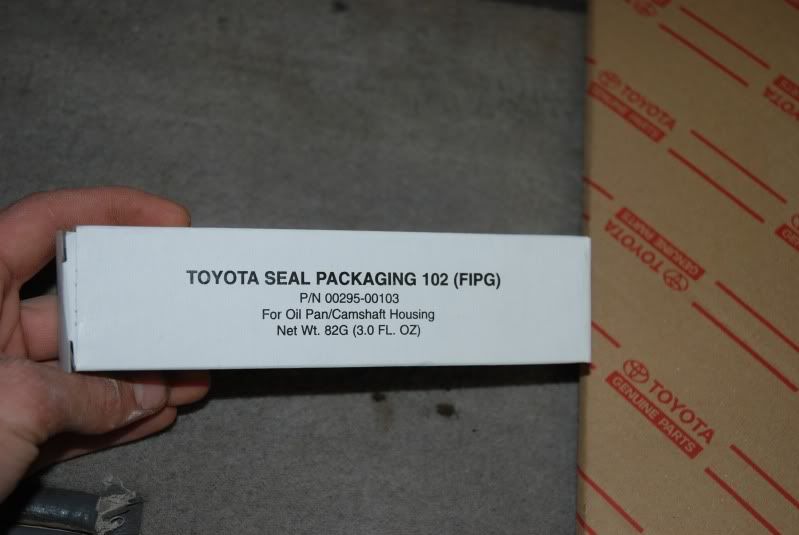
Some parts arrived today! OEM AISIN timing cover, oil pump, water pump, TOYOTA engine overhaul gasket set. If anyone wonders why Im keeping almost everything OEM, its better ha and the main reason is I have a hook up at TOYWORX AUTOMOTIVE check em out if your near slo county! I can get parts cheaper and FASTER THAN THE DEALER! No stuttering ha he gets all his parts from a stocking depot that ships twice a day, dealer only gets shipments once a day. Thanks Daniel!!!!
Its funny how AISIN grinds off Toyota and puts their name on it
ENGNBLDR parts will be arriving on monday! (.020 pistons, Street RV Head, 268C Torkr cam, Timing kit w/ steel rail, moly rings, king bearings)
I'm going to sleep with all these new parts ha jk but seriously I am VERY EXCITED NOW!!!!!!
Got the Rocker Arm Assembly torn down. I'm shipping it to 22RE Performance in Chico to have it glass beaded,resurfaced, checked for ware, and re-assembled with new adjuster screws an higher oiling capacity rocker shafts.
My worn rocker shafts
Up close of pistons (i know that they are numbered on the top but I don't want to scape off all of the carbon just to see what cylinder they go to!)
In the process of replacing both input shaft seals
Installed a new clutch master cylinder and clutch slave (OEM AISIN of course)
I have a new brake master cylinder just sitting there, but I'm gonna wait until I have the engine back in so that the vacuum booster will be working while I'm bleeding it and checking the pedal for proper pressure.
Pressure washed the clutch housing (if anything is leaking ill know for sure!)
Pressure washed the valve cover
Look at all the crud that was in my block coolant drain plug!
Some parts arrived today! OEM AISIN timing cover, oil pump, water pump, TOYOTA engine overhaul gasket set. If anyone wonders why Im keeping almost everything OEM, its better ha and the main reason is I have a hook up at TOYWORX AUTOMOTIVE check em out if your near slo county! I can get parts cheaper and FASTER THAN THE DEALER! No stuttering ha he gets all his parts from a stocking depot that ships twice a day, dealer only gets shipments once a day. Thanks Daniel!!!!
Its funny how AISIN grinds off Toyota and puts their name on it
ENGNBLDR parts will be arriving on monday! (.020 pistons, Street RV Head, 268C Torkr cam, Timing kit w/ steel rail, moly rings, king bearings)
I'm going to sleep with all these new parts ha jk but seriously I am VERY EXCITED NOW!!!!!!
Last edited by PismoJoe; May 9, 2010 at 06:19 PM.
May 9, 2010 | 01:16 PM
#11
Woo Hoo! Subcribededed! lol....
Yeah, I'm sticking mostly with OEM 'heart of the matter' stuff as well. This will not be a rock crawler I have...but even then, many of those guys have told me that Toy's Factory stuff just lasts MUCH longer. .....Does your buddy ship?...I need a BVSV Valve! hahaha.
Yeah, I'm sticking mostly with OEM 'heart of the matter' stuff as well. This will not be a rock crawler I have...but even then, many of those guys have told me that Toy's Factory stuff just lasts MUCH longer. .....Does your buddy ship?...I need a BVSV Valve! hahaha.
May 9, 2010 | 03:47 PM
#12
Thread Starter
Registered User
Joined: Jan 2010
Posts: 2,259
Likes: 84
From: Pismo Beach, California
Glad you guys are amped too!!! It makes me way more amped!!!
Chef...I PM'd you about that BVSV
Gnarly, I haven't thought about those clips, I will replace them now for sure! And thanks for the advice on the collar, I've done a million clutches on 95+ toyotas, but would have missed that for sure!
Hope to have some more results for you guys soon!!
Chef...I PM'd you about that BVSV
Gnarly, I haven't thought about those clips, I will replace them now for sure! And thanks for the advice on the collar, I've done a million clutches on 95+ toyotas, but would have missed that for sure!
Hope to have some more results for you guys soon!!
May 9, 2010 | 05:23 PM
#16
Registered User
Joined: Jan 2009
Posts: 263
Likes: 0
From: anson, texas
So Pismo what would ya charge to do mine cuz im bein lazy lol... ad those clips are truly that serious... I tried skimpin on replacing mine... and guess what... ya iit didnt work right... so had to pull the dang tranny and replace the clips and whoot worked right again.
 May 10, 2010 | 08:30 AM
#19
Thread Starter
Registered User
Joined: Jan 2010
Posts: 2,259
Likes: 84
From: Pismo Beach, California
haha thanks guys!
92Toy...my goal is to get to the installation part soon ha I can't wait to drive this thing so hopefully a week tops until then!
nofly...welcome to YT...glad you're a part of this build! its good for ya!
lives4crawlin...howbout we put my engine in your rig and have the ultimate yoda haha. but seriously i want to get some suspension after this!
strangbanger...I would have to ship to FL so I dunno how much it would actually save you lol
May 10, 2010 | 10:12 AM
#20
Registered User
iTrader: (2)
Joined: Dec 2009
Posts: 2,159
Likes: 8
From: Pleasanton, CA - SF Bay Area
Subscribed!
In the middle of tearing down my front end (again) to address my leaking waterpump I installed in December with my timing set...lots looks familiar in these pics
Great work - keep the pics and commentary coming!
In the middle of tearing down my front end (again) to address my leaking waterpump I installed in December with my timing set...lots looks familiar in these pics
Great work - keep the pics and commentary coming!


