
OLblue87's '86 pickup build
 Apr 6, 2011 | 05:16 PM
#1
Thread Starter
Registered User
Joined: Dec 2010
Posts: 59
Likes: 0
From: NW GA
Hello out there in YotaLand! I am in the process of building up/building back my 86 pickup. I'll start with a little history behind the truck and proceed through my build from there.
I bought my truck when I turned sixteen from my neighbor across the road. He had recently bought a new crew cab Tacoma, and Ol Blue had been moved to a shed beside his house... I noticed after a couple of days that the truck had disappeared, and went to talk to him about the truck. After some negotiation, and an understanding that the truck may die on me the next time I turned the motor over, I took it home for $600 !! I put in new plugs, wires, rotor, had the ripped up seat reupholstered, and had a friend of the family spray on a new coat of Toyota factory blue. She passed smog with flying colors, I got a tag for her and the rest is history....
Fast forward a couple years after 1 new head, 1 head gasket, and a clutch(plus 4 years of highschool and then some haha).... The truck was no longer my daily driver and had turned into a weekend warrior. I was still running stock IFS and some 31x10.50 wranglers. Christmas eve I took her to the local mud ride, one thing led to another, and I limped her home with a god awful tick/knock/bang... later to be diagnosed as a broken tc guide(after some buddies and I had already pulled the motor for fear of finding much worse).
Which leads into my journey of love and reconstruction....
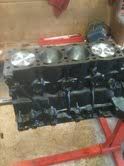
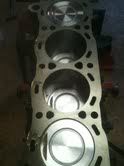
After getting the motor torn down, and everything checked, I decided to go ahead and freshen up the ol gal. My no.4 rod bearing was close to going and my cylinders were starting to show some wear so I took the block and crank off to my machinist for some work. I had the cylinders bored .20 over and the crank turned. I got in touch with EngnBldr and got the parts on the way.
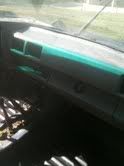
In the down time with the block and crank at the machine shop, I cleaned up the majority of my parts and freshened them up with some engine enamel. I also had a little interior work I wanted to get done ( apparently almost every yota has that trademark crack in the dash pad...) so i pulled out all the dash pieces and changed up the interior somewhat, as well as fiberglassing my dash pad to remedy the cracks. I also trashed my vinyl flooring as it was all but gone anyway, sanded down the floorboard and sprayed in some do it yourself bed liner in the floorboard and up the inside back of the cab.
All this long-windedness has brought my build process up to date and I will be following up with pictures soon! Just have to get them downloaded and then on here!
Future Plans:
4 runner buckets in the cab
console- with cupholders
SAS (will do another thread for this one if the deal I'm working goes through)
261C cam and O/S valves soon from EngnBldr
Weber( 32/36 or sync 38 not sure which yet) and smog delete -vehicle is past testing age-
header
2.25" exhaust to a super 10 Flowmaster to duals out the back
relocate radiator to the bed
GM alternator
fab up some plate/tube bumpers and maybe some sliders
lockers front/rear
5.29's
anything else??
Stay posted guys... it might start off slow but hopefully the momentum is building!!
Any input or feedback is always appreciated!
I bought my truck when I turned sixteen from my neighbor across the road. He had recently bought a new crew cab Tacoma, and Ol Blue had been moved to a shed beside his house... I noticed after a couple of days that the truck had disappeared, and went to talk to him about the truck. After some negotiation, and an understanding that the truck may die on me the next time I turned the motor over, I took it home for $600
!! I put in new plugs, wires, rotor, had the ripped up seat reupholstered, and had a friend of the family spray on a new coat of Toyota factory blue. She passed smog with flying colors, I got a tag for her and the rest is history....Fast forward a couple years after 1 new head, 1 head gasket, and a clutch(plus 4 years of highschool and then some haha).... The truck was no longer my daily driver and had turned into a weekend warrior. I was still running stock IFS and some 31x10.50 wranglers. Christmas eve I took her to the local mud ride, one thing led to another, and I limped her home with a god awful tick/knock/bang... later to be diagnosed as a broken tc guide(after some buddies and I had already pulled the motor for fear of finding much worse).
Which leads into my journey of love and reconstruction....
After getting the motor torn down, and everything checked, I decided to go ahead and freshen up the ol gal. My no.4 rod bearing was close to going and my cylinders were starting to show some wear so I took the block and crank off to my machinist for some work. I had the cylinders bored .20 over and the crank turned. I got in touch with EngnBldr and got the parts on the way.
In the down time with the block and crank at the machine shop, I cleaned up the majority of my parts and freshened them up with some engine enamel. I also had a little interior work I wanted to get done ( apparently almost every yota has that trademark crack in the dash pad...) so i pulled out all the dash pieces and changed up the interior somewhat, as well as fiberglassing my dash pad to remedy the cracks. I also trashed my vinyl flooring as it was all but gone anyway, sanded down the floorboard and sprayed in some do it yourself bed liner in the floorboard and up the inside back of the cab.
All this long-windedness has brought my build process up to date and I will be following up with pictures soon! Just have to get them downloaded and then on here!
Future Plans:
4 runner buckets in the cab
console- with cupholders
SAS (will do another thread for this one if the deal I'm working goes through)
261C cam and O/S valves soon from EngnBldr
Weber( 32/36 or sync 38 not sure which yet) and smog delete -vehicle is past testing age-
header
2.25" exhaust to a super 10 Flowmaster to duals out the back
relocate radiator to the bed
GM alternator
fab up some plate/tube bumpers and maybe some sliders
lockers front/rear
5.29's
anything else??
Stay posted guys... it might start off slow but hopefully the momentum is building!!
Any input or feedback is always appreciated!
Last edited by OLblue87; Apr 6, 2011 at 07:32 PM.
Apr 6, 2011 | 05:31 PM
#2
Thread Starter
Registered User
Joined: Dec 2010
Posts: 59
Likes: 0
From: NW GA
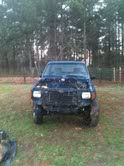
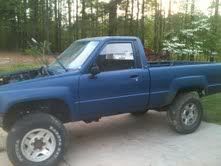
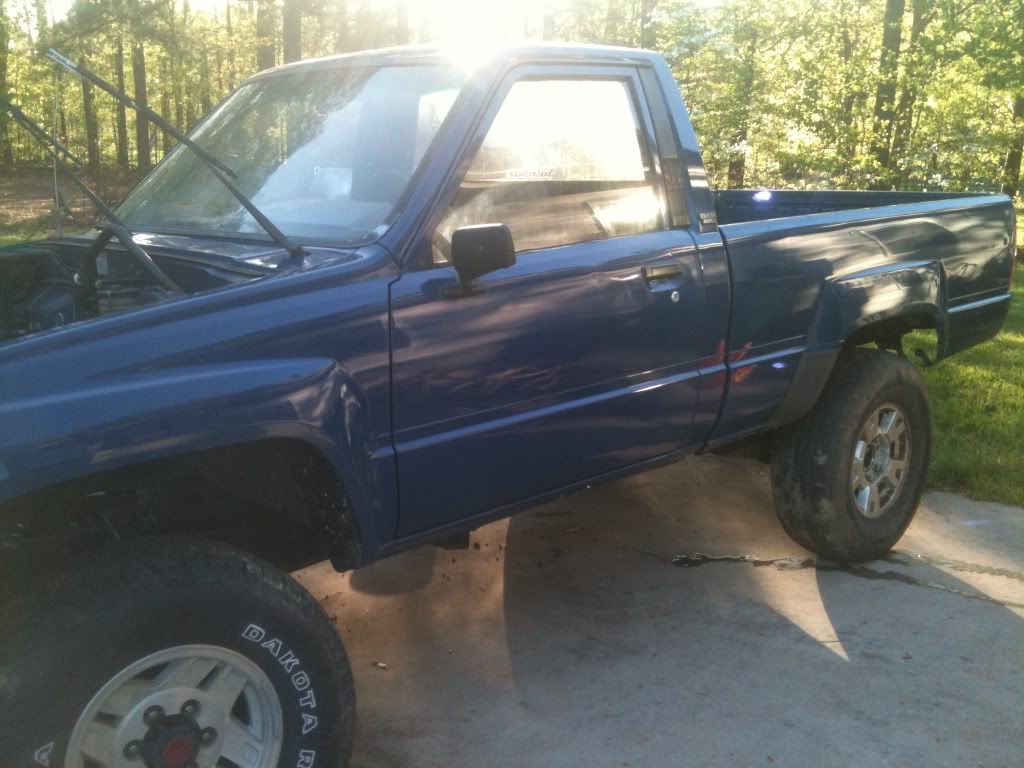
And without further ado... pictures! dont mind the tires/wheels in the pics... they are just roll arounds until I get her up and runnin again
here she sits...
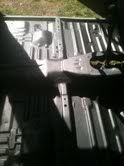
sanded down and undercoated the frame under the bed
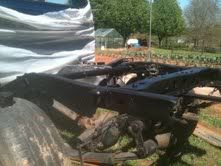
sorry for the crappy Iphone pics... I was really impressed with the overall look of the home bed liner kit


Me likey!!!
sooo shiney!!!
here she sits...
sanded down and undercoated the frame under the bed
sorry for the crappy Iphone pics... I was really impressed with the overall look of the home bed liner kit
Me likey!!!
sooo shiney!!!
Last edited by OLblue87; Apr 6, 2011 at 07:33 PM. Reason: tagging pics
Apr 11, 2011 | 04:08 PM
#3
Thread Starter
Registered User
Joined: Dec 2010
Posts: 59
Likes: 0
From: NW GA
hey everybody, sorry the build has been so slow... my head is off to the machine shop the end of this week to have the seats ground to match up with my new over sized valves from engnbldr! Also coming with the valves is my 261C cam!! I'm definitely excited! Hopefully, within the next week and a half I will have my weber on the way... still up in the air as to which one. what do you guys think? 32/36 or 38?? Any input would be greatly appreciated!! has anyone funning the same cam/valves I am going to have in my head with either the 32/36 of 38? How were your results?
Thanks for any feedback!!
I did get the bed back on this afternoon after work, so here is how she is sitting as I type haha
Thanks for any feedback!!
I did get the bed back on this afternoon after work, so here is how she is sitting as I type haha
Apr 12, 2011 | 04:45 PM
#4
Thread Starter
Registered User
Joined: Dec 2010
Posts: 59
Likes: 0
From: NW GA
Did a little bit of cleaning after work today, still waiting on my cam and valves to get here so I can finish up my engine...
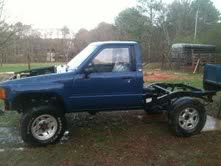
The paint on the old girl had started to fade a little bit, so I wanted to see if I could bring it back to life. After a bath, some rubbing compound, and some massaging with a buffer: this is where she's at
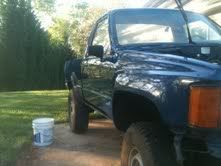
The paint on the old girl had started to fade a little bit, so I wanted to see if I could bring it back to life. After a bath, some rubbing compound, and some massaging with a buffer: this is where she's at
Last edited by OLblue87; Apr 12, 2011 at 04:48 PM.
Apr 17, 2011 | 12:22 PM
#5
Thread Starter
Registered User
Joined: Dec 2010
Posts: 59
Likes: 0
From: NW GA
little weekend update everybody! Got my cam and over sized valves from engnbldr on friday, so my head is going to the machinist monday for a valve job!!
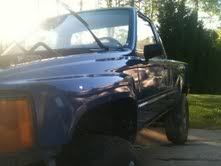
also, did a little more exterior work on the ol gal! tinted up the windows with some 20% black! she's startin to look good!!
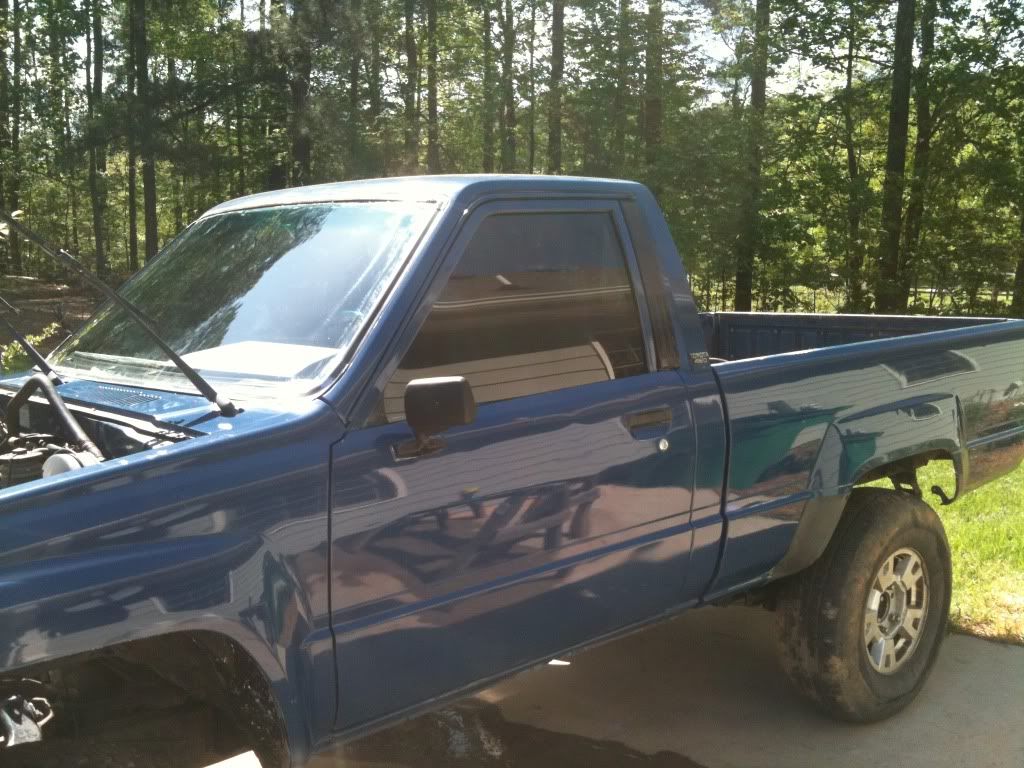
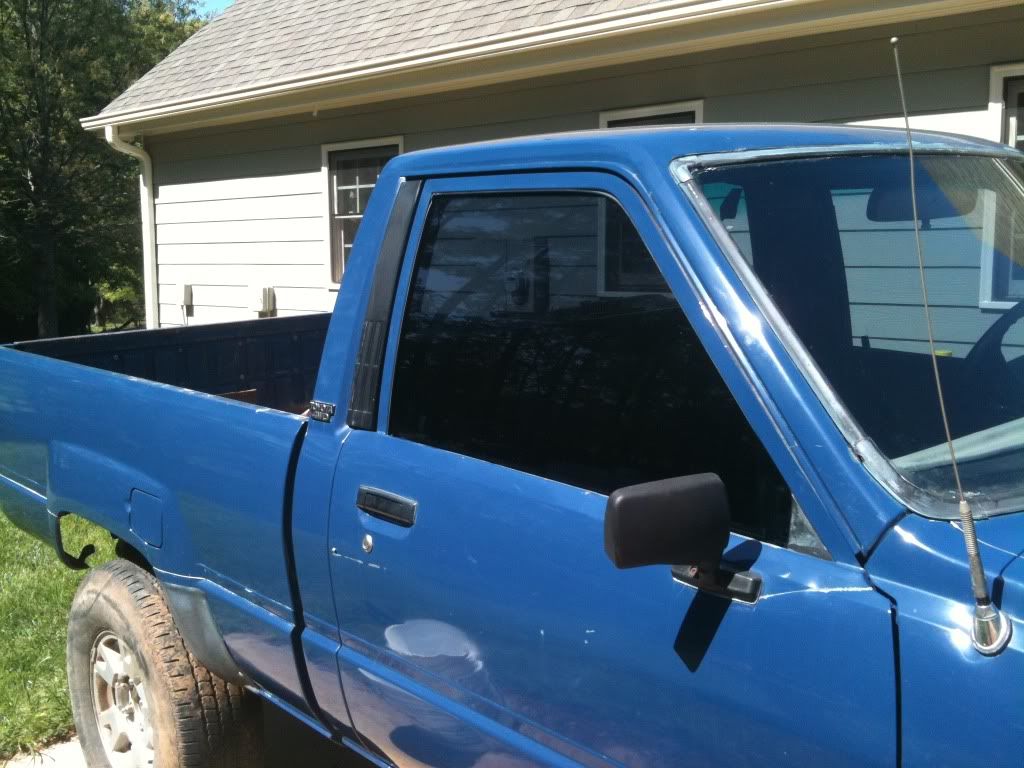
also, did a little more exterior work on the ol gal! tinted up the windows with some 20% black! she's startin to look good!!
Trending Topics
Apr 19, 2011 | 06:06 PM
#8
Thread Starter
Registered User
Joined: Dec 2010
Posts: 59
Likes: 0
From: NW GA
Thanks guys! I sure am proud of how the truck is looking now! I am considering using some spray bedliner to do the rocker panels and the area above on the doors and rear quarters. There is a little bit of rust starting to show in those areas and I want to get it out before its too late. I have seen a few rigs people have done this with and really like the way it looks. Any opinions on a certain brand of do it yourself stuff that you have had good results with against fading/discoloration?
Apr 22, 2011 | 04:02 PM
#10
Thread Starter
Registered User
Joined: Dec 2010
Posts: 59
Likes: 0
From: NW GA
good news for the end of the week! got my head with engnbldr's over sized valves installed back from the machine shop! gonna be putting the fresh 22R back together this weekend!!
lookin sexy!!
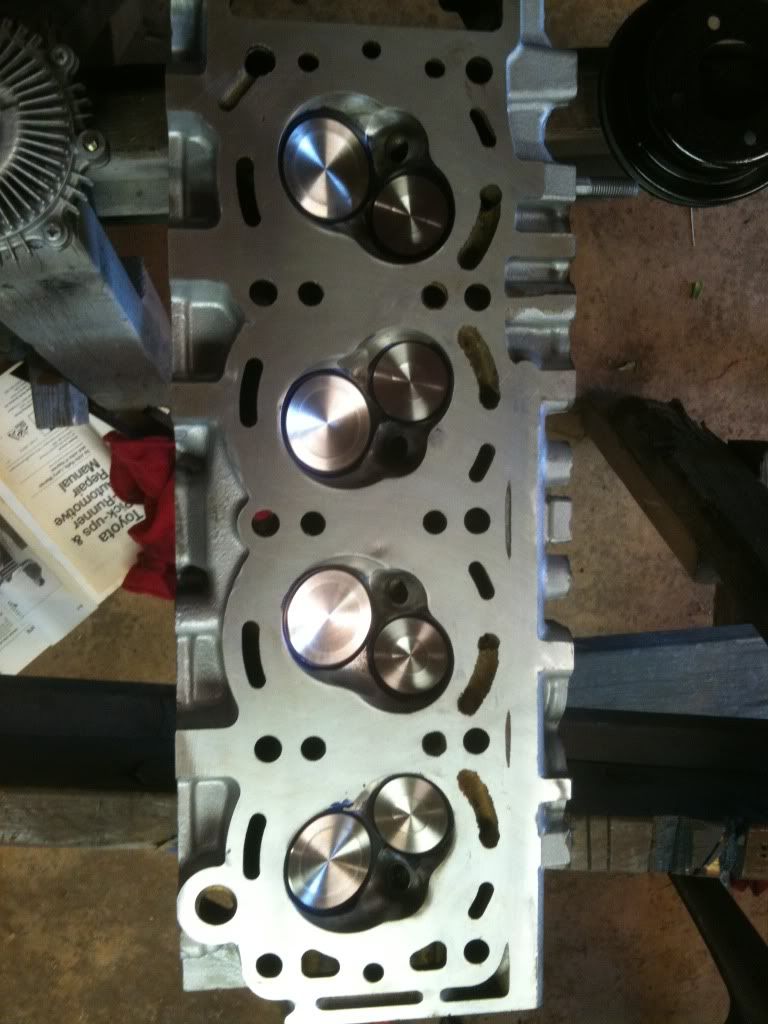
lookin sexy!!
Apr 22, 2011 | 04:52 PM
#12
the aftermarket head has better air flow.
Apr 22, 2011 | 11:46 PM
#14
Thread Starter
Registered User
Joined: Dec 2010
Posts: 59
Likes: 0
From: NW GA
it is the stock head with engnbldr's over sized stainless steel valves in it. stock valve springs,retainers, guides, and shims. when I talked to Ted, he said everything would work out fine as long as all the stock parts were to spec (my head has less than 50k on it since I had the top end re-done). I had the head re-surfaced, and my machinist grind the valve seats. I didn't have any port/polish work done to the head, which I believe is all that separates my head from the street/RV heads out there. Also, I have engnbldr's 261C cam going in the head. I will post more throughout the weekend, and hopefully have the motor all back together by early next week.
I am going to be placing an order to weber carbs direct next week for a new carb, and also getting the block off plates from LCE. I am still undecided on which carb to go with though.... anyone have any opinions/input on either the 32/36 vs the 38 with the setup I am going to be running- over sized valves and 261 cam? From my understanding, the 32/36 is fairly similar to the stock Asain carb... I am looking to get as much from my upgrades as possible... will I see significant gains by using the 38mm carb with a low-mid range cam, even though I have larger valves?
thanks for all the feed-back guys... hopefully there will be more to come soon!
Apr 23, 2011 | 06:05 AM
#15
Registered User
Joined: Nov 2009
Posts: 294
Likes: 17
From: SW Indiana
Can't speak from experience but from what I've read on YT the 32/36 is similar to the stock Aisin and the 38 will give you horsepower gains but you'll lose some MPG's. I'm hoping to go a smiliar route as you, one day...
Did Ted say you would see significant gains from adding the o/s valves? Just curious because that's a much more affordable way to go than ordering the Street RV head.
Did Ted say you would see significant gains from adding the o/s valves? Just curious because that's a much more affordable way to go than ordering the Street RV head.
Apr 23, 2011 | 08:00 AM
#16
Thread Starter
Registered User
Joined: Dec 2010
Posts: 59
Likes: 0
From: NW GA
when I talked to Ted, it was more about cam choices, and what was needed to run one of his RV cams. He said that the o/s valves would be a good addition to the top end.
I am leaning towards the 38mm weber more and more... and I think I will probably go that route.
Now that I've got the intake side somewhat buttoned up, I need a header and some free flowing exhaust on the other side haha. any good recommendations on a good header for the 22R that wont break the bank?
Apr 23, 2011 | 06:40 PM
#18
Thread Starter
Registered User
Joined: Dec 2010
Posts: 59
Likes: 0
From: NW GA
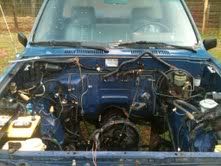
weekend update! did a little wrench turning this afternoon, got the timing, timing cover, new oil and water pump, head, cam, and rocker arm assembly on the block....!
look at that sexy beast!! haha
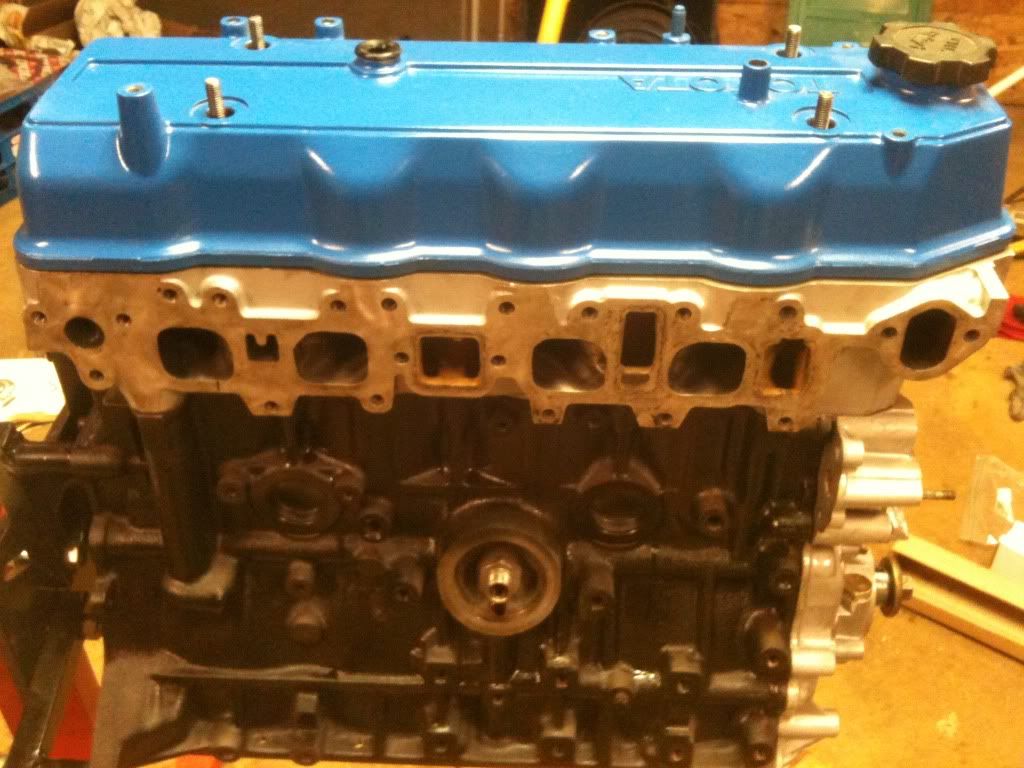
look at that sexy beast!! haha
Apr 23, 2011 | 07:58 PM
#19
Looking good man!!!
Header? Run the stock manifold with 2.25" pipes. I've got the lce header on mine and didnt notice much difference, big money I could have used elsewhere. Less than 2yrs old and rusting already, must be some cheap stainless they use, disappointed.
Header? Run the stock manifold with 2.25" pipes. I've got the lce header on mine and didnt notice much difference, big money I could have used elsewhere. Less than 2yrs old and rusting already, must be some cheap stainless they use, disappointed.
Last edited by streetlancer; Apr 23, 2011 at 08:12 PM.


