
Joaker66 1993 Pickup Build-Up Thread
 Mar 6, 2013 | 04:38 PM
#1
Thread Starter
Registered User
Joined: Aug 2012
Posts: 30
Likes: 0
From: Oklahoma
Joaker66 1993 Pickup Build-Up Thread
Hello all. I have been getting so much useful info from everyone here on YT that i figured i should introduce myself.
I got a non-running 1993 Ext cab DLX 22RE 4x4 5speed online last year and it is my first Toyota. I won't go into the long story but i find it to be in much worse condition than advertised, there i said it. However, the drivetrain appears to be in great condition with no leaks and the PO claims a new clutch and approx 38,000 on rebuilt 22RE, (188,000 on the rest) including metal timing chain guides among other upgrades. Suspension seems good (i have driven it about 100yards in a circle) other than the standard back end sag. I bought cheap AAL's to level it before i found the posts about w-ing the rear leafs so i will be looking for another solution. The body is pretty straight and there is basically zero rust other than surface stuff on exhaust and drums and whatnot. It also came with new Toyota fenders and F/R bumpers so it does have it's great points.
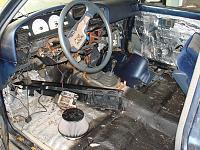
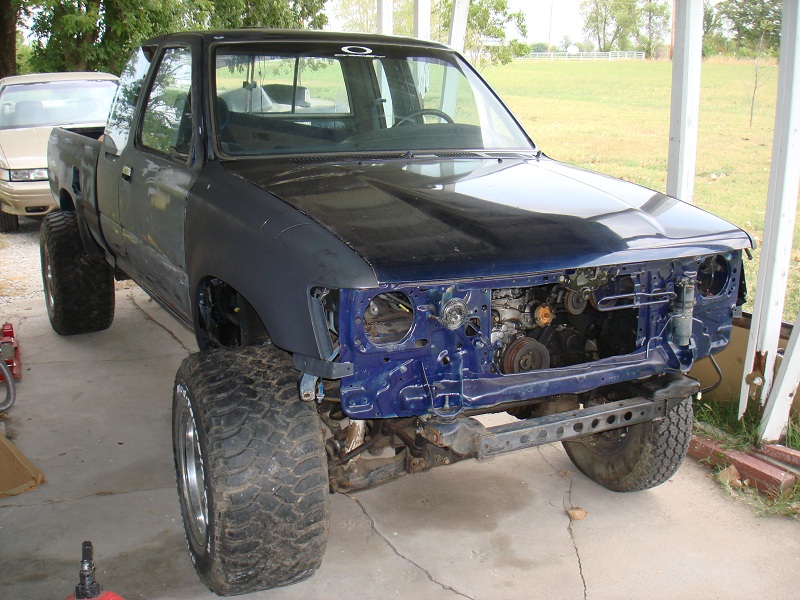
The rest is kind of a mess and partially disassembled. There was an undisclosed impact on the passenger front that tweaked the rad support and i suspect the inner fender. As soon as i have it road worthy i plan to try and have aligned, if it won't align then i will look closer at the frame. I have a sneaking suspicion that the PO was ADD with an un-bolting and un-screwing fetish because there are just random loose and missing threaded parts everywhere. Also the wiring is atrocious. Almost every wire is either cracked and corroded, or cut and spliced with general half-assery. It appears the A/C blew during the undisclosed impact and emptied the freon underhood.
I am a mechanically inclined DIY'er but this turned out to be a little outside of my league. Although once i was done feeling sorry for myself i started working on it anyway and expect to have a pretty solid rig in the end. Searching YT and others have been invaluable and i love this site. Thanks for reading my thread and on with the show!
No CEL but i get code 41 and 52. I think the 41 is from unplugging the TPS while idling and currently suspect bad wiring for the 52.
New or tested good Parts
Fuel filter
Spark Plugs (Denso)
Spark Plug wires
Dorman stock exhaust manifold (removed open Pacesetter header)
VAFM tested good
Stator magnet thing in the distributor
SR5 cluster (yes i blew the oil gauge by not searching)
190 degree thermostat
Upper rad hose
Zerex Asian coolant w/ HOAT
Marlin Crawler HD shift seat and end bushing
Vacuum hoses (about 75% complete)
Toyota PCV
Denso O2 Senser (not yet installed)
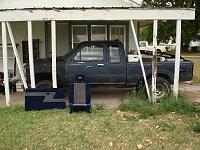
How it looked when i got it

I assembled it enough to run and this is a vid of the second or third start after sitting for about a year. sorry about the power steering whine...
Soon i noticed that once the engine warmed up a little the idle went to poop. Here is a vid of that.
I found that the vacuum hoses were not hooked up correctly and also a couple leaky ones as well. Once that was done the warm idle improved dramatically and i was able to time it.
It's still a shaky idle so i am focusing on the wiring and vacuum areas to get it as smooth as possible. I can also hear a tap/knock that sounds like it is right under the valve cover, i don't think it is a ping but i couldn't say for sure.
I think i have a good truck but i'm learning as i put it together and none of the loose parts/hardware were labeled so it is taking me some time. It's like a truck and a puzzle all-in-one, so again thanks to the site and contributors.
I got a non-running 1993 Ext cab DLX 22RE 4x4 5speed online last year and it is my first Toyota. I won't go into the long story but i find it to be in much worse condition than advertised, there i said it. However, the drivetrain appears to be in great condition with no leaks and the PO claims a new clutch and approx 38,000 on rebuilt 22RE, (188,000 on the rest) including metal timing chain guides among other upgrades. Suspension seems good (i have driven it about 100yards in a circle) other than the standard back end sag. I bought cheap AAL's to level it before i found the posts about w-ing the rear leafs so i will be looking for another solution. The body is pretty straight and there is basically zero rust other than surface stuff on exhaust and drums and whatnot. It also came with new Toyota fenders and F/R bumpers so it does have it's great points.
The rest is kind of a mess and partially disassembled. There was an undisclosed impact on the passenger front that tweaked the rad support and i suspect the inner fender. As soon as i have it road worthy i plan to try and have aligned, if it won't align then i will look closer at the frame. I have a sneaking suspicion that the PO was ADD with an un-bolting and un-screwing fetish because there are just random loose and missing threaded parts everywhere. Also the wiring is atrocious. Almost every wire is either cracked and corroded, or cut and spliced with general half-assery. It appears the A/C blew during the undisclosed impact and emptied the freon underhood.
I am a mechanically inclined DIY'er but this turned out to be a little outside of my league. Although once i was done feeling sorry for myself i started working on it anyway and expect to have a pretty solid rig in the end. Searching YT and others have been invaluable and i love this site. Thanks for reading my thread and on with the show!
No CEL but i get code 41 and 52. I think the 41 is from unplugging the TPS while idling and currently suspect bad wiring for the 52.
New or tested good Parts
Fuel filter
Spark Plugs (Denso)
Spark Plug wires
Dorman stock exhaust manifold (removed open Pacesetter header)
VAFM tested good
Stator magnet thing in the distributor
SR5 cluster (yes i blew the oil gauge by not searching)
190 degree thermostat
Upper rad hose
Zerex Asian coolant w/ HOAT
Marlin Crawler HD shift seat and end bushing
Vacuum hoses (about 75% complete)
Toyota PCV
Denso O2 Senser (not yet installed)
How it looked when i got it


I assembled it enough to run and this is a vid of the second or third start after sitting for about a year. sorry about the power steering whine...
Soon i noticed that once the engine warmed up a little the idle went to poop. Here is a vid of that.
I found that the vacuum hoses were not hooked up correctly and also a couple leaky ones as well. Once that was done the warm idle improved dramatically and i was able to time it.
It's still a shaky idle so i am focusing on the wiring and vacuum areas to get it as smooth as possible. I can also hear a tap/knock that sounds like it is right under the valve cover, i don't think it is a ping but i couldn't say for sure.
I think i have a good truck but i'm learning as i put it together and none of the loose parts/hardware were labeled so it is taking me some time. It's like a truck and a puzzle all-in-one, so again thanks to the site and contributors.
Mar 6, 2013 | 04:58 PM
#2
Thread Starter
Registered User
Joined: Aug 2012
Posts: 30
Likes: 0
From: Oklahoma
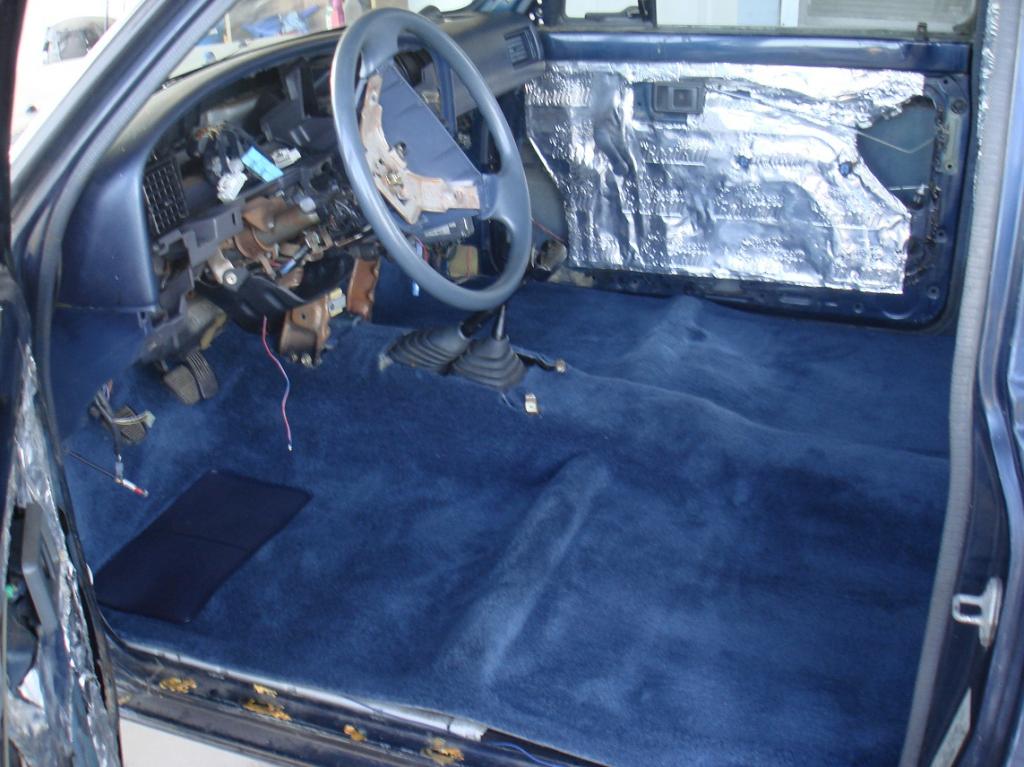
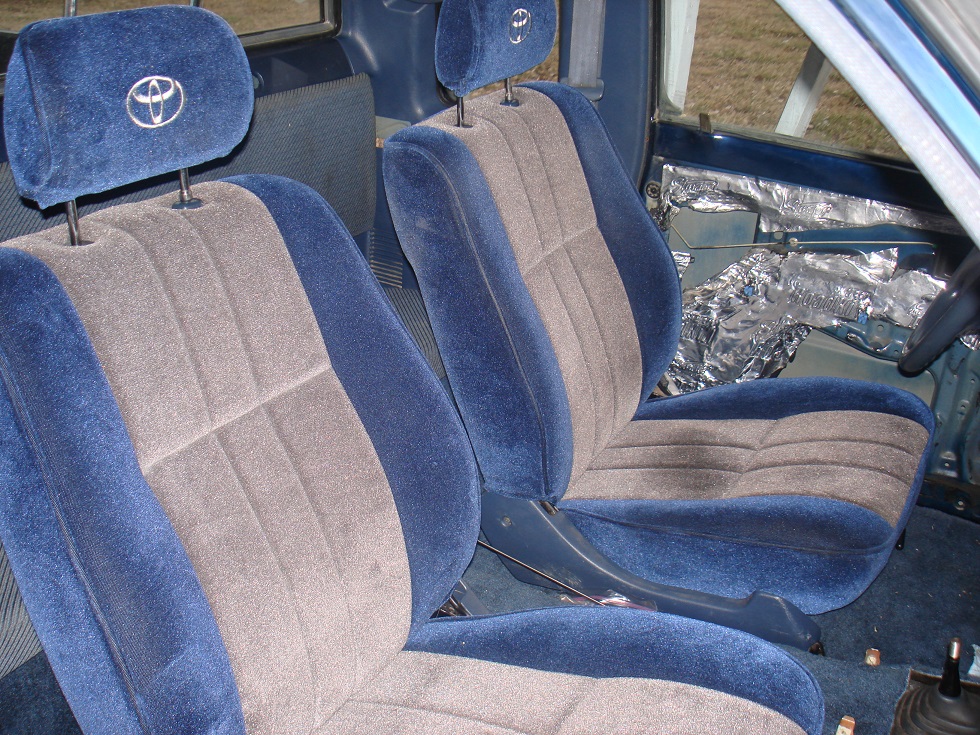
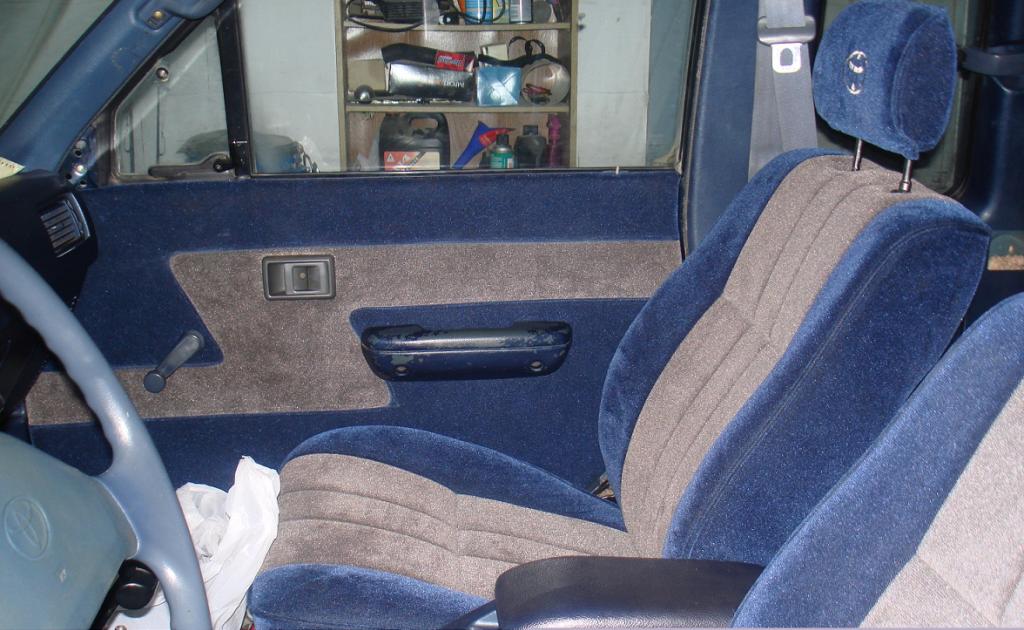
Interior
The truck came with newly upholstered sun visors, door panels and SR5 seats that had never been installed. I put in a new carpet and the seats, then test fitted on of the door panels and the center console.
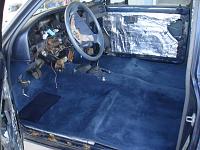

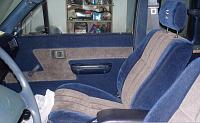
everything but the carpet is just loose fitted as i have to figure out all the mounting points and seat belts and stuff. It helped once i figured out that it had a bench originally and i am basically cloning a DLX as an SR5.
everything but the carpet is just loose fitted as i have to figure out all the mounting points and seat belts and stuff. It helped once i figured out that it had a bench originally and i am basically cloning a DLX as an SR5.
Mar 6, 2013 | 05:43 PM
#3

Pretty plush  Going to have to get you a velour suit to complete the leisure suit larry feel.

How about some photo of those recovered visors, I'm kind of intrested in the construction method used. still want to redo mine.
Going to have to get you a velour suit to complete the leisure suit larry feel.How about some photo of those recovered visors, I'm kind of intrested in the construction method used. still want to redo mine.


 Mar 6, 2013 | 06:20 PM
#5
Thread Starter
Registered User
Joined: Aug 2012
Posts: 30
Likes: 0
From: Oklahoma
lol, next item on the mod list=leisure suit 
They aren't installed because i still need to figure out my headliner situation, but here one is:
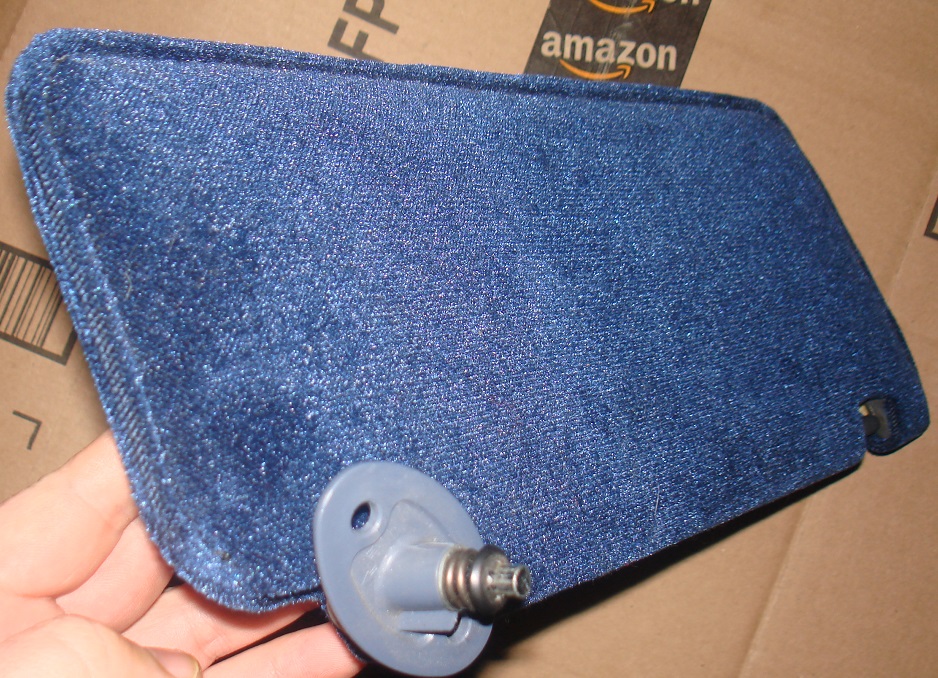
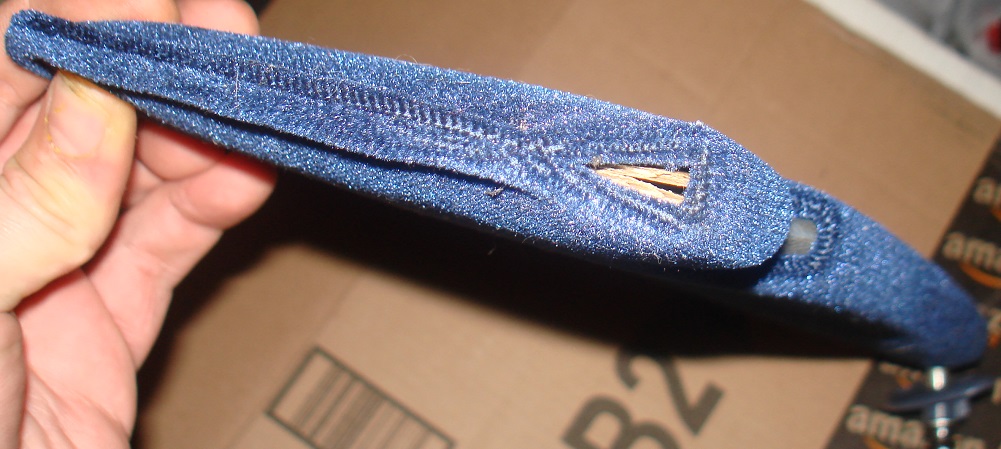
it looks like a regular piece of cardboard folded over the visor frame and then a single layer semi-stiff backing on the fabric with a little padding between. Then it's sewn around the outside edge.
it looks like a regular piece of cardboard folded over the visor frame and then a single layer semi-stiff backing on the fabric with a little padding between. Then it's sewn around the outside edge.
Mar 6, 2013 | 06:29 PM
#6
Thread Starter
Registered User
Joined: Aug 2012
Posts: 30
Likes: 0
From: Oklahoma
i have tested the afm (have a vid of it on utube) and it's within spec.
Did the TPS test where you pull the connector while idling and listen for an RPM change and it worked, i think that is why I have the 41 code. i will move a proper procedure test up on the priority list, thanks for the advice!
Mar 7, 2013 | 11:25 AM
#7
Thread Starter
Registered User
Joined: Aug 2012
Posts: 30
Likes: 0
From: Oklahoma
A/T Dashpot on my M/T
So i start to test the dashpot and realize it doesn't quite match what i am seeing in the FSM for my M/T truck, i read on a little and it does match the pic of the A/T dashpot. i know the PO drove it like this for at least 38,000 so i can't think it's that big of a deal but i like things the way they are supposed to be. seems like it would confuse the idle on deceleration too, if i am understanding the test procedure correctly.
a brief search for dashpot on here didnt really show me my issue so i am gonna do some googling.
a brief search for dashpot on here didnt really show me my issue so i am gonna do some googling.
Trending Topics
Mar 7, 2013 | 08:22 PM
#8
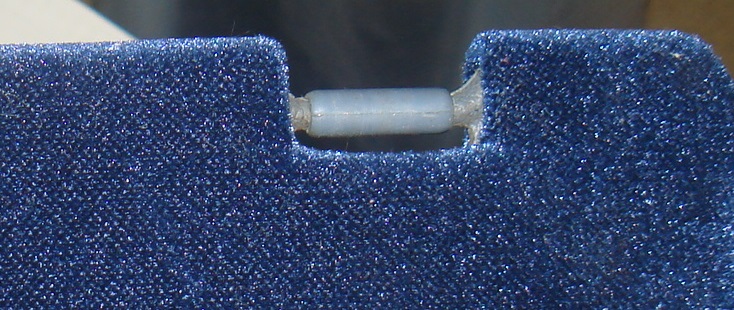
Thanks for the photos, should have been more specific about what I wanted but you covered it from all angles  Wasn't sure how to do the openings for the mount and clips
Didn't watch the videos first time thru, sorry. Liked the rag floating up over the lens "You can't see where my kill switch is!!" Is that open exhaust, eg just the down pipe, sounds really mean..
So your idle seems really low. What is it idling at when it is warmed up? It's shaking more than I would expect during the warm up also, so it's not just when it's warm. Check and adjust timing and idle already? FSM Troubleshooting chart link, under Poor idling, "rough idle" and "misfire". I'd bump compression test upto #1 just because it's a new to you motor.
For the noise under the cover you likely just need to do the valve adjustment.
Wasn't sure how to do the openings for the mount and clipsDidn't watch the videos first time thru, sorry. Liked the rag floating up over the lens
"You can't see where my kill switch is!!" Is that open exhaust, eg just the down pipe, sounds really mean..So your idle seems really low. What is it idling at when it is warmed up? It's shaking more than I would expect during the warm up also, so it's not just when it's warm. Check and adjust timing and idle already? FSM Troubleshooting chart link, under Poor idling, "rough idle" and "misfire". I'd bump compression test upto #1 just because it's a new to you motor.
For the noise under the cover you likely just need to do the valve adjustment.
Mar 7, 2013 | 09:29 PM
#9
Thread Starter
Registered User
Joined: Aug 2012
Posts: 30
Likes: 0
From: Oklahoma
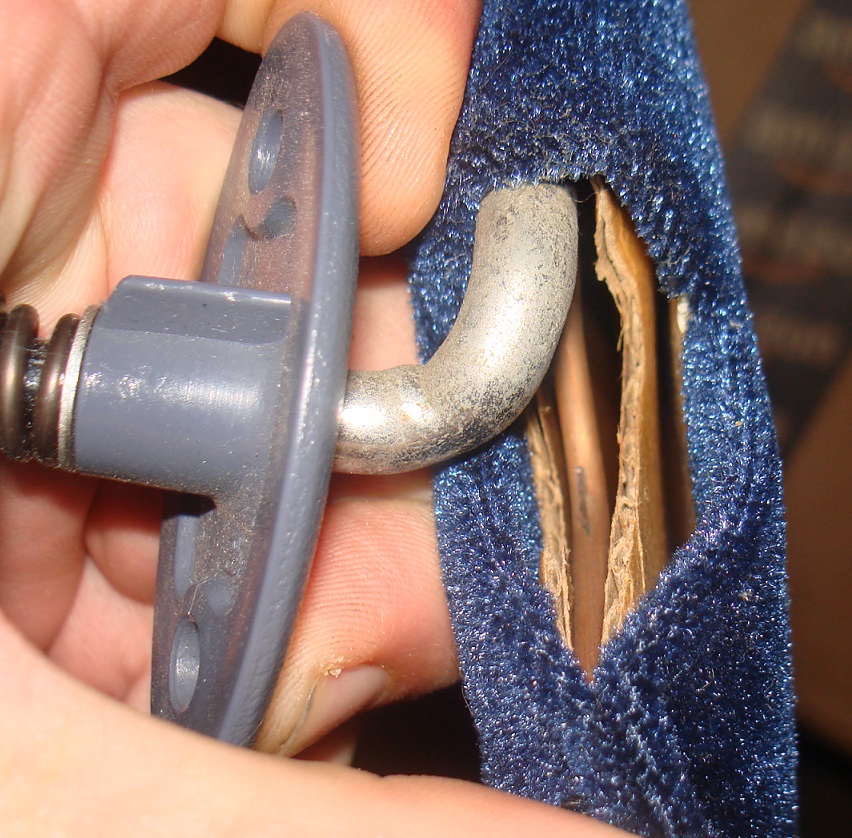
for the fabric it looks like they just glued it to the stiffer backing and then folded it over the frame to be sewn. here is the door handle hole from behind showing the same gluing technique.

So your idle seems really low. What is it idling at when it is warmed up? It's shaking more than I would expect during the warm up also, so it's not just when it's warm. Check and adjust timing and idle already? FSM Troubleshooting chart link, under Poor idling, "rough idle" and "misfire". I'd bump compression test upto #1 just because it's a new to you motor.
For the noise under the cover you likely just need to do the valve adjustment.
For the noise under the cover you likely just need to do the valve adjustment.
I was starting to do the idle and TPS today and realized my dashpot is for an A/T and the set screw ws backed all the way off. and there is a leak where the EGR feeds into the back of the intake due to the aluminum threads being stripped out.
Thanks for the advice, i will do the compression test right away. i think you are right about the valves too and plan to adjust them soon, just want to do the water cleaning before i do that and put in my new o2.
Mar 8, 2013 | 08:26 PM
#10
Thread Starter
Registered User
Joined: Aug 2012
Posts: 30
Likes: 0
From: Oklahoma
Water cleaning
Gonna do the water cleaning mentioned in a few threads and think i will try the method described here.
instead of using vice grips to control the flow i got two small plastic valves at ACE for $3.49 and used stuff i had around the house to make a little kit. this way i can control the air and water. the idea is to do a compression test before and after, and a valve adjustment.

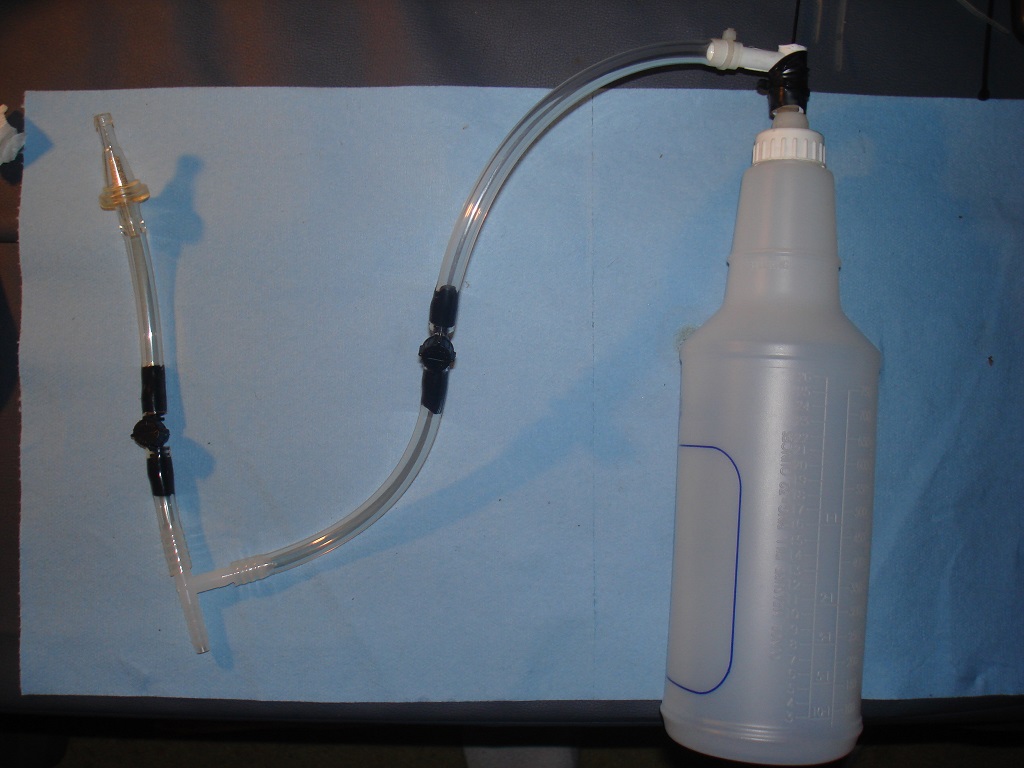
If it were me, I would try to blow that stuff out with water.
Here's one of the better techniques I've seen described for doing this:
https://www.yotatech.com/forums/f116.../#post50824736
Noltz suggests using a whole gallon of water - normally I would say that sounds a little extreme, except in your motor's case maybe a little extreme is called for. Just BE CAREFUL! not to allow the motor to suck too much water too fast: you can hydro-lock your cylinder, and then bye-bye connecting rod. (you can do the same thing with seafoam, btw - seafoam users be warned) Noltz recommends taking 20 minutes to feed the gallon, and that sounds about right. Be sure to allow the motor to reach operating temp before you begin.
You might consider adding some isopropyl alcohol to the water: that will act as a wetting agent and help the water transfer heat better, plus it will add some cleaning action. Add maybe 10-20 percent alcohol. If you're using 70% drug store rubbing alcohol, use 3 or 4 parts water to one part alcohol. If you have 90% isopropyl, you can pour in a 16 oz bottle and fill the rest of your gallon with water. Using distilled water would be best.
Change the oil after water injection, since some of it can squeeze past the rings and you don't want to run a motor with water in the oil.
Mar 9, 2013 | 03:21 PM
#11
Thread Starter
Registered User
Joined: Aug 2012
Posts: 30
Likes: 0
From: Oklahoma
Compression Test #1
Did my first ever compression test today and these are the results:
DRY
#1= 134
#2= 130
#3= 120
#4= 120
WET
#1= 140
#2= 133
#3= 119
#4= 117
I'm not real sure how to interpret this because the FSM says the range should be 128-171 but they are within 10-12% of each other and there was little change in the wet test. This indicates to me that the rings are good and tight and i find no visual evidence of coolant in the oil so i don't think HG. Not having access to a leak down tester i think i will go ahead and check/adjust the valves and see if that improves anything.
These are the plugs, they are brand new probably been run less than 10 hours total and have never been over 10 miles an hour. 90% of that run time was when the vacuum lines were way out of whack.

Any and all advice is appreciated.
DRY
#1= 134
#2= 130
#3= 120
#4= 120
WET
#1= 140
#2= 133
#3= 119
#4= 117
I'm not real sure how to interpret this because the FSM says the range should be 128-171 but they are within 10-12% of each other and there was little change in the wet test. This indicates to me that the rings are good and tight and i find no visual evidence of coolant in the oil so i don't think HG. Not having access to a leak down tester i think i will go ahead and check/adjust the valves and see if that improves anything.
These are the plugs, they are brand new probably been run less than 10 hours total and have never been over 10 miles an hour. 90% of that run time was when the vacuum lines were way out of whack.
Any and all advice is appreciated.
Mar 9, 2013 | 03:31 PM
#12
Thread Starter
Registered User
Joined: Aug 2012
Posts: 30
Likes: 0
From: Oklahoma
Low idle
So your idle seems really low. What is it idling at when it is warmed up? It's shaking more than I would expect during the warm up also, so it's not just when it's warm. Check and adjust timing and idle already? FSM Troubleshooting chart link, under Poor idling, "rough idle" and "misfire". I'd bump compression test upto #1 just because it's a new to you motor.
Thanks again for your advice and the link!
Mar 9, 2013 | 06:22 PM
#13
Bonus, picture and a description thanks! I was trying to remember the name of the stitch that is used to keep fabric from unfurling. Makes more sense they just folded it over and glued to the cardboard backer you showed.
The drip line valves are a nice touch, fish tank air valves are abit less "touchy" and what I use for drip irrigation instead. For gardening of course .
So for your compression test results. I wouldn't worry to much about the "low" readings, these gauges are never calibrate(maybe once when they came off the assembly line) and generally treated like the rent-a-tools they are. The inconsistency is likely due to just the connection, eg tube slip on the swivel nut. Todo them "right", eg consistently tight, you need the wrench that fits over the tube and down the hole. Lubing the connector or o-ring helps also.
Valve adjustments are part of the routine maintenence, and highly recommended. There is alot of advocates for going a little tighter than the spec, 7&11 instead of 8&12, as it cuts down on the valve noise alot.
I'm guessing the idle is a lot smoother now Just need to get that stripped EGR input taken care of, and the throttle opener swaped for a dashpot.
Don't know what size it is but you might be able to re-tap it w/o having to dissassemble anything. Just make sure the port gets covered well before you start, whether it's done on or off the engine.
Obviously the best thing todo is pull the airchamber/plenum, and tap it. However there is a trick we used to use. A waxed and oiled bolt and JB weld, we called it "form a thread". Not really recommending it just the striped egr port reminded me of it and I got a LOL.
The drip line valves are a nice touch, fish tank air valves are abit less "touchy" and what I use for drip irrigation instead. For gardening of course .
So for your compression test results. I wouldn't worry to much about the "low" readings, these gauges are never calibrate(maybe once when they came off the assembly line) and generally treated like the rent-a-tools they are. The inconsistency is likely due to just the connection, eg tube slip on the swivel nut. Todo them "right", eg consistently tight, you need the wrench that fits over the tube and down the hole. Lubing the connector or o-ring helps also.
Valve adjustments are part of the routine maintenence, and highly recommended. There is alot of advocates for going a little tighter than the spec, 7&11 instead of 8&12, as it cuts down on the valve noise alot.
I'm guessing the idle is a lot smoother now
Just need to get that stripped EGR input taken care of, and the throttle opener swaped for a dashpot.Don't know what size it is but you might be able to re-tap it w/o having to dissassemble anything. Just make sure the port gets covered well before you start, whether it's done on or off the engine.
Obviously the best thing todo is pull the airchamber/plenum, and tap it. However there is a trick we used to use. A waxed and oiled bolt and JB weld, we called it "form a thread". Not really recommending it just the striped egr port reminded me of it and I got a LOL.
Mar 9, 2013 | 06:52 PM
#14
Thread Starter
Registered User
Joined: Aug 2012
Posts: 30
Likes: 0
From: Oklahoma
So for your compression test results. I wouldn't worry to much about the "low" readings, these gauges are never calibrate(maybe once when they came off the assembly line) and generally treated like the rent-a-tools they are. The inconsistency is likely due to just the connection, eg tube slip on the swivel nut. Todo them "right", eg consistently tight, you need the wrench that fits over the tube and down the hole. Lubing the connector or o-ring helps also.
YESSIR!(or ma'am) I really appreciate your comment on this, to "my ear" its sounded high but it's at 750 and much smoother.
 not perfect but definately better i will be doing a before and after vid of the water cleaning and valve adjustment to compare with the before and after compression test.
Just need to get that stripped EGR input taken care of, and the throttle opener swaped for a dashpot.
Don't know what size it is but you might be able to re-tap it w/o having to dissassemble anything. Just make sure the port gets covered well before you start, whether it's done on or off the engine.
Obviously the best thing todo is pull the airchamber/plenum, and tap it. However there is a trick we used to use. A waxed and oiled bolt and JB weld, we called it "form a thread". Not really recommending it just the striped egr port reminded me of it and I got a LOL.
Mar 10, 2013 | 08:15 PM
#15
Thread Starter
Registered User
Joined: Aug 2012
Posts: 30
Likes: 0
From: Oklahoma
Water Cleaning done
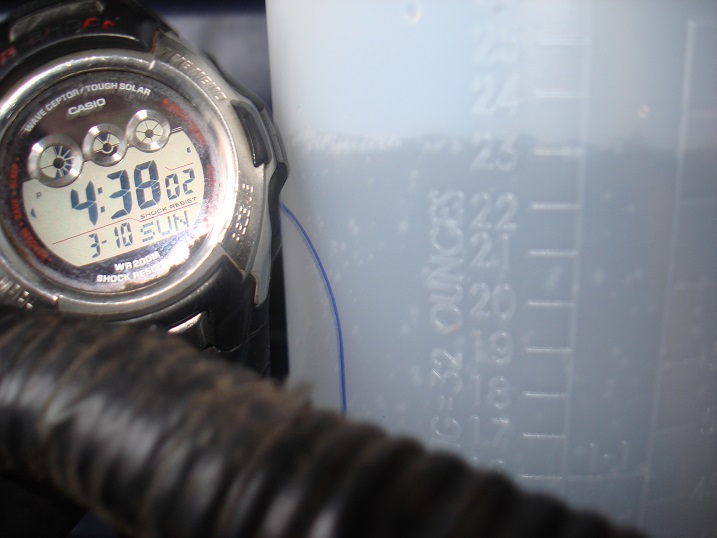
Ran a gallon of water mixed with isopropyl alcohol thru the truck today, took about 1.5 hours. Here is a short vid showing it running.
http://www.youtube.com/watch?v=3Ghvq...ature=youtu.be
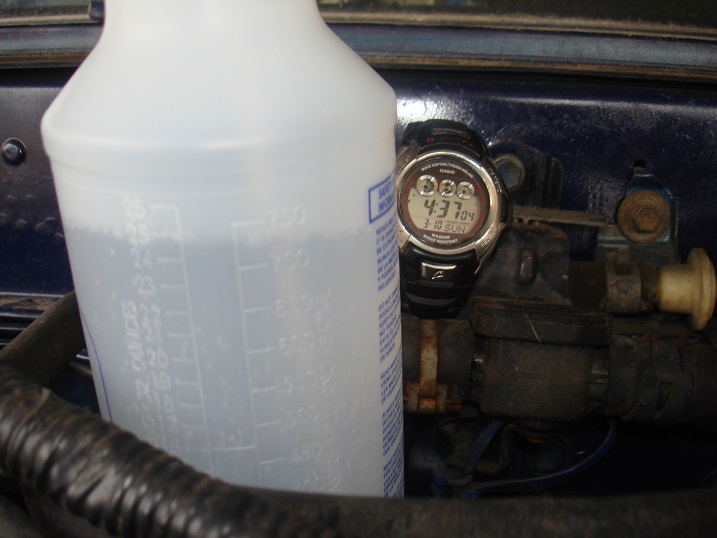
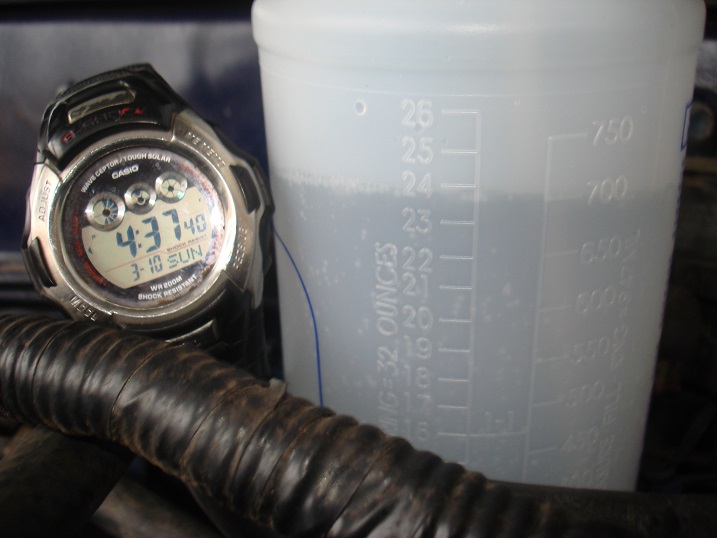
The goal was to run a gallon in an hour, once the vac and water were dialed in it was running about 2ozs per minute as seen here:

The write ups on this service encourage changing the oil when completed which i did. I took the valve cover off after running the cleaning so i could adjust the valves and there was the slightest "milking" of the oil at the front of the valve cover and in the oil cap (that was not there before), so it is a good idea to change the oil.
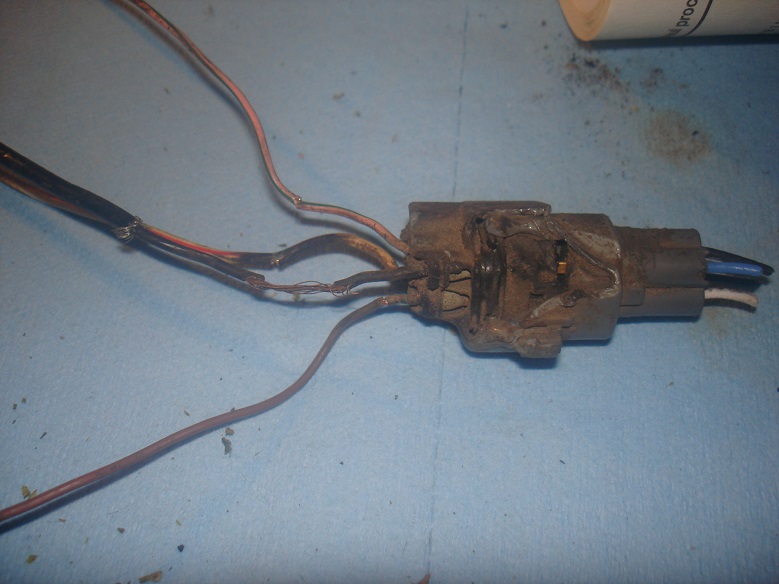
I was waiting to do this cleaning before installing my new o2 sensor and as i was setting up i saw the connector was melted and the wires cracked and corroded. Looks like i will be snipping and soldering the new in without a quick disconnect.
http://www.youtube.com/watch?v=3Ghvq...ature=youtu.be
The goal was to run a gallon in an hour, once the vac and water were dialed in it was running about 2ozs per minute as seen here:
The write ups on this service encourage changing the oil when completed which i did. I took the valve cover off after running the cleaning so i could adjust the valves and there was the slightest "milking" of the oil at the front of the valve cover and in the oil cap (that was not there before), so it is a good idea to change the oil.
I was waiting to do this cleaning before installing my new o2 sensor and as i was setting up i saw the connector was melted and the wires cracked and corroded. Looks like i will be snipping and soldering the new in without a quick disconnect.
Mar 10, 2013 | 08:57 PM
#16
Thread Starter
Registered User
Joined: Aug 2012
Posts: 30
Likes: 0
From: Oklahoma
Valve adjustment and temp sensor
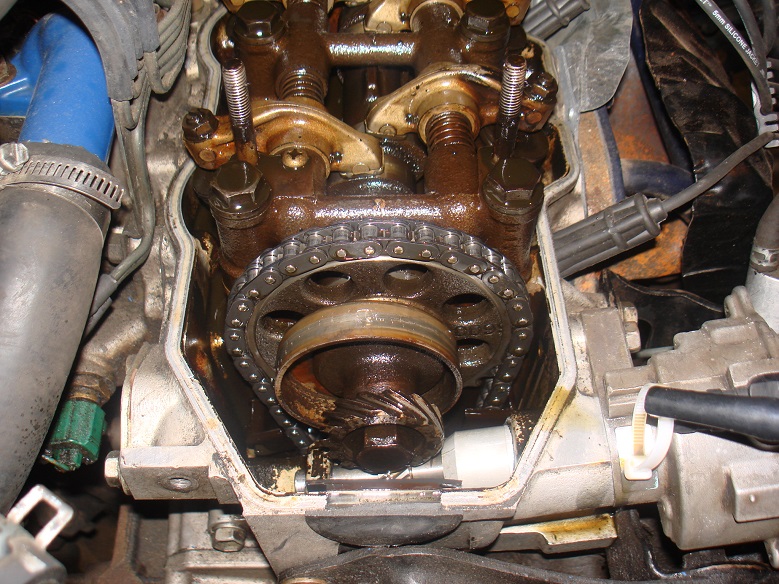
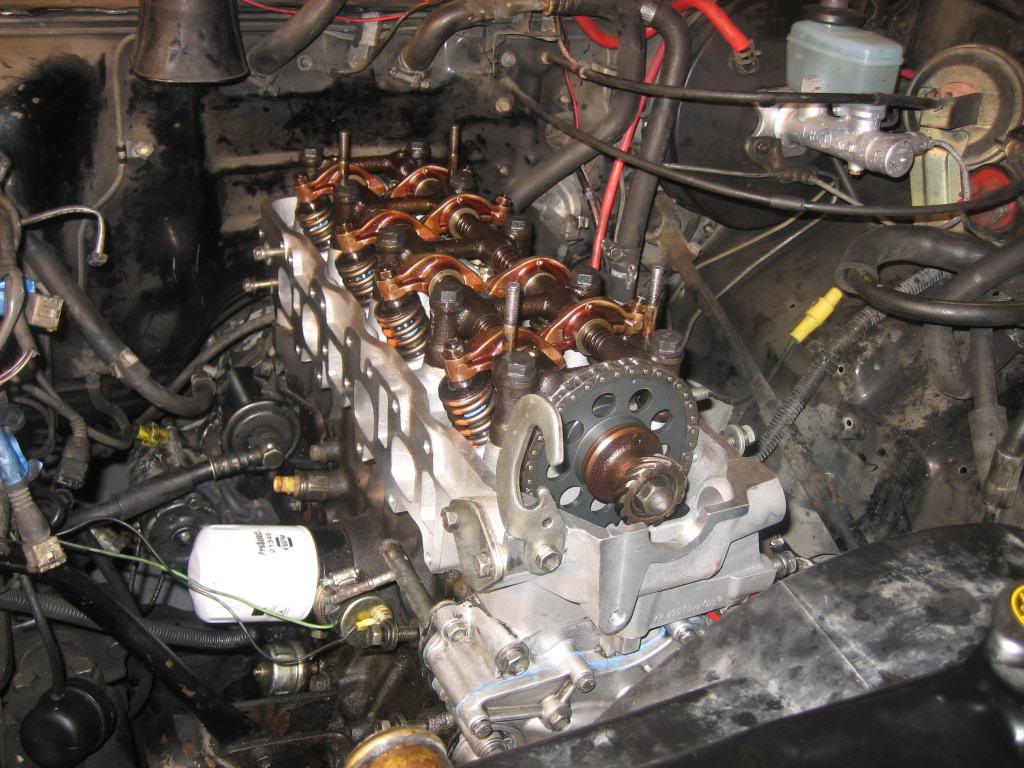
After the cleaning i performed the valve adjustment using the FSM specs. Only the intake on cylinder 1 needed a little tightening. Pic of my timing chain, which was shiney and tight.
After reassembly the clacking noise is almost gone but i really think the valve cover was over-torqued before because the one adjustment was really not that loose...
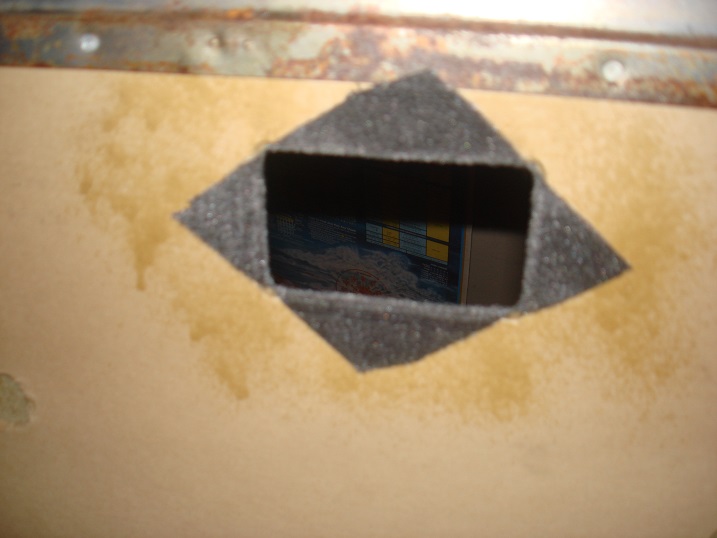
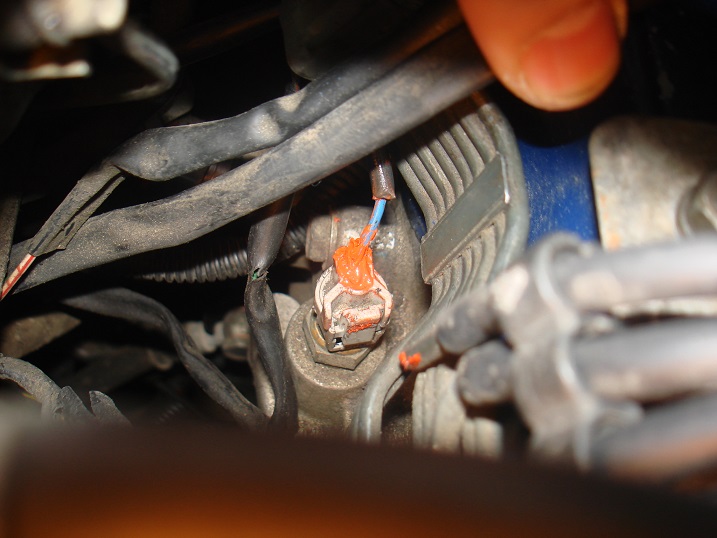
However with the valve cover off i noticed that the temp sensor wire was not how it should be... The wire had broken from the connector at some point and the PO had stripped the end and tried to put the bare wire in the sensor using the connector to hold it in place. Not a terrible idea but the wire was not making any contact and there was a splice about 5 inches up the wire that had been twisted together until it fell totally apart.
It took a while to devise a solution i was happy with and the frustration meant i wasn't taking any pics. What i did was disassemble the connector itself and then used an awl heated on the stove to melt a 18-20 gauge hole right into the slot on top and opposite of the release tab. Then tucked the bare wire into the original metal spade part and pushed the connector onto the sensor until it clicked. Used some high temp/ sensor safe RTV to seal around the wire, the original o-ring seal inside the connector is still working so it should be as weatherproof as ever, and now my temp gauge works! Here it is all buttoned up.
It got too dark and cold to do an "after" vid but i will put one up soon showing the noise difference once the Valve adjustment was completed.
After reassembly the clacking noise is almost gone
but i really think the valve cover was over-torqued before because the one adjustment was really not that loose...However with the valve cover off i noticed that the temp sensor wire was not how it should be... The wire had broken from the connector at some point and the PO had stripped the end and tried to put the bare wire in the sensor using the connector to hold it in place. Not a terrible idea but the wire was not making any contact and there was a splice about 5 inches up the wire that had been twisted together until it fell totally apart.
It took a while to devise a solution i was happy with and the frustration meant i wasn't taking any pics. What i did was disassemble the connector itself and then used an awl heated on the stove to melt a 18-20 gauge hole right into the slot on top and opposite of the release tab. Then tucked the bare wire into the original metal spade part and pushed the connector onto the sensor until it clicked. Used some high temp/ sensor safe RTV to seal around the wire, the original o-ring seal inside the connector is still working so it should be as weatherproof as ever, and now my temp gauge works!
Here it is all buttoned up.It got too dark and cold to do an "after" vid but i will put one up soon showing the noise difference once the Valve adjustment was completed.
Mar 10, 2013 | 10:00 PM
#17
Not to cause any undue alarm but uhm. What the heck is that between the distributor and timing chain cams? And maybe more importantly why and what is it rubbing on?
More PO engineering? Is the distributor drive cam maybe from a double row timing setup and he needed a spacer?
I just don't recall ever see that, in person or in any pictures!
Here is Philberts(since it was easy to pull up)
More PO engineering? Is the distributor drive cam maybe from a double row timing setup and he needed a spacer?
I just don't recall ever see that, in person or in any pictures!
Here is Philberts(since it was easy to pull up)
Mar 10, 2013 | 10:09 PM
#18
Should have searched first but I didn't
On a 22r
http://www.4x4wire.com/toyota/mainte...n/image001.jpg
Top center maybe, but the list says its the oil seal..
http://i.ebayimg.com/00/$(KGrHqUOKiUE33UUzvE0BOE(Jojo3g~~_3.JPG
and the answer is..
13517 CAM, FUEL PUMP DRIVE
PS. that also answers my lingering question of what the block off plate is for
Last edited by Co_94_PU; Mar 10, 2013 at 10:10 PM.
Mar 10, 2013 | 11:05 PM
#19
Thread Starter
Registered User
Joined: Aug 2012
Posts: 30
Likes: 0
From: Oklahoma
Happens to best of us
So im guessing it's ok then, thanks for doing the research! And thanks for looking out, i thought it was interesting but didnt know it was abnormal... It wasn't even close to contacting anything when i rotated crank so i figured the rubbing marks came from the installation. There are gouges in the head where the cover mates up also, like he used a screw driver as a gasket scraper or something so i figured par for the course. at least its not leaking.
I talked to the PO several times on the phone before and after purchase and he talked a good game, said all the right things but i suppose quality workmanship (and integrity) is in the eye of the beholder.
I was curious about the block off plate too, and again thanks for your time and input.
So im guessing it's ok then, thanks for doing the research!
And thanks for looking out, i thought it was interesting but didnt know it was abnormal... It wasn't even close to contacting anything when i rotated crank so i figured the rubbing marks came from the installation. There are gouges in the head where the cover mates up also, like he used a screw driver as a gasket scraper or something so i figured par for the course. at least its not leaking.I talked to the PO several times on the phone before and after purchase and he talked a good game, said all the right things but i suppose quality workmanship (and integrity) is in the eye of the beholder.
I was curious about the block off plate too, and again thanks for your time and input.

Thread
Thread Starter
Forum
Replies
Last Post
RedRunner_87
95.5-2004 Tacomas & 96-2002 4Runners (Build-Up Section)
84
Jun 1, 2021 01:51 PM


