When you click on links to various merchants on this site and make a purchase, this can result in this site earning a commission. Affiliate programs and affiliations include, but are not limited to, the eBay Partner Network.
Bought this truck when I was in the military back in 2002 out in CO for $4800 and can't let it go. Thing is too much fun taking it out in the woods deer/duck hunting and bumming around. Apparently the 3vze is a frowned upon motor, didn't know this until I came across this site, but I have had no problems with mine at least that I know of until recently. Pretty dogged out and pulling anything up a slight grade drags me down to a max of 50mph... See some oil leaking from rear of motor but couldn't tell exactly where. Rarely need to add any though... 171k miles.... Besides the Wisconsin salt slowly chewing up the frame, the engine is the other reason I'm doing this.
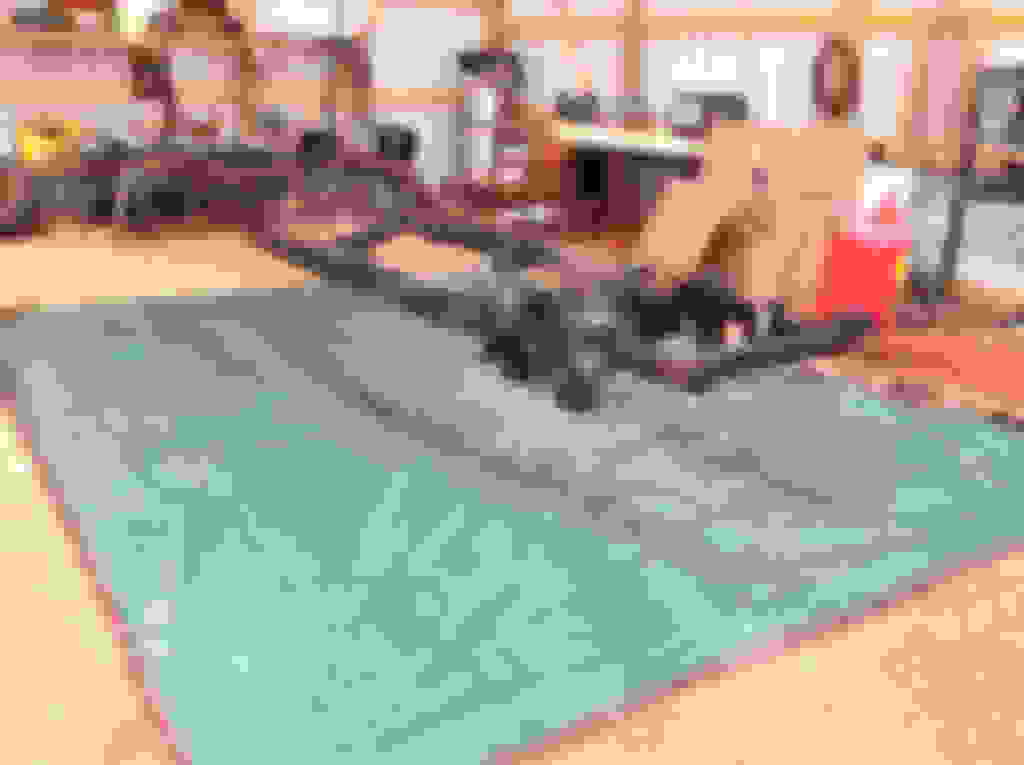
The truck... (Drop in bedliner tore up the rails pretty good... Only real body rust it has. When I'm done this will be the first time repainting. Not bad for being in WI 9 years!!!)
Plan on buying a new tailgate... Pretty bad rust here and can't really fix it....
EDIT:
I try to list where I get everything I used in my build at the time of installation (i.e. Rockauto, Marlin Crawler, 4wheelparts, etc). But here's some info for genuine Toyota parts because I typically leave this out.
Boch Toyota South out of MA - http://toyotaparts.bochtoyotasouth.com/
The main place I've bought from. Not very helpful for tracking down the right part #. Do your own due diligence to find the right parts. Of course parts vary but this is typically the cheapest I've found so far
Toyota parts estore out of CA. - http://toyotapartsestore.com
Went through them once and they were pretty helpful. Pretty cheap as well but not always. I'd order again from them
The link below is where I track down my part numbers. I'm sure others exist out there but this is the best IPB I could find on the internet. With this site I never need to ask a parts person any questions... Even for the most obscure parts. Just type in your VIN... http://japan-parts.eu/
Last edited by duckhead; Jul 5, 2017 at 02:43 PM.
Reason: Update broken photobucket links
Wiring clips were the biggest pain for this process... very very easy. Impact screwdriver was a pretty good friend to have during the tailgate removal as well as the fuel neck screws. Angled needlenose and a regular needlenose helped alot for the wiring clips. Lesson learned on the license plate too... I used regular steel and it was locked solid. I had to grind them off. I'll be using stainless steel hardware in the future for those
Some pics... I've read on here ppl hate the spare tire carrier because it rusts everything. WOW That's not a lie... It's gotten bad since last time I've had to drop that spare down;
Snapped this dang part off for the mud flaps. Will need to try to find another....
The bed mounts (8 17mm bolts) were pretty self explanatory and all came out nice and easy peasy with my relgious use of PB blaster. I did have problem with the passenger side one where it kept spinning. I grabbed a vise grips and pinched it down and let the impact do it's work. Lifted each corner myself to break it loose from the frame.
Crossed straps and getting ready to pull. As you can see I removed the tailgate due to the recommendation of others to take some weight off the back... Nice to have a tractor Turns alot of this project into a 1 man show!!!
To prevent the bed from hitting the cab I dropped some 2x4's inbetween to prevent any paint issues. The front end of the bed was still heavy so I had a chunk of 4x6 laying and this balanced it out pretty well.
And there she is!!!
Looks like they put this rubber material or whatever it is between the bed and frame. Is this normal? Are there no bushings?
Some of the worst rust was around that tube where that rubber plug is at Anyone take those out? Is it better to leave in? (Think I need a new muffler?)
Sprayed some PB blaster all over my sending units but I'm thinking new ones are in order... They're in pretty rough shape. Gas tank over all doesn't seem too bad.
Doors, hood, and seat were all really easy to get off... Seats were 14mm. Can't remember the doors and hood.
Last edited by duckhead; Jul 5, 2017 at 02:53 PM.
Reason: Added a few more details
Nice Yota you have there. I have a 1990 4runner with a 3vz as well. Dont let the engine discourage you because its a 3vz. Its not a horrible engine and it does lag going up a slanted road or rap as mine does the same. But, the one thing I wish Toyota got their crap together on, was to correct the head gasket issues when they manufactured the engines. As to a lot of long term owners its a pain.
Last edited by Terrys87; Jun 21, 2015 at 06:16 AM.
I just bought a 1990 with 29000 original miles on it for $750 from my neighbor. He had it sitting in his garage for 20 years so now I get to have fun with it. By the way I'm from Wisco also. Just wondering where's the best place to buy parts for these older yotas?
I just bought a 1990 with 29000 original miles on it for $750 from my neighbor. He had it sitting in his garage for 20 years so now I get to have fun with it. By the way I'm from Wisco also. Just wondering where's the best place to buy parts for these older yotas?
Rock auto.com or O'Reilly's auto parts are very Toyota friendly for whatever you need.
Rock auto.com or O'Reilly's auto parts are very Toyota friendly for whatever you need.
I agree... I honestly have neglected my truck quite a bit. It's needed a new muffler for a few years and other incidentals but nothing that's been very serious. rockauto.com would have been my recommendation as well... This will be where I order alot of my parts during my rebuild.
I just bought a 1990 with 29000 original miles on it for $750 from my neighbor. He had it sitting in his garage for 20 years so now I get to have fun with it. By the way I'm from Wisco also. Just wondering where's the best place to buy parts for these older yotas?
Very awesome... If I would have found a deal like this I probably wouldn't have to do what I'm doing!!! Insane deal/find
Nice Yota you have there. I have a 1990 4runner with a 3vz as well. Dont let the engine discourage you because its a 3vz. Its not a horrible engine and it does lag going up a slanted road or rap as mine does the same. But, the one thing I wish Toyota got their S*** together on, was to correct the head gasket issues when they manufactured the engines. As to a lot of long term owners its a pain.
Thanks Janos! I've honestly never had a headgasket problem... Even to this day it's not a head gasket problem. This is why I was so surprised when I found out there was an issue with head gaskets in this engine.
I agree... I honestly have neglected my truck quite a bit. It's needed a new muffler for a few years and other incidentals but nothing that's been very serious. rockauto.com would have been my recommendation as well... This will be where I order alot of my parts during my rebuild.
Thank you everybody for your input. Rock auto will be my go to from now on.
Next was the cab removal... I didn't find a relatively detailed how to on the cab when I was surfing the web prior to the project but this is how I did mine. It was pretty basic as far as disconnect the wires and the cab bolts then go to town. I'm sure I won't be able remember to document every detail but I'll do my best.
I took the fenders off due to the recommendation of others throughout this process. 9 bolts holding them on and two of them behind the bumper if I remember correctly. I'm pretty sure they were 10mm. They may be able to be removed with the bumper on but taking it off really helped me. Not to mention I needed it off anyway... I also took off the silver trim along the wheel well but you could probably get away with taking out the bolts on the inner portion of the splash well guard.
These 4 12mm bolts need to be taken off
I snapped off both end bumper bolts when trying to gain access to the other 2 fender bolts. You can see the snapped bolt towards bottom. Four 14mm bolts towards center of bumper as well.
Grill was just push tabs with screw driver... Push down and pull out.
There's also 2 12mm bolts under the door area for the fender. I also snapped a bolt off there.... Gonna have to drill that one out.
When bolts are all out my fender was glued on the top near the cowl panel. I simply pried it up with a flathead and it popped right off.
Fenders off... I couldn't get my antenna off so I cut the cable. It needed a new one... It's very loose and I couldn't tighten/loosen it.
Removed window washer tank. took line from hood off of side. 1 10mm bolt on front. Disconnect pump plug. I think my pump has seen better days...
Drained and then took out radiator and overflow tank.
I disconnected the brake line from the passenger wheel well
Also don't forget the the front drivers side line. Removed clutch from up on top by the firewall. Look towards center of picture. I also removed the vac lines off the intake which can be seen here.
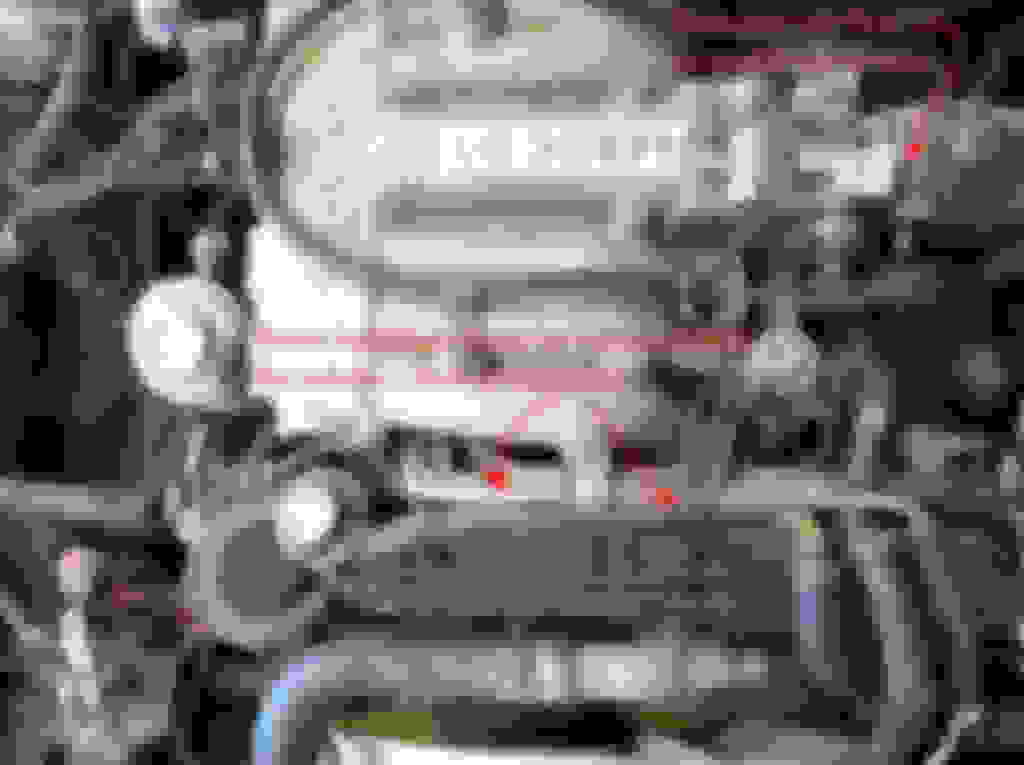
Removed complete air filter assembly and the alternator. There was a plug for 4wd that's coupled with what I think is the oil pressure. Those two then link up to the main engine wire harness.
I tried for a while to take this off with the intake on. I just couldn't do it... I ended up taking the intake out in order to get the bundle out. There's a wire for the distributor cap and a ground on the passenger side too.
Underneath there's 3 plugs on the transfer case.
Most of the wire clips under the cab could probably stay on with the way that I disconnected everything but I didn't know this at the time so I ended up removing them all. I think there were around 7 10mm. I disconnected the e-brake from the assembly towards rear of frame. Very easy once I got it broke loose from the rust. Here's a pic (There's a hidden clip on top of cross member. No need to remove just unclip the cable)
Also the gas lines that needed to be pulled out from lines under cab...
2 vac lines on the front end;
Take out the body mount bolts and should be good to go. If spinning gain access by lifting up the carpet and pulling the black plugs on floor pan.
I jacked mine up slowly with a jack on a 5 gallon bucket just to make sure I had everything disconnected.
Then I hooked the strap up but it was pinching pretty good so I was worried it would dent the rim on the outside of the door area. Put a 48" 2x6 there to alleviate the stress.
My old man has a crane for setting trusses so it came in pretty handy. I thought it would have been pretty level but it really wasn't. I put a 500lb strap towards the front to help pick it off a little cleaner over the engine. Wished I would have done this from the start but be careful. It's not the strongest support in the front. Nothing broke but you could see it was stressing that front support.
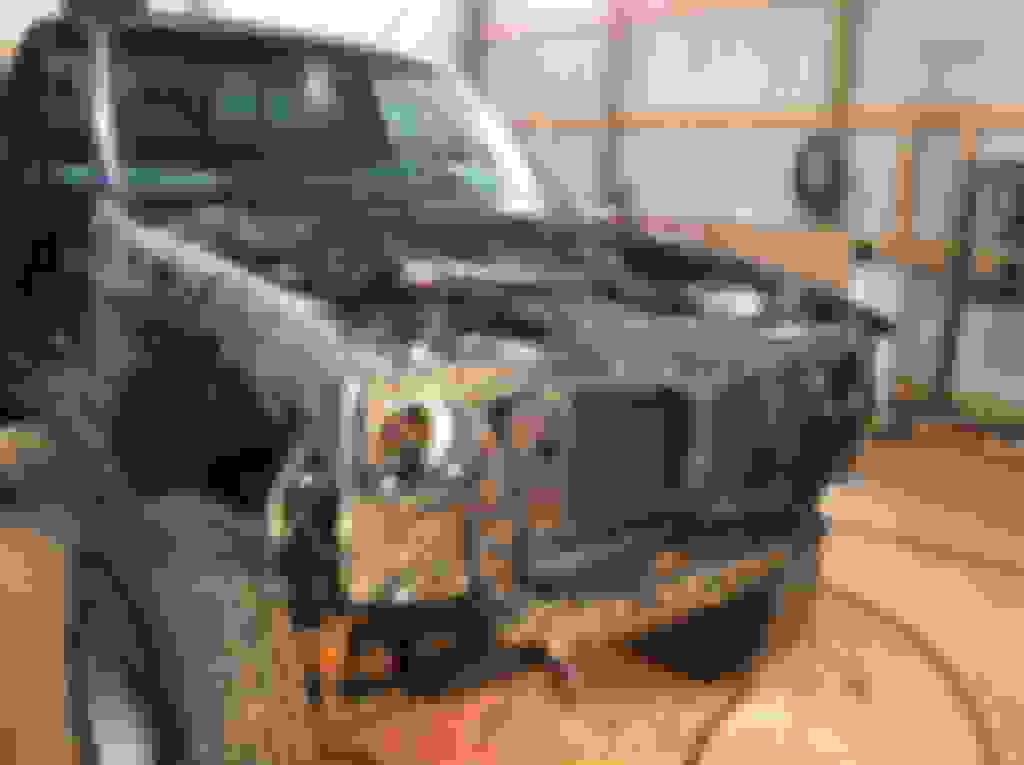
And there she is in pieces...
Last edited by duckhead; Jul 5, 2017 at 03:12 PM.
Reason: Fix photobucket links
Pulled everything else off nearly without a hitch... Torsion bars were a pain... bolt snapped off and sent everything flying. Fortunately no injuries.
I hired a guy to do my rear brakes last year and I'm not sure if they just seized up or if he overtightened everything. Stripped the key lug out trying to break em loose. Luckily this was the last wheel so welding the key on it got things movin.
Front end
Decided to just cut the U-Bolts off. Too much thread to muscle it off. I put em on in 2003 when I first bought the truck. Going to put new ones on...
Bad news on the rear spring removal... Took drivers side off and found a present in the retaining hole. The bolt was snapped off.
My stabilizer bar bushings were pretty well shot. Also i have a bent bracket. I'm not sure if I bought it like this back in 2003 or if that's something I did
There was a big mouse nest in the inner frame channel. They never cease to amaze me. Used one of Slacker's tips on raising the frame to rinse it out. Here's part of their acorn stash.
And this is where I'm currently at. Hanging from the rafters and hopefully blast 'er clean on Monday!
I skipped alot of the engine removal and everything else but if anyone wants any info on what I did lemme know and I'll see what I can dig up. It was pretty straightforward though.
Last edited by duckhead; Jul 5, 2017 at 03:24 PM.
Reason: Fix photobucket pics
I enjoy seeing a complete tear down and build it back up. I have never seen the plugs in the frame that you mentioned earlier. That is one area I always spray when at the carwash. Mice do some wonderful things on these trucks, luckily it doesnt look like he did much damage.
Rockauto is great on prices. Several other sites just as well. Ebay, Amazon and others are out there. I find the factory part number and key it in and find parts that way as well. Parts stores are high compared to what else can be found on the internet. Welcome to Yotatech and looking forward to your build.
Thanks Terry and Janos! Per your request Janos I edited in a few more pics in the above thread. I have a few more but not sure what ppl wanna see.
I was going to drop in a remanned 3vz from Denny's Auto but I decided to take the plunge in 3.4 land.... I kicked it around for a couple weeks but there's no backing out now. I was planning on blasting today but I found this beauty... 99 4runner for $900.
I'm hoping I can make alot of the money back parting this thing out.
Well blasting began and.... what a job. Now I know why they charge so much. Nasty, dirty, and not a fun job. I never got a quote but I've read people say it's a few hundred or so. It took me much longer than I anticipated but it only cost me $30 and my time. I bought this glass bead at Northern Tool for $10. I did the entire frame with 3 bags or 150 pounds. I recycled like crazy.
The start of my crime scene
Some of the rust
Tarps are good!!!! Reclaim those beads!
My rear tube crossmember that holds the muffler and gas tank mount showed what I feared. Rust chewed through that pipe.
Here's some shots of the clogged artery
So I decided if I'm doing this I'm doing it right. Grind out the welds and pull that pipe out for replacement!!!
Used a cutting wheel on the inside and chopped off this side of the bracket
And here it is gone
Problem is... the pipe wasn't coming out. I took a impact socket and tried pounding it out with a hammer. No dice and wasn't moving. Had to improvise and this is what I came up with.
She popped right out. You can also see the heavily pitted part of the frame that is still developing rust after the blast.
To mark the gas tank mount I laid a 2x4 flush with it and marked it on the frame for when I weld it on the new tubing. You can see the lines on the frame in this pic
And just finished up today Was hoping to have it painted by today but looks like it's gonna be longer than I expected...
This is what's left after doing the entire frame with 150lbs of blast media. I recycled alot and it still blasted fine. It was getting real fine and dusty though at the end. You can see the dust building up on my door and parts in the back of the picture. I'm cheap
wow, yours is in much better shape than mine was. great build! wish i had the room to have taken my cab off, but im happy im almost done.
By the way, a good way to save your blasted frame, water resistant, air resistant filler foam.
my frame had a large hole that someone filled with foam, and i expected it to be the worst section, quite the opposite, where i scraped the foam out, the frame still had factory e coating on the inside of the frame where the foam was.
after i patched my frame up, i filled my entire frame from front to back with it to ensure there will be no more internal rust issues. it also helps to keep out dirt, grime, mud, and salt.

 Jun 18, 2015 | 06:04 AM


 That's not a lie... It's gotten bad since last time I've had to drop that spare down;


 Turns alot of this project into a 1 man show!!!


 Anyone take those out? Is it better to leave in? (Think I need a new muffler?)


 crap together on, was to correct the head gasket issues when they manufactured the engines. As to a lot of long term owners its a pain.


 what a job. Now I know why they charge so much. Nasty, dirty, and not a fun job. I never got a quote but I've read people say it's a few hundred or so. It took me much longer than I anticipated but it only cost me $30 and my time. I bought this glass bead at Northern Tool for $10. I did the entire frame with 3 bags or 150 pounds. I recycled like crazy.