Alan's Classic' 1986 4Runner Build-Up Thread - Project "No Name"
 06-02-2010, 08:06 PM
#1
Registered User
Thread Starter
Join Date: Jun 2010
Location: North Georgia
Posts: 115
Likes: 0
Received 0 Likes
on
0 Posts
Alan's Classic' 1986 4Runner Build-Up Thread - Project "No Name"
I've had this truck for about 3 weeks now and drove it for about a week. I've been trying to get it to run right for the past 2 weeks. The only plan I have for it now is to repair what is broken and make it DD. It needs a lot of work. The body has 367K and the engine is not original.
Discussion about the issues I'm having with it.
https://www.yotatech.com/forums/f116...-power-213202/


I also picked this one up for parts. It's a 89 22RE 179K

Discussion about the issues I'm having with it.
https://www.yotatech.com/forums/f116...-power-213202/
I also picked this one up for parts. It's a 89 22RE 179K
 06-03-2010, 08:10 AM
#5
Registered User
Thread Starter
Join Date: Jun 2010
Location: North Georgia
Posts: 115
Likes: 0
Received 0 Likes
on
0 Posts
 It will have to share time with my 1965 C-10 I'm restoring.
I put a 59 Impala Dash in it along with a few other mods.


I'm in Ball Ground about 15 miles north of Canton on I-575. Your too kind, it's a rag muffin right now LOL. Maybe some day it can be as nice as this 96 Tacoma I changed the color from white to hugger orange.

Last edited by Alan's Classic; 06-03-2010 at 08:17 AM.
06-13-2010, 11:38 AM
#7
Registered User
Thread Starter
Join Date: Jun 2010
Location: North Georgia
Posts: 115
Likes: 0
Received 0 Likes
on
0 Posts
Still trouble shooting the 86 some, but drug the 89 in to see if I can get it on the road faster. Found this under the truck. It was a 5-6' stick wedged in pretty tight. Got it cut out.

The rear brakes were hanging up and the ebrake handle didn't have any tension on it so I thought the rear brakes had some issues. The left rear drum was very tight. I got it off and had the drums turned and replaced the shoes on both rears. In the process the left rear cylinder started leaking. I was going to replace both of them at the same time. Come to find out there are 2 different ones. 15/16" ($19) and 7/8" ($55) are offered from Advance Auto of coarse mine has the 7/8". Here is the discussion LINKY about size difference. I had the 15/16 on hand, but returned it thinking I couldn't use it. I honed it it clean the crud out. (no rebuild kit available thru Advance Auto for the 7/8") It held over night until I pressurized it when I bled the brakes the next day. It started pouring out under pressure. Just my luck. LOL I called the store I returned it too and they have already returned it since it was not a stocked item. The next closest store that has one is 40 miles away. I'm a cheap b*stard I don't want to spend $12 in fuel to go get it. LOL I'll just wait til tomorrow when I can order another closer to my work.


Also sealed up the water pump so I can run it thru a heat cycle to see what else it wrong.

I didn't take any pics, but I pumped out the old gas and put some fresh gas in, installed a new fuel cap (was missing) and changed the fuel filter. The 89 had been sitting in the woods for over a year with no fuel cap. I have not run it thru a heat cycle yet, but did start it. It starts, but stumbles off idle. I checked the values of the TPS and appear to be good. I need to set the timing since I swapped the dizzys out with the 86. I actually need to swap them back because swapping 86 to 89 components is not a good idea per sb5walker.
You'll also get nothing worthwhile in terms of troubleshooting data. Swapping components is a good idea, but you have to use 88 or older components.
Oh yeah the ebrake handle issue was a bent bracket where the front ebrake cable attaches to the frame under the passenger seat. Got it straightened out and working better.
Trending Topics
06-26-2010, 07:21 PM
#8
Registered User
Thread Starter
Join Date: Jun 2010
Location: North Georgia
Posts: 115
Likes: 0
Received 0 Likes
on
0 Posts
Things have gotten busy around here. I picked up another 4runner. It's a 95 SR5 4X4 V6 5spd with 133K. It had these wheels that I didn't like and the tires were square. LOL


I tried some late model 4Runner wheels for the heck of it. I couldn't keep them they weren't mine.

I ended up putting the 6 spoke wheels off of the 89. I hope to find a better set in time. I need the correct lug nuts for the wheels I have on it now. The ones on it now are the tapered lugnuts.

So far I replaced the idler arm and the lt rear axle seal was leaking. Yes I did replace the brake shoes and turned the drums.

I swapped the tops for the 89 to the 86 due to window frame rot. So now the red 86 now has a black top. No pics yet.............I forgot. Still messing with the running issues on the 86. It's getting better after replacing the ECU. Suspect the IACV is toast. I found the FPR VSV wasn't even hooked up the FPR was ran right off the plenum.
More to come.
I tried some late model 4Runner wheels for the heck of it. I couldn't keep them they weren't mine.
I ended up putting the 6 spoke wheels off of the 89. I hope to find a better set in time. I need the correct lug nuts for the wheels I have on it now. The ones on it now are the tapered lugnuts.
So far I replaced the idler arm and the lt rear axle seal was leaking. Yes I did replace the brake shoes and turned the drums.
I swapped the tops for the 89 to the 86 due to window frame rot. So now the red 86 now has a black top. No pics yet.............I forgot. Still messing with the running issues on the 86. It's getting better after replacing the ECU. Suspect the IACV is toast. I found the FPR VSV wasn't even hooked up the FPR was ran right off the plenum.
More to come.
07-11-2010, 04:55 PM
#9
Registered User
Thread Starter
Join Date: Jun 2010
Location: North Georgia
Posts: 115
Likes: 0
Received 0 Likes
on
0 Posts
Just finished up the front rotors (new) and new pads on the 95. I had a terrible vibration while braking. I found out the allowable runout on the rotors was only .0035". That's not much.

While I had it up in the air I discovered the both inner CV boots are torn.

Since it didn't have a free wheeling hub I decided to take the locking hubs off of the 89. That way in will keep the front axles from spinning going down the road. Helping with mileage and will remove the wear and tear on the axles. I prefer locking hubs anyway.


I also replaced the P/S pump and degreased the mess it made on the frame. No pics, I forgot.
I also installed the AAV on the 86 which helped with the cold idle. Still have to check the CSI.

I also replaced the vac rail on the 86 with a later model with more ports so I could clean up the vac lines by plumbing the FPR VSV and the evap can in the rail.

BEFORE

After

While I had it up in the air I discovered the both inner CV boots are torn.
Since it didn't have a free wheeling hub I decided to take the locking hubs off of the 89. That way in will keep the front axles from spinning going down the road. Helping with mileage and will remove the wear and tear on the axles. I prefer locking hubs anyway.
I also replaced the P/S pump and degreased the mess it made on the frame. No pics, I forgot.
I also installed the AAV on the 86 which helped with the cold idle. Still have to check the CSI.
I also replaced the vac rail on the 86 with a later model with more ports so I could clean up the vac lines by plumbing the FPR VSV and the evap can in the rail.
BEFORE
After
07-11-2010, 05:10 PM
#10
Contributing Member
Join Date: Nov 2006
Location: Colorado
Posts: 280
Likes: 0
Received 0 Likes
on
0 Posts
I need to show my wife this thread so she believes me when I tell her I'm not the only one who "collects" 4Runner's.
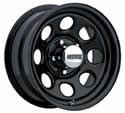
Nice work though! I had those same Mag wheels on my '87 that you have on your '86 when I bought it, finally updated to some soft 8's last week.
Nice work though! I had those same Mag wheels on my '87 that you have on your '86 when I bought it, finally updated to some soft 8's last week.
07-11-2010, 06:14 PM
#11
Registered User
Thread Starter
Join Date: Jun 2010
Location: North Georgia
Posts: 115
Likes: 0
Received 0 Likes
on
0 Posts
What are soft 8's? I never heard of them.
 07-11-2010, 06:28 PM
#13
Contributing Member
Join Date: Nov 2006
Location: Colorado
Posts: 280
Likes: 0
Received 0 Likes
on
0 Posts
You got it, that's the ones. Myself and 25,000 of my closest friends probably have the same wheels but they are cheap and I really like the looks of them.
What shape is the '87 in? Got any pics? I want to live vicariously through you because I'm pretty sure I'm at my limit before the wife loses her good nature when it comes to my hobbies.
What shape is the '87 in? Got any pics? I want to live vicariously through you because I'm pretty sure I'm at my limit before the wife loses her good nature when it comes to my hobbies.
07-11-2010, 06:39 PM
#14
Registered User
Thread Starter
Join Date: Jun 2010
Location: North Georgia
Posts: 115
Likes: 0
Received 0 Likes
on
0 Posts
I've seen those before didn't know what they are called. As a matter of fact I think the 87 I'm looking at has them with a new set of maxxis 31x10.5 mudders. It lost comp on #2 cyl and he found a cracked ring. I'll have to upload pics laterof the 87. We are still working out the details. He is 100 miles away.


 07-13-2010, 03:29 PM
#17
Registered User
Thread Starter
Join Date: Jun 2010
Location: North Georgia
Posts: 115
Likes: 0
Received 0 Likes
on
0 Posts
I can't offer much in trouble shooting engines or electrical issues, but I can offer help in body work. I did this write up for the heck of it.
I got bored at work and the only thing I had there to work on in my spare time was the 4Runner. I decided to do a step by step on how to make a patch panel with only a few hand tools and a welder. It might help someone out.
First step find what you want to cut out.

And mark what you want to cut out.


I used an old tailgate for some scrap metal and laid it out. I over sized the pattern for trimming.

First set of bends was made with a vise and body hammer as well as the rest of the bends.

I made some relief cuts to make the compound curve. The original piece is behind it. I clamped it in place a little at a time to form the curves. Don't distort the original panel. You will end up with a bad patch.

I tacked the cuts to hold it's shape then removed the rusty piece and finished welding.

Ground the welds down and here is the patch.

Trimmed to fit and tacked in place. I did clean up the inner structure on the truck prior to install


2 more pics coming..........
07-13-2010, 03:31 PM
#18
Registered User
Thread Starter
Join Date: Jun 2010
Location: North Georgia
Posts: 115
Likes: 0
Received 0 Likes
on
0 Posts
Ground the welds

Wiped with filler

The inside of the 1/4 was cleaned, seam sealed and undercoated.

Primed

It took me about 5.5 hours to do all of this. I rushed it just to see how fast I could do it. I got lucky a couple times, but it turned out pretty good for a rush.
Wiped with filler
The inside of the 1/4 was cleaned, seam sealed and undercoated.
Primed
It took me about 5.5 hours to do all of this. I rushed it just to see how fast I could do it. I got lucky a couple times, but it turned out pretty good for a rush.

 wounderful job. looks great!


