92 4Runner build up and rookie restore.
 04-12-2012, 11:14 PM
#1
Registered User
Thread Starter
Please help me build an expedition 3.0 4Runner. Lot's of photos.
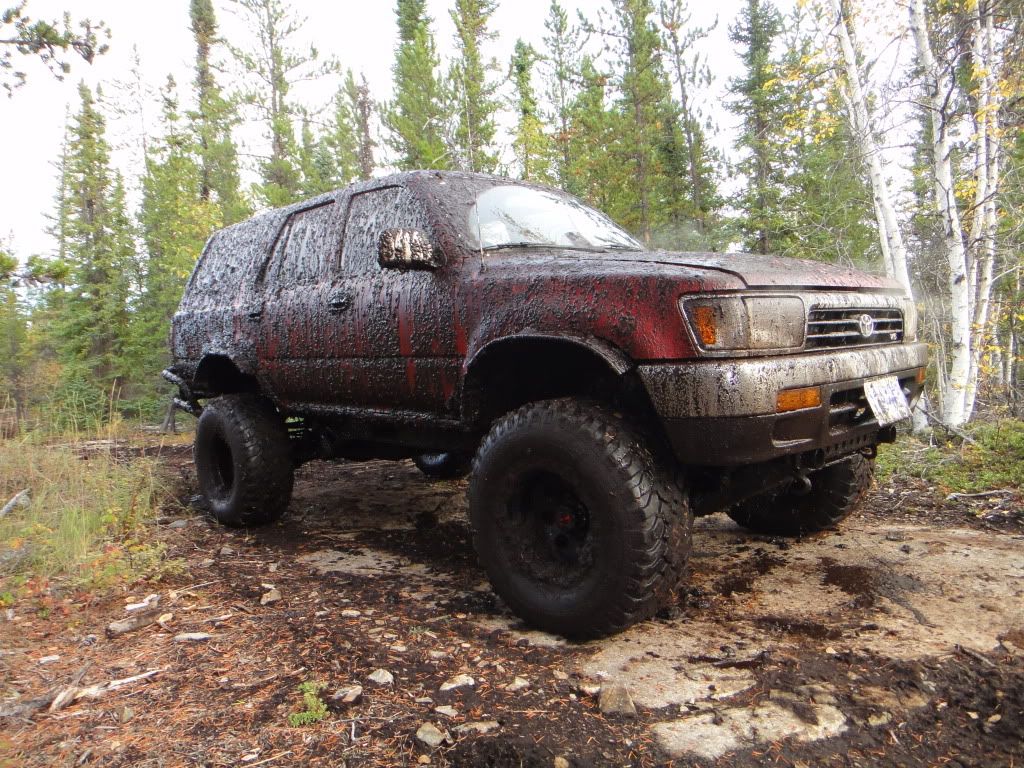
Over the past few months I've been in here posting questions and reading information on making my 4Runner better. My front ring and pinion needed replacing as bits of tooth fell out of the drain plug. They where stock and I bought the truck with a 3" body lift, 33"s and rust.
I had work done right away to fix the engine and had the suspension redone. I had added 1.5" ball joint spacers (I think) and new coils, shocks etc. I think the rear must be higher than stock by at least 4 or 5 inches judging by the angle of the panhard bar after learning about it from this forum. I've also picked up a stock skid plate from the wrecker and found a new rear window regulator so I can actually get my window up. This lead to that same rear window exploding at -40C temps from overpressure when I jumped in. Off to the wrecker again where the window still was when I grabbed the regulator. I nearly broke it but my buddy stopped me and said something about karma. He was right and I got it for $40 instead of $1500 some place wanted in Edmonton. The window even had the same tint!!! I'll be going back to get there this summer to get the two side rear windows. I can see them getting smashed out for some reason. I also seem to be losing brake fluid and hope to see where I might be having issues when I'm under there tomorrow.
Anyway, what's broken might as well be upgraded and as my tyres are getting a bit bald might as well get 35"s too! I quoted safety concerns to the missus and she kindly allowed this.
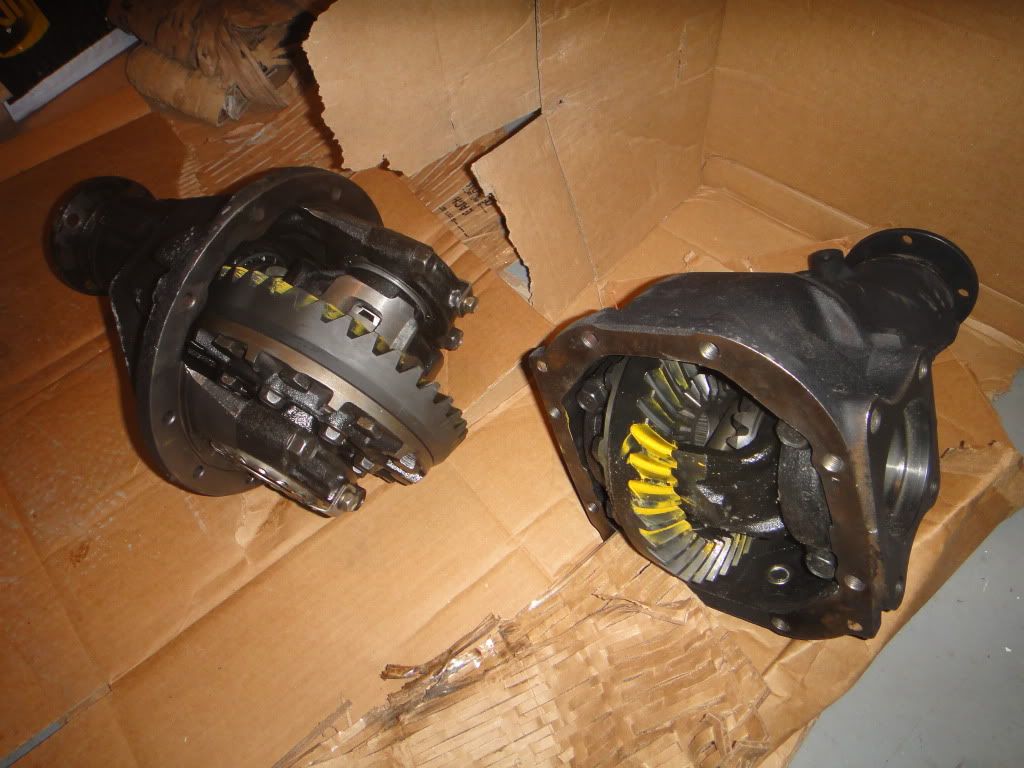
I chose Nitro Gears from East Coast Gear Supply who where great to me and answered all my questions and dealt with the hassle of sending to Canada. I picked 5.29 gears to match the Goodyear MTR Kevlars and the Spartan Locker for the rear.
Here is the truck from last summer before I learnt what changes are needed.
I really like the exploring aspect of wheeling and want to build something very capable for that. After this project I'll tear down a 1st Gen with a 3.0 so I can get a transfer case, transmission and an engine to play with. The front fenders where not rotted out and my buddy with a 1st Gen is taking all the glass and the fenders. $75 bucks each and it was a steal.

My friend has the technical skill and access to tools and shipping and I have the garage space. Nice deal for us both.
Here are my parts and the truck waiting for the instal.
This is my first truck and I've pretty much no idea what I am getting into but I'm going to jump right in.
Any tips, advice or anything to add will be very much appreciated.
One stupid thing I already have done is get a diff with no ABS sensor hole....... Now after I break in my gears I'll have to switch them to my current carrier or eliminate my ABS. Not sure what to do there quite yet.
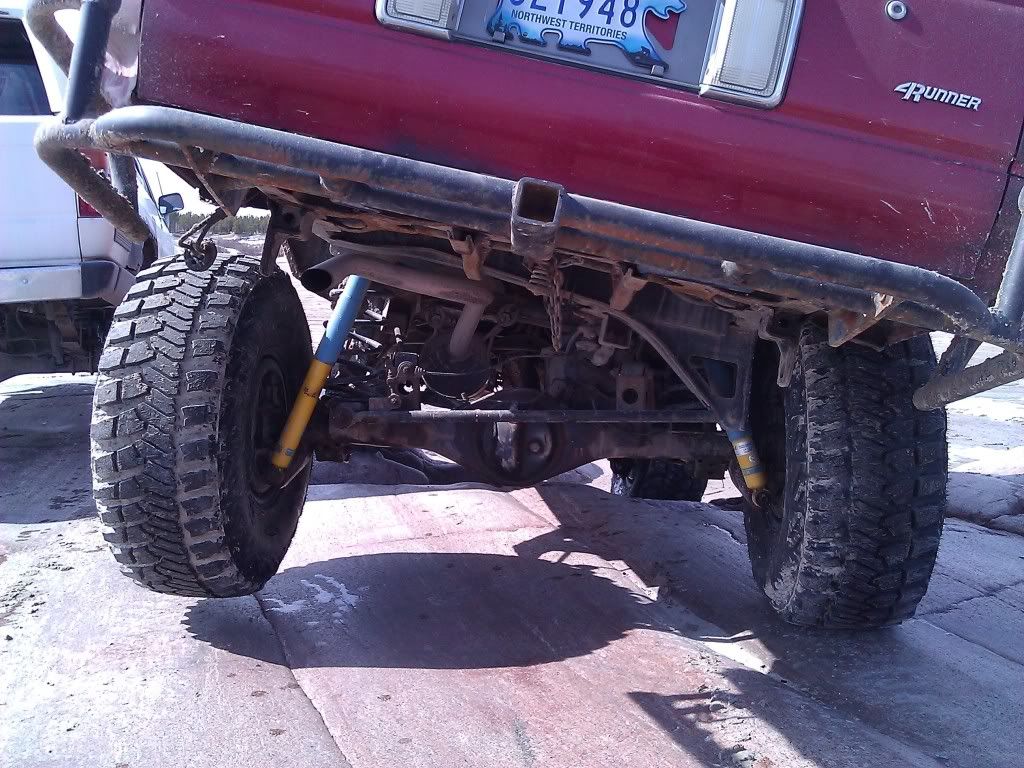
Next mod will be to drop my 3" BL down to a 1" and do something about that panhard bar. I lean to the driver side and I now notice how close the drive shaft is to my gas tank. Along with the passenger tyre being pushed out. Now that I can see it I can't unsee it and want it fixed. Good thing those drop brackets are cheap. Is there a better option to a drop bracket? What are good 1" BL kits?
After that work is done I'd like to start getting the rust off the frame and body. Basically a full rebuild and restore if I can pull it off.
I'll post more tomorrow after we get progress made. I'll check my thread fist before I get onto it.
This is from my road trip moving to Yellowknife.
Thanks!
I had work done right away to fix the engine and had the suspension redone. I had added 1.5" ball joint spacers (I think) and new coils, shocks etc. I think the rear must be higher than stock by at least 4 or 5 inches judging by the angle of the panhard bar after learning about it from this forum. I've also picked up a stock skid plate from the wrecker and found a new rear window regulator so I can actually get my window up. This lead to that same rear window exploding at -40C temps from overpressure when I jumped in. Off to the wrecker again where the window still was when I grabbed the regulator. I nearly broke it but my buddy stopped me and said something about karma. He was right and I got it for $40 instead of $1500 some place wanted in Edmonton. The window even had the same tint!!! I'll be going back to get there this summer to get the two side rear windows. I can see them getting smashed out for some reason. I also seem to be losing brake fluid and hope to see where I might be having issues when I'm under there tomorrow.
Anyway, what's broken might as well be upgraded and as my tyres are getting a bit bald might as well get 35"s too! I quoted safety concerns to the missus and she kindly allowed this.
I chose Nitro Gears from East Coast Gear Supply who where great to me and answered all my questions and dealt with the hassle of sending to Canada. I picked 5.29 gears to match the Goodyear MTR Kevlars and the Spartan Locker for the rear.
Here is the truck from last summer before I learnt what changes are needed.
I really like the exploring aspect of wheeling and want to build something very capable for that. After this project I'll tear down a 1st Gen with a 3.0 so I can get a transfer case, transmission and an engine to play with. The front fenders where not rotted out and my buddy with a 1st Gen is taking all the glass and the fenders. $75 bucks each and it was a steal.
My friend has the technical skill and access to tools and shipping and I have the garage space. Nice deal for us both.
Here are my parts and the truck waiting for the instal.
This is my first truck and I've pretty much no idea what I am getting into but I'm going to jump right in.
Any tips, advice or anything to add will be very much appreciated.
One stupid thing I already have done is get a diff with no ABS sensor hole....... Now after I break in my gears I'll have to switch them to my current carrier or eliminate my ABS. Not sure what to do there quite yet.
Next mod will be to drop my 3" BL down to a 1" and do something about that panhard bar. I lean to the driver side and I now notice how close the drive shaft is to my gas tank. Along with the passenger tyre being pushed out. Now that I can see it I can't unsee it and want it fixed. Good thing those drop brackets are cheap. Is there a better option to a drop bracket? What are good 1" BL kits?
After that work is done I'd like to start getting the rust off the frame and body. Basically a full rebuild and restore if I can pull it off.
I'll post more tomorrow after we get progress made. I'll check my thread fist before I get onto it.
This is from my road trip moving to Yellowknife.
Thanks!
Last edited by Red Wagon; 01-01-2014 at 11:42 PM.
 04-12-2012, 11:52 PM
#2
Registered User

I can help with the ABS issue(maybe). When I retrofitted an Elocker to my rear housing, it no longer had the hole for the sensor, so I simply zip tied it up out of the way. The light doesn't stay on in the dash or anything, and the worst effect that I'm aware of it having is that it no longer has ABS. I don't personally find this to be a problem, this is the only vehicle I've ever owned with it, and I haven't killed myself or anyone else, yet.
If you are bothered by stuff hanging around the rig uselessly, it will require new power steering hoses and I think some different hard lines to eliminate the ABS actuator(inline between the PS pump and the gearbox, mounted on the passenger side frame rail right up by the radiator). I'm usually bothered by useless crap hanging on my rig, but this time it didn't seem worth the trouble and expense to remove it.
Hope that helps you out, only other thing I can add is you better have your sway bars on unless you don't mind some major lean in corners from that rear locker. When my Elocker was stuck in the locked position and the rear sway bar doesn't fit anymore due to the locker motor, the inside would raise up quite alot when I would make a 90* turn. My '83 with a welded rear and no sway bars doesn't do this, though, so I'm pretty sure it's the rear suspension design.
Have a great day, wrench away!
04-13-2012, 07:52 AM
#3
Registered User
Thread Starter
Good advice buddy. I can swap gears to my old carrier if I need to. I'll decide after my gear break in period. I think it's 500 miles of driving like an old lady? Then change the oil to a better quality stuff.
I don't plan on removing my sway bars. I've seen a few threads in here about a home job sway bar quick disconnect. Looks like a nice cheap mod at a later date.
I want to make this as off road capable as I can while retaining a nice ride for road trips between wheeling spots.
I'm pretty excited. I can't wait to get at all the rust and make her look pretty too. I'm thinking orange paint.
Can a mod move this to the build up section? I think I put it in the wrong spot.
Last edited by Red Wagon; 04-13-2012 at 07:56 AM.
04-13-2012, 08:15 AM
#4
Registered User
I figured it's like breaking in an engine, 500 miles of driving it how it's going to be used. Unless that means 3,000 rpm clutch drops and power braking, of course. As for the locker, just cruising around or highway driving wasn't really any different, just around town. Once you see what it can do for you off road, I'm sure you won't want to get rid of it!
04-14-2012, 12:21 PM
#5
Registered User
Thread Starter
Progress was made yesterday. I'll get the axles back in today and I happily found where I was losing brake fluid. One of my rear brake cylinders is leaking and there where fibres glued to everything on the backing plate.
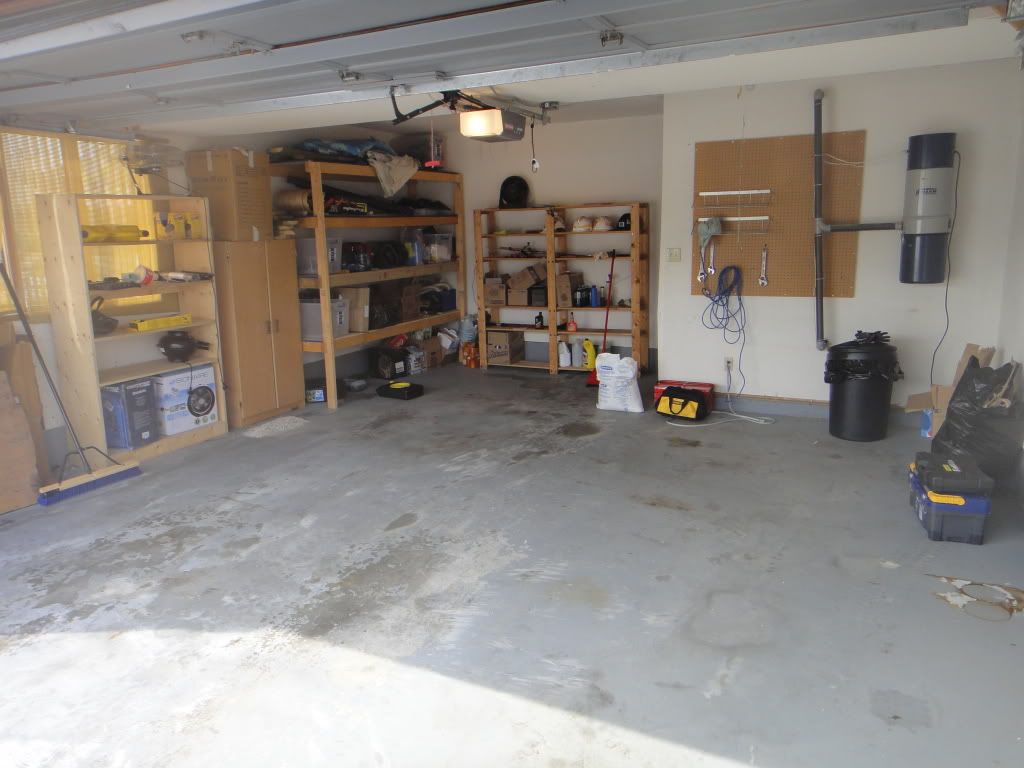
Started with a clean garage.
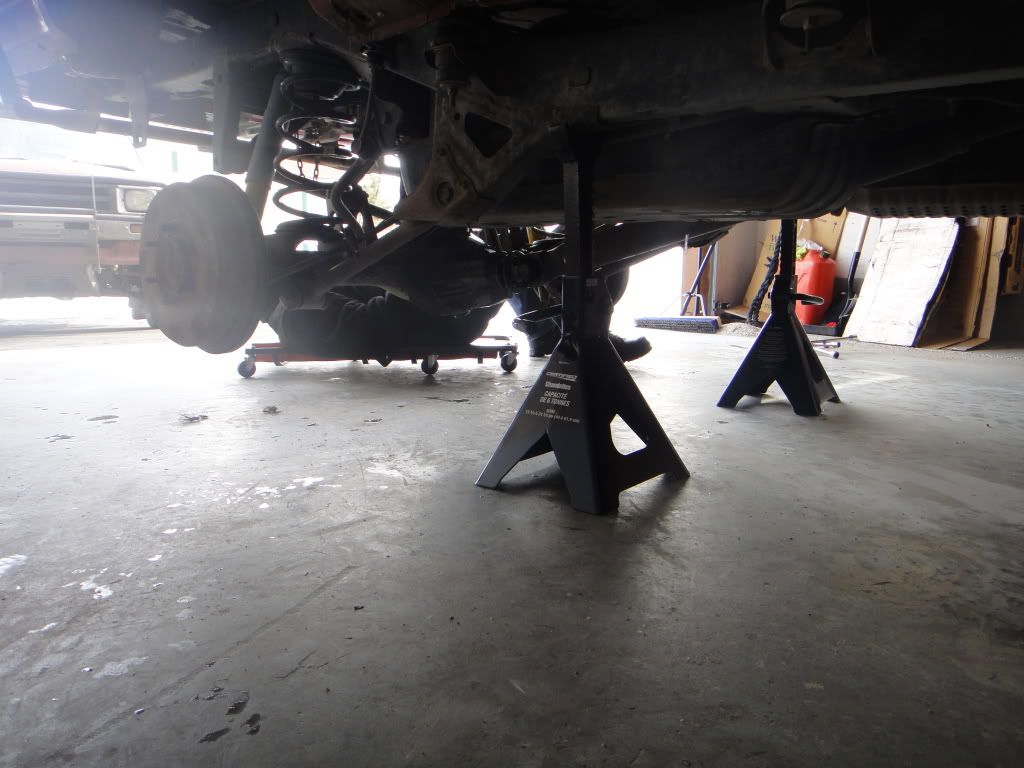
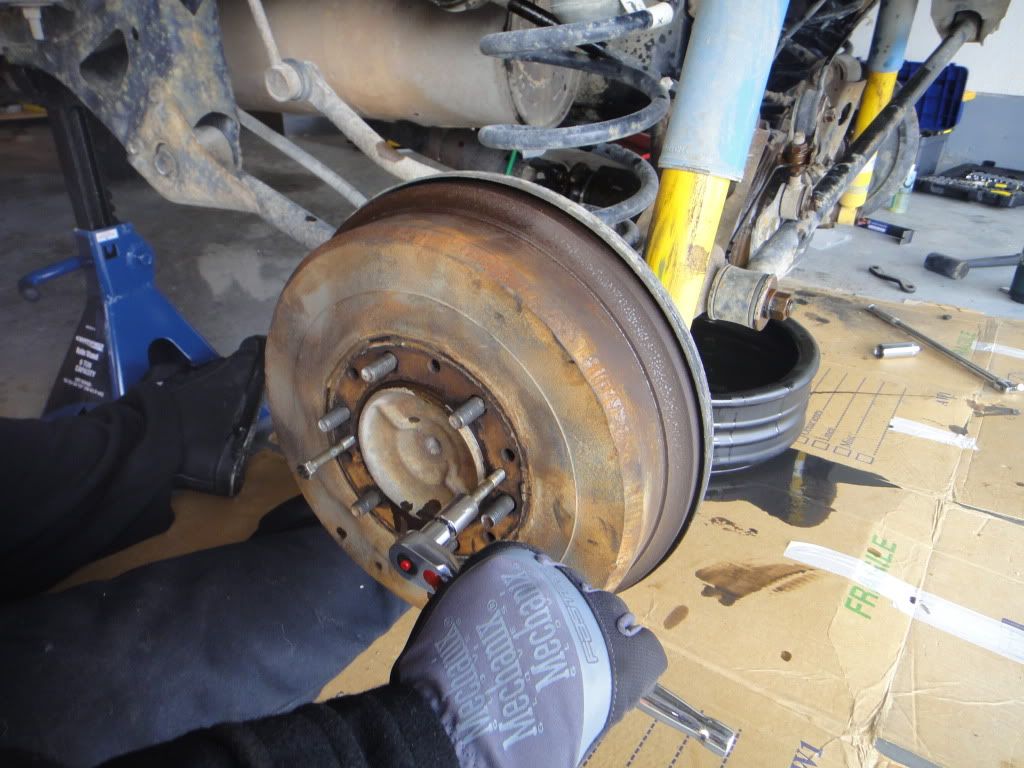
We figured out how to get the drums off. I hope they go on easier than they come off.
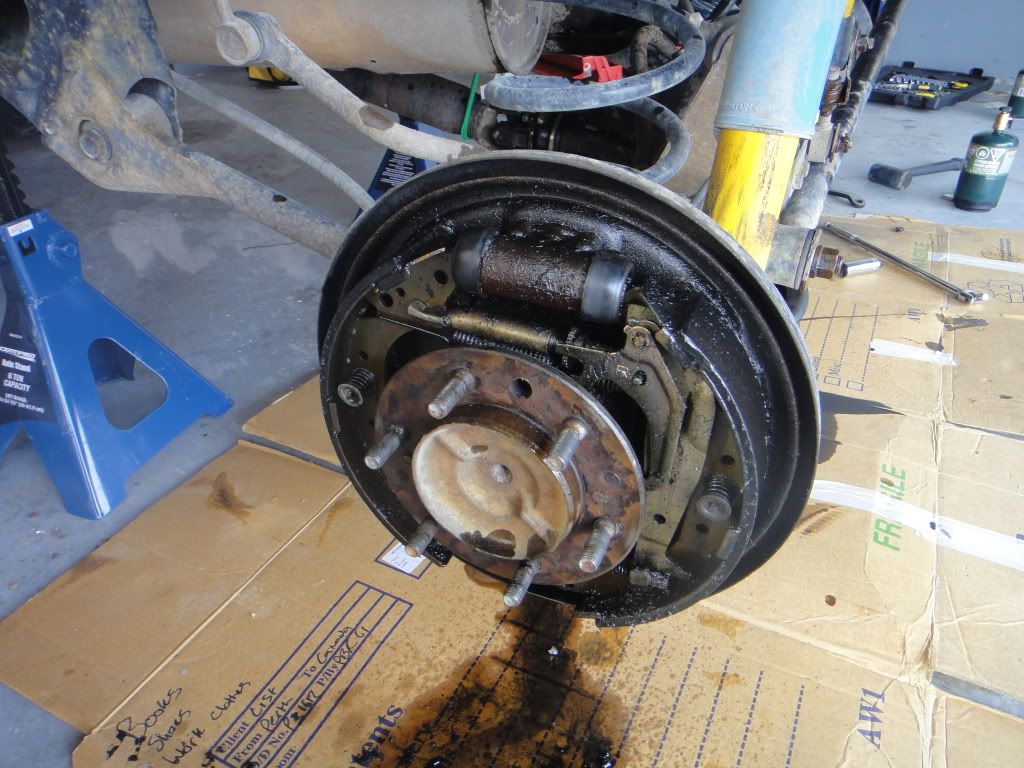
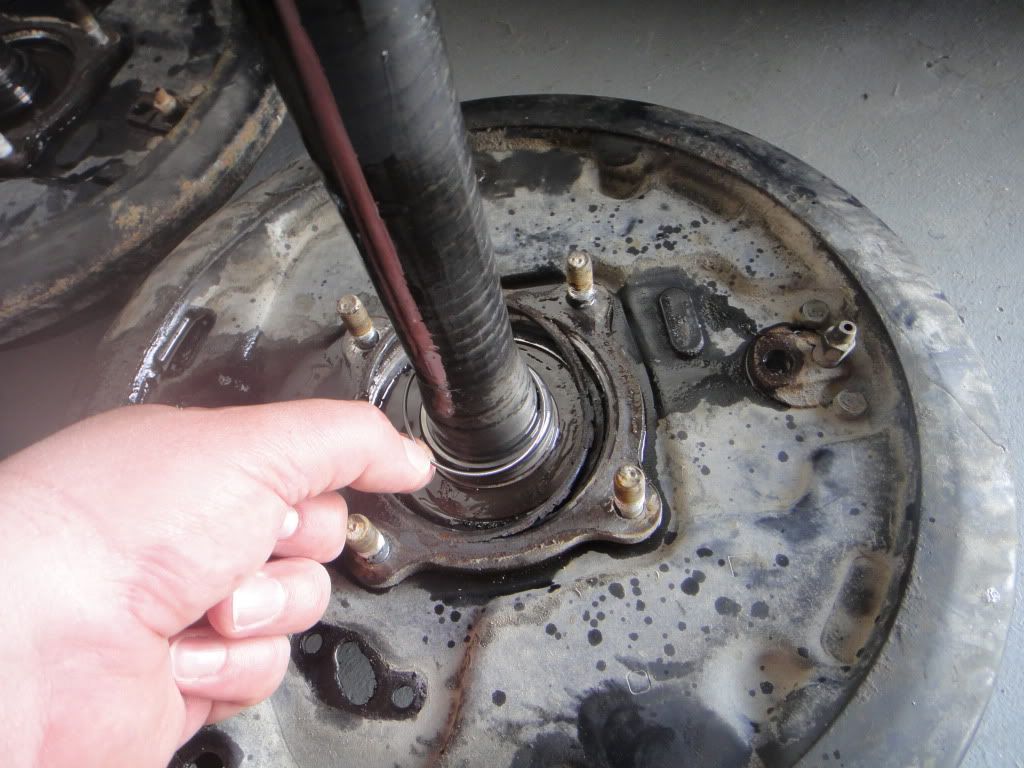
Below is the mess left by the cylinder leaking. I hope those fibres aren't asbestos but I wouldn't bet on it.
Axle completely out, the inner part of the seal came out too so I'll carefully tuck it back under the rubber where it belongs.
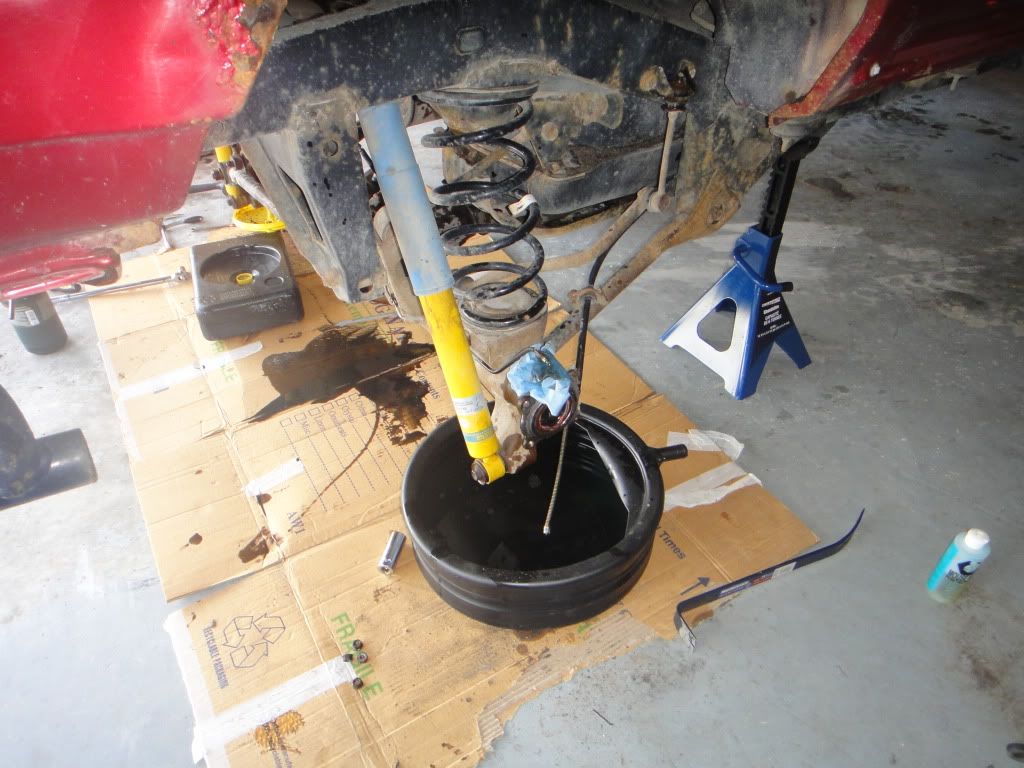
Bungee cords hold up the driveshaft great.
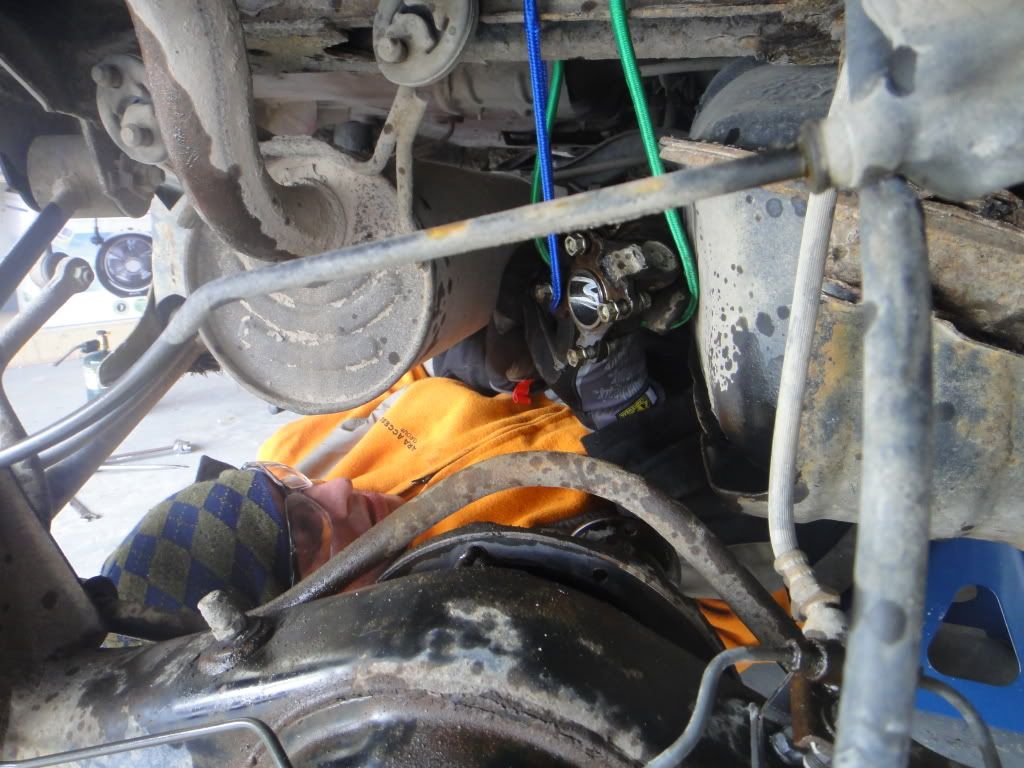
Rear Diff off. No jack available so had to manhandle it.
We got it out and the new one back on. Done for the day and after this sentence we go back to work and reassemble.
We will be getting to the front soon and that parts truck we bought does not have the ADD system. What will I need to pull out and instal into mine? Are the CV's different for ADD over non ADD? Anyone else done this mod and have some advice for me?
Also can an admin move this to the build section? Sorry for posting into the wrong spot.
Started with a clean garage.
We figured out how to get the drums off. I hope they go on easier than they come off.
Below is the mess left by the cylinder leaking. I hope those fibres aren't asbestos but I wouldn't bet on it.
Axle completely out, the inner part of the seal came out too so I'll carefully tuck it back under the rubber where it belongs.
Bungee cords hold up the driveshaft great.
Rear Diff off. No jack available so had to manhandle it.
We got it out and the new one back on. Done for the day and after this sentence we go back to work and reassemble.
We will be getting to the front soon and that parts truck we bought does not have the ADD system. What will I need to pull out and instal into mine? Are the CV's different for ADD over non ADD? Anyone else done this mod and have some advice for me?
Also can an admin move this to the build section? Sorry for posting into the wrong spot.
Last edited by Red Wagon; 04-14-2012 at 12:27 PM.
04-15-2012, 10:46 AM
#6
Registered User
Thread Starter
In my previous post you can see where a sprung ring is on my axle shaft. It came out from under the rubber axle seal and am wondering if not putting it back will be a problem? It would not go back underneath which was pretty frustrating so we gave up and left it out.
I'm now done the rear and took it out for a drive. The locker will take some getting used to and it does act weird on slow sharp turns but I can live with that. What I could not live with would have been if it acted out whatsoever on highways in turns at speed. Good news is that you don't feel anything different there which is great so far. I only drove a very short time but I think with minor adjustments in driving it will be just fine.
Another odd thing is it looks like my ADD system started working again.... I think it's possible water seeped in and over the very cold winters up here it froze. Yet another reason I'm glad I got that parts truck so I can eliminate this hassle. It also goes to show that air lockers are not for everyone. I think it would act strange in the constant low temps up here. It's still dropping to -25C at night here in April!!!
I am hoping someone can answer my question about there being and difference in the assembly for non ADD and ADD CV's 4Runners. I am searching the forums and the interwebs for a thread where someone else has swapped out the ADD actuator for the older style with no luck so far.
My rear end is done now so I'll be starting on the front today and hope to finish tomorrow before I fly back to work Wednesday morning.
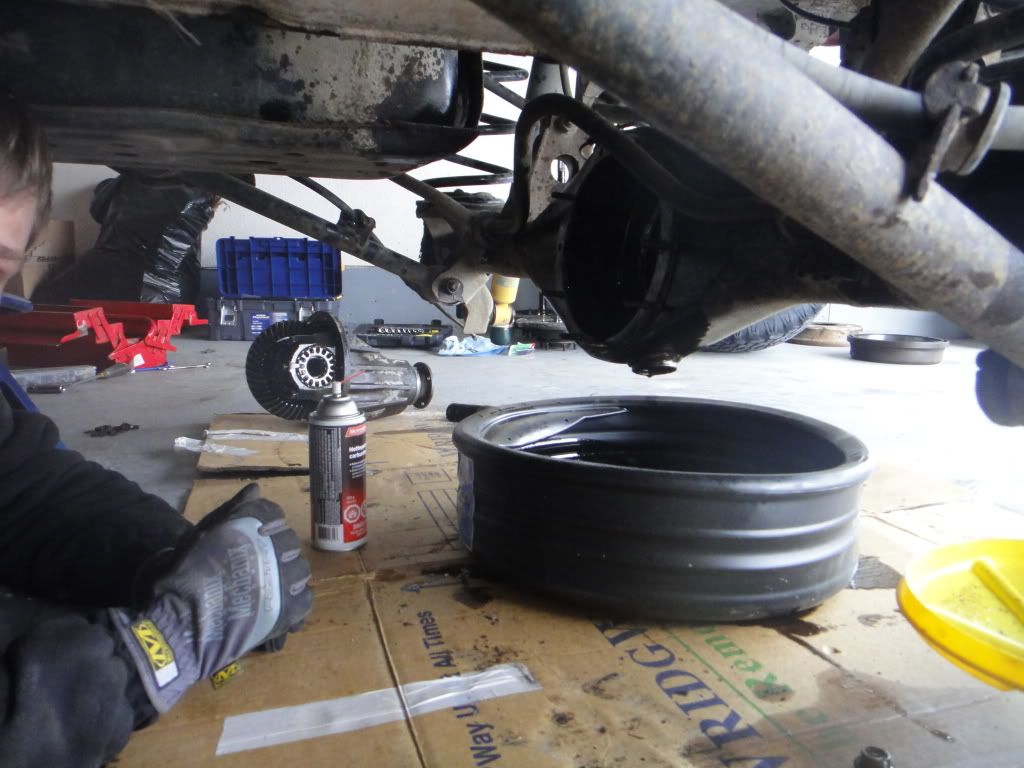
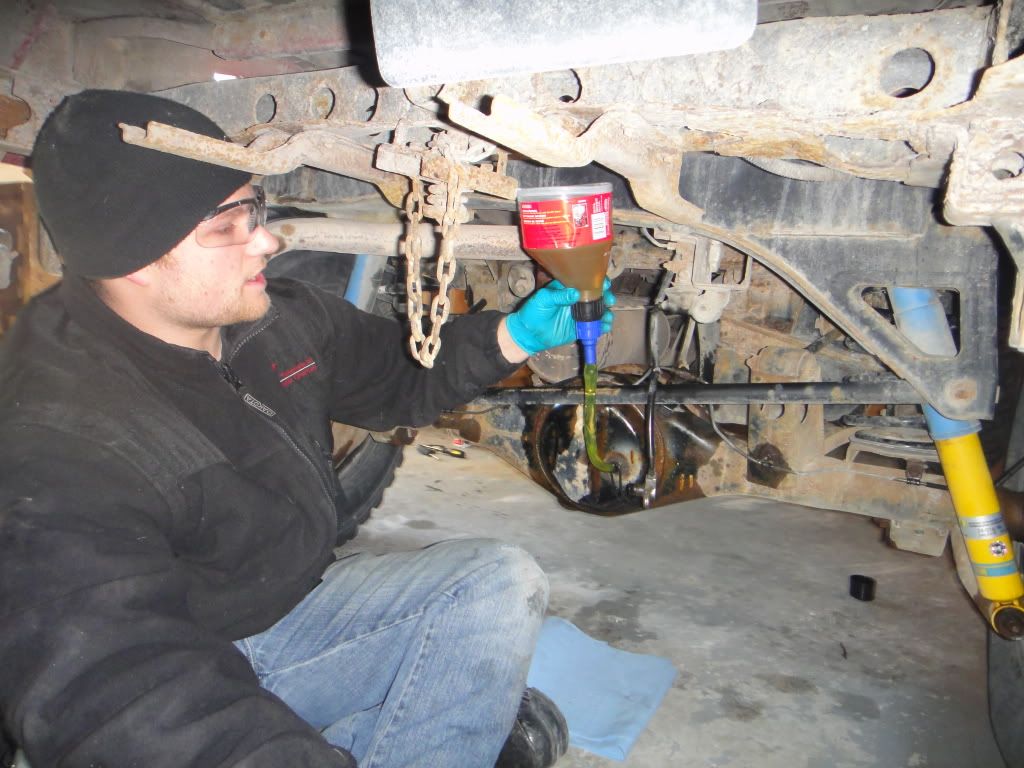
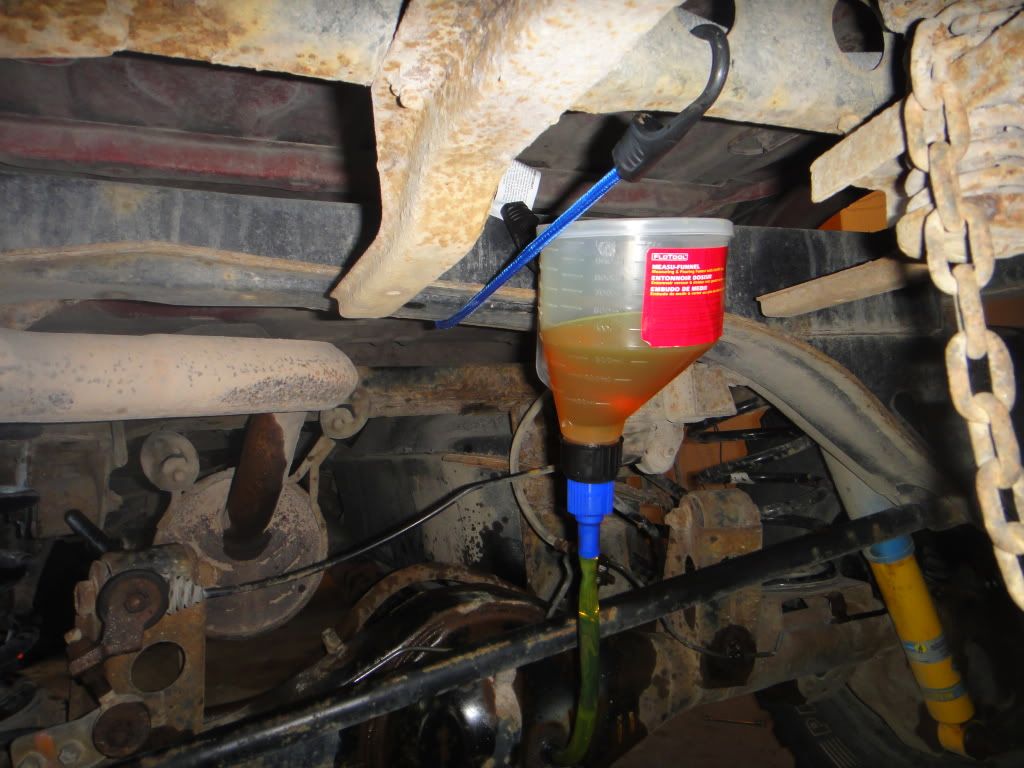
Here are some more photos.
We used some RTV at the end of the axle and found an easy way of refilling the diff.

EDIT/////
If you see that spring come out of your axle seal get a new axle seal. It WILL leak.
I'm now done the rear and took it out for a drive. The locker will take some getting used to and it does act weird on slow sharp turns but I can live with that. What I could not live with would have been if it acted out whatsoever on highways in turns at speed. Good news is that you don't feel anything different there which is great so far. I only drove a very short time but I think with minor adjustments in driving it will be just fine.
Another odd thing is it looks like my ADD system started working again.... I think it's possible water seeped in and over the very cold winters up here it froze. Yet another reason I'm glad I got that parts truck so I can eliminate this hassle. It also goes to show that air lockers are not for everyone. I think it would act strange in the constant low temps up here. It's still dropping to -25C at night here in April!!!
I am hoping someone can answer my question about there being and difference in the assembly for non ADD and ADD CV's 4Runners. I am searching the forums and the interwebs for a thread where someone else has swapped out the ADD actuator for the older style with no luck so far.
My rear end is done now so I'll be starting on the front today and hope to finish tomorrow before I fly back to work Wednesday morning.
Here are some more photos.
We used some RTV at the end of the axle and found an easy way of refilling the diff.
EDIT/////
If you see that spring come out of your axle seal get a new axle seal. It WILL leak.
Last edited by Red Wagon; 01-14-2013 at 05:25 PM.
04-17-2012, 10:34 AM
#7
Registered User
Thread Starter
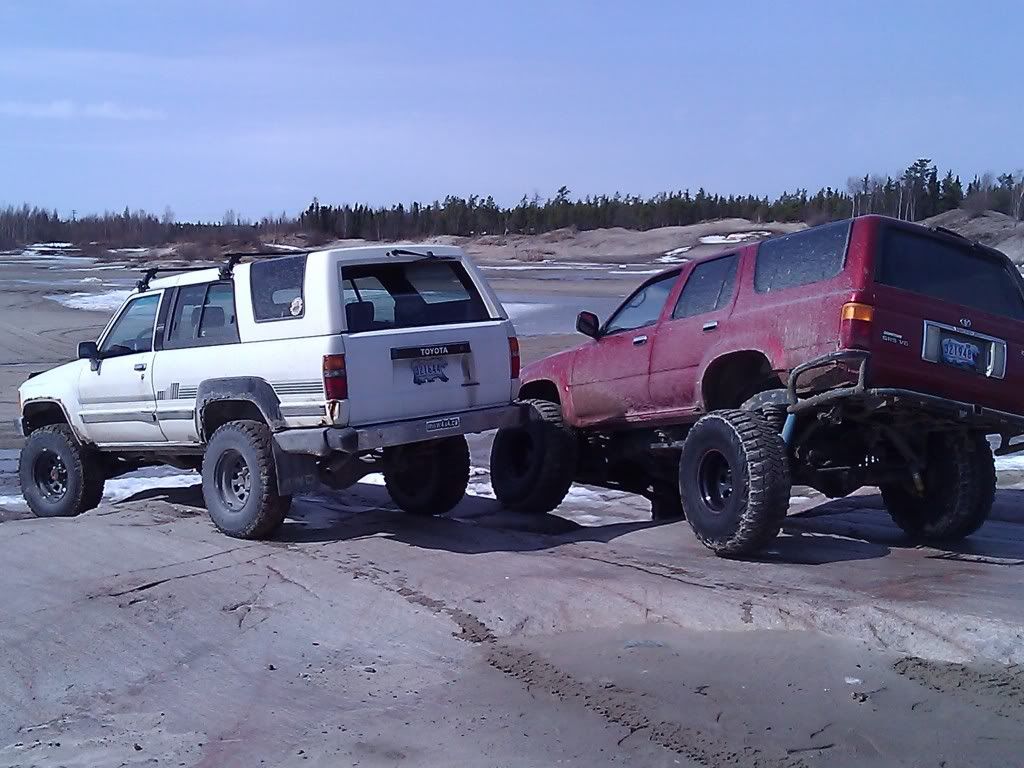
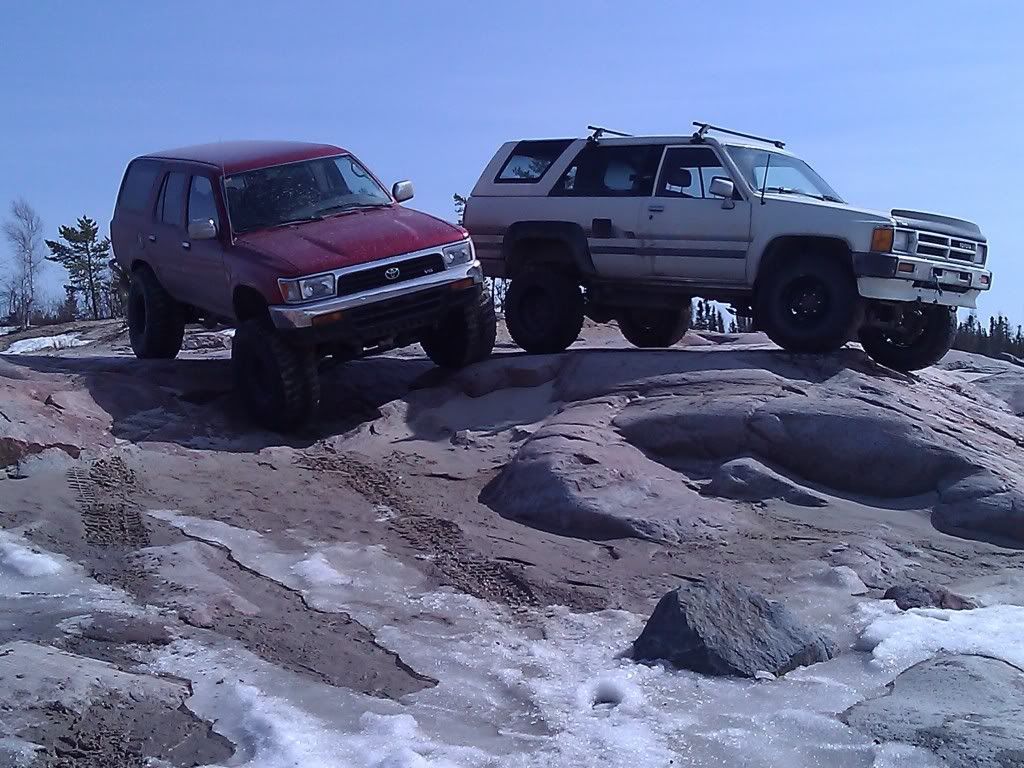
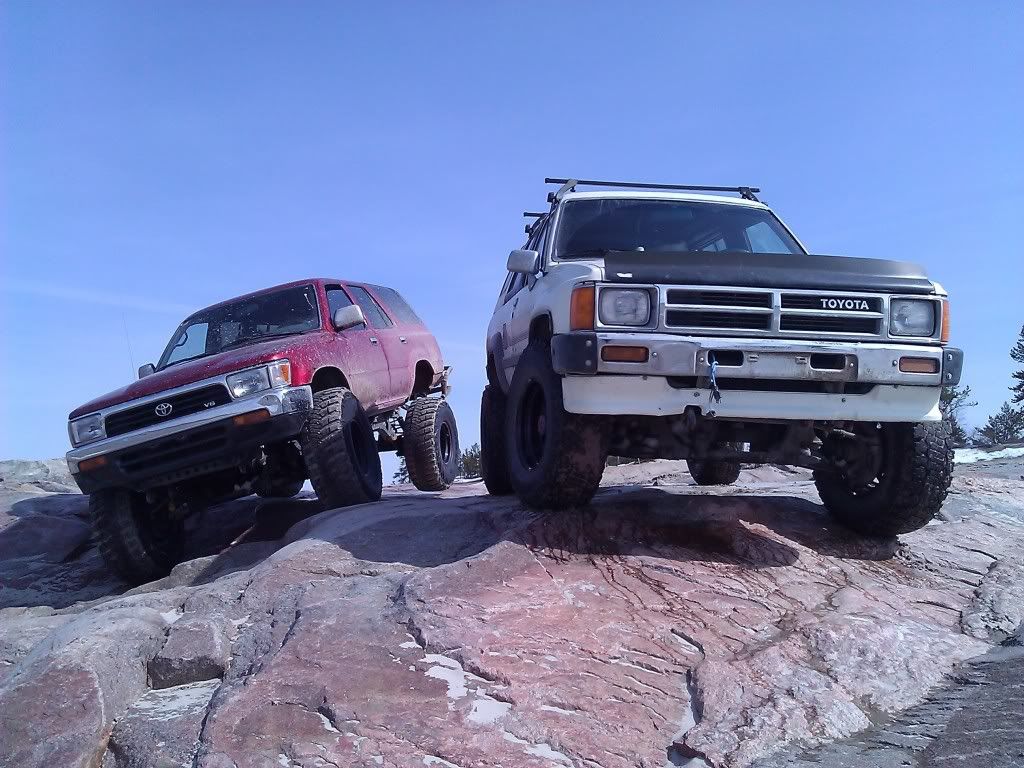
My buddy drove by the shop and saw the new tyres mounted before I did. He sent me this photo and let me know it's taaalllll dude.
We'll have to see how to drop the body lift down to 1" so it fits in my garage and is better on and off road. I don't really want the centre of gravity too high.
I'd love to hear advice and ideas.
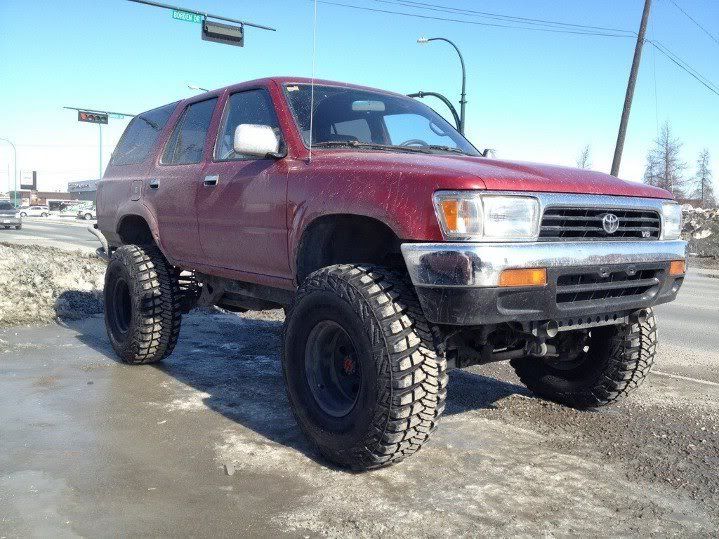
We'll have to see how to drop the body lift down to 1" so it fits in my garage and is better on and off road. I don't really want the centre of gravity too high.
I'd love to hear advice and ideas.
Trending Topics
04-17-2012, 10:54 AM
#8
Registered User
Looks good with the MTR's, they almost look like tall skinnies. As for the ADD differences, the actuator is on the axle tube, all inside of where the inside of the halfshaft bolts up to. As far as I know the halfshafts are the same, but it might be a good idea to just search "add delete" or "add removal" to see if someone has detailed it in their threads.
04-17-2012, 01:10 PM
#9
Registered User
Thread Starter
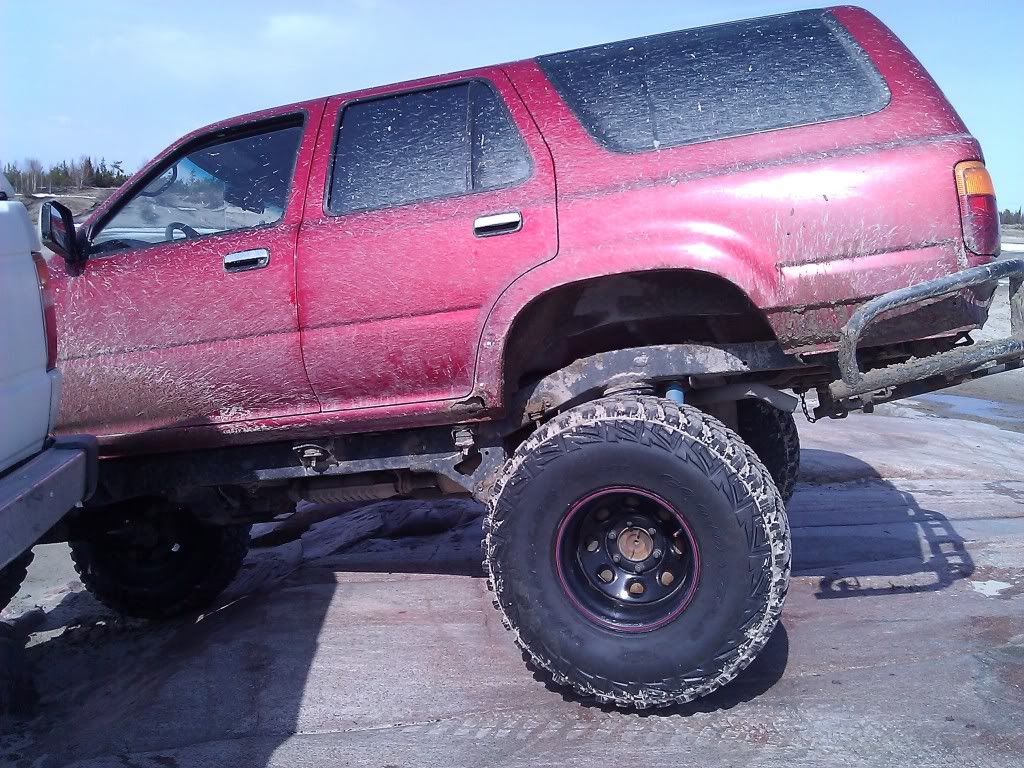
It fits into my garage! Just.
As for the ADD elimination I found multiple work around threads but not a full swap out. Going in there with a clamp is how all this started. Bits of ring teeth in the front diff = upgrade time!
Sure is weird with the big lugs, you can feel them. The other thing is it definitely rubs the front lower skirt of my bumper. Does that separate from the chrome section?
04-17-2012, 05:00 PM
#10
Registered User
Thread Starter
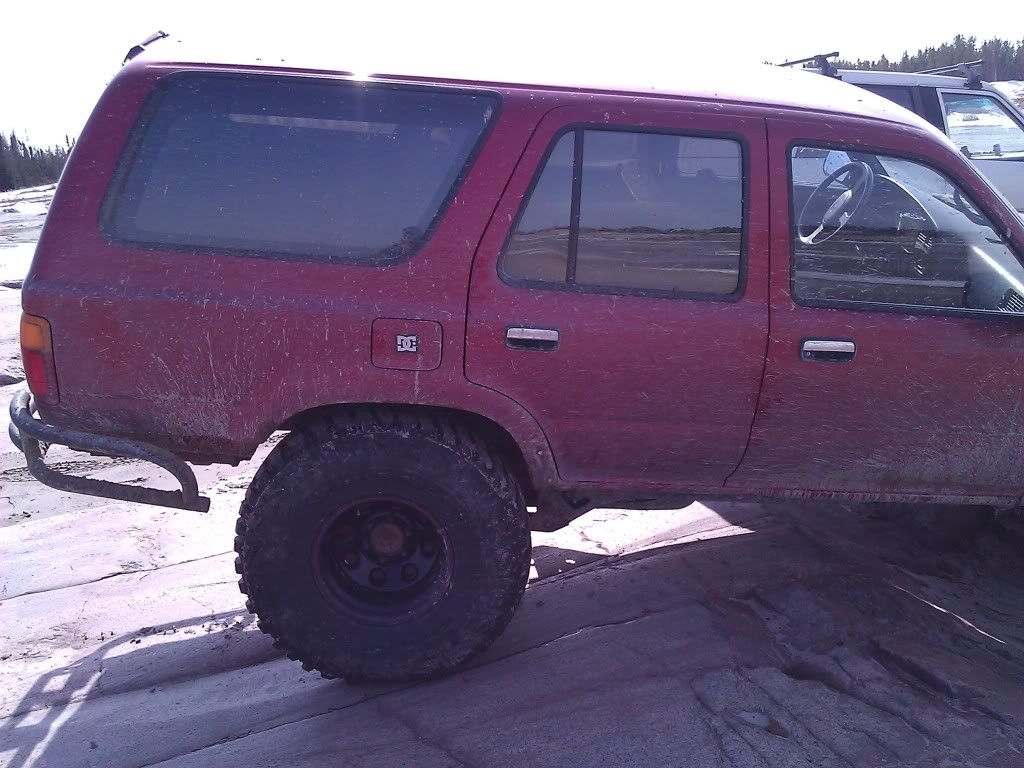
I had to take a sawzall to the corner of the bumper skirt. Easy fix to stop the rubbing cutting away that plastic.
Does not look like I get any frame rub but I'll keep trying when I get back from work in a couple weeks. After I do my front diff I'll take it out on the trail and see how we go.
Like I said above I'd love ideas on my next project or things to watch out for running 35's on IFS.
Does not look like I get any frame rub but I'll keep trying when I get back from work in a couple weeks. After I do my front diff I'll take it out on the trail and see how we go.
Like I said above I'd love ideas on my next project or things to watch out for running 35's on IFS.
 05-03-2012, 12:55 PM
#13
Registered User
Thread Starter
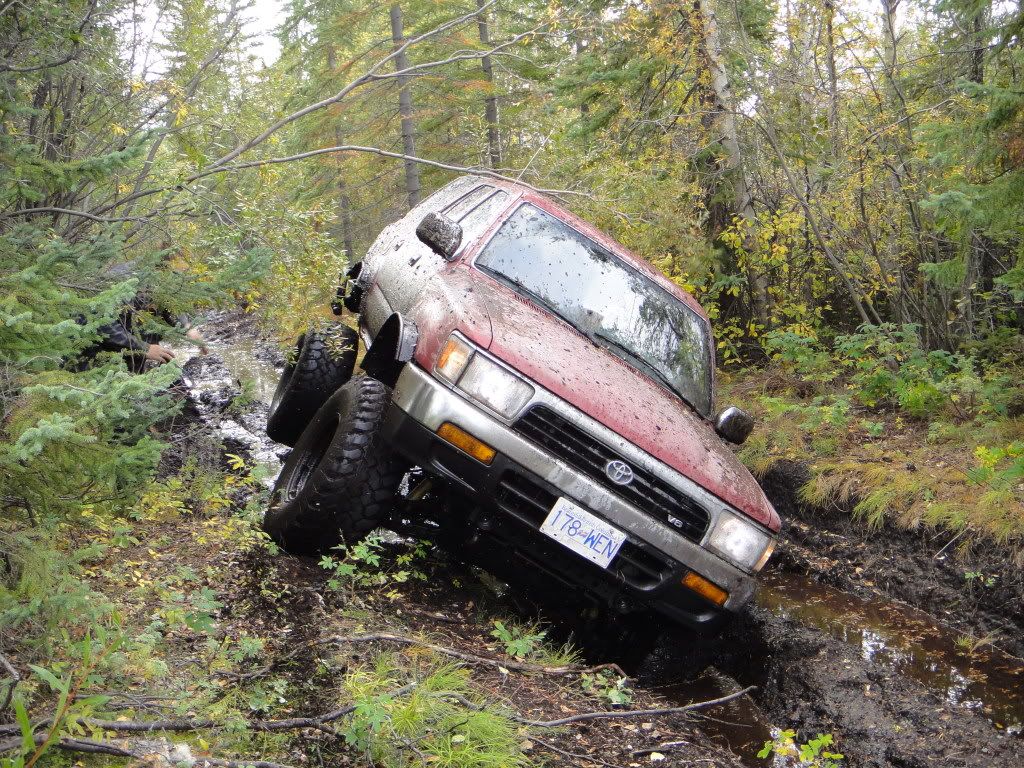
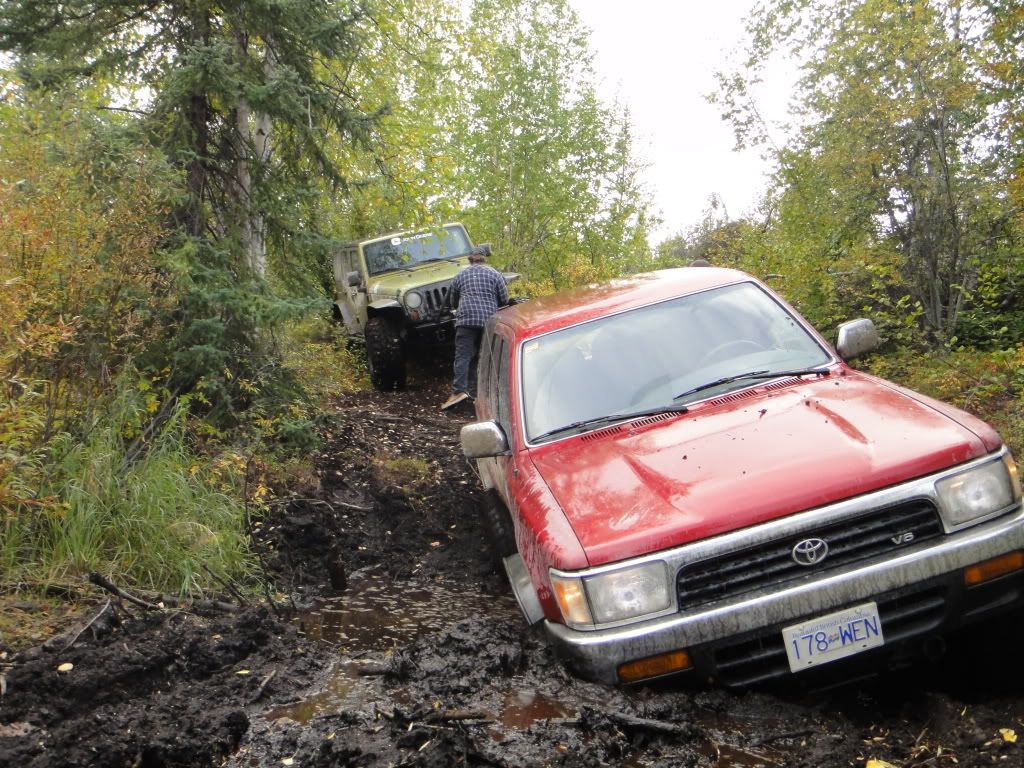
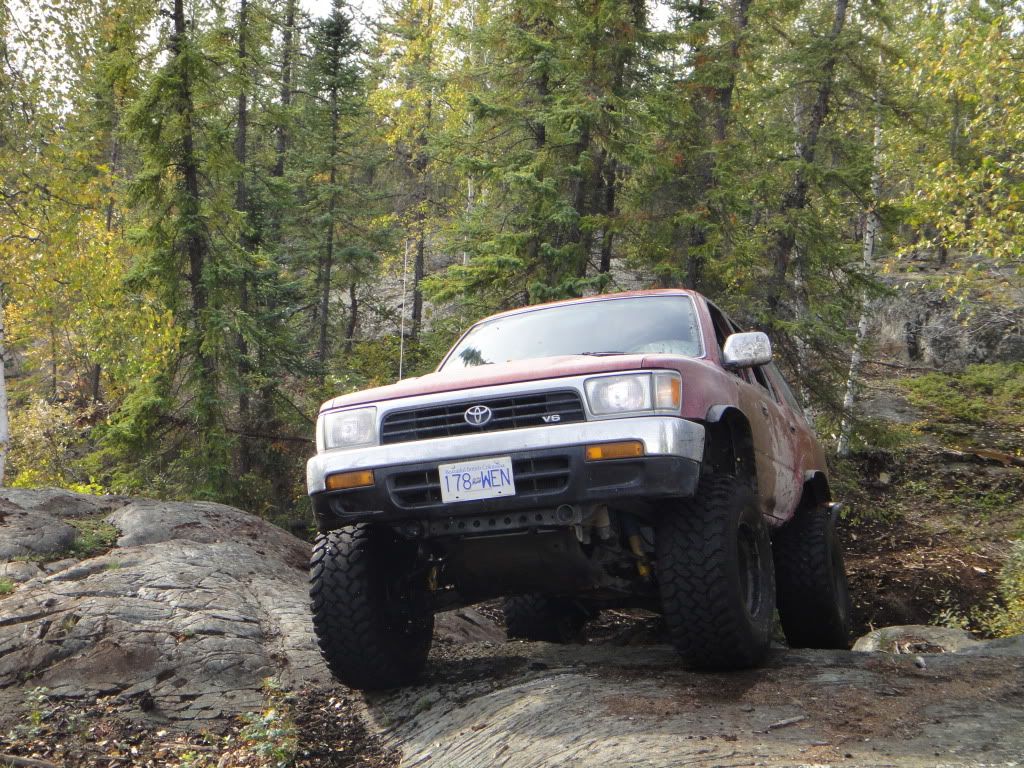
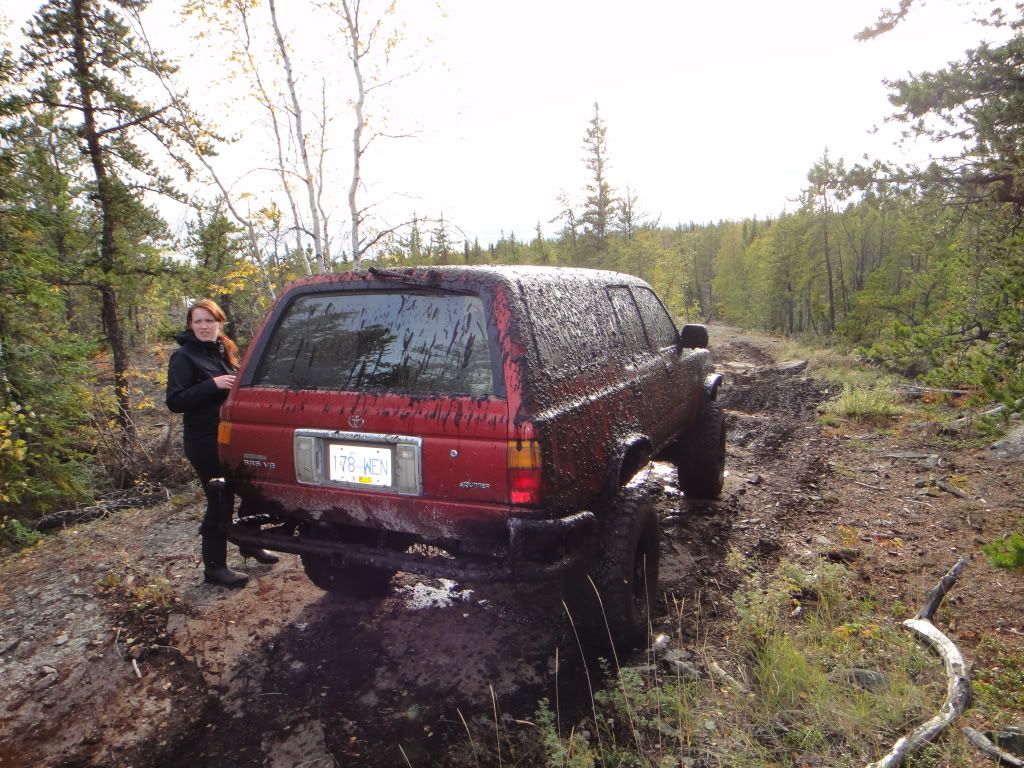
Just got back from site yesterday. Not thrown in the front diff yet but took it out to see where I will rub at full flex. Looks pretty good really, have to trim a little up front but not too bad. I will definitely keep the 3" body lift and eventually raise the transfer case, gas tank and transmission for a flat bottom.
Wow, the locker is amazing. I went through deep slushy snow and wet sand easy. The tyres bite hard into the sand, I can really feel the surge forward when I hit the gas. Can't wait to throw in the front diff and see what 4x4 is like engaged.
I'm pretty happy with how this project is turning out.
Wow, the locker is amazing. I went through deep slushy snow and wet sand easy. The tyres bite hard into the sand, I can really feel the surge forward when I hit the gas. Can't wait to throw in the front diff and see what 4x4 is like engaged.
I'm pretty happy with how this project is turning out.
Last edited by Red Wagon; 05-04-2012 at 12:42 PM.
05-04-2012, 12:38 PM
#14
Registered User
Thread Starter
Busy day today. Got some stuff for the garage. Me and Colton where discussing painting, air tools etc and by coincidence I got a pretty good compressor on sale. Reg around $300 down to $98.98! I also got a jack on sale and some wrenches.
After that I went to the wrecker and was first in on a 2nd Gen 22RE 4Runner! I got two fenders, no rust, an ashtray and screws for the dash. I also got the passenger side door cup in the arm rest, mine was missing as well as the plastic around the ignition. The screws I got where for my hood and gas cap release levers.
Had a great run of luck today!
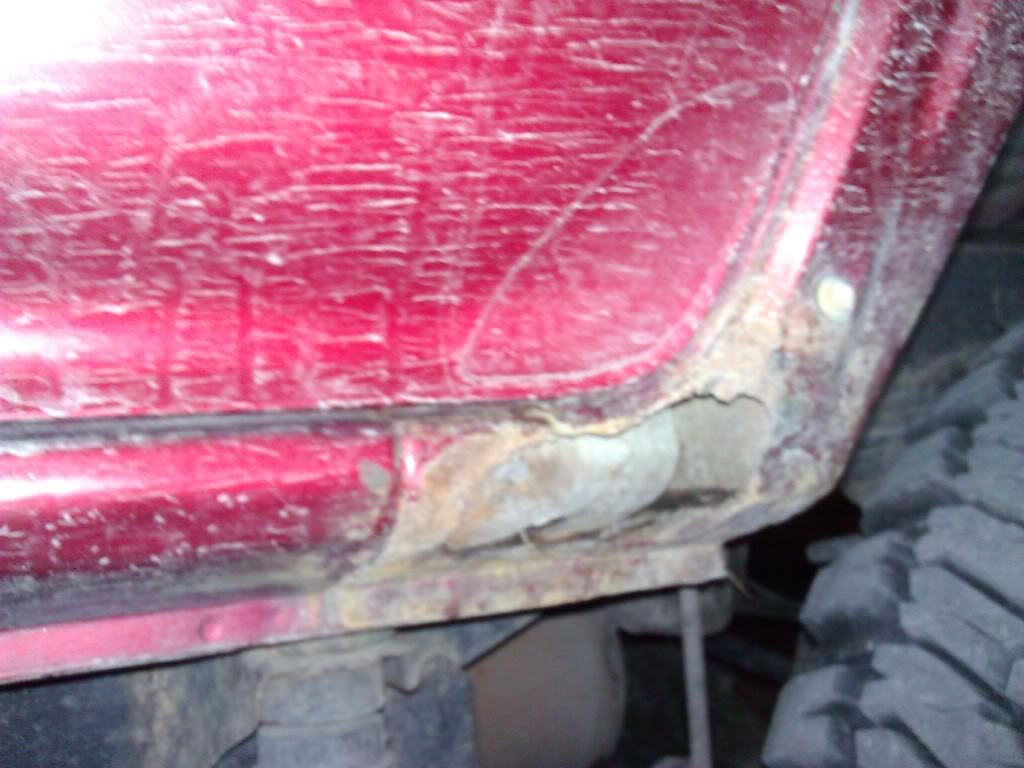
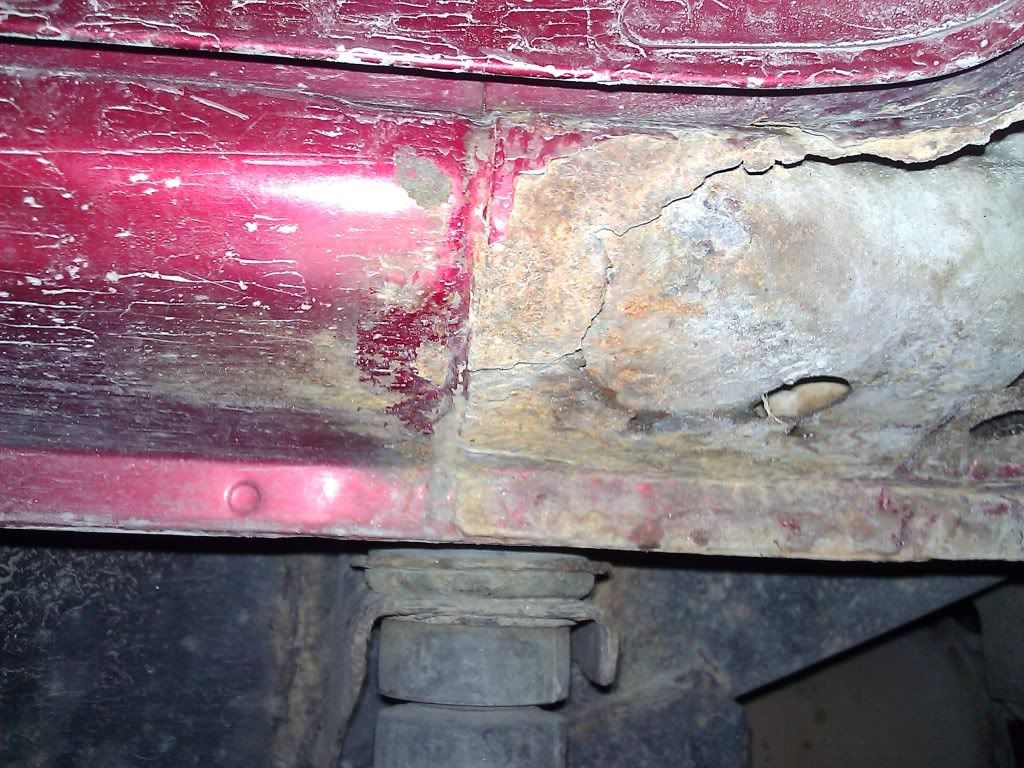
I want to repair the rust next project. I'll show you one of the holes, ideas are really appreciated. I want to learn to do body repair and painting.
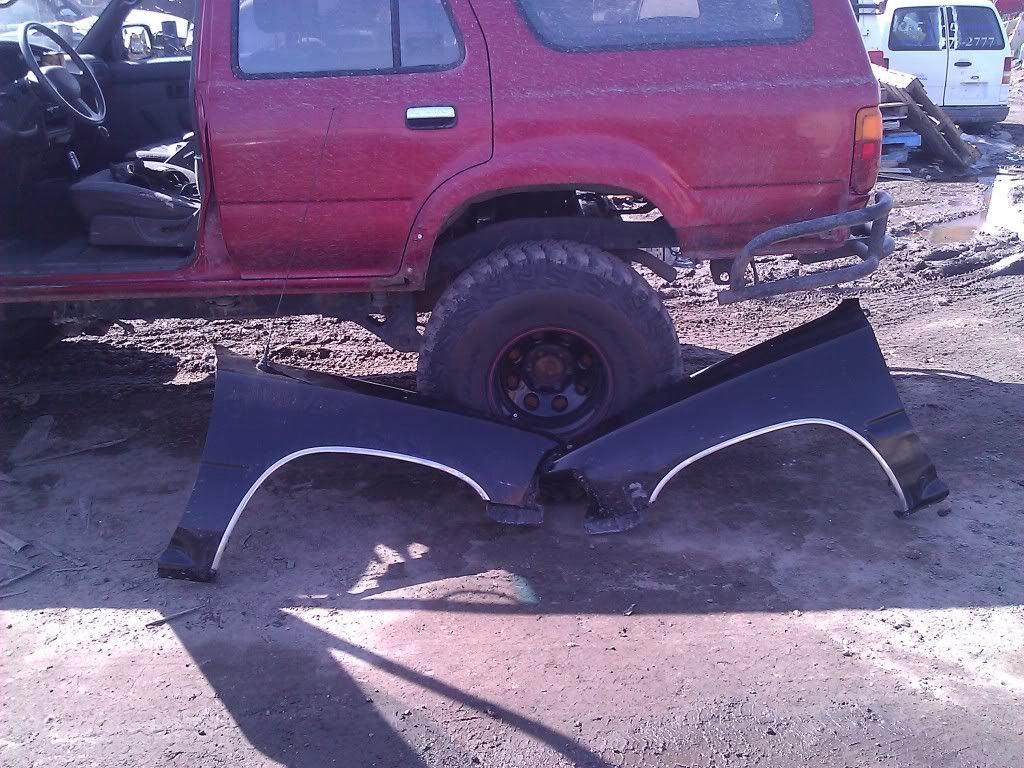
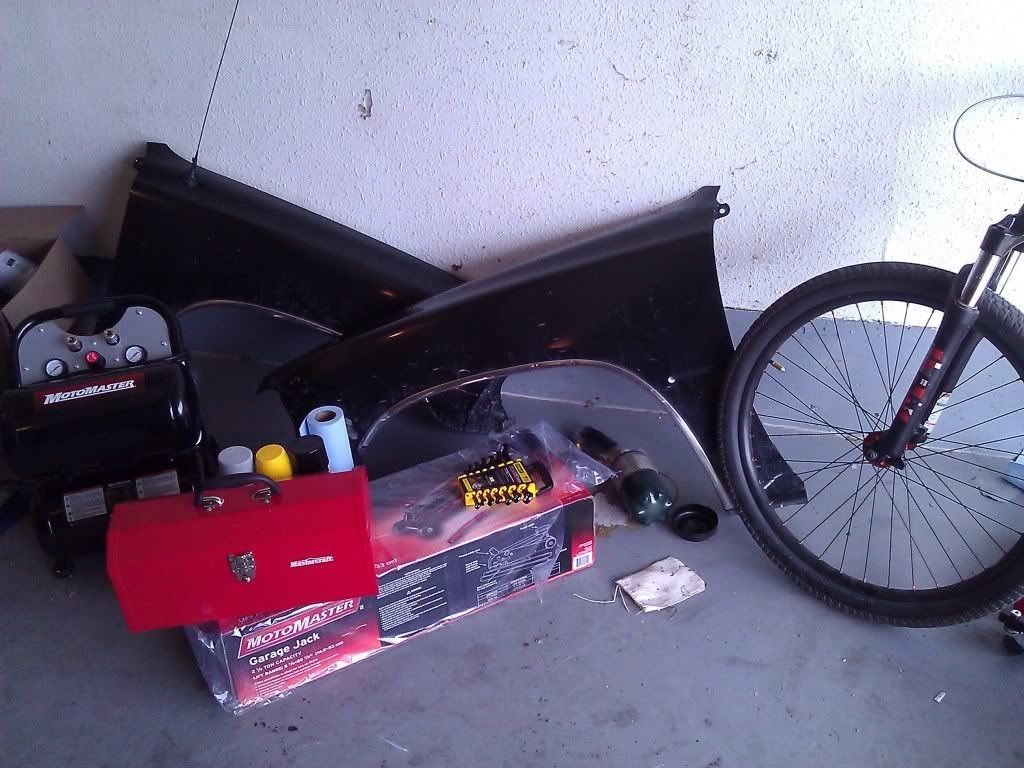
After that I went to the wrecker and was first in on a 2nd Gen 22RE 4Runner! I got two fenders, no rust, an ashtray and screws for the dash. I also got the passenger side door cup in the arm rest, mine was missing as well as the plastic around the ignition. The screws I got where for my hood and gas cap release levers.
Had a great run of luck today!
I want to repair the rust next project. I'll show you one of the holes, ideas are really appreciated. I want to learn to do body repair and painting.
Last edited by Red Wagon; 05-04-2012 at 12:43 PM.
05-05-2012, 12:14 PM
#15
Registered User
Thread Starter
Bump for advice please on next steps and tool requirements.
I had to take that compressor back after I was advised it would be insufficient for running air tools properly. Some compressor advice would be great here. I hope to run air tools and be able to paint. It does not need to be pro but good enough for home use.
I'd also like recommendations in what to look for in a welder. I want to fabricate a tyre carrier and patch body holes like the one pictured above. In the first photo you can also see how rusted the rear crossmember is. Instead of tying to grind it I figured cutting and replacing would be the more simple choice by far. Once I learn to weld that is.
Last edited by Red Wagon; 05-05-2012 at 12:18 PM.
05-06-2012, 01:40 PM
#16
Registered User
Thread Starter
I think I may have found a welder from a friend in Midnight Sun Wheelers which is our club here in the Northwest Territories. It's a Mig Pak 150 which should do the trick nicely.
Still fishing for advice here as well.
Still fishing for advice here as well.
05-08-2012, 07:02 PM
#17
Registered User
Thread Starter
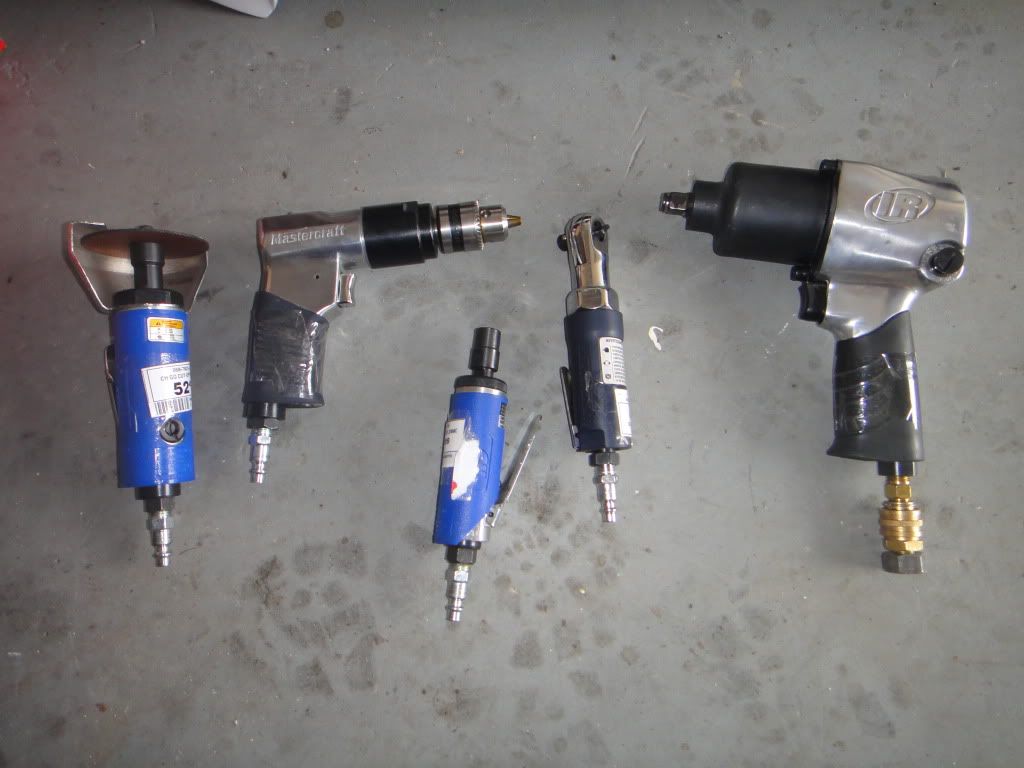
So the day started with some great luck as I walked into Canadian Tire there was a dude on his hands and knees marking down a bunch of last years air tools as they where display models. I got them all for %50 off or more!! I threw them all into a basket to show a buddy and find out which ones to put back.
I'm glad I did because a couple minutes later another dude was all over them. They are final sale but was able to test them in their garage before I paid and they all work.
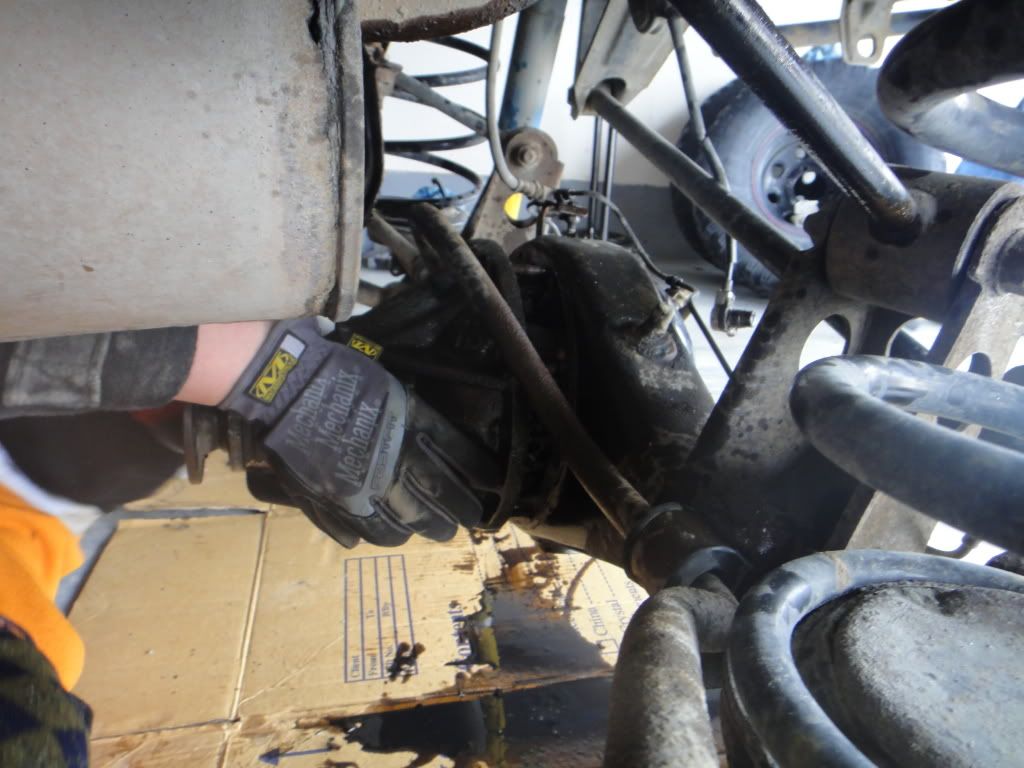
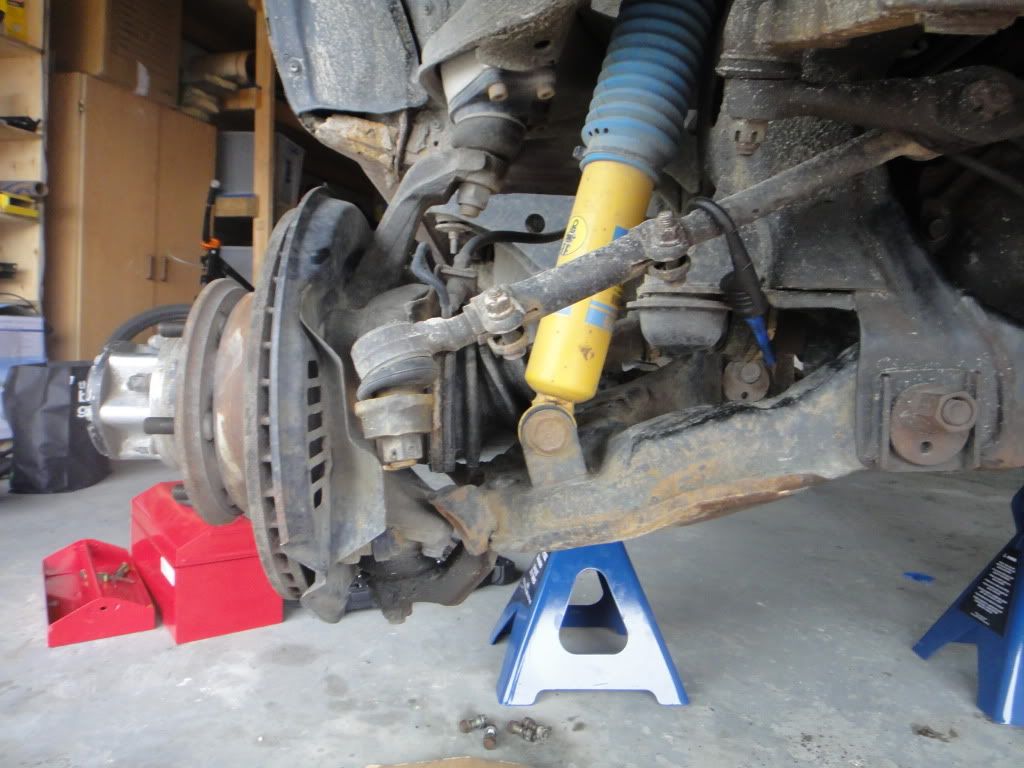
After that things went downhill a bit. I am removing the front diff but the CV's are in the way and I also found a torn CV boot on the passenger side. I happen to have the correct spare so not too bad but I can not get the CV out!
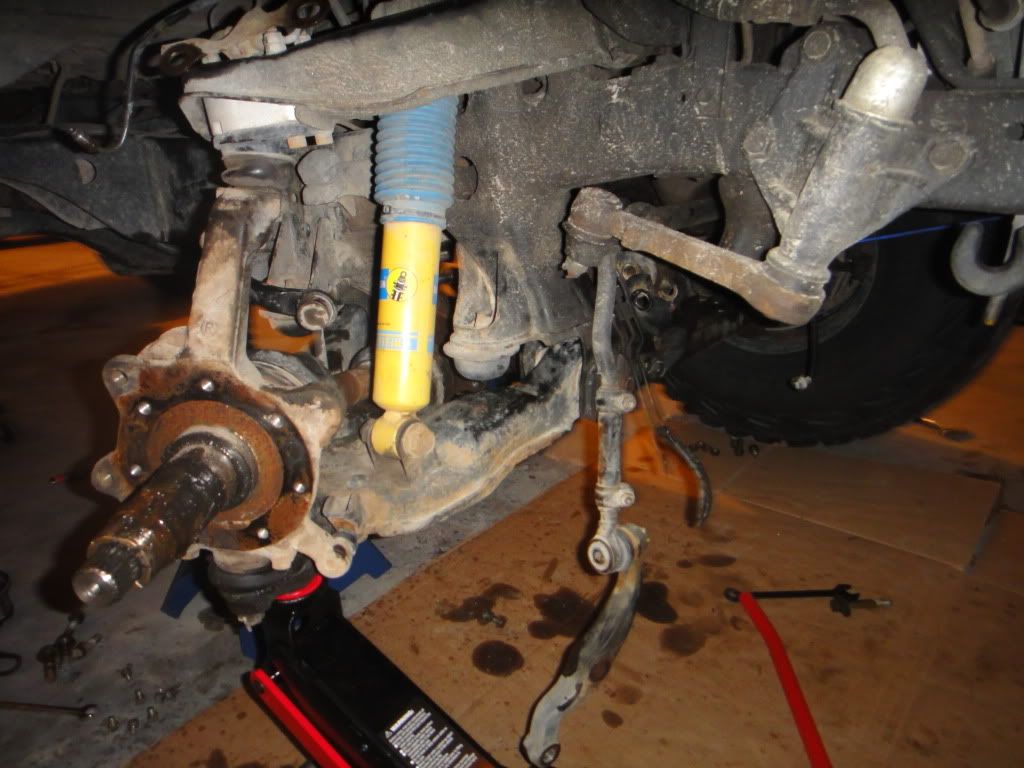
I could use some help here really. I got the diff out at least after a struggle.
I'm glad I did because a couple minutes later another dude was all over them. They are final sale but was able to test them in their garage before I paid and they all work.
After that things went downhill a bit. I am removing the front diff but the CV's are in the way and I also found a torn CV boot on the passenger side. I happen to have the correct spare so not too bad but I can not get the CV out!
I could use some help here really. I got the diff out at least after a struggle.
05-09-2012, 01:17 PM
#19
Registered User
Thread Starter
Compressor is in the works. The deal was too good to pass up. Plus we want to paint. We are hoping to get a 60 gallon one. Hopefully it comes through.


