
1988 4Runner build
 Nov 9, 2014 | 10:26 PM
#22
That is a great looking runner you got. To post pictures, get a Photobucket account. Photobucket will have 4 different text for the picture. The bottom of the four text will we something like [IMG...IMG] and that is what you want to copy and paste in your post.
Nov 10, 2014 | 05:08 AM
#23
Thread Starter
Registered User
Joined: Dec 2011
Posts: 83
Likes: 0
[QUOTE="sshutch82;52234514"]Got the rear panels cleaned, primed, painted and cleared. Installed another light on the passenger panel, and relocated the exhaust to a side exit. Test drove it and it's 100% better than the rear exit as far as fumes with the rear window down are concerned. I also sold the 88 last week too! So happy to now only have 3 vehicles back in the driveway instead of four.
 Nov 10, 2014 | 03:44 PM
#26
Thread Starter
Registered User
Joined: Dec 2011
Posts: 83
Likes: 0
Got a radio today. Sony MEX-N500BT. Just tested out the radio, haven't tested out all the features yet. Sounds pretty good with four stock speakers that are more than likely the original speakers (the tears are from a 91 4Runner).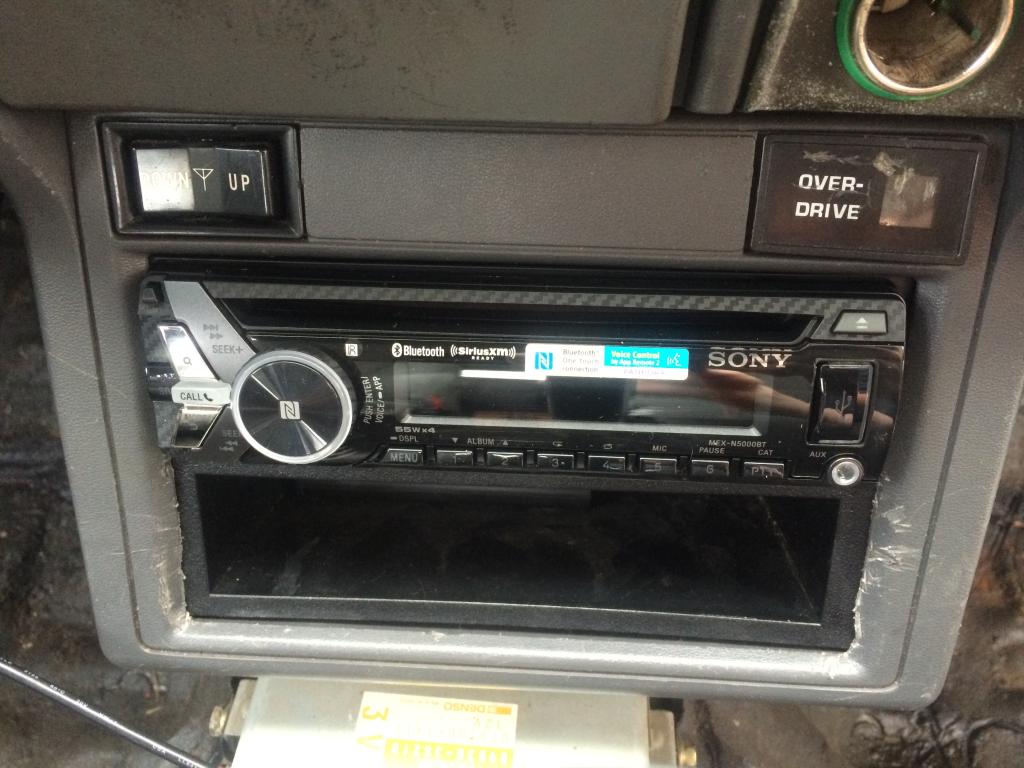
Also started working on the emblems too. Haven't gotten too far with them yet though. Just got one of them completely cleaned and the others just got the glue/tape off.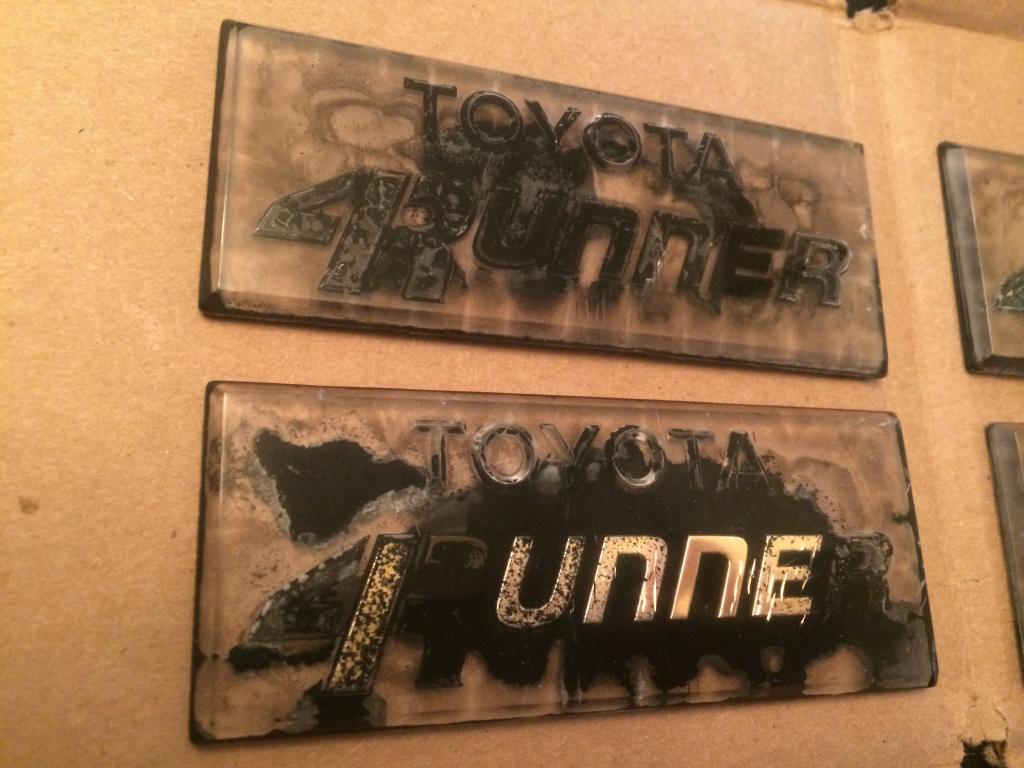

Also started working on the emblems too. Haven't gotten too far with them yet though. Just got one of them completely cleaned and the others just got the glue/tape off.

 Nov 20, 2014 | 03:04 PM
#27
Thread Starter
Registered User
Joined: Dec 2011
Posts: 83
Likes: 0
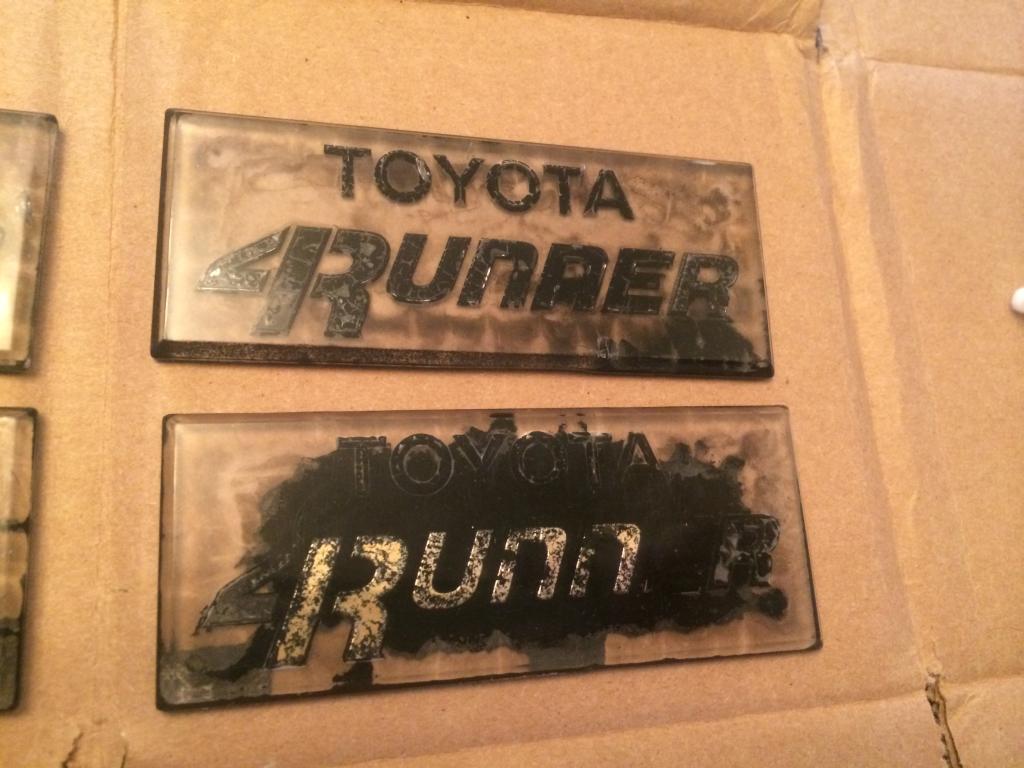
Got some progress done this past weekend through today. Got the emblems completely cleaned, sanded, cleaned, painted, sanded, cleaned, polished and cleared. Here's how they look!
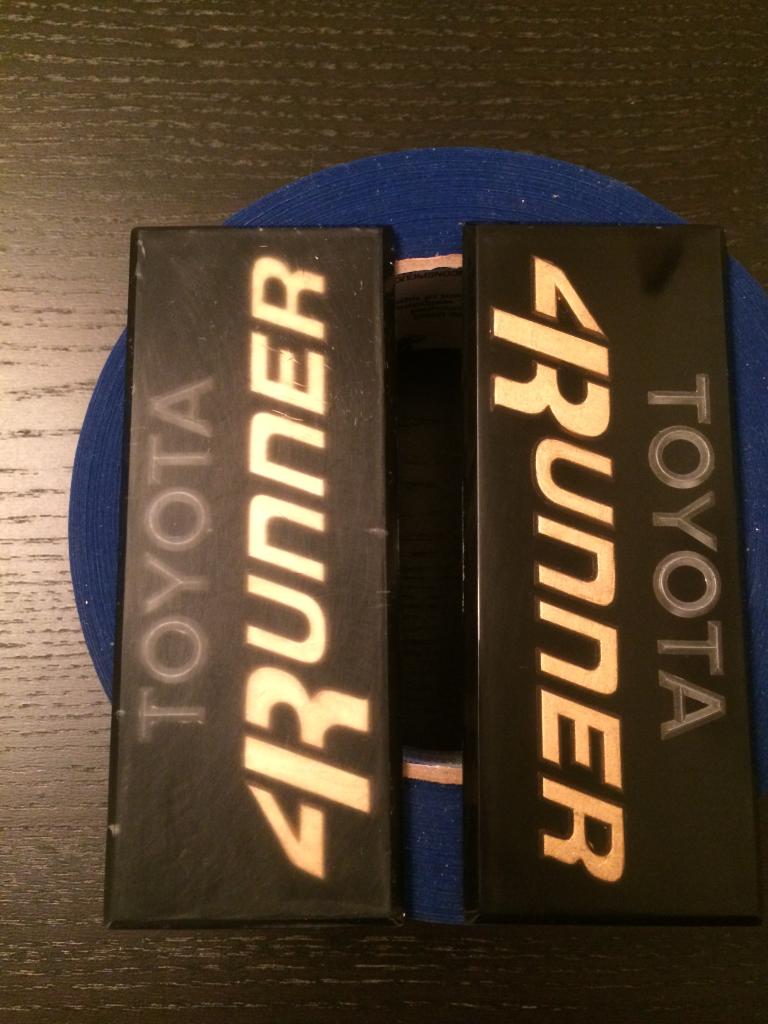
Sanded left, sanded and polished right.
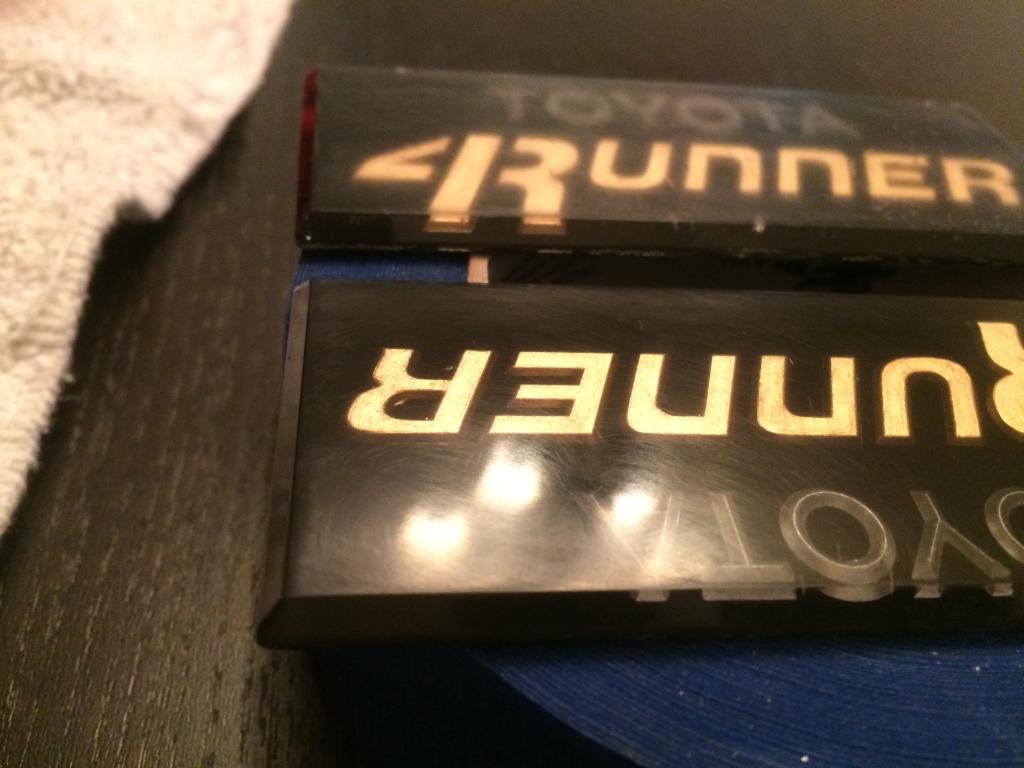
Polished, after sanding. Still swirl scratches.
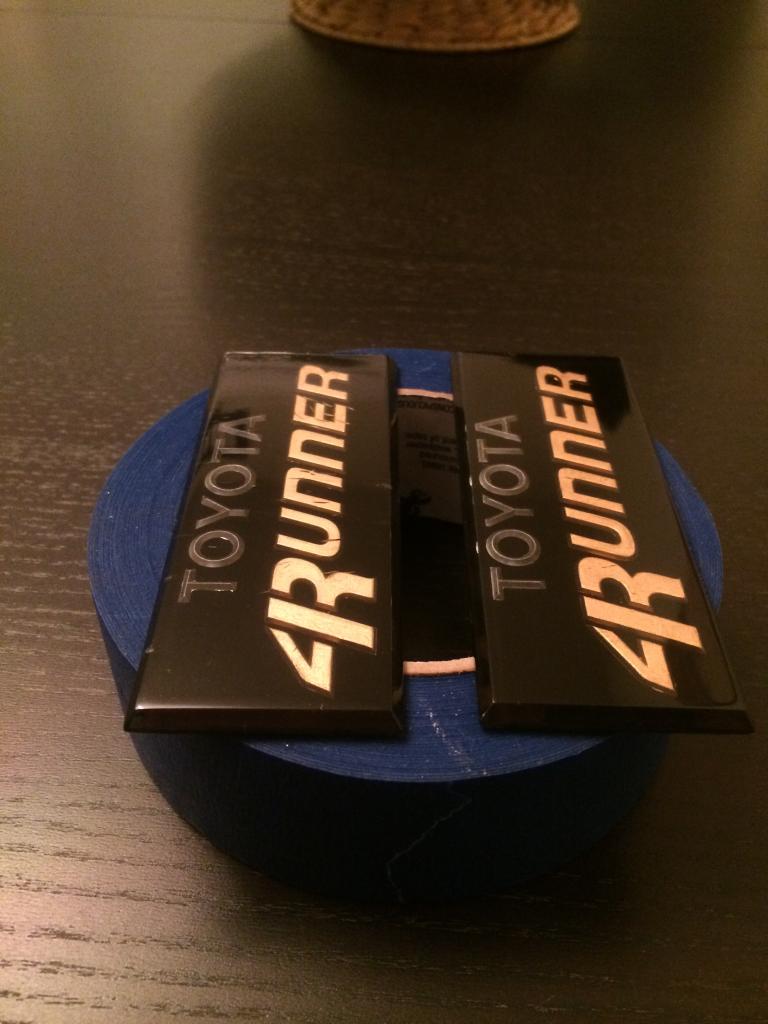
After sanding, cleaning, polishing and clearing!
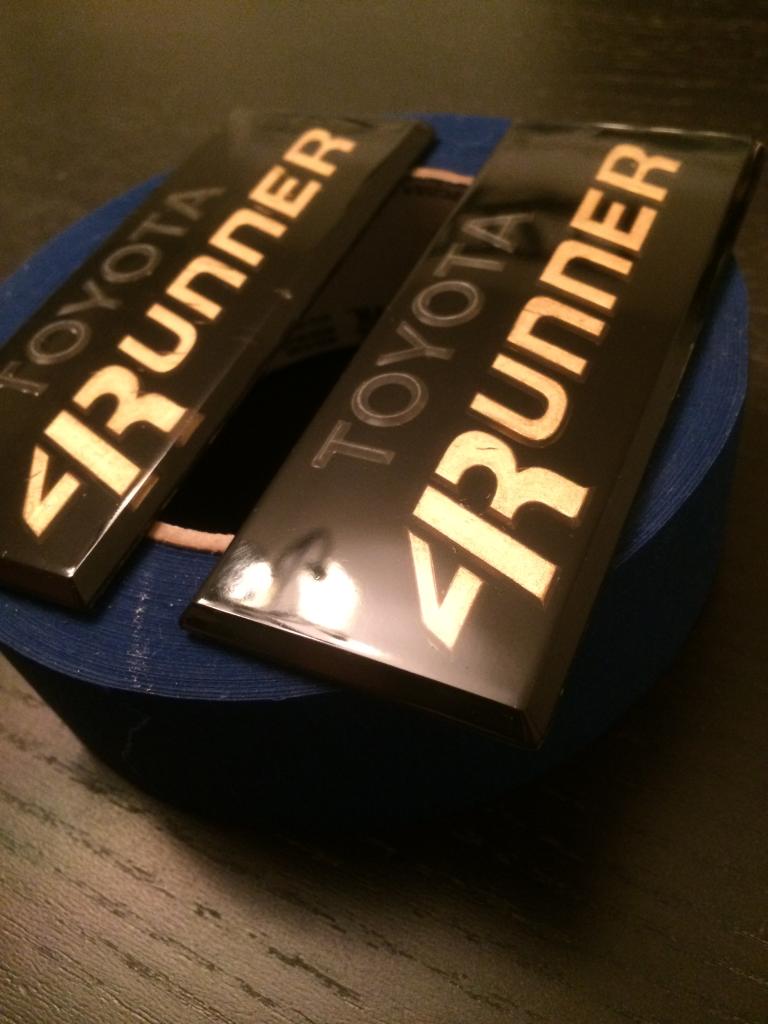
Looks fantastic (IMHO)!!


Sanded left, sanded and polished right.

Polished, after sanding. Still swirl scratches.

After sanding, cleaning, polishing and clearing!

Looks fantastic (IMHO)!!
Nov 20, 2014 | 07:09 PM
#28

Registered User
Joined: Mar 2013
Posts: 1,060
Likes: 48
Looks awesome!!
Few questions
1) How did you take off the old paint?
2) What new paint did you use?
3) What polish and high grit sand paper did you use?
4) And finally, how do you plan to reattach them?
Thanks!
Few questions
1) How did you take off the old paint?
2) What new paint did you use?
3) What polish and high grit sand paper did you use?
4) And finally, how do you plan to reattach them?
Thanks!
Nov 20, 2014 | 10:39 PM
#29
Thread Starter
Registered User
Joined: Dec 2011
Posts: 83
Likes: 0
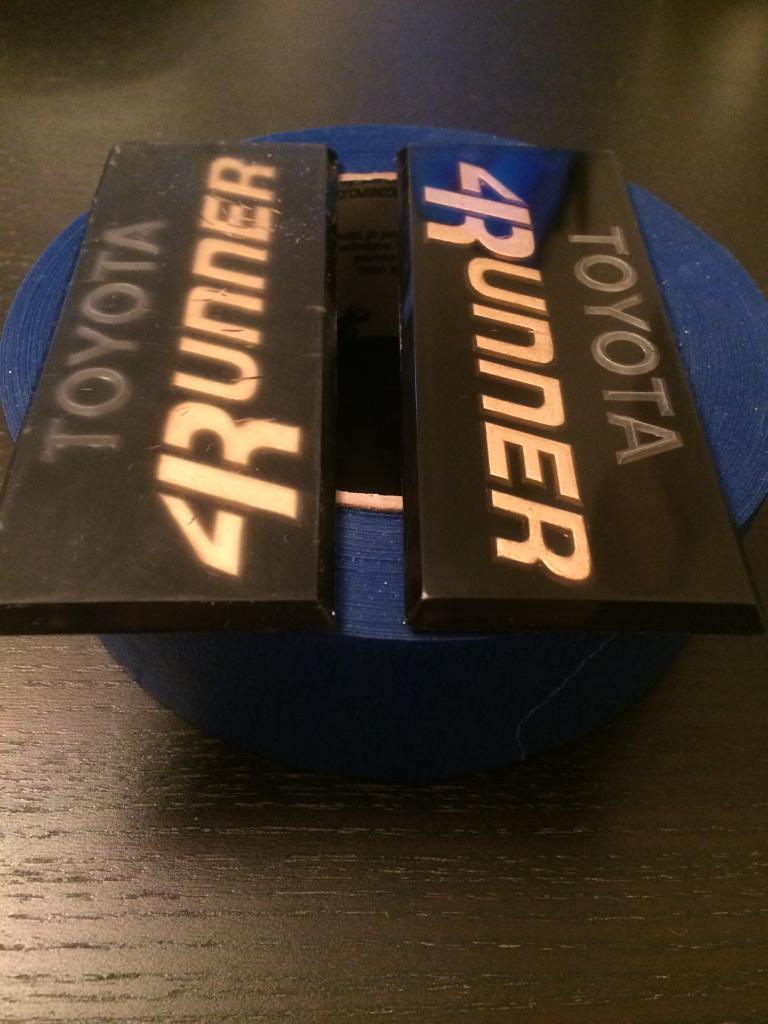
This is my write-up on FB Toyota 4Runner.
Ok. Here goes...... This was my how to, so do at your own risk!
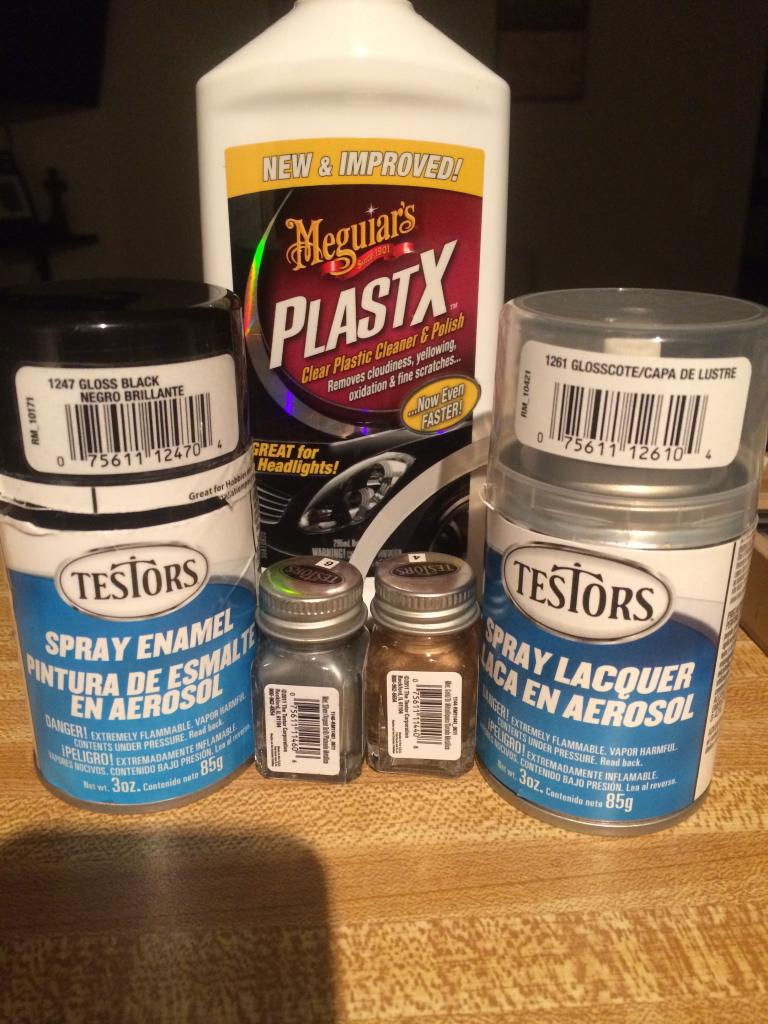
If your emblems are pretty much gone (like the first photo, while still on your pillars) then they should be (I say should) pretty easy to pry off. Once off, there are different methods of getting the different glues and paint off. I scraped the glue off then used nail polish remover to loosen the paint and then just used tooth picks and a really sharp hobby knife to get the rest of the paint off. Be very careful to not let the nail polish remover set for too long, cause it will start to crack the plastic. Keep in mind the plastic is over 20 years old and has been sun damaged (which is why they look the way they do!). After getting them free of paint and glue as much as possible, I wet sanded the tops and bottoms with 1000, then 1500, the. 2000 grit. Then came the Testors gold and silver paint. This part was the longest. It took about 4 coats of gold to get the 4Runner filled in with no light shining through. Silver toyota was a little easier. After that, let it dry real good, like a few days, then wet sand again to get the excess paint off the back so that it's perfectly setting in the letters. Then I sprayed black (using black Testors spray can, it's a real small can), and let dry. I then polished the front with Meguirs plastic renewal and then cleared. Again, this was over almost a two week period (when I had time, plus letting paint dry) and I wanted to get it right. Hope this helps anyone who wants to do it. Patients is the key!
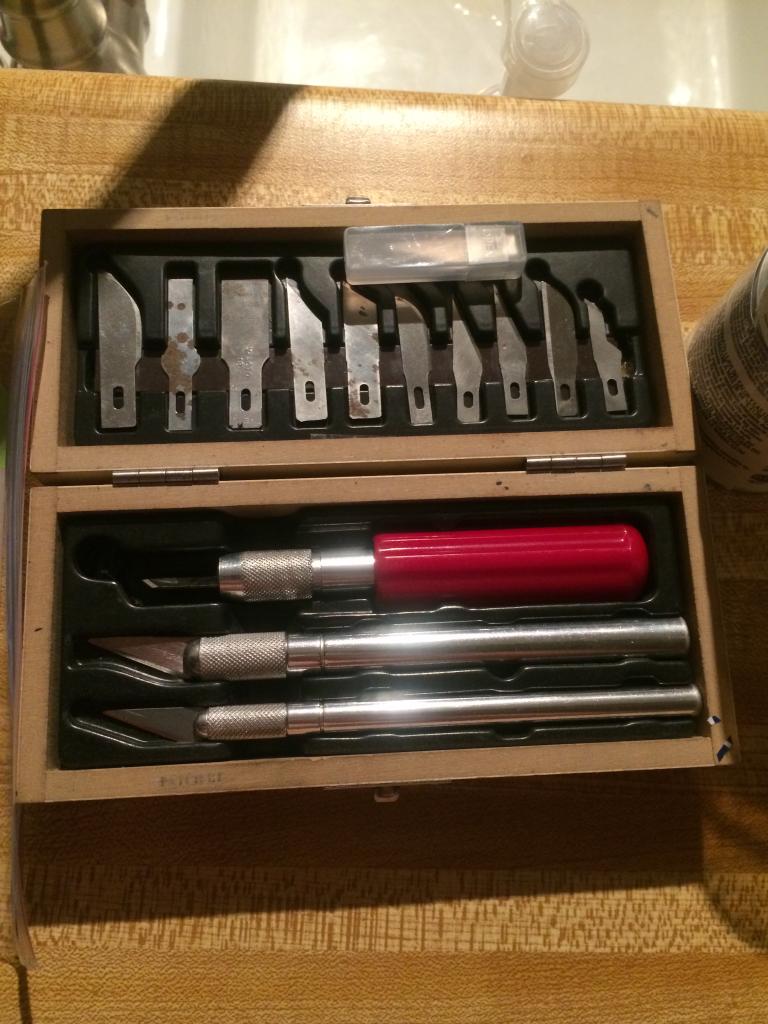
My tools for success!
Ok. Here goes...... This was my how to, so do at your own risk!
If your emblems are pretty much gone (like the first photo, while still on your pillars) then they should be (I say should) pretty easy to pry off. Once off, there are different methods of getting the different glues and paint off. I scraped the glue off then used nail polish remover to loosen the paint and then just used tooth picks and a really sharp hobby knife to get the rest of the paint off. Be very careful to not let the nail polish remover set for too long, cause it will start to crack the plastic. Keep in mind the plastic is over 20 years old and has been sun damaged (which is why they look the way they do!). After getting them free of paint and glue as much as possible, I wet sanded the tops and bottoms with 1000, then 1500, the. 2000 grit. Then came the Testors gold and silver paint. This part was the longest. It took about 4 coats of gold to get the 4Runner filled in with no light shining through. Silver toyota was a little easier. After that, let it dry real good, like a few days, then wet sand again to get the excess paint off the back so that it's perfectly setting in the letters. Then I sprayed black (using black Testors spray can, it's a real small can), and let dry. I then polished the front with Meguirs plastic renewal and then cleared. Again, this was over almost a two week period (when I had time, plus letting paint dry) and I wanted to get it right. Hope this helps anyone who wants to do it. Patients is the key!


My tools for success!
 Nov 28, 2014 | 10:44 PM
#34
Registered User
Joined: Jul 2013
Posts: 129
Likes: 4
Great job on the emblems! Not to be pessimistic like my brother but I wonder how well the Testors will hold up in sunlight? On some bike forums guys spray paint in the cap or a cup and brush it on. I know it will last longer than me probably. BTW where does one find a rig like that in Georgia for 2500 bucks. I see hulks  for 1500.
for 1500.
Last edited by papawhellie; Nov 28, 2014 at 10:45 PM.
Nov 30, 2014 | 05:14 PM
#36
Thread Starter
Registered User
Joined: Dec 2011
Posts: 83
Likes: 0
Papawheelie, thanks. I looked online and just followed what other guys did as far as painting them goes. And for finding the rig, I searched eBay, Craigslist, and the various other "traders" for almost a year and a half looking for a decent 1985 SR5 4Runner, or SAS 4Runner, but finally settled on a clean stock 88 and about a month later found this one on Craigslist about 5 hours away in darlington, SC. The guy didn't like the way the SAS rode and it needed some other work too. He had it posted for over a month with no takers and I gave him a call and he let it go for 2500! No leaks, new 35's, locked front, spool rear, runs great, no smoke. I hate the spool and that it's an auto, but it's a great rig with lots of potential!
Nov 30, 2014 | 05:17 PM
#37
Thread Starter
Registered User
Joined: Dec 2011
Posts: 83
Likes: 0
84yotadude, I sanded and then polished them to see how they'd look, but ended up cleaning the polish off and then cleared them. I couldn't get all the hairline swirls out with polish like other people said they could, but after clear coating them, they look like new. If you need anymore tips, just let me know.
Apr 20, 2015 | 04:25 PM
#40
Thread Starter
Registered User
Joined: Dec 2011
Posts: 83
Likes: 0
Well, haven't posted in a while, but since the last post, I installed a Detroit truetrac in the rear and removed the spool. And did some more interior work, but my big accomplishment was swapping out the auto for a 5 speed from another 89 4Runner that was at the junk yard. I had to buy a shifter (cause it was already nabbed from the trans before I could pull the whole thing) and also replaced the crossmember bushing. Overall the swap wasn't too difficult, just time consuming and trying to get my buddy to help with our two different work schedules.


