
Nothingbetters 85 pickup


 Aug 18, 2013 | 08:10 PM
#65
Thread Starter
Registered User
Joined: Jul 2009
Posts: 727
Likes: 1
From: Rocky Mtn. House AB, Canada
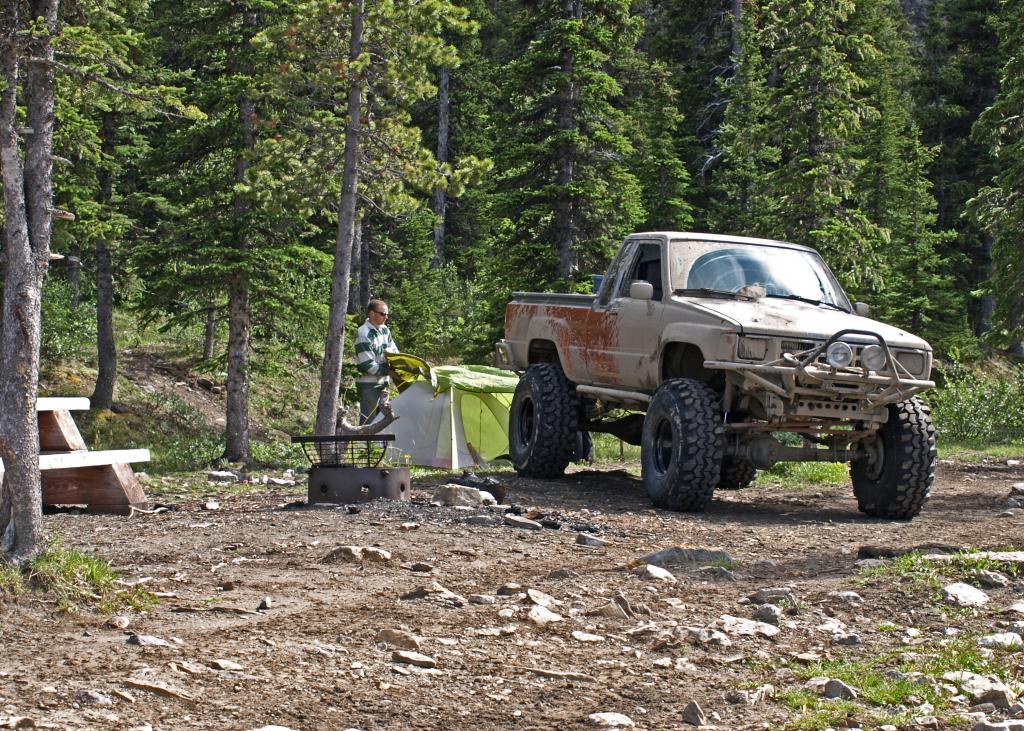
Smilemon...yes, it does get on the trail. My girlfriend and I got invited to go to Ruby falls with a bunch of cruisers. Got a couple scratches, rock chips and dings. Its only paint!
Setting up the tent at Ruby Falls.
For the record, I was not stuck. Just got some electrical stuff wet so the engine stopped. Every other hole was 3/4 of the way up the tires untill this one went up to the door handle on the drivers side. Thats the first time I've had water a few inches from coming in the open window. I don't want to do that again! Change the wet ignitor with my spare and off we go!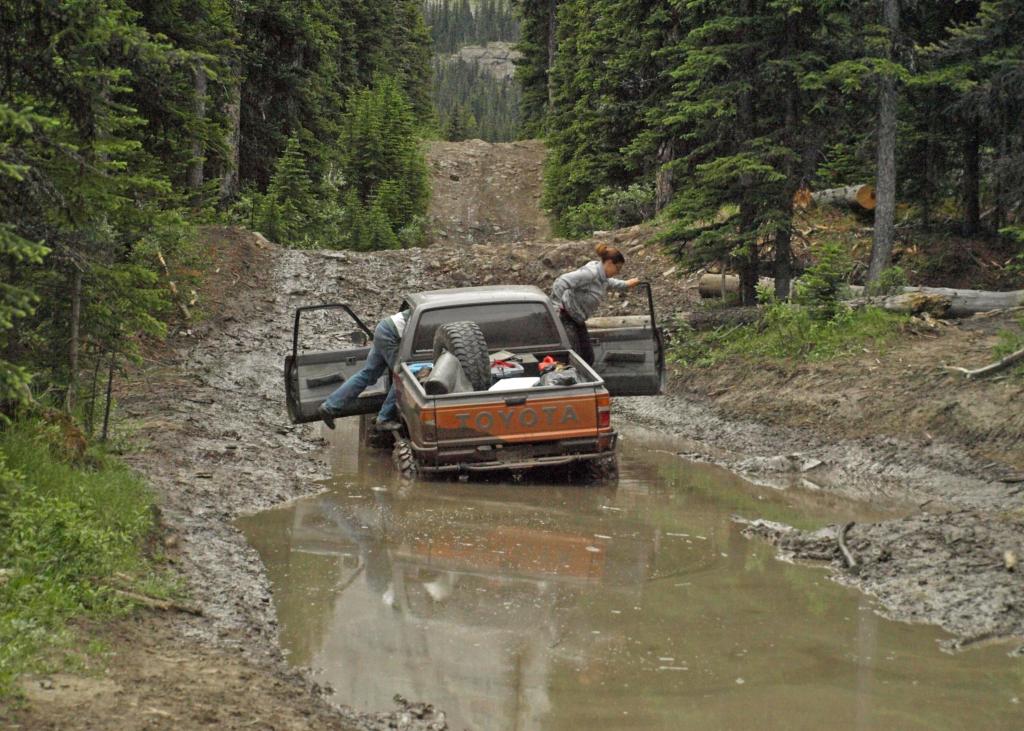
Creek crossing
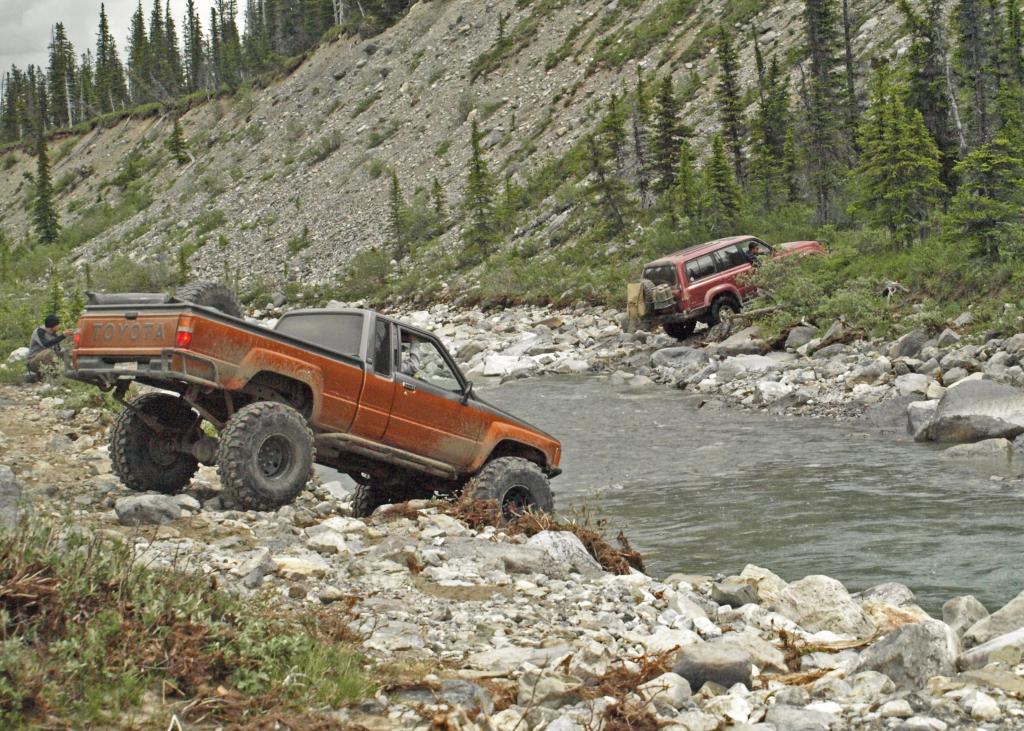
Into the creek bed. Lots of flood damage from early in the year so it was rough going with some interesting route choices.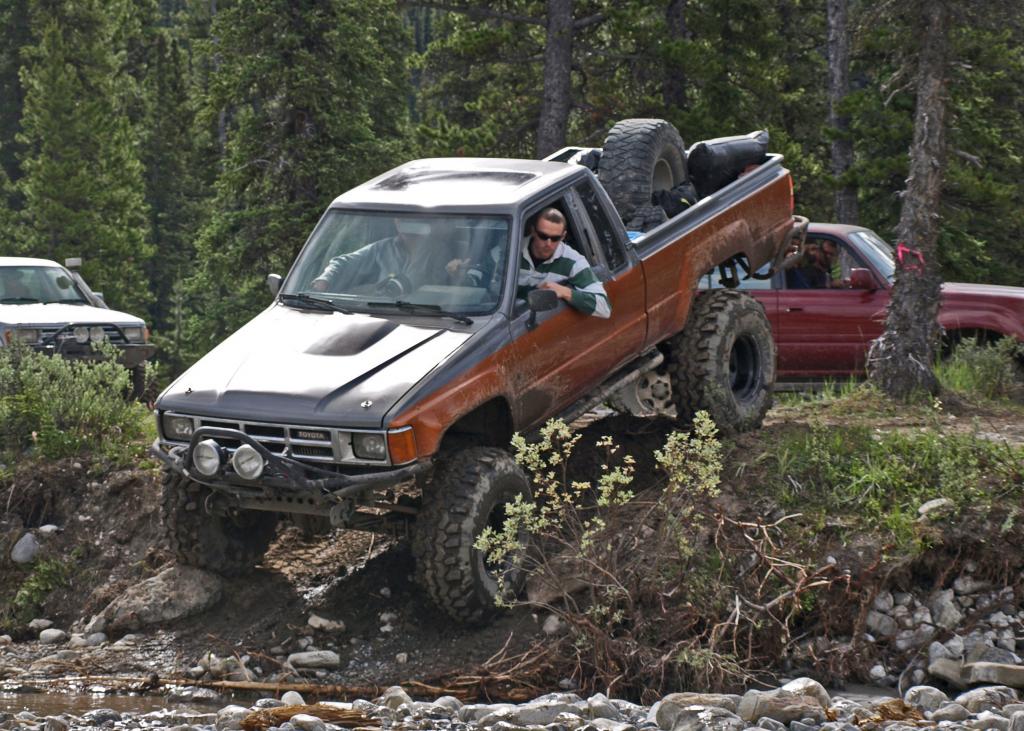
Setting up the tent at Ruby Falls.
For the record, I was not stuck. Just got some electrical stuff wet so the engine stopped. Every other hole was 3/4 of the way up the tires untill this one went up to the door handle on the drivers side. Thats the first time I've had water a few inches from coming in the open window. I don't want to do that again! Change the wet ignitor with my spare and off we go!
Creek crossing
Into the creek bed. Lots of flood damage from early in the year so it was rough going with some interesting route choices.
Aug 18, 2013 | 08:36 PM
#66
Thread Starter
Registered User
Joined: Jul 2009
Posts: 727
Likes: 1
From: Rocky Mtn. House AB, Canada
I have fallen so far behind on this thread. Oh well. I've since ground all the old boxliner off of my bumpers and rock sliders, re-sprayed them and painted them high gloss black. Unprotected boxliner fades over time and I don't like that. I received a smoothie cowl and interior rear trim panels from Toyotafiberglass. Both look great, installed with no problems and do exactly what they're suppoed to do.
I also forgot to put in my hood pins one day while in a rush. My hood flipped up on the highway. Opps. Bent the hood beyond repair, broke off my wiper arm, bent both hinges and cracked my windshield. So I bought a new aftermarket hood, hinges, wiper arm and windshield. Cut the cowl off my damaged hood, bent it back to shape, cut a hole in my new hood, and installed the cowl just like it was on the old hood. What a waste of time. Oh well. $500ish later its back to where it was before the hood pin incident. The new windshield sure is nice to have.
I also just got back from a road trip. I went to Penticton to the show and shine that ToyotaFiberglass was holding at their shop. It seemed like a good reason for a road trip. 9 hours of driving and I was sitting on the beach working on my sun burn while eating peaches. Life is good. It was a good show, finally got to put some faces to some names and some some really nice looking trucks. I'm excited to go back next year!
I have pictures on my phone of everything described above but I first have to learn how to get them onto my computer.
Aug 20, 2013 | 06:48 PM
#67
It was Great to put a face to the name Jon , you and your gal are welcome anytime ..
I'm thinkin' next year we'll do a "poker run" , (off road of course) and make it a 2 day event , we'll see .. looking for a better location for the next year show as of right now ! and already have some interested companies wanting in on door prizes .. learned alot this year , and I know next year will be better . I THANK YOU again for making the trip
.
I'm thinkin' next year we'll do a "poker run" , (off road of course) and make it a 2 day event
, we'll see .. looking for a better location for the next year show as of right now ! and already have some interested companies wanting in on door prizes .. learned alot this year , and I know next year will be better . I THANK YOU again for making the trip.
Last edited by slacker; Aug 20, 2013 at 06:49 PM.
Feb 9, 2014 | 02:32 PM
#68
Thread Starter
Registered User
Joined: Jul 2009
Posts: 727
Likes: 1
From: Rocky Mtn. House AB, Canada
since I'm once again falling behind oon my posting here goes.
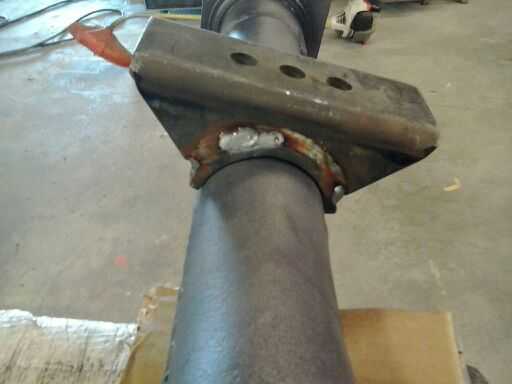
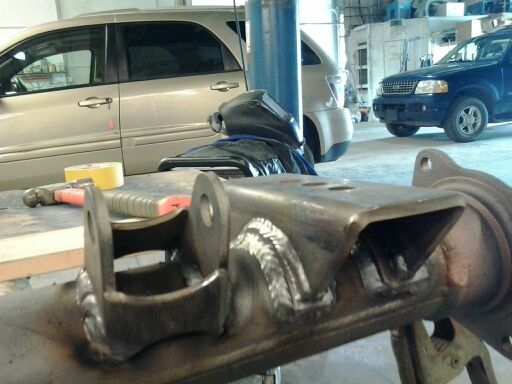
Early october I started building my new rear axle. All I originally wanted was rear disc brakes. priced it out and I was looking around $500 for one of the trail gear kits. Then I found a guy with a Front range off road full floating rear end complete with upgraded axle shafts, new spring mounts and disc brakes, for $800. Perfect. Bought that, Sand blasted the 85 housing that came with it, welded on my perches and shock mounts, painted it gloss black, changed the wheel bearings. and installed it. I believe the spring mounts I had were for the 86 and up axle so they are made for a larger diameter axle tube. So as shown in the pics I made some spacers so they would fit nice and snug on the 85 axle. This also makes it possible for me to put off the perches in the future to change the pinion agle without cutting into the axle tube.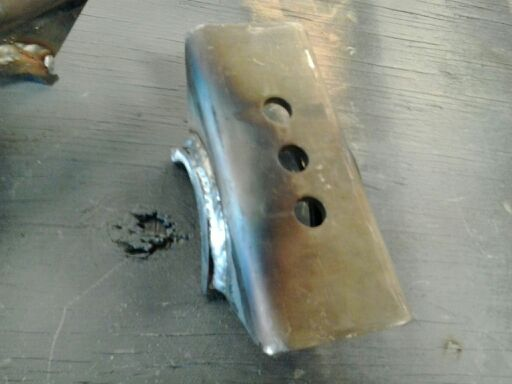
Early october I started building my new rear axle. All I originally wanted was rear disc brakes. priced it out and I was looking around $500 for one of the trail gear kits. Then I found a guy with a Front range off road full floating rear end complete with upgraded axle shafts, new spring mounts and disc brakes, for $800. Perfect. Bought that, Sand blasted the 85 housing that came with it, welded on my perches and shock mounts, painted it gloss black, changed the wheel bearings. and installed it. I believe the spring mounts I had were for the 86 and up axle so they are made for a larger diameter axle tube. So as shown in the pics I made some spacers so they would fit nice and snug on the 85 axle. This also makes it possible for me to put off the perches in the future to change the pinion agle without cutting into the axle tube.
Feb 9, 2014 | 02:43 PM
#69
Thread Starter
Registered User
Joined: Jul 2009
Posts: 727
Likes: 1
From: Rocky Mtn. House AB, Canada
then it was time to hook up the brakes. I bought a MC from Trail gear canada from an fj80. So that gave me a 1" bore with residual vales on both front and rear outlets. I picked up a manual proportioning valve as well. I went to my parts store of choice and picked up $50 of pre flared line in the lengths I measured out. These pre flared lines already had fittings attatched so you simply just bent them with your hands and screwed them together. Very easy to do, I recommend it to anyone. So I installed my new MC after painting it the same red as the engine, ran my lines to the now installed full floating rear axle, ran lines to each caliper, bled the system with some help from dad and I'm ready to go.
Now its gone much to smoothly up to this point so somethign was bound to go wrong. Sure enough it did. Drove it home...it was great. Drove out the airport to go flying with dad and I lost all power to the tires. Huh, well that sucks. Pulled one of the hubs apart, the clutch had slid so it wasn't attatched to the axle anymore. Hmmm. Put it back together, went flying, then while driving home, same thing. Long story short, the rear hubs were unlocking under constant load. Driving around town was not a problem but highway use was. I never did figure out how to solve the problem was so drive flanges were ordered and installed later.
Now its gone much to smoothly up to this point so somethign was bound to go wrong. Sure enough it did. Drove it home...it was great. Drove out the airport to go flying with dad and I lost all power to the tires. Huh, well that sucks. Pulled one of the hubs apart, the clutch had slid so it wasn't attatched to the axle anymore. Hmmm. Put it back together, went flying, then while driving home, same thing. Long story short, the rear hubs were unlocking under constant load. Driving around town was not a problem but highway use was. I never did figure out how to solve the problem was so drive flanges were ordered and installed later.
Feb 9, 2014 | 02:49 PM
#70
Thread Starter
Registered User
Joined: Jul 2009
Posts: 727
Likes: 1
From: Rocky Mtn. House AB, Canada
So while troubleshooting my rear hub issue I found another problem. My fancy cromoly axles had aluminum built up on them. Turns out there is a FROR specific seal used and when the axle tube is bent...or warped from welding on spring perches...the aluminum on the seal rubs against the axle. Google search showed me I was not the only one to make this mistake while welding on spring perches. Oops. Now I should have bought a new axle housing and started over...but I have a 20 ton frame rack in the body shop I work in so I did some red neck engineering, chained my truck to the frame rack and "unbented" my axle housing. The axle is not rubbing any more and the alignment shop says they would never know anything was ever wrong with it. Perfect.
Feb 9, 2014 | 02:54 PM
#71
Thread Starter
Registered User
Joined: Jul 2009
Posts: 727
Likes: 1
From: Rocky Mtn. House AB, Canada
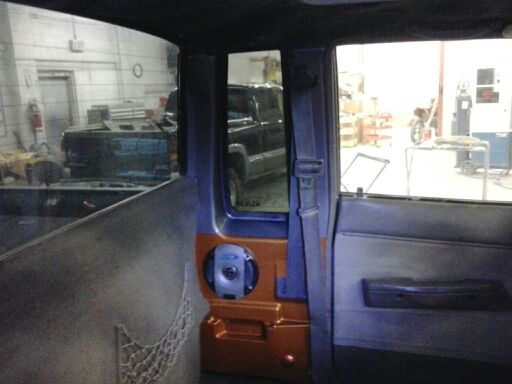
I mentioned the inner trim panels I ordered from Toyotafiberglass.com a few posts back. Here they are. First picture is doing the test fit and cutting out the speaker hole and seat belt hole, second is after being painted. My carpet is pulled out as I installed my new ARB compressor at this time too. I have easy access to the power supply for my amp under my seat so I wired the compressor directly into that. One less set of wires through the firewall. And since I was painting those i pulled out most of the dash and the A piller gauge pod and painted lots of those bits either orange or silver as well. 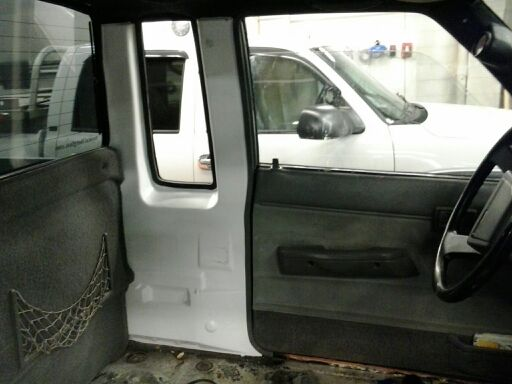
Feb 9, 2014 | 03:10 PM
#72
Thread Starter
Registered User
Joined: Jul 2009
Posts: 727
Likes: 1
From: Rocky Mtn. House AB, Canada
To catch up on the hood I had to make. Heres some pics.
New hood with a new hole.
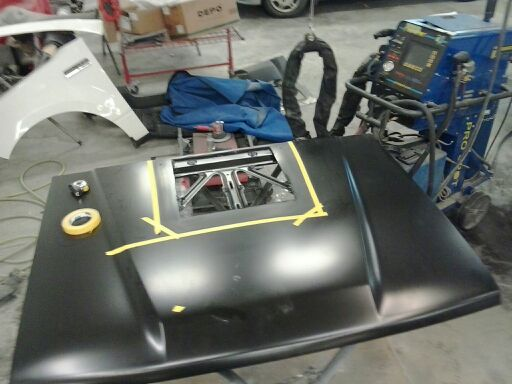
Placement of the scoop from a newer tacoma that I've turned into a cowl.
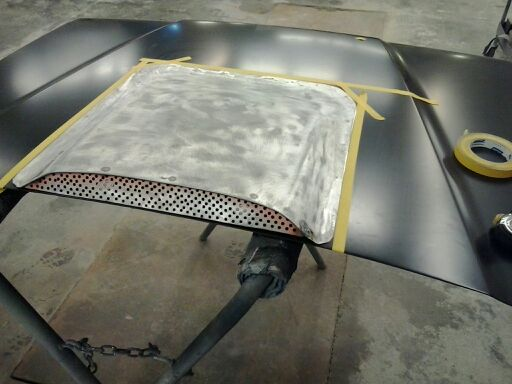
Welded on with our shops resistance welder with a layer of 3m panel bonding adhesive inbetween the cowl and hood skin. Then a layer of fiberglass filler.
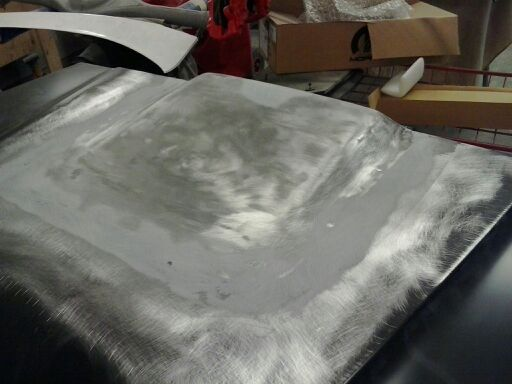
Then after my poly filler and finishing putty it sits in the booth waiting for primer.
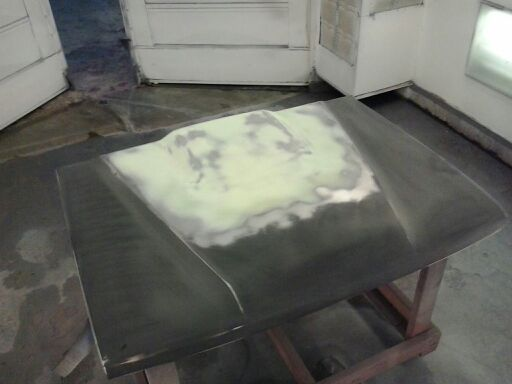
after blocking the primer, it was painted and installed...and looks just like it did before the hood pin incident that I dont like to talk about.
New hood with a new hole.
Placement of the scoop from a newer tacoma that I've turned into a cowl.
Welded on with our shops resistance welder with a layer of 3m panel bonding adhesive inbetween the cowl and hood skin. Then a layer of fiberglass filler.
Then after my poly filler and finishing putty it sits in the booth waiting for primer.
after blocking the primer, it was painted and installed...and looks just like it did before the hood pin incident that I dont like to talk about.
 Feb 9, 2014 | 09:07 PM
#75
Thread Starter
Registered User
Joined: Jul 2009
Posts: 727
Likes: 1
From: Rocky Mtn. House AB, Canada
Thank you! I try to take that little bit of extra time to get things done right. Apparently not enough time as I warped an axle housing from welding to fast.
Time for my next block of text.
Since I've owned the truck its always had a Subaru intercooler mounted directly above the turbo. Its the only place under the hood that it will fit. It keeps the charge piping short and direct, it fits in the available space, it even cools the air when I'm on the highway. But I know a front mounted IC would be a much more efficent option. Sure it will have longer piping so it will take a bit longer to build boost, but I'm not going for high performance, just practical performance. Being front mounted it should lower my exhaust gas temps a bit, help the engine run a bit cooler, and naturally help cool the air charge better than being top mounted above the turbo. So I've been looking around trying to find a IC that will work for me. I want one that has both air ports on the same side. This will keep my piping length to a minimum, costing me less money and having less places for a leak to start. Occasionally I see one available online but they either have holes, cost a bunch or are very low quality and have poor reviews. So I decided to make one. Our shop has an aluminum welder. It uses our miller 210, swap on a bottle of 100% argon for shielding, and a spool gun to feed the wire and go to town.
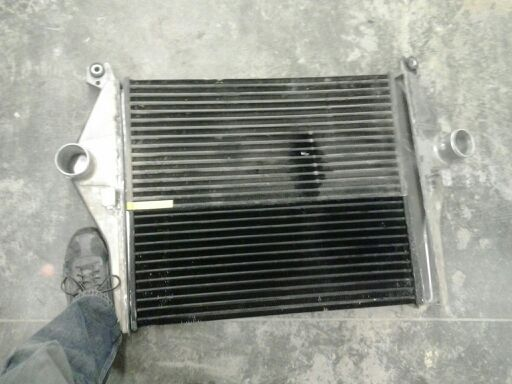
First I needed an intercooler to cut apart and make my own from. I worked on a 2005 Dodge that hit a deer, small hole in the intercooler, had to replace it. Perfect. So now I'm working with this. I put my foot in the picture for reference. Those are size 12s I'm rocking so its not some little intercooler I'm playing with.
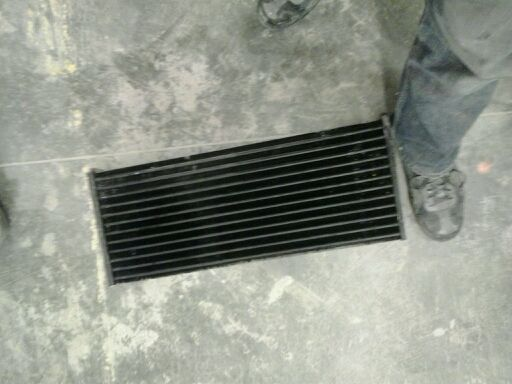
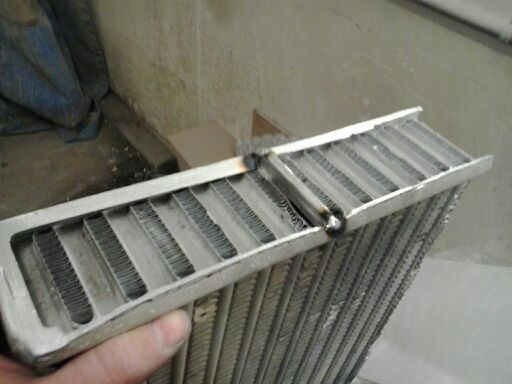
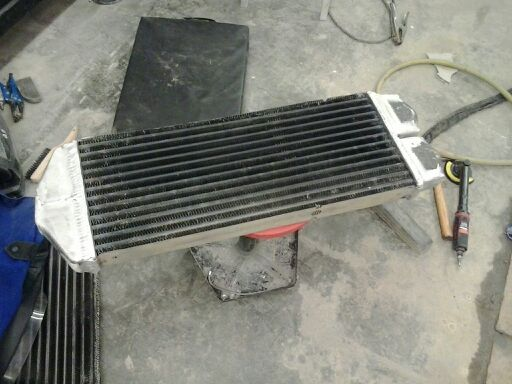
Next I cut off both tanks using my handy cut off wheel. Then cut the core to the size I need. Once again my foot is included for reference.
Next I cut apart the tanks and welded up some inlet and outlet ports. This was my first time using this welder so it was a steep learning curve. Very similar to mig with steel...but much torquey-er. Don't get too close to your work or the wire gets stuck on the contact tip and you have to spend 5 minutes changing it. Also for those who don't know, when you weld aluminum, it doesn't turn red like steel does and it has a lower melting temperature. So that makes it a harder than with steel.
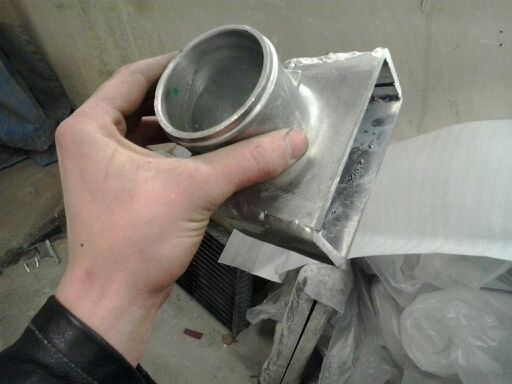
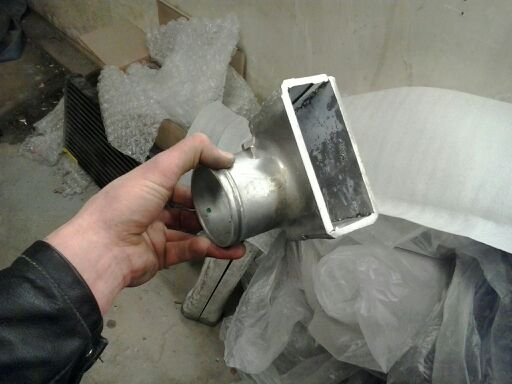
Then I needed a tank for the other end. I cut and welded together a wonderful feat of engineering I think.
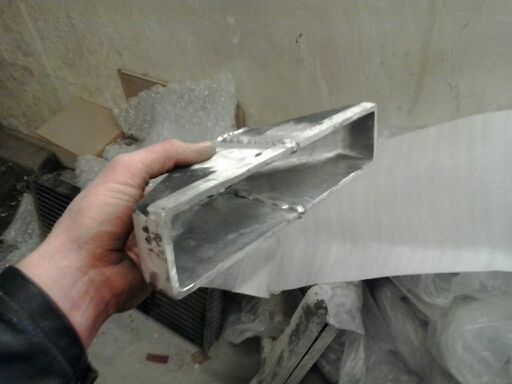
then I needed to create a "wall" if you will between the inlet and outlet ports so air would be forced to travel through the core. Its not a perfect seal but I'm convinced it will do it job fine.
Next step was to weld on my, end tank and my inlet and outlet.
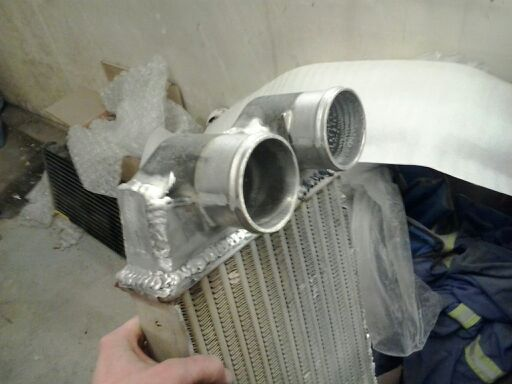
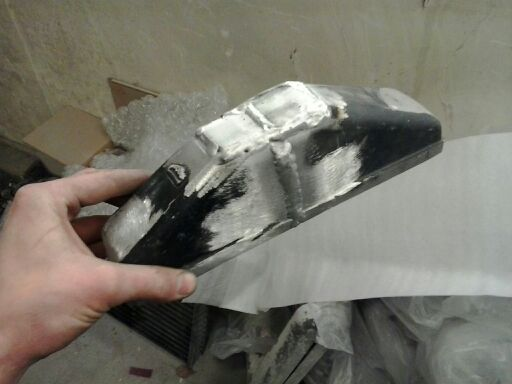
Then I had my finished product!
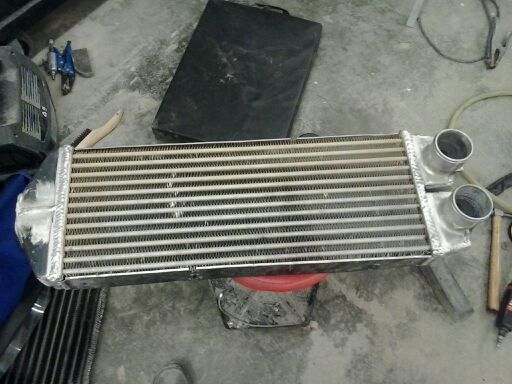
So I took it to the local rad shop, had them pressure test it in trade for a case of beer and it was leaking on pretty much every corner and every where in between. So they gave it back, I attacked it with the welder and round two of pressure testing was a success. No leaks! So it has been steam cleaned and is waiting by my tool box for me to buy my charge piping, paint it black and to install it. Total cost : $60 for a steam clean, $20 for a case of beer, and $10 for a spool of auminum wire.
For me to mount the IC I am going to have it more or less replace my grill. So it will take away of of the few factory things left on the truck and will remove some of the "sleeper" aspect. Oh well. Along with install of this IC I will also have to change my rad set up as well. During hot summer days the current rad will hold me just under 200F on the highway without my electric cooling fan running. Which is what all the 7m freaks say is perfect for this engine. When I install this IC infront of the rad my temps are going to jump out of the comfortable range.
So since my rad core is leaking anyways after flexing our way into Ruby falls, I was going to get another core ordered in that is 3 inches longer than my current core, have my existing tanks soldered to it and it should be fine for highway cruising my way back to penticton this summer for Slackers next Toyota show and shine.
Time for my next block of text.
Since I've owned the truck its always had a Subaru intercooler mounted directly above the turbo. Its the only place under the hood that it will fit. It keeps the charge piping short and direct, it fits in the available space, it even cools the air when I'm on the highway. But I know a front mounted IC would be a much more efficent option. Sure it will have longer piping so it will take a bit longer to build boost, but I'm not going for high performance, just practical performance. Being front mounted it should lower my exhaust gas temps a bit, help the engine run a bit cooler, and naturally help cool the air charge better than being top mounted above the turbo. So I've been looking around trying to find a IC that will work for me. I want one that has both air ports on the same side. This will keep my piping length to a minimum, costing me less money and having less places for a leak to start. Occasionally I see one available online but they either have holes, cost a bunch or are very low quality and have poor reviews. So I decided to make one. Our shop has an aluminum welder. It uses our miller 210, swap on a bottle of 100% argon for shielding, and a spool gun to feed the wire and go to town.
First I needed an intercooler to cut apart and make my own from. I worked on a 2005 Dodge that hit a deer, small hole in the intercooler, had to replace it. Perfect. So now I'm working with this. I put my foot in the picture for reference. Those are size 12s I'm rocking so its not some little intercooler I'm playing with.
Next I cut off both tanks using my handy cut off wheel. Then cut the core to the size I need. Once again my foot is included for reference.
Next I cut apart the tanks and welded up some inlet and outlet ports. This was my first time using this welder so it was a steep learning curve. Very similar to mig with steel...but much torquey-er. Don't get too close to your work or the wire gets stuck on the contact tip and you have to spend 5 minutes changing it. Also for those who don't know, when you weld aluminum, it doesn't turn red like steel does and it has a lower melting temperature. So that makes it a harder than with steel.
Then I needed a tank for the other end. I cut and welded together a wonderful feat of engineering I think.
then I needed to create a "wall" if you will between the inlet and outlet ports so air would be forced to travel through the core. Its not a perfect seal but I'm convinced it will do it job fine.
Next step was to weld on my, end tank and my inlet and outlet.
Then I had my finished product!
So I took it to the local rad shop, had them pressure test it in trade for a case of beer and it was leaking on pretty much every corner and every where in between. So they gave it back, I attacked it with the welder and round two of pressure testing was a success. No leaks! So it has been steam cleaned and is waiting by my tool box for me to buy my charge piping, paint it black and to install it. Total cost : $60 for a steam clean, $20 for a case of beer, and $10 for a spool of auminum wire.
For me to mount the IC I am going to have it more or less replace my grill. So it will take away of of the few factory things left on the truck and will remove some of the "sleeper" aspect. Oh well. Along with install of this IC I will also have to change my rad set up as well. During hot summer days the current rad will hold me just under 200F on the highway without my electric cooling fan running. Which is what all the 7m freaks say is perfect for this engine. When I install this IC infront of the rad my temps are going to jump out of the comfortable range.
So since my rad core is leaking anyways after flexing our way into Ruby falls, I was going to get another core ordered in that is 3 inches longer than my current core, have my existing tanks soldered to it and it should be fine for highway cruising my way back to penticton this summer for Slackers next Toyota show and shine.
Last edited by nothingbetter; Feb 9, 2014 at 09:16 PM.
Feb 9, 2014 | 09:26 PM
#76
Thread Starter
Registered User
Joined: Jul 2009
Posts: 727
Likes: 1
From: Rocky Mtn. House AB, Canada
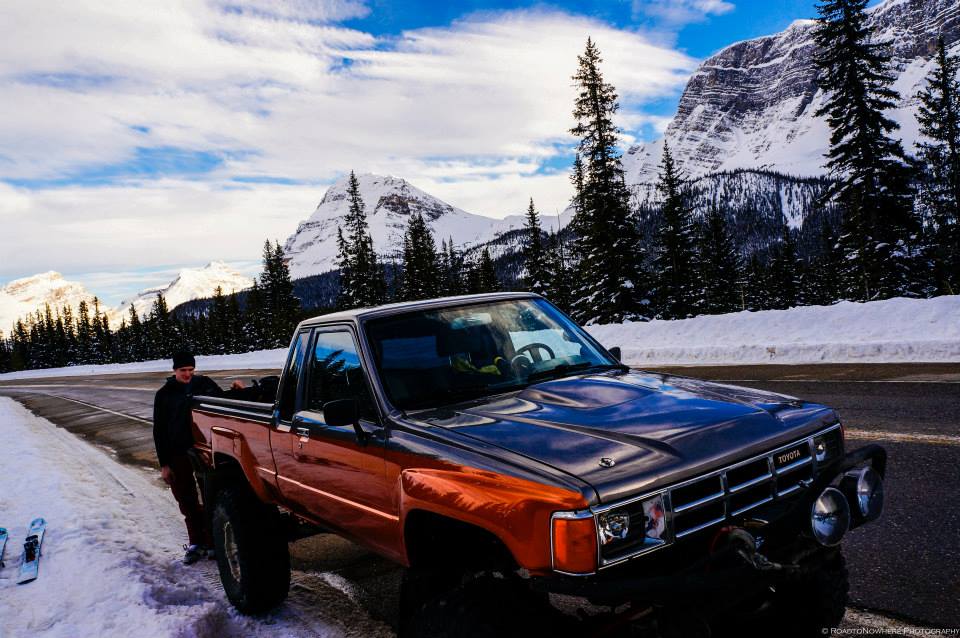
And since I'm on a roll with posting, heres 2 shots of me and my truck while out skiing this year. Photographer is one of my ski/adventure buds. I should give him some credit so check out roadtonowherephotography if you feel so inclined.
Who says you can't drive lifted trucks with big tires in the winter?
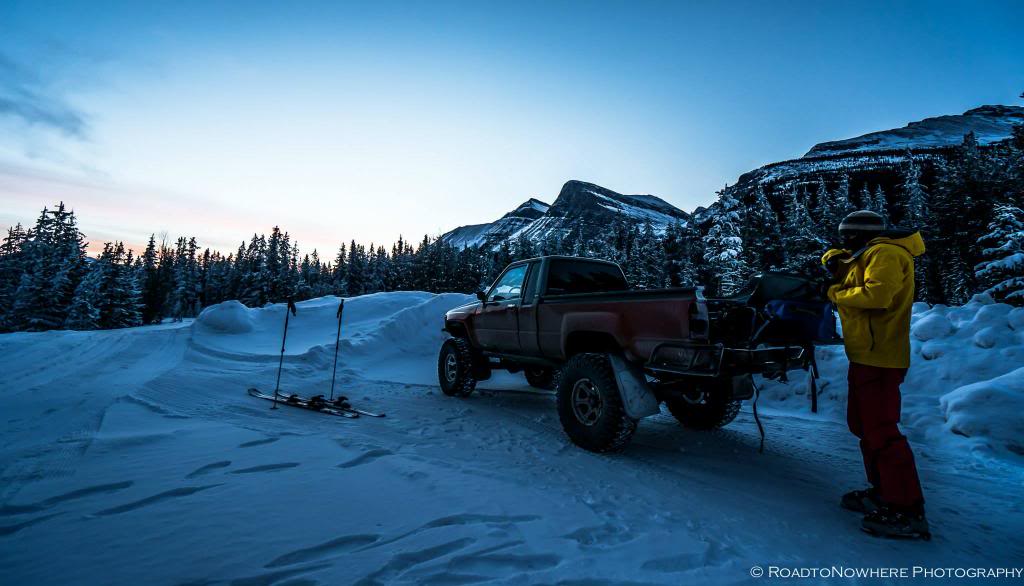
Who says you can't drive lifted trucks with big tires in the winter?
Last edited by nothingbetter; Feb 9, 2014 at 09:27 PM.
Feb 9, 2014 | 10:18 PM
#77
Just spent the last hour reading your thread and enjoyed every pic and info you had. Really enjoyed your detail into the metal repair. You have one great looking truck and the details you put into it. Great Job!!!
Feb 10, 2014 | 05:27 AM
#78
Never would have thought about warping the axle like that. Glad you got it squared away without having to replace the whole housing.
I love trading work for beer. The new IC came out great. Thats some skills you have there.
I have to agree with terry and every one else on here. Your attention to detail, especially with the truck paint and body work, is absolutely amazing.
Those pics your buddy took are Magazine cover worthy!!
Keep em coming.


