
Nothingbetters 85 pickup
 Dec 13, 2012 | 09:17 PM
#21
Thread Starter
Registered User
Joined: Jul 2009
Posts: 727
Likes: 1
From: Rocky Mtn. House AB, Canada
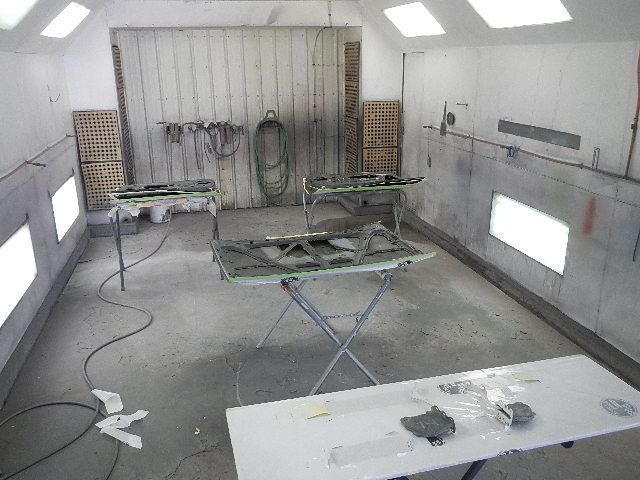
Doors, hood hinges and hood in the booth
ooooOOOOoooo...shiny
Blocking out the box. round 1
yet another use for my round block!
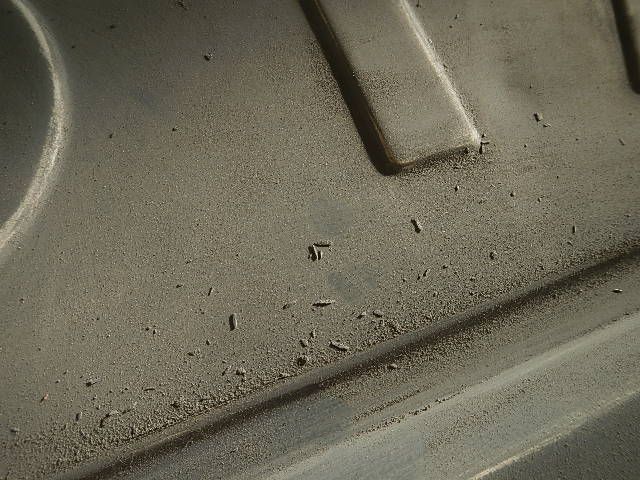
This is what happens to the epoxy primer when you try to sand it. It balls up and clogs your paper. This is on the tailgate.
ooooOOOOoooo...shiny
Blocking out the box. round 1
yet another use for my round block!
This is what happens to the epoxy primer when you try to sand it. It balls up and clogs your paper. This is on the tailgate.
Dec 13, 2012 | 09:21 PM
#22
Thread Starter
Registered User
Joined: Jul 2009
Posts: 727
Likes: 1
From: Rocky Mtn. House AB, Canada
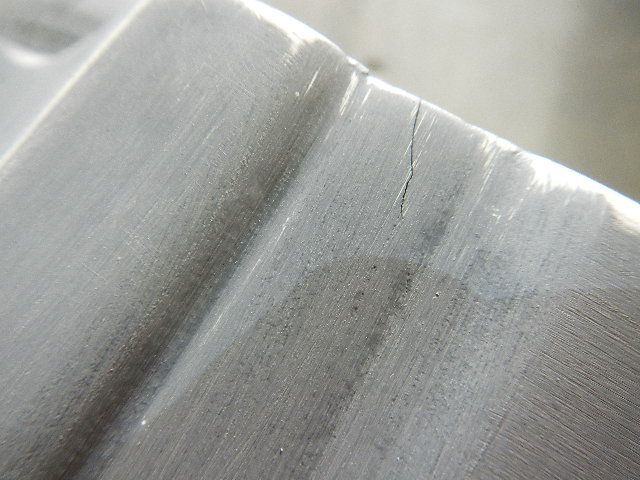
I found 2 little cracks on the tailgate. Both in the same spot on either side. Ground them out, used fiberglass repair adhesive, filled it. and its good as new...better then new?
Dec 13, 2012 | 09:23 PM
#23
Thread Starter
Registered User
Joined: Jul 2009
Posts: 727
Likes: 1
From: Rocky Mtn. House AB, Canada
After fitting this fender.
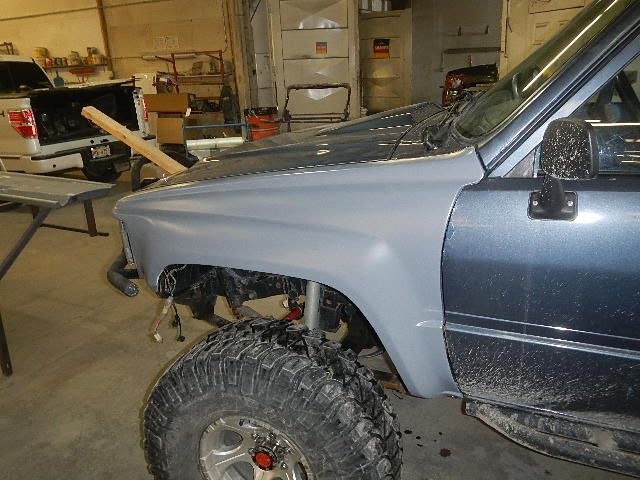
I took off my old box and mounted the new box so I could mark my holes to be drilled. These body lines don't line up to well but thats probally because of the box liner I sprayed on the underside. I'll make sure to grind it off in the spot where it contacts the mounts and it should sit where its supposed to.
I took off my old box and mounted the new box so I could mark my holes to be drilled. These body lines don't line up to well but thats probally because of the box liner I sprayed on the underside. I'll make sure to grind it off in the spot where it contacts the mounts and it should sit where its supposed to.
Dec 13, 2012 | 09:26 PM
#24
Thread Starter
Registered User
Joined: Jul 2009
Posts: 727
Likes: 1
From: Rocky Mtn. House AB, Canada
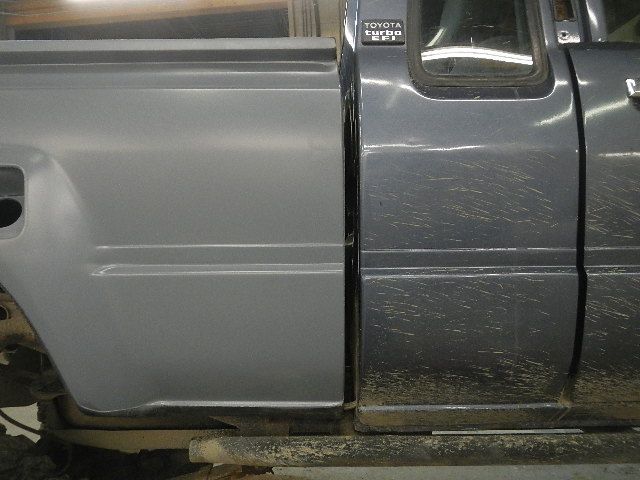
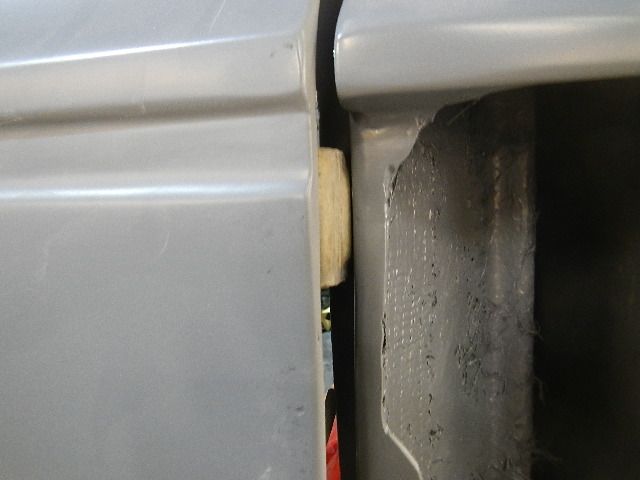
For test fitting the tail gate. I installed all the hardware and drilled my latch mounting holes in the box. Its a tight fit on this side where as the other side has lots of room. The gaps and body lines line up after some adjustment/die grinding of the hinges but the stricker still hit on this one side. hmmm. a bit more adjusting and shimming and I got it so it doesn't contact.
After test fitting my taillights I wasn't happy with how it looked so I decided to make it up to my standards. Sanded down to bare fiberglass with 80 grit. Used rigid fiberglass repair adhesive (fusor 100ez) to build up the material to the needed thickness. The 2x4 is used so it doesn't drip all over the place. Its covered on wax paper so it doesn't stick to the wood. Its a heat set product so I pulled out my heat gun, set it, and sanded it to where it needed to be 5 min later. A little filler on the "oops" spots and its prime-able!
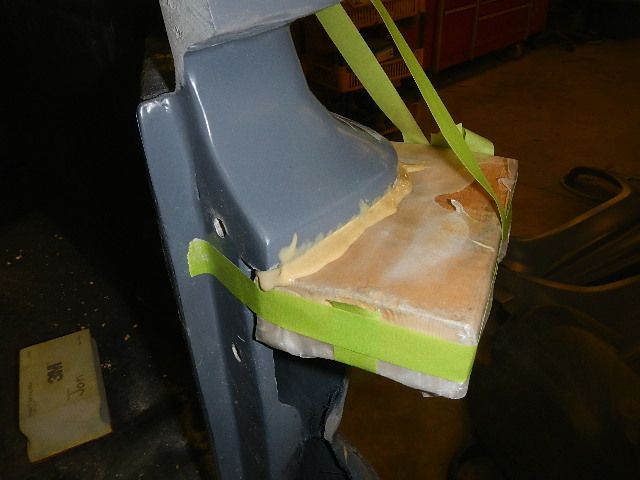
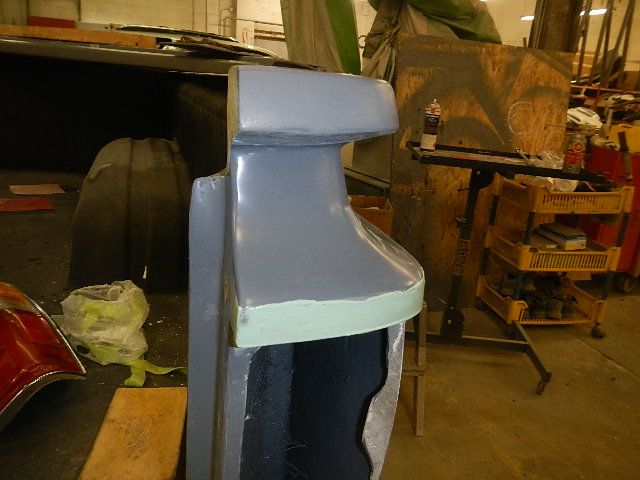
Now that much better! Bodyman approved!
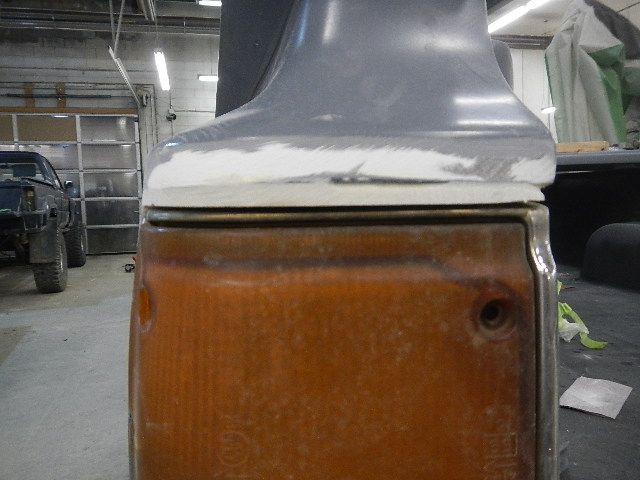
smeared with putty which is ready to be knocked off then primed
After test fitting my taillights I wasn't happy with how it looked so I decided to make it up to my standards. Sanded down to bare fiberglass with 80 grit. Used rigid fiberglass repair adhesive (fusor 100ez) to build up the material to the needed thickness. The 2x4 is used so it doesn't drip all over the place. Its covered on wax paper so it doesn't stick to the wood. Its a heat set product so I pulled out my heat gun, set it, and sanded it to where it needed to be 5 min later. A little filler on the "oops" spots and its prime-able!
Now that much better! Bodyman approved!
smeared with putty which is ready to be knocked off then primed
Last edited by nothingbetter; Dec 13, 2012 at 09:36 PM.
Dec 13, 2012 | 09:44 PM
#25
Thread Starter
Registered User
Joined: Jul 2009
Posts: 727
Likes: 1
From: Rocky Mtn. House AB, Canada
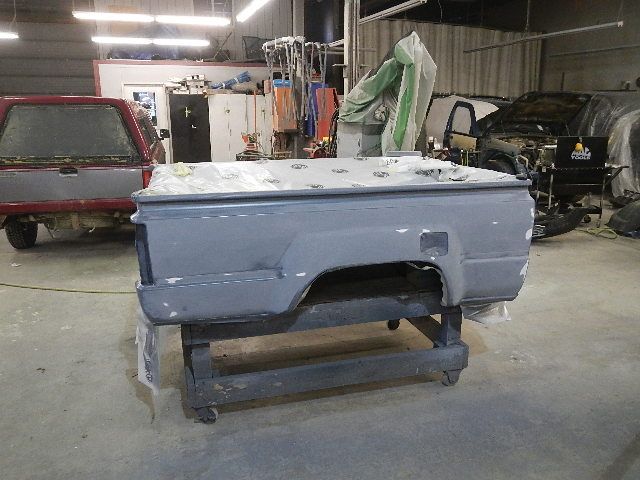
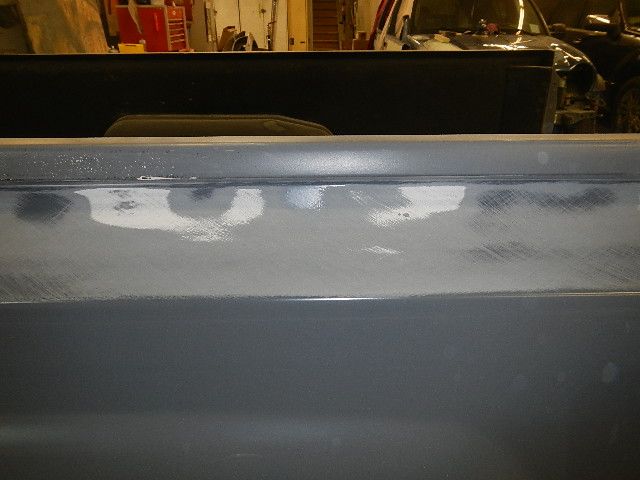
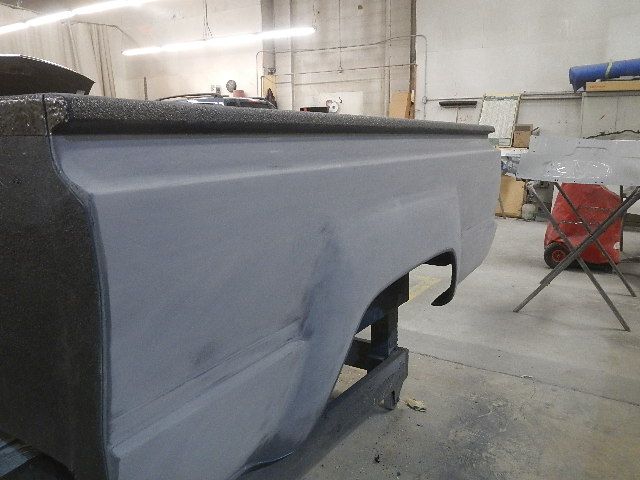
As for the wavy rails I was talking about. This is blocked with a 30cm block. Which is used for making pretty much anything straight. You can see in some spots it down to bare fiberglass, then whatever kind of white primer, then the epoxy (whats left) then 2 applications of high build primer and its still not even close to being straight ebough for me. Other people who buy this box might be happy with this...but I'm fussy and capable of "fixing" it. Filled just the low spots, blocked in 80grit, filled the whole rail again, then blocked it off untill it was straight. There is still a wave in there that I won't be able to get rid of. Its just to long and gradual. So I'll have to deal with it.
Dec 13, 2012 | 09:56 PM
#26
Thread Starter
Registered User
Joined: Jul 2009
Posts: 727
Likes: 1
From: Rocky Mtn. House AB, Canada
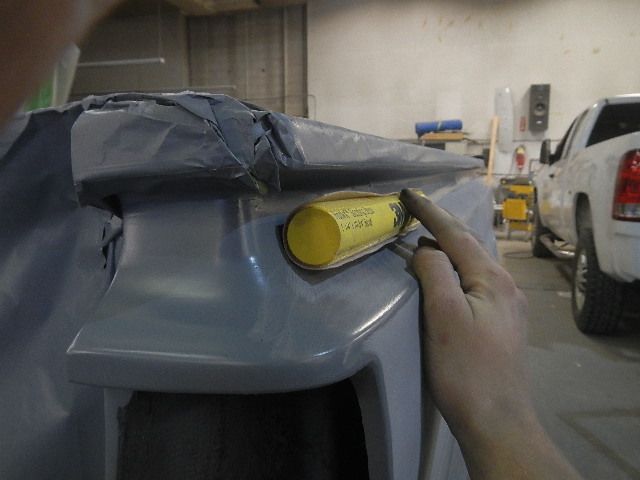
As for mounting the box. If I used the supplied bolts in the "hardware kit", I decided it would crush the fiberglass so it will absorb water, also exposing the 2x4 wood supports underneath and have them rot away slowly from moisture. So I decided to make myself some sleeves that will take that force and save the box.
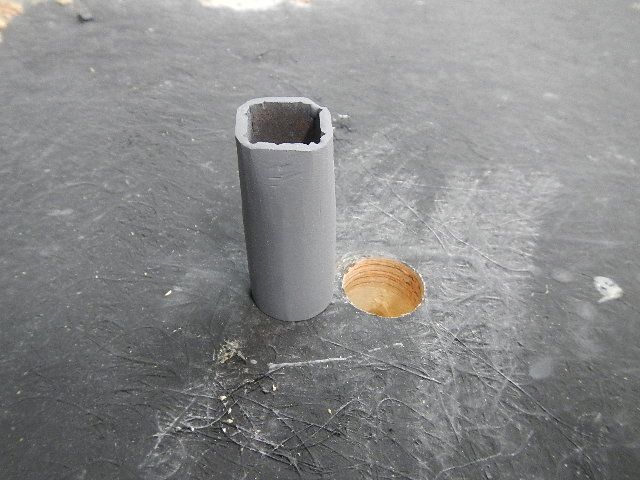
fyi, those fancy round top bolts with a square underneath were sent so you can slide stuff in/out of the box with ease. Things would catch on normal bolts. If anyone knows the technical term please help. I needed to build my sleeves to accept these fancy bolts.
I started with pipe with a 1 inch outside diameter. Cut some slits in the top on the "corners".
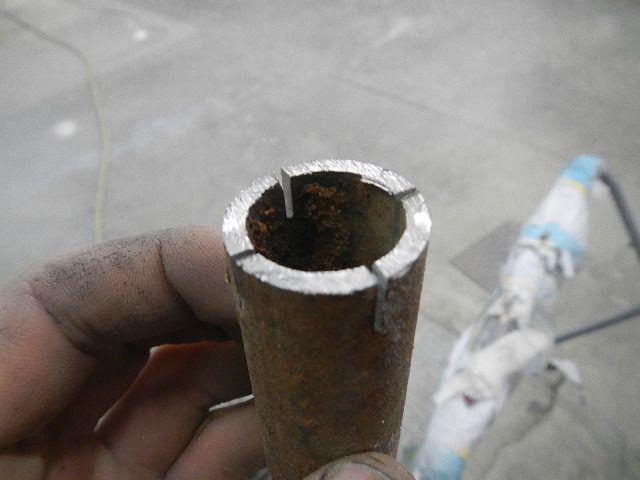
spread out the tabs so my bolts would slide into place.
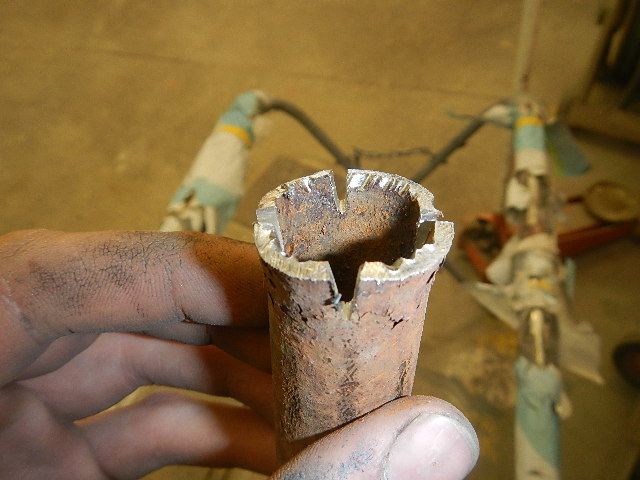
formed them with a trusty body hammer around the square part of the bolt
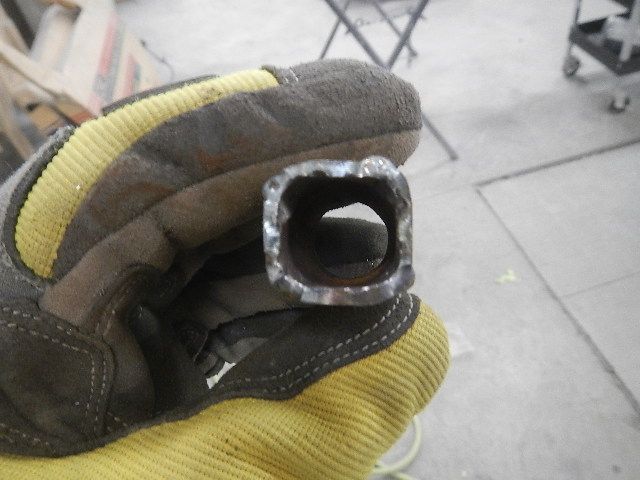
Ran a quick weld on my cuts, ground it so its pretty, sprayed with some self etching primer and its done! I made 8 total as there are 8 mounting bolts. You can see one here sitting beside the hole drilled in the box it will slide into after the box has been boxlinered.
fyi, those fancy round top bolts with a square underneath were sent so you can slide stuff in/out of the box with ease. Things would catch on normal bolts. If anyone knows the technical term please help. I needed to build my sleeves to accept these fancy bolts.
I started with pipe with a 1 inch outside diameter. Cut some slits in the top on the "corners".
spread out the tabs so my bolts would slide into place.
formed them with a trusty body hammer around the square part of the bolt
Ran a quick weld on my cuts, ground it so its pretty, sprayed with some self etching primer and its done! I made 8 total as there are 8 mounting bolts. You can see one here sitting beside the hole drilled in the box it will slide into after the box has been boxlinered.
Last edited by nothingbetter; Jan 14, 2013 at 09:00 PM.
Dec 13, 2012 | 10:03 PM
#27
Thread Starter
Registered User
Joined: Jul 2009
Posts: 727
Likes: 1
From: Rocky Mtn. House AB, Canada
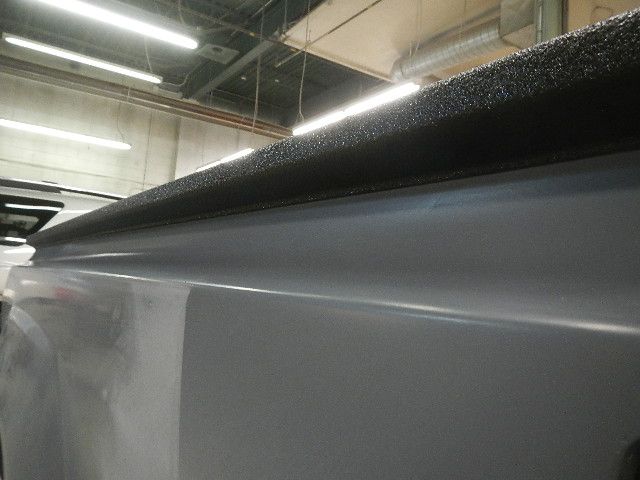
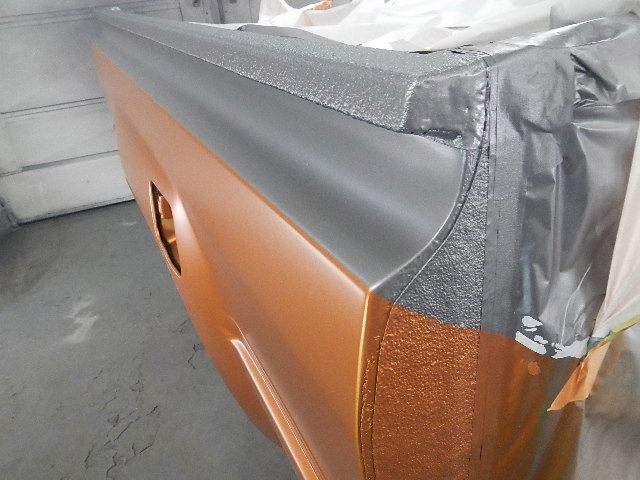
Today was boxliner day. The liner we use "bulldog" is the same as line-x. Its a 2 part hot spray, gets as much build as your want, easy to texture, and is dry to the touch in 5-10 seconds depending on the air temp.
I ran the liner a bit lower than the bend in the lip as there were quite a few uneven spots in that body line I wasn't happy with and can't get filler into. Boxliner can hide 1000 sins!
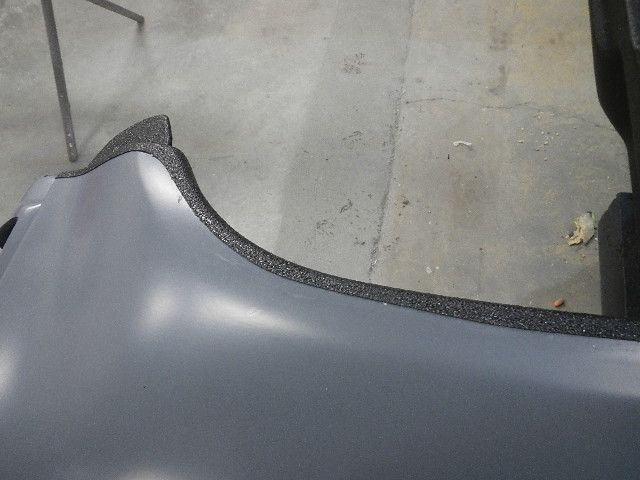
I also sprayed the inside of my fenders at the same as the box, ran a line just outside the wheel lip to protect from rocks and moisture.
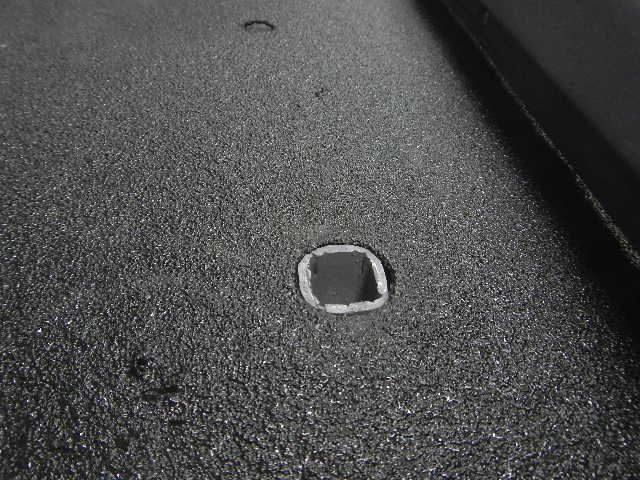
This is one of my sleeves installed. Just pound it in with a hammer. I coated the inside of the hole with a spray bomb undercoating first so the wood won't absorb any moisture.
After the boxliner ordeal I started blocking for paint. I noticed very few sharps waves while blocking...which is good. The box sides have been great to work with!
I ran the liner a bit lower than the bend in the lip as there were quite a few uneven spots in that body line I wasn't happy with and can't get filler into. Boxliner can hide 1000 sins!
I also sprayed the inside of my fenders at the same as the box, ran a line just outside the wheel lip to protect from rocks and moisture.
This is one of my sleeves installed. Just pound it in with a hammer. I coated the inside of the hole with a spray bomb undercoating first so the wood won't absorb any moisture.
After the boxliner ordeal I started blocking for paint. I noticed very few sharps waves while blocking...which is good. The box sides have been great to work with!
Last edited by nothingbetter; Jan 14, 2013 at 09:02 PM.
Dec 14, 2012 | 07:20 PM
#28
Thread Starter
Registered User
Joined: Jul 2009
Posts: 727
Likes: 1
From: Rocky Mtn. House AB, Canada
Today I finished prepping the box as I'll be painting it tomorrow. I'll be sure to post pics of it coat by coat.
My plans have changed a little bit. I'll get the box painted and put it in the yard behind the shop untill I can get the cab done. That way I can paint the cab, fenders and hood all at the same time. My girlfriend is coming here on the 18th so I'll be ignoring my truck untill the beginning of janruary. It might take a while for me to get it done but thats ok. I'm in no rush. I would feel bad driving a freshly re painted truck all through winter anyways.
My plans have changed a little bit. I'll get the box painted and put it in the yard behind the shop untill I can get the cab done. That way I can paint the cab, fenders and hood all at the same time. My girlfriend is coming here on the 18th so I'll be ignoring my truck untill the beginning of janruary. It might take a while for me to get it done but thats ok. I'm in no rush. I would feel bad driving a freshly re painted truck all through winter anyways.
Last edited by nothingbetter; Dec 14, 2012 at 07:21 PM.
Dec 15, 2012 | 03:24 PM
#29


some serious attention to detail .. GREAT job
We're doing a "show and shine" this year , FIRST anual .. will be listed on Harrison's
http://www.autoeventlist.com/ maybe you could come out ?
.
We're doing a "show and shine" this year , FIRST anual .. will be listed on Harrison's
http://www.autoeventlist.com/ maybe you could come out ?
.
Last edited by slacker; Dec 15, 2012 at 03:30 PM.
Dec 15, 2012 | 07:50 PM
#30
Thread Starter
Registered User
Joined: Jul 2009
Posts: 727
Likes: 1
From: Rocky Mtn. House AB, Canada
Thanks Slacker. I try and pride myself on attention to the small details as they all add up and make a huge difference in the final out come of any project.
I'd love to come out for a show and shine. We'll have to see how it fits into the schedule. Thats a long way in the future for me to be planning stuff.
Do you know how I can get this thread to show up on "recent threads" on the home page so it gets more attention so I can get more ideas flowing about what I should do? Seems like every time I post it doesn't pop up on "recent threads"
I got the box painted today. It is everything I dreamed of. It has made me very excited to get the rest of it done. The colours are perfect Its always hard to judge what the colours will look like on the spray out cards I make but I think I judged right. As for straightness, unless I said so, you wouldn't know it wasn't sheet metal. Even brand new boxsides we get in have this much for waves. I'm definatly glad I put the extra 15 some hours into it. Little details right? I'll post pics when I can.
I'd love to come out for a show and shine. We'll have to see how it fits into the schedule. Thats a long way in the future for me to be planning stuff.
Do you know how I can get this thread to show up on "recent threads" on the home page so it gets more attention so I can get more ideas flowing about what I should do? Seems like every time I post it doesn't pop up on "recent threads"
I got the box painted today. It is everything I dreamed of. It has made me very excited to get the rest of it done. The colours are perfect
Its always hard to judge what the colours will look like on the spray out cards I make but I think I judged right. As for straightness, unless I said so, you wouldn't know it wasn't sheet metal. Even brand new boxsides we get in have this much for waves. I'm definatly glad I put the extra 15 some hours into it. Little details right? I'll post pics when I can.
Last edited by nothingbetter; Dec 15, 2012 at 09:22 PM.
Dec 16, 2012 | 06:58 PM
#33
Thread Starter
Registered User
Joined: Jul 2009
Posts: 727
Likes: 1
From: Rocky Mtn. House AB, Canada
masked up for paint
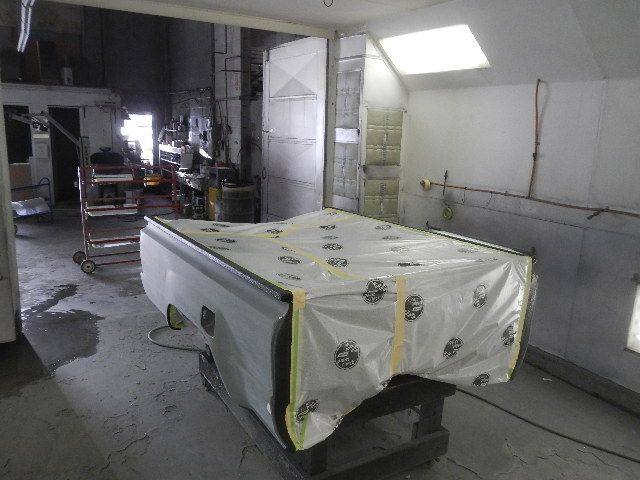
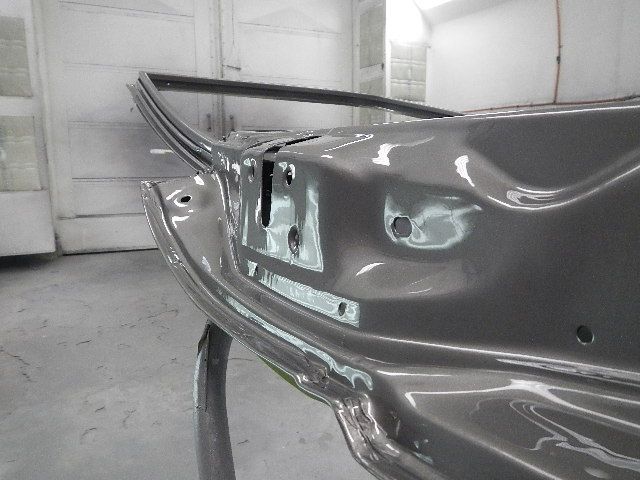
Sprayed with gray/blue sealer. Both the sealer and clear have a flex additive in them to help with the expansion of the fiberglass as the temperature varies. The colour coats (base coats) do not have enough mil thickness for a flex additive to make any difference.
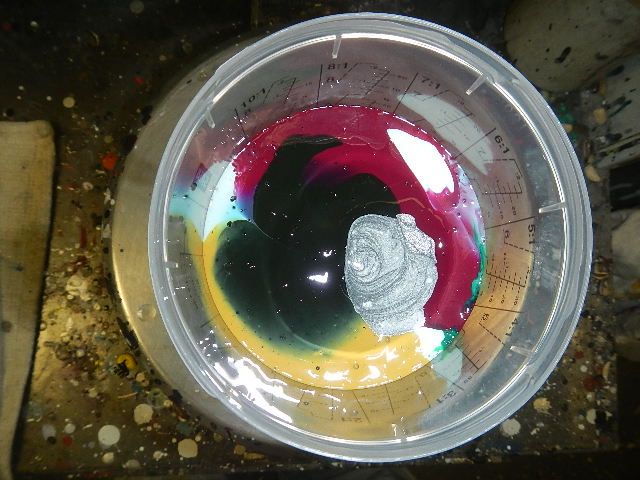
mixing my silver paint. This is one of the hardest parts of painting. Being able to look past the main colour and see all the other colours. This silver is a suzuki colour used from 89-99. The code is 32m. As proven in the picture, it contains green, yellow/gold, purple/magenta and black (buried under green) this is before I added the silver colours. This is why I liked this silver over others. It has dark values from the green, light values from the transparent yellow and it matches the orange well because of the red from the magenta. Its a very complex colour. Welcome to my world
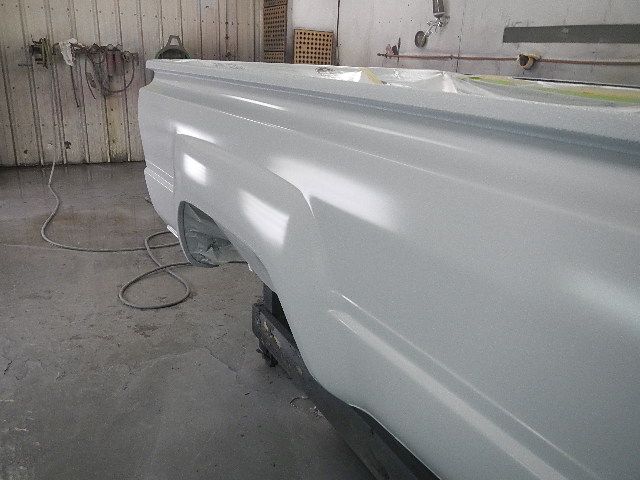
So here is the box sprayed in the silver. 2 coats for coverage and a drop coat for metallic orientation.
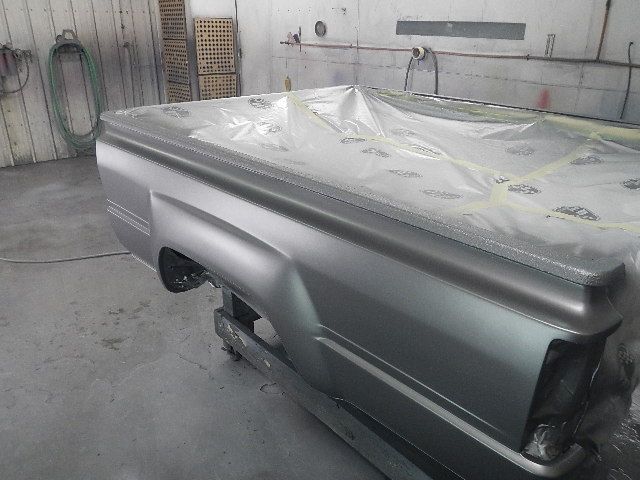
after this I had to wait 4 hours for the base to totally dry before I could tape over it without moving the metallics around. This may sound like I'm pulling your leg but its true.
After my 4 hour wait, I masked off my two tone line. I used a fine line tape as normal masking tape is not a straight enough edge. It looks rough if used. I will be using lots of this tape on the tailgate because those letters are a pain.
Then I started spraying my orange directly over the silver!
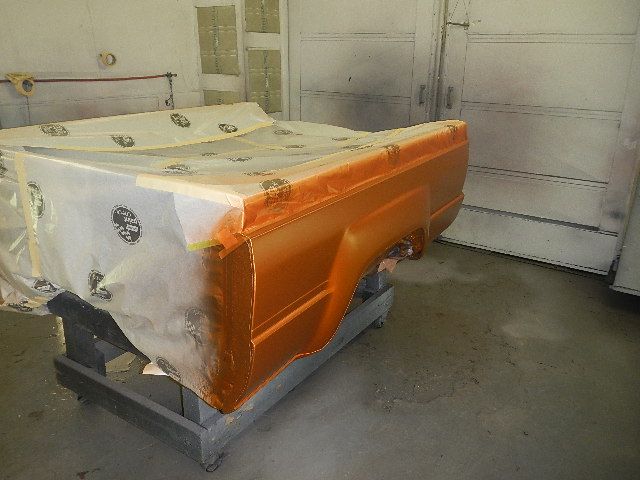
This orange is a translucent colour. That means it take lots of coats to fully cover whats underneath it. When I painted the Honda element I got the colour from, it took 7 coats of base to fully cover. Perfect. So I only sprayed 3 coats plus my drop coat over my silver. That way you can still get some of the effects from the silver seen through the orange. It ends up being a very deep colour to look at. Very appealing to the eyes. It also helps them blend in together.
So after letting the orange base set up untill it was flashed (10 min) I took off my fineline masking to expose the silver.
then on goes the clear coat!
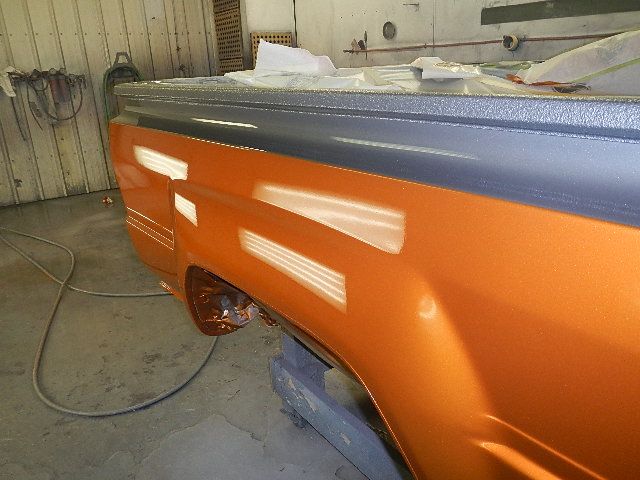
So then I cleaned my clear gun, had a beer, celebrated at how awesome it looked and finished waiting my 1 hour before I could unmask it. I'm very happy with how the colours turned out. and I'm satisfied with the location my two tone line. I was worried it would be to high but after seeing it, I think its right where it should be.
Sprayed with gray/blue sealer. Both the sealer and clear have a flex additive in them to help with the expansion of the fiberglass as the temperature varies. The colour coats (base coats) do not have enough mil thickness for a flex additive to make any difference.
mixing my silver paint. This is one of the hardest parts of painting. Being able to look past the main colour and see all the other colours. This silver is a suzuki colour used from 89-99. The code is 32m. As proven in the picture, it contains green, yellow/gold, purple/magenta and black (buried under green) this is before I added the silver colours. This is why I liked this silver over others. It has dark values from the green, light values from the transparent yellow and it matches the orange well because of the red from the magenta. Its a very complex colour. Welcome to my world
So here is the box sprayed in the silver. 2 coats for coverage and a drop coat for metallic orientation.
after this I had to wait 4 hours for the base to totally dry before I could tape over it without moving the metallics around. This may sound like I'm pulling your leg but its true.
After my 4 hour wait, I masked off my two tone line. I used a fine line tape as normal masking tape is not a straight enough edge. It looks rough if used. I will be using lots of this tape on the tailgate because those letters are a pain.
Then I started spraying my orange directly over the silver!
This orange is a translucent colour. That means it take lots of coats to fully cover whats underneath it. When I painted the Honda element I got the colour from, it took 7 coats of base to fully cover. Perfect. So I only sprayed 3 coats plus my drop coat over my silver. That way you can still get some of the effects from the silver seen through the orange. It ends up being a very deep colour to look at. Very appealing to the eyes. It also helps them blend in together.
So after letting the orange base set up untill it was flashed (10 min) I took off my fineline masking to expose the silver.
then on goes the clear coat!
So then I cleaned my clear gun, had a beer, celebrated at how awesome it looked and finished waiting my 1 hour before I could unmask it. I'm very happy with how the colours turned out. and I'm satisfied with the location my two tone line. I was worried it would be to high but after seeing it, I think its right where it should be.
Dec 18, 2012 | 05:02 PM
#37
yeah .. right on your 2 tone line
I dont know the whole "paint sceem" .. with out the cab in the pic , hard to tell by pictures , but , just a thought
.
I dont know the whole "paint sceem" .. with out the cab in the pic , hard to tell by pictures , but , just a thought
.
Last edited by slacker; Dec 18, 2012 at 05:05 PM.
Dec 18, 2012 | 08:03 PM
#38
Thread Starter
Registered User
Joined: Jul 2009
Posts: 727
Likes: 1
From: Rocky Mtn. House AB, Canada
OPINION WARNING!!! pin stripes are for people who don't know how to make a nice, straight, sharp line
Same thing with boxliner, chrome rocker chrome and other stick on bits. It can hide more mistakes than you can imagine. We see it all the time when we pull it off of vehicles. So often it covers previous damage or poor work.
I put the two tone line on the body line so its a smooth transition between the two colours.


