
DIRTCO's 1985 4Runner Build-Up Thread
 Apr 21, 2008 | 06:44 PM
#141
Thread Starter
Registered User
Joined: May 2007
Posts: 1,441
Likes: 0
From: Summit County, Colorado
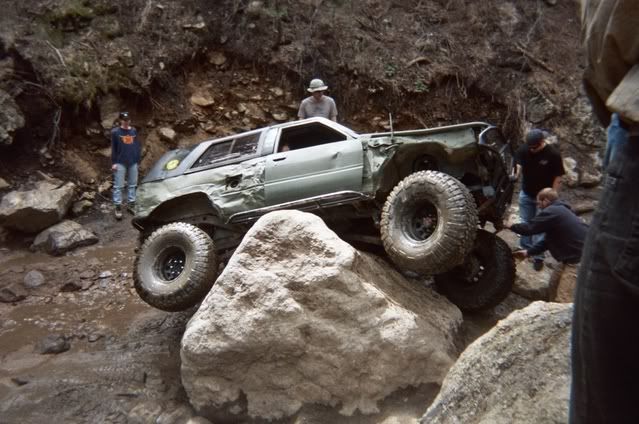
The rear third member has been leaking a little since this last summer (Double low, third gear, full throttle assault's at a very large boulder  ). I also wanted to change the rear gear oil and inspect the gears for any damage.
Here is where the rear end started leaking
I pulled the axle shafts and started draining the fluid, you can see the old fluid on the housing.

I pulled the third and inspected it; everything looked great, there was even wear and no chips on the teeth. I cleaned the housing and installed Trail Gear's stud eliminator kit. Instead of a stud it is a button head bolt that threads in from the back of hole. It should be alot stronger and reduce the chances of leaks.


). I also wanted to change the rear gear oil and inspect the gears for any damage.Here is where the rear end started leaking
I pulled the axle shafts and started draining the fluid, you can see the old fluid on the housing.
I pulled the third and inspected it; everything looked great, there was even wear and no chips on the teeth. I cleaned the housing and installed Trail Gear's stud eliminator kit. Instead of a stud it is a button head bolt that threads in from the back of hole. It should be alot stronger and reduce the chances of leaks.
 Apr 21, 2008 | 08:12 PM
#143
Registered User
Joined: Aug 2004
Posts: 1,209
Likes: 0
From: Pueblo, CO
 Apr 22, 2008 | 04:10 PM
#144
Thread Starter
Registered User
Joined: May 2007
Posts: 1,441
Likes: 0
From: Summit County, Colorado
That was one of my biggest complaints of the truck; it wouldn't turn. With the front locker, smaller than stock steering wheel and more scrub radius, turning was the truck's one downfall (especialy on trails like Hell's revenge and Golden Spike). I am really looking forward to this whole steering thing, but I have gotten pretty good at the Austin Power's 25 point turn.
 Apr 28, 2008 | 04:51 PM
#145
Thread Starter
Registered User
Joined: May 2007
Posts: 1,441
Likes: 0
From: Summit County, Colorado
As you can tell from above I started on the hydro assist steering. This has been on my to do list for a very long time but never got around to it. The project itself is pretty straight forward but kind of time consuming.
The first step was to tap the steering box for the hydro lines. I picked up a spare box to save some time and have the truck be drivable a little bit longer. After getting ready to tear the box apart I realized that the sector shaft was bent and the splines were twisted.
Here's a crappy picture of the bent sector shaft.

So I pulled the box out of the truck and started tearing it apart.
Here are the two articles that I used for the tapping info. The Marlin article is the main one I used.
http://www.wildyoats.com/hydraulic_assist_tech.htm
http://board.marlincrawler.com/index.php?topic=10579.0
It was a lot easier than I thought it would be. Just take your time, this is not a project to rush through. Here's a couple issue's to be aware of.
1. When taking the box apart, make sure to have the input shat all the way to the left. I've heard of people turning it a little to the right and loosing all the ball bearings. I made sure not to turn it at all, but if you were not thinking, it would be an easy mistake.
2. When drilling the top hole into the narrow passage take your time. I think it would be pretty hard to drill all the way through the box unless you never checked how far the bit was. Also, when tapping that hole I had to grind off the bottom of my tap to get more threads at the bottom. Marlin's article covers everything so read the whole thing and you should be set.
The first step was to tap the steering box for the hydro lines. I picked up a spare box to save some time and have the truck be drivable a little bit longer. After getting ready to tear the box apart I realized that the sector shaft was bent and the splines were twisted.
Here's a crappy picture of the bent sector shaft.
So I pulled the box out of the truck and started tearing it apart.
Here are the two articles that I used for the tapping info. The Marlin article is the main one I used.
http://www.wildyoats.com/hydraulic_assist_tech.htm
http://board.marlincrawler.com/index.php?topic=10579.0
It was a lot easier than I thought it would be. Just take your time, this is not a project to rush through. Here's a couple issue's to be aware of.
1. When taking the box apart, make sure to have the input shat all the way to the left. I've heard of people turning it a little to the right and loosing all the ball bearings. I made sure not to turn it at all, but if you were not thinking, it would be an easy mistake.
2. When drilling the top hole into the narrow passage take your time. I think it would be pretty hard to drill all the way through the box unless you never checked how far the bit was. Also, when tapping that hole I had to grind off the bottom of my tap to get more threads at the bottom. Marlin's article covers everything so read the whole thing and you should be set.
Apr 28, 2008 | 05:07 PM
#146
Thread Starter
Registered User
Joined: May 2007
Posts: 1,441
Likes: 0
From: Summit County, Colorado
Picture of the frame without the steering box, the plate goes all the way to the front of the frame (it looks like it stops in the picture)

When I moved the steering box forward (years ago), I had to cut out the front clip for clearance. It ended up working well because the hoses have some extra room.
Without the box

With the box. I was able to drill and tap the TOYODA and keep the hoses inside the engine bay


When I moved the steering box forward (years ago), I had to cut out the front clip for clearance. It ended up working well because the hoses have some extra room.
Without the box
With the box. I was able to drill and tap the TOYODA and keep the hoses inside the engine bay
Apr 28, 2008 | 05:34 PM
#147
Thread Starter
Registered User
Joined: May 2007
Posts: 1,441
Likes: 0
From: Summit County, Colorado
Then I mounted the cooler.


My old tie rod was bent so I got a new one. I really didn't want to weld the new bracket on a bent old POS tie rod.

Then it was time to get the ram settled in it's new home Just make sure you get your toe set first. I also adjusted the drag link to make sure everything was were it needed to be before welding.


And with the hoses ran.


My old tie rod was bent so I got a new one. I really didn't want to weld the new bracket on a bent old POS tie rod.
Then it was time to get the ram settled in it's new home
Just make sure you get your toe set first. I also adjusted the drag link to make sure everything was were it needed to be before welding.And with the hoses ran.
Apr 28, 2008 | 07:28 PM
#148
Thread Starter
Registered User
Joined: May 2007
Posts: 1,441
Likes: 0
From: Summit County, Colorado
The front licence plate covers the hole, when I need to get to the hoses and fittings I can just take the plate off.


I came in the next day and found this on the floor. The top fitting on the steering box was leaking just a little bit. 1/4 NPT is a tapered fitting and there is not much room to bottom out the tap (even when you grind the bottom off). I took it back apart and added some teflon pipe tape and there's no more leaks.

I ran into some more issue's when I drilled out the restrictor for the PS pump. If drill the restrictor out it will flow more volume and make the wheels turn faster, it also makes the pump sound like it's going to blow up. I added the cooler and some more volume to the system (3 1/2" exhuast tubing) but it still didn't do the job. I grapped another stock restrictor and the pump was happy again. With this set up I probably don't need extra fluid capacity but it can't hurt.


I came in the next day and found this on the floor. The top fitting on the steering box was leaking just a little bit. 1/4 NPT is a tapered fitting and there is not much room to bottom out the tap (even when you grind the bottom off). I took it back apart and added some teflon pipe tape and there's no more leaks.
I ran into some more issue's when I drilled out the restrictor for the PS pump. If drill the restrictor out it will flow more volume and make the wheels turn faster, it also makes the pump sound like it's going to blow up.
I added the cooler and some more volume to the system (3 1/2" exhuast tubing) but it still didn't do the job. I grapped another stock restrictor and the pump was happy again. With this set up I probably don't need extra fluid capacity but it can't hurt.
Apr 28, 2008 | 07:42 PM
#149
Thread Starter
Registered User
Joined: May 2007
Posts: 1,441
Likes: 0
From: Summit County, Colorado
I've also wanted to tie the shock hoops into the fender bars for a while. I used the old tie rod  , I think 0.250 wall tubing should do the trick . The passenger side is finished up but the driver's side is going to take a little a work.


, I think 0.250 wall tubing should do the trick . The passenger side is finished up but the driver's side is going to take a little a work.
Apr 29, 2008 | 03:57 PM
#150
Thread Starter
Registered User
Joined: May 2007
Posts: 1,441
Likes: 0
From: Summit County, Colorado
The rear driveshaft was pretty tore up. I thought about having it re-tubed and a new slip installed, but I don't like how the slip hangs down in the rocks. I decided to use this driveshaft as a spare and replace the slip myself. This used to be the front CV shaft and I had it re-tubed for the rear with heavy wall tubing. This time I'm going to try a non-cv driveshaft with heavy wall sch 40 tubing.
Old driveshaft


New slip section

Old

Old driveshaft
New slip section
Old
Apr 29, 2008 | 04:12 PM
#151
Thread Starter
Registered User
Joined: May 2007
Posts: 1,441
Likes: 0
From: Summit County, Colorado
I welded the good slip section on to the drive shaft. I took my time to try and get it straight as possible but it's not perfect, part of that could also be that the tubing is dented. This will only be a spare so I'm not too worried as long I can get off the trail and too the nearest town.
I took it for a test drive and was able to get up to 40 MPH before feeling any vibration, that's good enough for me! I thought I took some pictures but I didn't, so I'll take some later.
I took it for a test drive and was able to get up to 40 MPH before feeling any vibration, that's good enough for me! I thought I took some pictures but I didn't, so I'll take some later.
May 14, 2008 | 05:23 PM
#152
Thread Starter
Registered User
Joined: May 2007
Posts: 1,441
Likes: 0
From: Summit County, Colorado
Here's a picture of the rear driveshaft in the truck.

And a picture of the new non-cv driveshaft. It's .120 wall (maybe thicker!) and both the U-joint's were replaced in the process.

I also picked up a spare tire, a friend gave it to me. It's a 37" Super Swamper SSR and has around 75% tread. I don't plan on having it with me all the time but it will be nice to take on long trips (Moab) and leave it at the campsite. I still need to get a wheel for it but I want to check all my wheels first, if any are bent I will use that for the spare.

And a picture of the new non-cv driveshaft.
It's .120 wall (maybe thicker!) and both the U-joint's were replaced in the process.I also picked up a spare tire, a friend gave it to me. It's a 37" Super Swamper SSR and has around 75% tread. I don't plan on having it with me all the time but it will be nice to take on long trips (Moab) and leave it at the campsite. I still need to get a wheel for it but I want to check all my wheels first, if any are bent I will use that for the spare.
May 14, 2008 | 06:30 PM
#153
Thread Starter
Registered User
Joined: May 2007
Posts: 1,441
Likes: 0
From: Summit County, Colorado
Ever since I cut down the rocksliders I was a little worried about a couple things. First, my exhaust runs through the body on the drivers side, I have been lucky and not hit it too bad but it's bound to happen. That's one of those thing's I do not what to re-work, so I needed to find a way to protect it. I've also been having a hard time getting gas in the filler since the body is so smashed up, a few more rocks and the complete filler is going to have to be relocated.
So I made these ...
Driver side


Passenger side


So I made these ...
Driver side
Passenger side


 May 19, 2008 | 07:23 PM
#156
Thread Starter
Registered User
Joined: May 2007
Posts: 1,441
Likes: 0
From: Summit County, Colorado
I finally took the 4Runner out for the first shake down run since I re-built it.  I am VERY happy with how everything turned out.
I also picked up a decent camera on Sunday, but I ran the trail on Saturday. So, I don't have any pictures of the trail ride yet (I should have a couple tomorrow), but I do have a couple of the aftermath.
What kind of run would it be without me flopping it on the side


I'm glad I made some side bars for the rock sliders, you can see where the rock hit the door jam and slid along the tubing.

I also managed to bend my skid plate a little, I don't think it will create any issues (as long as it lines back up when/if I take it off).

And a good shot of my MTR "Slicks"

I am VERY happy with how everything turned out.I also picked up a decent camera on Sunday, but I ran the trail on Saturday
. So, I don't have any pictures of the trail ride yet (I should have a couple tomorrow), but I do have a couple of the aftermath. What kind of run would it be without me flopping it on the side
I'm glad I made some side bars for the rock sliders, you can see where the rock hit the door jam and slid along the tubing.
I also managed to bend my skid plate a little, I don't think it will create any issues (as long as it lines back up when/if I take it off).
And a good shot of my MTR "Slicks"
May 20, 2008 | 04:48 PM
#158
Thread Starter
Registered User
Joined: May 2007
Posts: 1,441
Likes: 0
From: Summit County, Colorado
Just about, there's still more on the list but it's stuff that can wait. Tire's are at the top of the list but that's a $ waiting game. I did have to order a windsheild, the one in the truck is beyond broken and the whole side of it has popped out of the glue.
How much longer until your 4Runner is ready?
Tire's are at the top of the list but that's a $ waiting game. I did have to order a windsheild, the one in the truck is beyond broken and the whole side of it has popped out of the glue.How much longer until your 4Runner is ready?
May 20, 2008 | 05:28 PM
#159
Thread Starter
Registered User
Joined: May 2007
Posts: 1,441
Likes: 0
From: Summit County, Colorado
As you can tell from the pictures I took the 4Runner out on Saturday . I was very happy how everything worked. It was nice to be able to turn and not have to fight the steering wheel all day. The suspension worked great, it handles alot better on the trail since I lowered it a little. One of the biggest things I noticed was the cut down rock sliders, that made a HUGE differance. Before, I would get my front tire on a rock, the slider would hit and the rear tire would slide along the bottom of the rock. Now the rear tire follows the front, which works great (that's also why I flopped it )
I got a few pictures, but I was mainly getting used to the truck. Sorry but no pictures of the flop, I was in to much of a hurry to get it back over; I didn't even think about it.


. I was very happy how everything worked. It was nice to be able to turn and not have to fight the steering wheel all day. The suspension worked great, it handles alot better on the trail since I lowered it a little. One of the biggest things I noticed was the cut down rock sliders, that made a HUGE differance. Before, I would get my front tire on a rock, the slider would hit and the rear tire would slide along the bottom of the rock. Now the rear tire follows the front, which works great (that's also why I flopped it )I got a few pictures, but I was mainly getting used to the truck. Sorry but no pictures of the flop, I was in to much of a hurry to get it back over; I didn't even think about it.


