
Whirlybird's 1982 Trekker Build-Up Thread
 Apr 6, 2013 | 11:49 AM
#1
Thread Starter
Registered User
Joined: Mar 2009
Posts: 63
Likes: 0
From: Houston
Whirlybird's 1982 Trekker Build-Up Thread
Hey, everyone! Been lurking (and SOMETIMES posting) for a while here on Yotatech, MANY thanks to everyone who's helped me figure things out here and there along the way so far.
I decided to start a build thread in hopes of "forcing" myself to stay motivated/on track with this project, document the entire process, and at the very least keep me from letting this thing sit too long without being worked on! I've had several Toyota's over the past few years (almost all of them I regret getting rid of) and eventually ended up with this 1982 Trekker! Meets all of my needs/desires: styling/look of first gen truck, backseat/removeable top of first gen 4Runner, relatively simple to work on (wanted carb etc for ease of repair...I'm still new to working on cars...trying to teach myself as I go)...yadda yadda yadda.
Vehicle Background:
'82 Trekker purchased with ~170k on the ODO in non running condition (believe carb gummed up from sitting etc.), lived in central TX it's whole life as far as I can tell, person I purchased from only owned it about 6 months or so (he was a fellow toyota lover and said he purchased from another person local to him who was going to start majorly hacking on it...he basically said he bought it to save it...gotta respect that!) body is in fair condition, interior is rough.
Good:
- It's a Trekker (been in love with them since I rediscovered Toyotas)
- RELATIVELY good body...only small rust areas on drivers side floor, body mounts/frame look decent
- Factory AC equipped (needs new hard line between evaporator/drier)...looks almost sheared...VERY strange)
Bad (unfortunately there are a LOT more of these than goods):
- Frankly it's a basketcase: only ran/stumbled for a few seconds on starter fluid when I got it (been sitting for 2-3 years according to PO)
- Interior is beat
- wiring looks like it's been hacked a bit
- 4wd doesn't dissengage as far as I can tell (think hubs just need cleaning/rebuild hopefully)...here's the kicker...there was ONE 35 on one of the front wheels when I picked it up...PO said he drove it around the block a couple of times since he had it...I'm kind of freaked...really hoping nothing is seriously wrong with drivetrain (open diffs so maybe no?)
So this build thread is a bit belated: I've had the truck for four-five months and have done a little work here and there on it, time is my MAJOR limiting factor (full time work/full time school have kept me VERY busy).
The plan/goal: DD capable rig that is capable of light-moderate offroad duty (camping/day at the beach without top MAYBE some mild wheeling etc)...SUPER simple/reliable is my goal. I want to be able to drive this thing ANYWHERE and trust it to get me there and back again in relative comfort (AC). Ideally: Small lift, 33's, 4.88's, Aussie in the rear(?)
So far:
- Weber carb added (electric choke converted to manual choke)
- Desmogged (thanks to the recent tutorial from Kawazx636
- Gas tank dropped/acid dipped at local radiator shop and reinstalled (looks brand newish inside now), new strainer from toyota installed on pickup
- Fuel filter
- Spark plugs/wires/cap/rotor...spark plugs were a PAIN...more to follow on that
- Fuel lines blown out with carb cleaner
As of a few days ago IT RUNS!!! You have NO idea how excited I am just for that small victory! Runs/idles smooooth...throughout this whole process so far I've felt like banging my head against the wall MANY times (and I have to admit have even thought about selling it to fund a running project...seriously frustrating at times...I'm sure everyone here can relate). Felt great to breathe life in to it again. So for now it stays! I have to admit that beginning this thread was partly to make sure I commited to THIS particular project...I'm in it to win it now.
Issues so far:
- No charge light/charge (according to guage in dash...idiot light does not work)
- No oil light on dash
- No temp idication
- No fuel indication (admittedly just put a LITTLE in the tank to get it to run. I didn't want it sitting in there too long if I couldn't drive it for a while)
- Noticed after a few minutes it starts to smoke just a tad (dissipates very quickly...hoping it's just the cool weather...didn't look bluish/overly whitish/or black/sooty)
- Gas leaking from Fuel pressure regulator so I didn't let it run long (hoping I just need to really crank down on the adapters...it was the same Summit FPR used in the Desmog tutorial from Kawazx636)
The plan moving forward:
- Seafoam engine
- Drivetrain (axle rebuild? (would definitely be my first), oils/fluids etc)
- Wiring issues
- Interior refreshing etc..
- ????
Well enough blabbing...pics to be uploaded ASAP (I know that's all everyone cares about anyway!)...Thanks for "listening" so far.
I decided to start a build thread in hopes of "forcing" myself to stay motivated/on track with this project, document the entire process, and at the very least keep me from letting this thing sit too long without being worked on! I've had several Toyota's over the past few years (almost all of them I regret getting rid of) and eventually ended up with this 1982 Trekker! Meets all of my needs/desires: styling/look of first gen truck, backseat/removeable top of first gen 4Runner, relatively simple to work on (wanted carb etc for ease of repair...I'm still new to working on cars...trying to teach myself as I go)...yadda yadda yadda.
Vehicle Background:
'82 Trekker purchased with ~170k on the ODO in non running condition (believe carb gummed up from sitting etc.), lived in central TX it's whole life as far as I can tell, person I purchased from only owned it about 6 months or so (he was a fellow toyota lover and said he purchased from another person local to him who was going to start majorly hacking on it...he basically said he bought it to save it...gotta respect that!) body is in fair condition, interior is rough.
Good:
- It's a Trekker (been in love with them since I rediscovered Toyotas)
- RELATIVELY good body...only small rust areas on drivers side floor, body mounts/frame look decent
- Factory AC equipped (needs new hard line between evaporator/drier)...looks almost sheared...VERY strange)
Bad (unfortunately there are a LOT more of these than goods):
- Frankly it's a basketcase: only ran/stumbled for a few seconds on starter fluid when I got it (been sitting for 2-3 years according to PO)
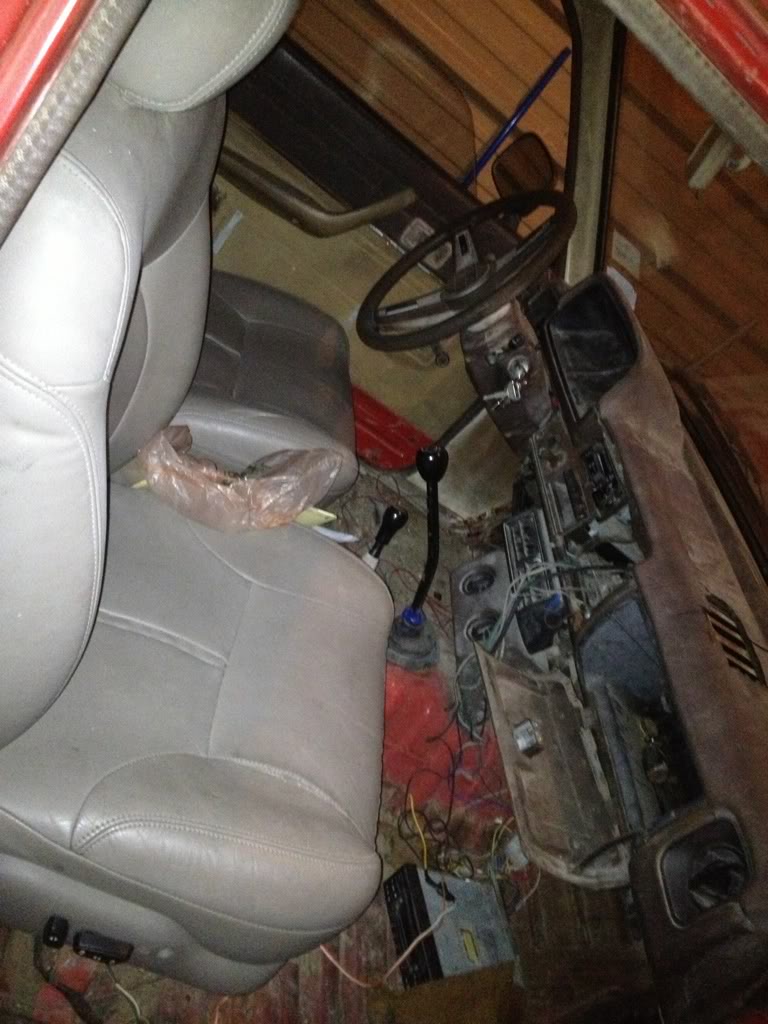
- Interior is beat
- wiring looks like it's been hacked a bit
- 4wd doesn't dissengage as far as I can tell (think hubs just need cleaning/rebuild hopefully)...here's the kicker...there was ONE 35 on one of the front wheels when I picked it up...PO said he drove it around the block a couple of times since he had it...I'm kind of freaked...really hoping nothing is seriously wrong with drivetrain (open diffs so maybe no?)
So this build thread is a bit belated: I've had the truck for four-five months and have done a little work here and there on it, time is my MAJOR limiting factor (full time work/full time school have kept me VERY busy).
The plan/goal: DD capable rig that is capable of light-moderate offroad duty (camping/day at the beach without top MAYBE some mild wheeling etc)...SUPER simple/reliable is my goal. I want to be able to drive this thing ANYWHERE and trust it to get me there and back again in relative comfort (AC). Ideally: Small lift, 33's, 4.88's, Aussie in the rear(?)
So far:
- Weber carb added (electric choke converted to manual choke)
- Desmogged (thanks to the recent tutorial from Kawazx636
- Gas tank dropped/acid dipped at local radiator shop and reinstalled (looks brand newish inside now), new strainer from toyota installed on pickup
- Fuel filter
- Spark plugs/wires/cap/rotor...spark plugs were a PAIN...more to follow on that
- Fuel lines blown out with carb cleaner
As of a few days ago IT RUNS!!! You have NO idea how excited I am just for that small victory! Runs/idles smooooth...throughout this whole process so far I've felt like banging my head against the wall MANY times (and I have to admit have even thought about selling it to fund a running project...seriously frustrating at times...I'm sure everyone here can relate). Felt great to breathe life in to it again. So for now it stays! I have to admit that beginning this thread was partly to make sure I commited to THIS particular project...I'm in it to win it now.
Issues so far:
- No charge light/charge (according to guage in dash...idiot light does not work)
- No oil light on dash
- No temp idication
- No fuel indication (admittedly just put a LITTLE in the tank to get it to run. I didn't want it sitting in there too long if I couldn't drive it for a while)
- Noticed after a few minutes it starts to smoke just a tad (dissipates very quickly...hoping it's just the cool weather...didn't look bluish/overly whitish/or black/sooty)
- Gas leaking from Fuel pressure regulator so I didn't let it run long (hoping I just need to really crank down on the adapters...it was the same Summit FPR used in the Desmog tutorial from Kawazx636)
The plan moving forward:
- Seafoam engine
- Drivetrain (axle rebuild? (would definitely be my first), oils/fluids etc)
- Wiring issues
- Interior refreshing etc..
- ????
Well enough blabbing...pics to be uploaded ASAP (I know that's all everyone cares about anyway!)...Thanks for "listening" so far.
Last edited by whirlybird; Apr 6, 2013 at 11:54 AM.
Apr 6, 2013 | 12:05 PM
#2
Thread Starter
Registered User
Joined: Mar 2009
Posts: 63
Likes: 0
From: Houston
Here are some pics!
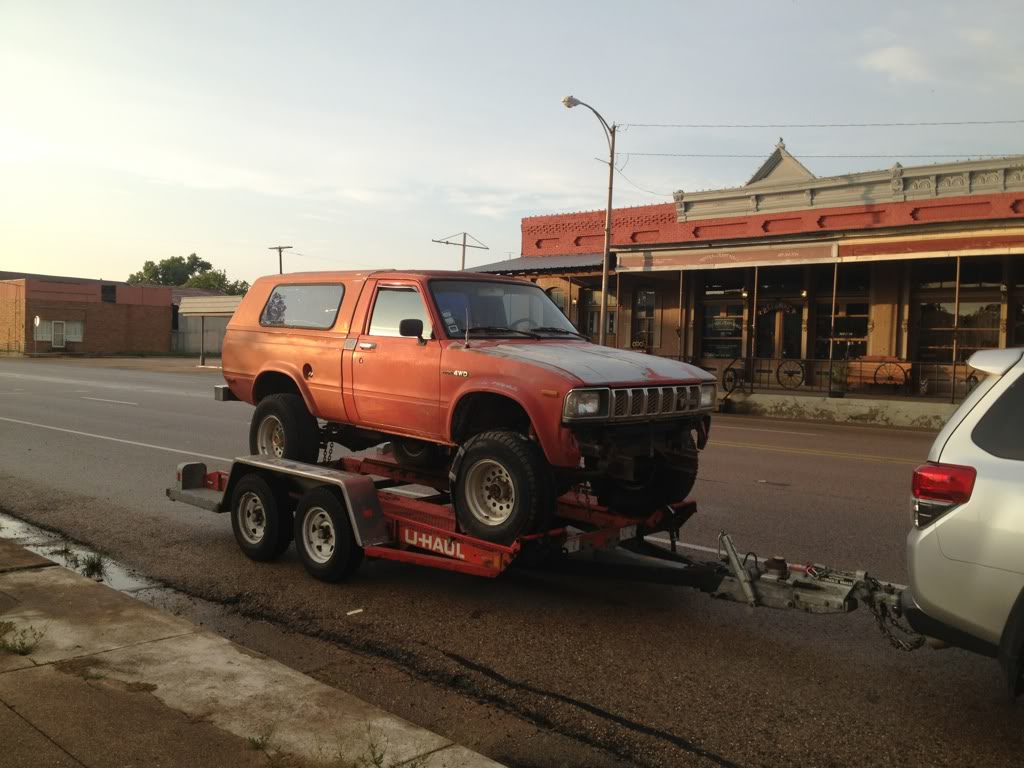
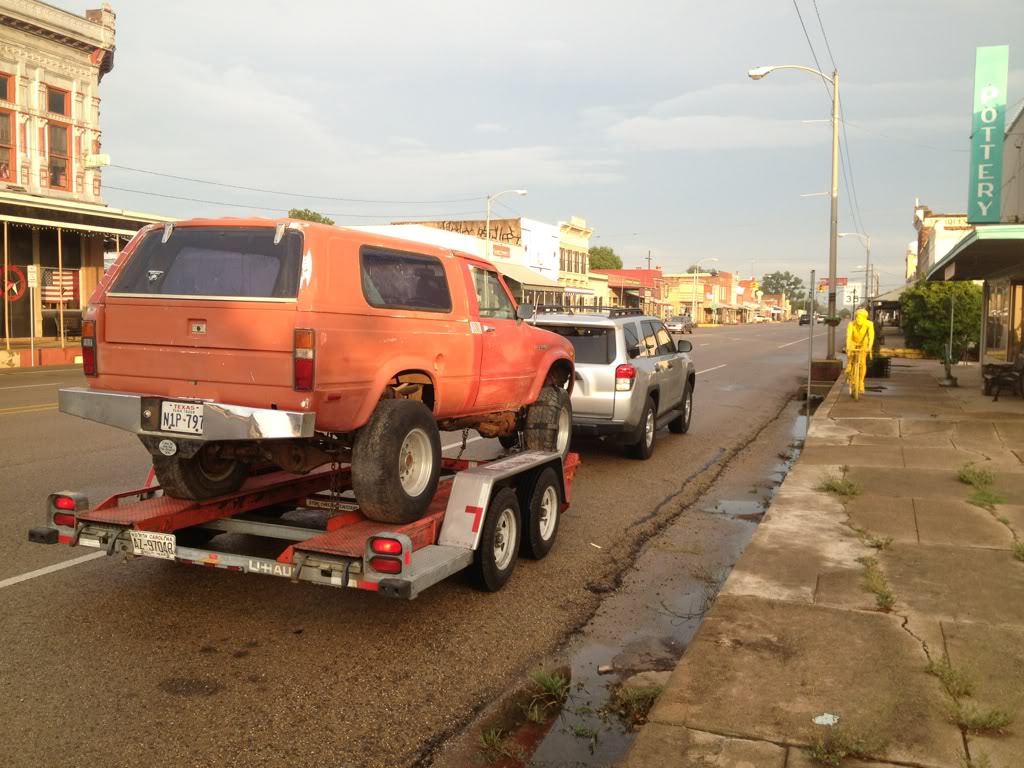
Hauling it 4.5 hrs home (note the lone 35 on front DS)
In storage/shop area:
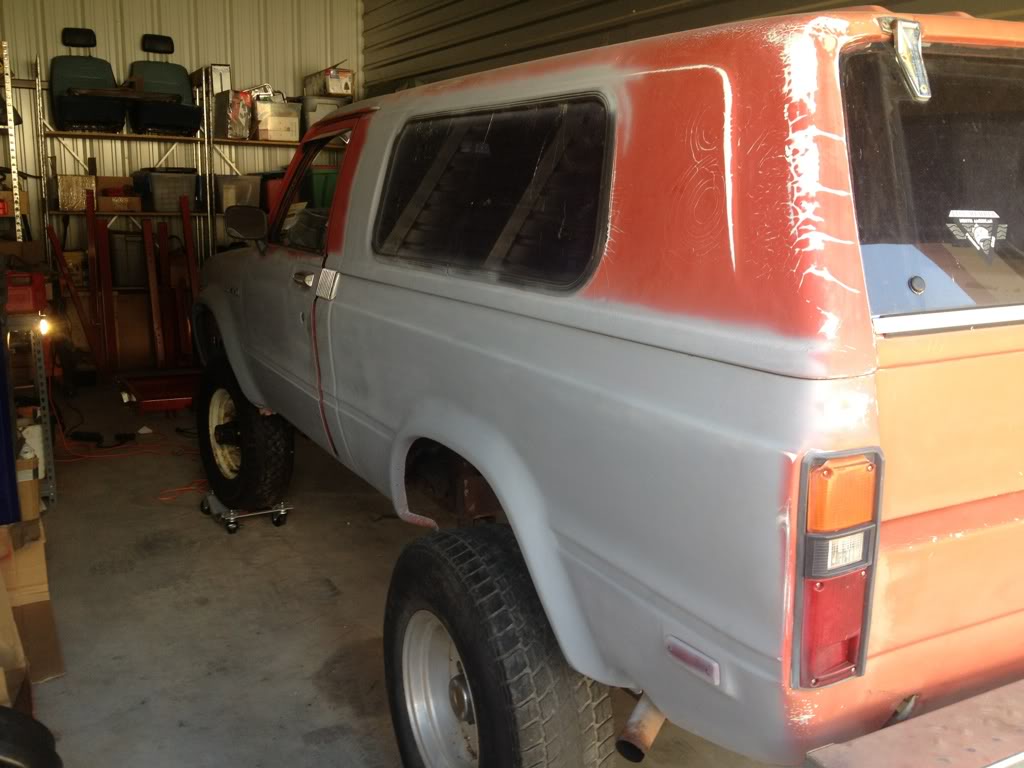
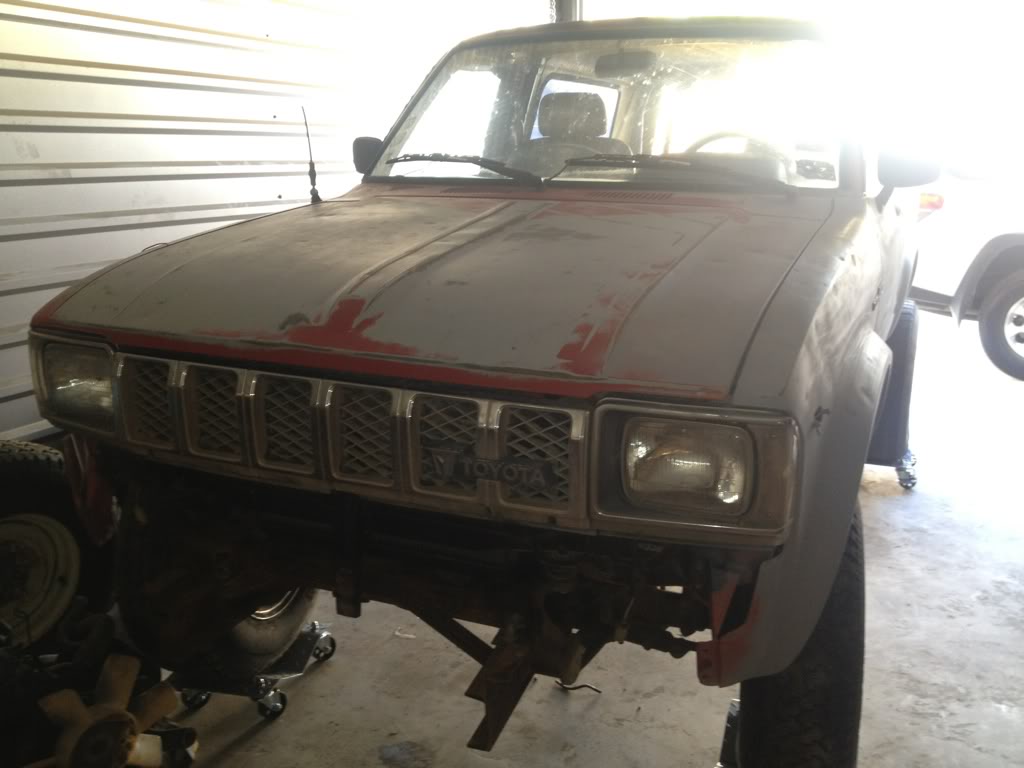
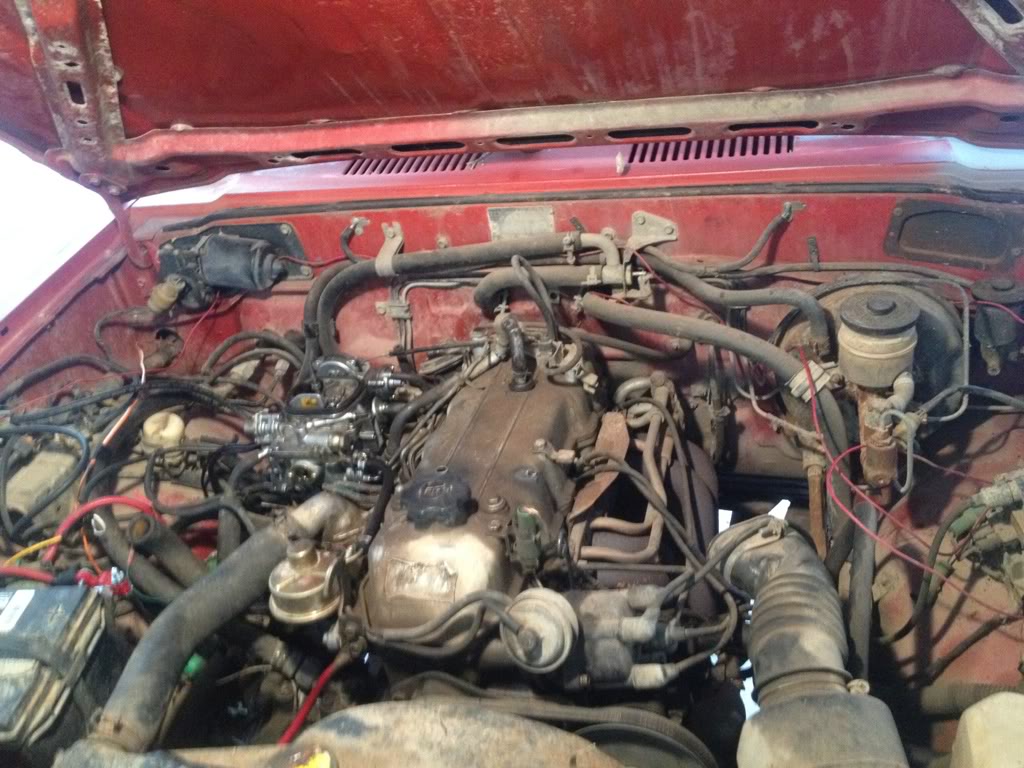
Dirty dirty (cleaning it SOOOOON)
More to come...
Hauling it 4.5 hrs home (note the lone 35 on front DS)
In storage/shop area:
Dirty dirty (cleaning it SOOOOON)
More to come...
Last edited by whirlybird; Apr 6, 2013 at 12:10 PM.
Apr 6, 2013 | 12:36 PM
#3
Thread Starter
Registered User
Joined: Mar 2009
Posts: 63
Likes: 0
From: Houston
More pics....
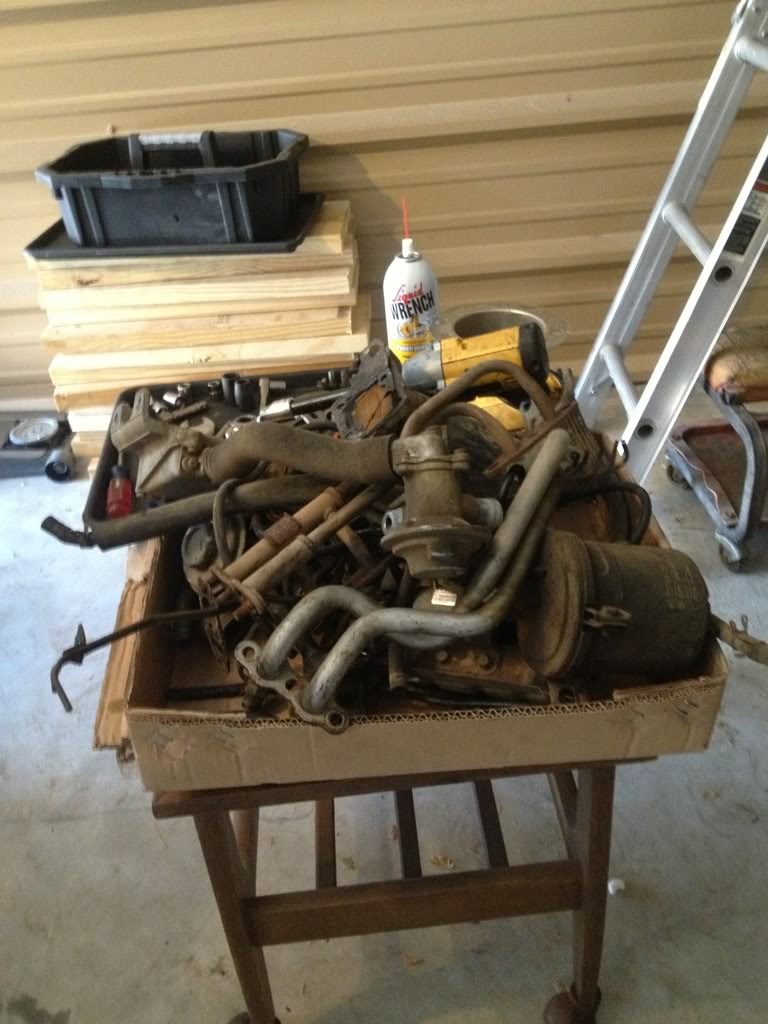
Items removed for Desmog (thanks again kawazx/pumpkin!)
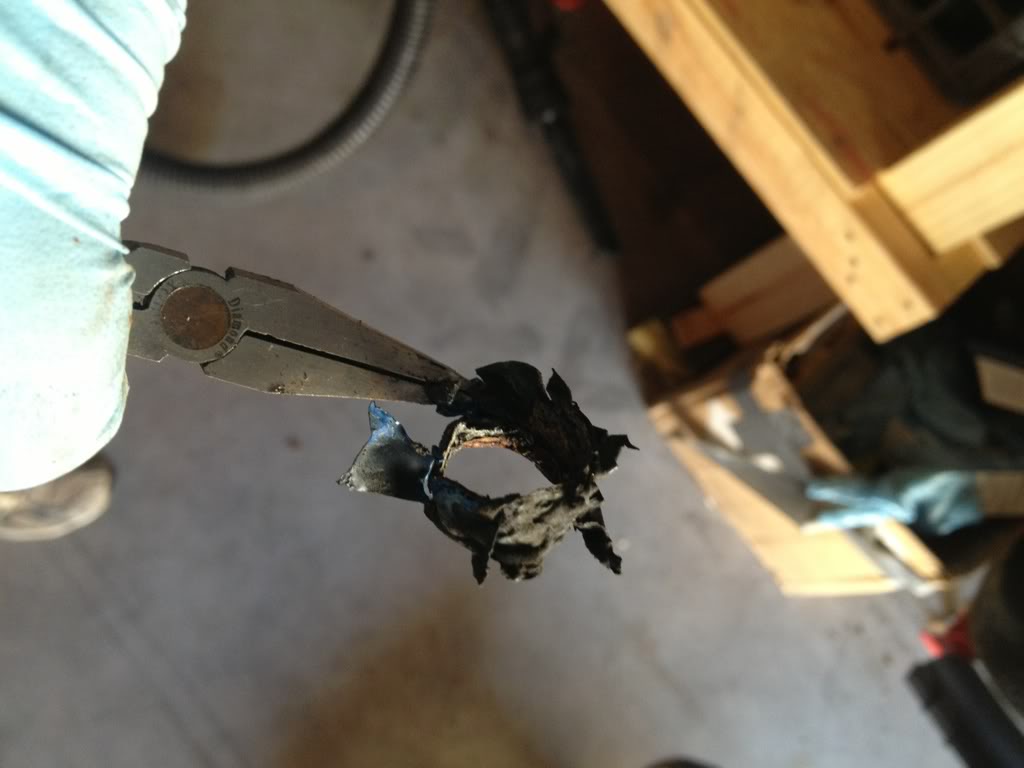
Can't find the "before" for the gas tank but here is the sender...
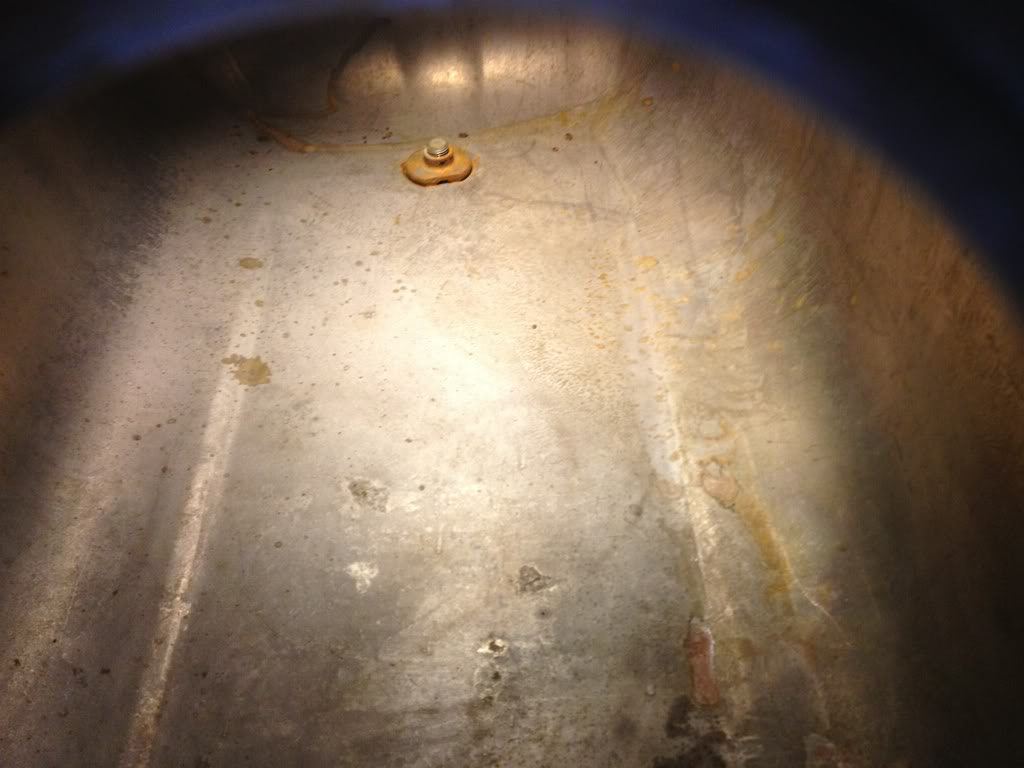
Gas tank "after"
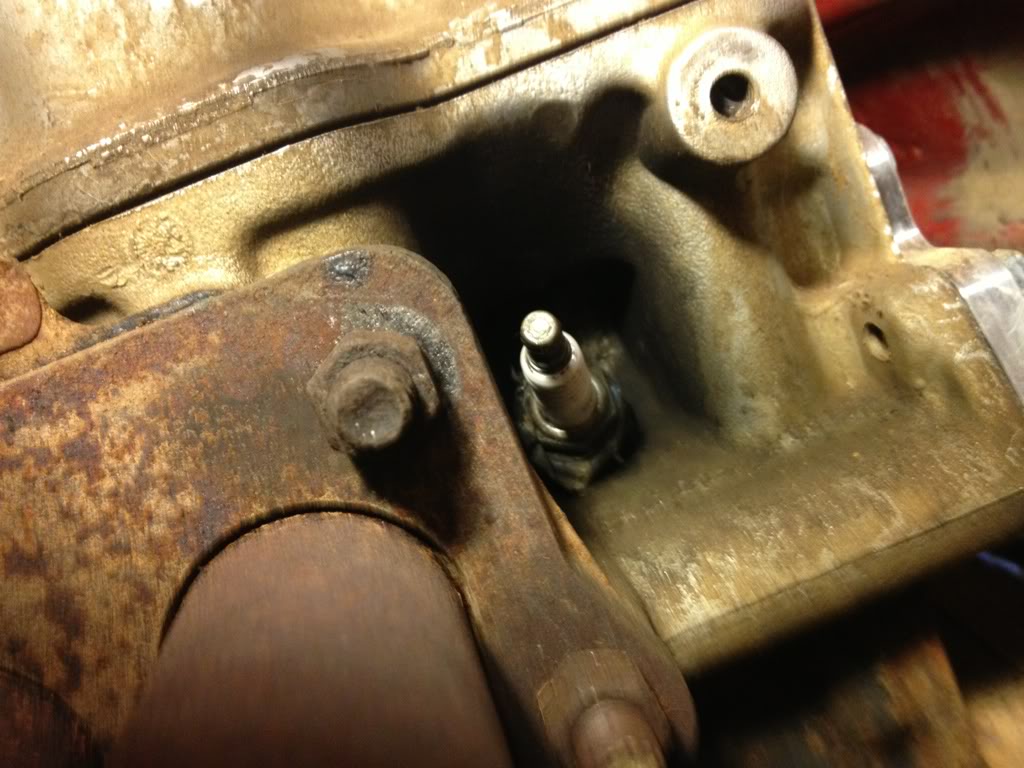
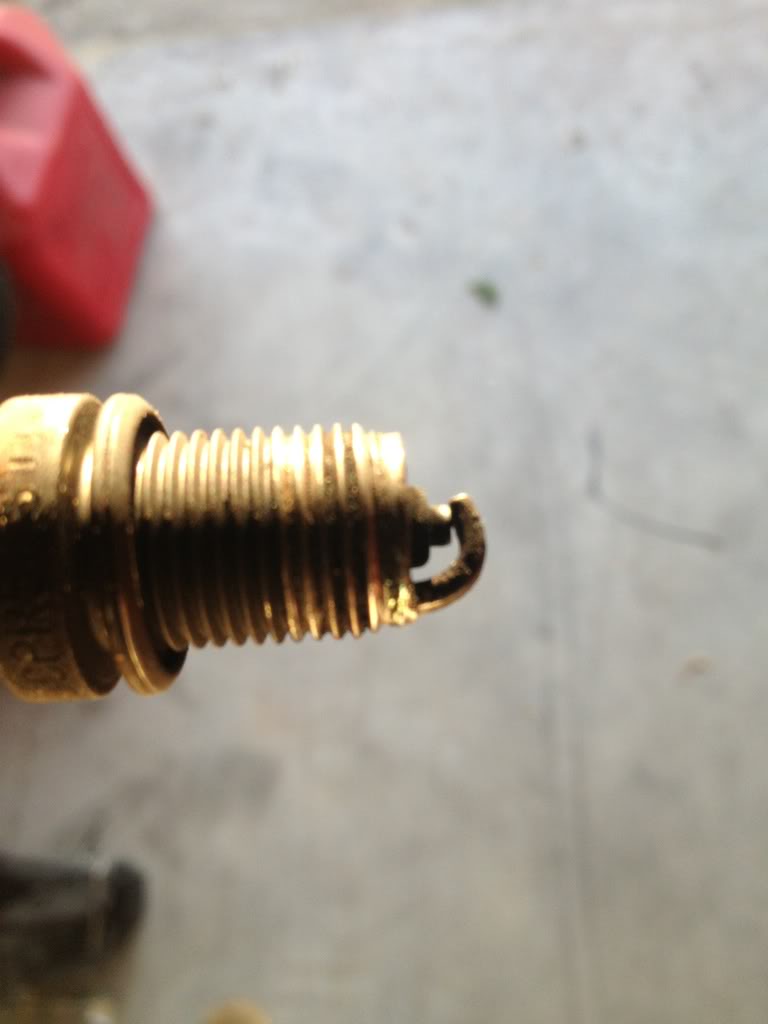
Looks innocent right? No 4 plug...couldn't figure out how to get spark plug socket down there so ended up grinding a bit of header flange off so I could get it out.
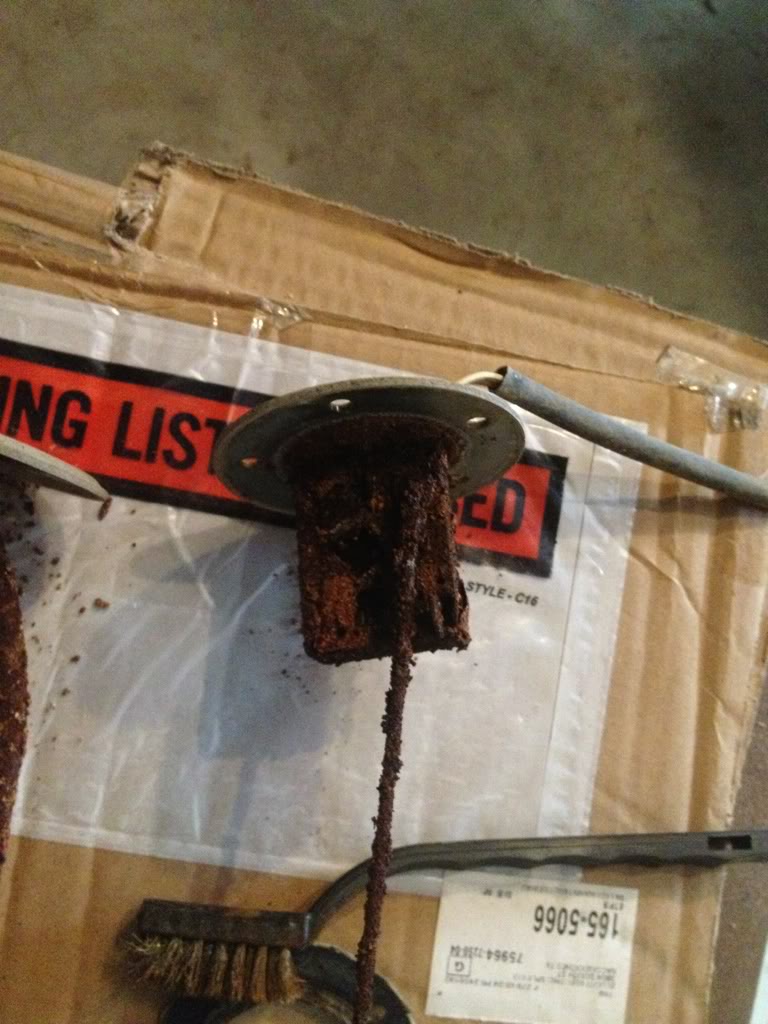
Gotta admit this really hacked me off (One of the "do I keep it" moments)...apparently spark plug was crossthreaded VERY badly at some point in this Trekker's life...found this wrapped around No 4 plug threads that were exposed (it was barely threaded)
And finally...No 4 plug intentionally manipulated so that it wouldn't fire (guessing)...engine had been running on three cylinders for who knows how long! again...kind of guessing...but i was frustrated! Thought I was going to have to yank engine (w/ 170k miles pulling the head to retap a spark plug hole seemed kind of pointless...)
Items removed for Desmog (thanks again kawazx/pumpkin!)
Can't find the "before" for the gas tank but here is the sender...
Gas tank "after"
Looks innocent right? No 4 plug...couldn't figure out how to get spark plug socket down there so ended up grinding a bit of header flange off so I could get it out.
Gotta admit this really hacked me off (One of the "do I keep it" moments)...apparently spark plug was crossthreaded VERY badly at some point in this Trekker's life...found this wrapped around No 4 plug threads that were exposed (it was barely threaded)
And finally...No 4 plug intentionally manipulated so that it wouldn't fire (guessing)...engine had been running on three cylinders for who knows how long! again...kind of guessing...but i was frustrated! Thought I was going to have to yank engine (w/ 170k miles pulling the head to retap a spark plug hole seemed kind of pointless...)
Last edited by whirlybird; Apr 6, 2013 at 01:19 PM.
Apr 6, 2013 | 12:42 PM
#4
Thread Starter
Registered User
Joined: Mar 2009
Posts: 63
Likes: 0
From: Houston
In the end the head/labor was saved thanks to this product:
I couldn't get an actual spark plug thread chaser in there due to it being too tight a space...this thing is AWESOME!!! worked well...retapped and new plug put in...now it seems to run/idle great!
I couldn't get an actual spark plug thread chaser in there due to it being too tight a space...this thing is AWESOME!!! worked well...retapped and new plug put in...now it seems to run/idle great!
 Apr 6, 2013 | 01:19 PM
#6
Thread Starter
Registered User
Joined: Mar 2009
Posts: 63
Likes: 0
From: Houston
Trending Topics
Apr 6, 2013 | 05:26 PM
#8
Nice to see another Trekker around
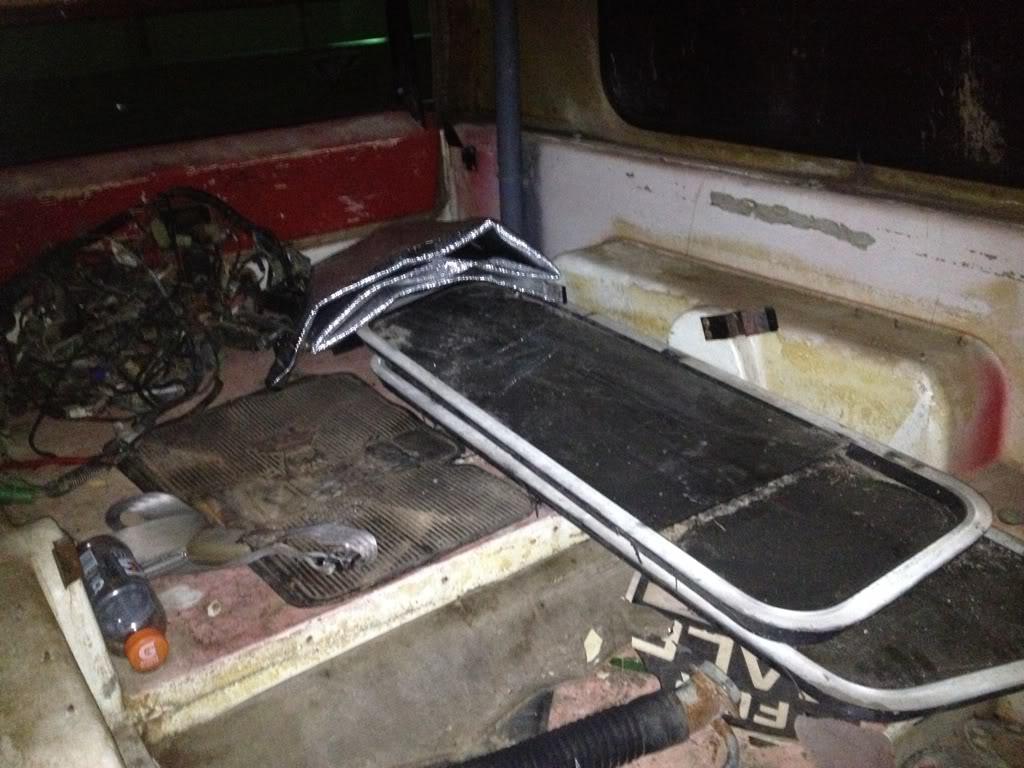
extra set of 81 Sliding windows...cool..
unfortunately trekkers seem to see more than the usual abuse by past owners.
looking forward to seeing the progress on this...
extra set of 81 Sliding windows...cool..
unfortunately trekkers seem to see more than the usual abuse by past owners.
looking forward to seeing the progress on this...
Apr 7, 2013 | 05:50 AM
#9
Thread Starter
Registered User
Joined: Mar 2009
Posts: 63
Likes: 0
From: Houston
Thanks guys! I appreciate the kind words and encouragement...I'm definitely trying to take a "long" approach...this will more than likely be a fairly slow build. Unfortunately I probably won't be able to touch it for another week or so given my current schedule (salright, more time to plan/daydream); but MAN I wanna get this thing up and going ASAP!
@ OC: yes I was very pleasantly surprised to see the sliding windows when I showed up! And much agreed on how a lot of these seem to be beat on pretty well...ah well...makes it more "mine" I suppose after all the work.
@ OC: yes I was very pleasantly surprised to see the sliding windows when I showed up! And much agreed on how a lot of these seem to be beat on pretty well...ah well...makes it more "mine" I suppose after all the work.
Apr 8, 2013 | 03:38 PM
#10
Good progress! What did you use on your tank to get the rust out? I've heard of a lot of products out there, but I've never SEEN actual results. Also, keep that sending unit - they are super hard to find. Just take a soft wire brush to it to clean it up. Mine was seized up and just as bad as yours, but once I cleaned it up it worked perfectly.
Apr 9, 2013 | 08:01 PM
#11
Thread Starter
Registered User
Joined: Mar 2009
Posts: 63
Likes: 0
From: Houston
Good progress! What did you use on your tank to get the rust out? I've heard of a lot of products out there, but I've never SEEN actual results. Also, keep that sending unit - they are super hard to find. Just take a soft wire brush to it to clean it up. Mine was seized up and just as bad as yours, but once I cleaned it up it worked perfectly.
Thanks!
In the end I totally cheated and took the tank to a local radiator shop...I tried degreasing/solvents/shaking with nuts/bolts with only "OK" results...I'm actually glad I took it to him...it looked SOOOOOO much better after a few hours (literally) at his shop than it did after DAYS of me trying to do it. If I EVER have anything like this todo again I'll just take it straight to him...
Apr 15, 2013 | 12:23 PM
#14
Contributing Member
Joined: Mar 2003
Posts: 11,334
Likes: 0
From: COTKU,Ontario,Canada
Looks like a sweet project... the interior is trashed but the body looks solid at least...
that #4 plug looks like it was too long a reach one and the electrode got mashed by the cylinder... if eng only has 170 on it for sure and it's solid otherwise no worries about retapping... the eng. in my 87 did 700+ before I sold it and it was running strong... admittedly it was the next generation of that eng . from yours but they were essentially the same bullet proof block.
that #4 plug looks like it was too long a reach one and the electrode got mashed by the cylinder... if eng only has 170 on it for sure and it's solid otherwise no worries about retapping... the eng. in my 87 did 700+ before I sold it and it was running strong... admittedly it was the next generation of that eng . from yours but they were essentially the same bullet proof block.


 Apr 23, 2013 | 06:43 PM
#20
Thread Starter
Registered User
Joined: Mar 2009
Posts: 63
Likes: 0
From: Houston
Thanks again guys, I appreciate it...over the next couple of weeks I'm hoping to get around to cleaning the interior up and taking some "quiet time" with the truck (probably w a frosty beverage in hand) to REALLY take stock of the truck/situation and prioritize the work to accomplish. I was hoping to at least have it road ready by June/July but that's probably not going to happen given my current schedule. Gotta get through finals/last/last two semesters and in addition ill probably be traveling quite a bit for work over the next few months...ugh!


