
'78 Chinook Newport Project
 Mar 11, 2013 | 07:05 AM
#21
Thread Starter
Registered User
Joined: May 2008
Posts: 4,591
Likes: 126
From: Montana
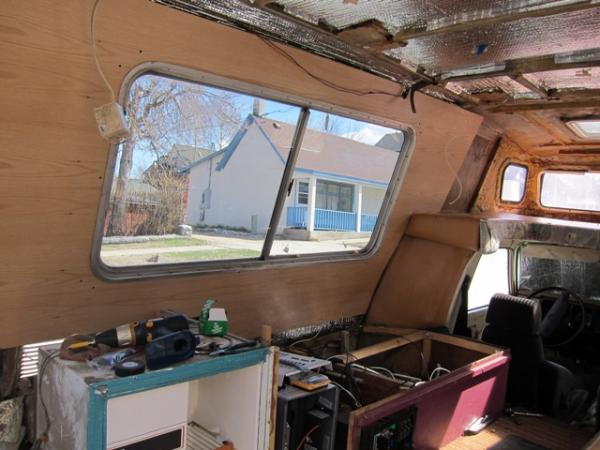
Did a little more work. Got the inverter wired for 120V (haven't started 12v yet), new furnace is in (just not mounted or connected yet), and I got the foil insulation in everywhere except the cab over. I'm still gutting that part a little, and it's giving me issues...
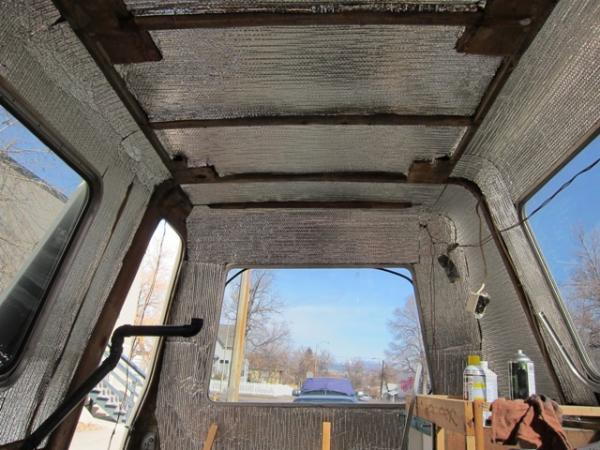

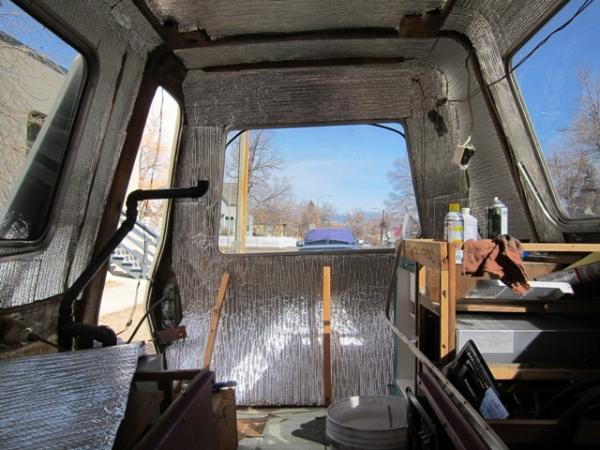
Cab over. The window frames hold in the pleather material and insulation. They're held in by screws. All the screws are really corroded. I can't get most of them out, so I can't ge the window frames out...hard to get stuck, corroded screws out with a screwdriver. Bolts would be different. Not sure what to do here.

This thing makes a lot of noise going down the road. A lot of it will be taken care of with what I've already done, but I'm trying to find anything else that might rattle. The padding for the bed in the cab over is foam glued onto plywood, with pleather stretched over it. And it just sits on blocks on the fiberglass. Definitely catching air and slamming back down when I hit good bumps. I'm not going to try to anchor it, really, but I'm gluing some foam to the bottoms of the blocks, to quiet it down a bit.
Cab over. The window frames hold in the pleather material and insulation. They're held in by screws. All the screws are really corroded. I can't get most of them out, so I can't ge the window frames out...hard to get stuck, corroded screws out with a screwdriver. Bolts would be different. Not sure what to do here.
This thing makes a lot of noise going down the road. A lot of it will be taken care of with what I've already done, but I'm trying to find anything else that might rattle. The padding for the bed in the cab over is foam glued onto plywood, with pleather stretched over it. And it just sits on blocks on the fiberglass. Definitely catching air and slamming back down when I hit good bumps. I'm not going to try to anchor it, really, but I'm gluing some foam to the bottoms of the blocks, to quiet it down a bit.
Mar 18, 2013 | 06:49 AM
#22
Thread Starter
Registered User
Joined: May 2008
Posts: 4,591
Likes: 126
From: Montana
Did a little work over the weekend. Taped the seams of the foil insulation, and got new seats in! Gigantic improvement over stock, and no modifications to my cab, no welding, no rigging up brackets.
Since I don't weld, didn't want to pay money, and didn't want to do a hack job of it (like I kind of did with my 83...seats are a little unstable and don't slide well in the tracks), I thought for a while about how to get these in.

My idea ended up working. Take the tracks off the old seats and put them on the new seats. As long as the new seats aren't any wider, there then shouldn't be any reason they wouldn't just bolt right into the existing holes in the cab.
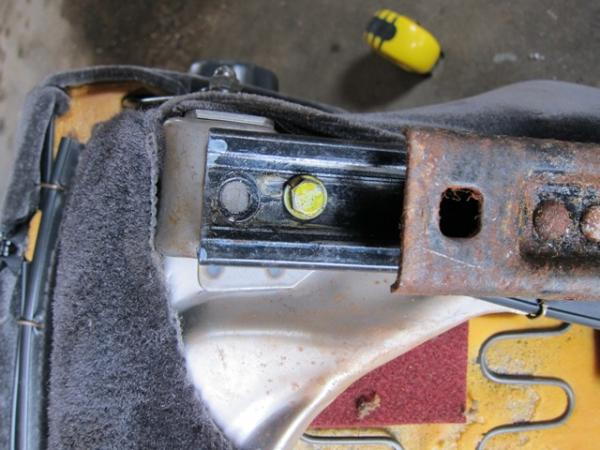
The only thing I had to do was drill one new hole in the old tracks, one for each of the four tracks. The threaded holes on the new seats were just a little shorter-spaced than the old ones.
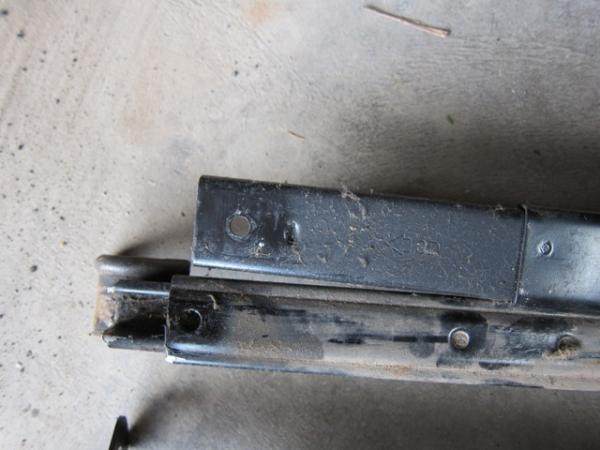


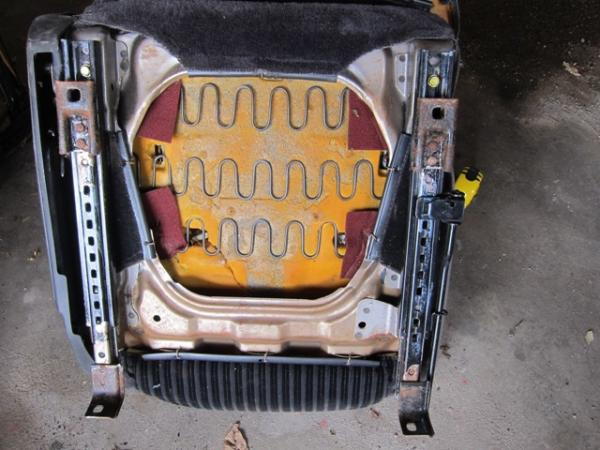
No welding! No fabricated brackets! Holes line up perfectly, seats feel solid, and slide back & forth smoothly.

Front holes

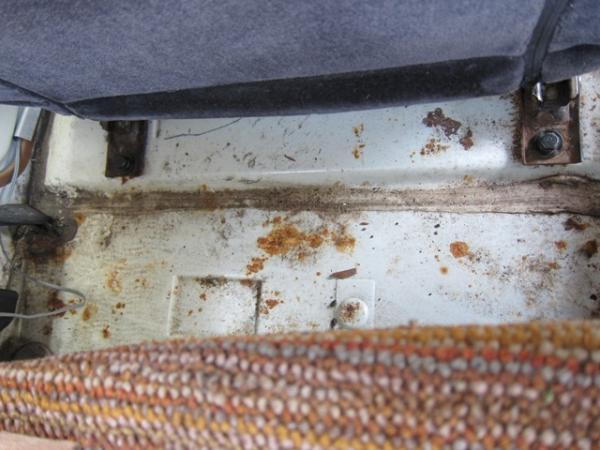
Back holes
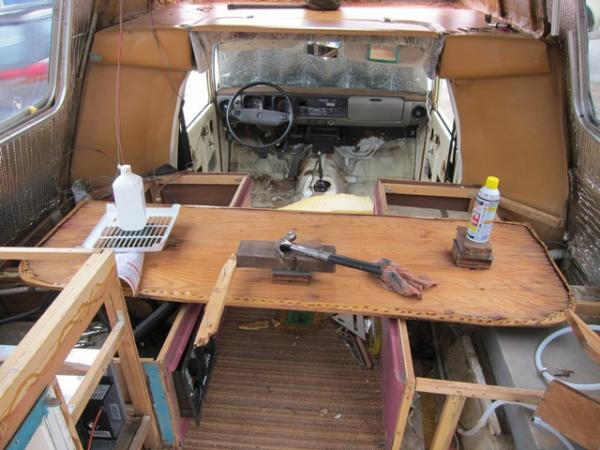
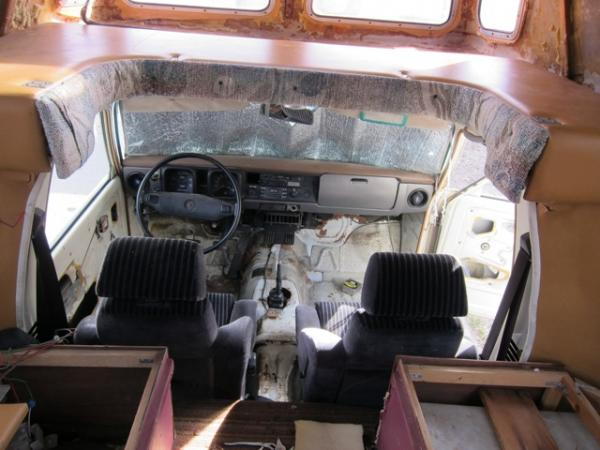
And the result. This is the best thing that's happened since I started putting things back together. The original seat was uncomfortable. Not uncomfortable after a long trip, or an hour, or even a half hour. Just immediately uncomfortable when I sat down. Things poking me in the lower back, etc.

One of the next steps:

Since I don't weld, didn't want to pay money, and didn't want to do a hack job of it (like I kind of did with my 83...seats are a little unstable and don't slide well in the tracks), I thought for a while about how to get these in.
My idea ended up working. Take the tracks off the old seats and put them on the new seats. As long as the new seats aren't any wider, there then shouldn't be any reason they wouldn't just bolt right into the existing holes in the cab.
The only thing I had to do was drill one new hole in the old tracks, one for each of the four tracks. The threaded holes on the new seats were just a little shorter-spaced than the old ones.
No welding! No fabricated brackets! Holes line up perfectly, seats feel solid, and slide back & forth smoothly.
Front holes
Back holes
And the result. This is the best thing that's happened since I started putting things back together. The original seat was uncomfortable. Not uncomfortable after a long trip, or an hour, or even a half hour. Just immediately uncomfortable when I sat down. Things poking me in the lower back, etc.
One of the next steps:
Last edited by 83; Nov 6, 2013 at 02:35 PM.
May 6, 2013 | 01:40 PM
#28
Thread Starter
Registered User
Joined: May 2008
Posts: 4,591
Likes: 126
From: Montana
Soon. I've been doing a lot...but a lot of it is invisible, and prep work. Once things really start going back together I'll have a few posts with lots of progress. It's going to be functional for camping by mid-June, so there will be a lot of progress to report on soon.
May 6, 2013 | 04:17 PM
#29
Registered User

Joined: Sep 2008
Posts: 177
Likes: 12
What vehicle are the new seats from? They look so much more comfortable than the stock ones.
Are you still running with the stock carb.?
May 6, 2013 | 07:00 PM
#30
Thread Starter
Registered User
Joined: May 2008
Posts: 4,591
Likes: 126
From: Montana
Mine should have been in use by now...but I always forget how much longer things take than I plan.
Either a Honda or Acura. Same thing, basically. Early 90's model. They fit really nice, and are very comfy on their own, but compared to the stock seats...WOW.
Yes, on the stock carb, but we'll see for how long. It does need some work, and I've been curious about Webers for a long time...so this may be the vehicle I try one out on.
May 7, 2013 | 07:11 AM
#31
Registered User
Joined: Sep 2008
Posts: 177
Likes: 12
Mine should have been in use by now...but I always forget how much longer things take than I plan.
Either a Honda or Acura. Same thing, basically. Early 90's model. They fit really nice, and are very comfy on their own, but compared to the stock seats...WOW.
Yes, on the stock carb, but we'll see for how long. It does need some work, and I've been curious about Webers for a long time...so this may be the vehicle I try one out on.
Either a Honda or Acura. Same thing, basically. Early 90's model. They fit really nice, and are very comfy on their own, but compared to the stock seats...WOW.
Yes, on the stock carb, but we'll see for how long. It does need some work, and I've been curious about Webers for a long time...so this may be the vehicle I try one out on.
I'm also looking into the weber. I've read a lot of good things, but my stock carb is working at the moment.
 May 7, 2013 | 09:19 AM
#33
Registered User
Joined: Aug 2007
Posts: 872
Likes: 1
From: Reno, NV
subscribed. good luck with the rebuild.
the modern touches will be more energy efficient, also.
seats look good and comfy.
i'm guessing the 5 speed just bolted right up.
no experience with the older 4 cylinders.
have you thought of installing a solar panel?
the modern touches will be more energy efficient, also.
seats look good and comfy.
i'm guessing the 5 speed just bolted right up.
no experience with the older 4 cylinders.
have you thought of installing a solar panel?
May 7, 2013 | 11:50 AM
#34
Thread Starter
Registered User
Joined: May 2008
Posts: 4,591
Likes: 126
From: Montana
I'll get solar eventually. If I plan on staying out places for more than a weekend, without having to run the engine, I'll need it. But for this summer, I'll just see how it does for 1 & 2 night trips. No microwave, tv, ac, or any of that, so it won't draw much power.
May 7, 2013 | 12:13 PM
#35
Thread Starter
Registered User
Joined: May 2008
Posts: 4,591
Likes: 126
From: Montana
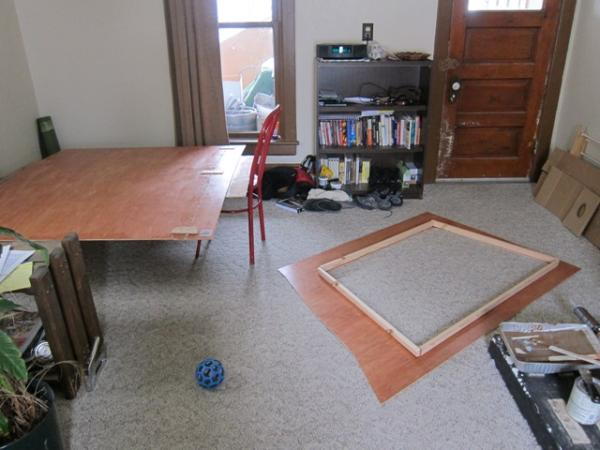
Working on the new walls. Cutting, sealing, putting frames on.

Insulating the walls. Putting upholstery foam on the back wall panel and ceiling, along with insulation.


Vinyl stretched over the ceiling and back panel.


So the ceiling and back panel are insulated, padded, and covered with vinyl. That's how it was when I bought it and I didn't see any reason not to do it that way again, with all new materials.
Walls up.


LED bulbs in old light fixtures. Some I soldered directly in, others I just bought bulbs that connected into the old incandescent bulb location.

Other things...I've rewired everything (just haven't put the fixtures in), been spraying PB Blaster on the leaf springs getting ready for the add-a-leaf and new shocks, painted the mirror mounts and am getting the new mirrors mounted on them, and I've started framing in the cabinet that the stove, furnace and fridge sit in.
Ceiling is almost ready to go up. It came down in 3 peices, I only have one peice ready so far and they all need to go up at the same time.
Insulating the walls. Putting upholstery foam on the back wall panel and ceiling, along with insulation.
Vinyl stretched over the ceiling and back panel.
So the ceiling and back panel are insulated, padded, and covered with vinyl. That's how it was when I bought it and I didn't see any reason not to do it that way again, with all new materials.
Walls up.
LED bulbs in old light fixtures. Some I soldered directly in, others I just bought bulbs that connected into the old incandescent bulb location.
Other things...I've rewired everything (just haven't put the fixtures in), been spraying PB Blaster on the leaf springs getting ready for the add-a-leaf and new shocks, painted the mirror mounts and am getting the new mirrors mounted on them, and I've started framing in the cabinet that the stove, furnace and fridge sit in.
Ceiling is almost ready to go up. It came down in 3 peices, I only have one peice ready so far and they all need to go up at the same time.
Last edited by 83; May 7, 2013 at 01:42 PM.
May 7, 2013 | 01:55 PM
#36
Registered User
Joined: Jan 2012
Posts: 325
Likes: 2
From: Kansas City, Missouri
I missed the point where you managed to pull the window frame screws (ground off the heads, then twisted the stalks after removed frame?). Obviously, you found a way to deal with them...
The new walls look excellent (and insulated-YES). Where is the noise coming from when you mentioned when you drive down the road? I had loose front bumper and still have at least one heat shield to find and pin down, and something in the right door. On the Chinook, it could be inside a cabinet, or wall!
Great idea on the lights. Where do you come up with the time!?
Last edited by 83pingpong; May 7, 2013 at 01:57 PM.
May 7, 2013 | 04:43 PM
#37
Thread Starter
Registered User
Joined: May 2008
Posts: 4,591
Likes: 126
From: Montana
Yeah, I bought a impact screwdriver, and it got the last screws out no problem. Except the ones in the cab-over...I think I'll need to drill those out. The angle is no good for the screwdriver.
Thanks! The noises were partially from unsecured pieces of wood slamming when I went over bumps, like the padded "bed" area in the cab-over, and other parts of benches and cabinets that just kind of sat on the floor, but weren't attached. Other noises were from cabinets that loosed up or pulled screws out, and were moving around. Driving around on roads is hard on wood construction!
I get single-minded about things...which is why it's rare that I start projects. I like free time. But once I got going, I had to finish it. Now it's summer and I'm hating that camping weekends are going by, and I'm still sleeping in the back of my truck!
So, an hour or two or three after work, a half day or two on the weekends...I've just been doing stuff little by little over the last 4 months. It adds up, but not fast enough...


