
1981 toyota pickup DLX Project
 Jan 26, 2014 | 04:43 PM
#41

Yes I forgot you built your own floor as well! And when you say I need more than just your rockers what do you mean? I know the cab is in (very) bad shape, but I doubt I can get another cab in better shape around here for less than 800$-1000$, which I don't want to spend for another cab, I want to save this one. For the plus side my windshield frame is perfect, battery tray is good and heater vents has no rust.
Jan 26, 2014 | 04:51 PM
#42
I don't know man. I don't want to discourage you, but that cab looks pretty rough. If it were mine, I would start looking for another cab. The key to the success of my floor replacement was the relatively good condition of my rocker panels - they ended up being the foundation of my repair. I have seen steel replacement rockers out ther before but I'm not to sure of their quality and I'm not sure how fiberglass would work for you (not my specialty). I would also do the tunnel if you're already replacing that much. I have a tunnel template if you want it. Just PM me your email address.
Jan 26, 2014 | 04:58 PM
#43
Damn you all with your pessimistic words  haha
haha
I will at least try to do something with this cab that's for sure, it will be a great way to learn, and it may not look great but that won't wipe the smile off my face when I'm driving it I can assure you. I don't want big gaps between the door and fender and rocker but I don't care if it is not perfect, for now. This will probably be a never ending project. One day it will have a nice original bed, and I would also like to find an original cab that doesn't need work or very little that's for sure, even if it takes away more ''original'' feel from the truck.
hahaI will at least try to do something with this cab that's for sure, it will be a great way to learn, and it may not look great but that won't wipe the smile off my face when I'm driving it I can assure you. I don't want big gaps between the door and fender and rocker but I don't care if it is not perfect, for now. This will probably be a never ending project. One day it will have a nice original bed, and I would also like to find an original cab that doesn't need work or very little that's for sure, even if it takes away more ''original'' feel from the truck.
Last edited by gillesdetrail; Jan 26, 2014 at 05:00 PM.
Jan 26, 2014 | 05:10 PM
#45
Not pessimistic, just realistic LOL
Anything is doable especially if you aren't worried about it being perfect. If you plan on doing something a couple years down the road, I would skip looking for a cab all together and buy a fiberglass cab from Corey. He should have them perfected by then. To be honest, if I had to do it again, I would do a fiberglass cab and forget about rust forever!
Anything is doable especially if you aren't worried about it being perfect. If you plan on doing something a couple years down the road, I would skip looking for a cab all together and buy a fiberglass cab from Corey. He should have them perfected by then. To be honest, if I had to do it again, I would do a fiberglass cab and forget about rust forever!
 Jan 27, 2014 | 04:28 PM
#50

Registered User
Joined: Jan 2013
Posts: 30
Likes: 0
From: California
It wears on the bearings and whatnot from of the weight of the grinder. That and there's a chance of it chasing you down if you plug it in and the switch is on. But that's just exciting. Yeah, my projects are totally fun I'm just stuck on the boring parts. Happy building!
Jan 28, 2014 | 01:02 PM
#51
Thanks man!
Kawazx6 was kind enough to send me his tunnel templates, which I will get printed 1:1 scale, then trace on a sheet of metal and cut/bend. That will make things a lot easier!
Here is what I did last night


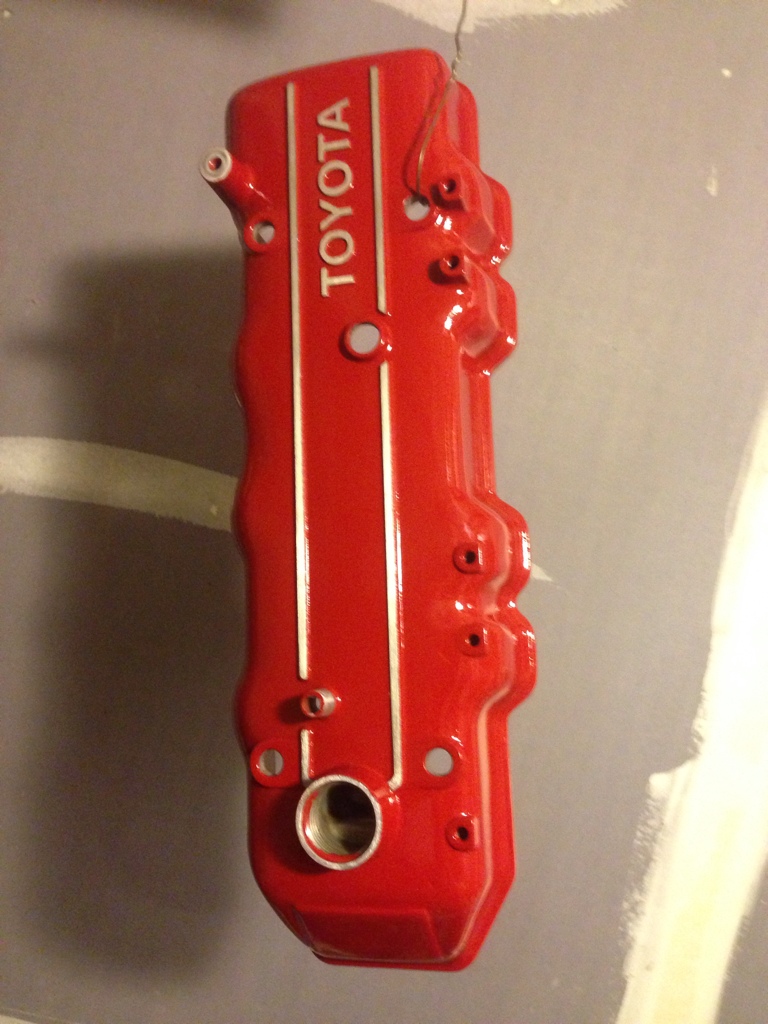
I am still debating wether I paint the intake manifold aluminum and the valve cover chevy orange like the block, or the valve cover and intake black...
Got news from the machinist today, exhaust studs are stripped and will need to be fixed with helicoil, should have the head installed by next week!
Kawazx6 was kind enough to send me his tunnel templates, which I will get printed 1:1 scale, then trace on a sheet of metal and cut/bend. That will make things a lot easier!
Here is what I did last night
I am still debating wether I paint the intake manifold aluminum and the valve cover chevy orange like the block, or the valve cover and intake black...
Got news from the machinist today, exhaust studs are stripped and will need to be fixed with helicoil, should have the head installed by next week!
Jan 30, 2014 | 04:41 PM
#53
I painted my valve cover red, filed the raised areas down to bare aluminum and clear coated it. That style would look good in black too. I'll probably buy another used valve cover and do the same thing except with powdercoating since Igot the powdercoating gun after I spent the time to do my valve cover. Here's what mine looks like:
Jan 31, 2014 | 12:51 PM
#54
Yes I like it with polished raised letters, every valve cover looks better that way in my opinion. I have decided to paint my intake manifold and head aluminum and the valve cover chevy orange, I just gotta find a 2-3 hours that my gf is away so I can let it cure in the oven once painted, I already tried the ''correct way'' by asking nicely but she refused. What is it with women that refuse to have clean engine parts in the oven. 
Anyways I got a call from the machinist, the head is in good shape and straight, only problem is 4 exhaust stud are stripped in the head. Already ordered from dealer. He let me take it home to do a but of port work and cleaning up before he cuts the valve seats for the oversize valves and head milling.
For the intake port there was lots to improve, there were casting flaws such as core shift, when the molds aren't perfertly aligned during the casting process. I opened up the entry of the port by about 1mm diameter, raised the port roof a little, smoothed the short turn radius, and blended the bowls. I left a 60 grit rough finish at the port entry for fuel atomisation then smoother to 120 grit.


Here the bowl wasn't aligned with the exit because of core shift, now everything is blended.

Because of the difference in bore size between the 20r and 22r, the combustion chamber is smaller in the head. To avoid having a 90 degree edge that can cause hot spots and pre-ignition I smoothed that out, as well as edges around and between the valves. I also polished the combustion chamber however that is pretty useless since it will be covered by carbon anyway.


Here you can see the intake port with the intake manifold attached, there is a small step (about 1mm dia) from the intake to the head, for anti-reversion.

EGR port threaded and blocked with an allen bolt from above and JB weld from bellow.


For the exhaust side I smoothed the short turn radius (curve) since the transition wasn't nice, but I didn't do anything to the port walls since they were straight and will be covered with carbon anyways.
Can anybody tell me what these seals are for?

And the resurfaced flywheel

Anyways I got a call from the machinist, the head is in good shape and straight, only problem is 4 exhaust stud are stripped in the head. Already ordered from dealer. He let me take it home to do a but of port work and cleaning up before he cuts the valve seats for the oversize valves and head milling.
For the intake port there was lots to improve, there were casting flaws such as core shift, when the molds aren't perfertly aligned during the casting process. I opened up the entry of the port by about 1mm diameter, raised the port roof a little, smoothed the short turn radius, and blended the bowls. I left a 60 grit rough finish at the port entry for fuel atomisation then smoother to 120 grit.
Here the bowl wasn't aligned with the exit because of core shift, now everything is blended.
Because of the difference in bore size between the 20r and 22r, the combustion chamber is smaller in the head. To avoid having a 90 degree edge that can cause hot spots and pre-ignition I smoothed that out, as well as edges around and between the valves. I also polished the combustion chamber however that is pretty useless since it will be covered by carbon anyway.
Here you can see the intake port with the intake manifold attached, there is a small step (about 1mm dia) from the intake to the head, for anti-reversion.
EGR port threaded and blocked with an allen bolt from above and JB weld from bellow.
For the exhaust side I smoothed the short turn radius (curve) since the transition wasn't nice, but I didn't do anything to the port walls since they were straight and will be covered with carbon anyways.
Can anybody tell me what these seals are for?
And the resurfaced flywheel
Last edited by gillesdetrail; Feb 1, 2014 at 07:03 PM.
Jan 31, 2014 | 01:42 PM
#55
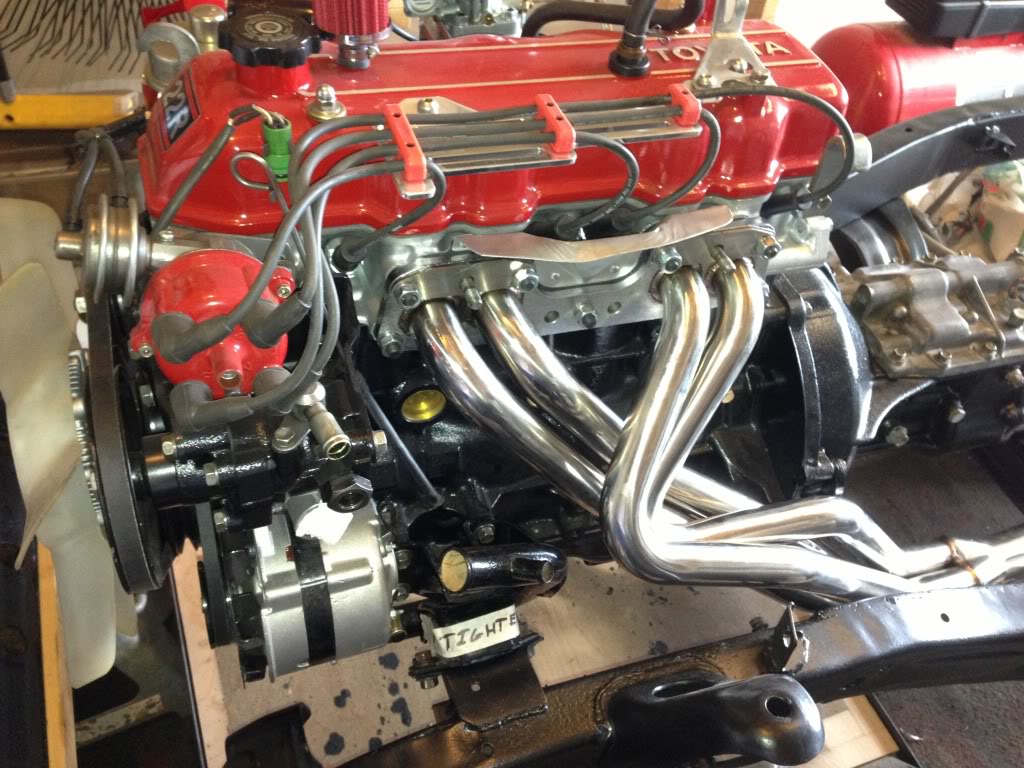
I sent the head back to the machine shop for the oversize valve install, 3 angle valve job and milling, should get it by middle of next week.
In the next couple of days I will be changing the pilot bearing and rear main seal, installing the transmission and the transfer case on the motor then on to the chassis. I ordered a bunch of parts to keep me busy all month, I want the chassis to be complete by 1st of march exept for the shocks.
In the next couple of days I will be changing the pilot bearing and rear main seal, installing the transmission and the transfer case on the motor then on to the chassis. I ordered a bunch of parts to keep me busy all month, I want the chassis to be complete by 1st of march exept for the shocks.
Feb 1, 2014 | 10:55 AM
#56
If you think that having a girlfriend is tough, try having a wife!!! I have a dedicated oven for powdercoating so I don't have arguments over using the oven, but I do have the tendency to use the dishwasher to clean parts when she isn't home - works surprisingly well!!!
Good job on the porting and polishing - it truly does make a difference in power and fuel economy. Also a great idea with the allen plug in the ERG port - you may have just started a trend there! As for those seals, they are for the stock headers where they connect to the collector pipes.
Good job on the porting and polishing - it truly does make a difference in power and fuel economy. Also a great idea with the allen plug in the ERG port - you may have just started a trend there! As for those seals, they are for the stock headers where they connect to the collector pipes.
Feb 6, 2014 | 11:16 AM
#58
No not a daily driver, I work on the road so I have another car for that, but I will use it as much as I can outside of work. And I won't be affraid to use it properly, I'ill go wheeling with it, hopefully without body damage. However it will be more of a street truck, restomod I guess. My deadline to finish the project is for wednesday the 28th of june, since on thursday I have a 300km drive to a friends land where we gather a bunch of trucks every year to wheel and camp out in the wood for 6 days. It HAS to be ready and at least a little broken in by then.
Last edited by gillesdetrail; Feb 6, 2014 at 11:18 AM.


