When you click on links to various merchants on this site and make a purchase, this can result in this site earning a commission. Affiliate programs and affiliations include, but are not limited to, the eBay Partner Network.
Nice looking work on the Y arm, thanks for posting up all the pics, they should come in handy down the road! One question, when you do the shackles up front is there a specific shackle angle to shoot for?
Look forward to seeing some pics from your Moab trip!
rustED,
I just measured my shackle angles using a metal protractor and rear shackle angle is between 30 and 32 degrees.
Measured the front and it's almost exactly the same....just coincidence. I set them with just my eyeballs originally.
rustED,
I just measured my shackle angles using a metal protractor and rear shackle angle is between 30 and 32 degrees.
Measured the front and it's almost exactly the same....just coincidence. I set them with just my eyeballs originally.
Thanks for the info Zuk, I wasn't sure if there was an exact degree to shoot for. I hope to do a sas on my 87' eventually, was hoping to use a FJ60 or FJ62 front axel, but haven't had any luck even finding one in my area, I'll probably end up just using a mini-truck front axel, spring under with shackles up front...I think I got the crossover steering figured out!
Thanks for the info Zuk, I wasn't sure if there was an exact degree to shoot for.
I hope to do a sas on my 87' eventually, was hoping to use a FJ60 or FJ62 front axel, but haven't had any
luck even finding one in my area, I'll probably end up just using a mini-truck front axel, spring under with
shackles up front...I think I got the crossover steering figured out!
.
.
You have options....since you'd be already using the stock fj60 front shackle arrangement and the SUA then
you could also use the proven FJ stock linkages and have the draglink bolt directly into the crossrod
.
.
.
see this SOR page
you can get used arms even
I bet if you called them they might have a line on a whole fj60 axle housing hub to hub
. https://www.sor.com/cat094.sor#094-01-A-KIT
.
.
.
plenty of fj60 axles out there just have to let your fingers do the walking....
see attached html file
click on it then save it to your desktop then click it
and it will open in a browser window automatically
pick a junkyard in the southwest as those axles will be rust free maybe.
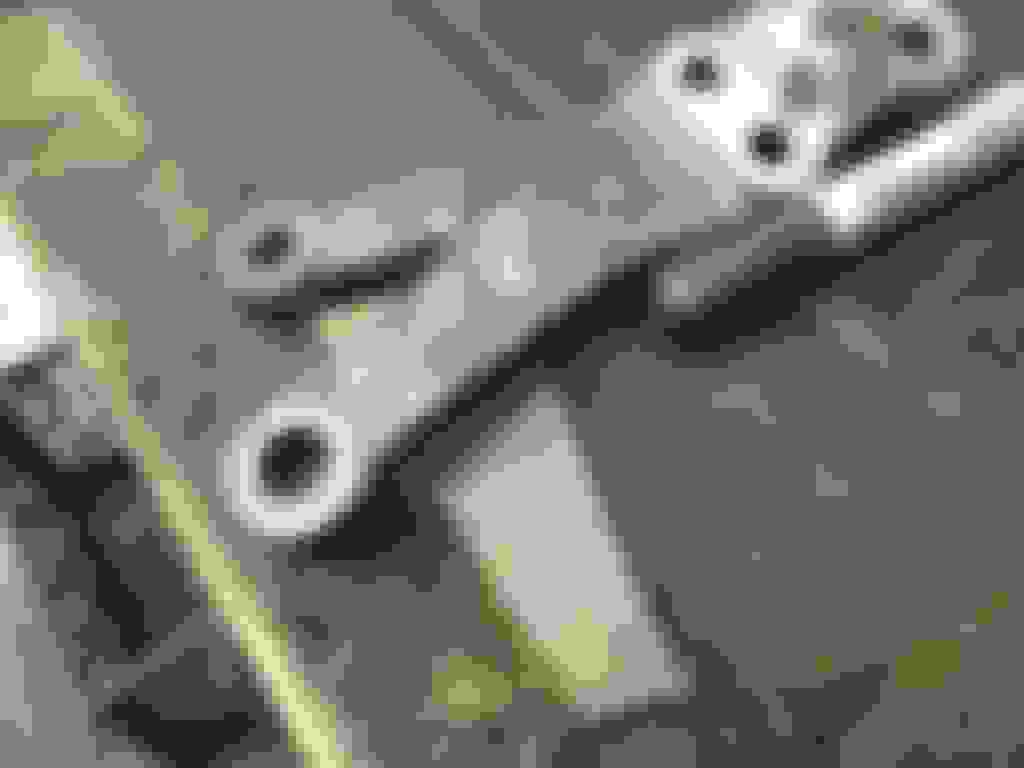
beefing the y-arm and rotating the tires in preparation for Moab trip
OK....good time to rotate the tires before the trip. And to also clean the insides of the
aluminum wheels with a strong detergent. Wow, they were filthy! They almost look like
brand new now. Started thinking about the forces involved and decided that this Y-arm
is getting braced.
Found a 3/16" thick plate of steel and started marking it up.
Cut it out and heated with a torch to get that perfect bend.
Tacked in place.
Looks good.
Underside will fill in real nice with the Millermatic Glue Gun.
Piglett- While searching for something unrelated, I found this as it applies to FJ60's and the wheel offset with the stock 15" tires.
Even the 60 guys have their share of back spacing issues as soon as they start making mild changes.
Reading down that thread I saw this...... FYI, OEM backspacing is 3.35"
Cool....we are thinking on the same track.
Agree that the y-arm needed the beef.
I hope you start your build thread on Yotatech.....and hopefully soon.
Just have to do the minor stuff......Galaxy DX 949 CB gets mounted on the passenger side of the tunnel hump......ac outlet in the front bumper and that's about it.
Oh...this was really critical.....had to paint the white Marlin Steering stabilizer satin black to blend with the axle theme. That was a must do.
No flash.....
Cool....we are thinking on the same track.
Agree that the y-arm needed the beef.
I hope you start your build thread on Yotatech.....and hopefully soon.
Just have to do the minor stuff......Galaxy DX 949 CB gets mounted on the passenger side of the tunnel hump......ac outlet in the front bumper and that's about it.
Oh...this was really critical.....had to paint the white Marlin Steering stabilizer satin black to blend with the axle theme. That was a must do.
I have a build thread, my current build is the 87' 4runner in my signature. It's pretty much stock, except the Zuk mod, lol. Just working on cosmetics right now, changing over the ugly red interior to grey. Hopefully I will start the sas this summer.
^^^EDIT*** unless I misunderstood and you were talking about starting a build thread on the SAS forum when I start my sas?
The AC outlet that you mentioned, is that going to get power from an inverter?
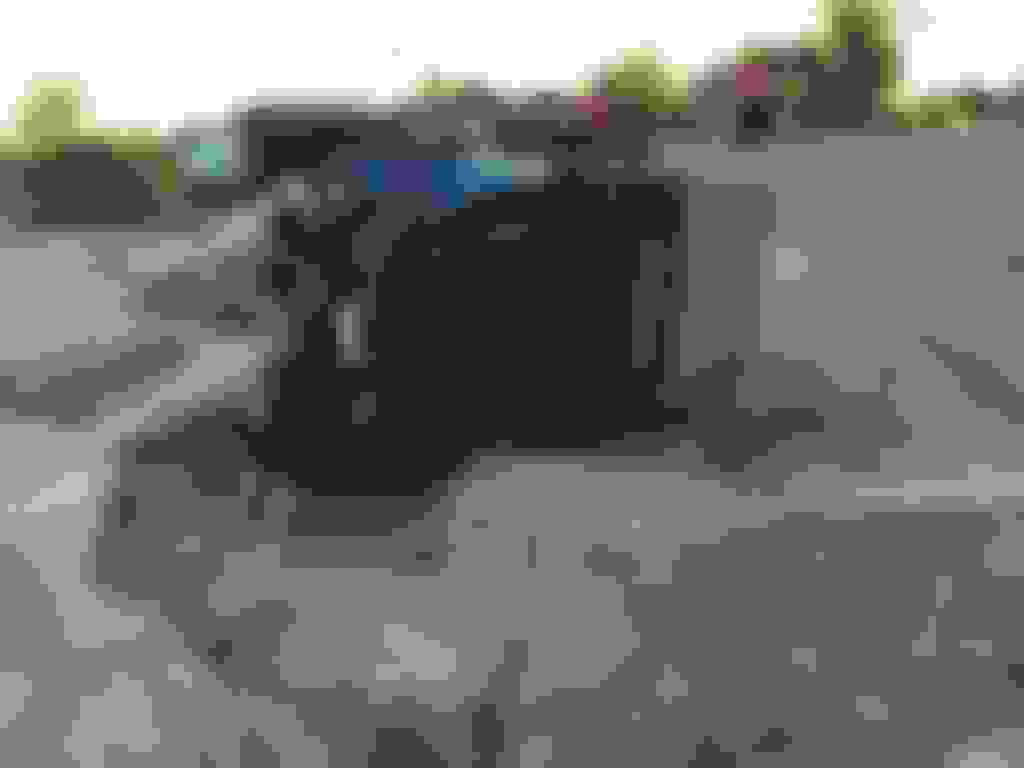
Back from Moab last Sunday evening....had a great time. Nobody died thank God. But we had Terry's Jeep do a 3/4 role on the Z Turn on the famous Moab Rim Trail. 2 people were on the dangerous downhill side....me and Jim. This was a fast rollover.....I got out of the way quick. Jim dove out of the way but the tumble on the rocks resulted in a deep gash to the scalp and a fractured C2 C3 vertebrae. He was released from the hospital just yesterday and is now aok. He has to take it real easy for 4 months though....due to the steel plate with 6 screws holding his vertebrae in line. Jim has had a lot of work done to him in the past....total of 3 knee replacements and some backbone work and numerous other things. The doctors said that if it weren't for the previous fusing of some of his vertebrae from years past that he would be dead from that Z Turn tumble. The previous work on his neck somehow gave him a "get out of jail free" card.
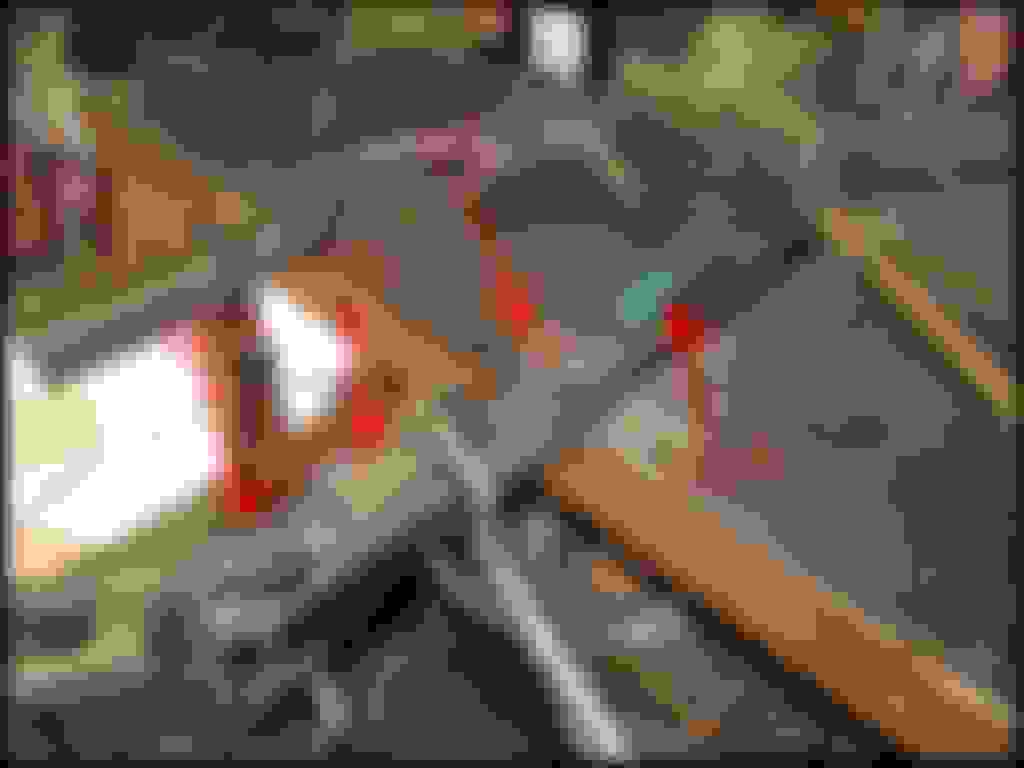
All 6 spark plugs were removed and the engine was turned over and, sure enough, a large
amount of oil shot out of the 2 most rearward plug holes. If we hadn't done this and
instead tried to do a engine start with oil in the cylinders....even a small bump of the starter.....
there would have been a very good chance of hydro lock and bending a crank rod. Because
we took the precautions, Terry was able to drive the Jeep back to Phoenix.
In the pic below , Jim can be seen sitting on the rocks.
Jim's wound......
The Z Turn shown from an angle that shows how dangerous this obstacle is....
Everything tilts to the right so you're already on dangerous angles just
trying to get lined up.
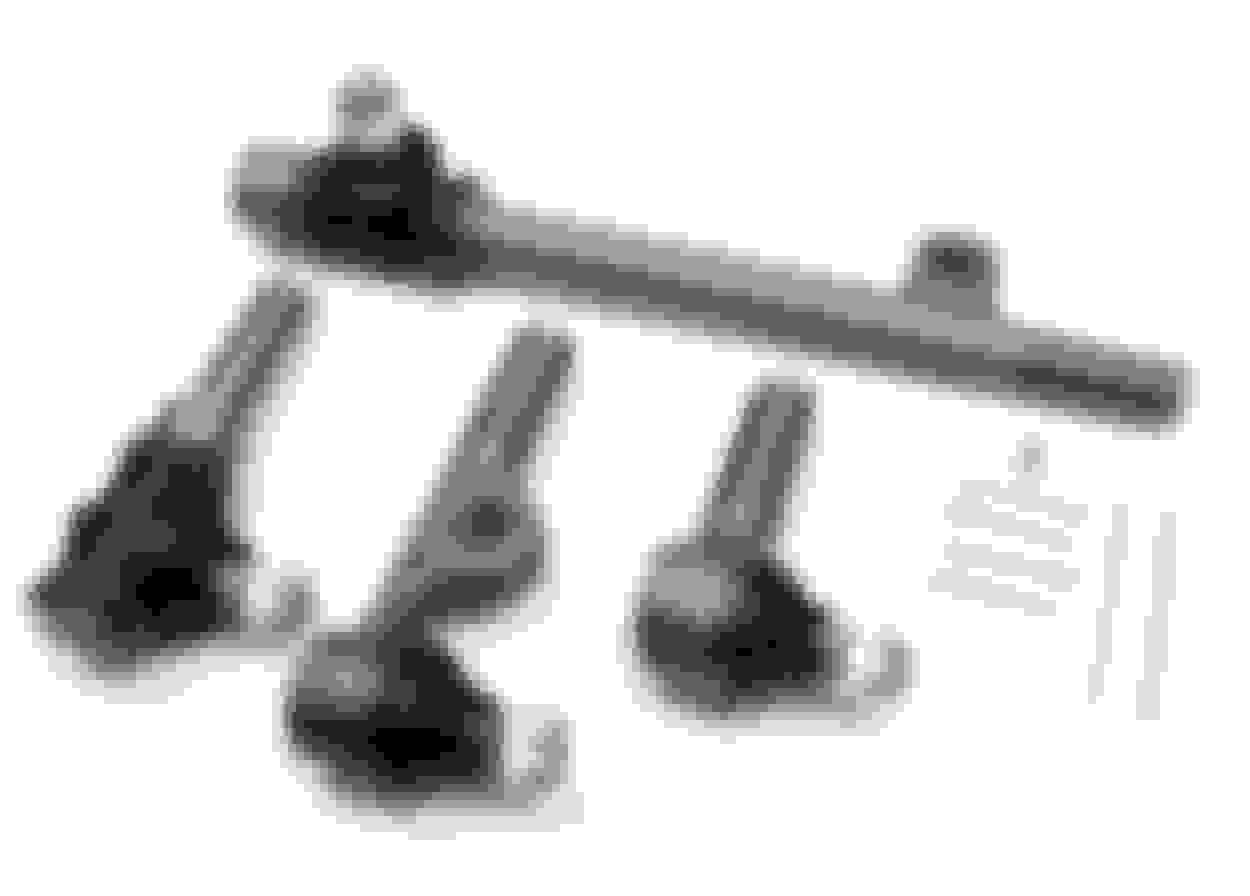
My truck performed well. On day 3 on Saturday, I started getting a clunk noise from the front every time
I hit a bump on the Golden Spike trail. Turns out the Trail-Gear pitman arm was the culprit. The
machined splines in the arm were cut wrong....too loose a fit on the OEM factory box. I knew it before the
trip and thought that might happen and it did. The solution is to replace it with a higher quality
arm....like a Marlin straight arm. But my solution was to chopsaw off the bad piece and put a
known good piece on. Went very well.
Using the OEM splined portion fixed it up nice. Also, I noted that a drop pitman arm
that I had from Marlin fits snug just like the OEM one.....but the TG is loosey
goosey(over-sized).
Glad your friend is going to recover ok! Thats some beautiful country, and some tough looking obstacles/trails! Nice work on the pitman arm repair, that really brings into question TG's quality control methods, lol.
Glad your friend is going to recover ok! Thats some beautiful country, and some tough looking obstacles/trails! Nice work on the pitman arm repair, that really brings into question TG's quality control methods, lol.
Basically, I couldn't tighten the pitman nut anymore.......the splines had
run out on the steering box shaft(topped out). The oem and Marlin
pitman tightened up with plenty of shaft spline still visible.
The oem/Marlin pitmans go on only one way....turning them upside
down they do no mesh with the shaft splines which means the factory
does a slight taper of the pitman(Marlin also) bore. The TG fits loose
either way.
Drove it off the Golden Spike and back 440 miles on the highway
with a loose goosey feeling in the steering(maybe an extra 1/2" iplay in the steering). Considered the danger
factor (what if the splines sheered/stripped off?)and felt it was not a concern......guess I was right this time
Was glad to see that the shaft splines were mostly undamaged also.
update
TG arm....measured big end at 1.248"....small end at 1.238"
Scenic photos.....this is on Hells Revenge ...the premier slickrock trail of the southwest
David's built Jeep with 40" stickies with Debbie stuck on the tire
Shot of Craig's well built Yota....auto of course. This is the famous Double Whammy.
Numerous rollovers occur here on the first lip as rigs claw to get the front tires up the
2nd step and then they slide hard and fast in the left direction and on their roofs.
Craig walked right up the left side with ease. No bumping was needed with his
wheelbase advantage.
David in his Yellow rig with yellow gloves is now pulling up to the ridiculous right hand side route.
One of about 5 hot tubs found towards the end of HR.
Tip-over Challenge shown here at the end of the Hells Revenge Trail. Jeff is locked up front and rear and motored slowly up it.
I forgot to lock in my rear e-locker on it and went up it but there was a lot of tire squealing.
Leans to the right near the top. Can feel a little "unnerving" right about here.....
Beautiful panoramic view of the highway 191 looking towards Moab along one of the
many cliff edges vantage points on the Spike
LaSal mountains in the background.
Jeff and Craig. Craig did an amazing job of building up that Yota by himself.
He never welded before and I gave him a quick MIG lesson and he took off
like a pro. Now his welds are probably better than mine. He also tackled
this link suspension himself.....something I would not want to do myself....
and he did a super job.
update.....Jeff's White Jeep is a work of love. He built it up himself. The Jeep is still around but Jeff passed away in May of 2017. We all miss him. He was 68. Too young.
a view of the Gemini Arches from the bottom side in Bull canyon.

 04-10-2016, 07:54 PM