
New guy here, and my SAS 94 runner
 Feb 26, 2007 | 11:29 AM
#1
Thread Starter
Registered User
Joined: Dec 2006
Posts: 18
Likes: 0
From: Galt Kalifornia
New guy here, and my SAS 94 runner
Hey guys, been cruzin this forum for abit, seem like a bunch of cool cats with no flamin!!!
Mine has been done (for the most part) for about 3 month's now and thought I would share it with you.
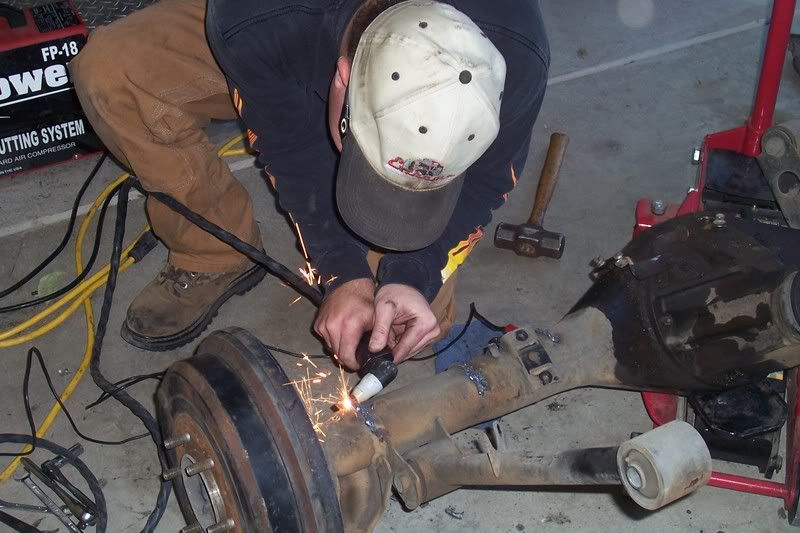
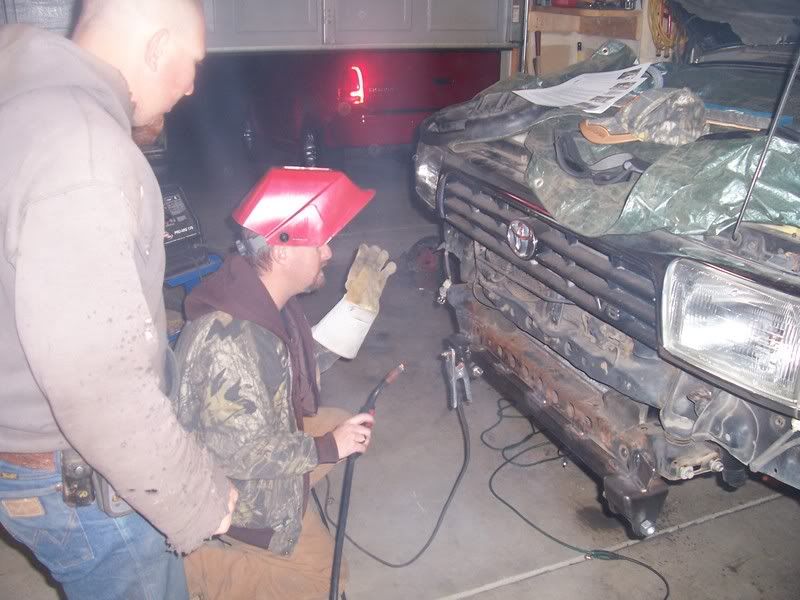
Started out as a bone stock 94 4runner, 3.slow, 5 spd and a blown up rear carrier. When I got it apart, looked like the kid I bought it from was doing nuetral drops!!! 5 teeth missing from the ring gear and 2 missing off the pinion. GOOD TIMES!!! Could'nt even daily drive it. So the fun began.........
Got kind of a late start on the pics

alot of cutting
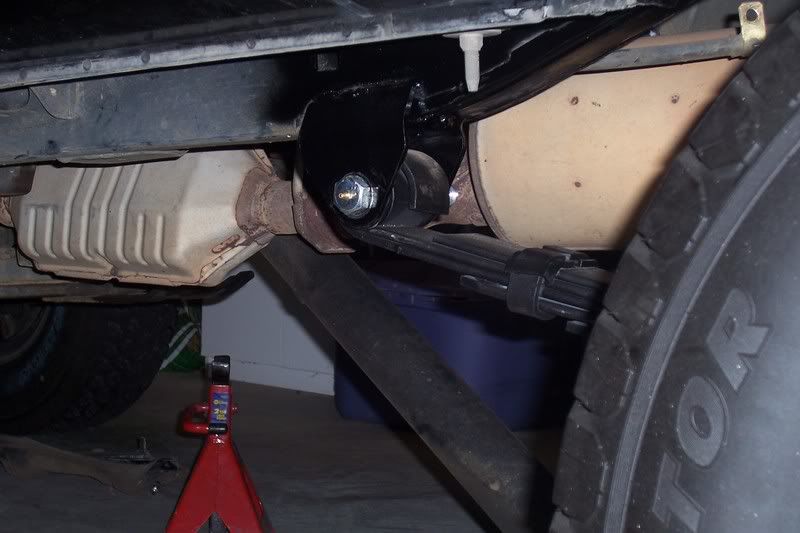
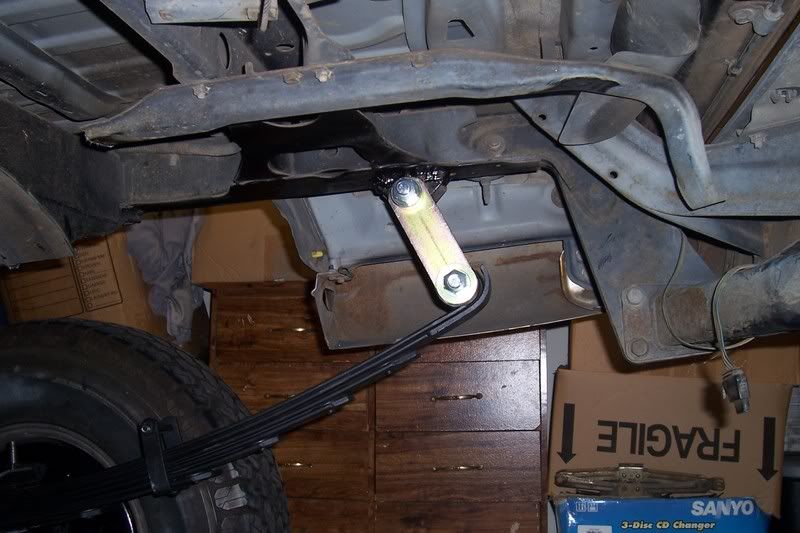
Knowing where the mounts go is a challange, hard to find any info
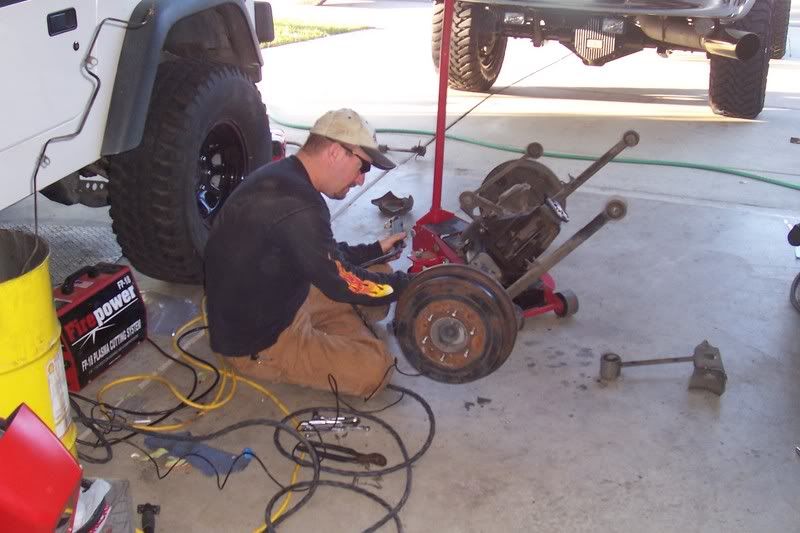
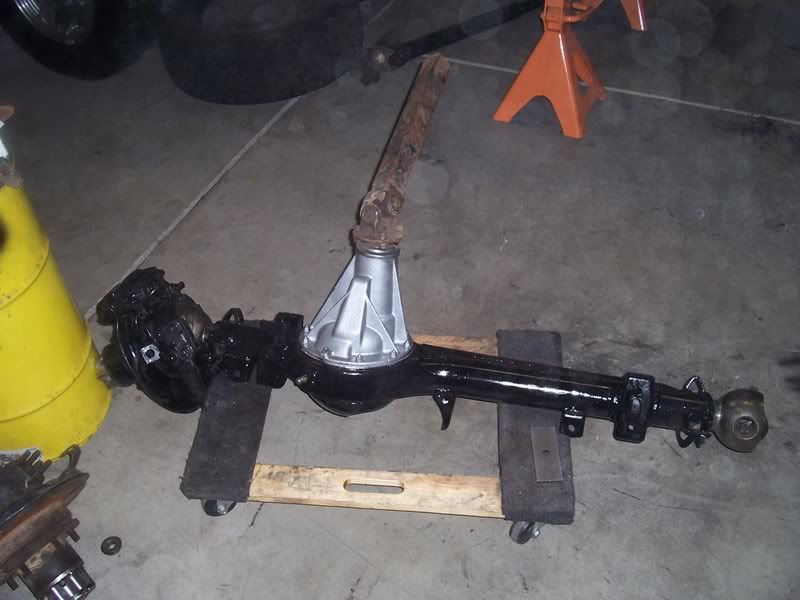
Rear is done for the hard part, still needed to tack in the spring perches
Then the notorious pile of junk...........
And more cutting and grinding and cutting and grinding...........
And the fun part begins again.........
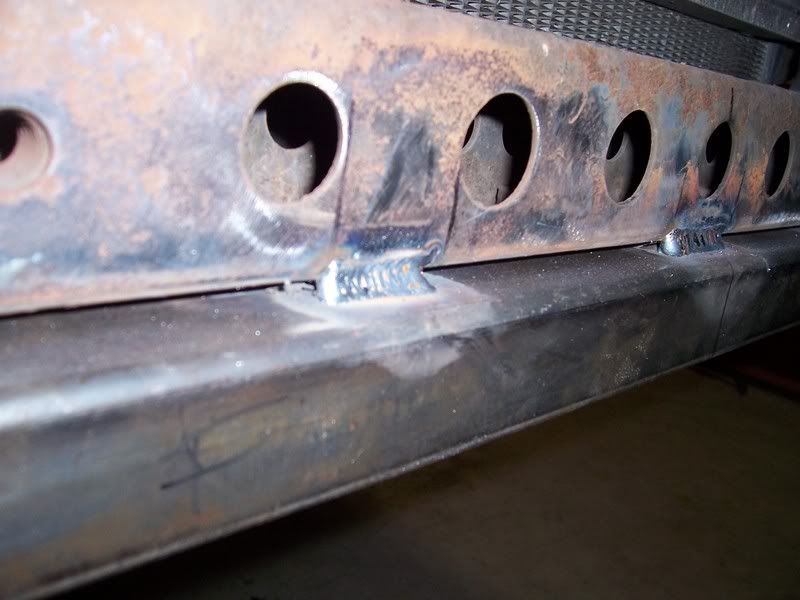
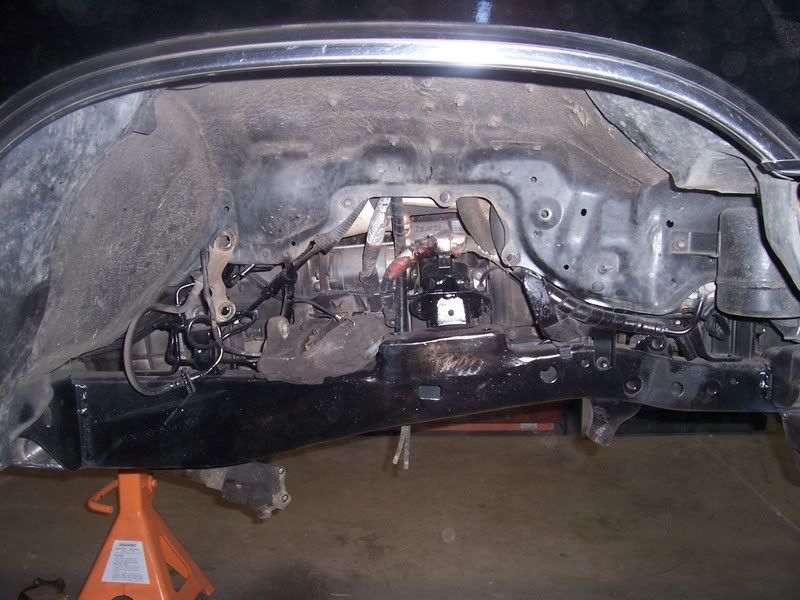
These were a pain in the butt, and also our first mistake......Didnt put the jigs up high enough.......No worries, just plated the bottom of the frame

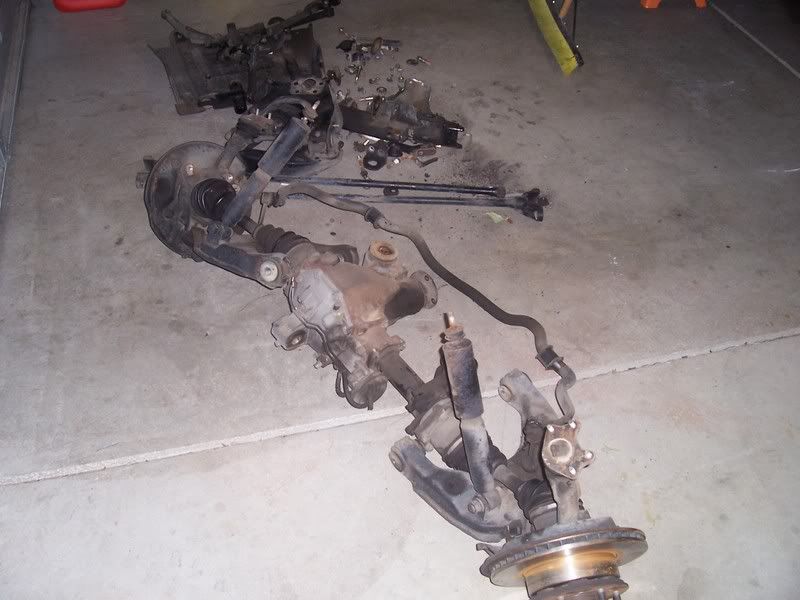
Got the front all cleaned up........
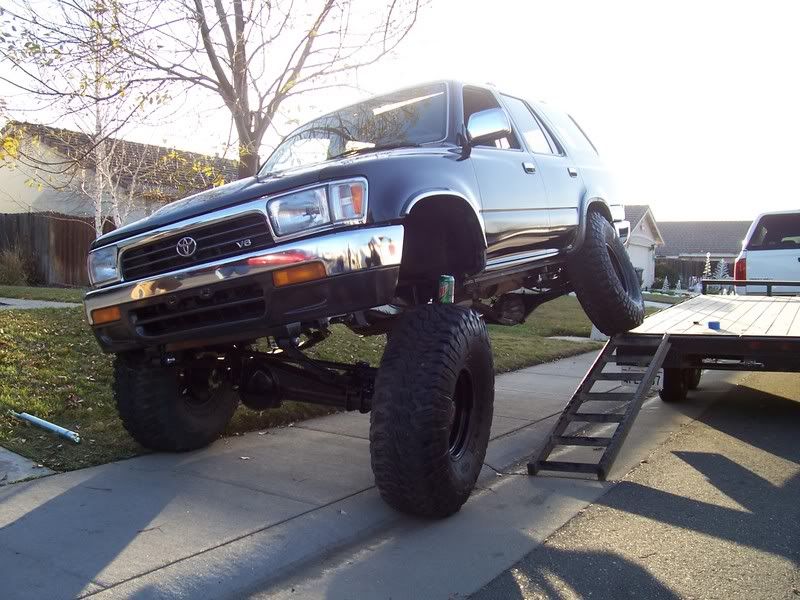
All mocked up on 37's............

When I was going together with the cross-over steering, none of the ball joints wanted to seat all the way down, so I called Trail-Gear and they sent me a whole complete set up without the tie rod and drag link for free and an apology, really cool guys to deal with!!!!
So I got the steering all done and the pitman arm was about 1/2" to long, (arms crossed each other) Sky has a 1/2" shorted billit arm, so put that on and no more problem's there.
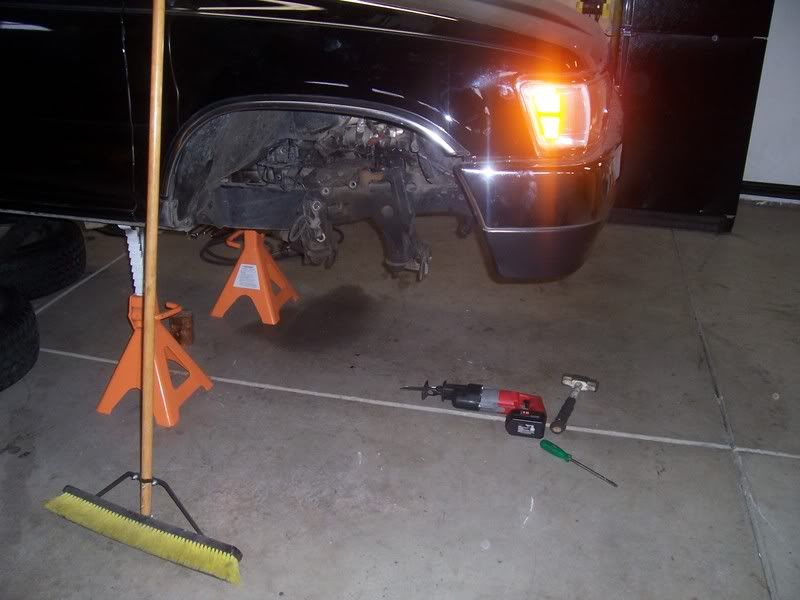
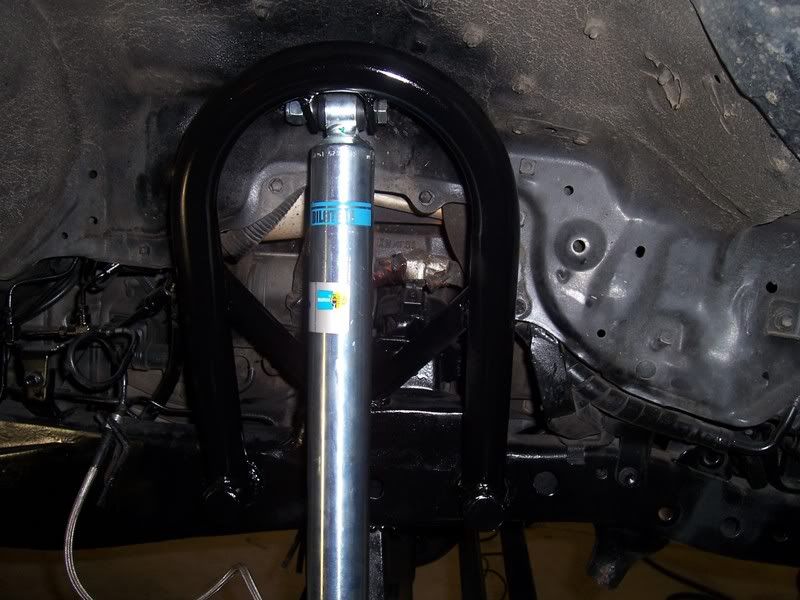
Welded on the shock mounts and installed shocks..............
The other big problem for me was what to mount the rear shocks to frame side. Wound up going to Sky again for the upper shock mount (sorry no pics yet) and welded that in. Worked out good, but if I had to do it over again, I would just make my own cross mount.
The last problem I still have, is where to mount the LSPV. Only have it tied up right now. Need to hard mount it and do the adjustable bolt deal for the rod. I would like to get rid of it completely.
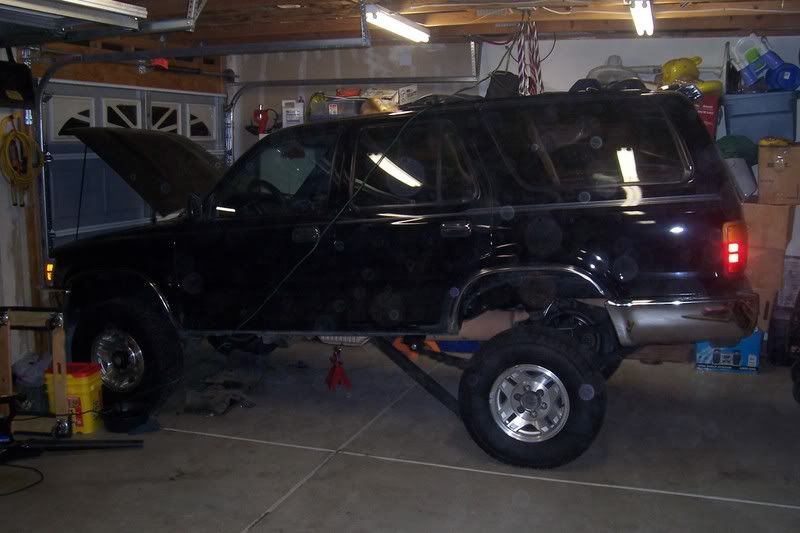
Got it out and did some okie ramp testing...........
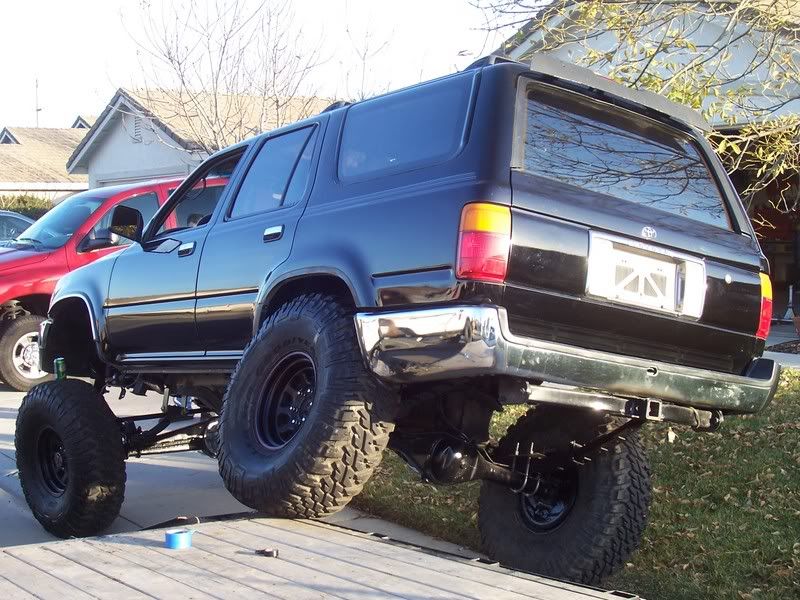
The rear tires hit now in the front of the wheel wells of the rear, and the front's hit the rear of the wheel well, but only when turned. Not sure if I am going to try and clear for the 37's, or step down to a 35". Really would like to keep the 37's for the trail.
Now, the next big purchase will be the doubler t-cases$$$$$$$$$$
That's about it for now. Will keep it up dated
Thanks guys, Don
Mine has been done (for the most part) for about 3 month's now and thought I would share it with you.
Started out as a bone stock 94 4runner, 3.slow, 5 spd and a blown up rear carrier. When I got it apart, looked like the kid I bought it from was doing nuetral drops!!! 5 teeth missing from the ring gear and 2 missing off the pinion. GOOD TIMES!!! Could'nt even daily drive it. So the fun began.........
Got kind of a late start on the pics
alot of cutting
Knowing where the mounts go is a challange, hard to find any info
Rear is done for the hard part, still needed to tack in the spring perches
Then the notorious pile of junk...........
And more cutting and grinding and cutting and grinding...........
And the fun part begins again.........
These were a pain in the butt, and also our first mistake......Didnt put the jigs up high enough.......No worries, just plated the bottom of the frame
Got the front all cleaned up........
All mocked up on 37's............
When I was going together with the cross-over steering, none of the ball joints wanted to seat all the way down, so I called Trail-Gear and they sent me a whole complete set up without the tie rod and drag link for free and an apology, really cool guys to deal with!!!!
So I got the steering all done and the pitman arm was about 1/2" to long, (arms crossed each other) Sky has a 1/2" shorted billit arm, so put that on and no more problem's there.
Welded on the shock mounts and installed shocks..............
The other big problem for me was what to mount the rear shocks to frame side. Wound up going to Sky again for the upper shock mount (sorry no pics yet) and welded that in. Worked out good, but if I had to do it over again, I would just make my own cross mount.
The last problem I still have, is where to mount the LSPV. Only have it tied up right now. Need to hard mount it and do the adjustable bolt deal for the rod. I would like to get rid of it completely.
Got it out and did some okie ramp testing...........
The rear tires hit now in the front of the wheel wells of the rear, and the front's hit the rear of the wheel well, but only when turned. Not sure if I am going to try and clear for the 37's, or step down to a 35". Really would like to keep the 37's for the trail.
Now, the next big purchase will be the doubler t-cases$$$$$$$$$$
That's about it for now. Will keep it up dated
Thanks guys, Don
Feb 26, 2007 | 12:17 PM
#4
Contributing Member
Joined: May 2002
Posts: 4,267
Likes: 1
From: Solano Co, CA Originally a North Idaho Hick
Awesome! Welcome to Yotatech from another Norcal guy. I'm just outside of Vacaville not far from you. I am in the middle of doing the same thing to mine right now. There's a link to the build up in my signature line. Alot of people leave the LPSV just zip tied to the frame but there are lots of other options out there. There's a set up to move the sensing valve in the engine bay, I've seen people remount it and weld the little arm to the crossmember after adjusting it work properly, and I saw one guy take it out totally and just T the hardline down to the axles. He said after doing that his brakes were working better than they ever had.
What are the specs on your front axle?? Did you upgrade to longs already?? Lockers?? Get to saving for that crawler box. I took out a loan to buy mine... $2235 out the door from Marlin and that was W/O shipping I went to pick it up at their shop. You can do it cheaper if you build it yourself. I bought the ready to bolt in model for the V-6. All rebuilt boxes with 23 spline shafts already installed. You'll need the $150 speed sensor too if you want your speedo to work.
What are the specs on your front axle?? Did you upgrade to longs already?? Lockers?? Get to saving for that crawler box. I took out a loan to buy mine... $2235 out the door from Marlin and that was W/O shipping I went to pick it up at their shop. You can do it cheaper if you build it yourself. I bought the ready to bolt in model for the V-6. All rebuilt boxes with 23 spline shafts already installed. You'll need the $150 speed sensor too if you want your speedo to work.
Last edited by UKMyers; Feb 26, 2007 at 12:21 PM.
Feb 26, 2007 | 12:50 PM
#6
Thread Starter
Registered User
Joined: Dec 2006
Posts: 18
Likes: 0
From: Galt Kalifornia
OH YA!!!! Forgot to mention that I do have gears and locker
I have 5.29's front and rear with a Detroit in the back. The front is open for now, eventually going to get a selectable locker, either e-locker or ARB.
As far as the doublers, I think I will build it myself. ALOT cheaper!!!!
It is my dailey driver right now, and I do have the front drive shaft, been sitting in my garage for the last month waiting for me to put it on. I had a long spline built for it.
Some big major changes coming next month though, stay tuned..............
Thanks for the nice comments guys
Feb 26, 2007 | 01:38 PM
#7
Contributing Member
Joined: Jun 2005
Posts: 3,415
Likes: 10
From: Phx, AZ
Nice looking rig.
I just put a dual TC in mine. Got it used so saved some there. But with all the 3.0 conversion parts it was still steep... but I know it will be worth it.
One comment, I had my front SAS hanger welded all the way across the front and on the back... but the frame started to crack slightly behind the bracket. It was minimal, and I caught it early so no major problems. I'd suggest welding a gusset of sorts in line with the frame rail behind the hanger to keep things together.
I don't abuse my rig, no jumping. But I do try and hit the AZ trails most weekends. It's an area of concern I feel get's overlooked on most swaps and is an easy thing to prevent.
My .02
Trending Topics


 Mar 1, 2007 | 07:16 PM
#15
Thread Starter
Registered User
Joined: Dec 2006
Posts: 18
Likes: 0
From: Galt Kalifornia
As far as the near future, doing some tube work. Dont want to ruin the surprise for everyone, truthfully, I'm not really sure how it's gonna turn out. The guy that's doing the bending is going to use his imagination with my input. Should be real cool


