
$40! DIY 4Runner Top Hoist $40!
 Jul 5, 2010 | 08:31 AM
#1
Thread Starter
Registered User
Joined: Apr 2007
Posts: 1,458
Likes: 5
From: ATL!
$40! DIY 4Runner Top Hoist $40!
hi all,
every year i pull the top to go watch fireworks on July4th. We park the truck on the top of a parking deck and hang out in the bed. This year I couldn't round up any volunteers to help me pull it off, so I decided to build a sling to remove and hold it in my garage. It took about 3 hrs, with the difficulty level very low until it got dark. It worked very well!
I'll break it down in steps with pics. Sorry for the mediocre picture quality, they are from my phone.
Step 1: ACQUIRE THE GOODS
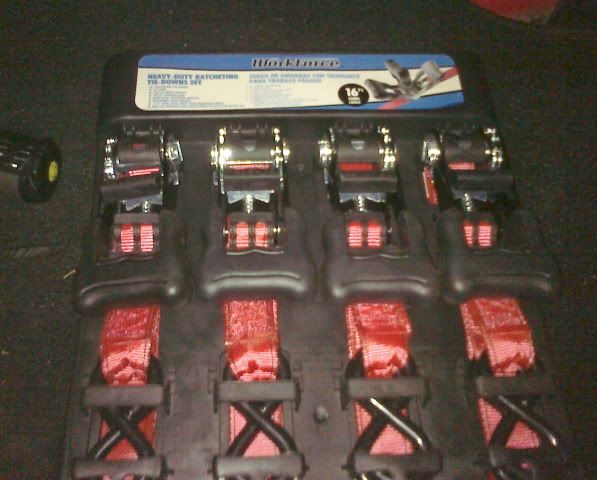
at my local home supply store, i picked up a set of decent quality ratchet straps for $18. Plastic/rubbery-padded handles, 16' long straps rated to 700 lbs. Also, 4 of the largest eye hooks I could find. Rated 325 lbs.
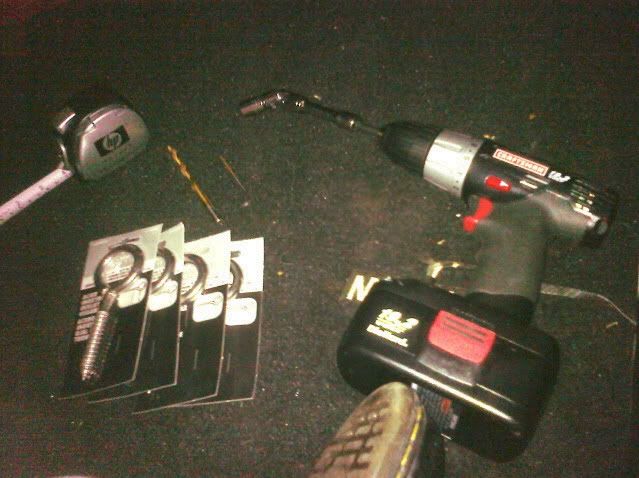
Tools for the install were:
Rachet with 12mm for the roof bolts
Drill
Measuring tape
Marker
Professional Grade Multi-purpose Device
tiny drill bit to help find the studs in the ceiling
big drill bit to pre-drill for the eye hooks to avoid splitting the studs
flexible extension and adapter bit to spin out loosened roof bolts quicker with drill
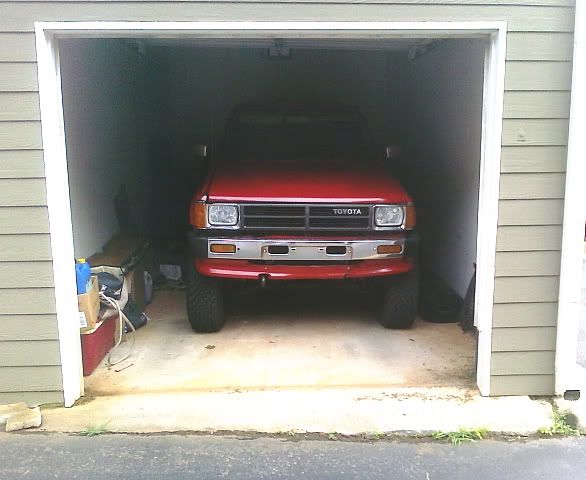
and of course you'll need a 1st gen 4Runner and an overhead structure, such as a garage, carport, wood deck you can drive under, tree, etc.
STEP 2: IDENTIFY THE MOUNT LOCATION
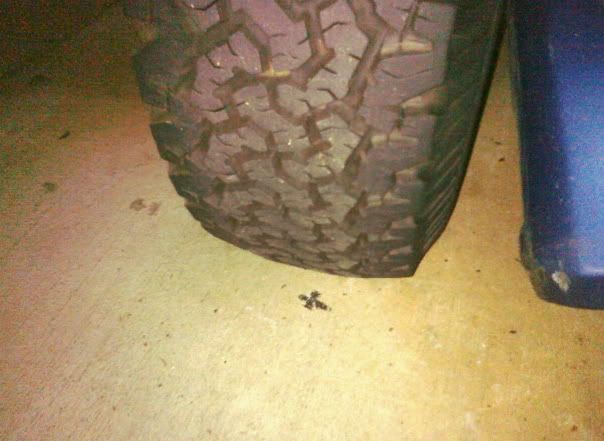
Park the Runner where you're sure the roof will clear the garage door, etc. Then mark the floor so you can park in the exact same location any time. I made black X's in front of the driver's rear, and behind the driver's front tires, at the center line of the tread. From the driver's seat, I can see when I've put the X's in between the skins, and I can also see if the tire is off-center.
STEP 3: MARK THE CEILING FOR THE FRONT HOOKS
I stood on each rear tire and "eyeballed" where I wanted the front pair of hooks. I wanted them just over the slider windows, and a little inboard. I made marks on the ceiling with my Professional Grade Ceiling Marker. (OEM spare tire bar)
I measured a few times between the wall and truck, between each other, etc. to make sure I had the marks on the ceiling where I wanted them.
STEP 4: MOUNT FRONT HOOKS INTO STUDS
Roll the truck forward about 2 feet so you can stand on the tail gate to work in the ceiling.
I couldn't reach the ceiling to use a stud finder, plus I don't have one. So, I used a tiny drill bit to poke around and find the studs. Turned out they run length-wise of my garage, so it limited my left-to-right positioning. I wound up having to install the hooks a little more inbound than I had expected.
Once you've found the edges of the stud with the tiny bit, you can drill a pilot hole in the center of the stud. This will prevent the stud from splitting when you crank in the eye hook. Avoid standing directly under the hole you drill. Eye protection recommended. (squinting)
I cranked my eye hooks in using my Professional Grade Eye hook Installer (spare tire bar again).
Once I had the front two hooks in, I hung two of the ratchet straps. Then I tested them by holding on to them both and hanging on them. They held the 180lb test dummy just fine.
STEP 5: MOUNT REAR HOOKS AND STRAPS
Roll the truck back a little to reach where you'll position the rear hooks.
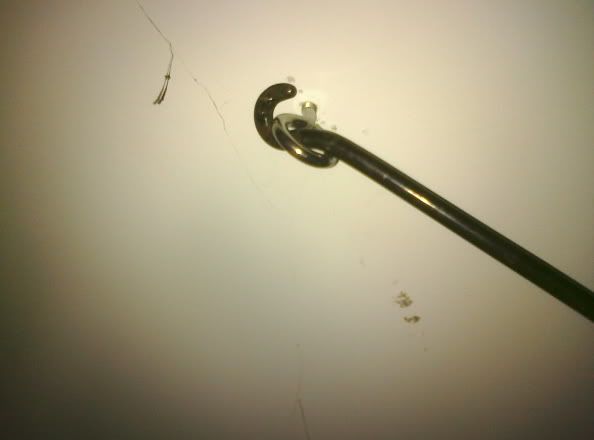
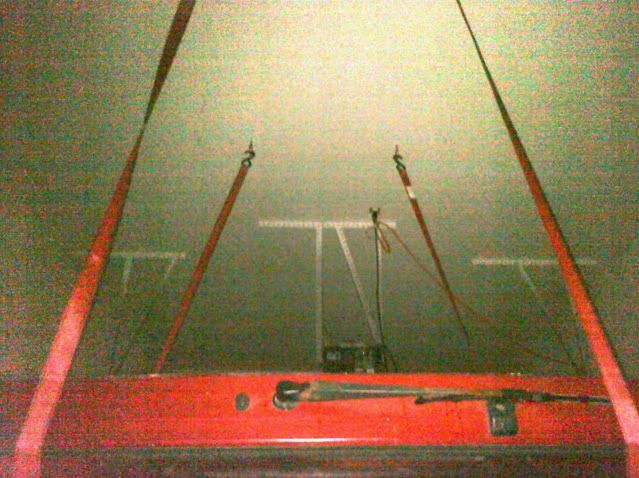
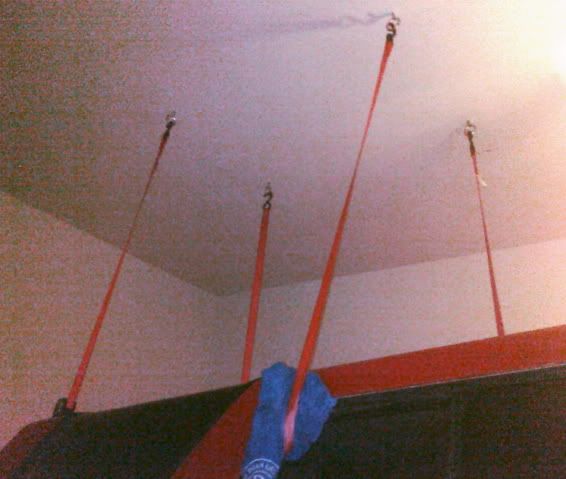
Determine their position by measuring from the slider window to the tailgate window, then mark that distance on the ceiling, from each front eye hook. I think my measure was 40". Repeat the process of finding the edges of the stud with the tiny drill bit. This was a little easier now that I had some guesstimate from the location of the front hooks. Drill the pilot holes again, and crank in the two hooks. Hang the straps. Now, from the rear and looking up, you should have four straps dangling something like what you see here:
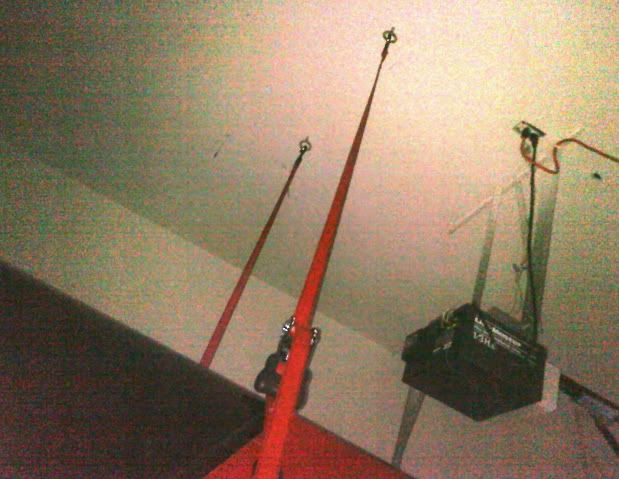
STEP 6: CREATE AND SET THE SLING
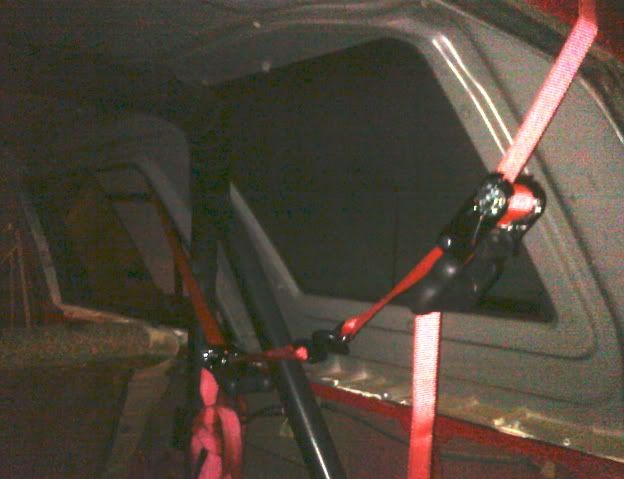
The straps were packaged separate from the ratchets, so thread the strap through the mechanism and determine where to SET them with a couple ratchet cranks so they will dangle about as low as the bottom of the slider and tailgate windows. Then get inside the bed of the truck and pull the ratchets inside. Link the two ratchets to each other. For my first attempt I decided to link the lefts and the rights to each other.
I stuffed some towels under each point of contact for the straps. I was concerned about the strength of the fiberglass. I didn't want the straps to crack or crush anything. HOWEVER, FYI: after all was done, my towels slipped out, and it was clear the straps were NOT causing stress to the roof. So I DO recommend the extra protection, but do not consider them "critical". Don't stress if one pops out.
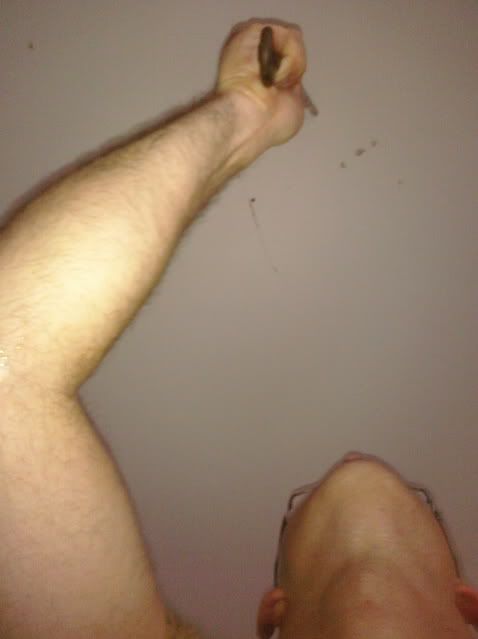
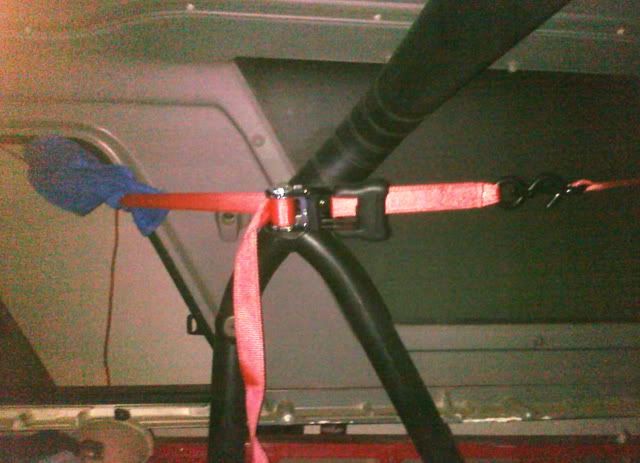
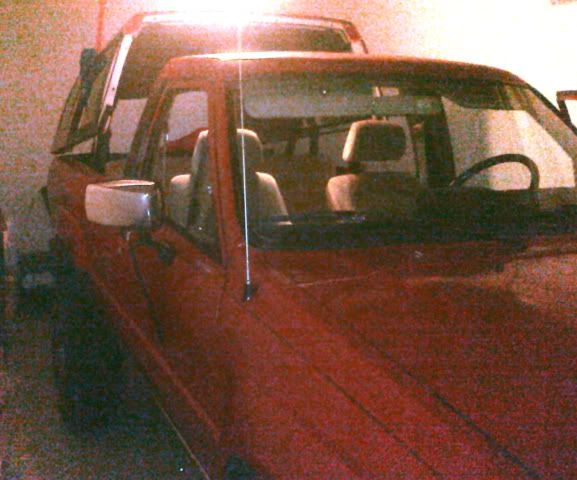
STEP 7.5 BEFORE GOING TO STEP 8, CONFIRM YOU HAVE NOT WRAPPED THE STRAPS AROUND YOUR FACTORY ROLL BAR.
I missed this, and when i started to ratchet up for lift off, I realized that if i kept going, i'd be ratcheting up the whole truck. Or, ratcheting down the whole garage ceiling. (unratchet, unhook, start again)
SEE BELOW? NOT LIKE THIS!
STEP 7: RATCHET UP FOR LIFT OFF
It's not difficult at all to ratchet up the top. I did a little at a time on each of the four ratchets. The PRIMARY CONCERN is keeping the position of the ratchets where they won't grind over the contact points, and where the spool of strap won't reach maximum before you have the top high enough off the truck. This took me several times each of releasing the tension, pulling the strap through, and sliding the ratchet up or down.
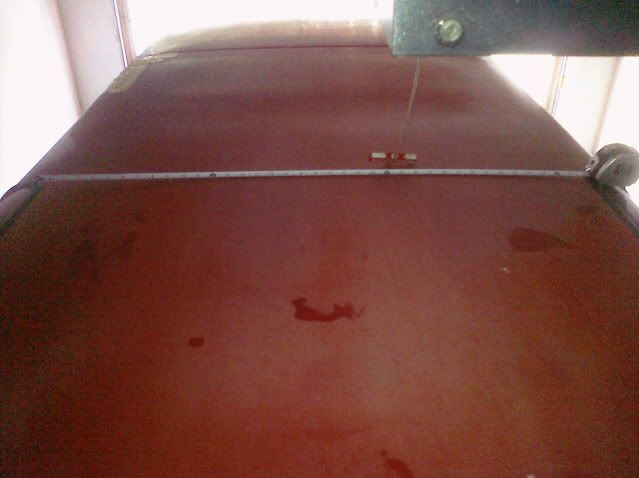
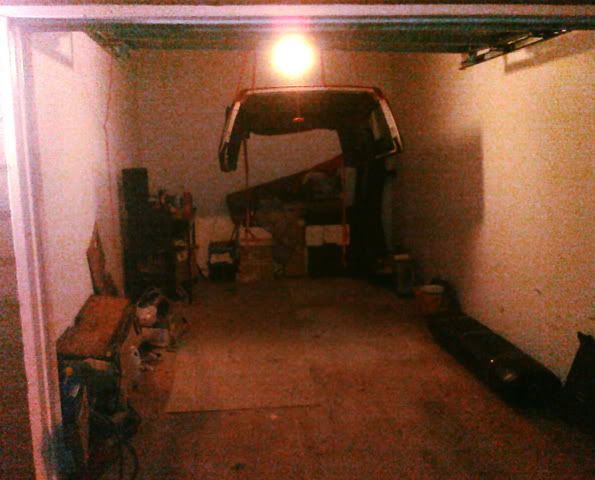
Eventually, you'll see the separation begin:
YEAH!
STEP 8: DRIVE TRUCK OUT FROM UNDERNEATH
Once you've cleared the bed rails, you just drive out from underneath. Because mine is a little front heavy, I had to come up quite a bit to not drag the cap's front corners along the bed rails. This is what made me realize I need 2x4s on each side to keep the top level.
My top has been hanging in there for 3 days now, so I'll assume that it's passed the endurance test for leaving it hanging in mid-air.
When I'm ready to reinstall the top, I can back right in under it. With the straps supporting the weight, i'll be able to bring the front down to line up the cab seal, then bring down the back, moving it with my feet to align with the bed rail pegs (the bolts you don't need to remove to take the top off) as I continue releasing the ratchets.
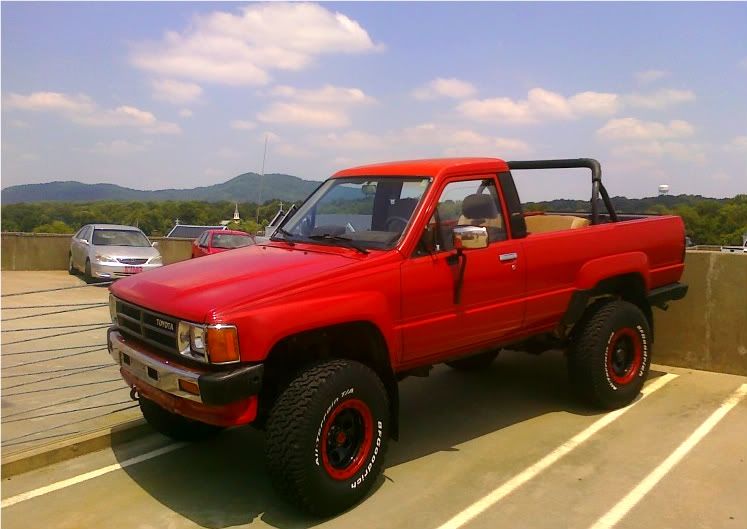
Went to see July 4th fireworks topless! It was awesome!
SO, I've always had a pet-peeve reading "for sale" ads for 1st gen Runners that say "top never removed". THAT'S CRAZY! You now have no excuse.
Oh, and I've had my top on and off many times. As long as you follow the unusually detailed instructions from Toyota (in our owner's manual) for re-installing the bolts, you'll have no problem with leaks. I have no leaks from the top anywhere with regard to the seals. (the crack in the fiberglass with the duct tape on it is another story)
Ratchets $18
Eye hooks Qty: 8 $16
Install Time 3 hrs (probably quicker in DAYLIGHT)
Enjoy the summer y'all! TOPLESS IF YOU CAN!
Tj
every year i pull the top to go watch fireworks on July4th. We park the truck on the top of a parking deck and hang out in the bed. This year I couldn't round up any volunteers to help me pull it off, so I decided to build a sling to remove and hold it in my garage. It took about 3 hrs, with the difficulty level very low until it got dark. It worked very well!
I'll break it down in steps with pics. Sorry for the mediocre picture quality, they are from my phone.
Step 1: ACQUIRE THE GOODS
at my local home supply store, i picked up a set of decent quality ratchet straps for $18. Plastic/rubbery-padded handles, 16' long straps rated to 700 lbs. Also, 4 of the largest eye hooks I could find. Rated 325 lbs.
Tools for the install were:
Rachet with 12mm for the roof bolts
Drill
Measuring tape
Marker
Professional Grade Multi-purpose Device
tiny drill bit to help find the studs in the ceiling
big drill bit to pre-drill for the eye hooks to avoid splitting the studs
flexible extension and adapter bit to spin out loosened roof bolts quicker with drill
and of course you'll need a 1st gen 4Runner and an overhead structure, such as a garage, carport, wood deck you can drive under, tree, etc.
STEP 2: IDENTIFY THE MOUNT LOCATION
Park the Runner where you're sure the roof will clear the garage door, etc. Then mark the floor so you can park in the exact same location any time. I made black X's in front of the driver's rear, and behind the driver's front tires, at the center line of the tread. From the driver's seat, I can see when I've put the X's in between the skins, and I can also see if the tire is off-center.
STEP 3: MARK THE CEILING FOR THE FRONT HOOKS
I stood on each rear tire and "eyeballed" where I wanted the front pair of hooks. I wanted them just over the slider windows, and a little inboard. I made marks on the ceiling with my Professional Grade Ceiling Marker. (OEM spare tire bar)
I measured a few times between the wall and truck, between each other, etc. to make sure I had the marks on the ceiling where I wanted them.
STEP 4: MOUNT FRONT HOOKS INTO STUDS
Roll the truck forward about 2 feet so you can stand on the tail gate to work in the ceiling.
I couldn't reach the ceiling to use a stud finder, plus I don't have one. So, I used a tiny drill bit to poke around and find the studs. Turned out they run length-wise of my garage, so it limited my left-to-right positioning. I wound up having to install the hooks a little more inbound than I had expected.
Once you've found the edges of the stud with the tiny bit, you can drill a pilot hole in the center of the stud. This will prevent the stud from splitting when you crank in the eye hook. Avoid standing directly under the hole you drill. Eye protection recommended. (squinting)
I cranked my eye hooks in using my Professional Grade Eye hook Installer (spare tire bar again).
Once I had the front two hooks in, I hung two of the ratchet straps. Then I tested them by holding on to them both and hanging on them. They held the 180lb test dummy just fine.
STEP 5: MOUNT REAR HOOKS AND STRAPS
Roll the truck back a little to reach where you'll position the rear hooks.
Determine their position by measuring from the slider window to the tailgate window, then mark that distance on the ceiling, from each front eye hook. I think my measure was 40". Repeat the process of finding the edges of the stud with the tiny drill bit. This was a little easier now that I had some guesstimate from the location of the front hooks. Drill the pilot holes again, and crank in the two hooks. Hang the straps. Now, from the rear and looking up, you should have four straps dangling something like what you see here:
STEP 6: CREATE AND SET THE SLING
The straps were packaged separate from the ratchets, so thread the strap through the mechanism and determine where to SET them with a couple ratchet cranks so they will dangle about as low as the bottom of the slider and tailgate windows. Then get inside the bed of the truck and pull the ratchets inside. Link the two ratchets to each other. For my first attempt I decided to link the lefts and the rights to each other.
i was expecting the rear to be much heavier to the front, so i was favoring supporting the rear. Once the top was "free hanging", it was obvious that the front needed more support. The top wanted to slide within the sling and tilt itself down in the front. The next time I use this sling, i will go pick up a 2x4, cut it in half and put some eye hooks in each end. Then the 2x4s will be supporting the top, and I can ratchet the straps in a position which holds the 2x4s in a fixed position. So, add to shopping list, 4 more eye hooks and 1 2x4, cut in half.
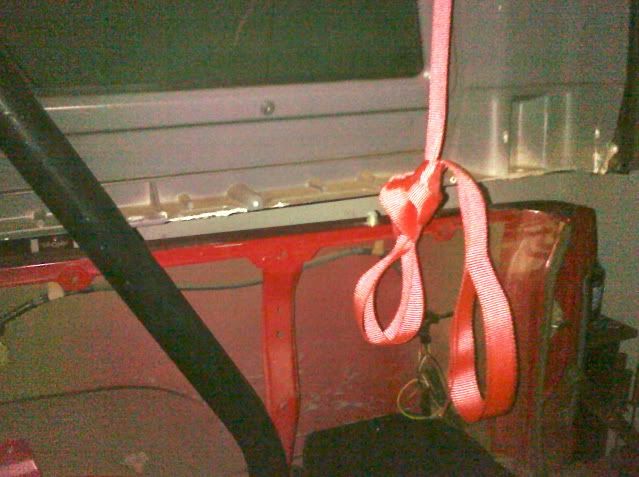
STEP 7: PAD THE STRAPS AT THE CONTACT POINTS AND REMOVE THE BOLTS SECURING THE HARD TOP. I stuffed some towels under each point of contact for the straps. I was concerned about the strength of the fiberglass. I didn't want the straps to crack or crush anything. HOWEVER, FYI: after all was done, my towels slipped out, and it was clear the straps were NOT causing stress to the roof. So I DO recommend the extra protection, but do not consider them "critical". Don't stress if one pops out.
STEP 7.5 BEFORE GOING TO STEP 8, CONFIRM YOU HAVE NOT WRAPPED THE STRAPS AROUND YOUR FACTORY ROLL BAR.
I missed this, and when i started to ratchet up for lift off, I realized that if i kept going, i'd be ratcheting up the whole truck. Or, ratcheting down the whole garage ceiling. (unratchet, unhook, start again)
SEE BELOW? NOT LIKE THIS!
STEP 7: RATCHET UP FOR LIFT OFF
It's not difficult at all to ratchet up the top. I did a little at a time on each of the four ratchets. The PRIMARY CONCERN is keeping the position of the ratchets where they won't grind over the contact points, and where the spool of strap won't reach maximum before you have the top high enough off the truck. This took me several times each of releasing the tension, pulling the strap through, and sliding the ratchet up or down.
Eventually, you'll see the separation begin:
YEAH!
STEP 8: DRIVE TRUCK OUT FROM UNDERNEATH
Once you've cleared the bed rails, you just drive out from underneath. Because mine is a little front heavy, I had to come up quite a bit to not drag the cap's front corners along the bed rails. This is what made me realize I need 2x4s on each side to keep the top level.
My top has been hanging in there for 3 days now, so I'll assume that it's passed the endurance test for leaving it hanging in mid-air.
When I'm ready to reinstall the top, I can back right in under it. With the straps supporting the weight, i'll be able to bring the front down to line up the cab seal, then bring down the back, moving it with my feet to align with the bed rail pegs (the bolts you don't need to remove to take the top off) as I continue releasing the ratchets.
Went to see July 4th fireworks topless! It was awesome!
SO, I've always had a pet-peeve reading "for sale" ads for 1st gen Runners that say "top never removed". THAT'S CRAZY! You now have no excuse.
Oh, and I've had my top on and off many times. As long as you follow the unusually detailed instructions from Toyota (in our owner's manual) for re-installing the bolts, you'll have no problem with leaks. I have no leaks from the top anywhere with regard to the seals. (the crack in the fiberglass with the duct tape on it is another story)
Ratchets $18
Eye hooks Qty: 8 $16
Install Time 3 hrs (probably quicker in DAYLIGHT)
Enjoy the summer y'all! TOPLESS IF YOU CAN!
Tj

Thread
Thread Starter
Forum
Replies
Last Post
crashburnoveride
86-95 Trucks & 4Runners
1
Jul 10, 2015 06:39 AM
FS[SouthEast]: 1st Gen 4Runner Slider Window, Driver Side
coryc85
Misc Stuff (Vehicle Related)
0
Jul 6, 2015 04:07 AM


