
Pics of my 1988 Toyota Driveable Project
 May 1, 2007 | 02:07 AM
#1
Thread Starter
Registered User
Joined: Apr 2007
Posts: 215
Likes: 0
From: Land of Enchantment
Pics of my 1988 Toyota Driveable Project
Hey Guys, well I finally found a rig to get me started. It was in Salt Lake City, UT, and i'm in ABQ, NM so I took a little road trip.
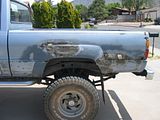
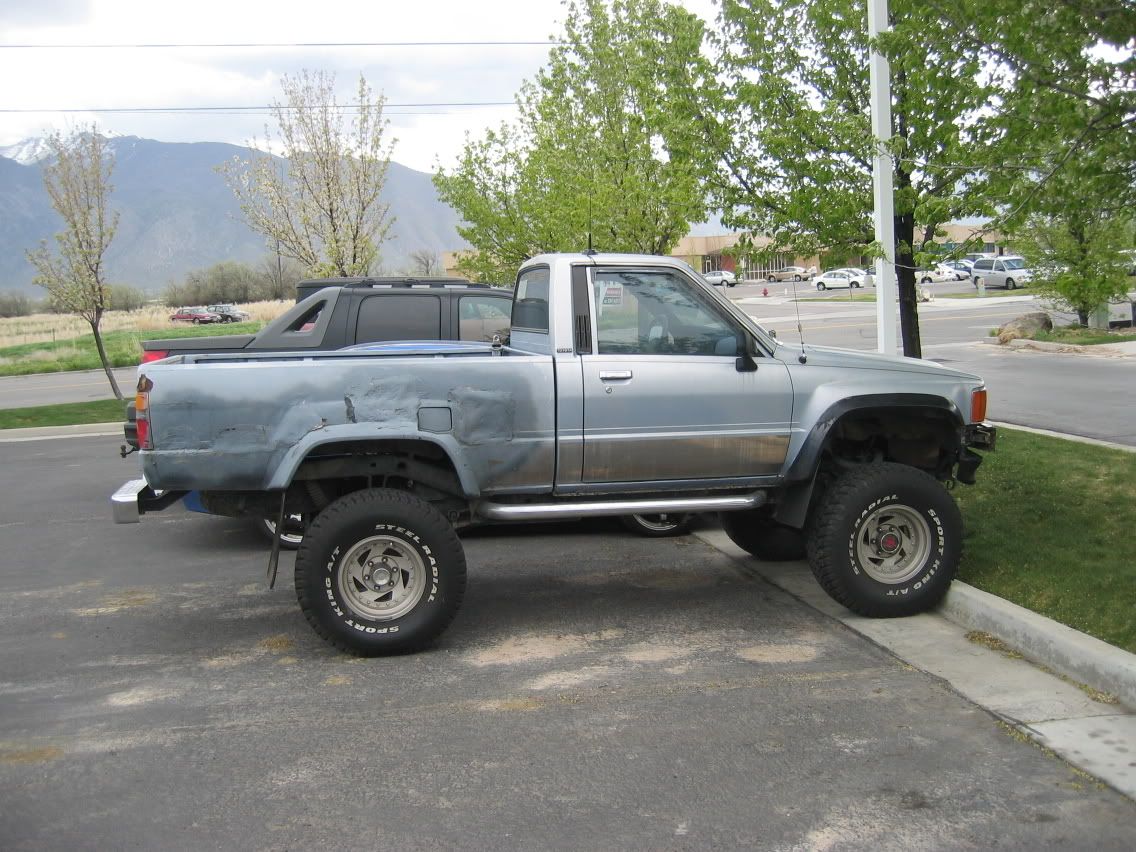
The truck is a 1988 4x4 Shortbed. The guy that was selling it was a dealer, and he let it go for cheap on the fact that it was ugly as sin. Dealers can't sell ugly cars.
Anyway, It had bondo work done to it, and it was a disaster. It looks like a 3 year old did the bondo work, and even then they did it poorly.
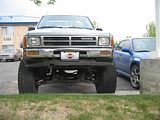
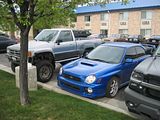
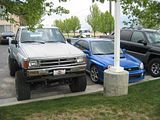
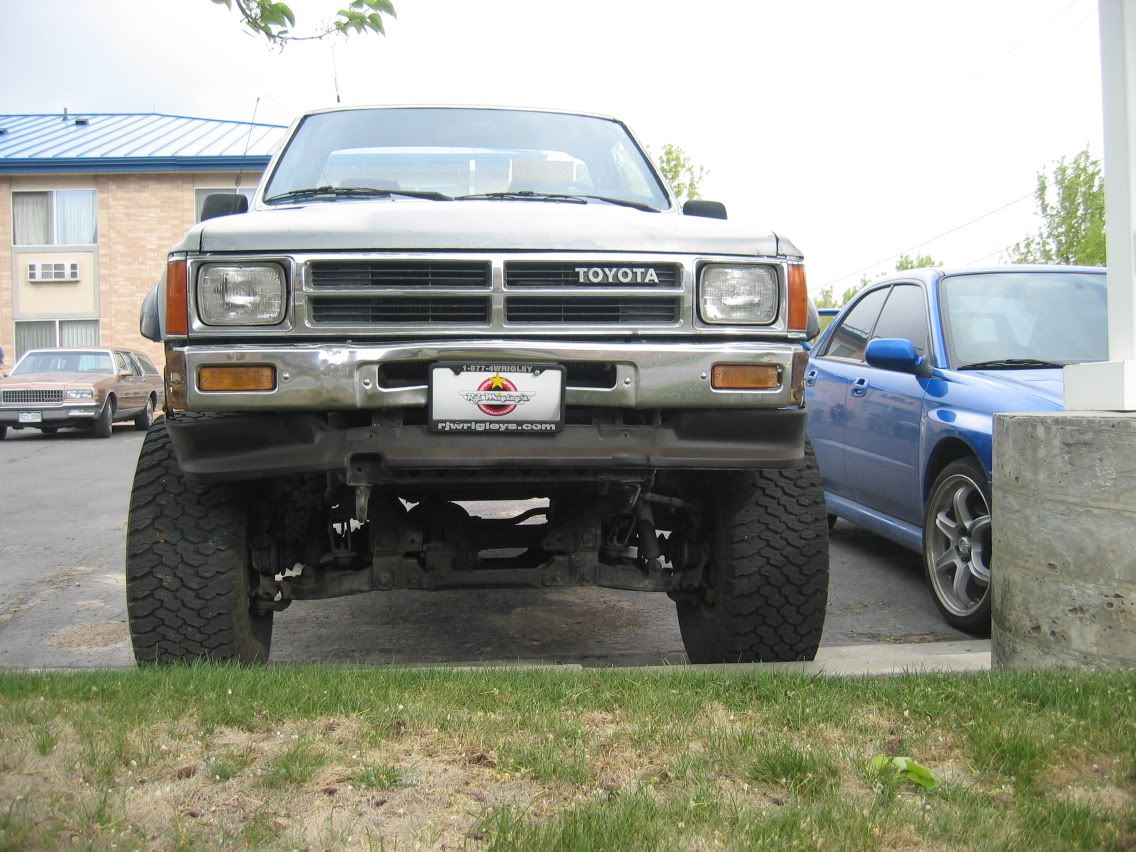
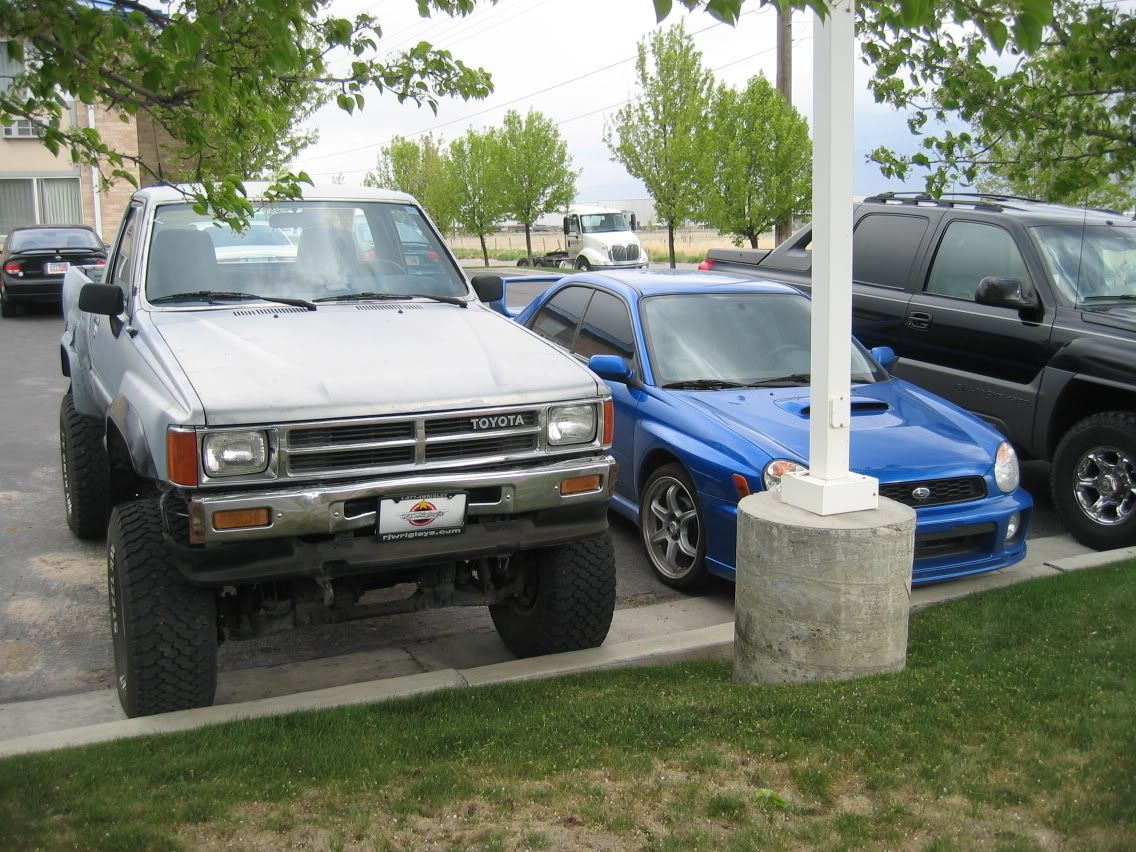
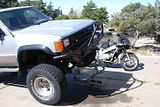
So here's the first pics i snapped of it, when I was at the hotel in Utah...next to it is my mom's WRX, which my dad and i drove up in.
(all pics are clickable thumbnails)


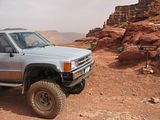
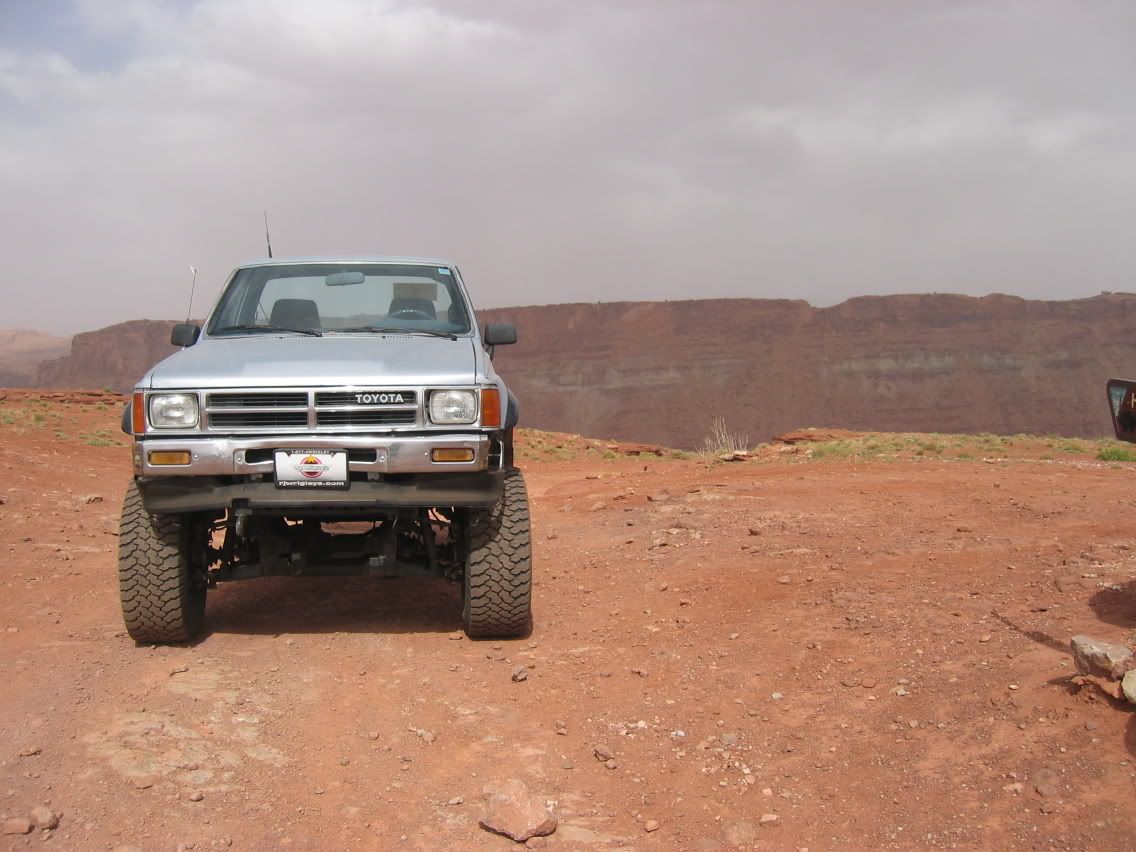
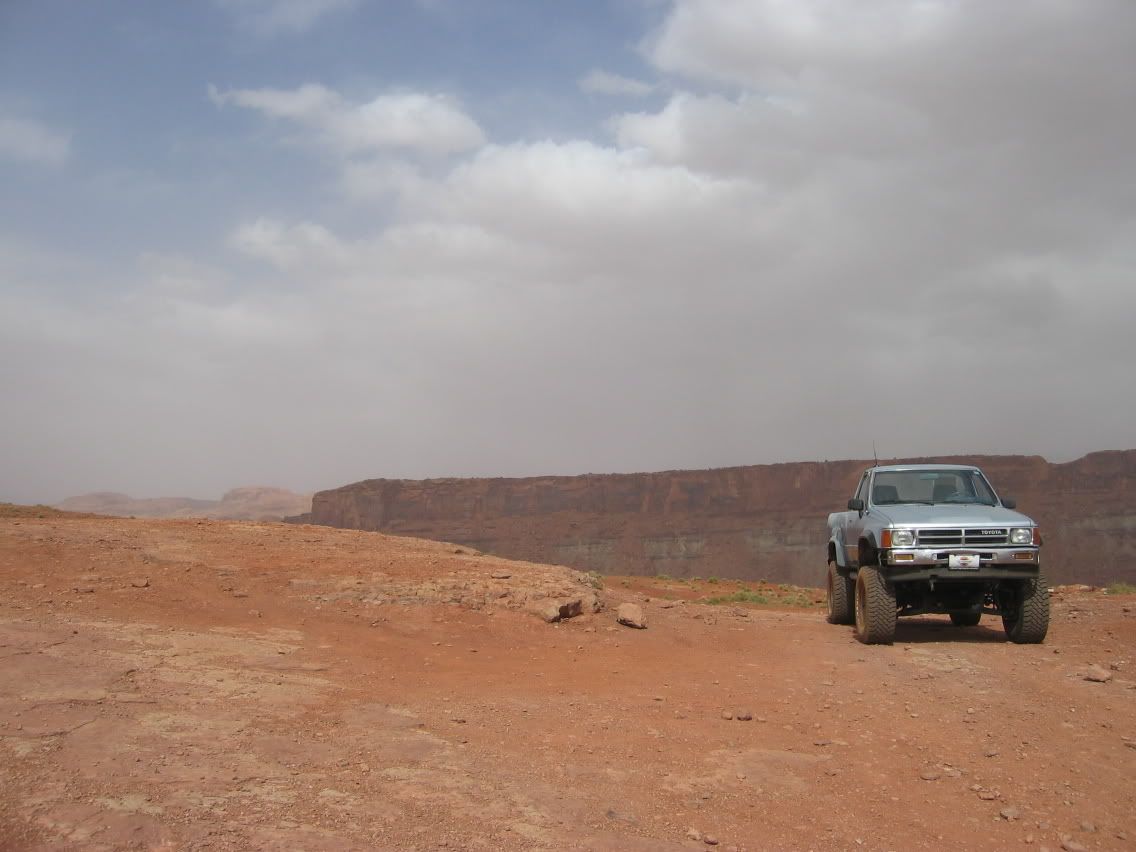
and since we were in Utah, and heading right through Moab, my dad and I decided to take it on an easy 4x4 trail, so as not to break anything, so we can get it home, but also have a little fun. We ran the easiest trail, Chicken Corners...and needless to say, i'm a big 4x4 n00b, so it was a little scary. Anyway, we enjoyed the ride and didn't take any pics until we got to Hurrah Pass:


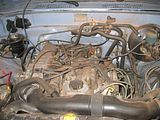
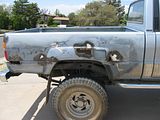
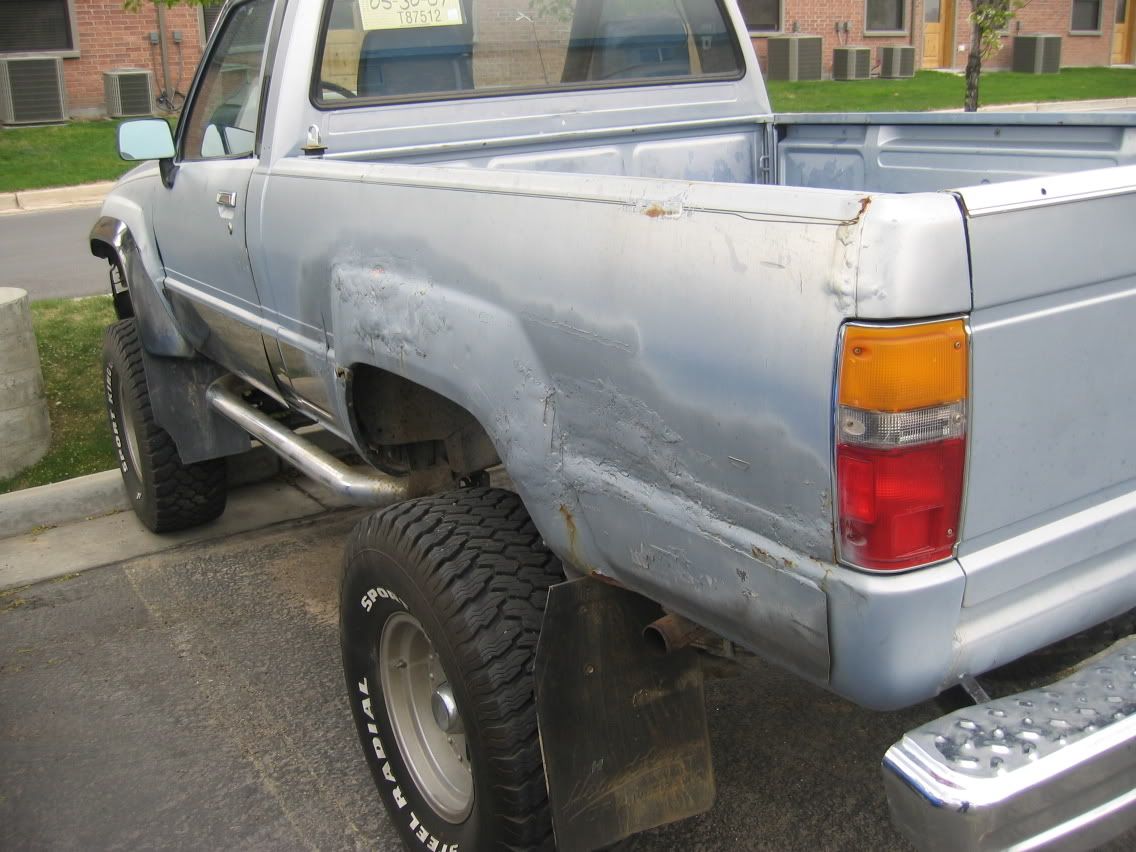
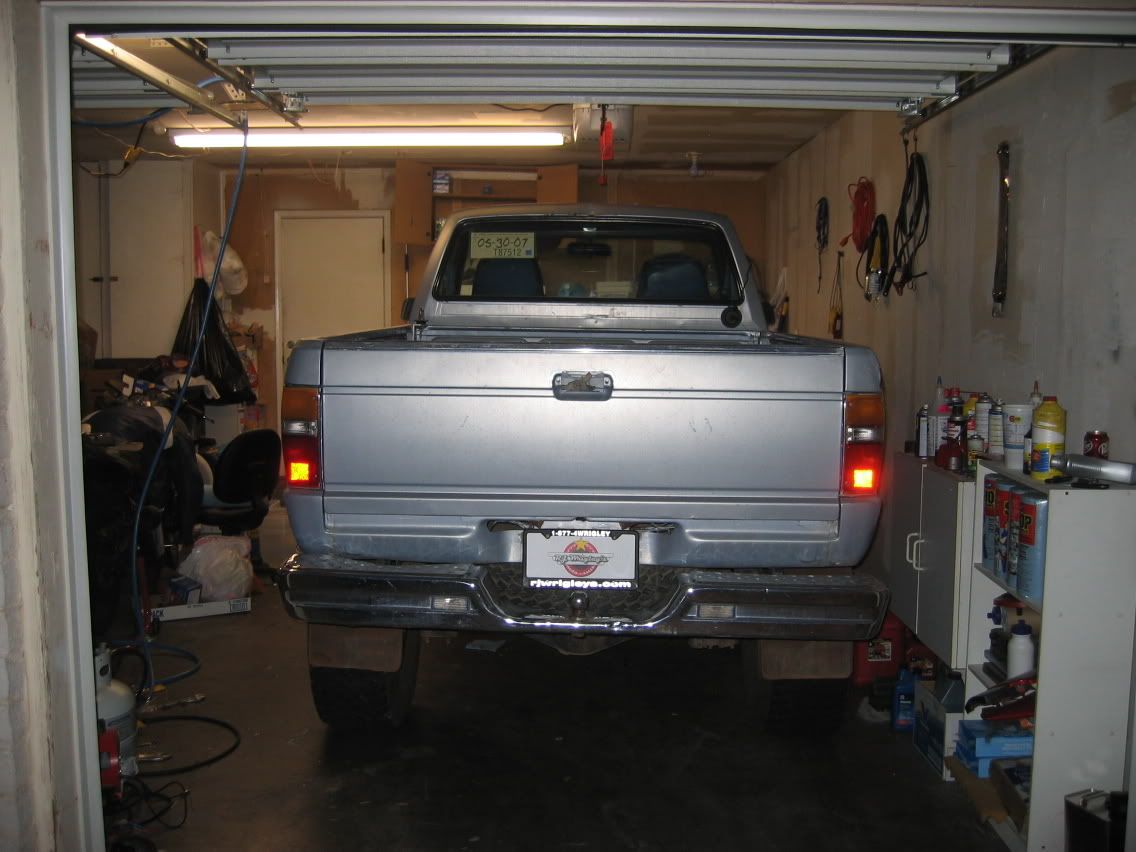
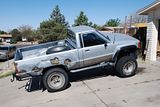
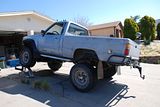
Then, finally, after a slow drive home (33" tires and no gearing), i got it into the garage, and started working on it. It nearly hit my garage door opener! Also, here's the 22RE powerplant, all dusty.

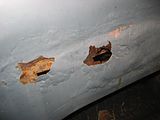
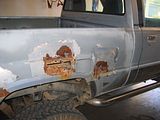
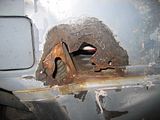
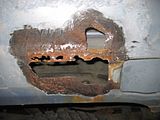
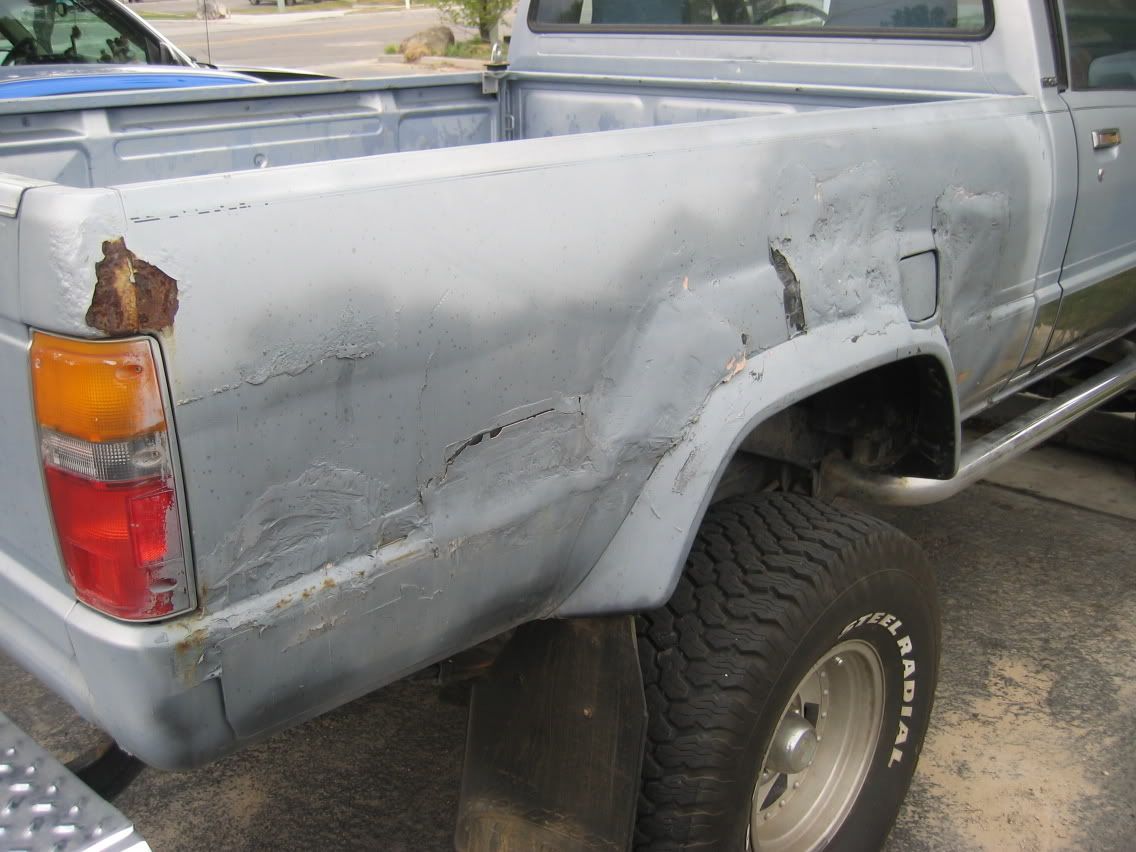
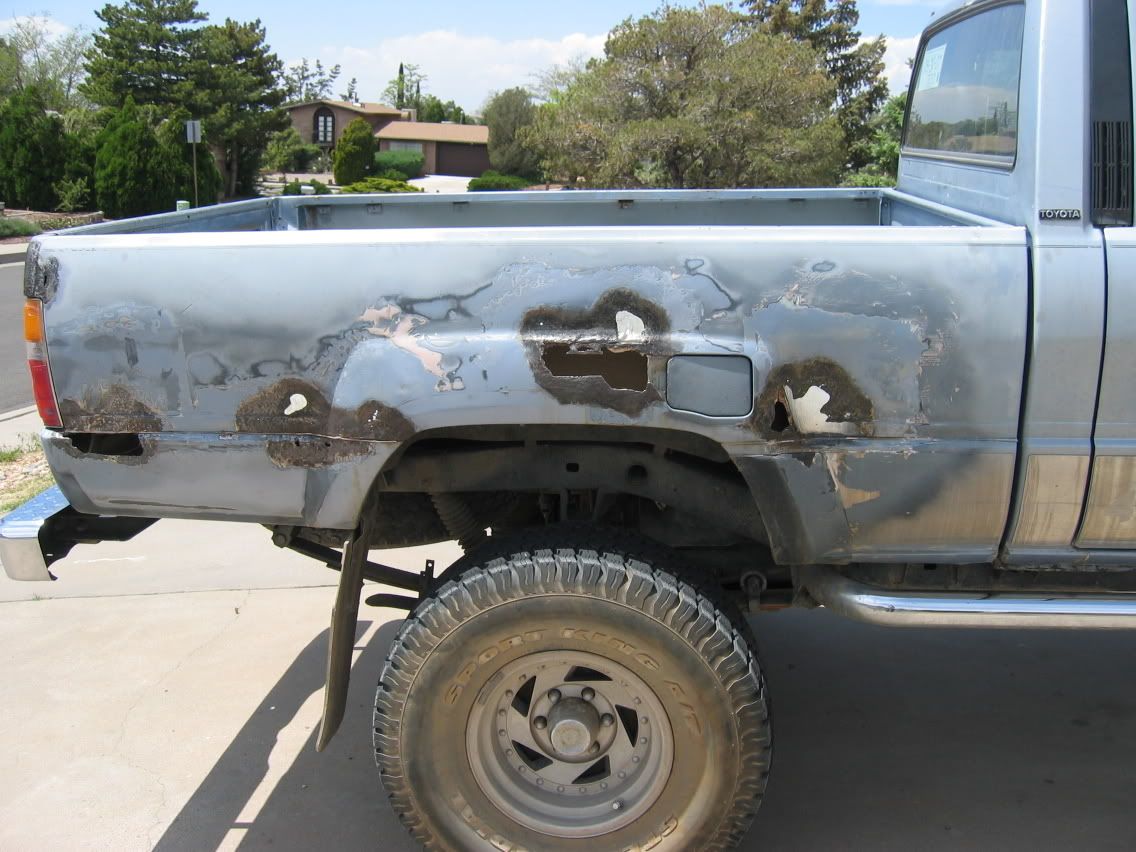
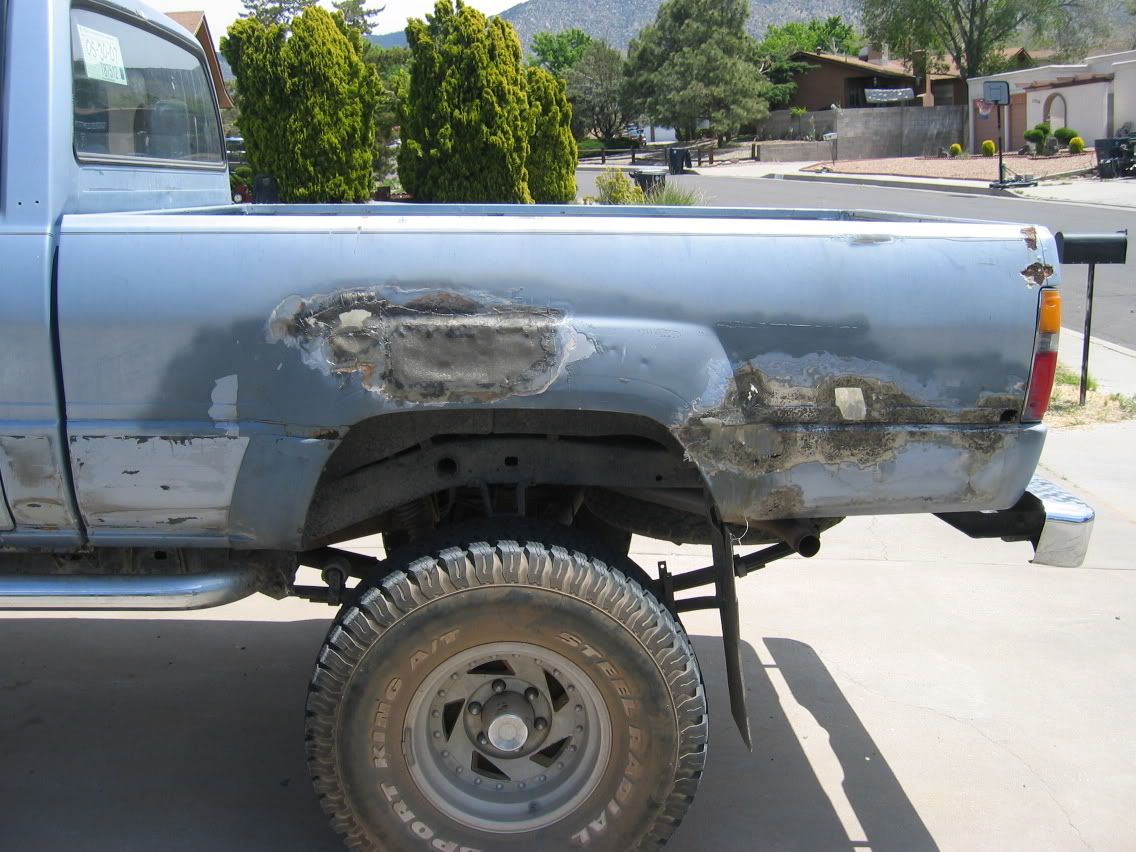
Anyway, back to work. First, remove the bondo and see what we're dealing with (probably rust)

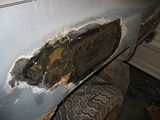
so, now i have two options. I can either 1) replace the bed, or 2) repair the bed. seeing as how i'm a poor college student, repairing the bed seemed like fun. At first i was going to weld in new sheetmetal wherever there was problems, but instead i saw an opportunity. I already know the rust problem spots on this truck, so i might as well fix it so it'd never rust again. Seeing as how i'm decently good at fiberglass (thank you, motorcycle crashes), I decided to put in fiberglass where the truck was rusting.
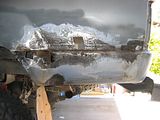
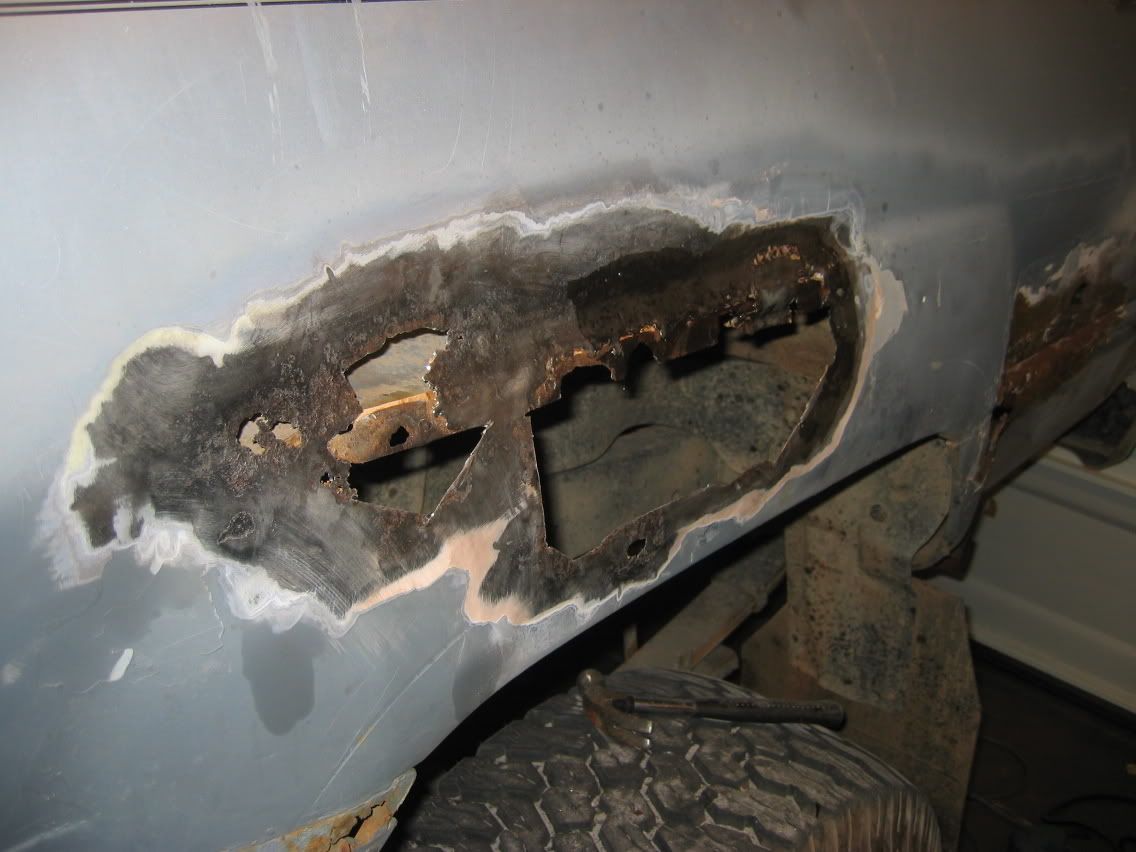
after much sanding, cutting, and grinding, the truck is ready for fiberglass:

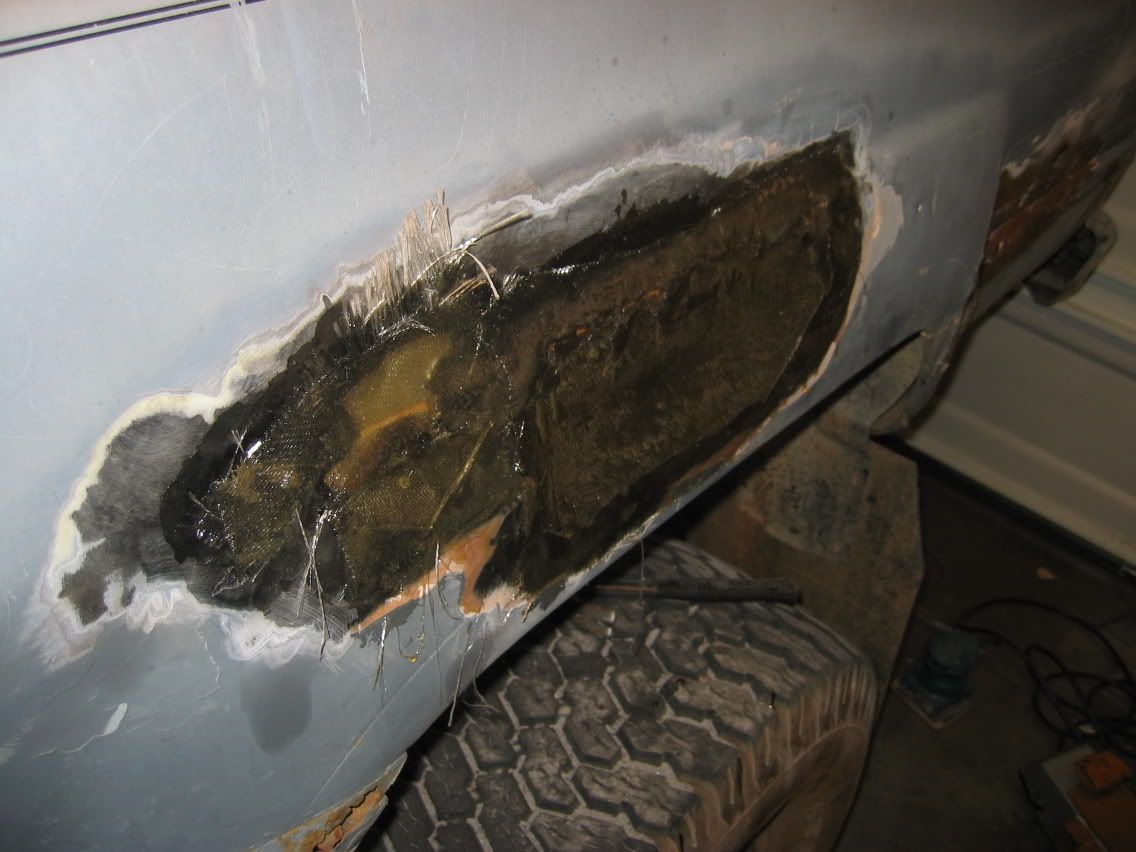
then, the fiberglass goes in:
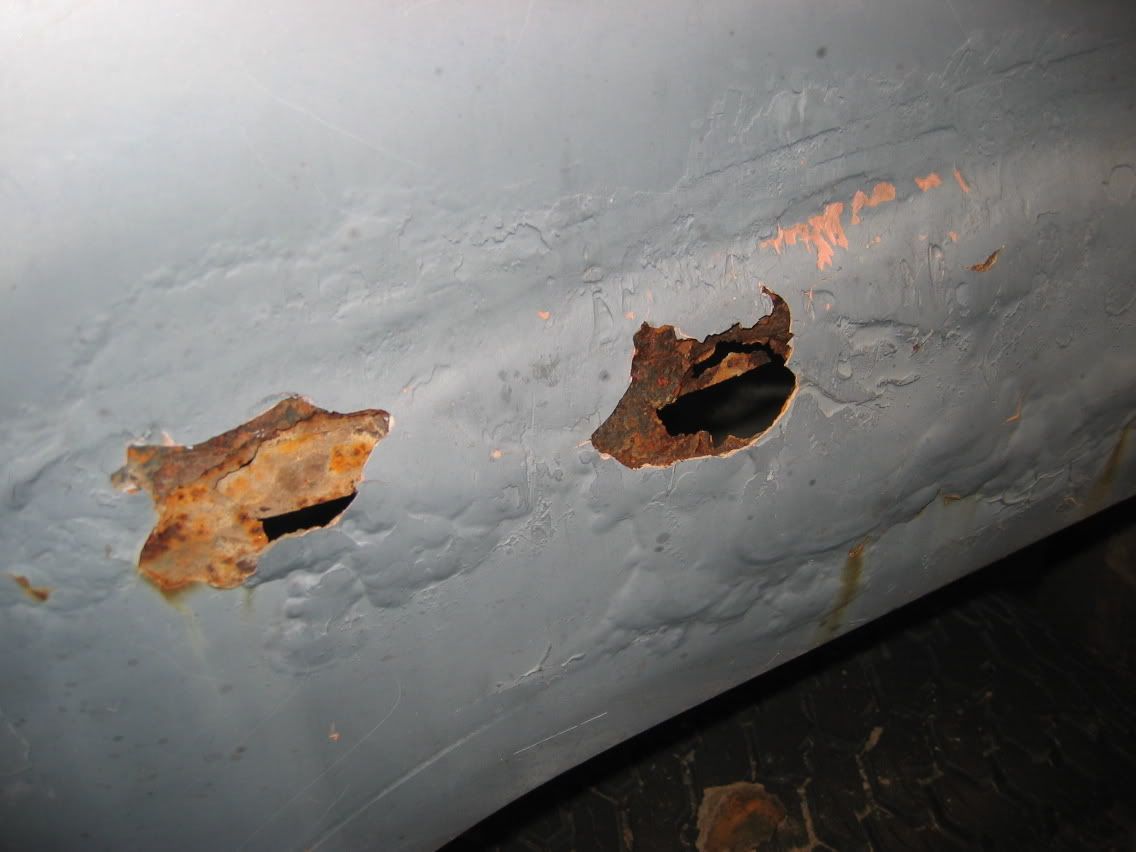
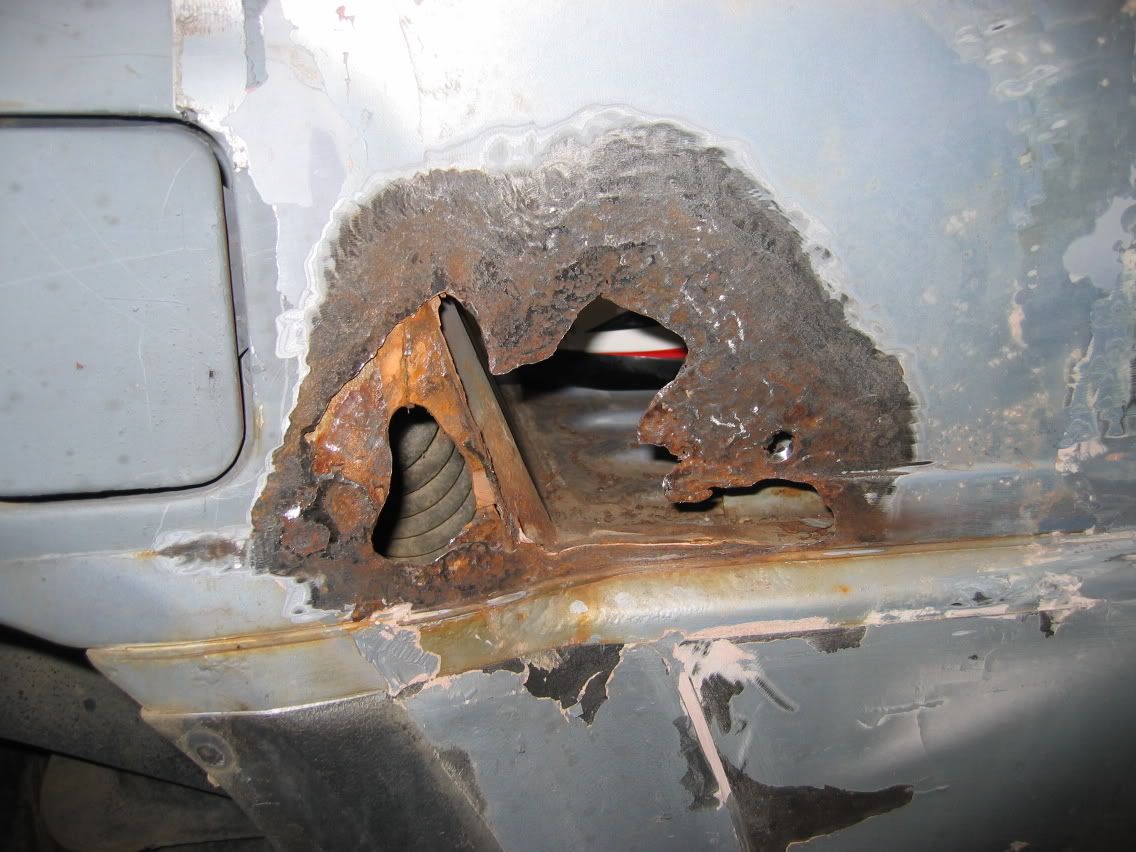
more close-ups of the rust on the passenger side

prepped and ready
and how it sits, before i started working on it tonight (haven't downloaded those pics yet)
i'm not planning anything serious, just stopping the rust, and getting it ready for paint. I'm thinking a darker blue, but once i get it all one color, then i will bust out some photoshop skills and turn out something that looks good.
whatcha think?
The truck is a 1988 4x4 Shortbed. The guy that was selling it was a dealer, and he let it go for cheap on the fact that it was ugly as sin. Dealers can't sell ugly cars.
Anyway, It had bondo work done to it, and it was a disaster. It looks like a 3 year old did the bondo work, and even then they did it poorly.
So here's the first pics i snapped of it, when I was at the hotel in Utah...next to it is my mom's WRX, which my dad and i drove up in.
(all pics are clickable thumbnails)

and since we were in Utah, and heading right through Moab, my dad and I decided to take it on an easy 4x4 trail, so as not to break anything, so we can get it home, but also have a little fun. We ran the easiest trail, Chicken Corners...and needless to say, i'm a big 4x4 n00b, so it was a little scary. Anyway, we enjoyed the ride and didn't take any pics until we got to Hurrah Pass:

Then, finally, after a slow drive home (33" tires and no gearing), i got it into the garage, and started working on it. It nearly hit my garage door opener! Also, here's the 22RE powerplant, all dusty.

Anyway, back to work. First, remove the bondo and see what we're dealing with (probably rust)
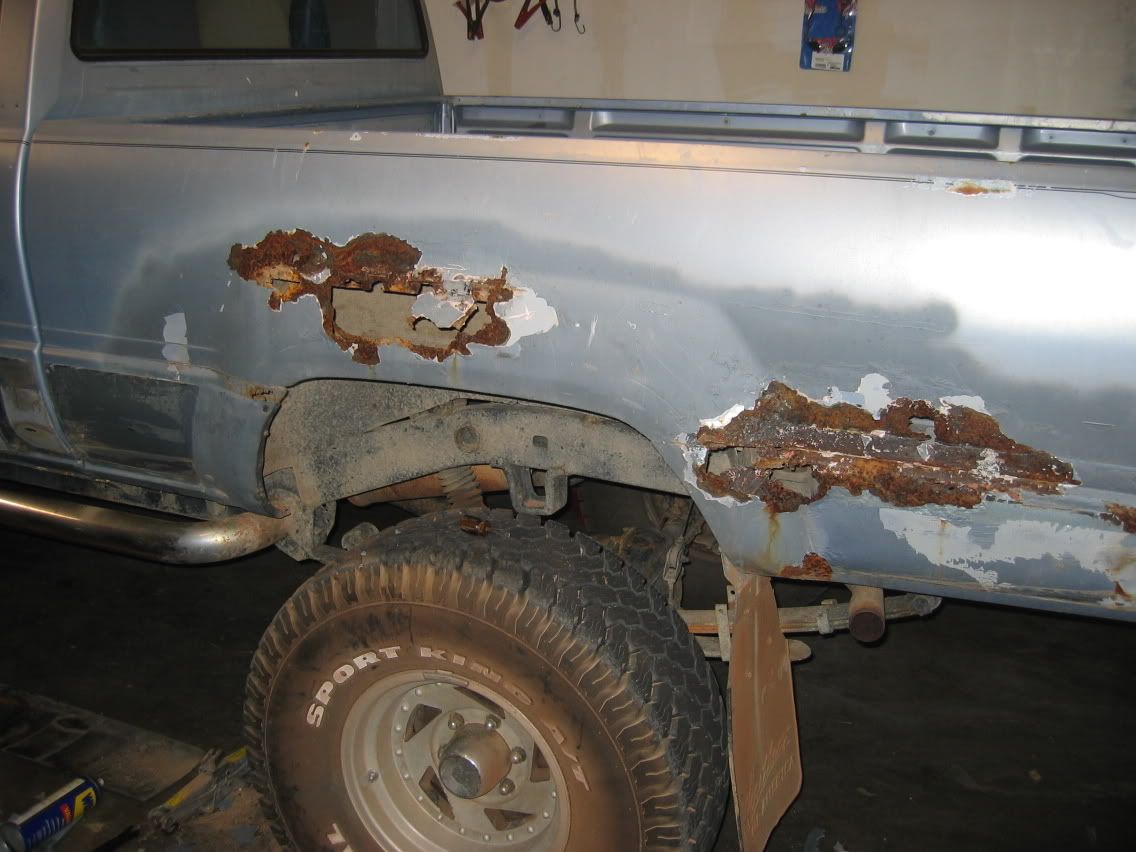
so, now i have two options. I can either 1) replace the bed, or 2) repair the bed. seeing as how i'm a poor college student, repairing the bed seemed like fun. At first i was going to weld in new sheetmetal wherever there was problems, but instead i saw an opportunity. I already know the rust problem spots on this truck, so i might as well fix it so it'd never rust again. Seeing as how i'm decently good at fiberglass (thank you, motorcycle crashes), I decided to put in fiberglass where the truck was rusting.
after much sanding, cutting, and grinding, the truck is ready for fiberglass:

then, the fiberglass goes in:
more close-ups of the rust on the passenger side


prepped and ready

and how it sits, before i started working on it tonight (haven't downloaded those pics yet)
i'm not planning anything serious, just stopping the rust, and getting it ready for paint. I'm thinking a darker blue, but once i get it all one color, then i will bust out some photoshop skills and turn out something that looks good.
whatcha think?
Last edited by NaeSLaS; May 1, 2007 at 02:33 AM. Reason: wrong pics added...oops
May 1, 2007 | 02:36 AM
#3
Thread Starter
Registered User
Joined: Apr 2007
Posts: 215
Likes: 0
From: Land of Enchantment
i was thinking that, but i occasionally have to haul junk to the dump, so a standard bed seemed to fit my needs better. I might still consider building something that can hold 3 motorcycles, with tire clamps and what not...but that'll be later, if i'm inspired.
May 1, 2007 | 05:44 AM
#5
Registered User
Joined: Sep 2005
Posts: 1,481
Likes: 6
From: Northern IL
Hey I am dealing with the same thing on my '88 bed now. Can you give me any pointers as to fixing the holes with fiberglass? I have some experience (also fixing motorcyle plastic, lol), but haven't dealt with using it on metal. What did you use to bond the glass to the metal? Also, how do you make the fiberglass resistant to water?
Rob
Rob
Trending Topics
May 1, 2007 | 07:36 AM
#8
Registered User
Joined: Oct 2006
Posts: 685
Likes: 0
From: Midlothian, VA
If you wanted to keep the bed and make really sure it won't rust you can get replacement fiberglass bedsides. Looks like you wouldn't have any problem installing them yourself. Still, the truck looks to be in really good shape otherwise. You might want to go over the frame really good around the spring mounts to make sure it's solid.
May 1, 2007 | 11:48 AM
#9
Thread Starter
Registered User
Joined: Apr 2007
Posts: 215
Likes: 0
From: Land of Enchantment
thanks for the tips guys. I'll be posting more progress pics as i take them.
As far as tips for the glass, i've just removed all the rust (sanded/grinded to pure shiny metal), clean with acetone, applied some resin to it, and put the cloth on top of it, then saturate. I haven't had any problems with it, and i've tried ripping it off...it's pretty strong. Usually it cracks and fractures before it lets go of the metal.
As far as tips for the glass, i've just removed all the rust (sanded/grinded to pure shiny metal), clean with acetone, applied some resin to it, and put the cloth on top of it, then saturate. I haven't had any problems with it, and i've tried ripping it off...it's pretty strong. Usually it cracks and fractures before it lets go of the metal.
 May 2, 2007 | 01:39 PM
#15
Registered User
Joined: Dec 2006
Posts: 386
Likes: 0
From: Albuquerque, New Mexico
May 3, 2007 | 07:15 AM
#16
Thread Starter
Registered User
Joined: Apr 2007
Posts: 215
Likes: 0
From: Land of Enchantment
haha, i drove up Manitoba from Juan Tabo to Tramway the other day, to see where it lead. Whatdoyaknow, the light called "Manitoba".
So yeah you're just around the corner too.
So yeah you're just around the corner too.
May 12, 2007 | 09:01 PM
#17
Registered User
Joined: Jan 2004
Posts: 407
Likes: 0
From: Northern California
haha, cool truck. rust looked pretty nasty, but i guess if you're down with fixing it and know what to do, cool! you could go with a custom flatbed but apparently your sticking to what you have.
if you did build a bed, and wanted sides....i would make some that can be attached and/or folded down. kinda like a garden kart. then you get the best of both worlds. but that would take a lot of work.
best of luck, you have a great start!
if you did build a bed, and wanted sides....i would make some that can be attached and/or folded down. kinda like a garden kart. then you get the best of both worlds. but that would take a lot of work.
best of luck, you have a great start!
Apr 26, 2009 | 10:53 AM
#18
Thread Starter
Registered User
Joined: Apr 2007
Posts: 215
Likes: 0
From: Land of Enchantment
Long overdue update!
I've done a bit of work to her since i first bought her.
Marlin Crawler Rear Bumper
Marlin Crawler Front Bumper
A little progress on the rust
For those that are interested, this is what the MC front and rear bumpers look like with a 2" body lift, and no compensation. The gaps are apparent, but I don't mind them as much. Not enough to work on fabbing something to correct it, at least. Maybe i'll just remove the body lift.
Pics!! (clickable thumbnails)
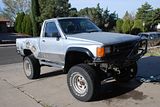
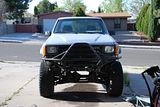
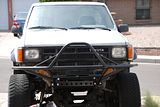
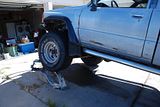
And of course, what is a front bumper install without a little yard-wheeling action?
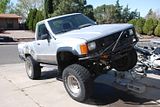
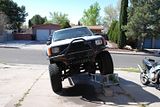
ATB NaeSLaS
I've done a bit of work to her since i first bought her.
Marlin Crawler Rear Bumper
Marlin Crawler Front Bumper
A little progress on the rust
For those that are interested, this is what the MC front and rear bumpers look like with a 2" body lift, and no compensation. The gaps are apparent, but I don't mind them as much. Not enough to work on fabbing something to correct it, at least. Maybe i'll just remove the body lift.
Pics!! (clickable thumbnails)


And of course, what is a front bumper install without a little yard-wheeling action?


ATB NaeSLaS


